
| Home | Current Inventory | Projects | Services | Company | Stuff | Bob's Car Collection | Contact Us |
|
on Facebook |
"Full Inventory" (Projects, Completions and Personal Collection) |
 77 Lancia Scorpion |
 67 Camaro RS Conv. |
|
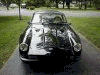
68 Austin Healey Sprite |
 68 Cougar |
 69 Corvette |
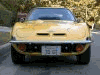 70 Opel GT |
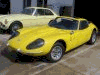 69 Marcos 3000GT |
 86 TVR 280i |
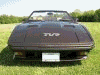
 73 TVR 2500M |
 90 Buick Reatta |
1974 FORD
|
Client Project |
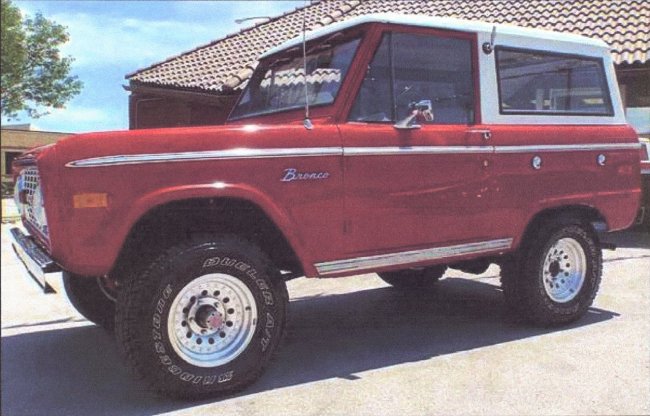 |
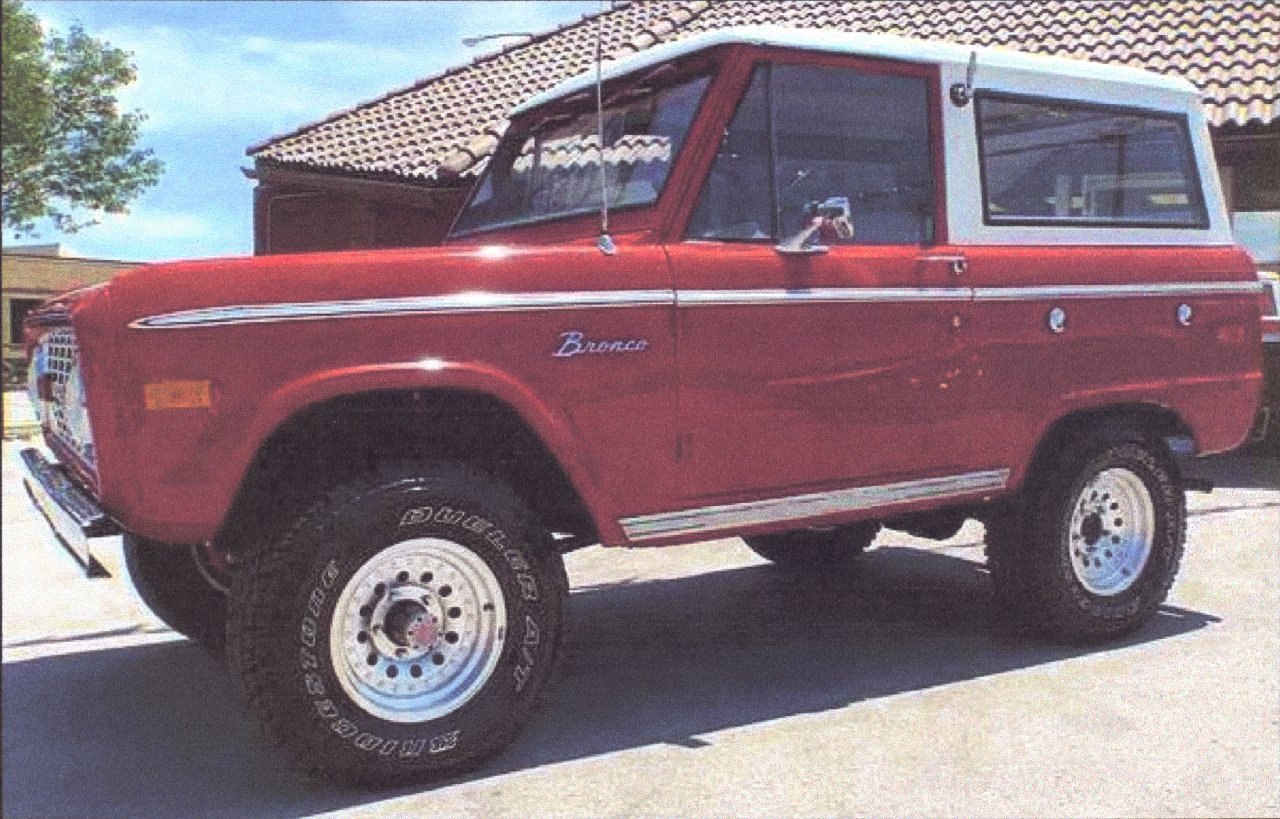
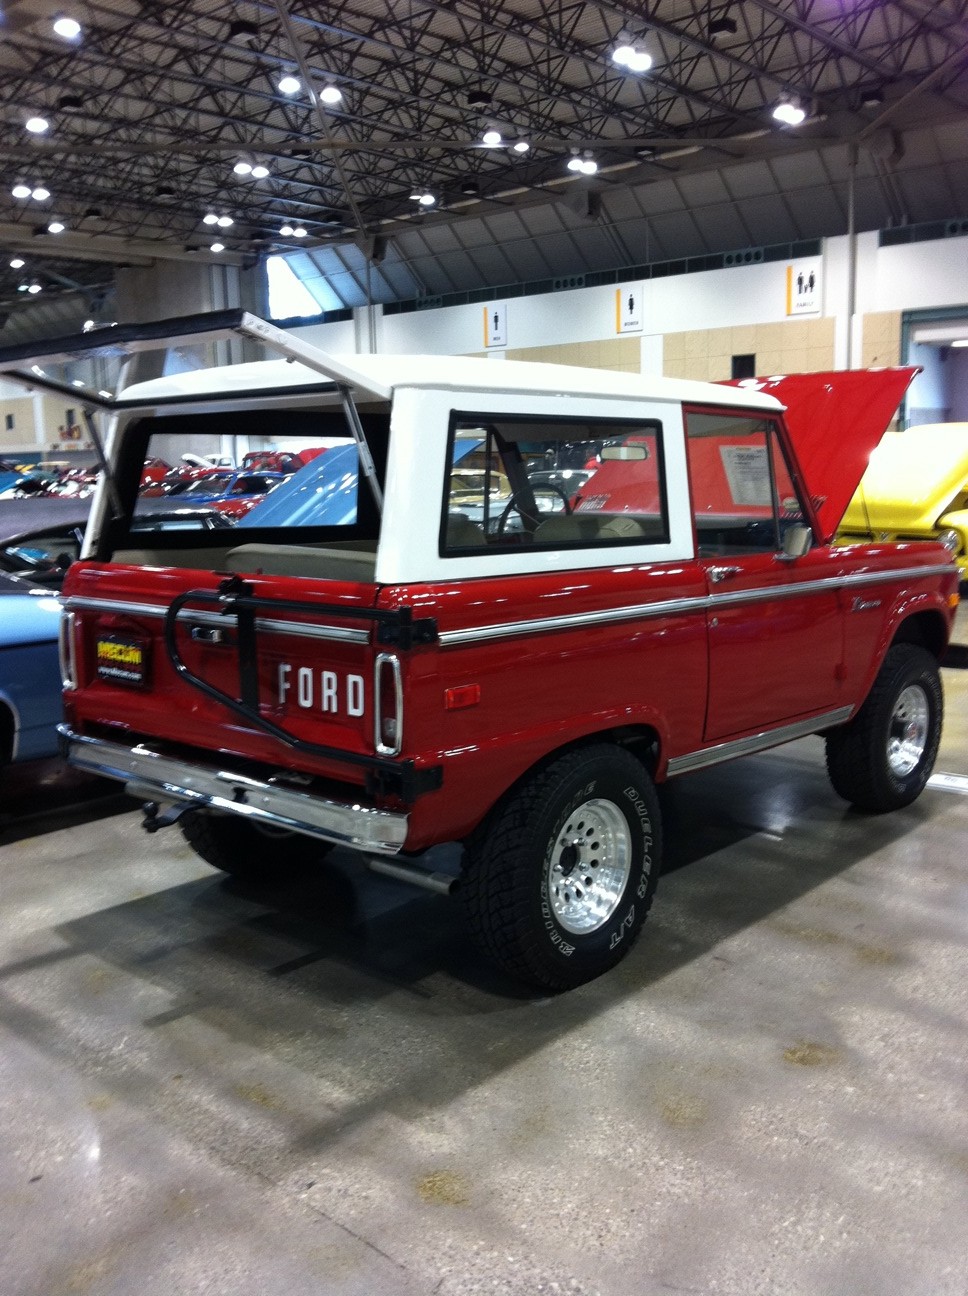
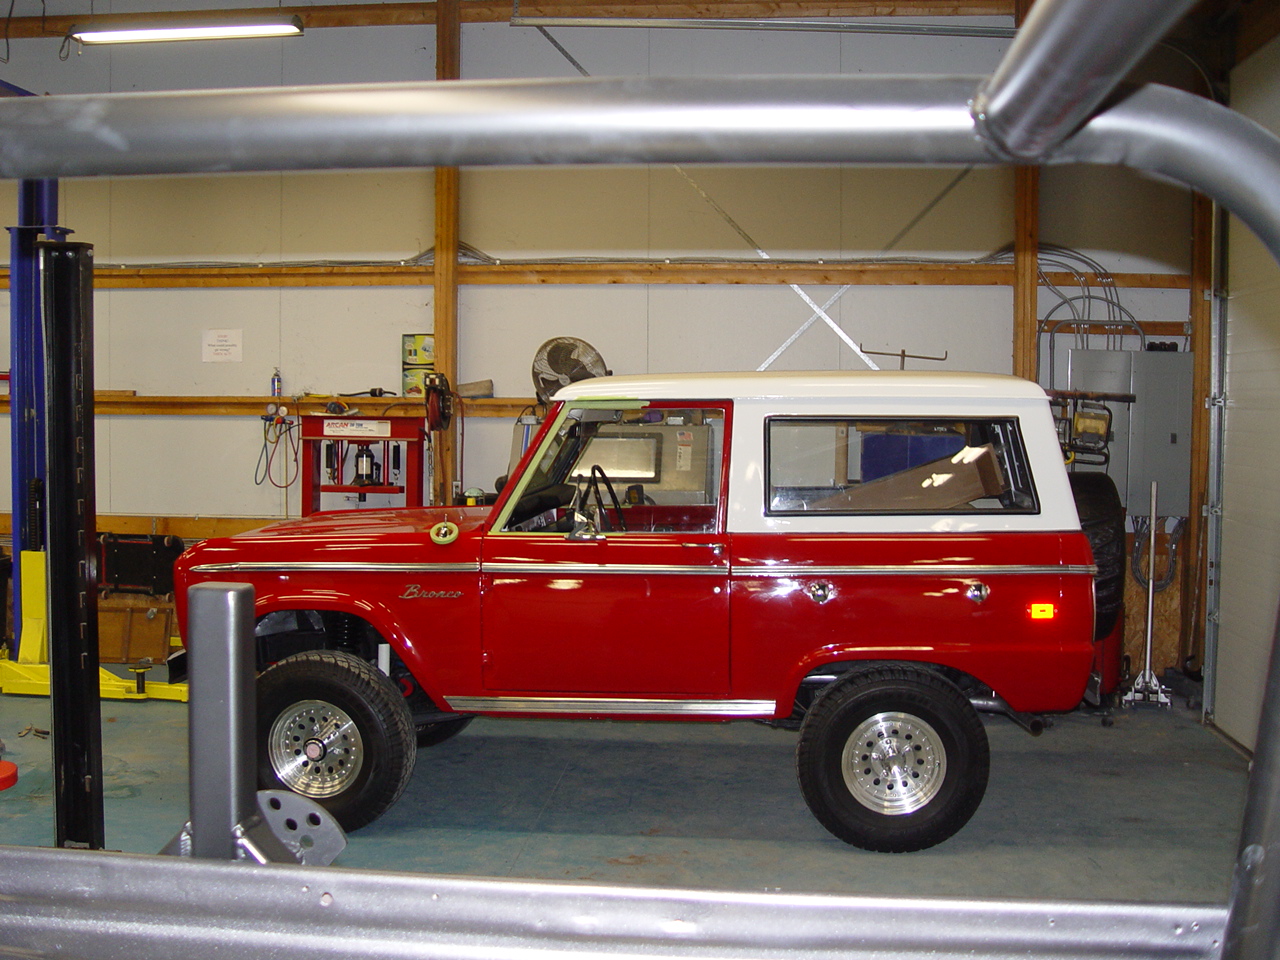
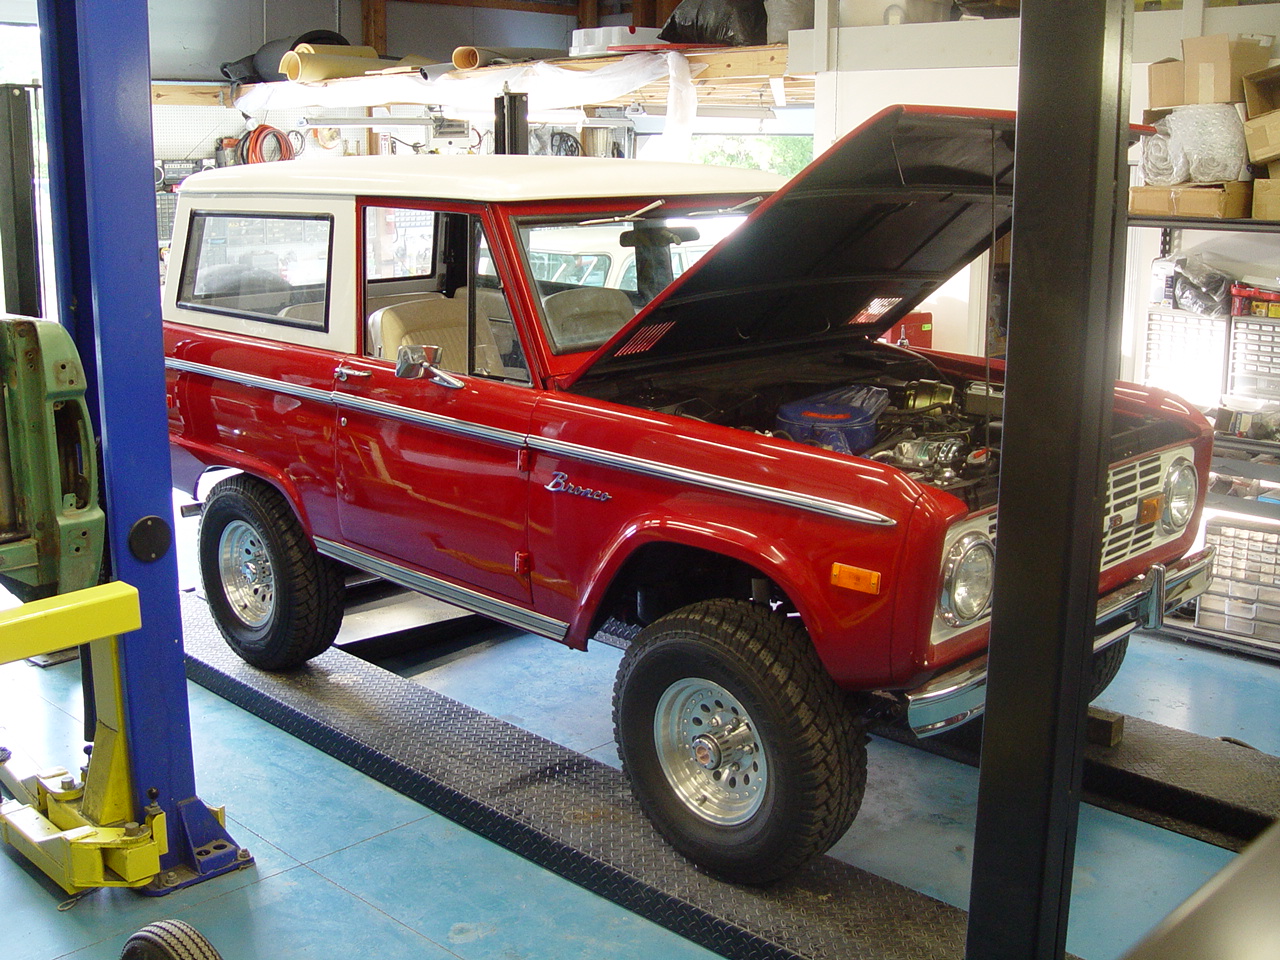
This 1974 Bronco came to us via a client who had just purchased it at a Mecum auction. He defined our mission quite simply as to "bring it to the next level of restoration". This mission statement was accompanied by a list of 24 action items.
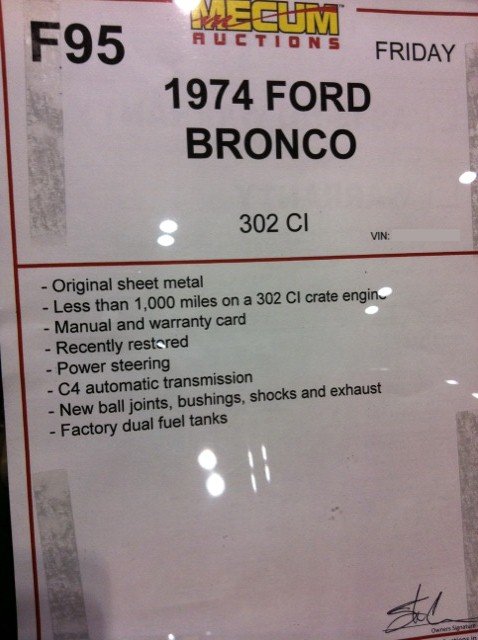
The following was listed on the to the Mecum Auction's lot detail sheet:
After our initial disassembly to address known issues (particularly the floor pans), the scope of the project had to be expanded to include a significant amount of sheetmetal repair. Unfortunately, this Bronco is a prime example of what not to buy at an auction. However, the new owner is sticking to his guns and we are doing what is necessary to "make it right".
|
BEFORE | ||||||
|
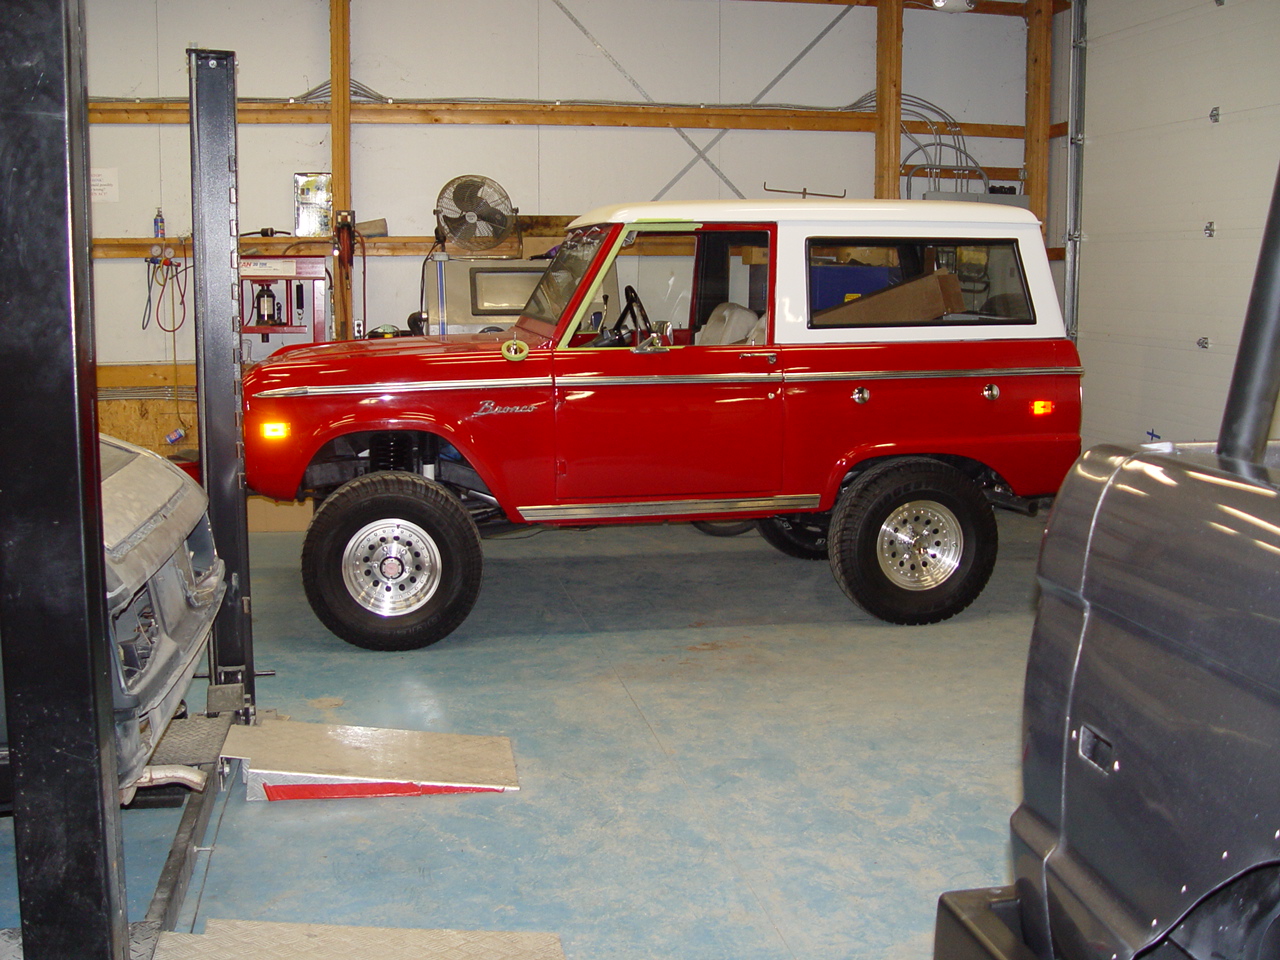
When we received Big Red, it looked as if it came straight from the auction. It actually appeared to be in quite nice condition - at least superficially. They say that beauty is only skin deep. Part of our job is to look under the skin and see what lies beneath. Like peeling an onion, more will be revealed...
|
||||||
 |
 |
 |
 |
 |
||
| Click on an image for a larger view | ||||||
RUNNING GEAR | ||||||
|
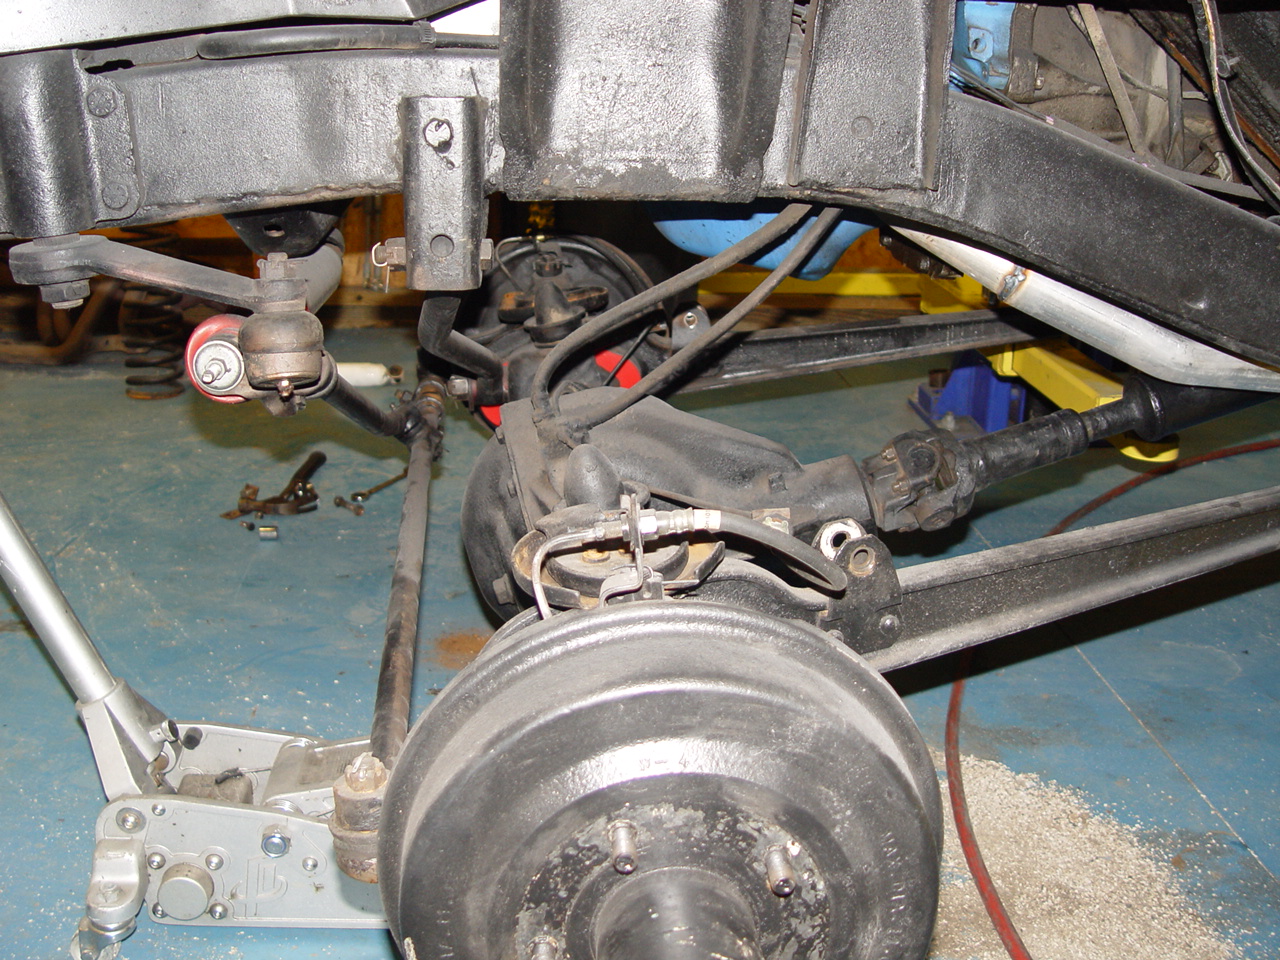
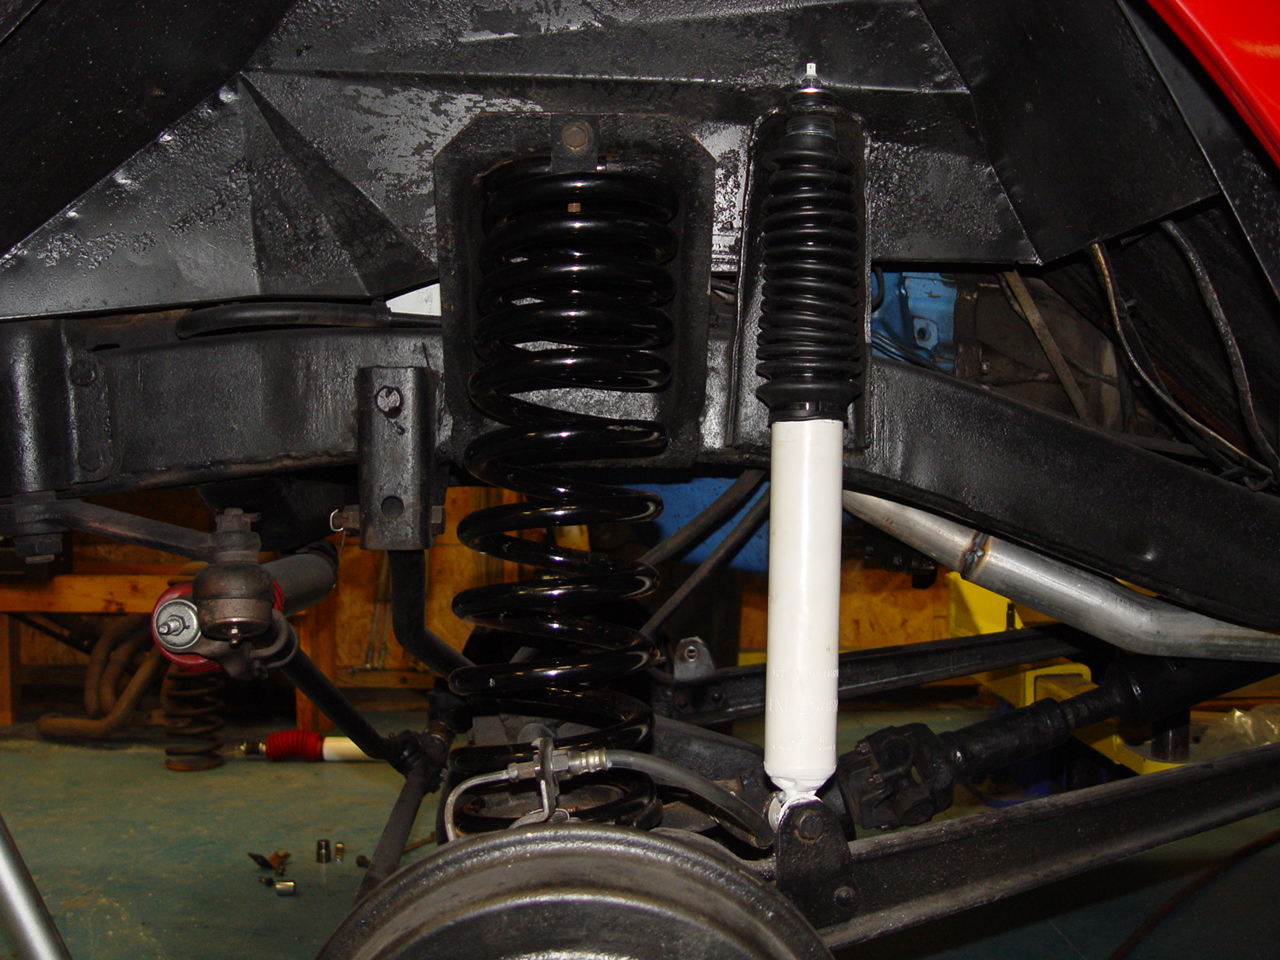
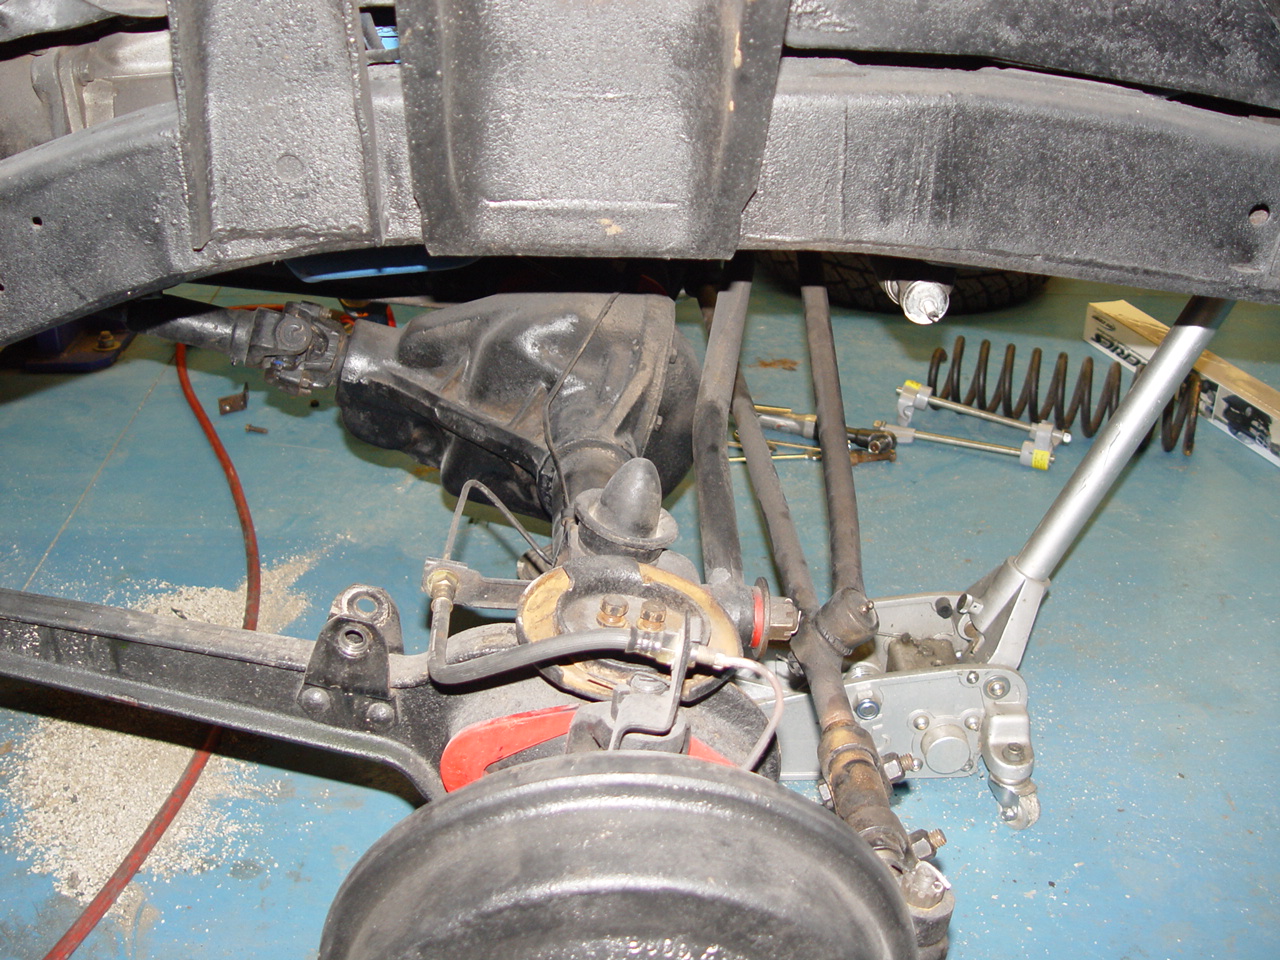
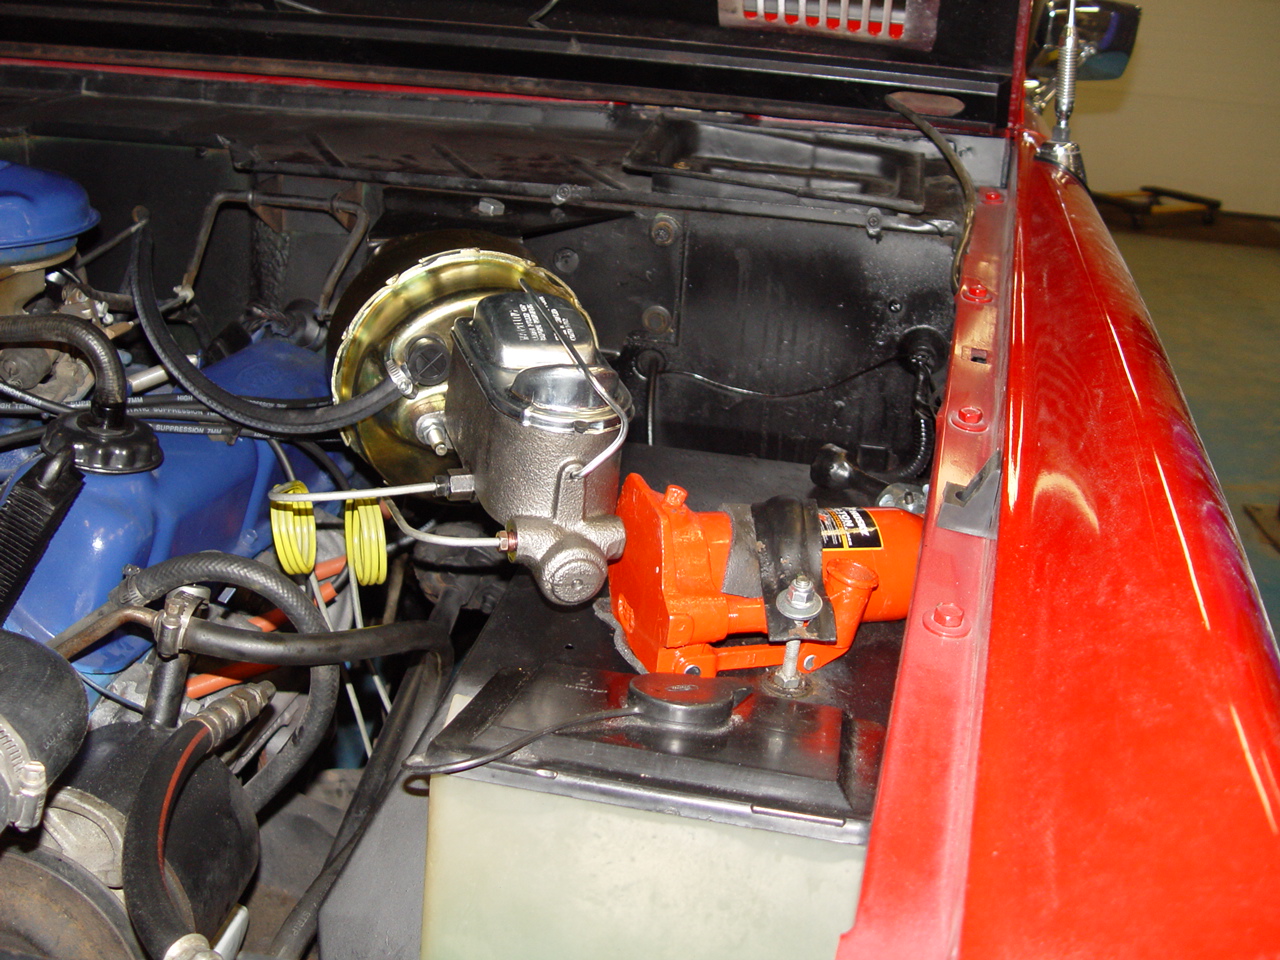
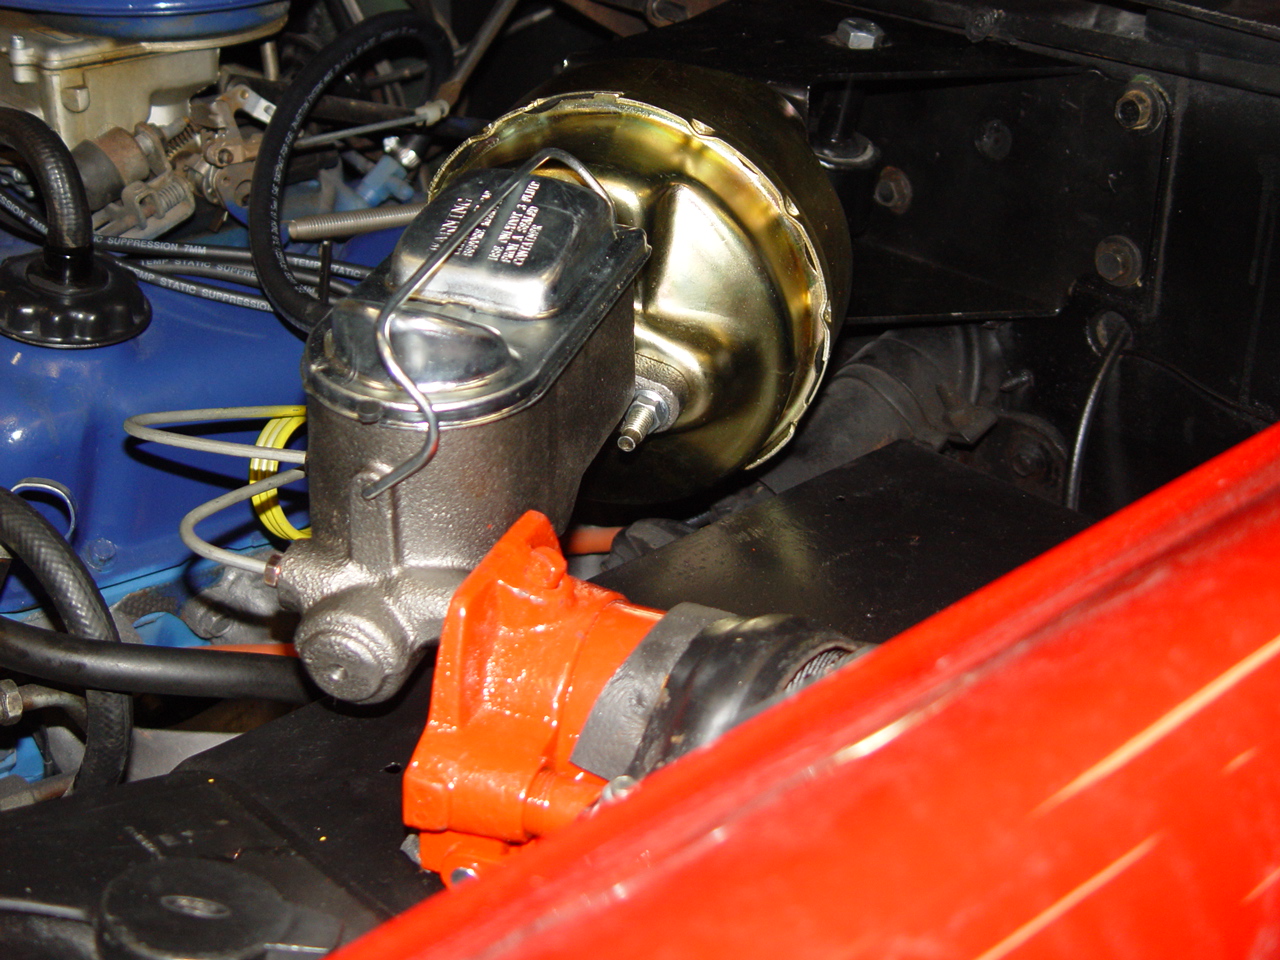
Our first order of business was to sort out the running gear. The ball joints, rod ends and suspension bushings had all been replaced prior to the auction. So, we did not have to worry about a suspension "rebuild". However, the new owner was not satisfied with the Bronco's stance. He felt that it had too much of a forward rake. So, he supplied us with a replacement 2 1/2" lift kit. This basically consisted of new coil springs up front and replacement leaf springs for the rear. Despite all the suspension bushings having been replaced recently, the disassembly proved to be a genuine bugger - especially when it came to the rear leaf spring and shackle attachment bolts. After wasting a good deal of time trying to remove them in the normal manner, we gave up and just cut the bolts - which we then replaced with new grade 8 fasteners.
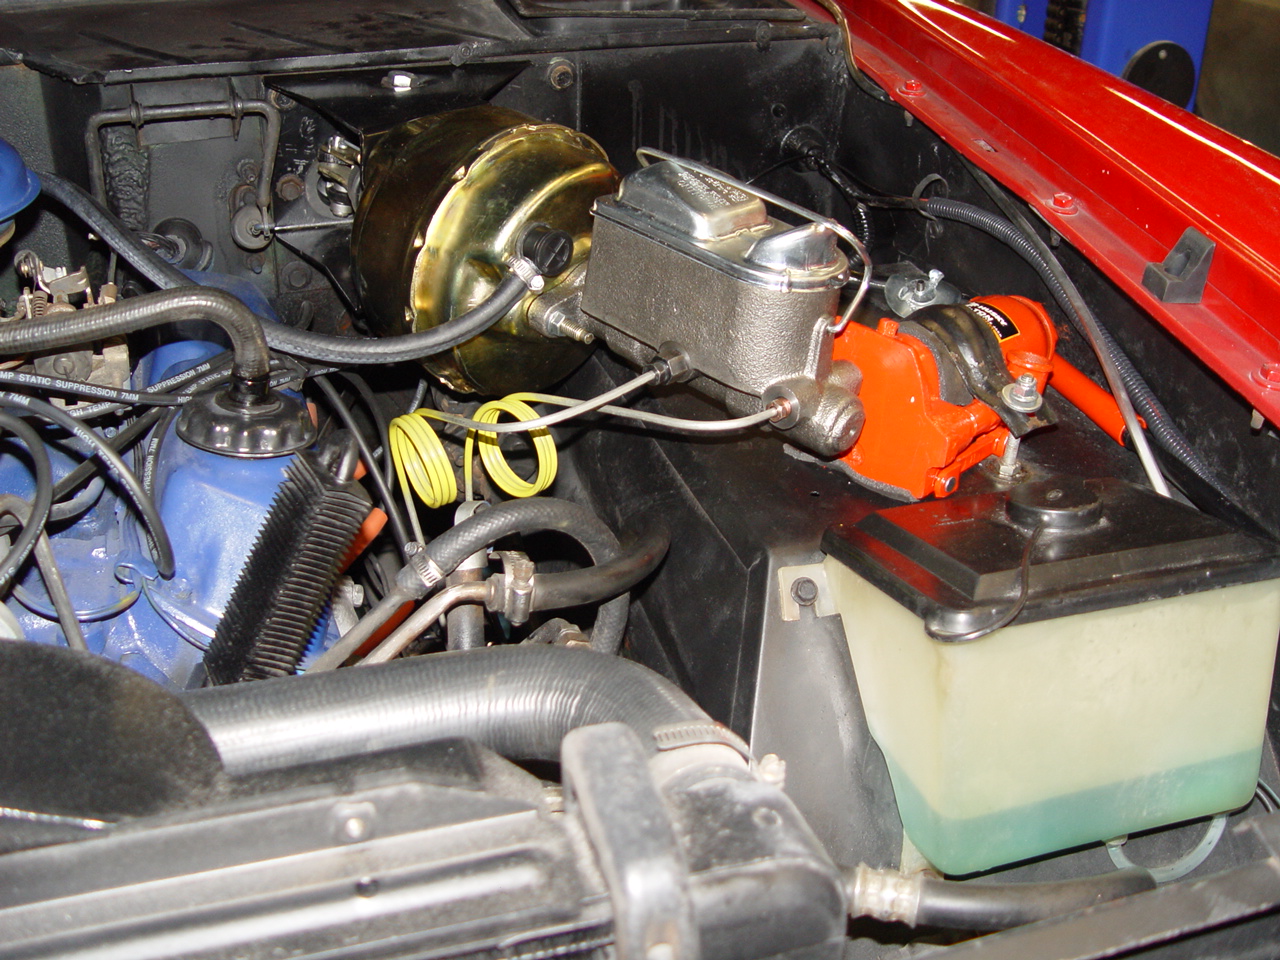
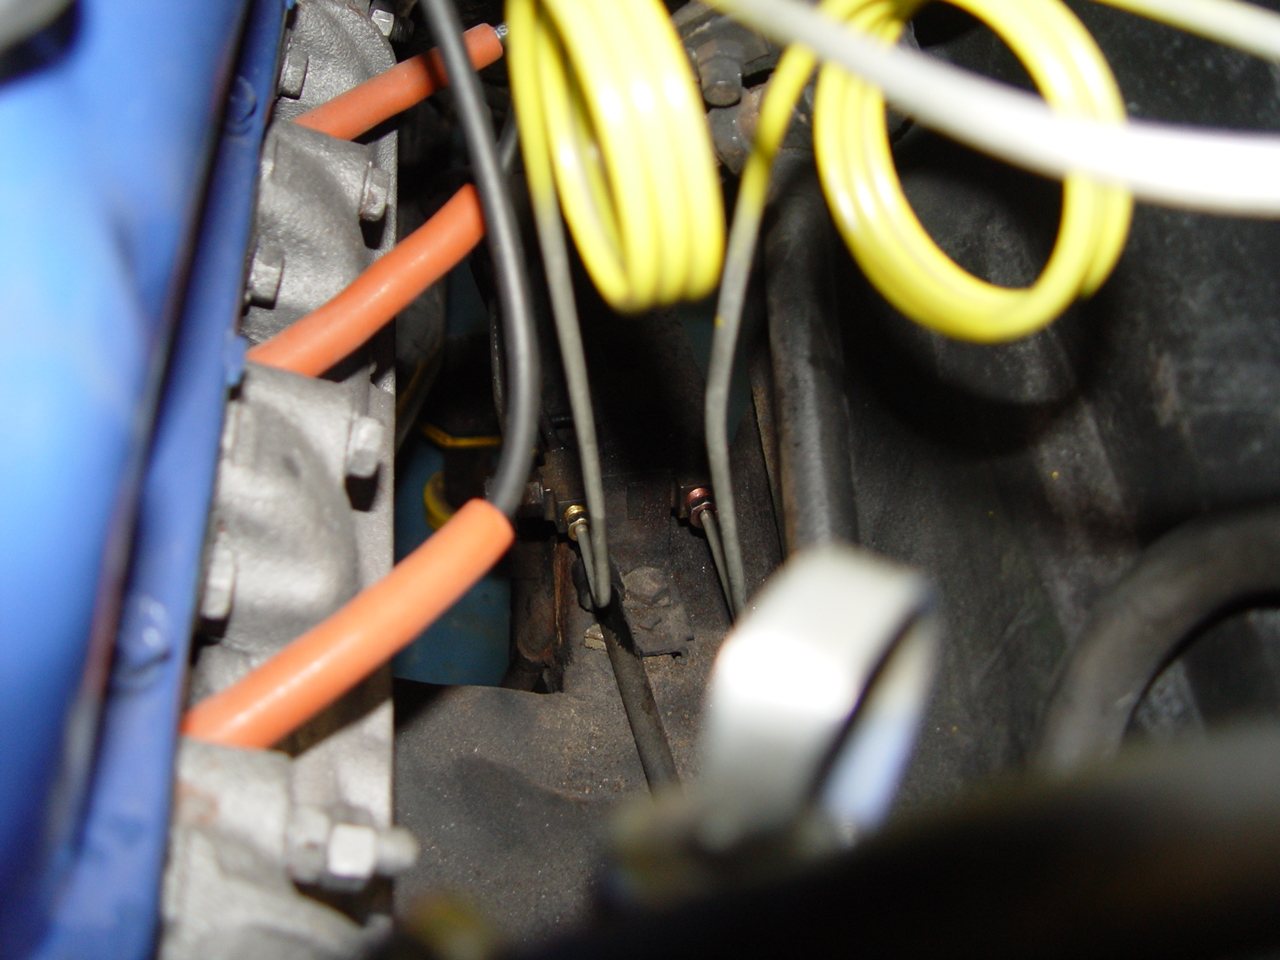
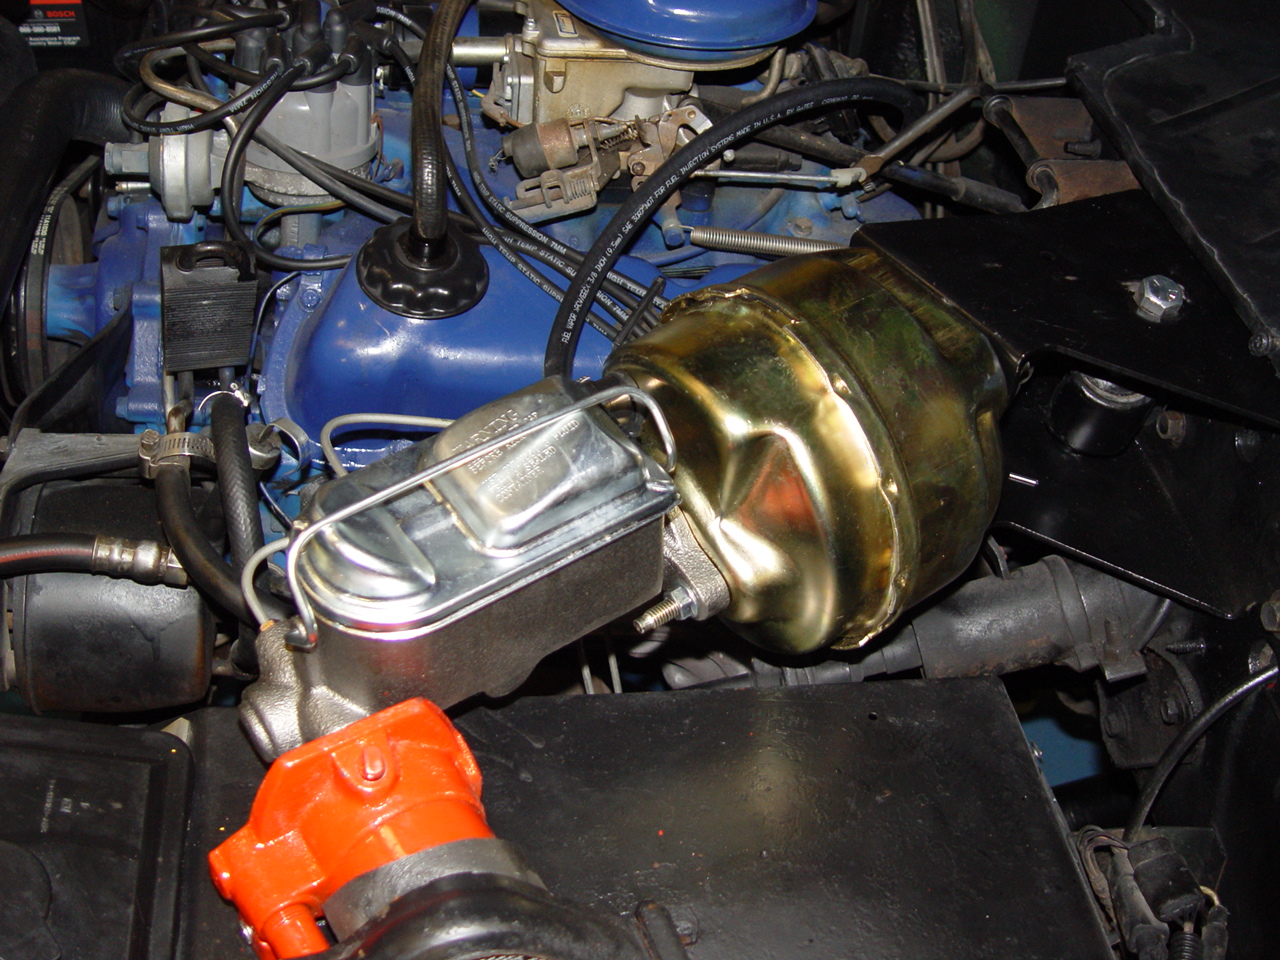
After installing the new lift kit, we proceeded to upgrading the brakes. The new lift kit resulted in us having to replace the rear brake hose with a longer unit as well as a longer e-brake cable for the left side. We then replaced the brake master cylinder with a power-assisted unit. For the Bronco, this requires installation of a unique angled mounting bracked and belcrank setup. The resulting installation appears a bit unorthodox, but quite effective.
|
||||||
 |
 |
 |
 |
 |
||
 |
 |
 |
 |
 |
||
| Click on an image for a larger view | ||||||
SHEETMETAL | ||||||
|
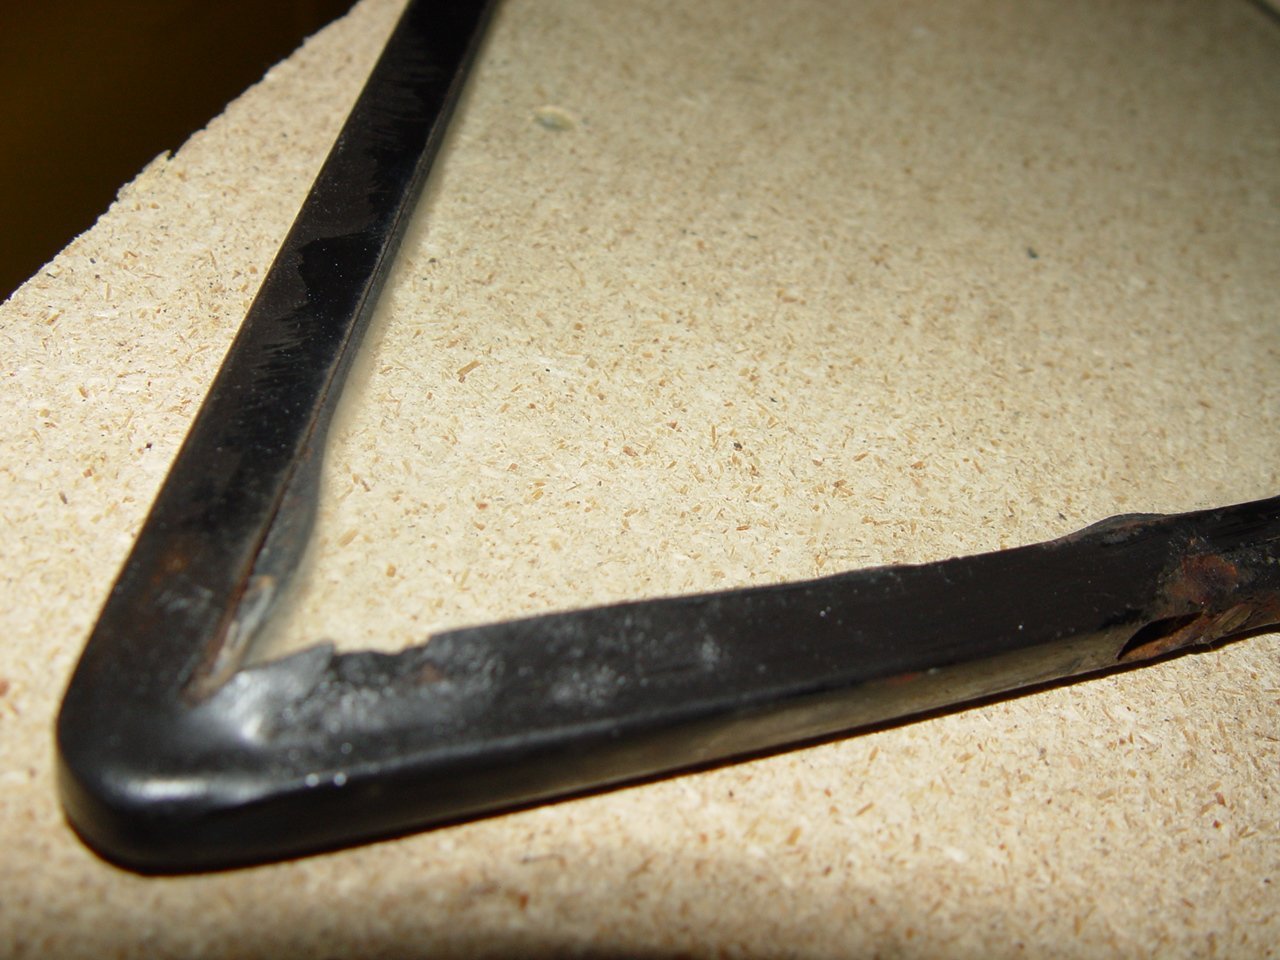
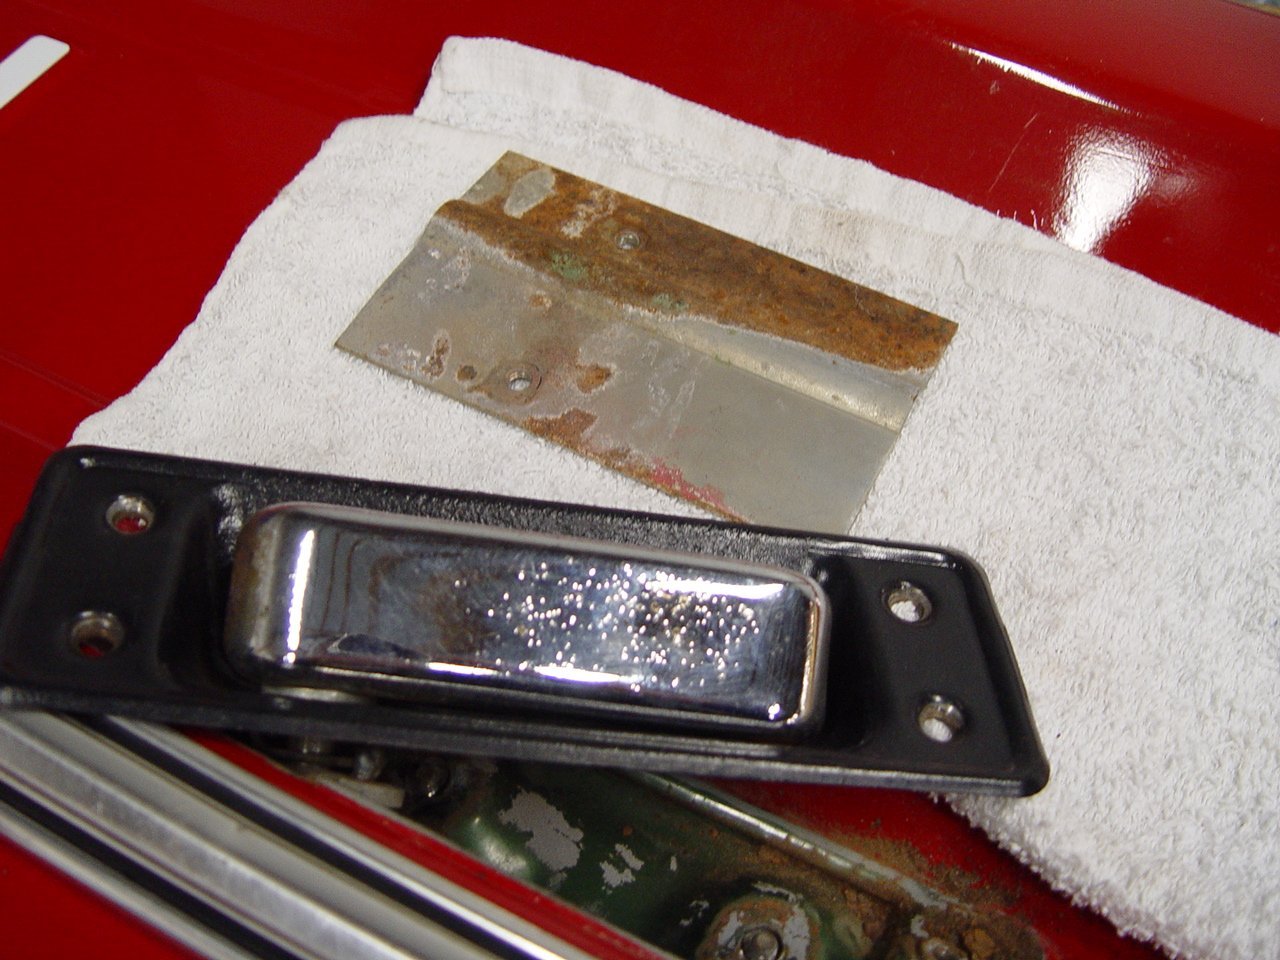
Big Red's new owner arrived with new front floorpans in hand. So, we were already prepared for some sheetmetal work. However, true to the "like peeling an onion, more will be revealed" philosophy of auto restoration, once we started removing sheetmetal, we found all sorts of problems that were previously unknown.
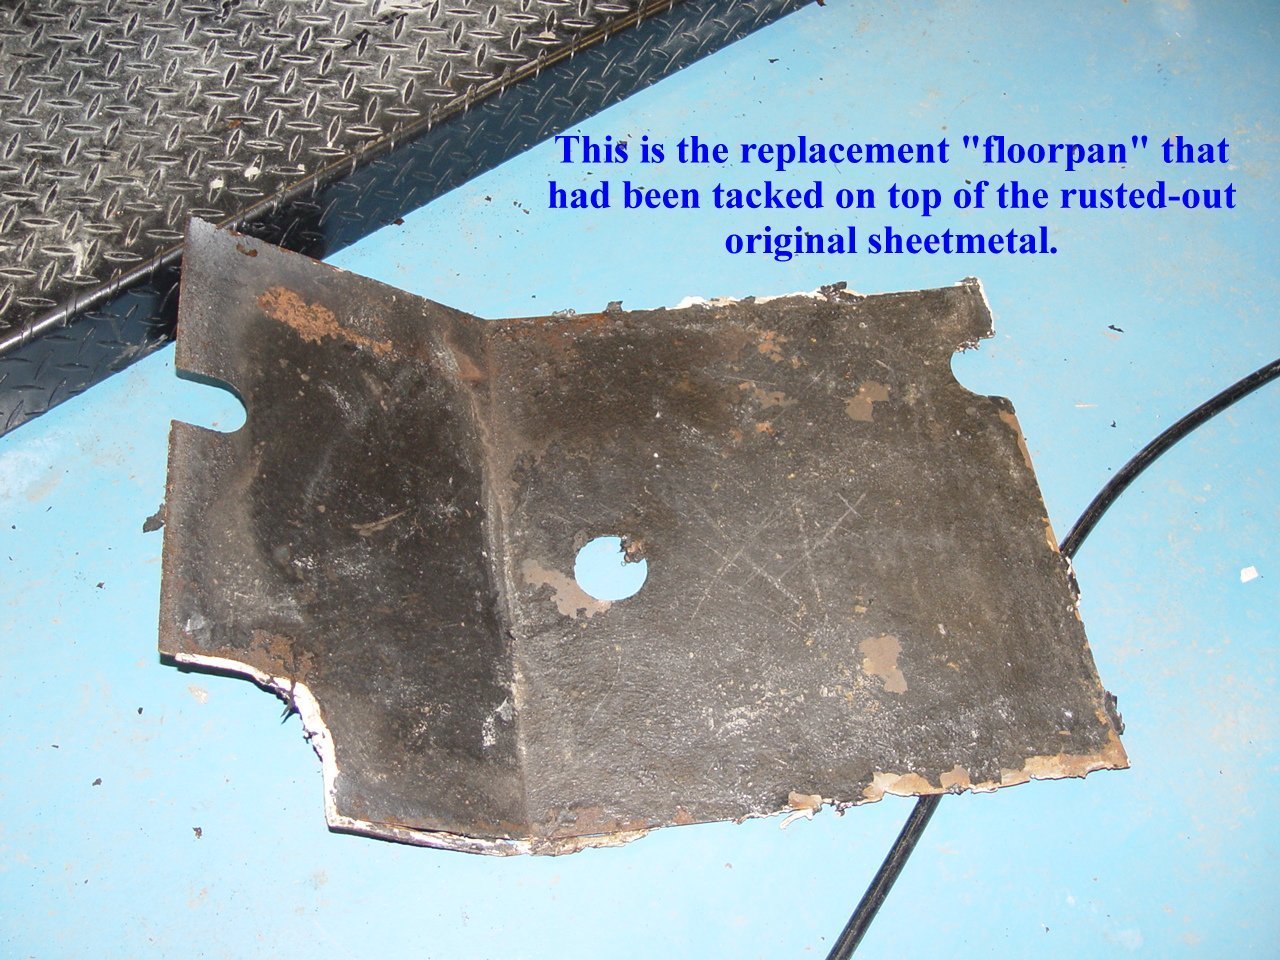
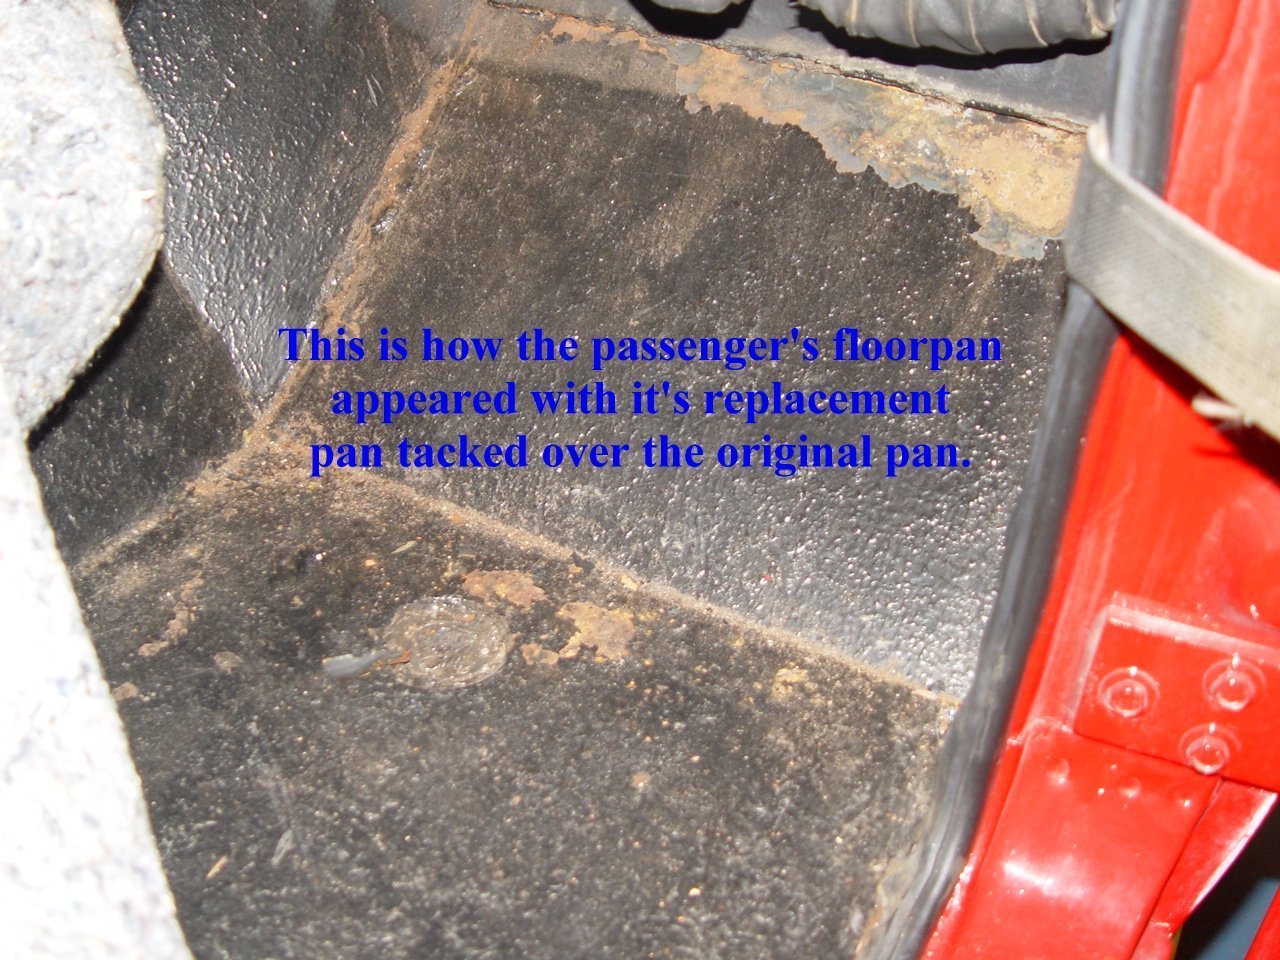
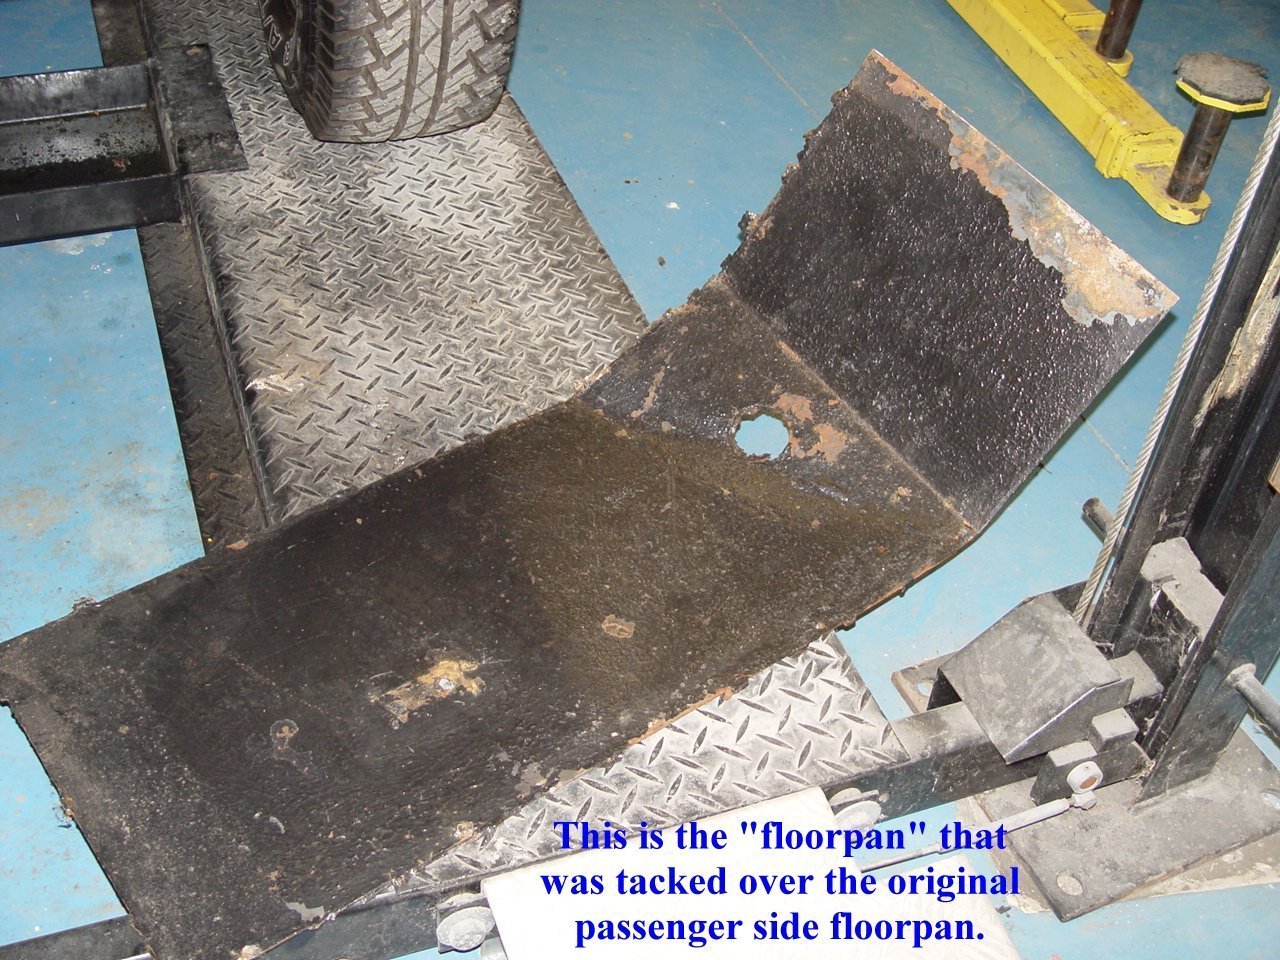
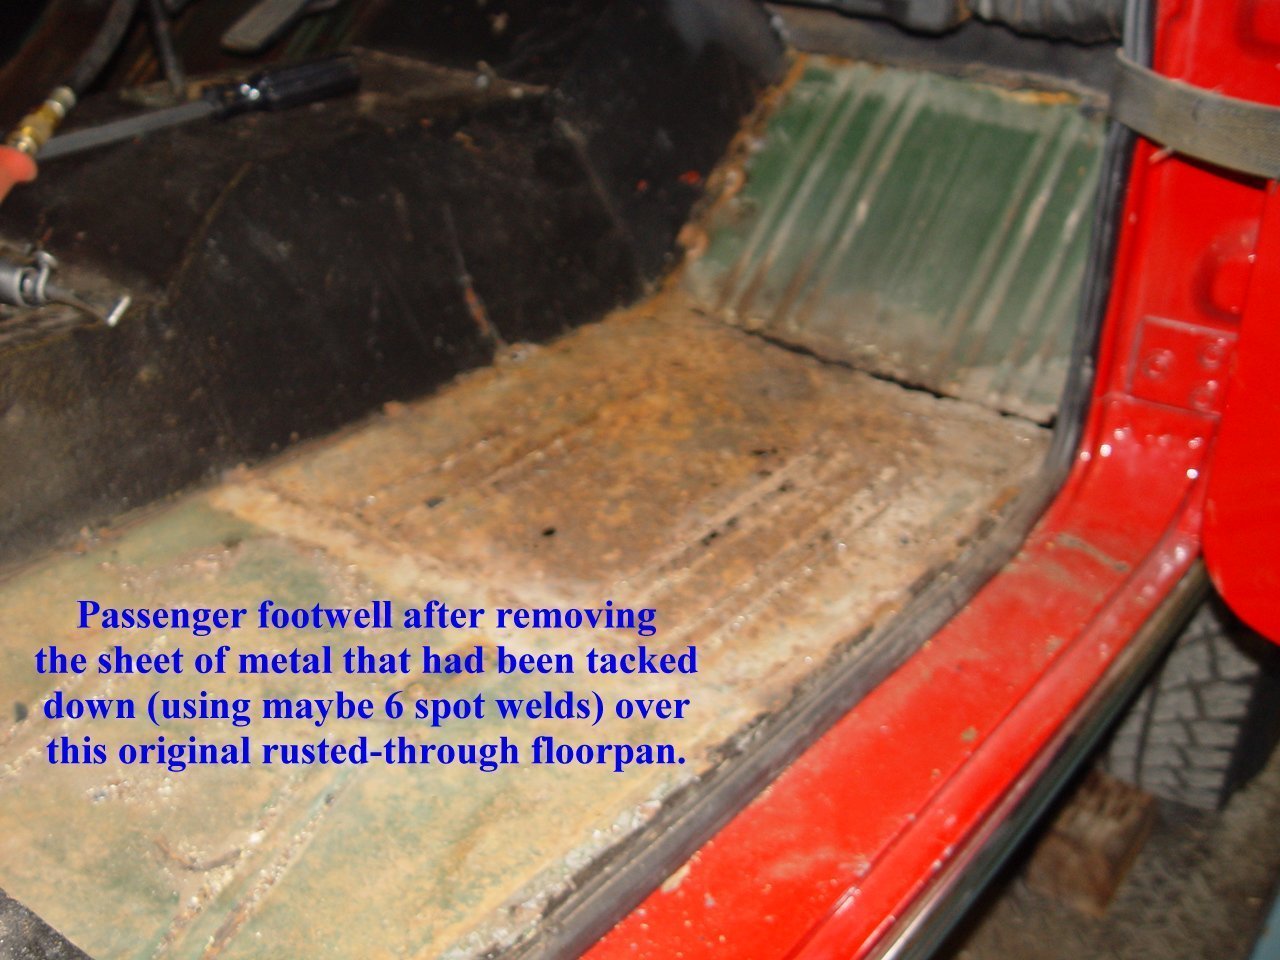
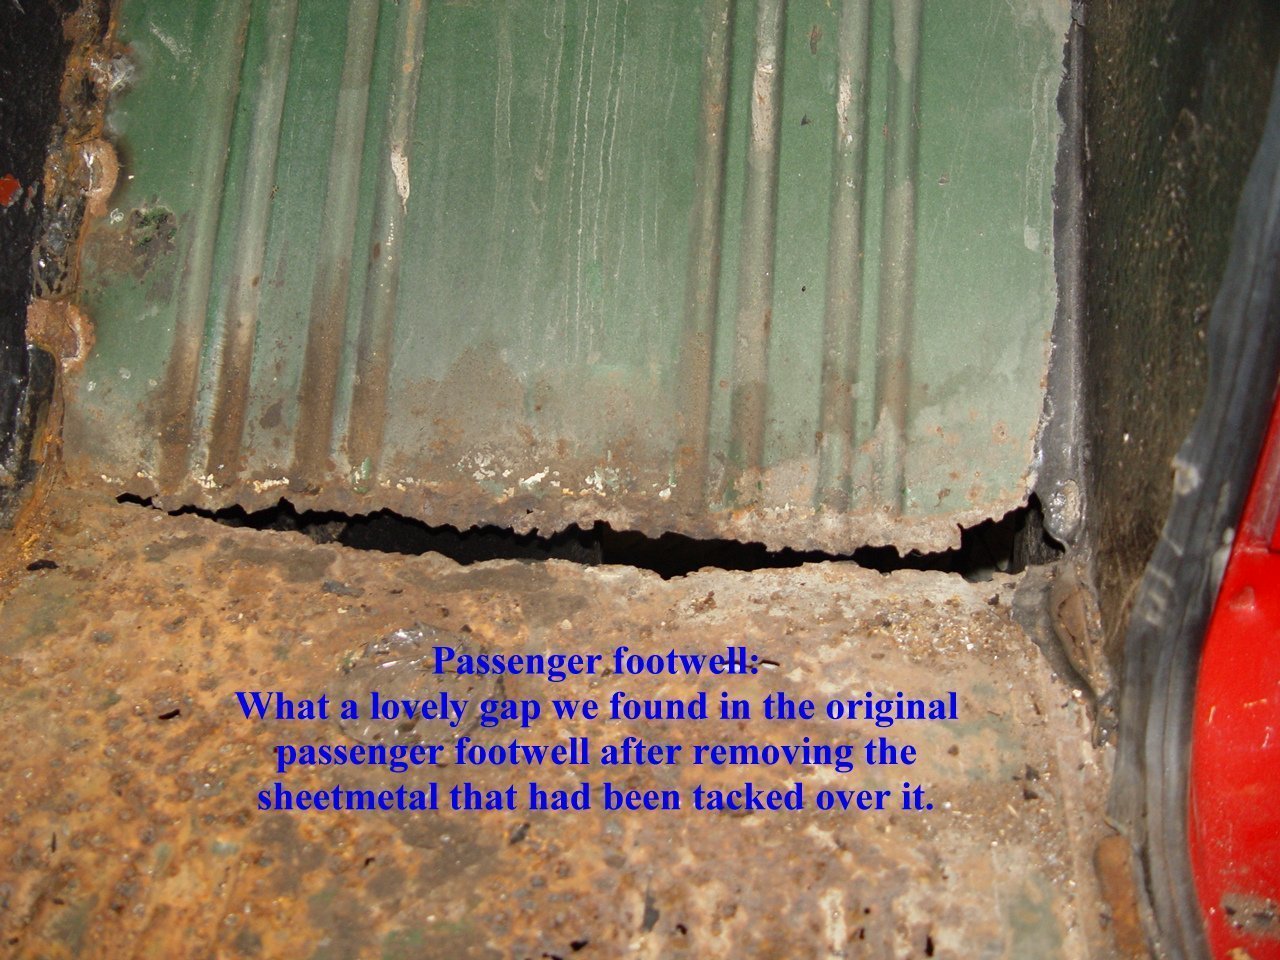
Since we were told to "make it right", we had no choice but to dig deep and tackle the body-cancer problem head-on. Nearly 100 hours of labor went into just cutting out, replacing/patching rusted metal. Apparently, the prior "restoration" shop elected to cover over the original sheet metal with home-made flat metal sheets. They did this by simply laying them on top of the old rusted-out pans, tacking them down with the minimum number of welds required to hold them in place. They then spread silicone sealer around the edges to keep moisture from breaching the interior. However, this only served to trap moisture between the two layers of metal - further promoting rust. Upon discovering this example of frightenly sub-standard workmanship, we braced for additional surprises. Below are numerous photos taken as a part of our documentation of the project. They're listed in order based on the paragraph headings below:
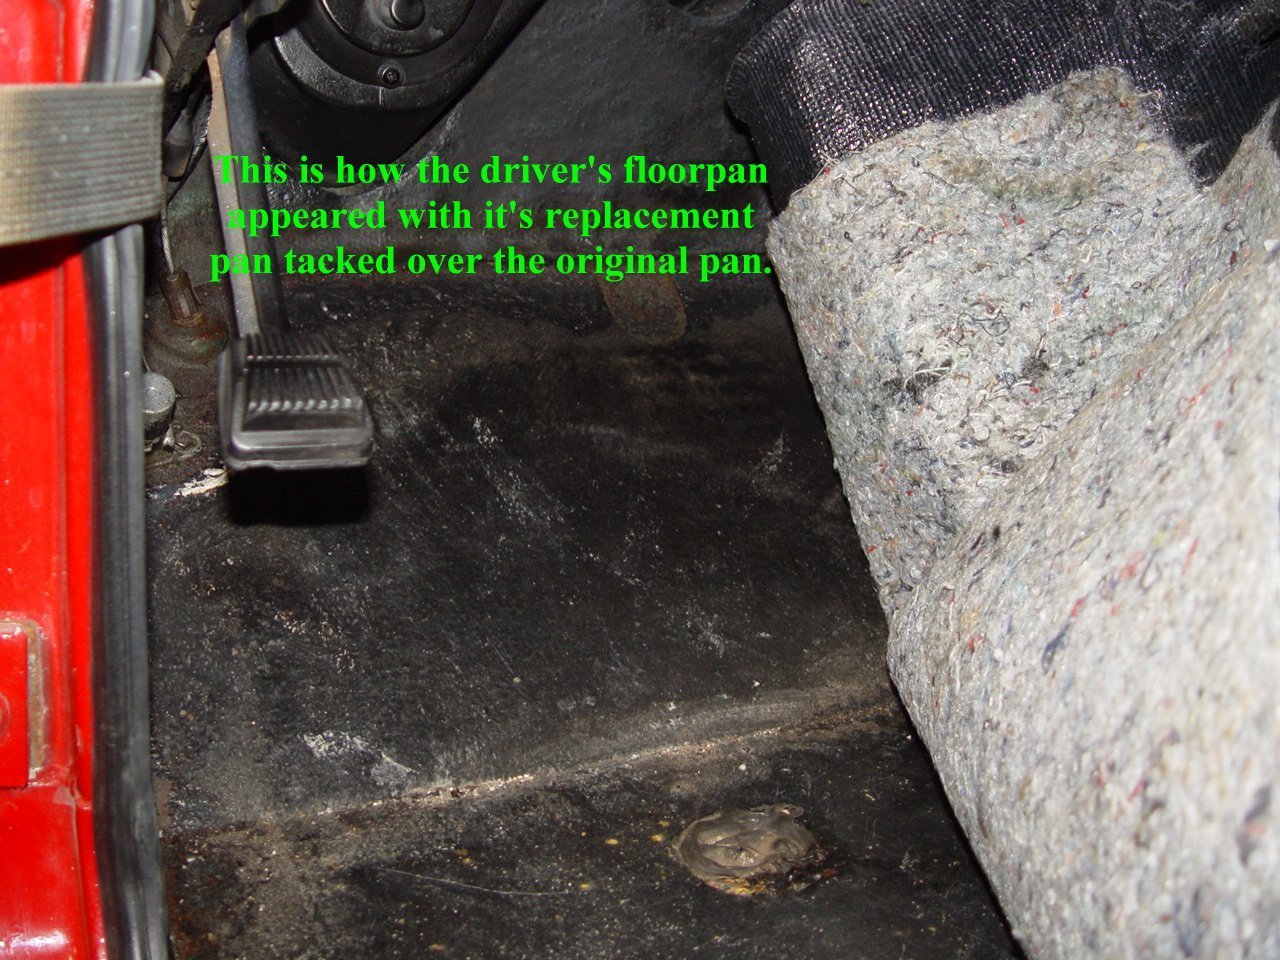
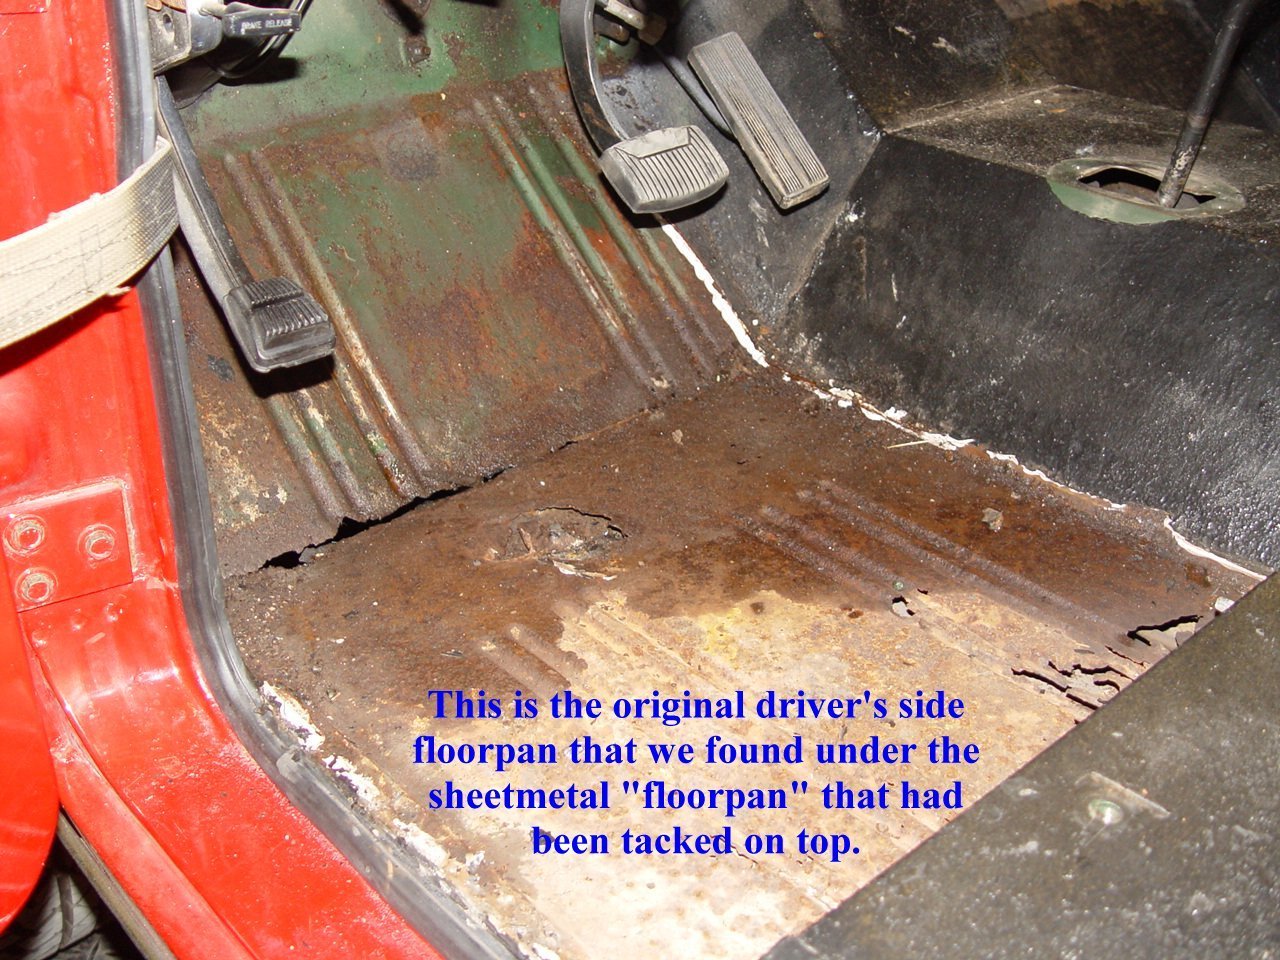
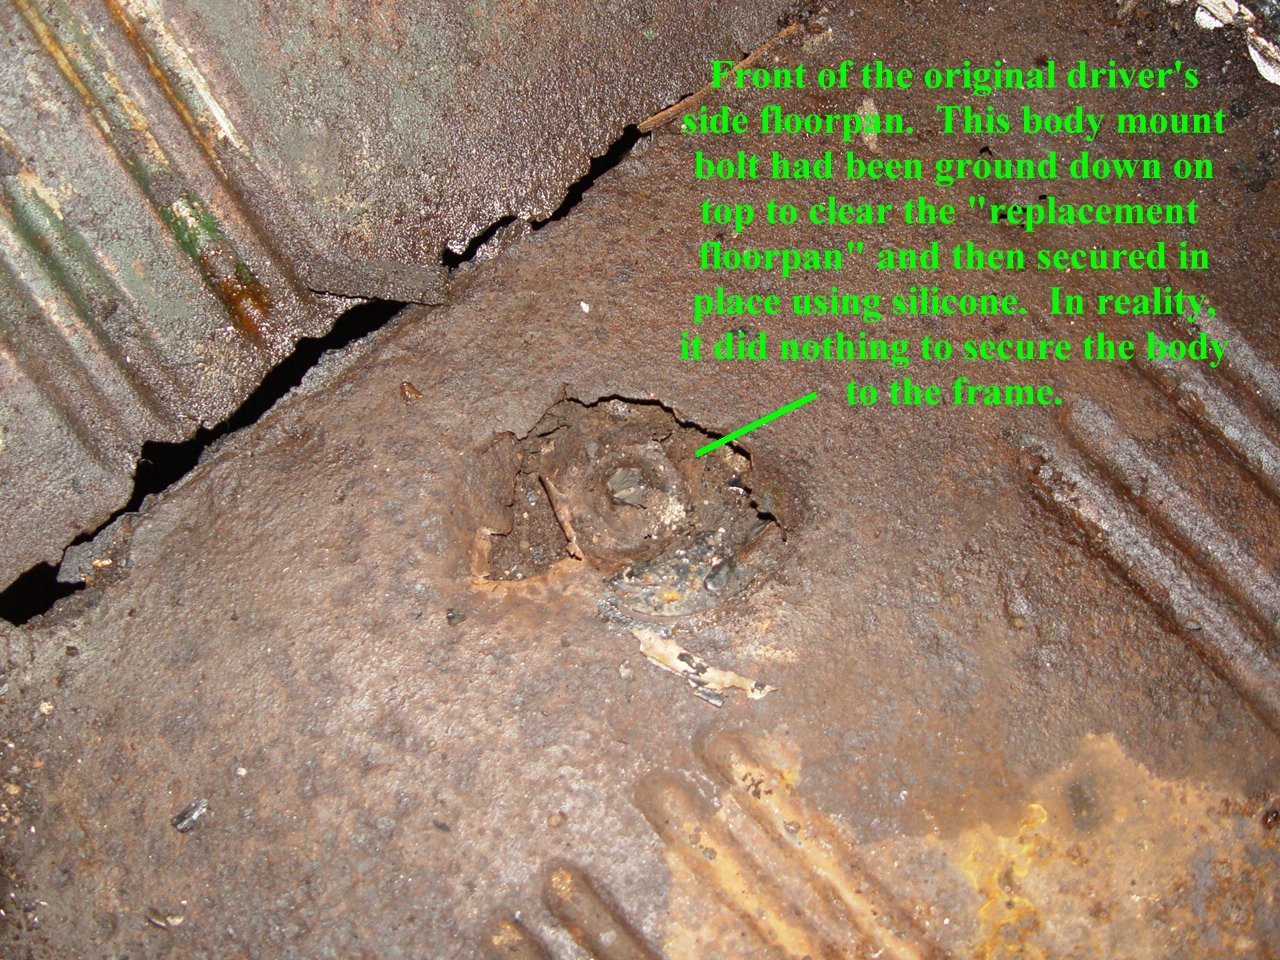
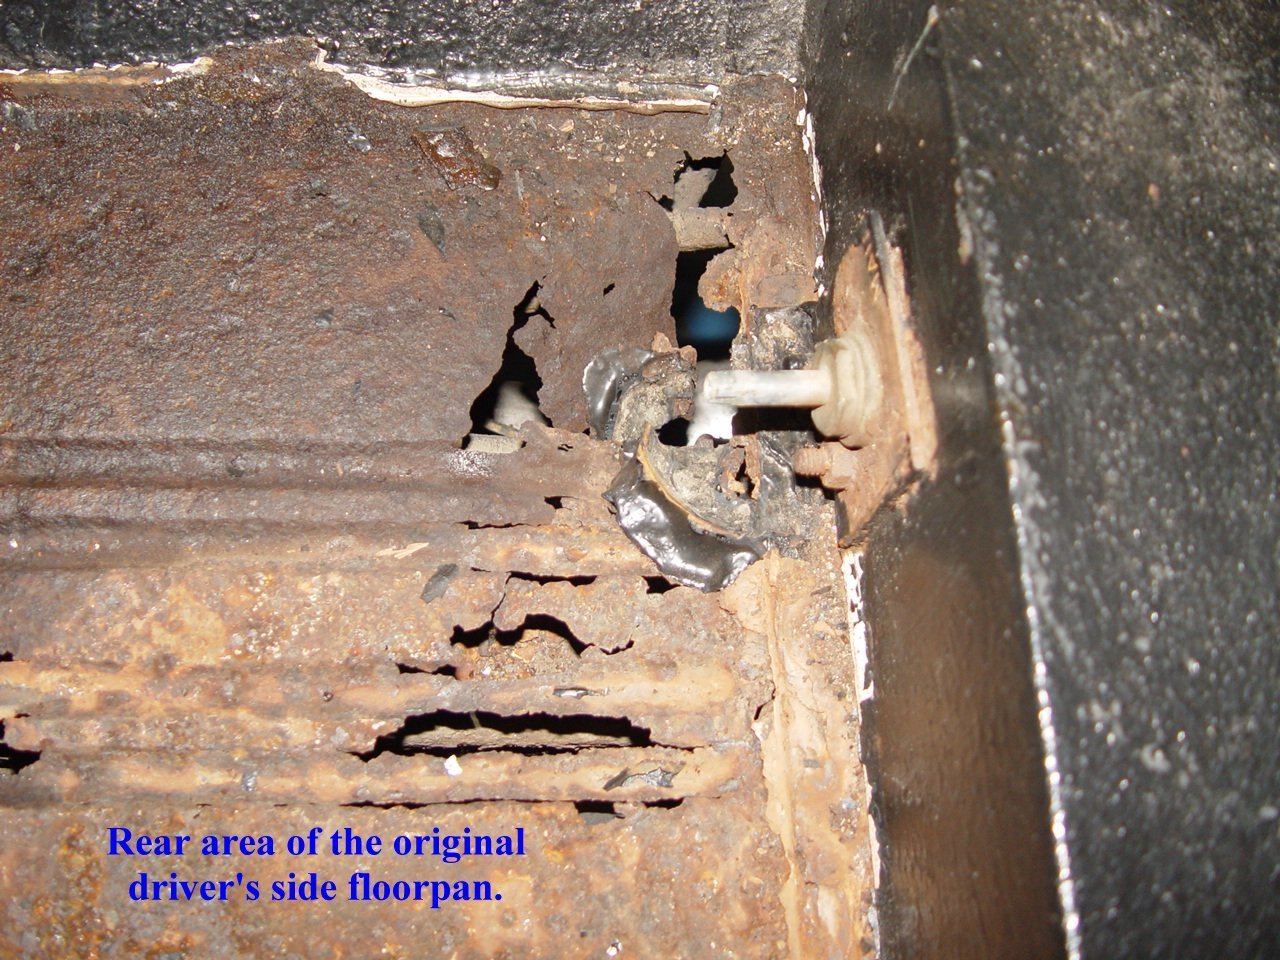
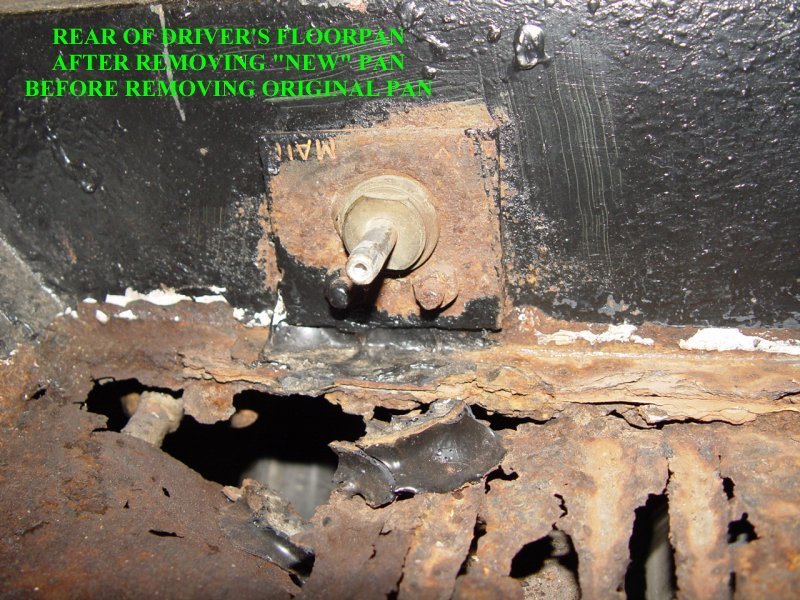
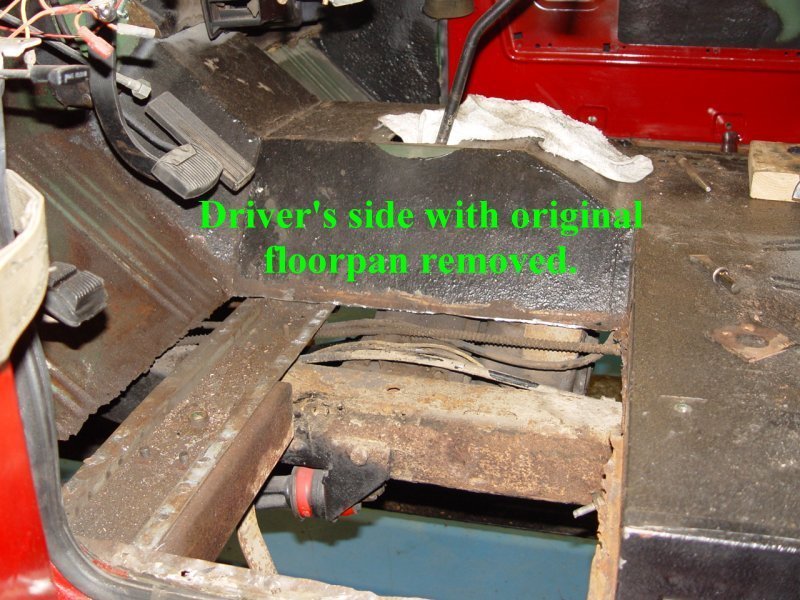
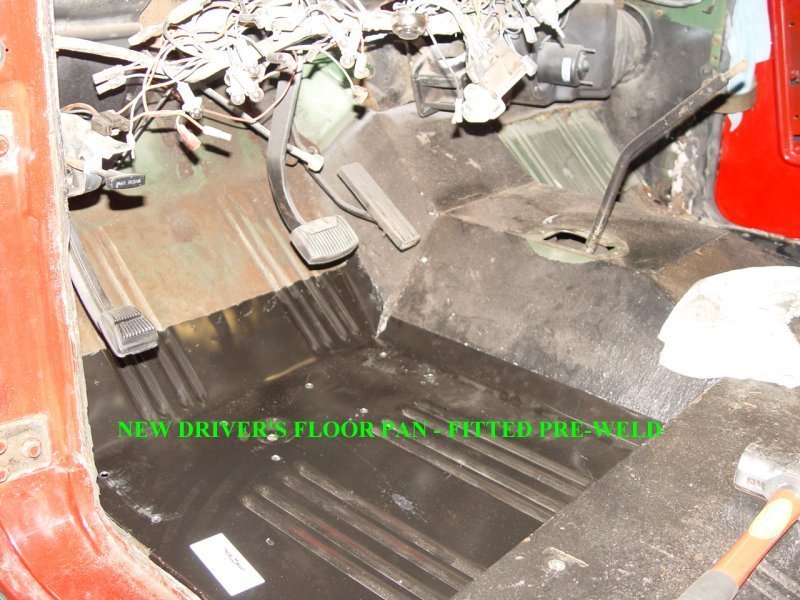
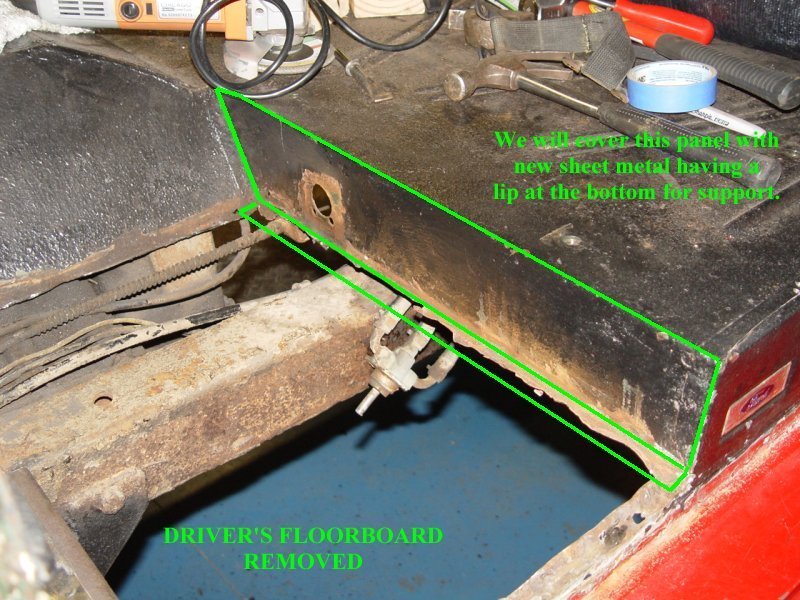
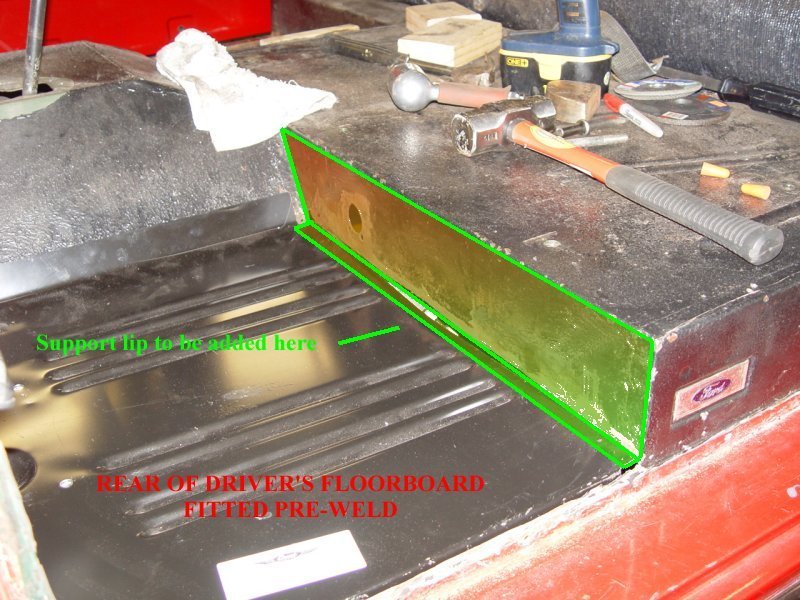
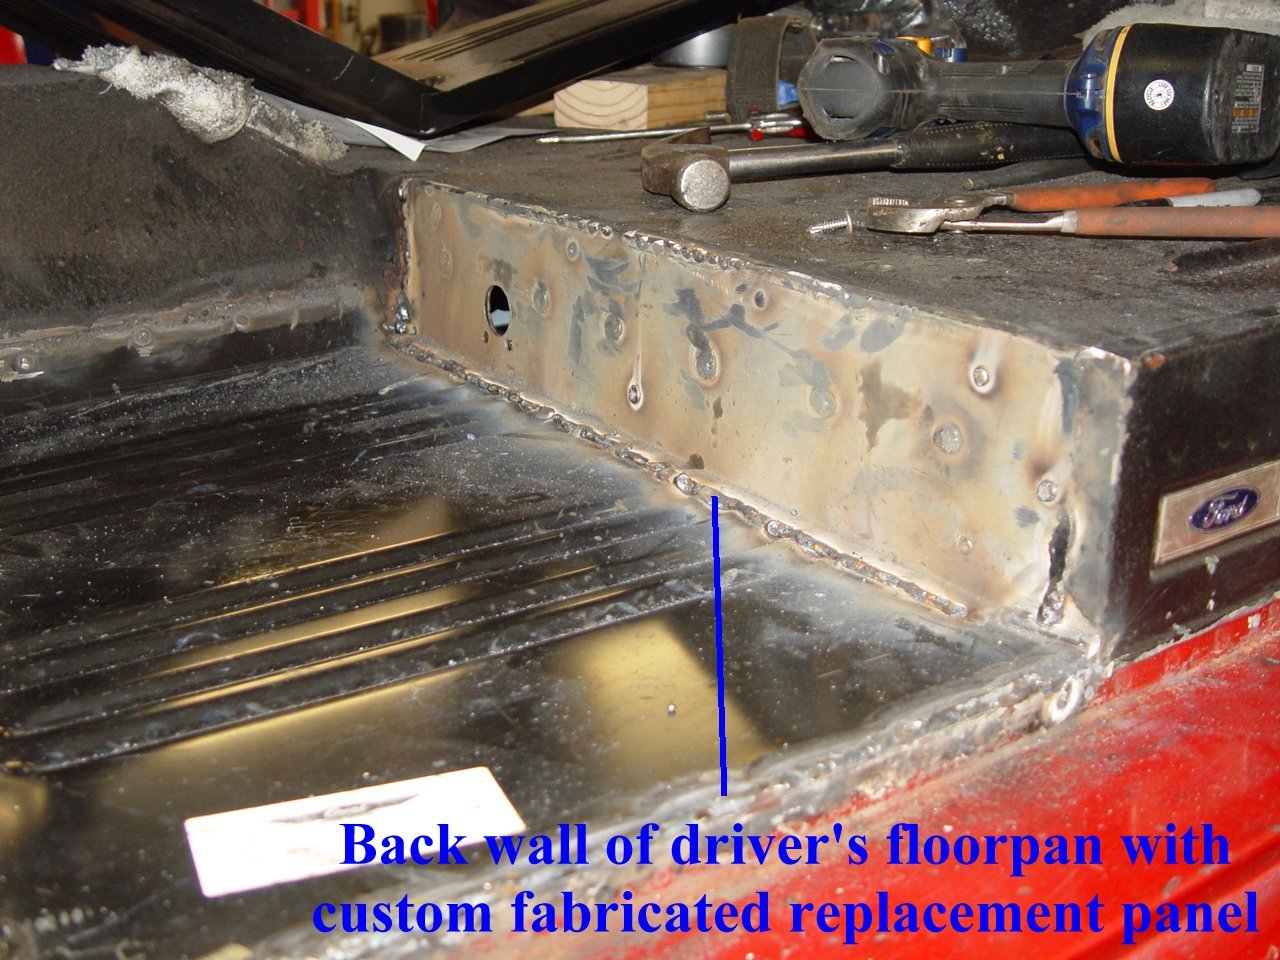
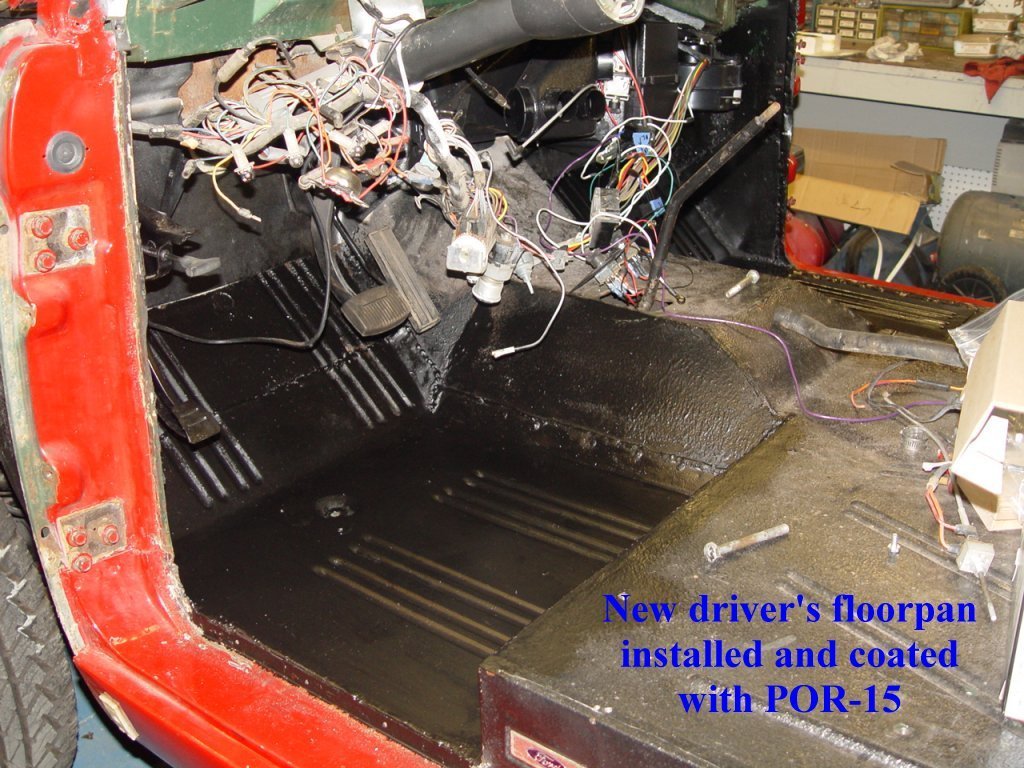
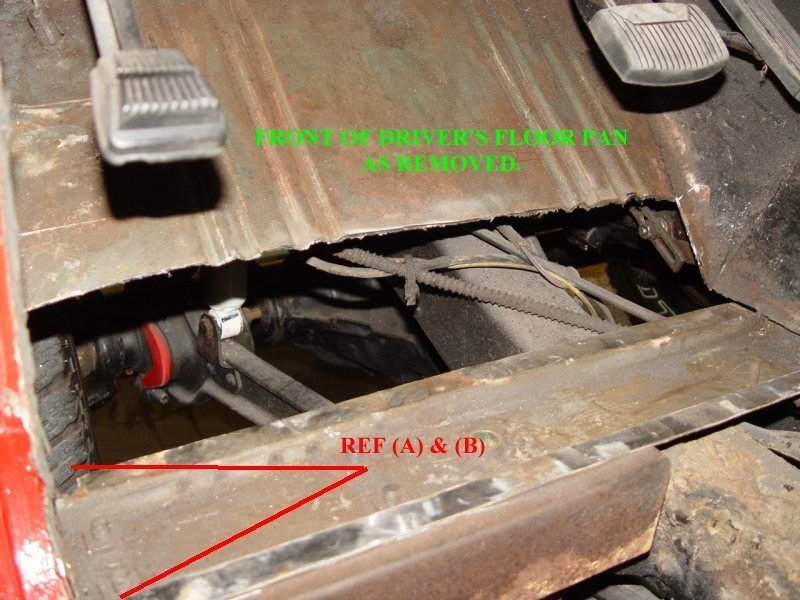
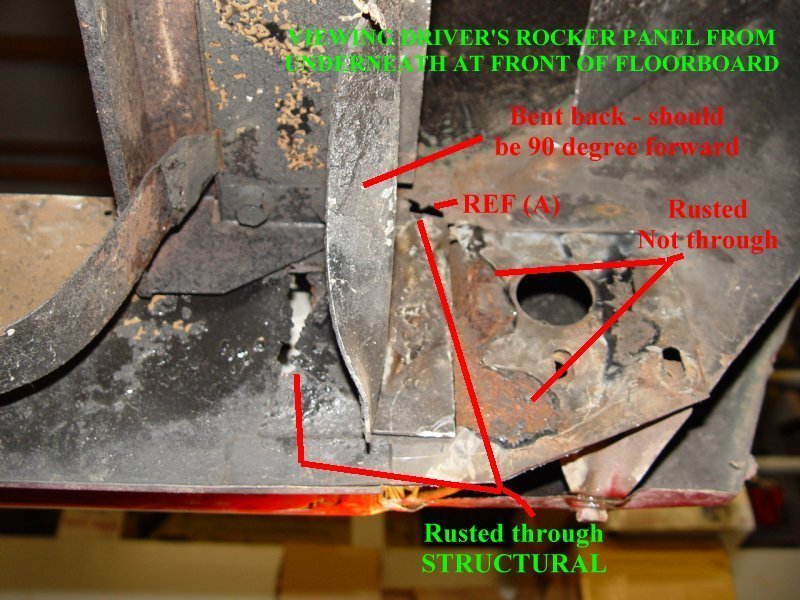
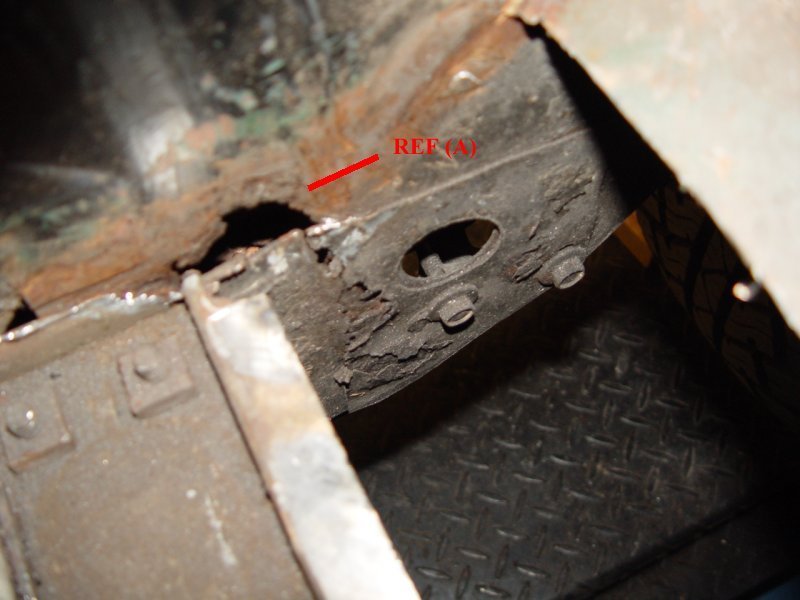
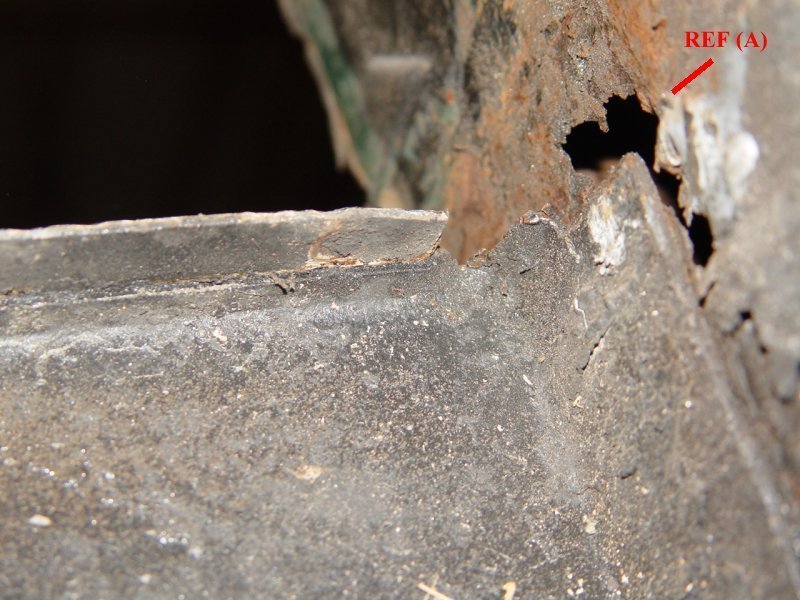
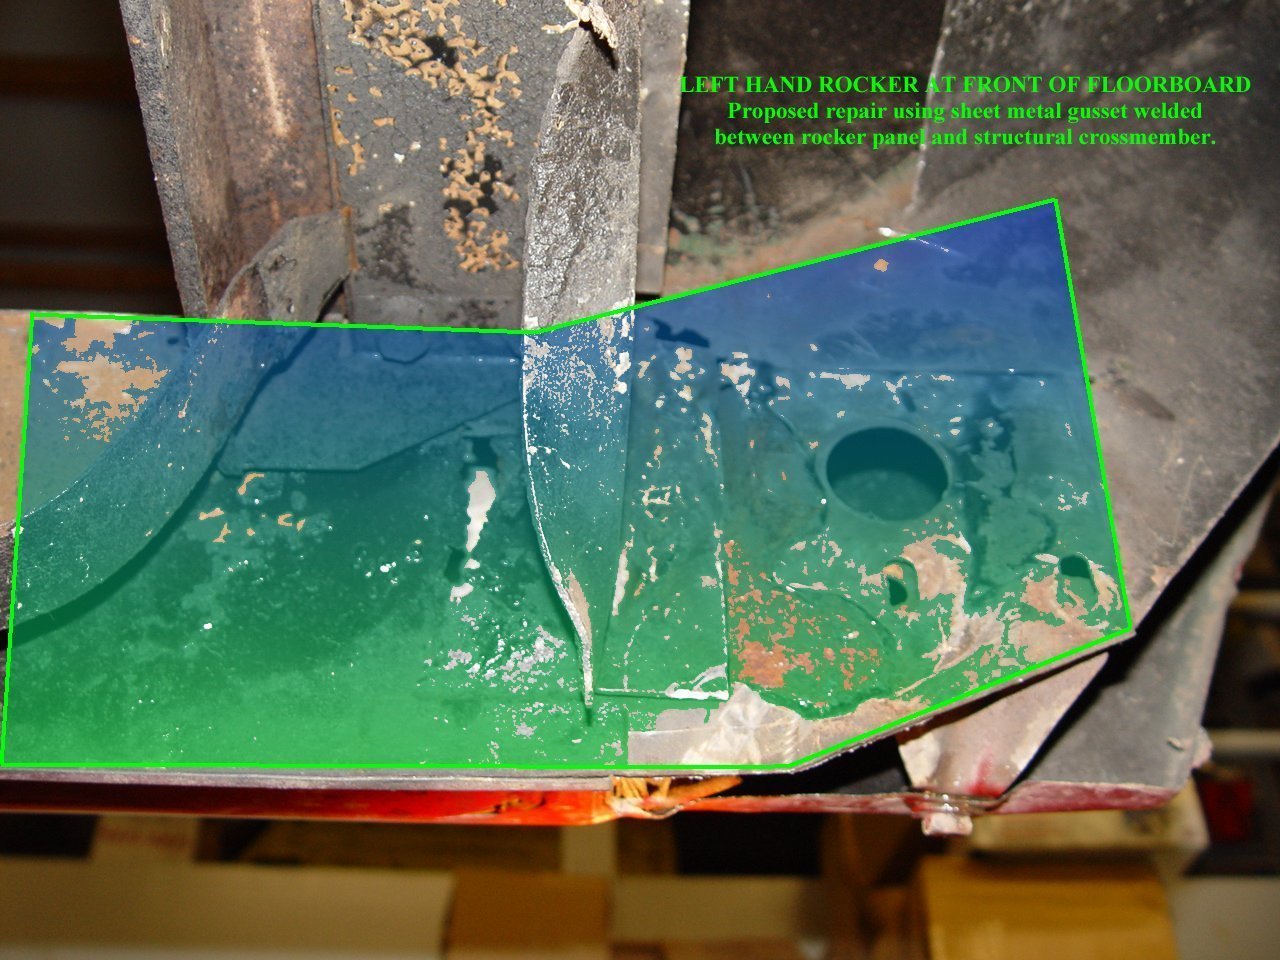
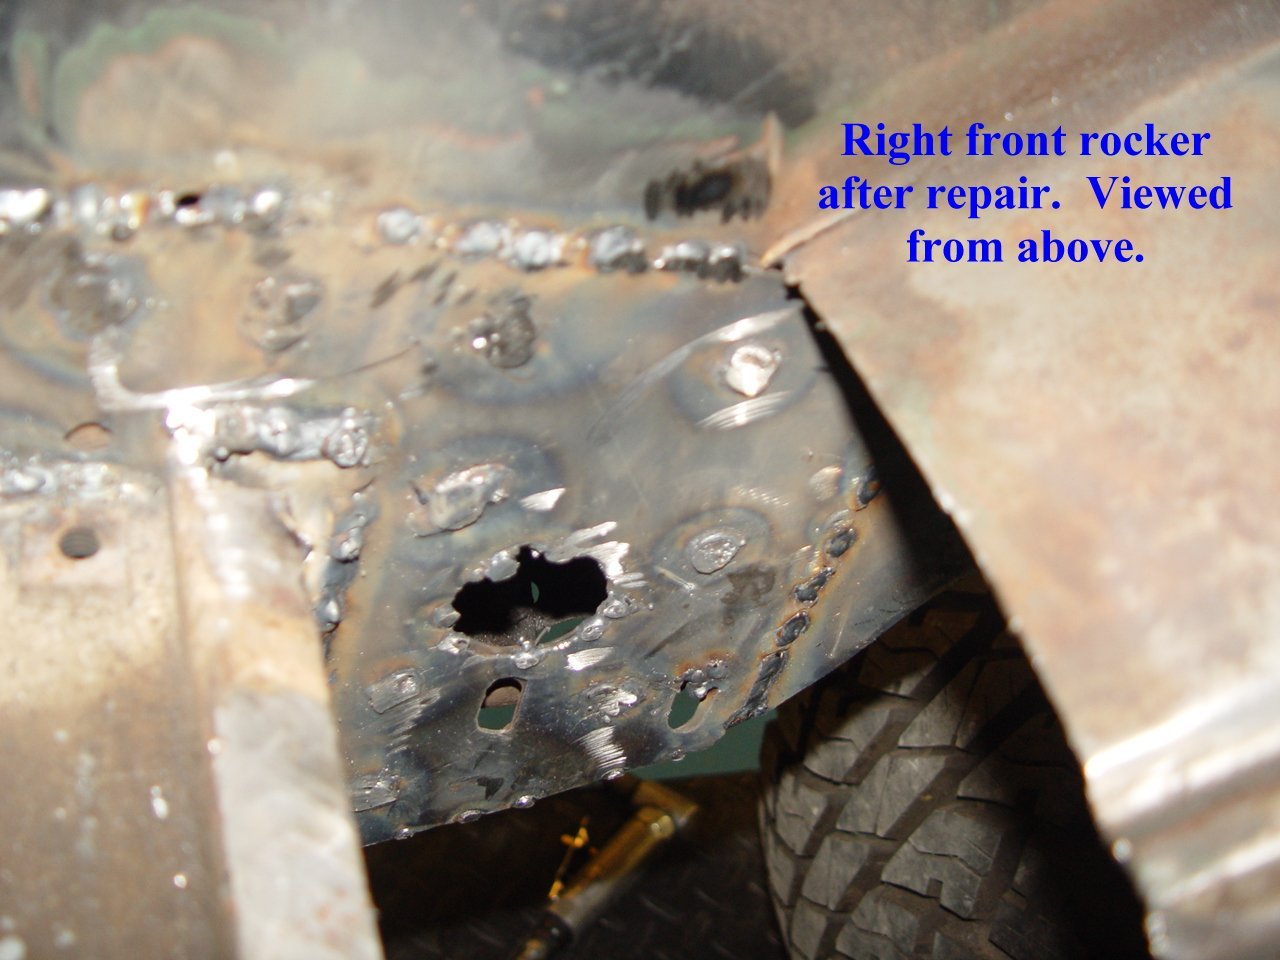
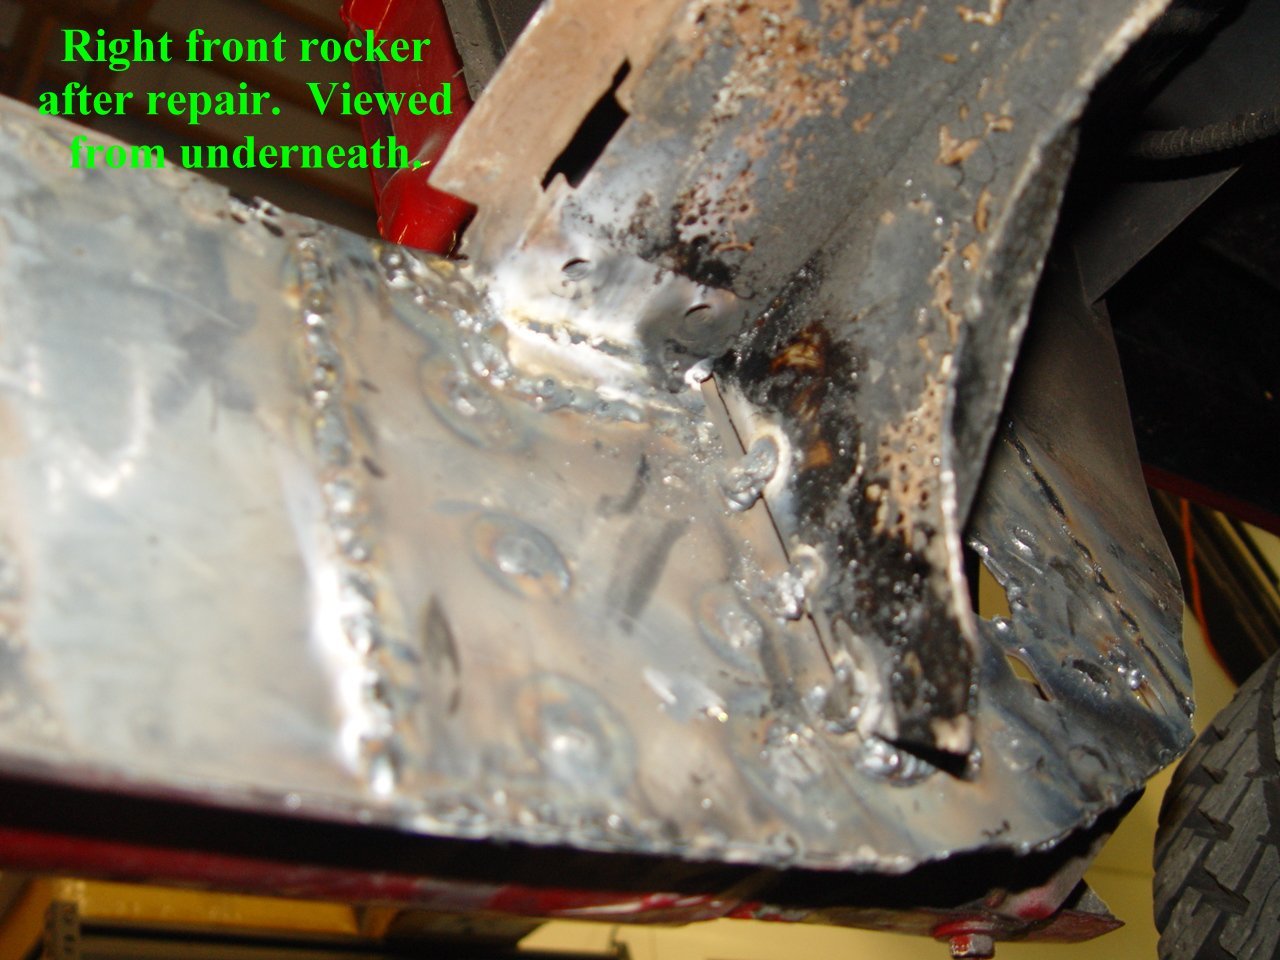
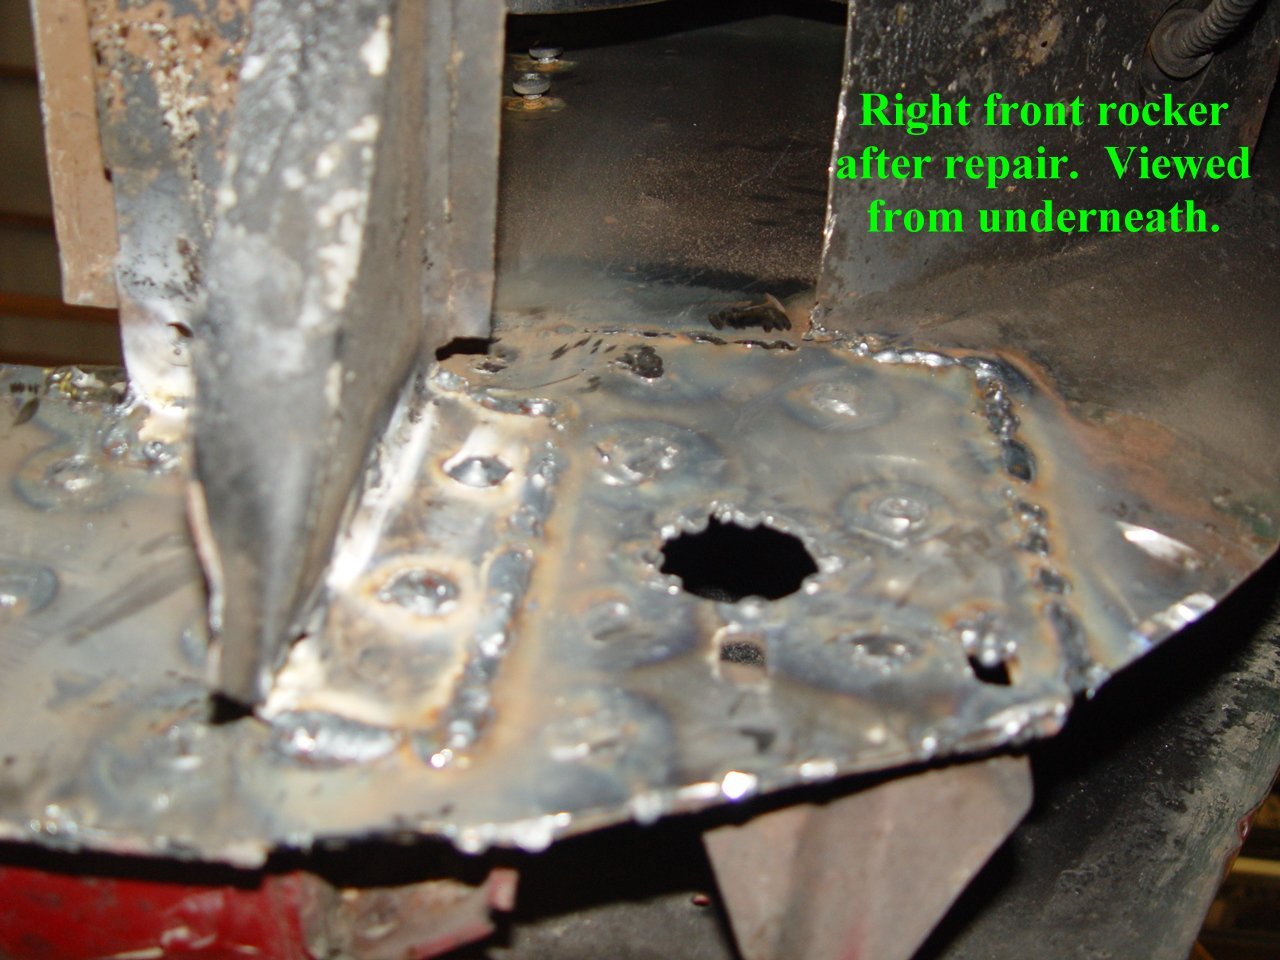
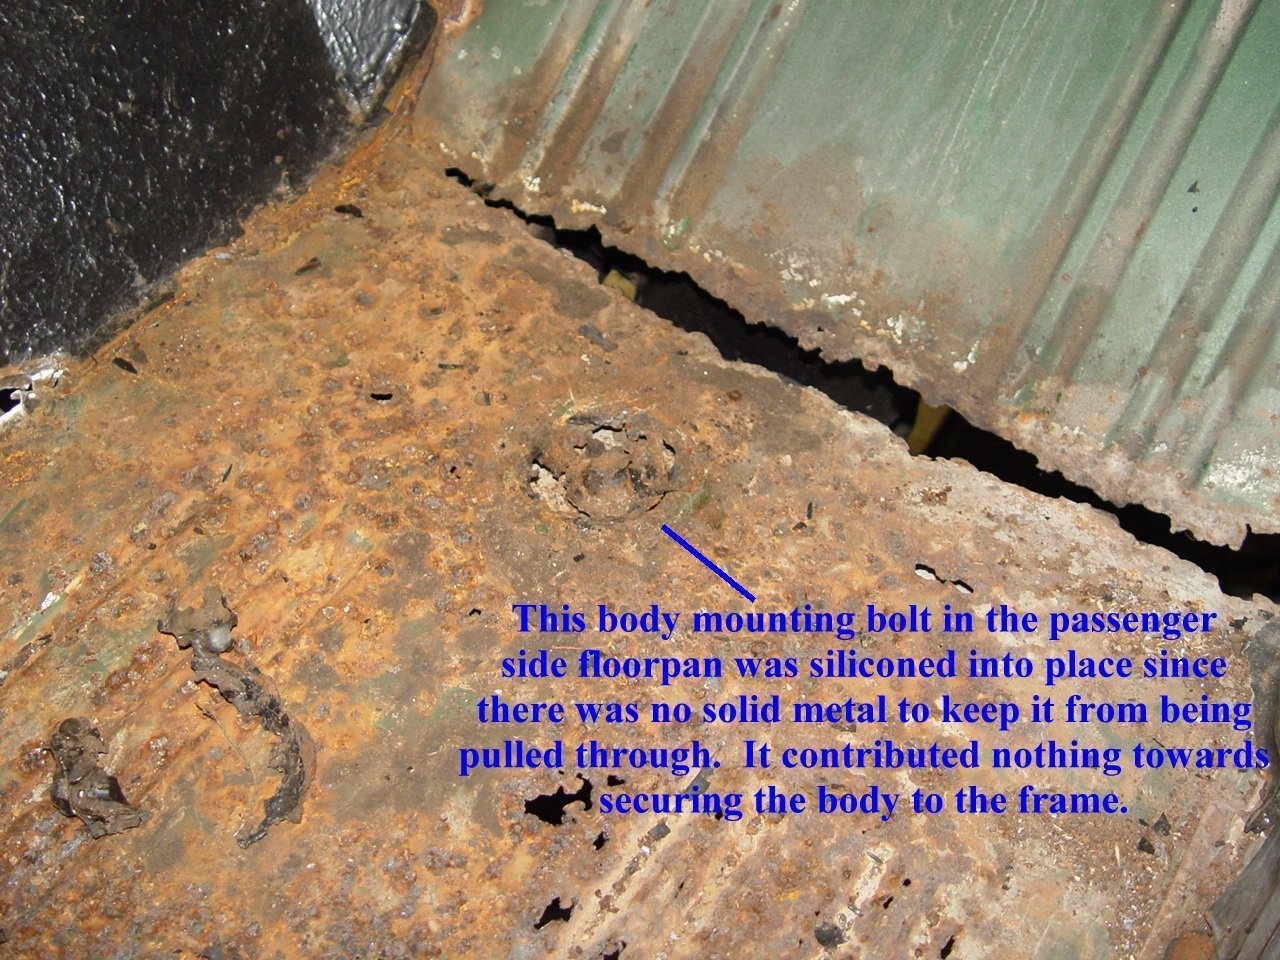
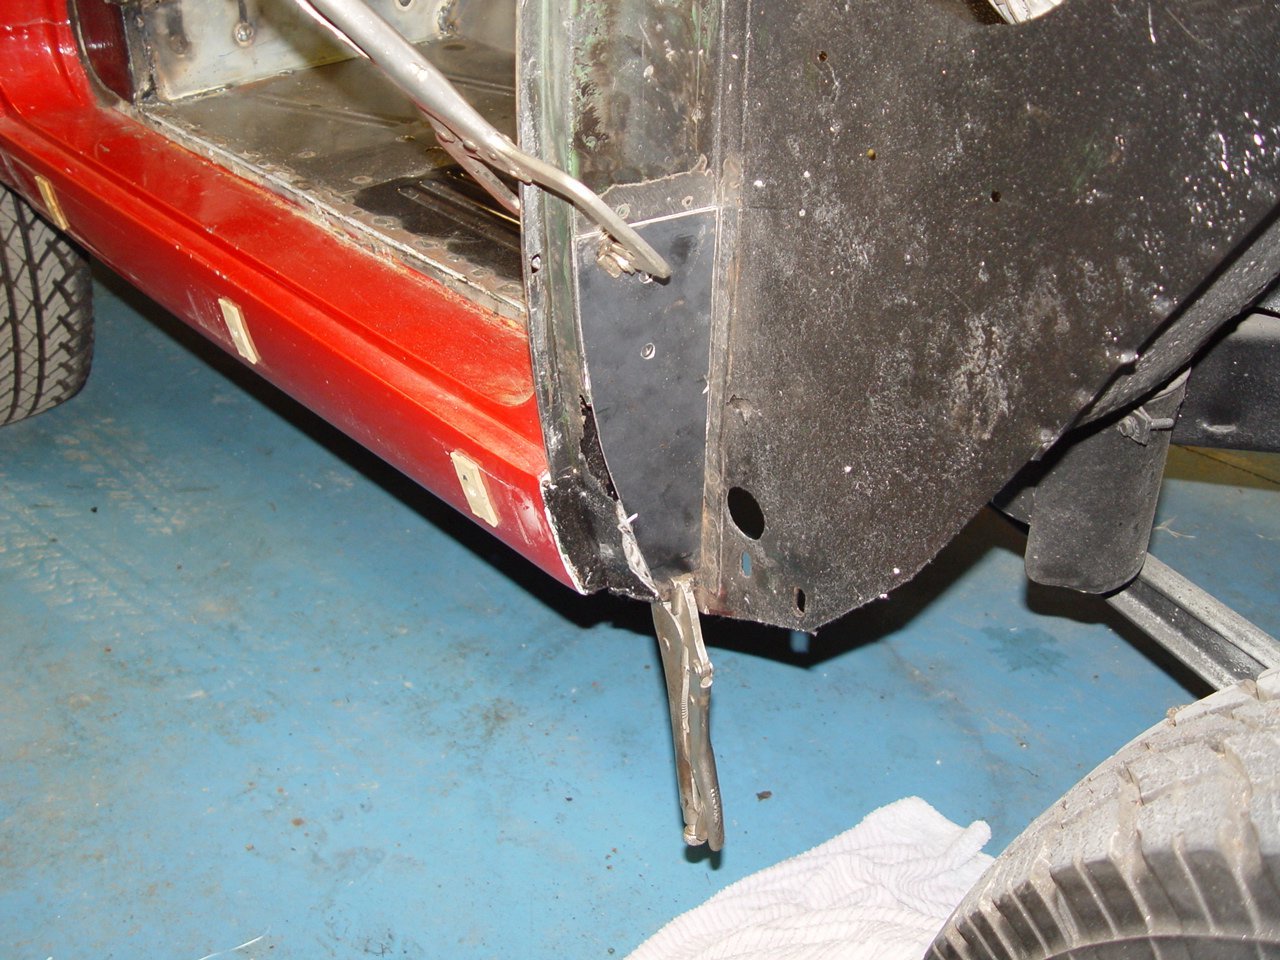
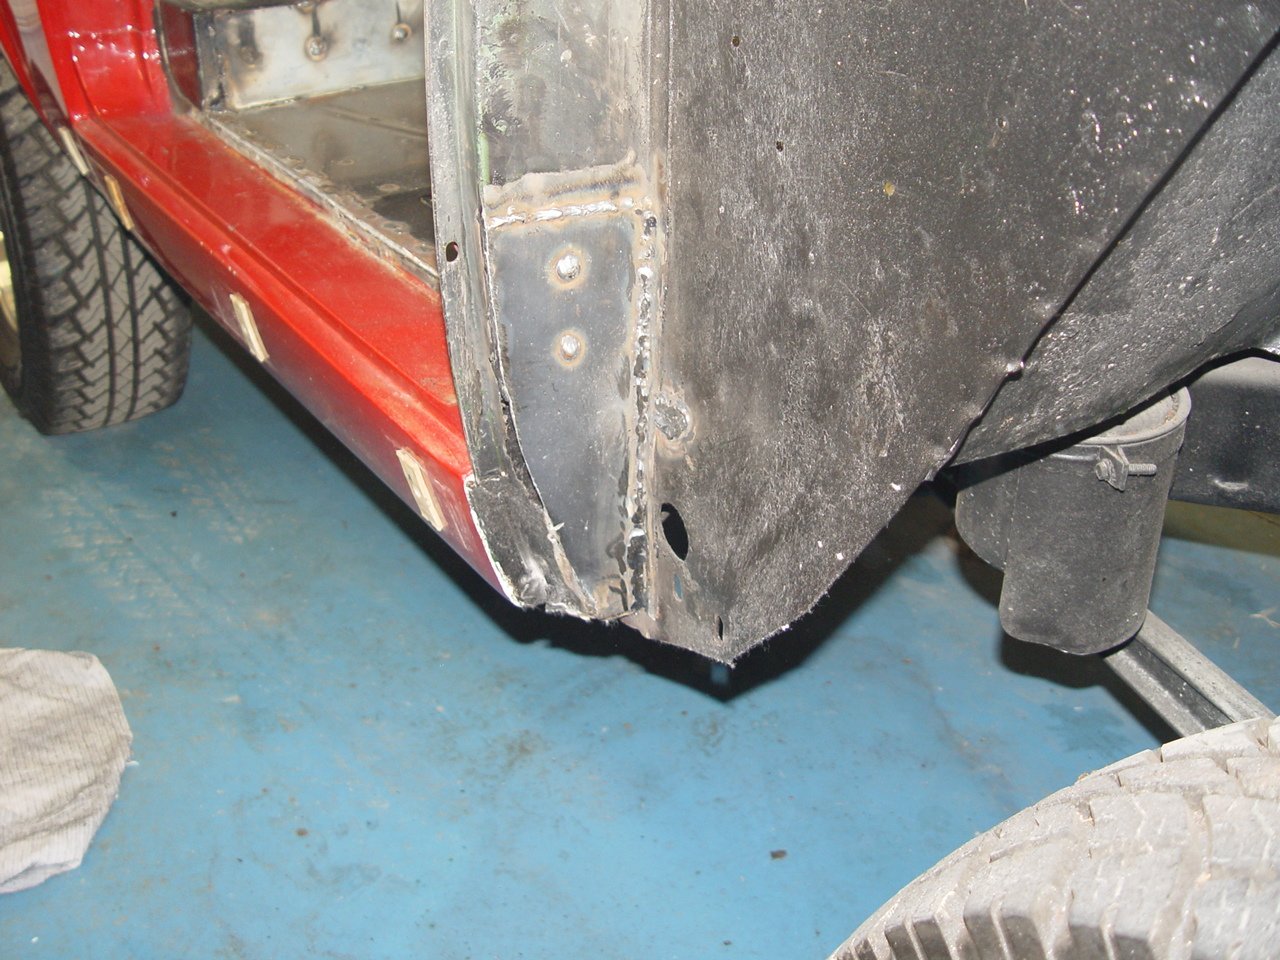
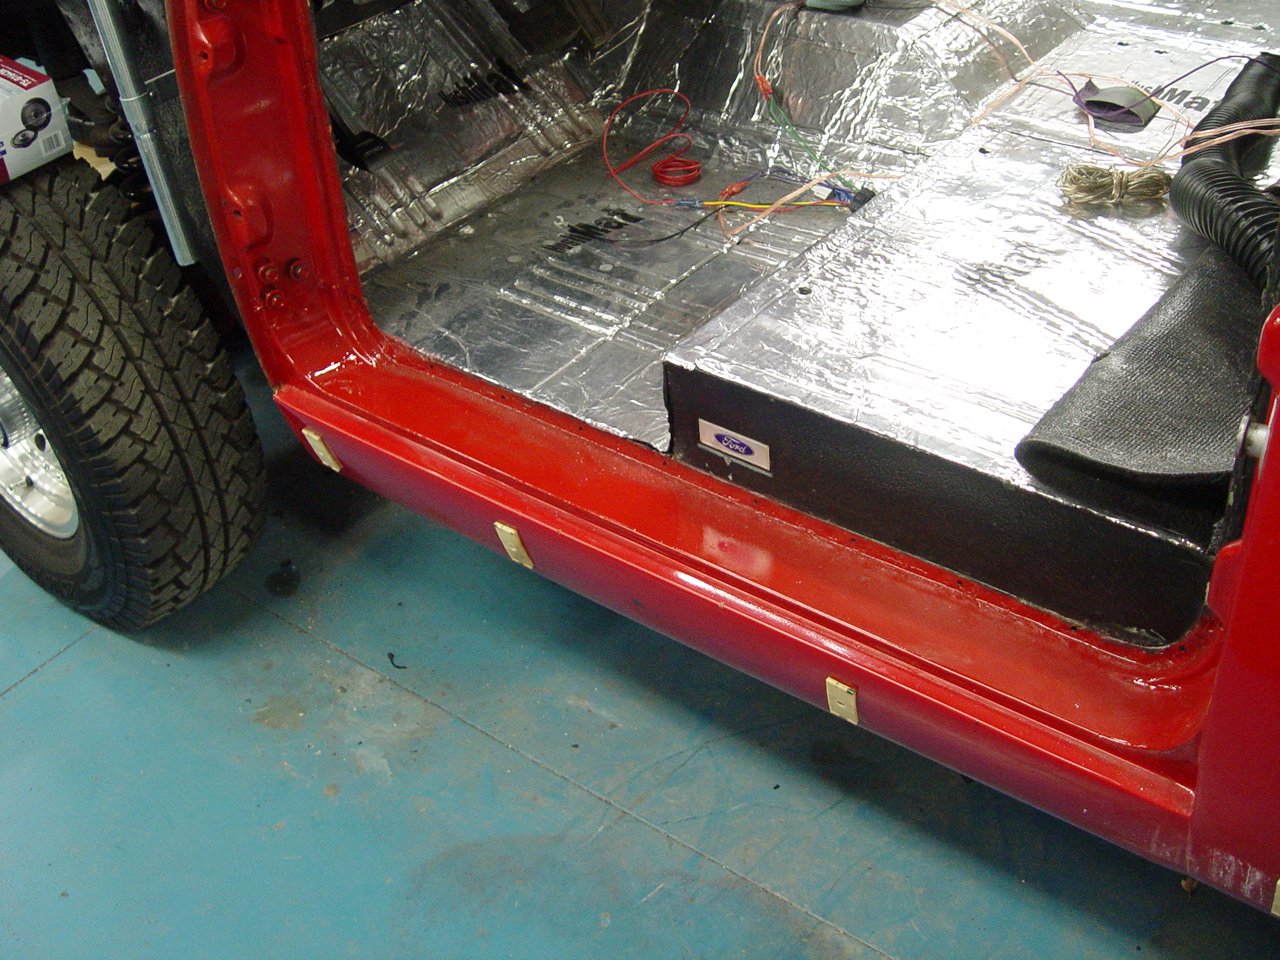
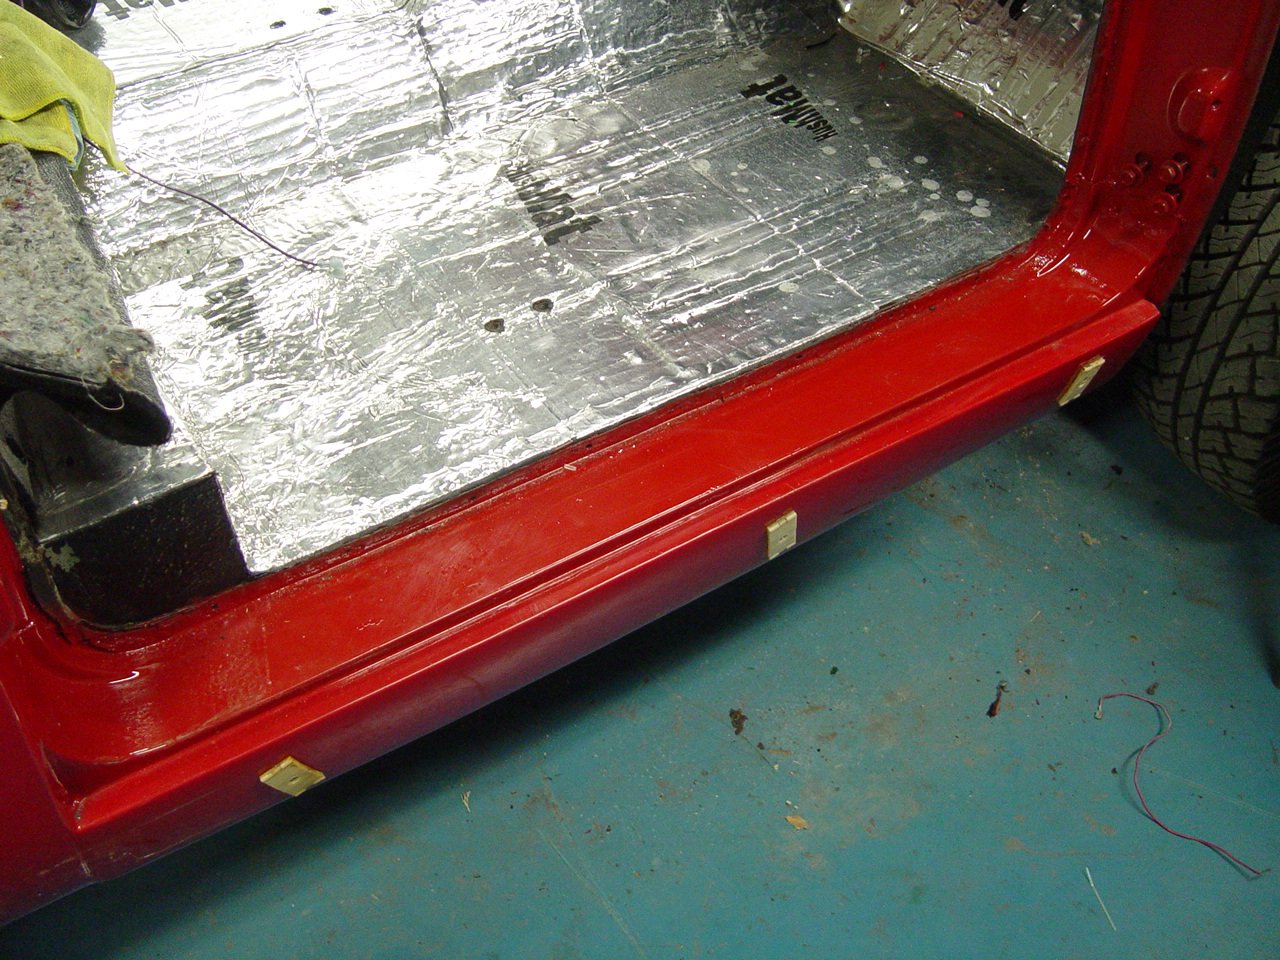
Driver's Floorpan: Once we removed the tacked-down sheetmetal cover over the original floorpan, we had a good look at what remained of the original sheetmetal. What was there wasn't pretty. It was quickly apparent that we had no lip at the rear wall of the floorboard on wich to weld the replacement pan. So, we would need to fabricate a rear wall for ourselves. We also discovered that the body mount bolt was held in place by silicone. There just wasn't enough metal around the original hole to bolt down the body at that point. So, they held the bolt in place with silicone so that an under-body inspection would reveal a bolt with nut. OK...now we were getting really concerned. The new pan was eventually welded into place along with a new rear wall, but not until we repaired a serious problem with the junction of the body support crossmember and the inner rocker panel. Read on...
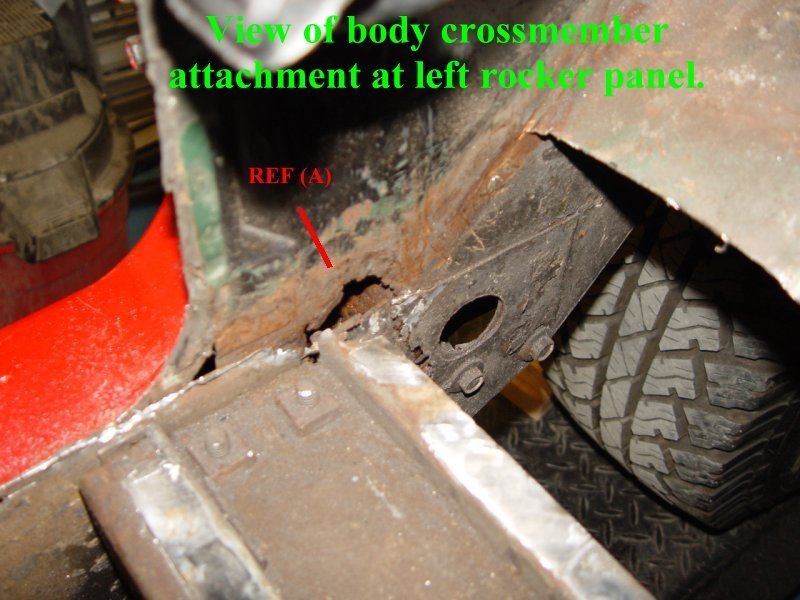
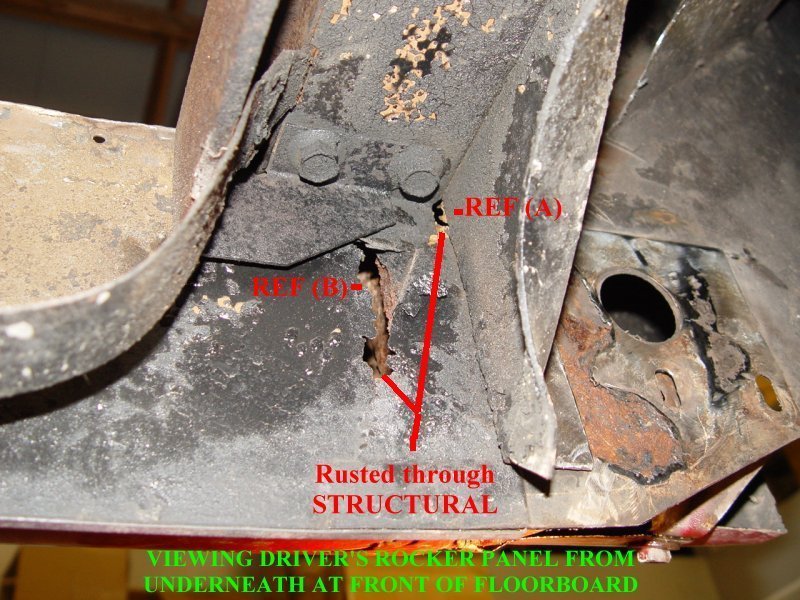
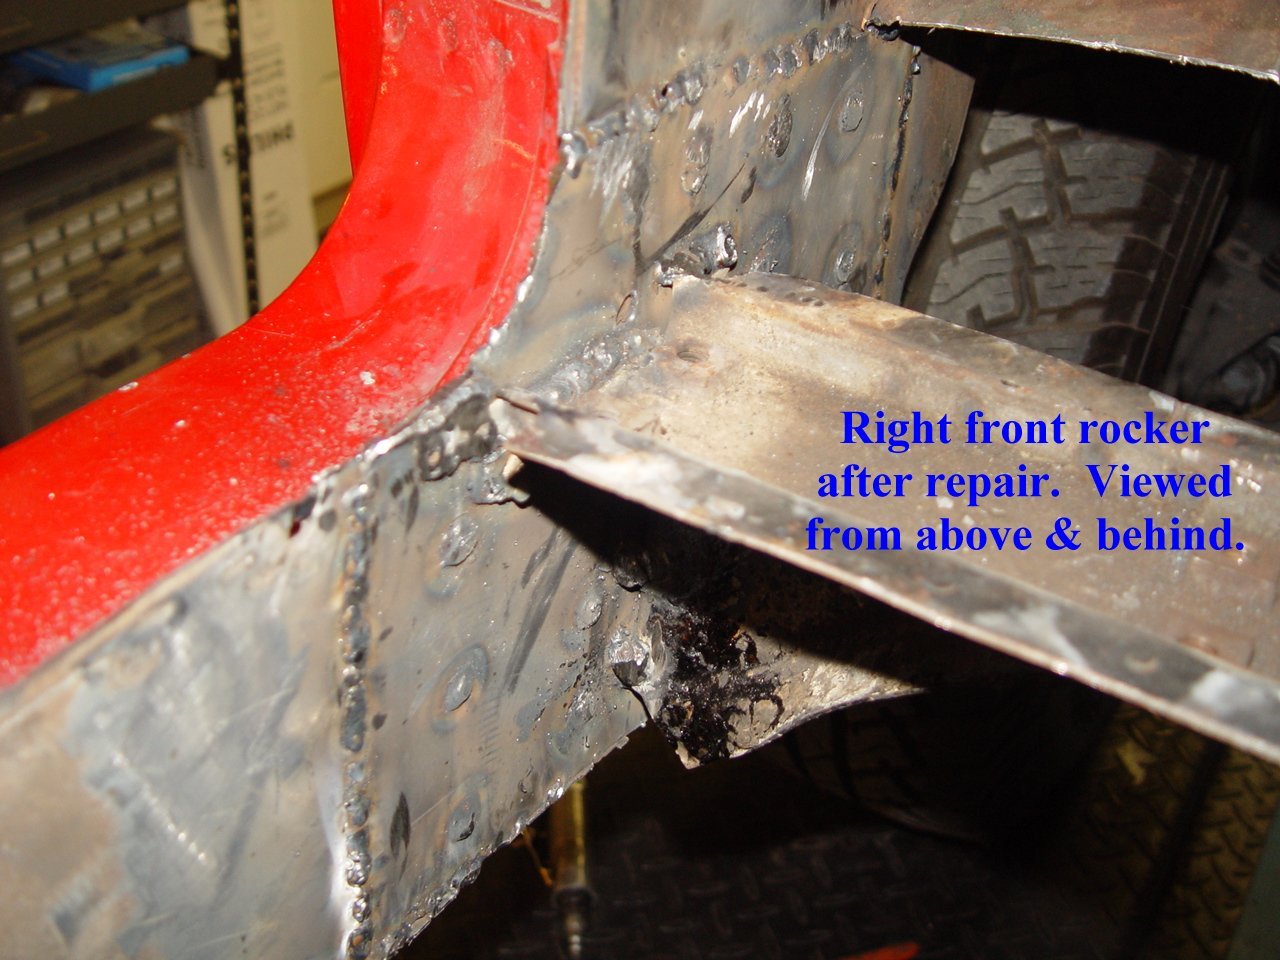
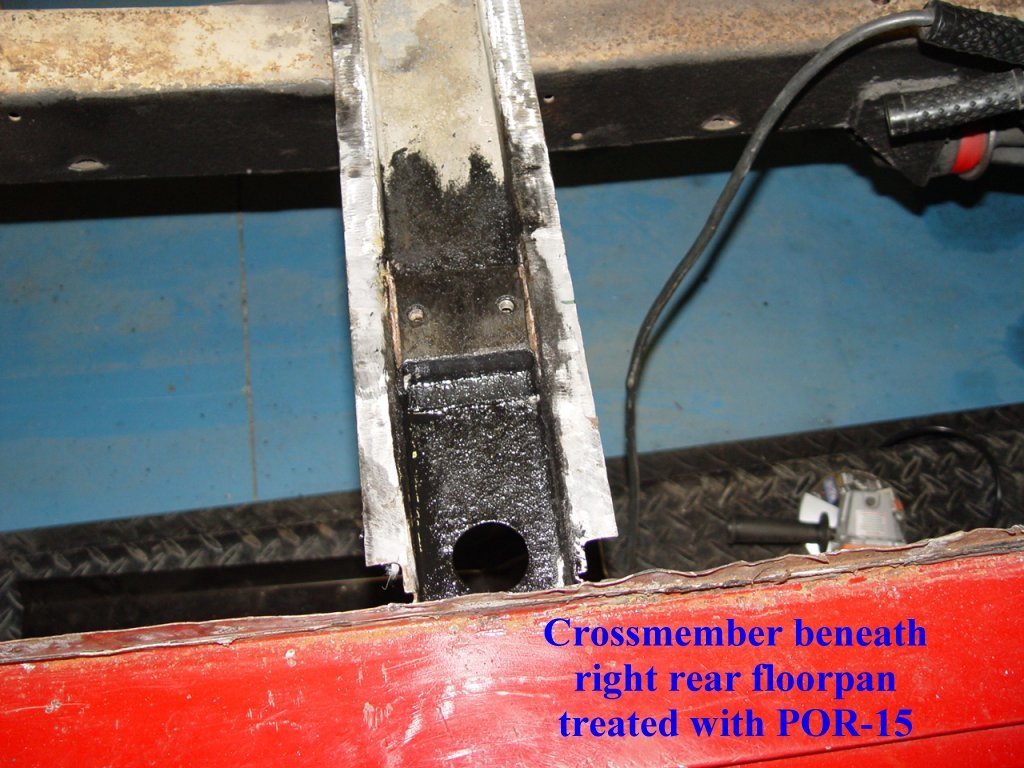
Left Inner Rocker Panel: After removing the driver's floorpan, we were able to see what lay beneath. Also, the vibration caused by air-chiseling the old floorpan seams caused a lot of bondo and rust to fall out of the left inner rocker panel. What we found came as a shock. Apparently, the inner rocker panel had nearly rotted away where the body's front crossmember attaches. The rust damage had been disguised with body filler and undercoating - which fell out from the vibration of our air chisel. The rust was so bad that it is highly likely that the right front corner of the body would have collapsed over the frame the first time a significant bump was encountered. We cut out as much rust as possible, treated what remained with POR-15 and then welded a sturdy gusset patch over the rocker panel. It became apparent that the rocker panel had moved out slightly with the weakened junction, but it wasn't enough to risk damaging the exterior body panel and finish by pushing it back in place. So, we pulled it back into alignment as much as possible and re-welded the junction.
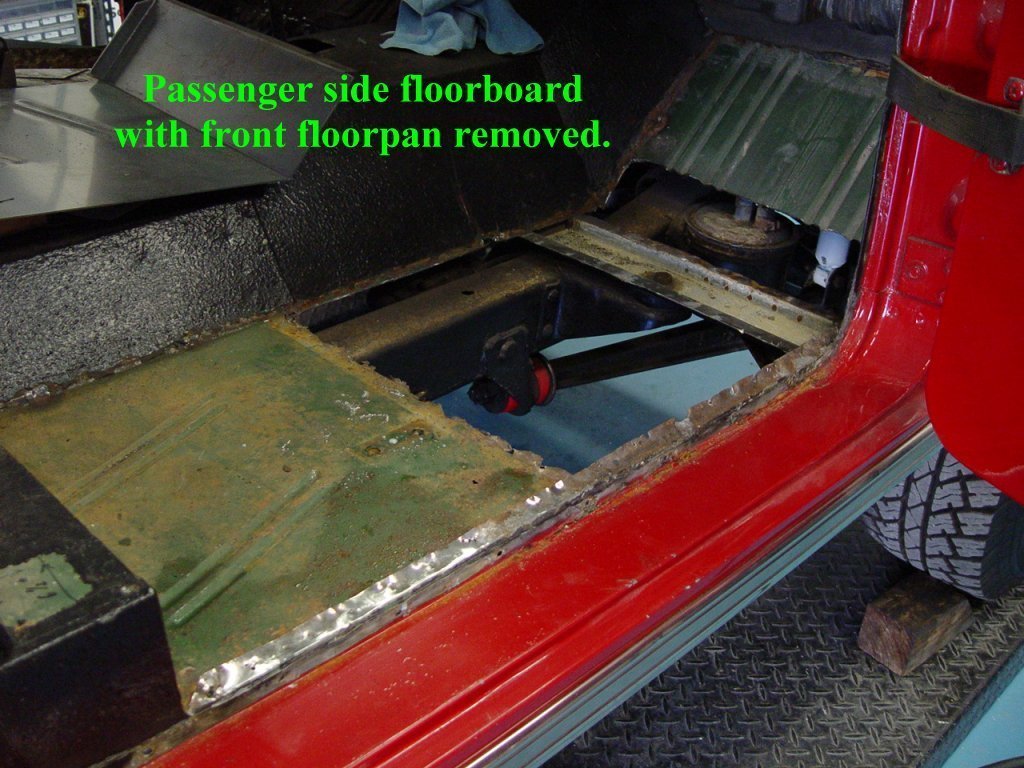
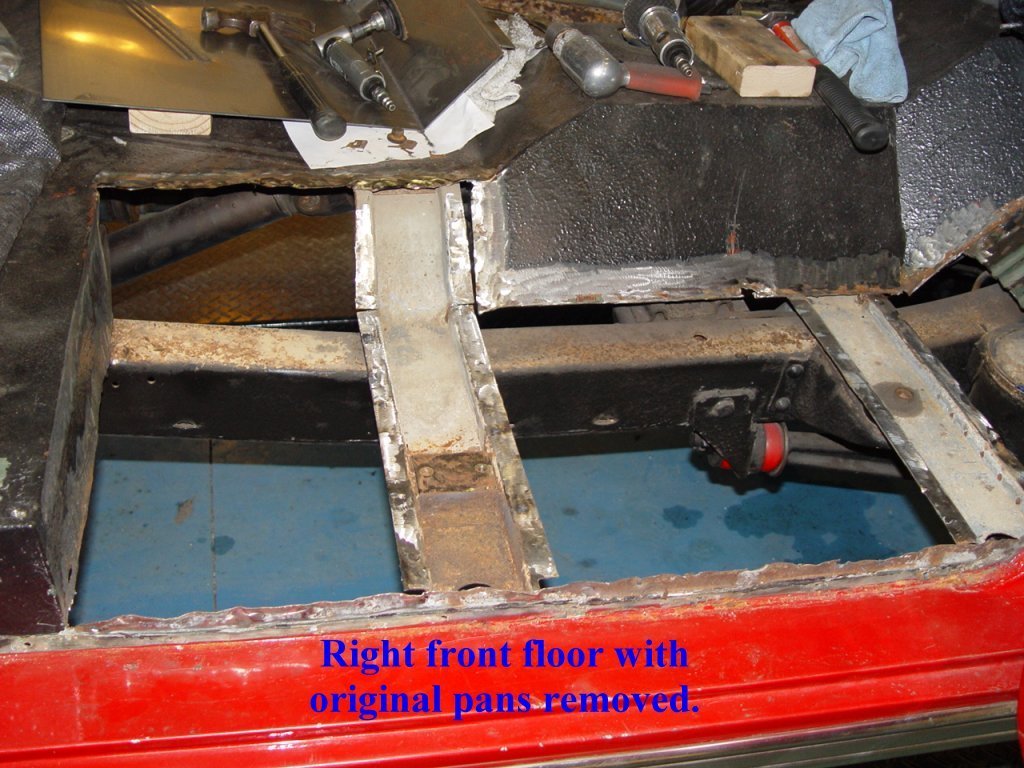
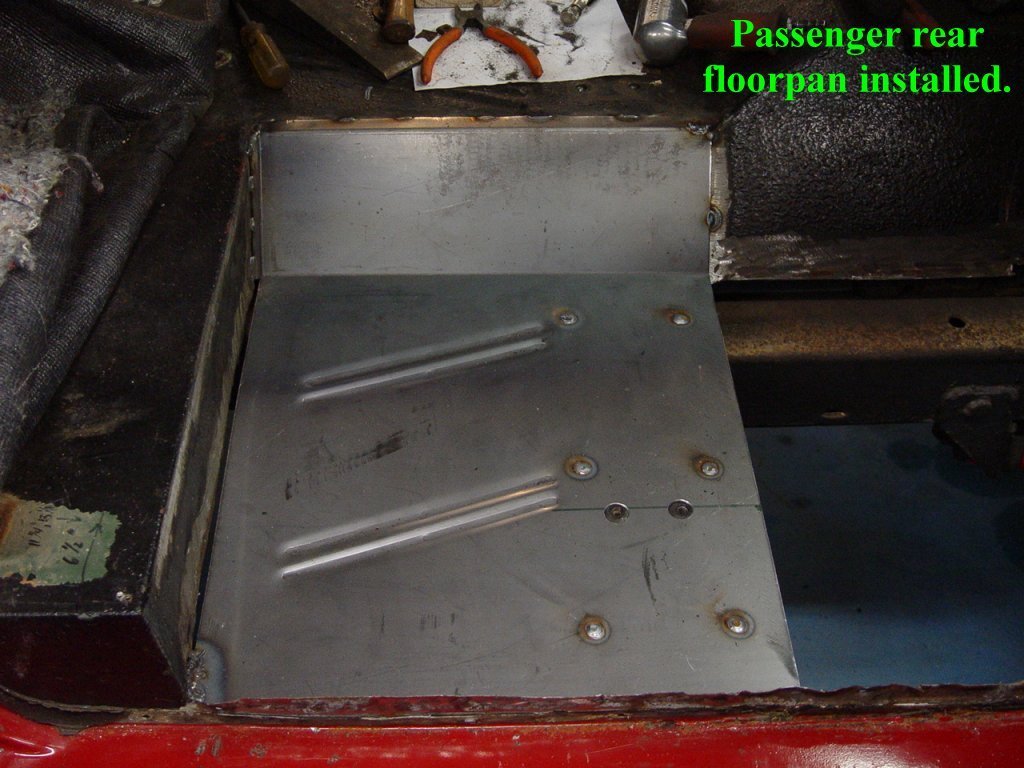
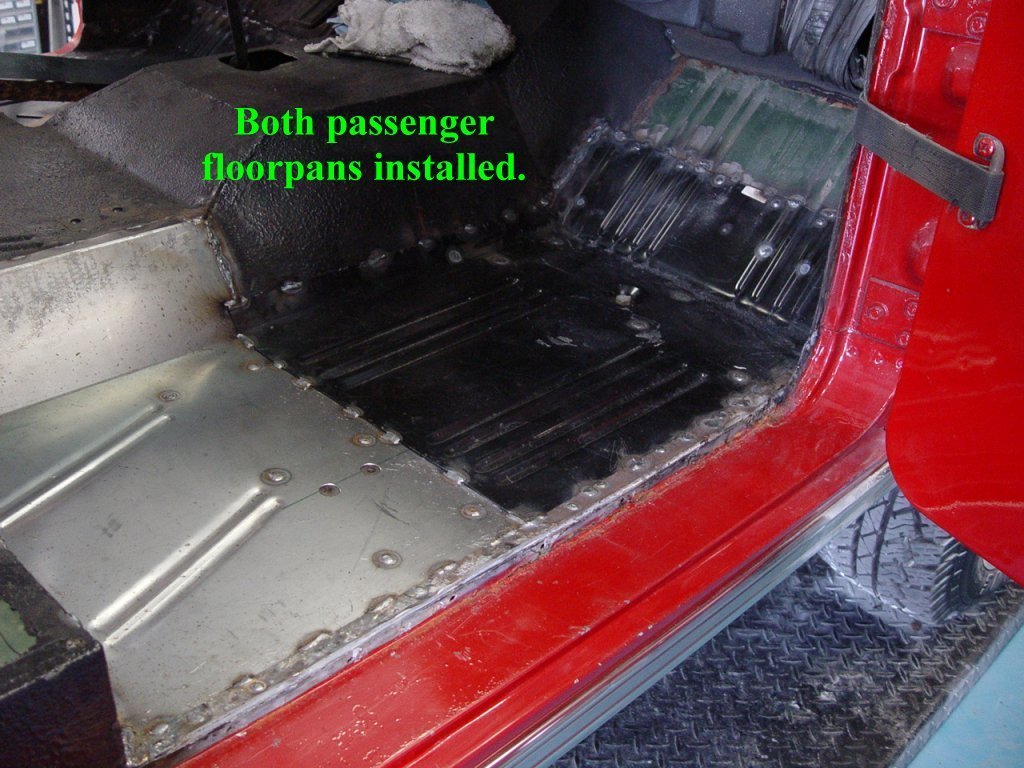
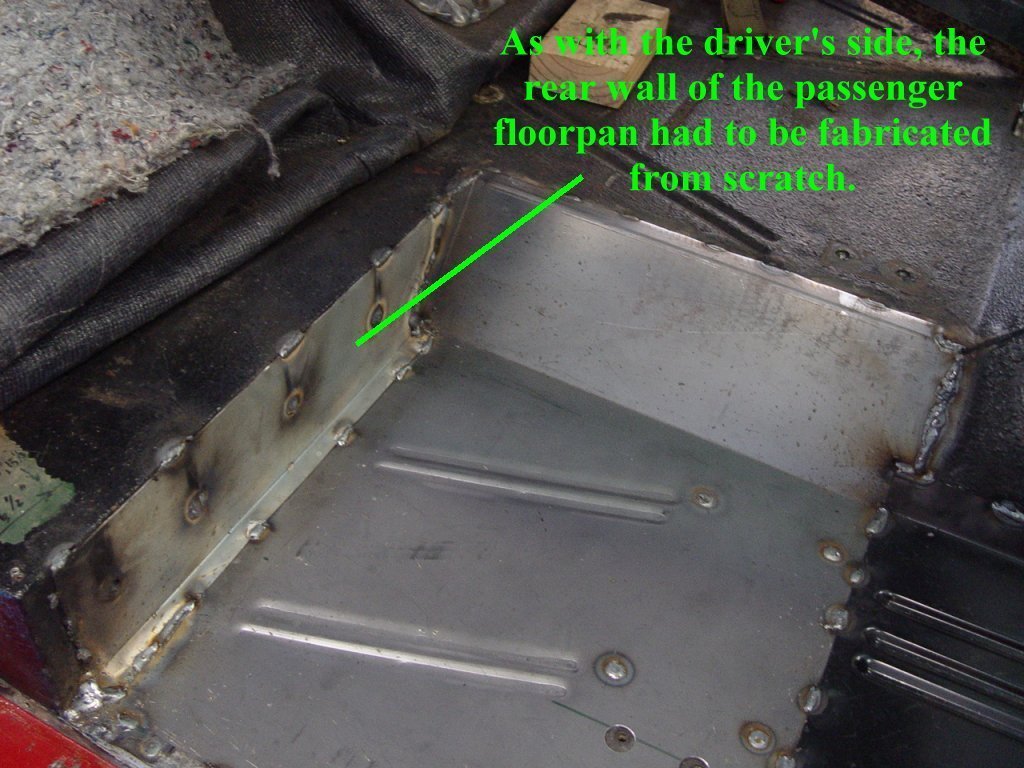
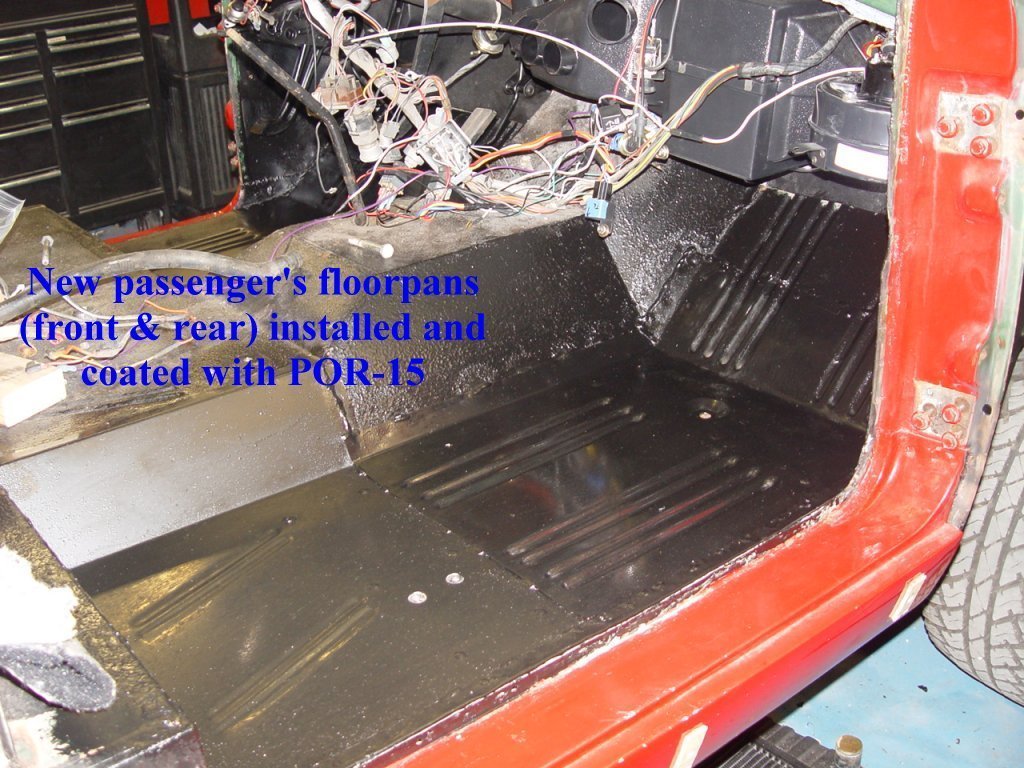
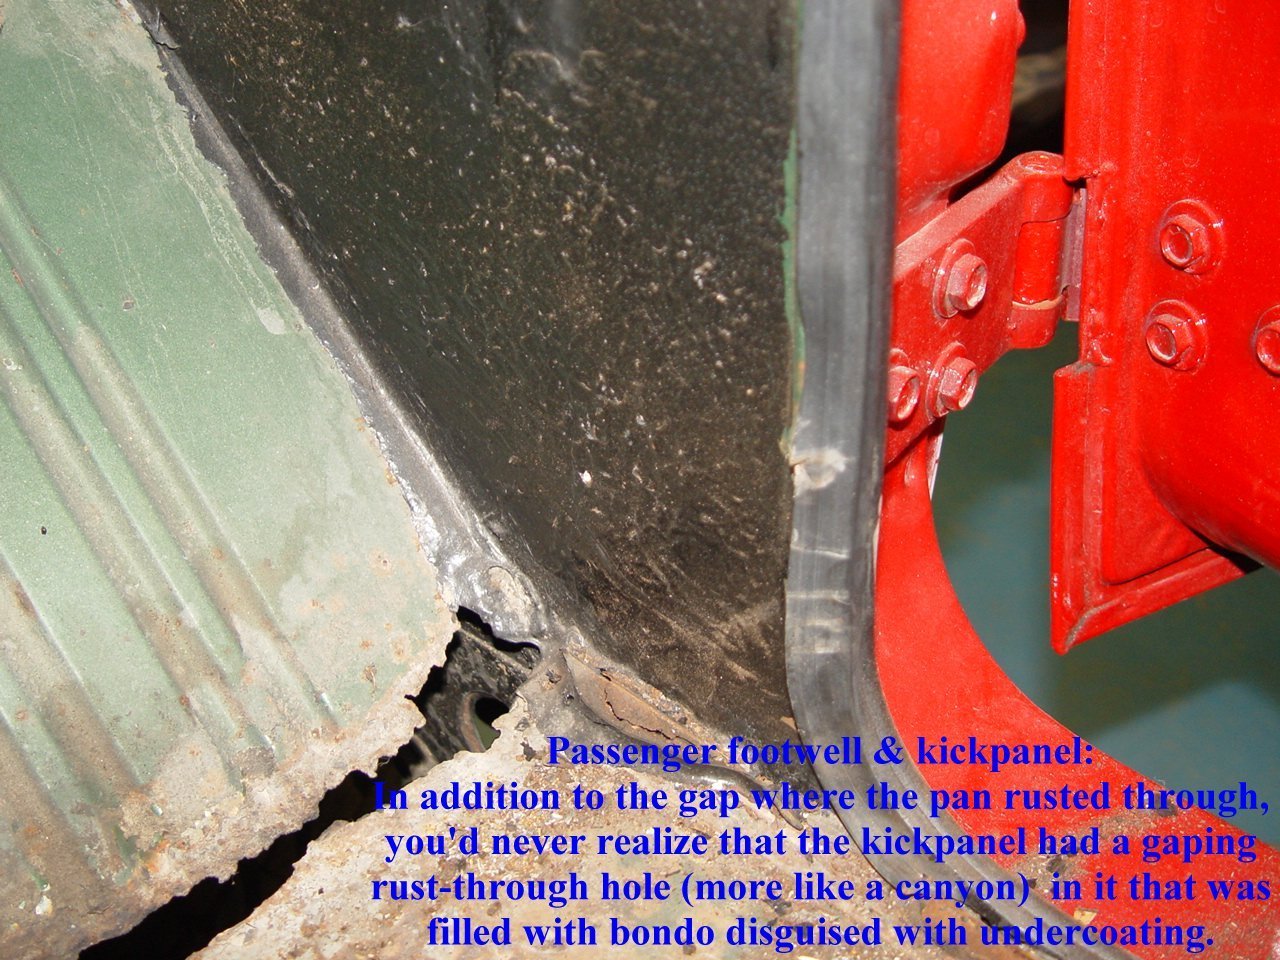
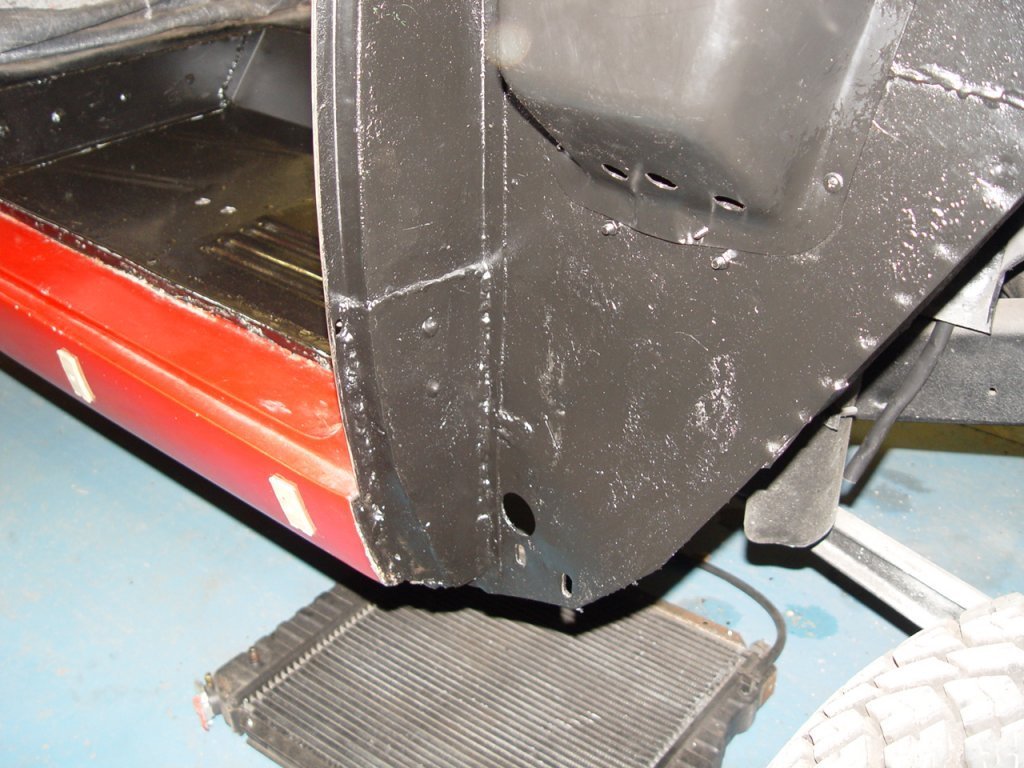
Passenger's Floorpan: Of course, the same cheesy repair had been made to the passenger's floorpan. Even the body mount bolt was given the same silicone treatment. Fortunately, when we removed the original pans (front and rear), we found that the junction of the rocker panel and body crossmember was still intact. However, vibration again caused body filler to fall out of another cheesy repair - this time to the kickpanel (see below). Both the front and rear pans were replaced with reproduction panels. Again, the rear wall had rotted away as well, so we fabricated and welded-in a replacement panel.
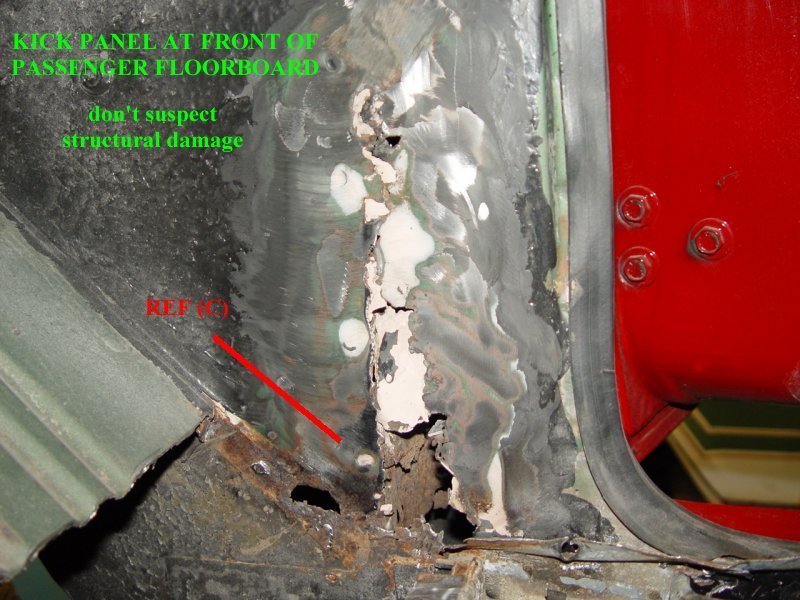
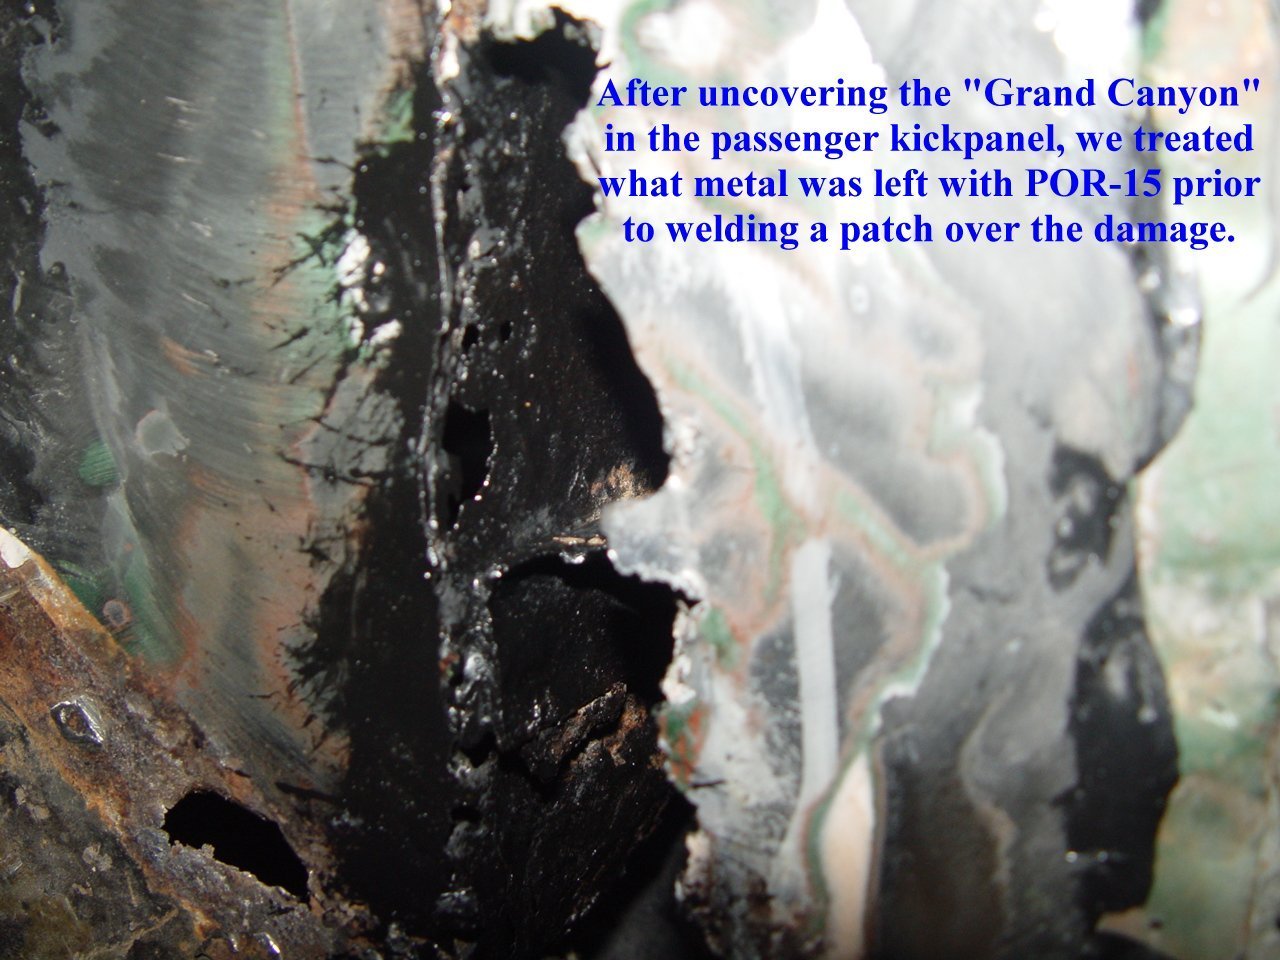
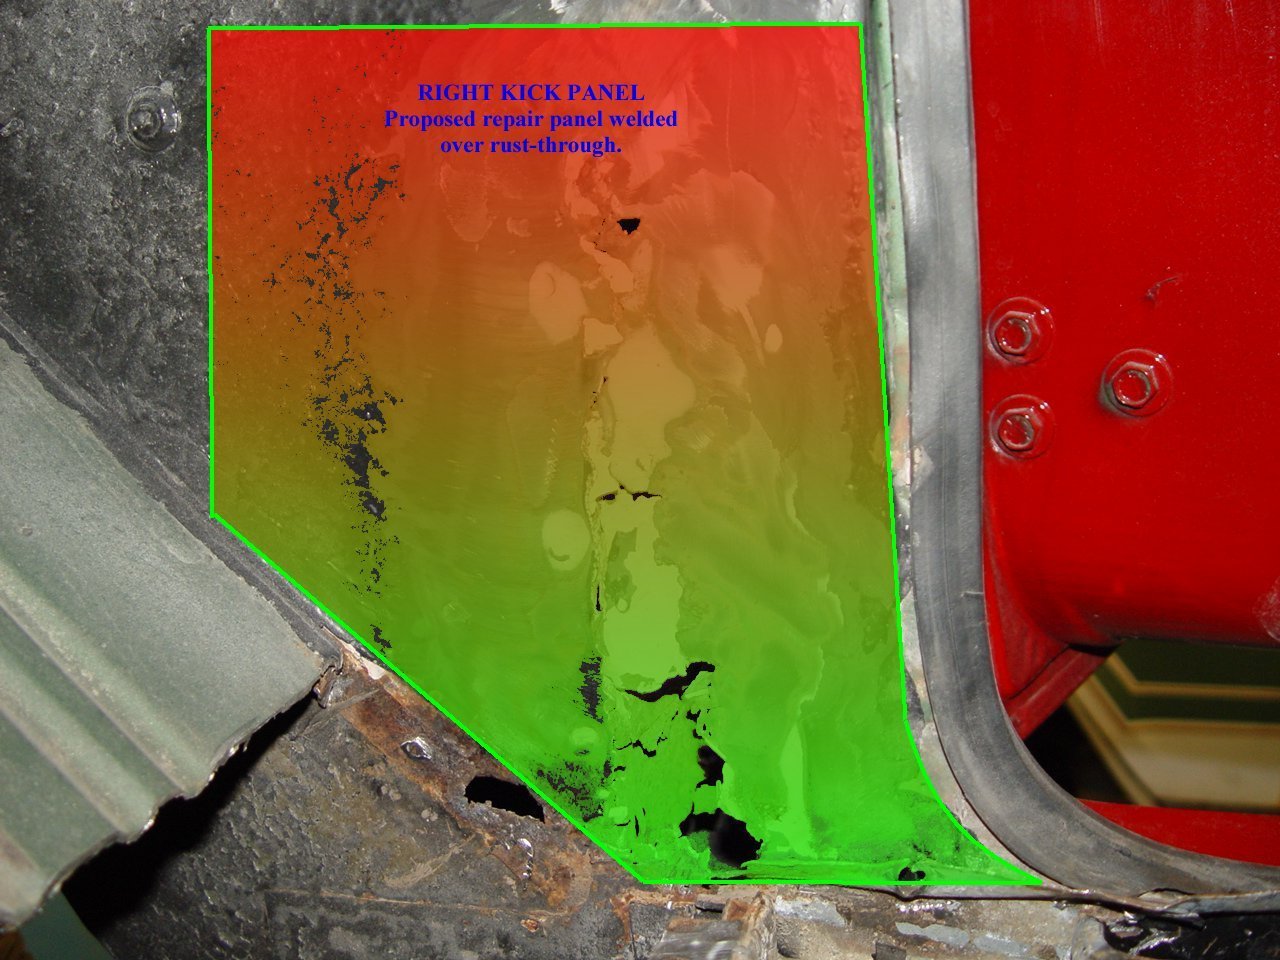
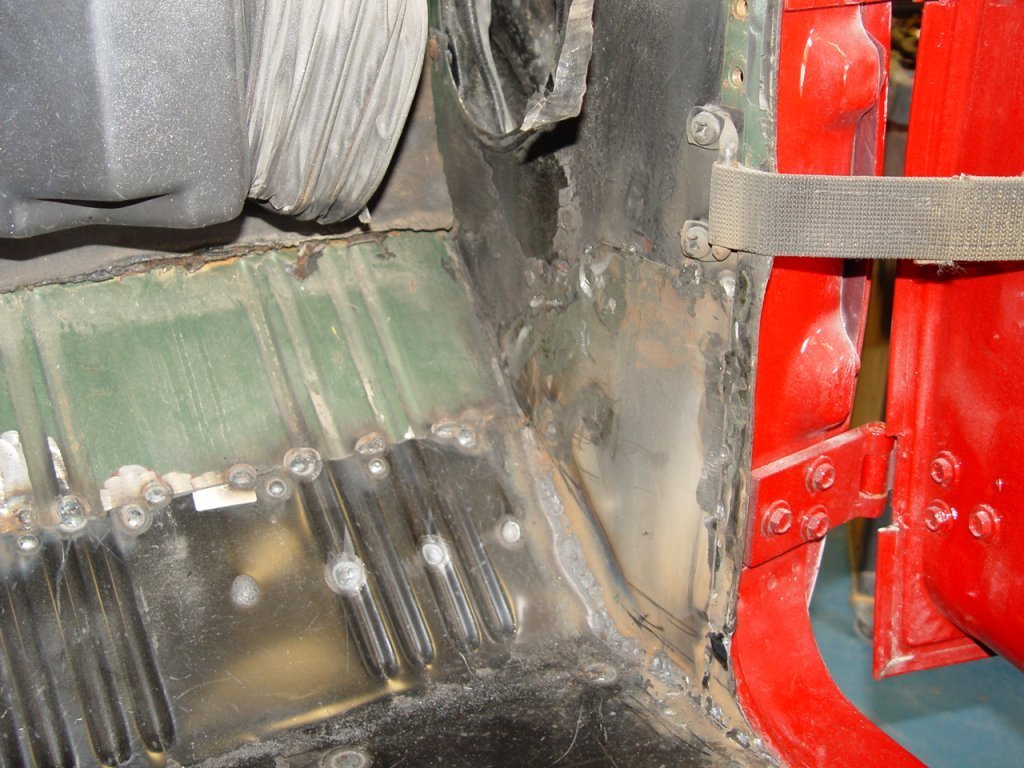
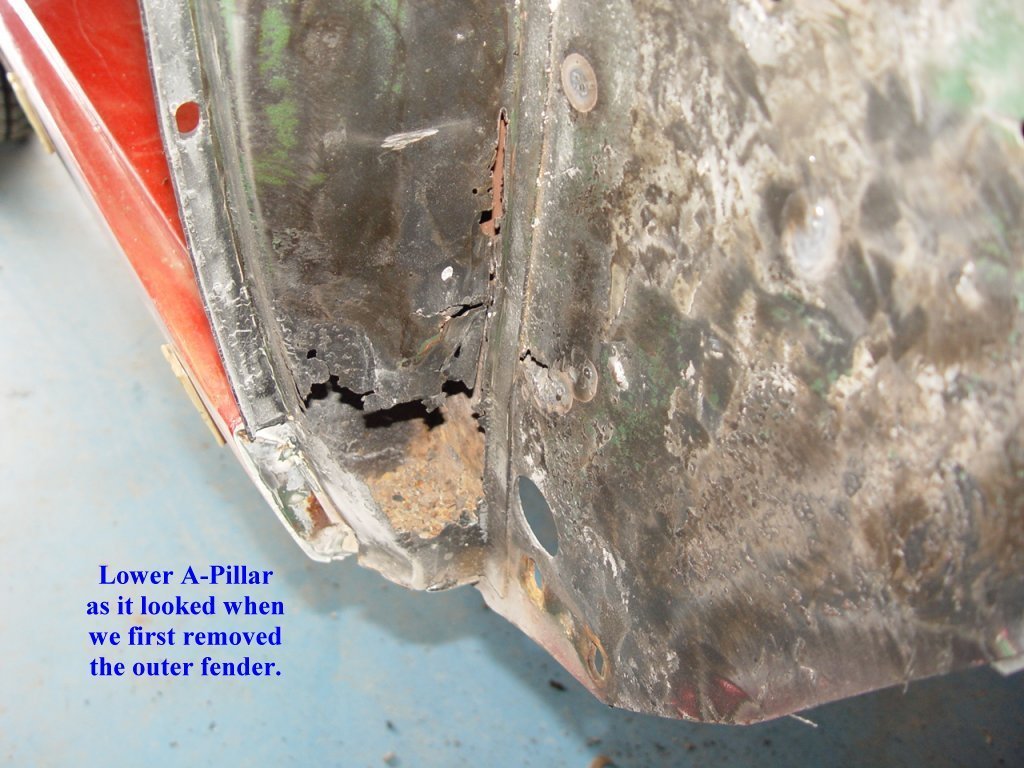
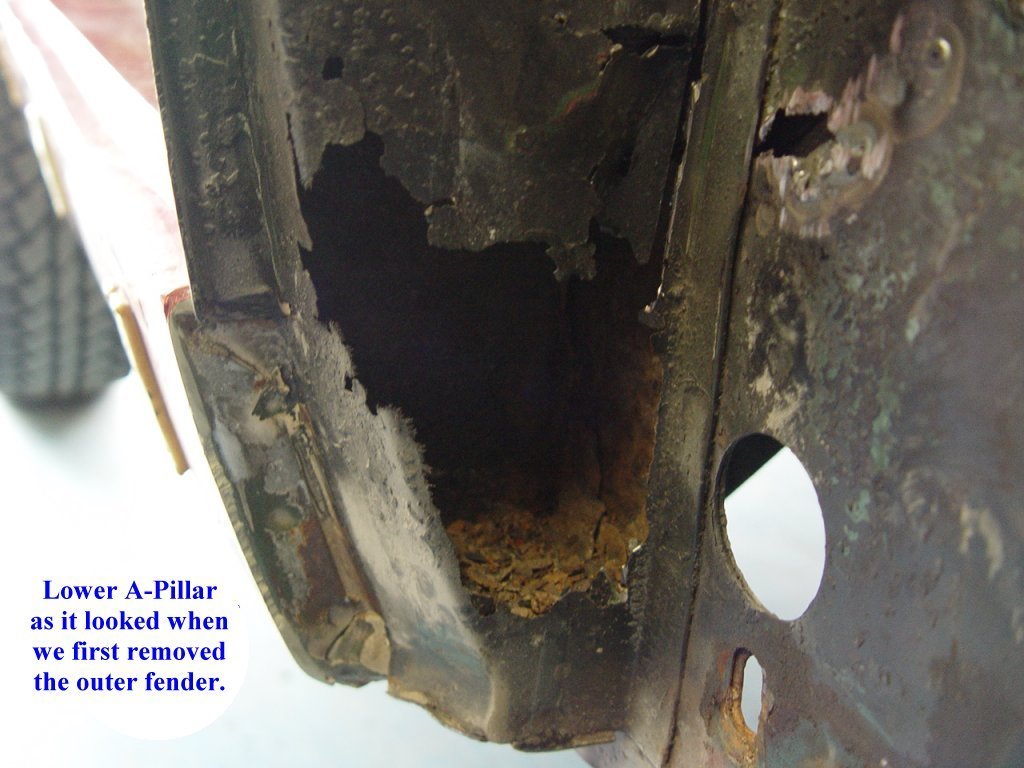
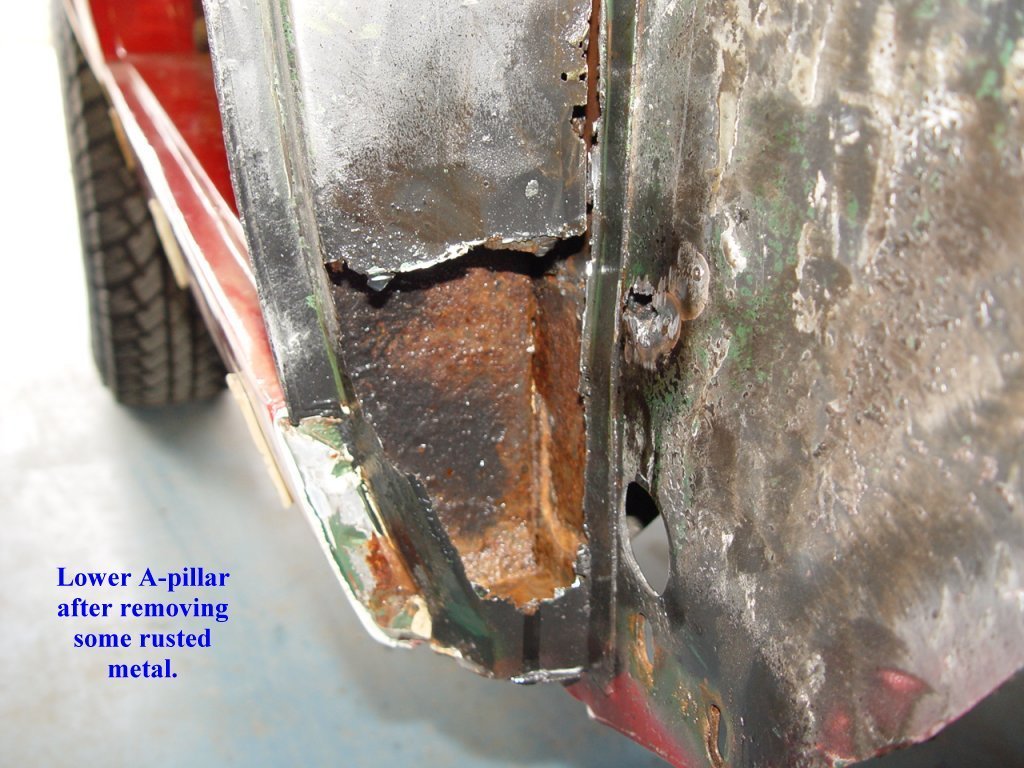
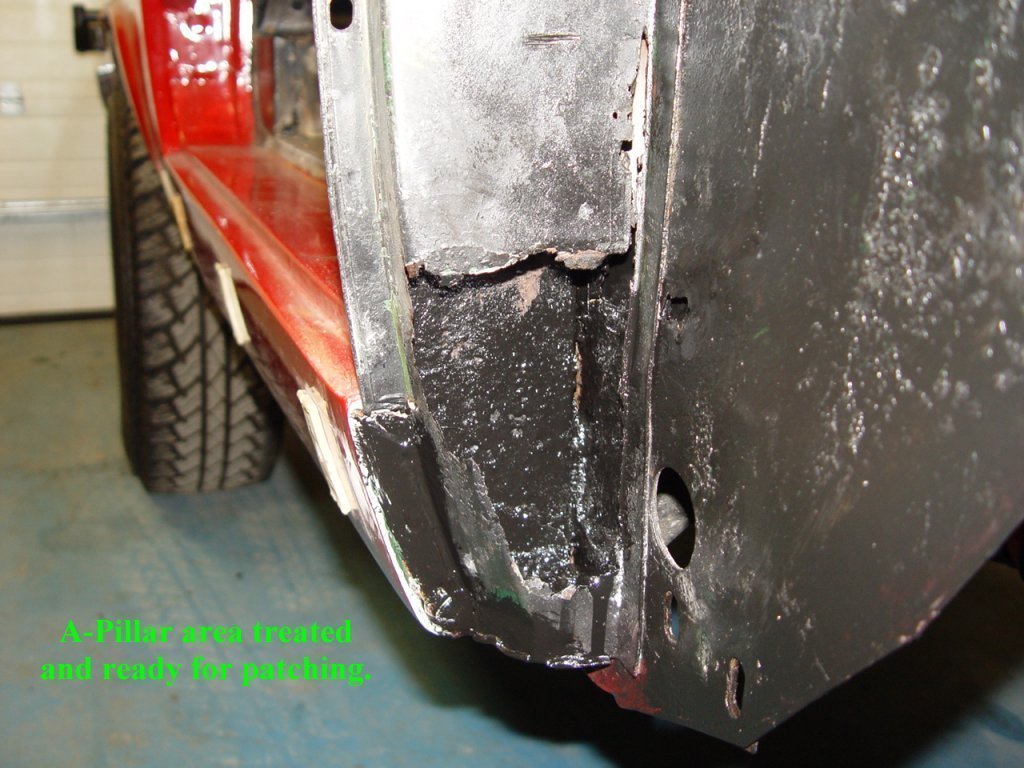
Passenger's Kickpanel: Again, vibration from our air-chiseling shook body filler out of a disguised "repair". What we found looked like the Grand Canyon of rusted kickpanels. Someone had simply filled in this chasm with bondo and then disguised the problem with undercoating. We removed the cancerous metal, treated what was left with POR-15, and then welded a sturdy patch over the mess. Before we did, we saw inside that the forward wall of the A-pillar had rotted away, so we knew we were going to have to remove the fender for even more repairs. Read on...
Right Side A-Pillar: As we found with Project Buckshot, the bottom front of the right side's A-pillar (front mounting point of the door) was rotted through. We simply removed the rusted metal, treated what remained with POR-15, then fabricated and welded on a patch.
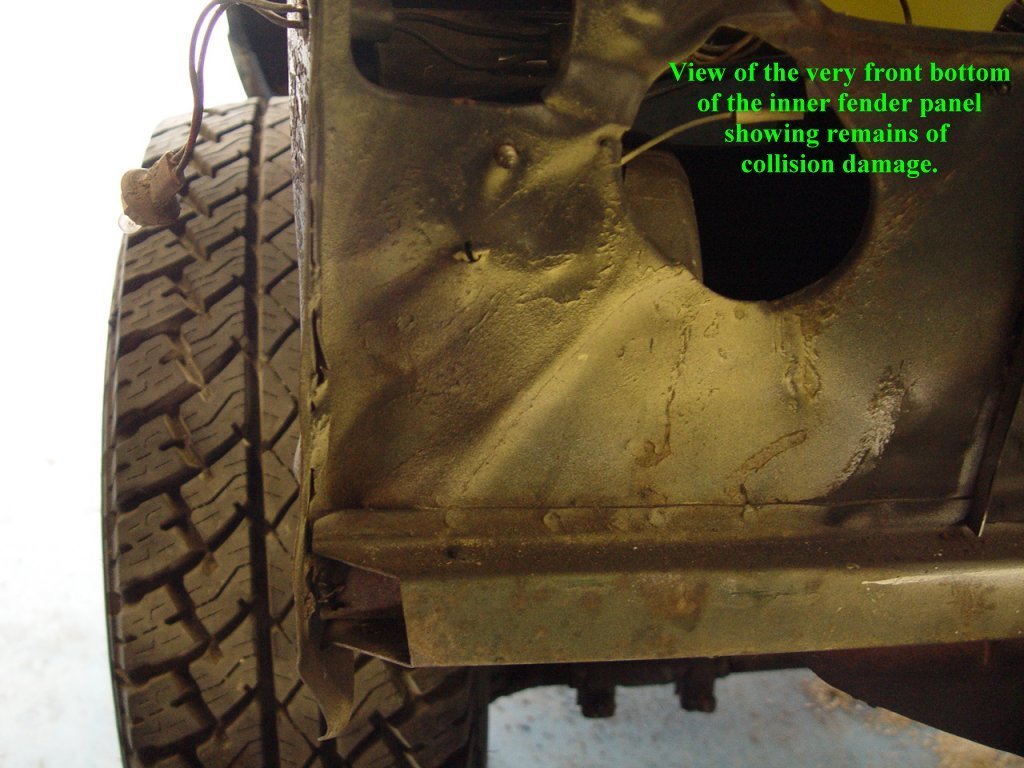
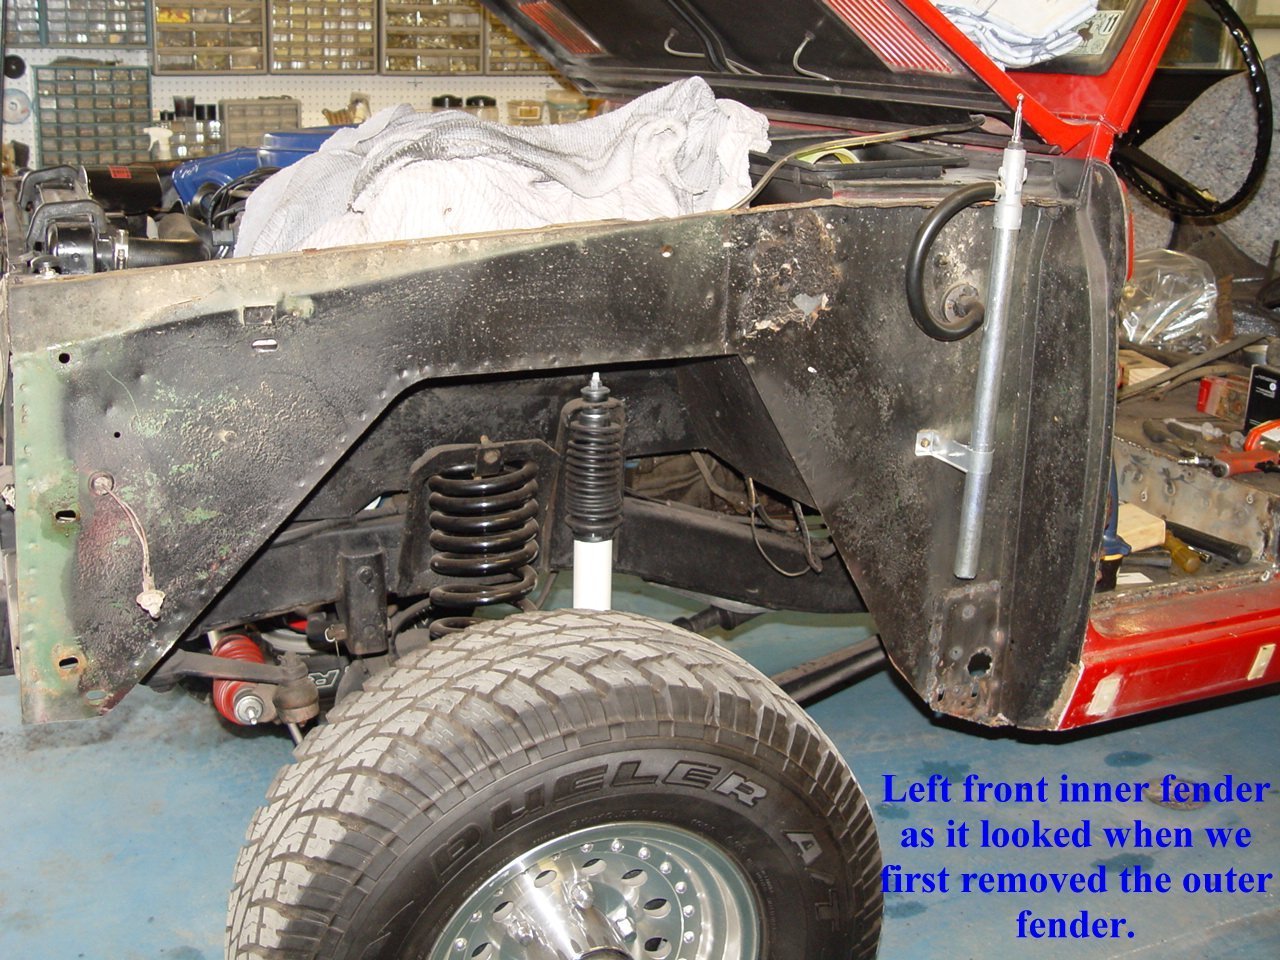
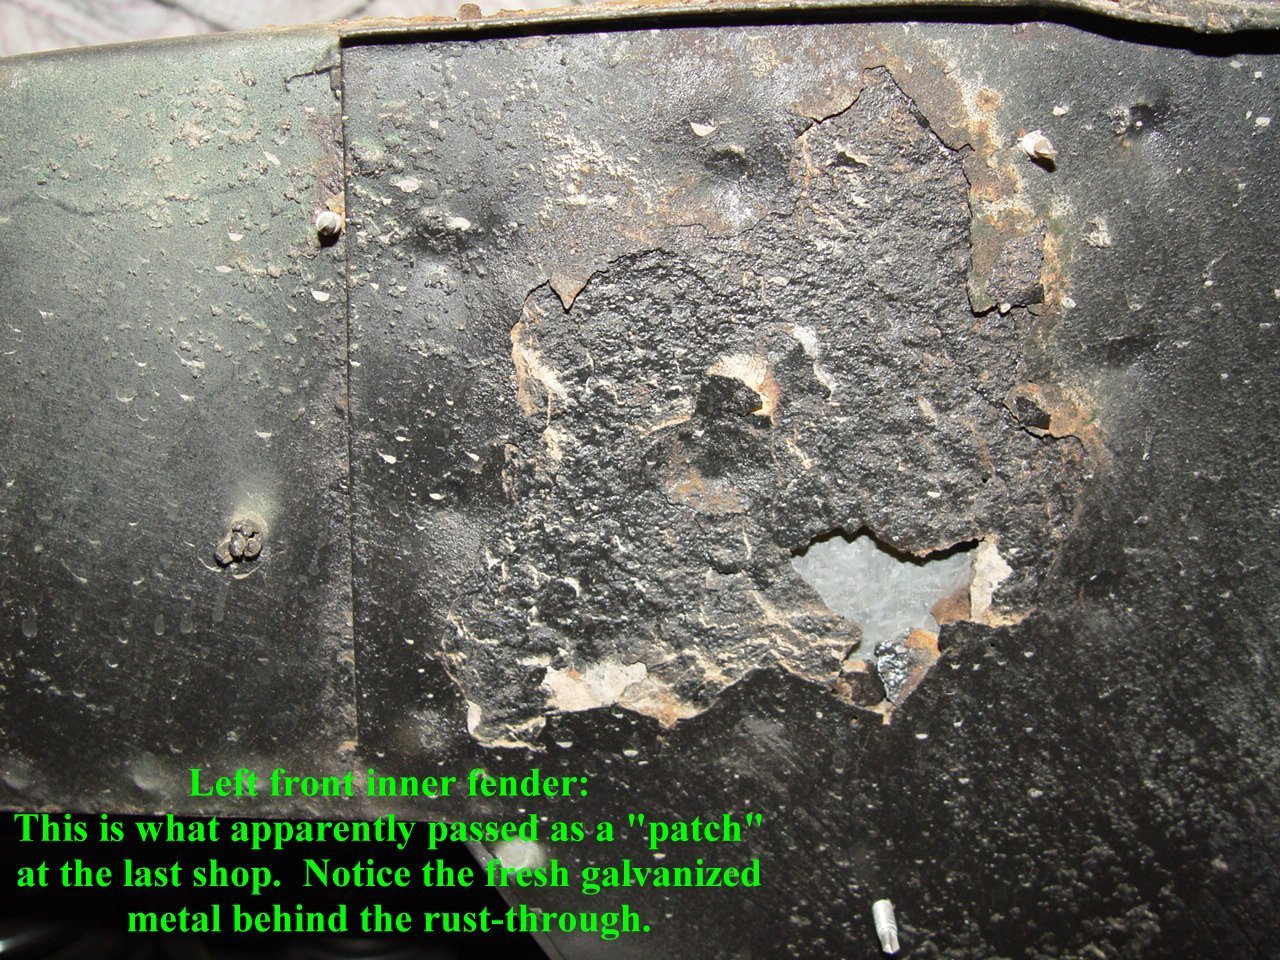
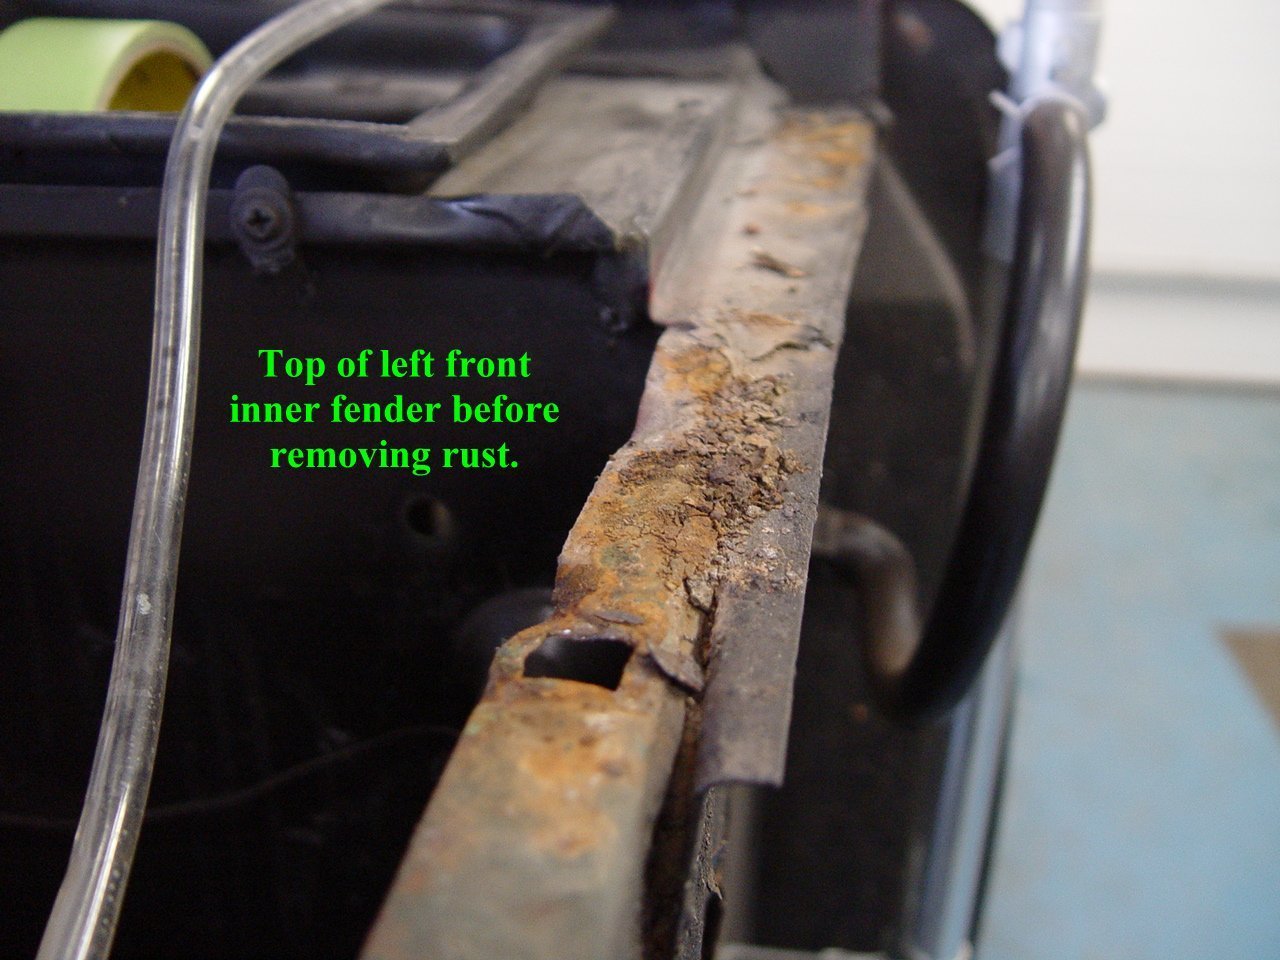
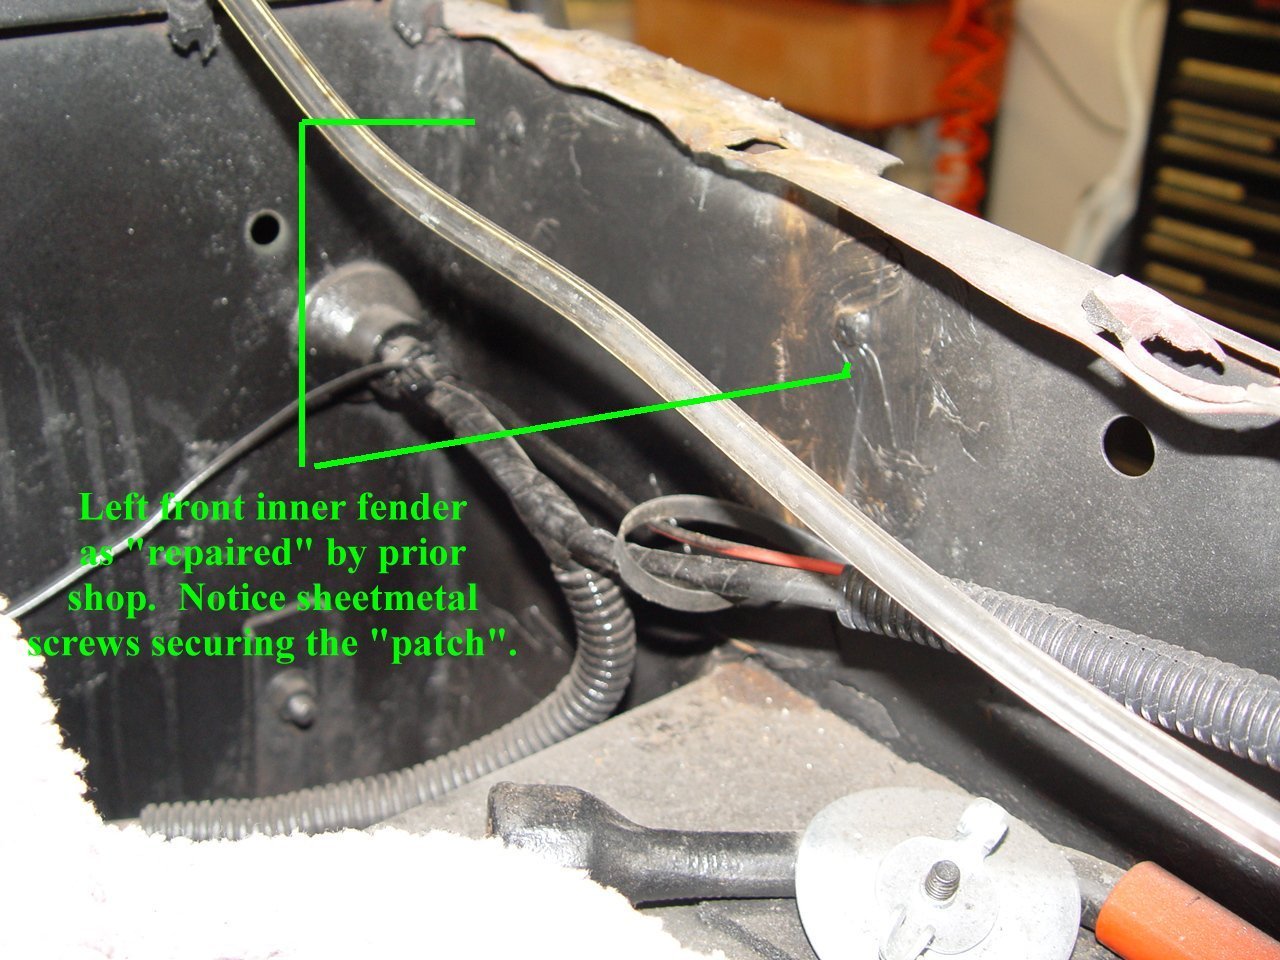
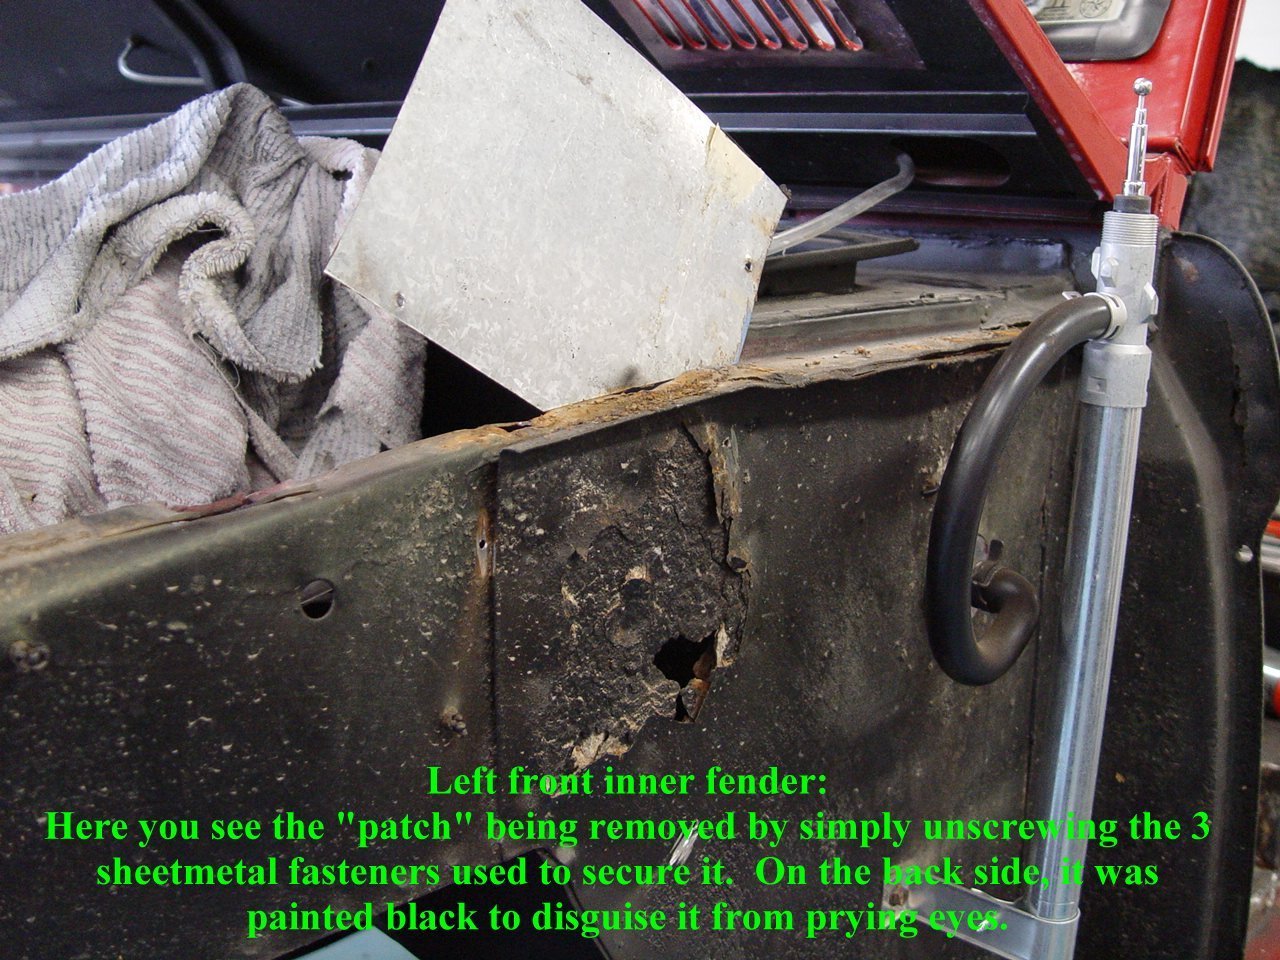
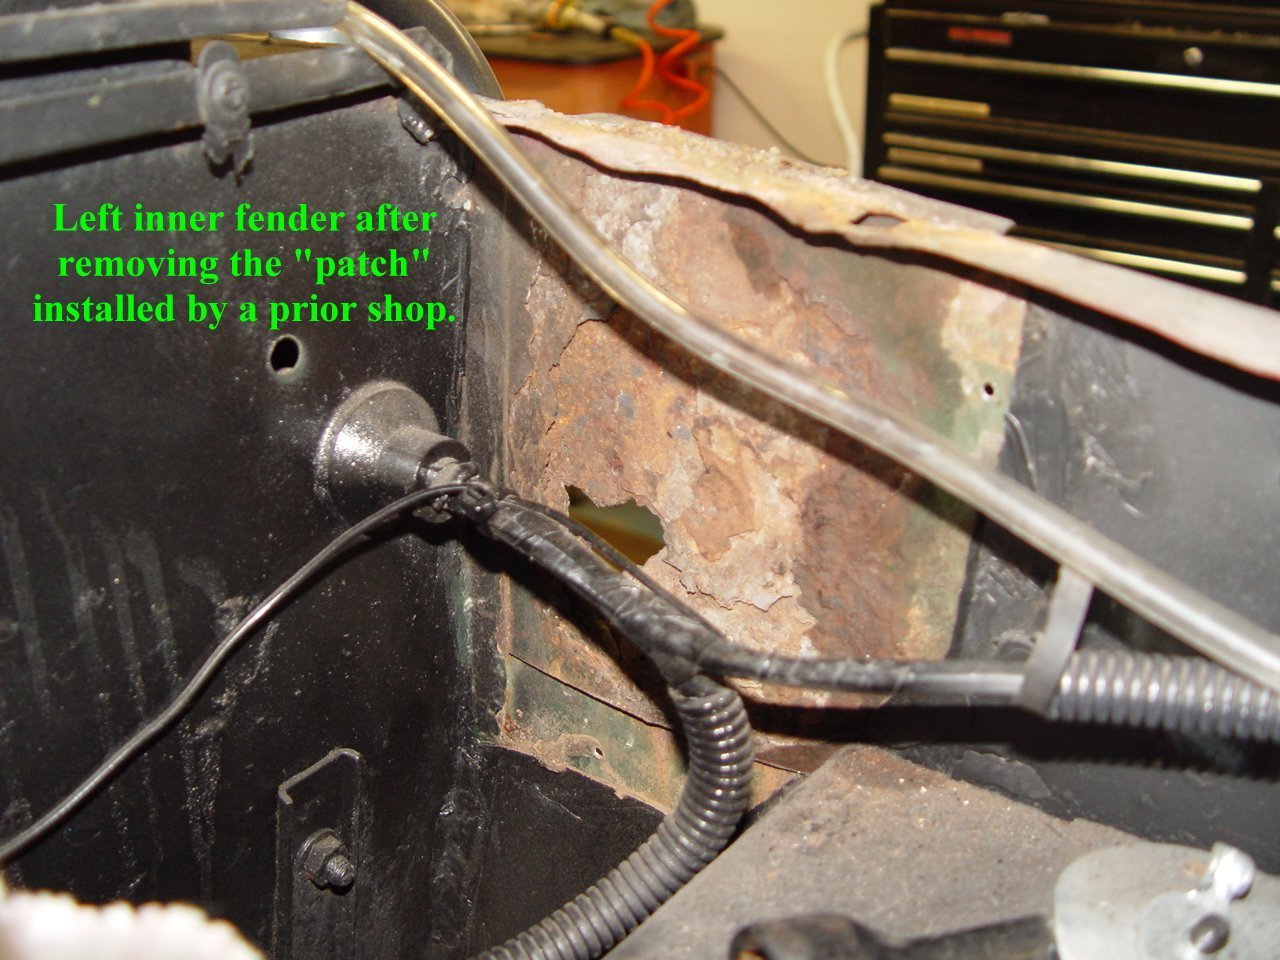
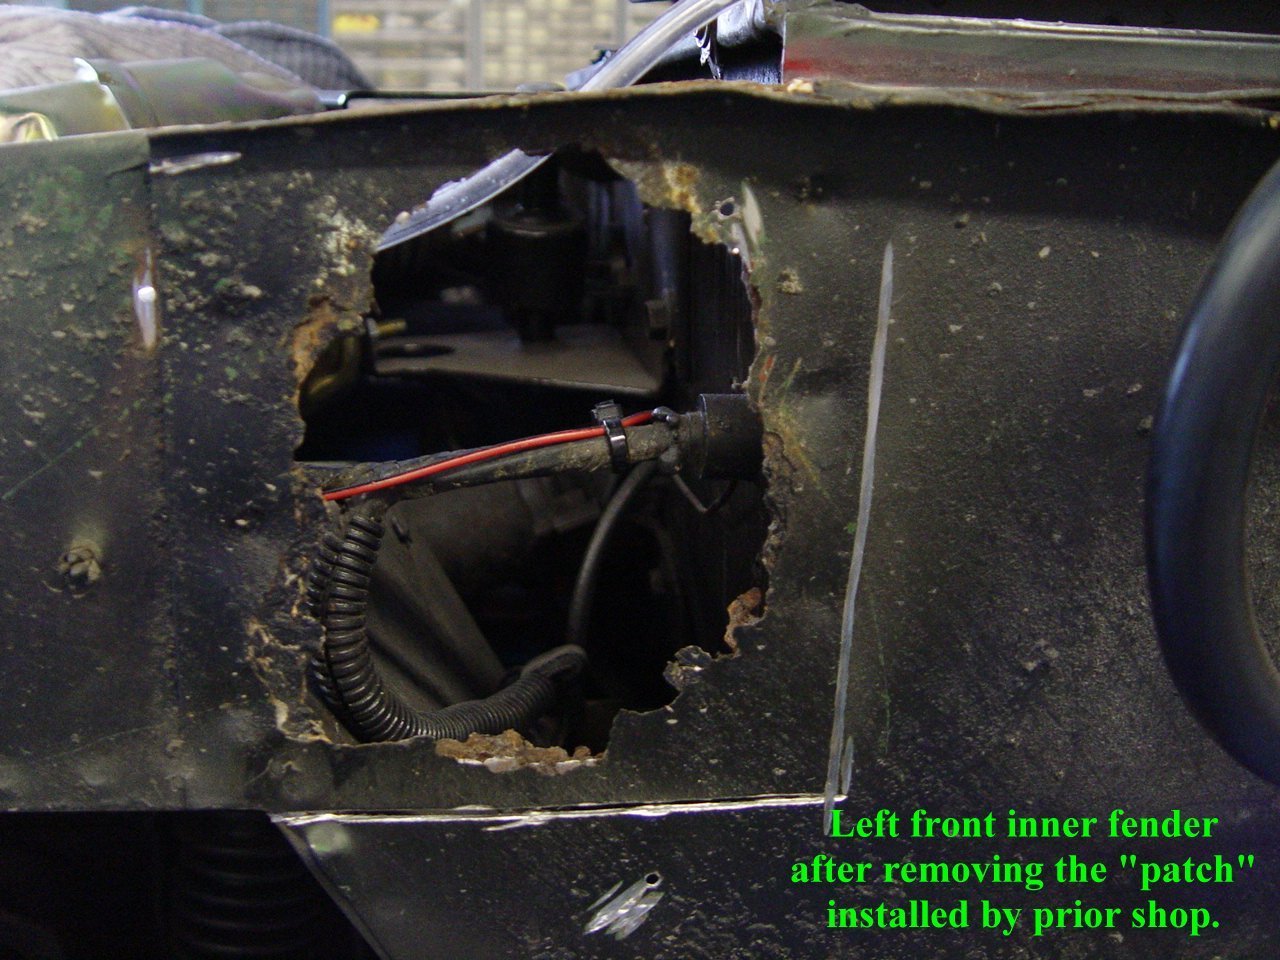
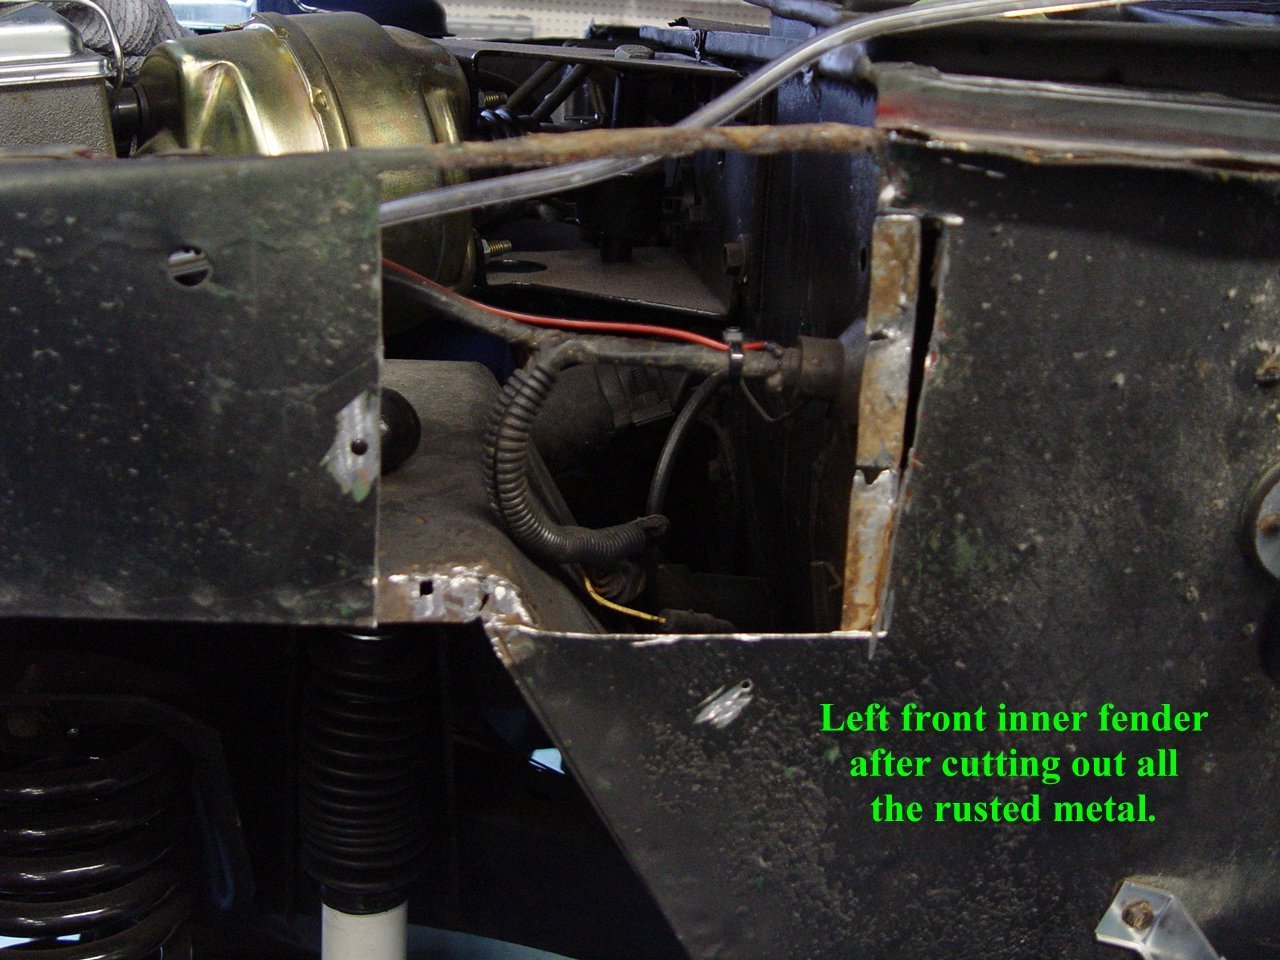
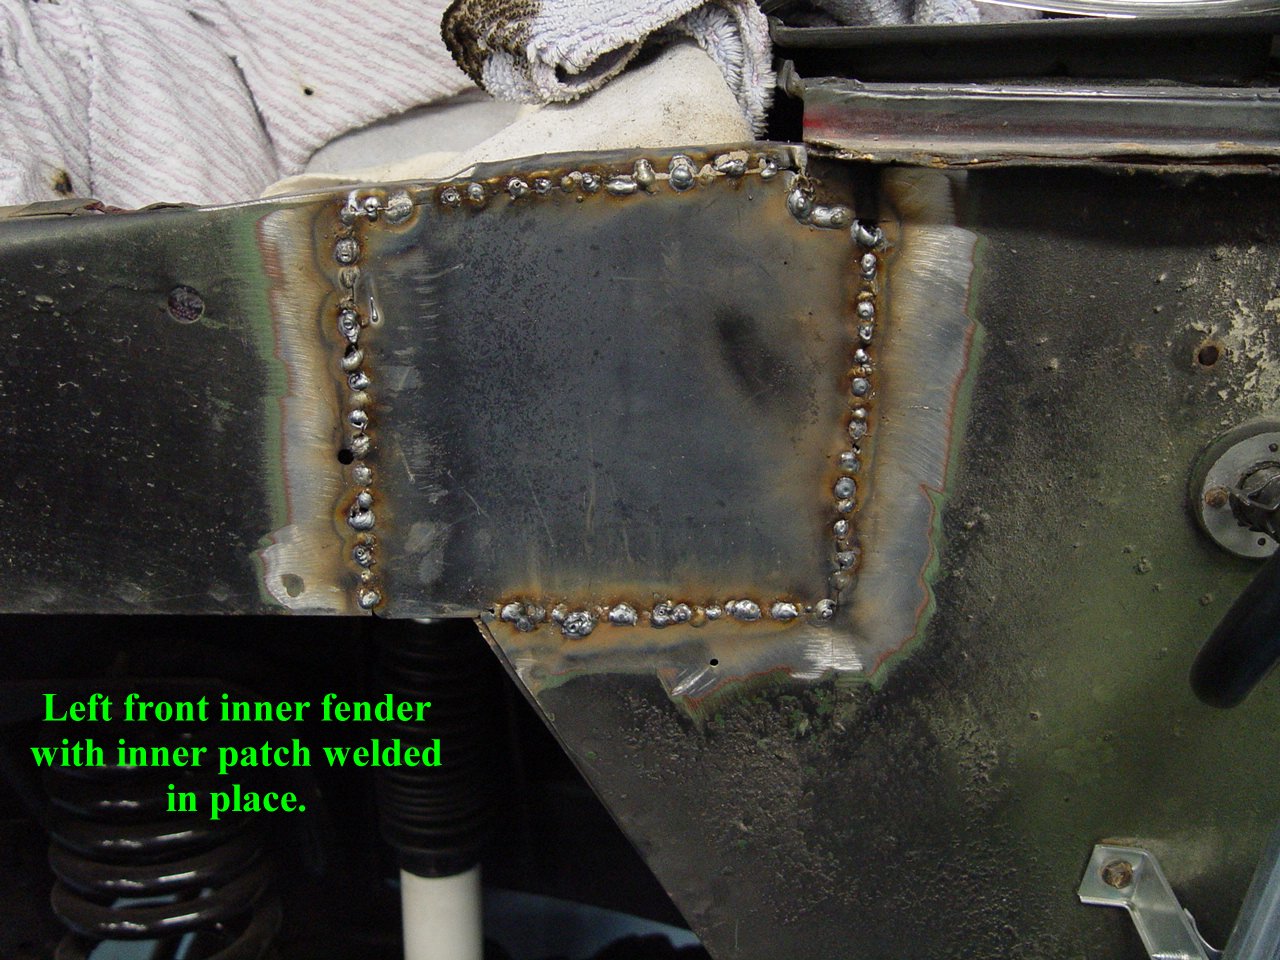
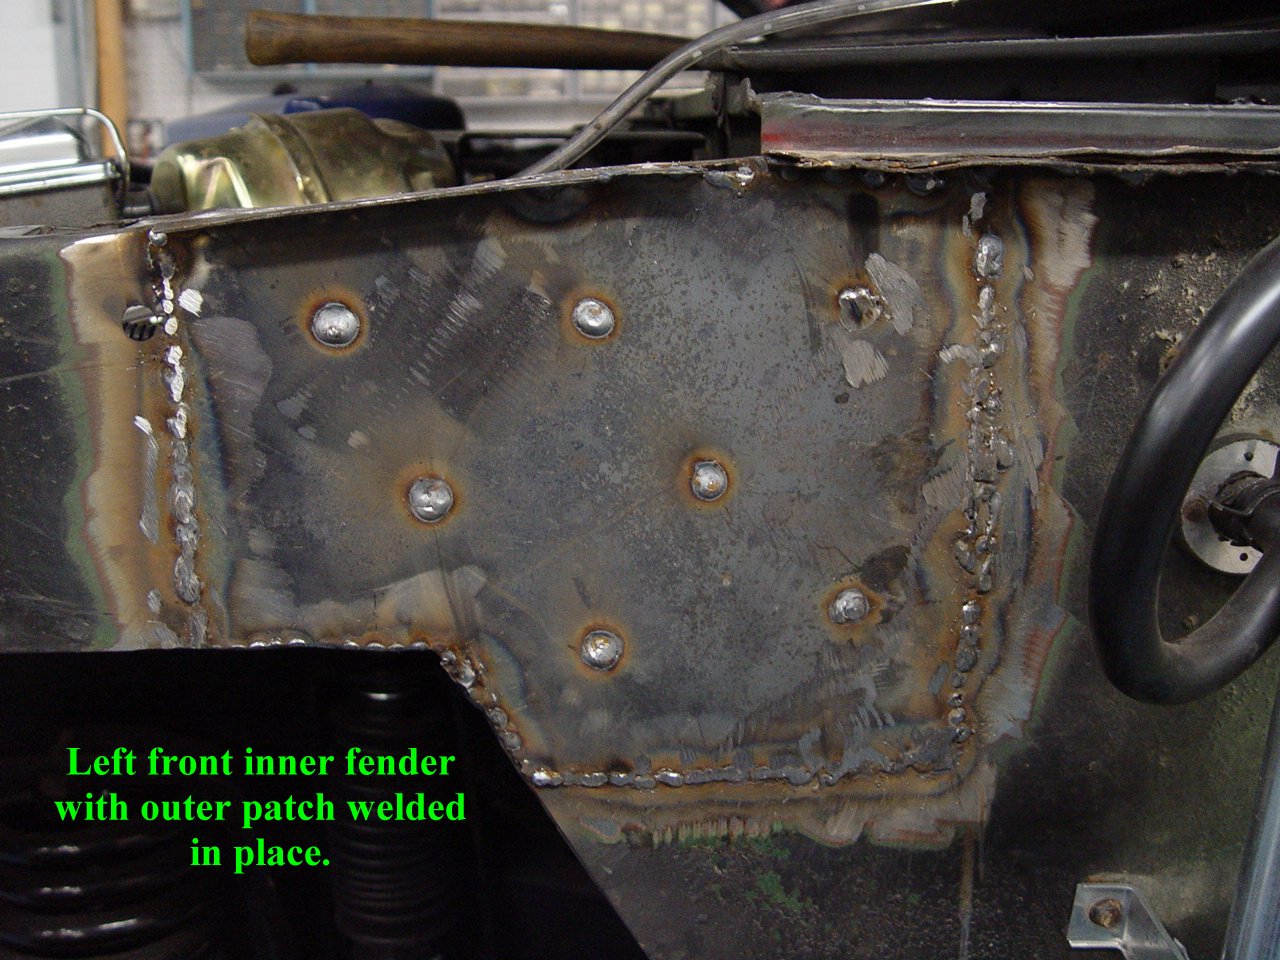
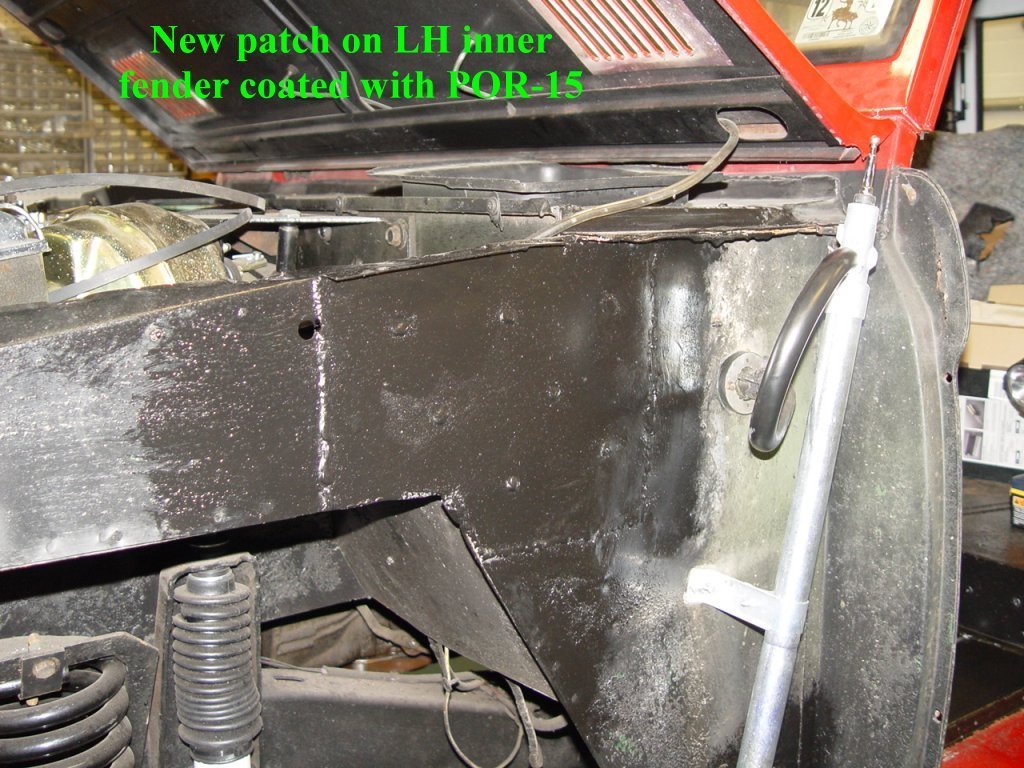
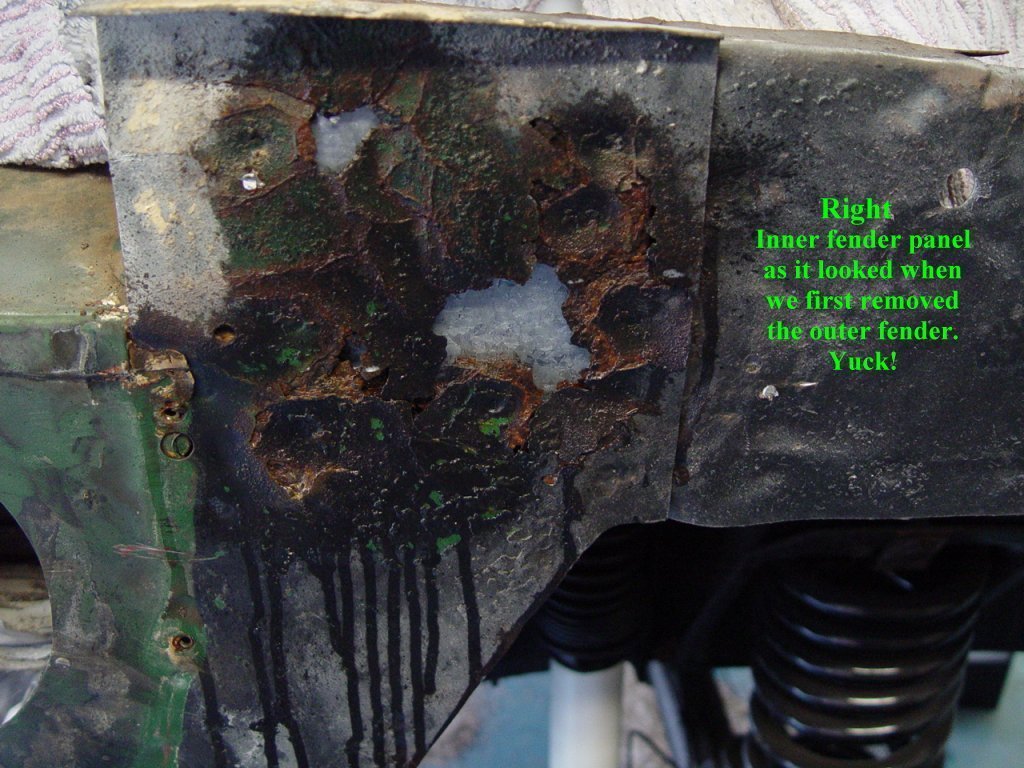
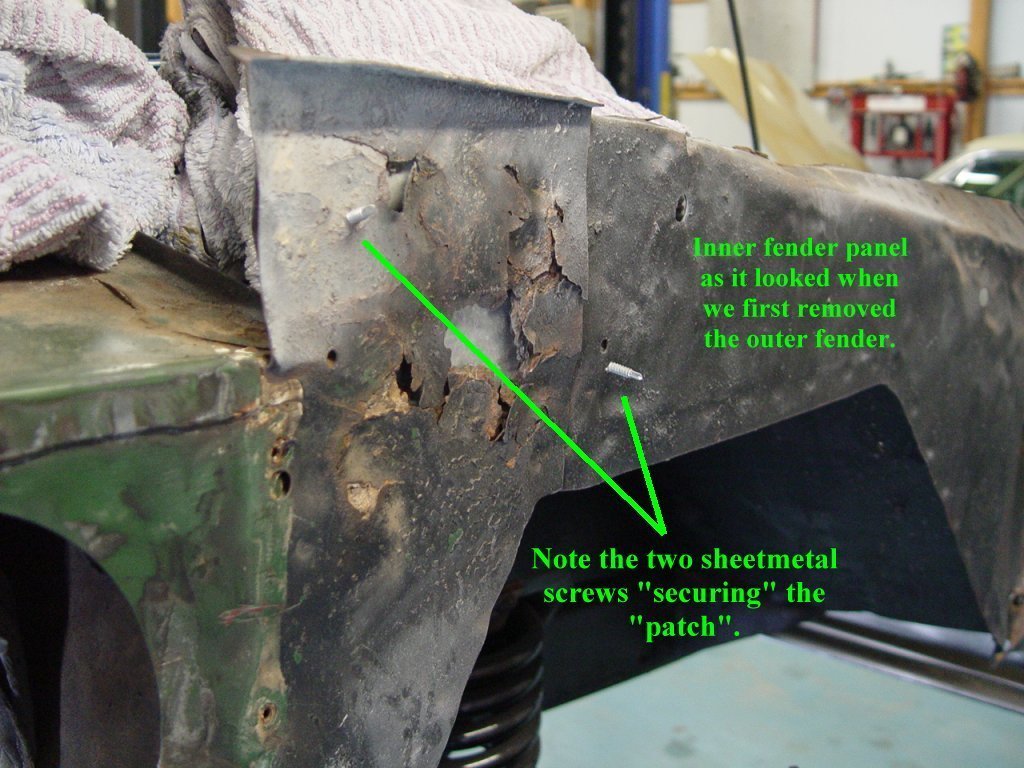
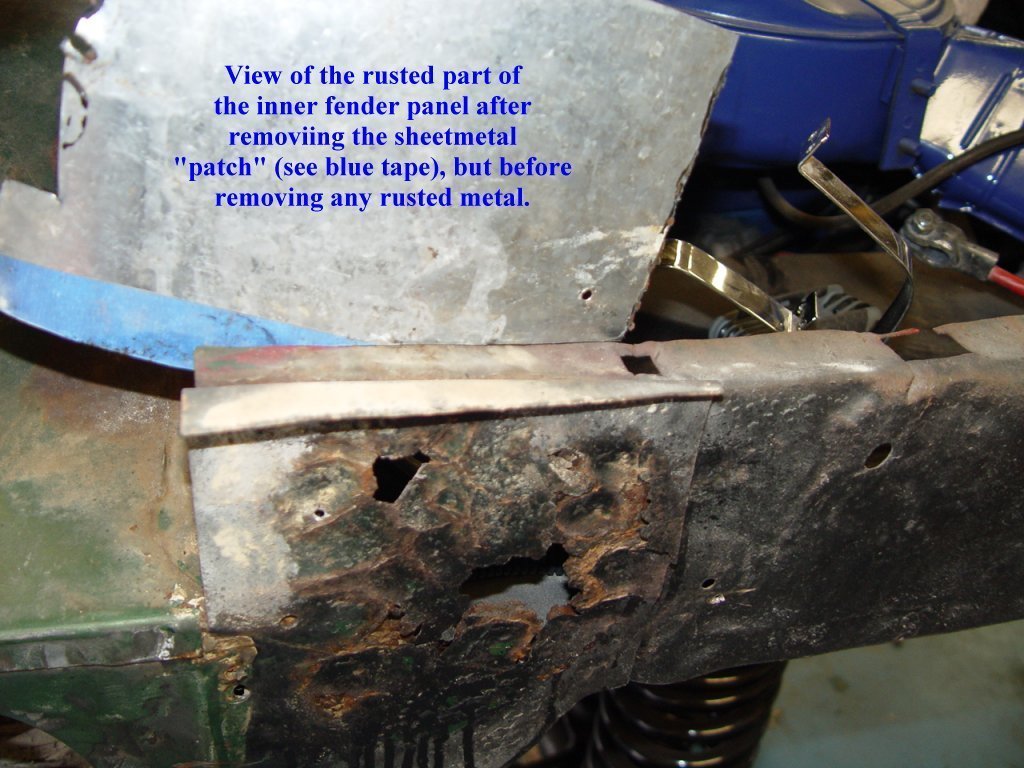
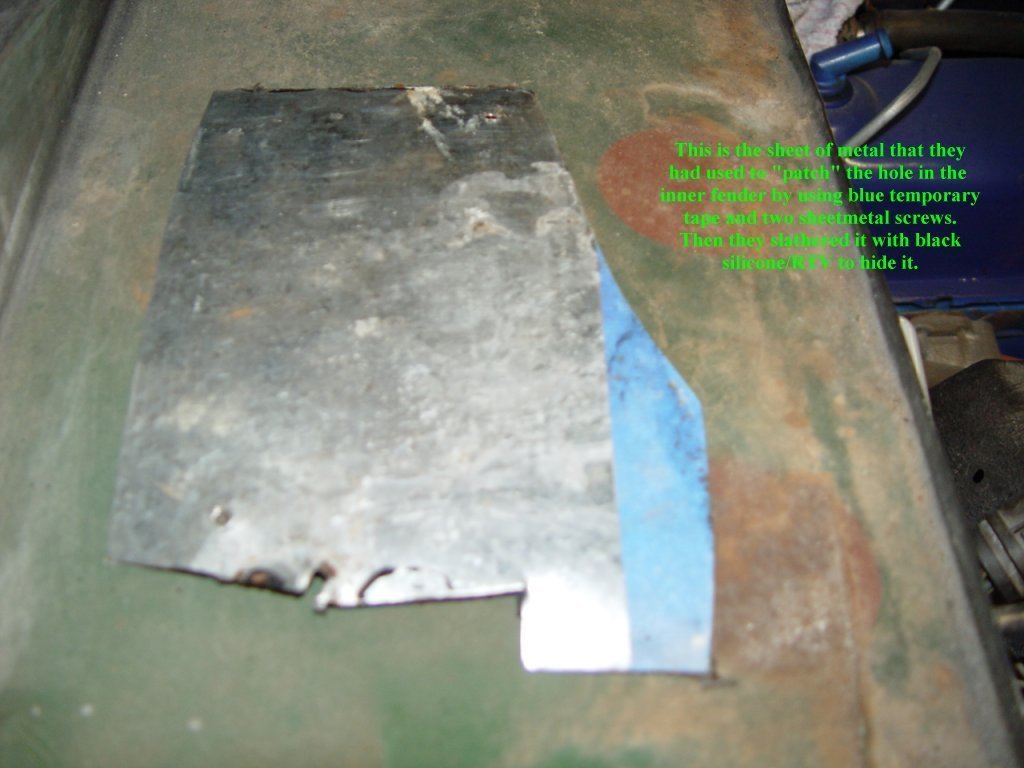
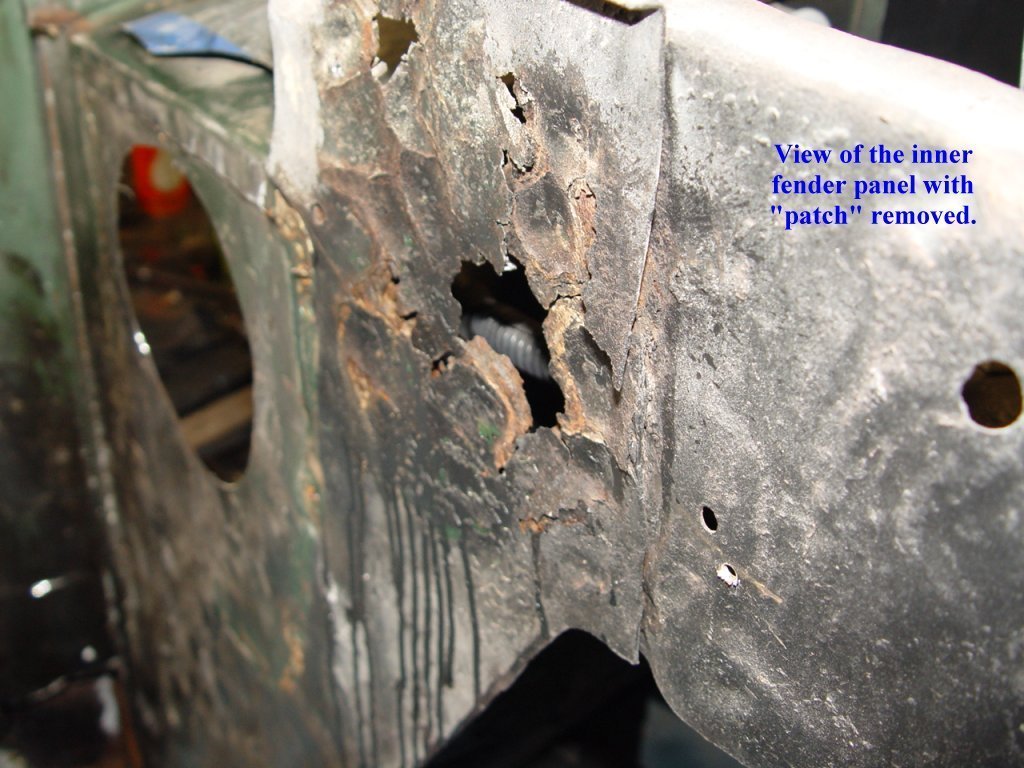
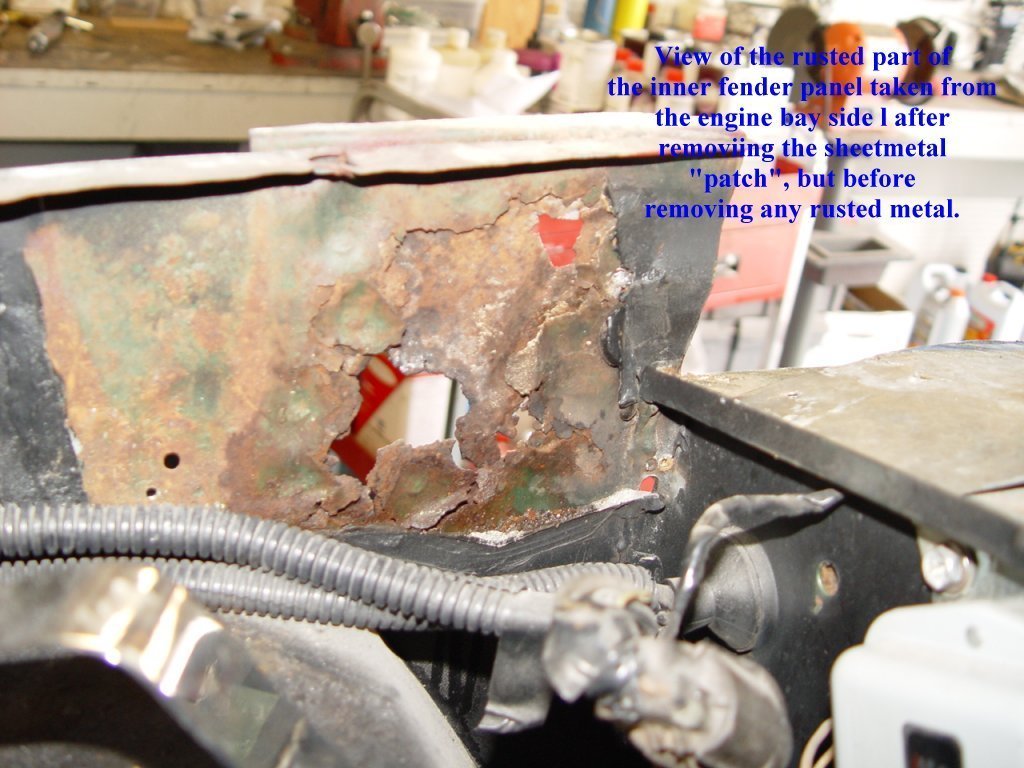
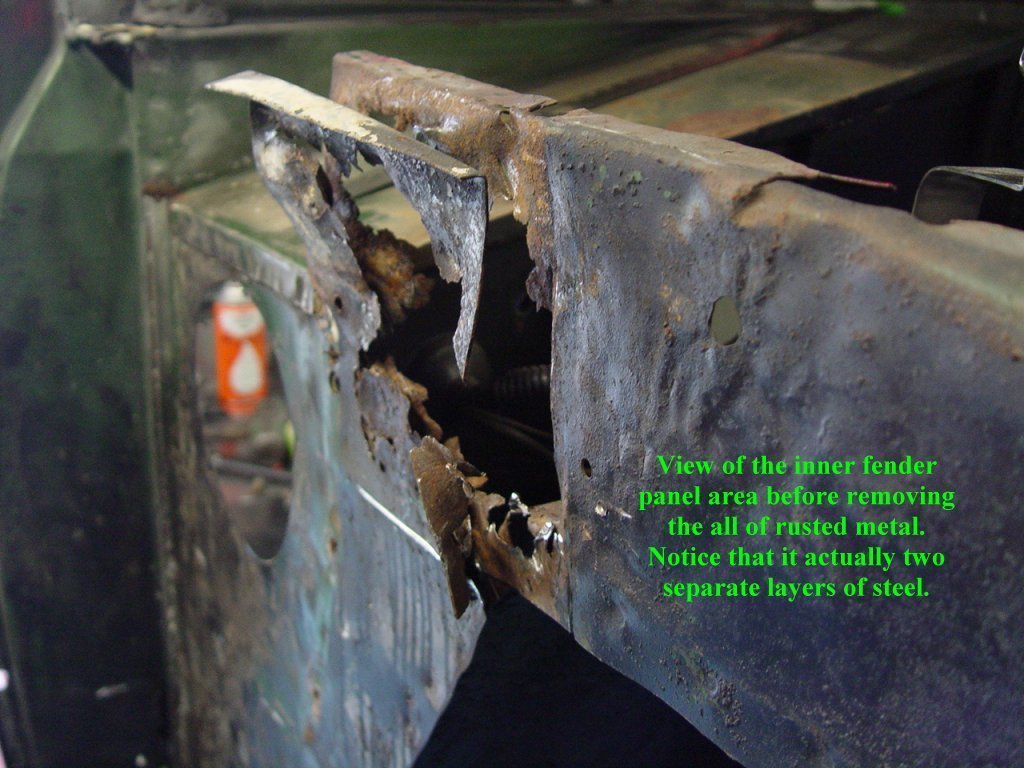
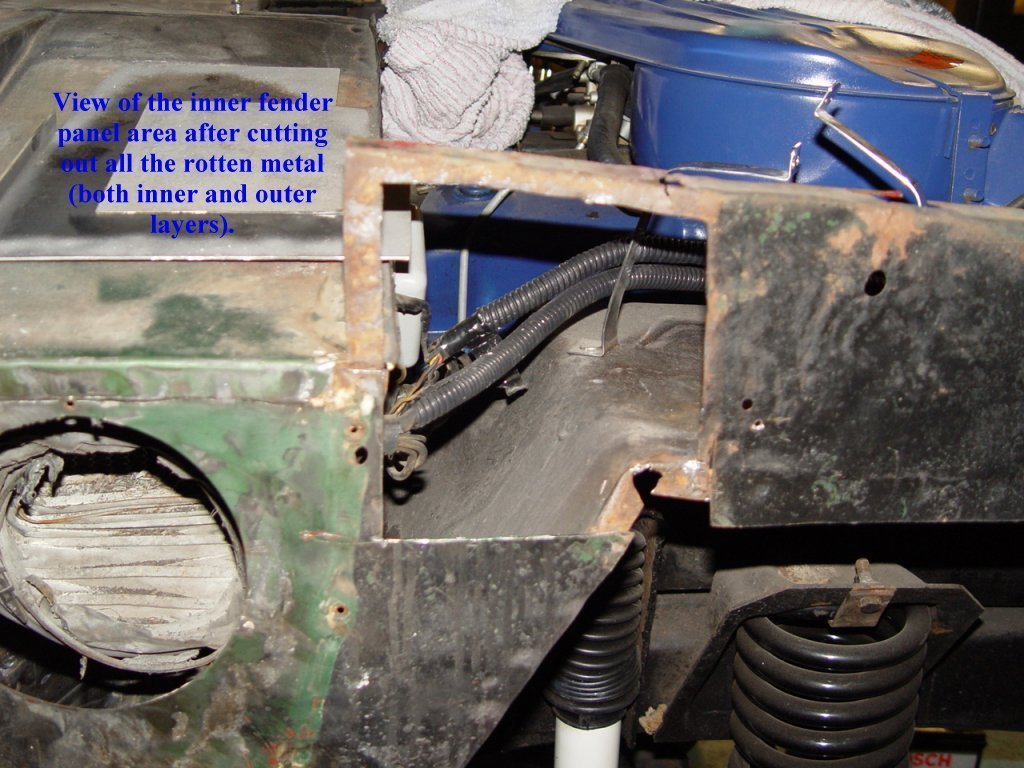
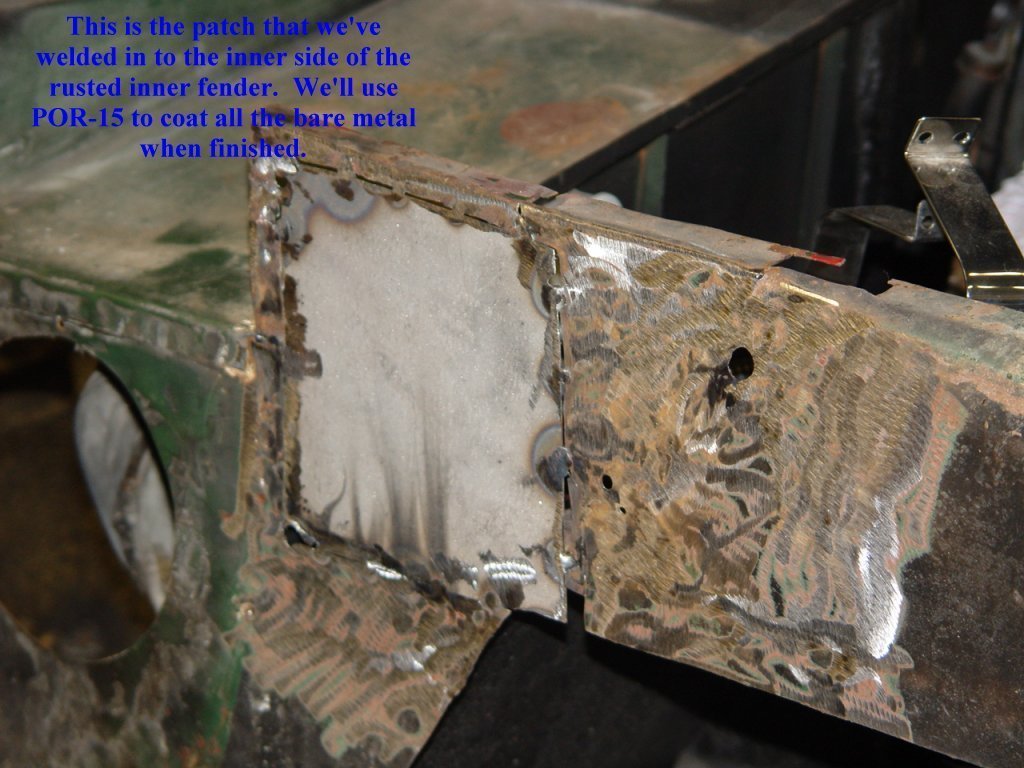
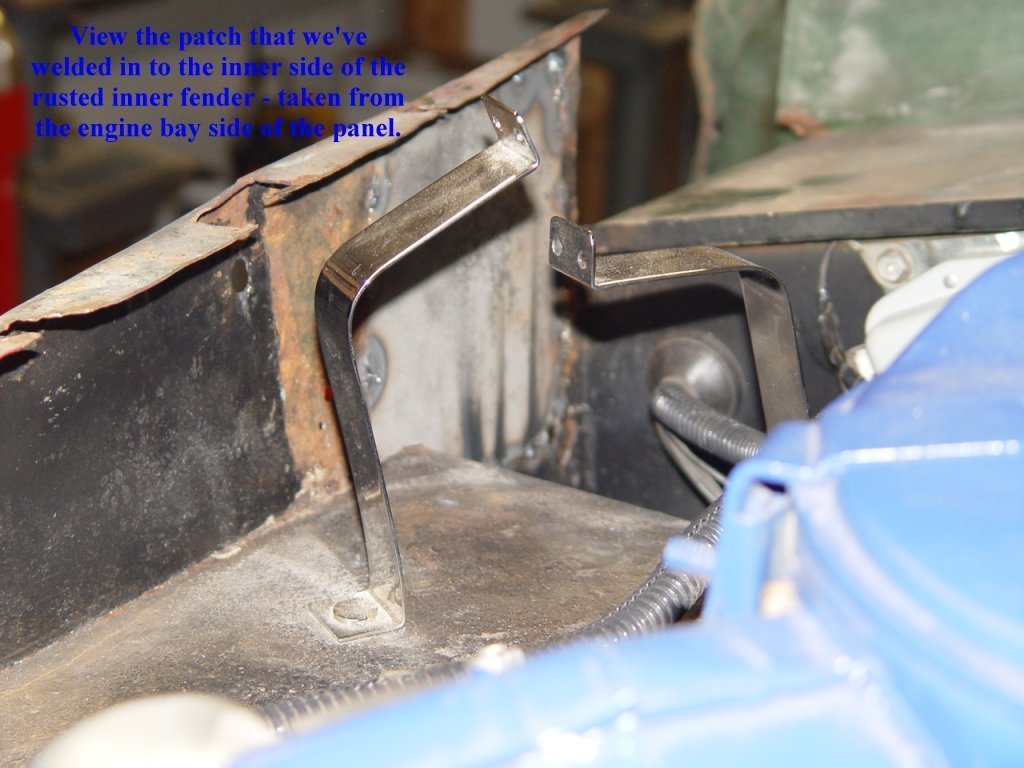
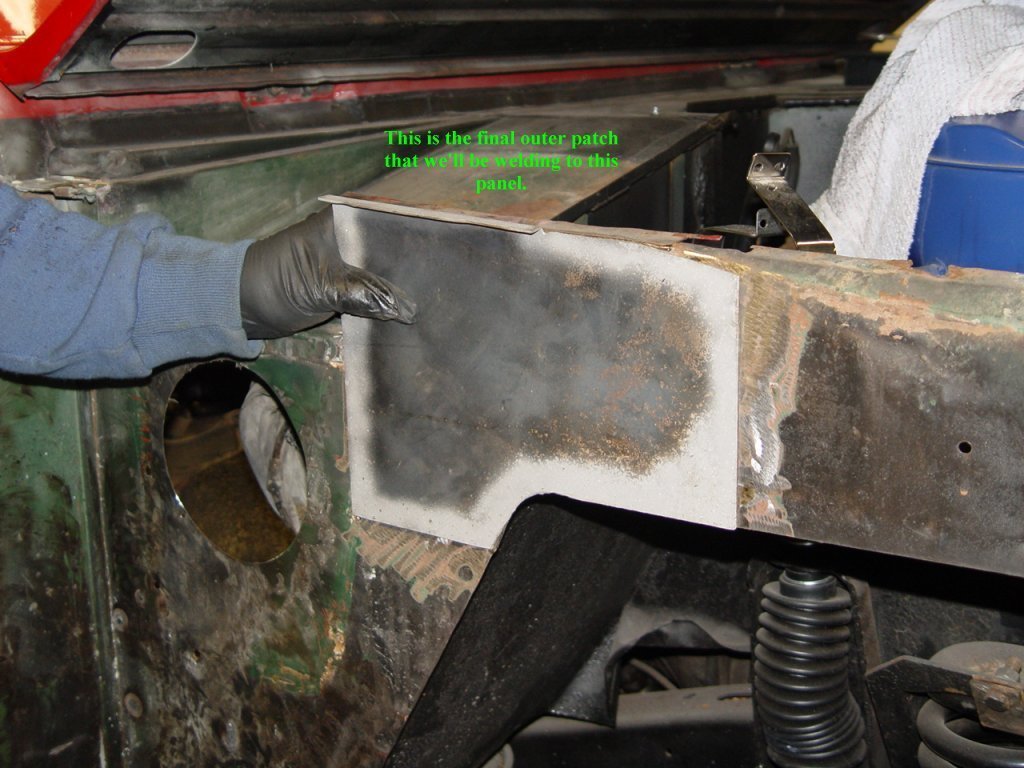
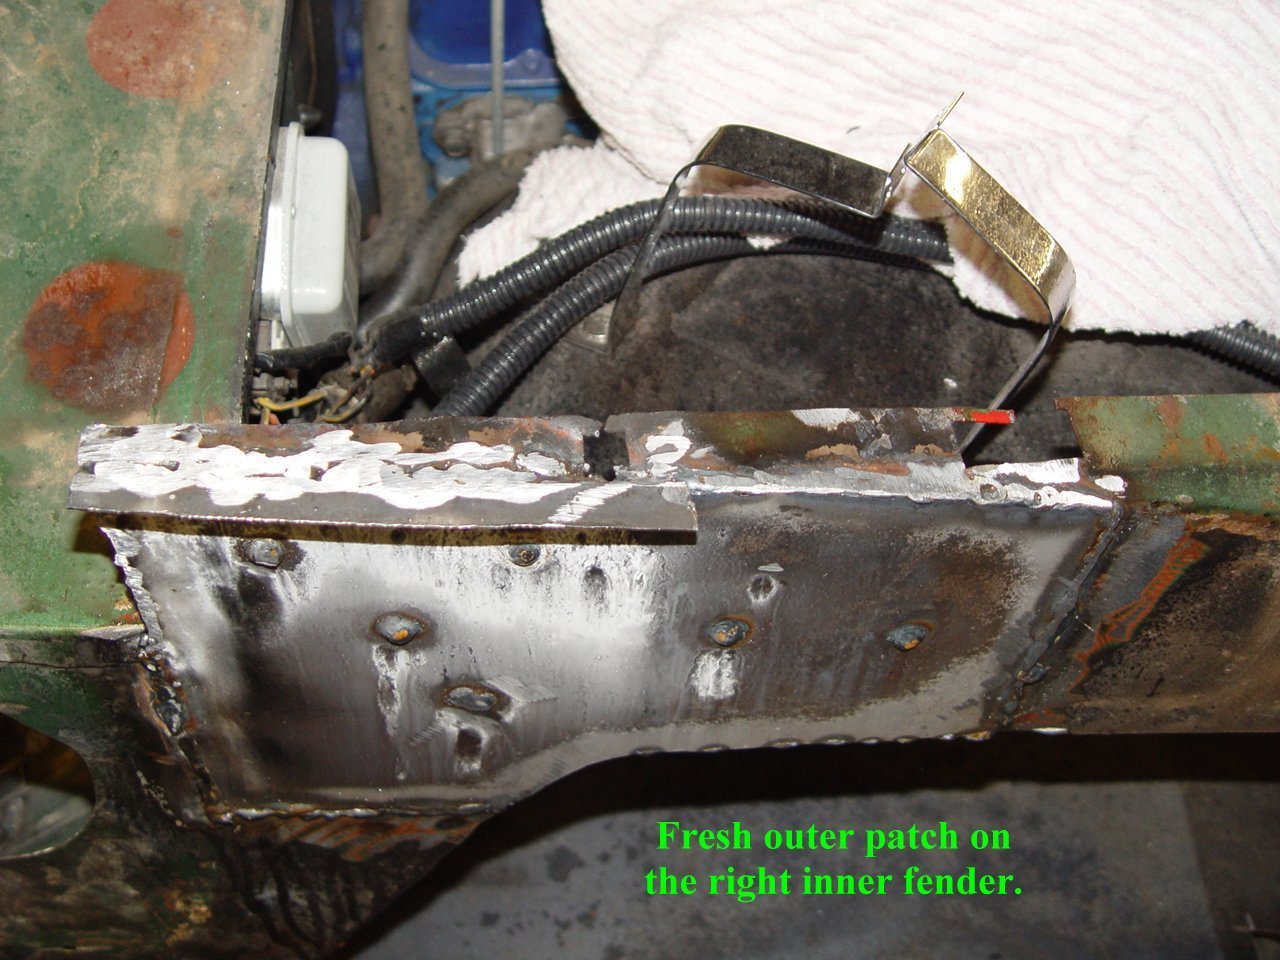
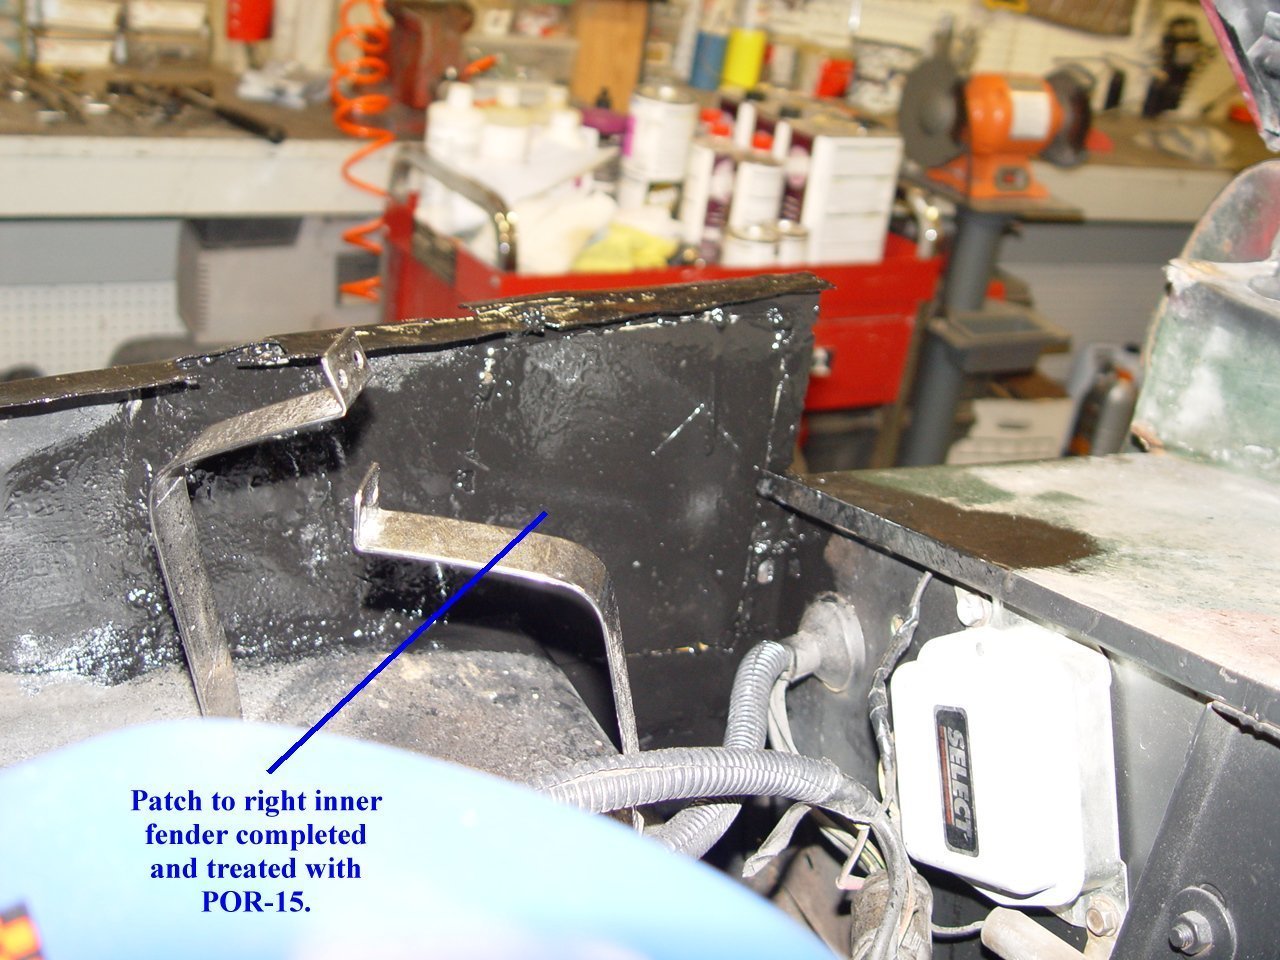
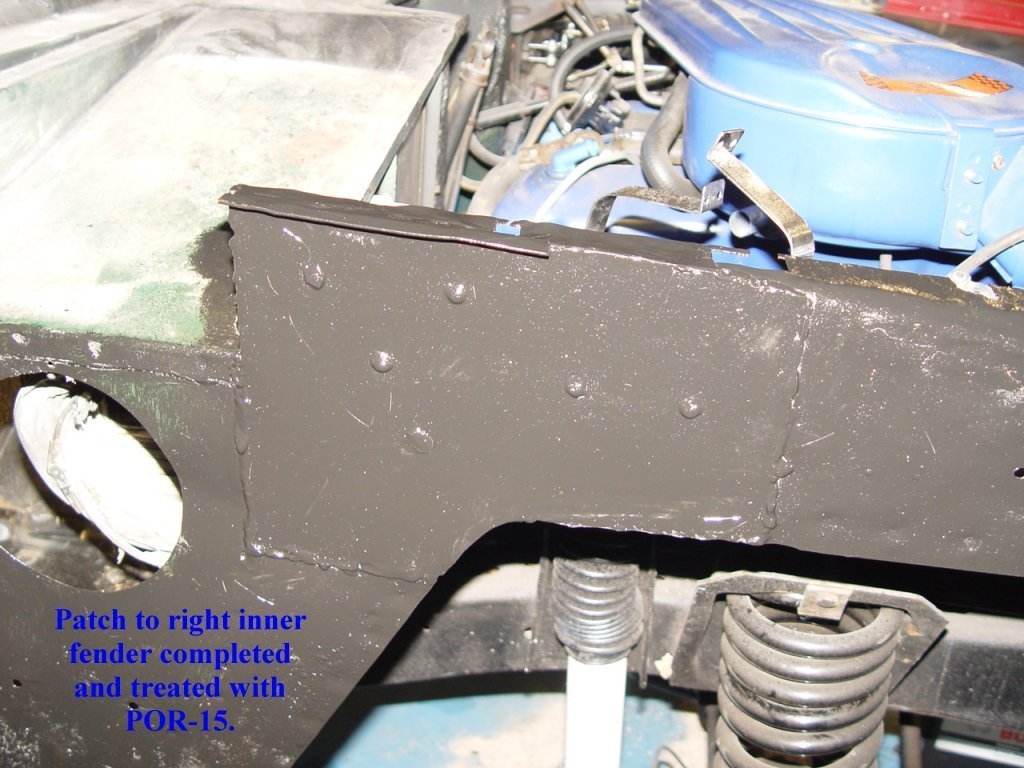
Left and Right Inner Fenders: Both inner fenders suffered what seems to be a classic Bronco rust problem. Each inner fender has a retangular section at the top - just forward of the firewall - that has rusted through on all three of the Broncos we've had in our shop. This section is double-walled, yet never fails to rust through. In Big Red's case, the "restoration" guys who worked on it before decided to secure some thin (maybe 20 gauge) galvanized steel to the inside of the fender panels with sheetmetal screws. They then slathered black silicone or RTV over the edges and sprayed some black rattle-can paint over the mess to disguise it. Both inner fender panels received this sub-par repair. We cut out all the rotted metal and welded in proper-gauge patches (inner and outer panels) on both inner fender panels.
It's really hard to believe that there are shops out there that would stoop to such cheesy "repairs" and cover-ups and then have the cajones to call it a restoration. The Mecum Auction sheet claimed "original sheet metal". I guess that if you cover over the original rotted floorpans with new metal and don't actually repair anything, you can say it has "original sheet metal", but come-on.
When we were finished with all of Big Red's sheetmetal repairs, we painted everything using POR-15's rust preventative coating process. Each of the photos below include annotations for a detailed depiction of the work performed.
|
||||||
 |
 |
 |
 |
 |
||
 |
 |
 |
 |
 |
||
 |
 |
 |
 |
 |
||
 |
 |
 |
 |
 |
||
 |
 |
 |
 |
 |
||
 |
 |
 |
 |
 |
||
 |
 |
 |
 |
 |
||
 |
 |
 |
 |
 |
||
 |
 |
 |
 |
 |
||
 |
 |
 |
 |
 |
||
 |
 |
 |
 |
 |
||
 |
 |
 |
 |
 |
||
 |
 |
 |
 |
 |
||
 |
 |
 |
 |
 |
||
 |
 |
 |
 |
 |
||
| Click on an image for a larger view | ||||||
AIR CONDITIONING | ||||||
|
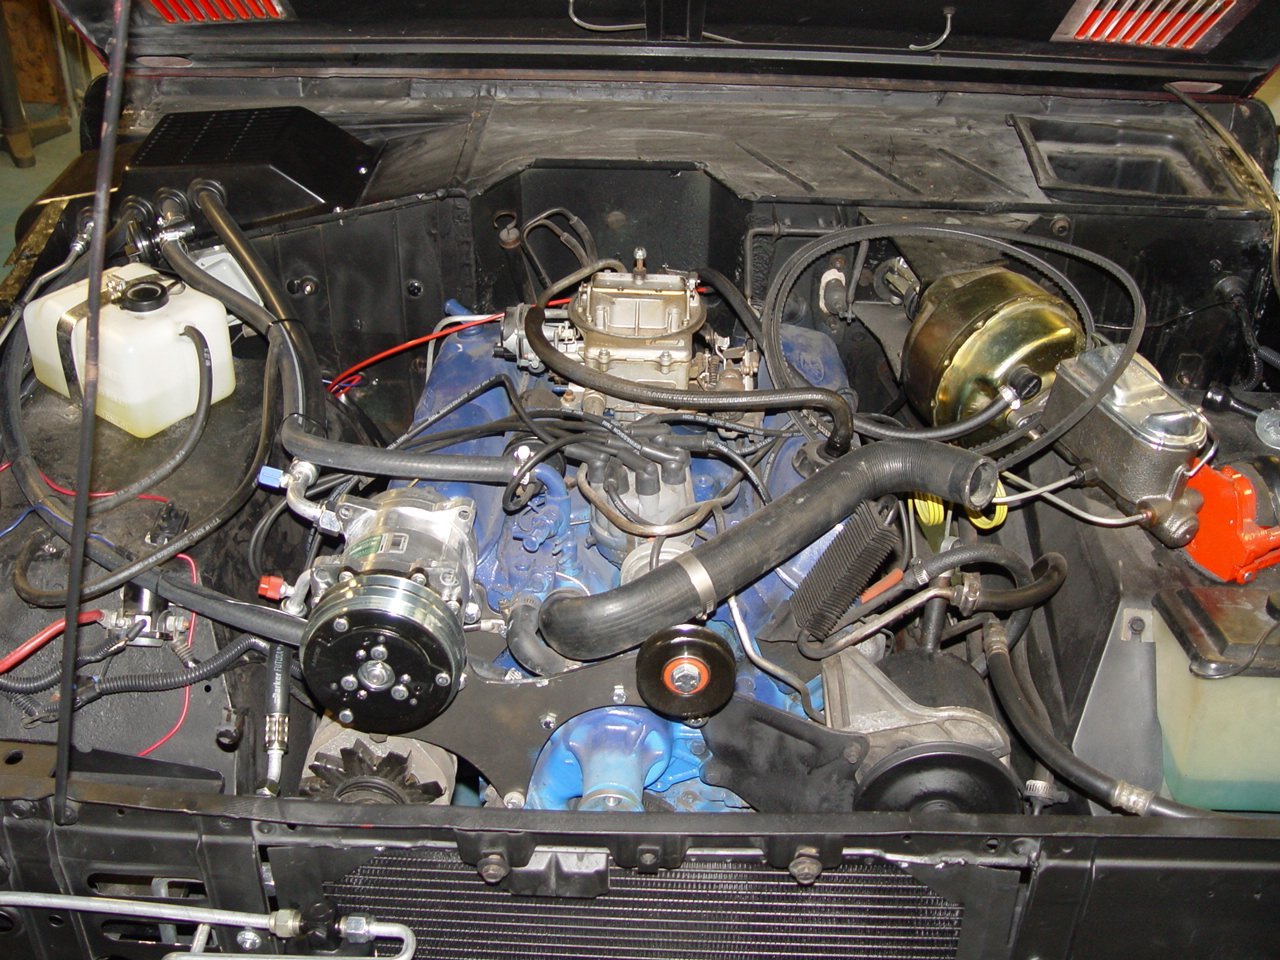
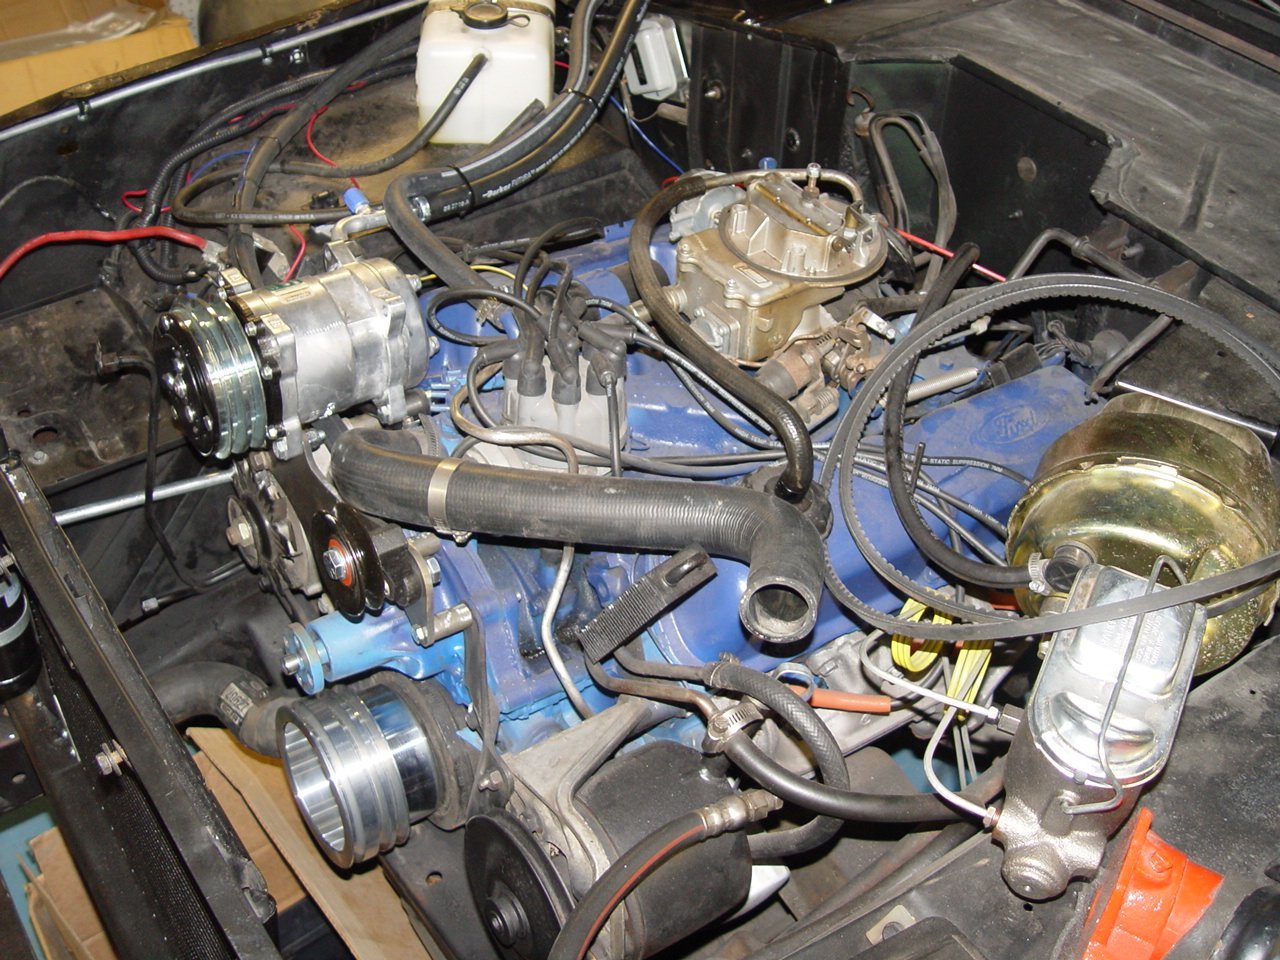
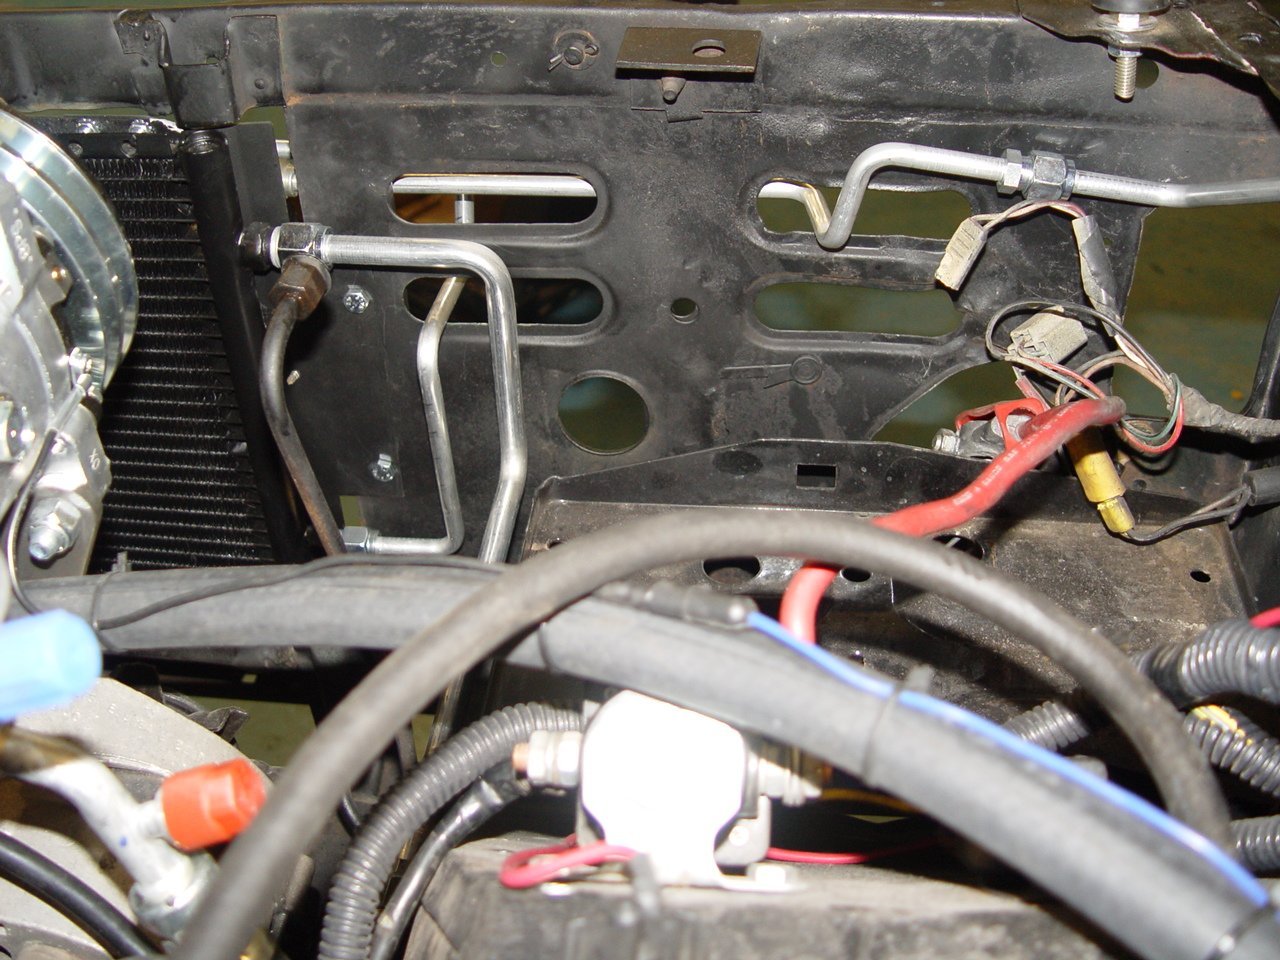
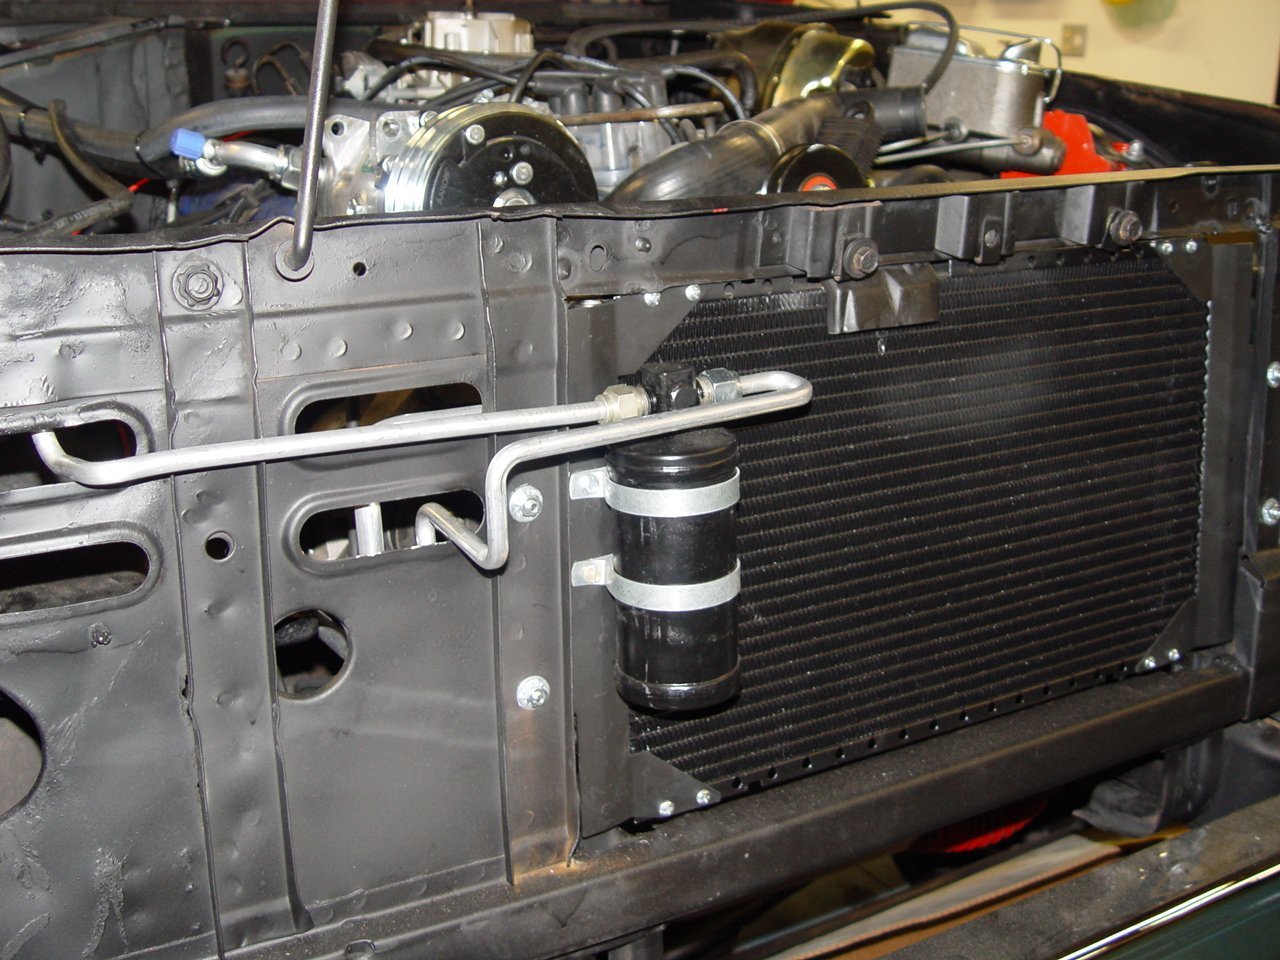
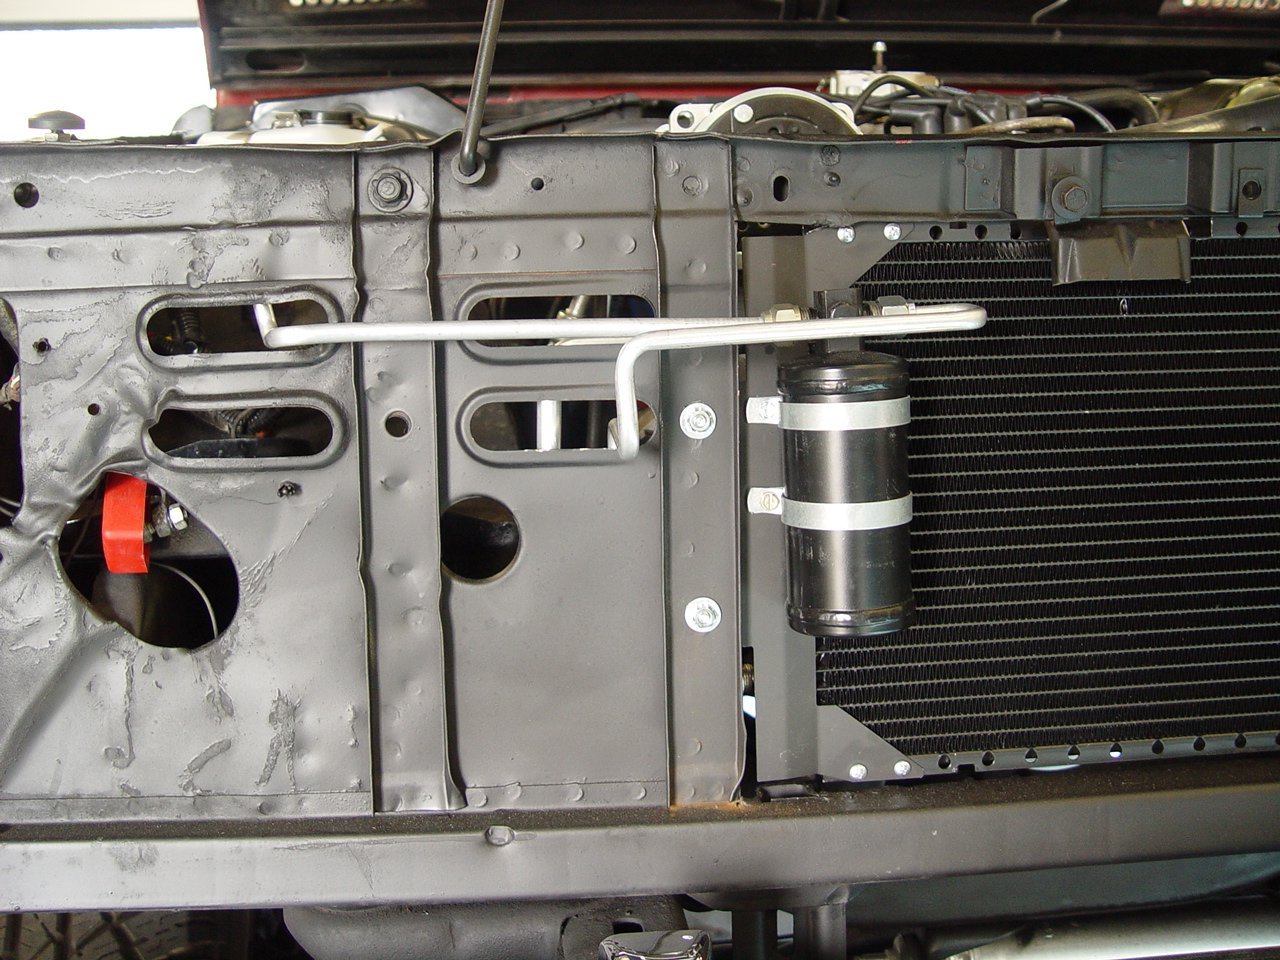
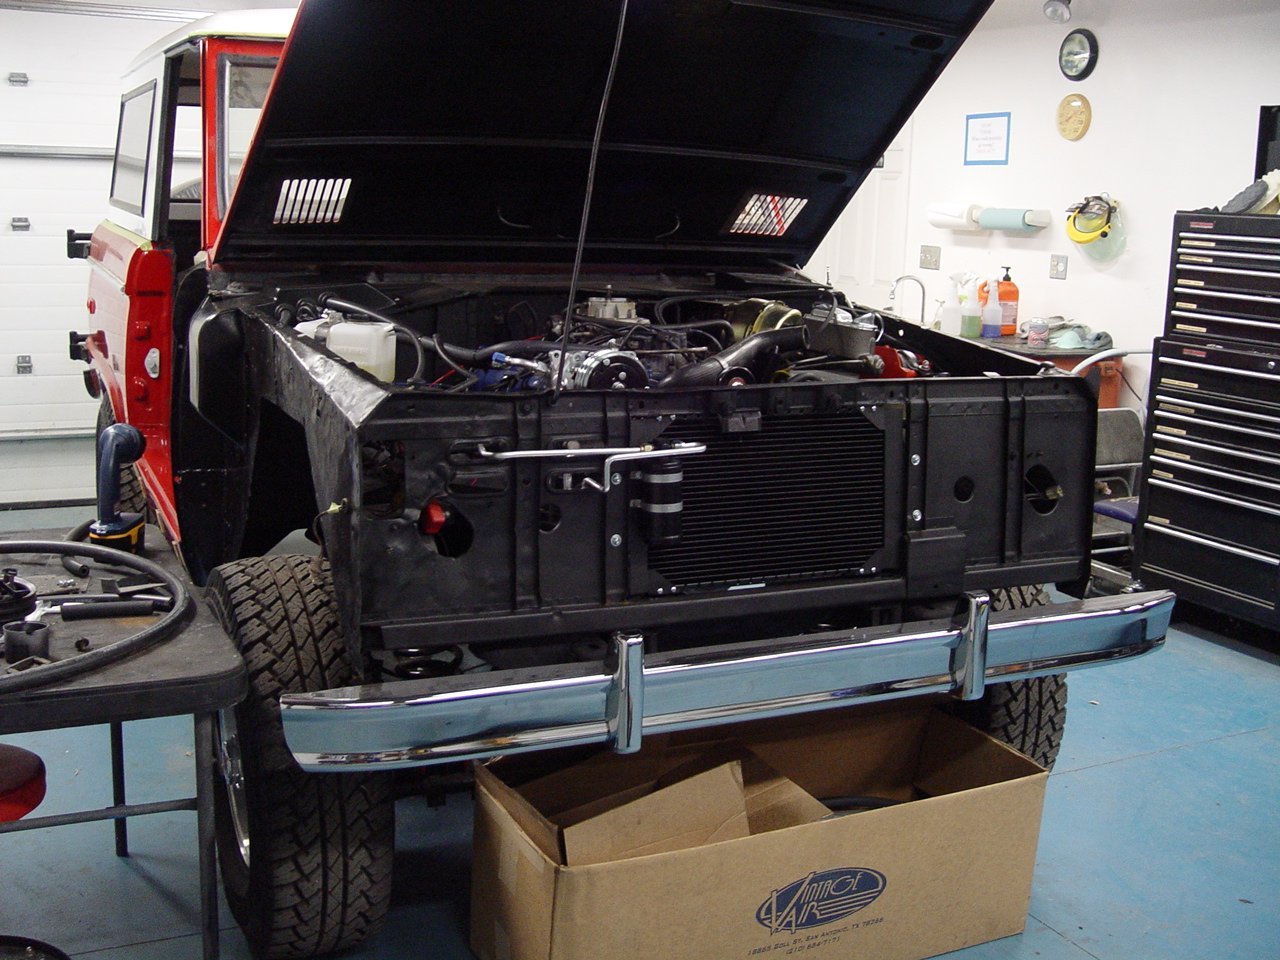
Big Red arrived here with a new Vintage Air system loaded in the owner's truck bed. We've worked with Vintage Air products in the past, but this was our first experience with one of their "Sure Fit" systems.
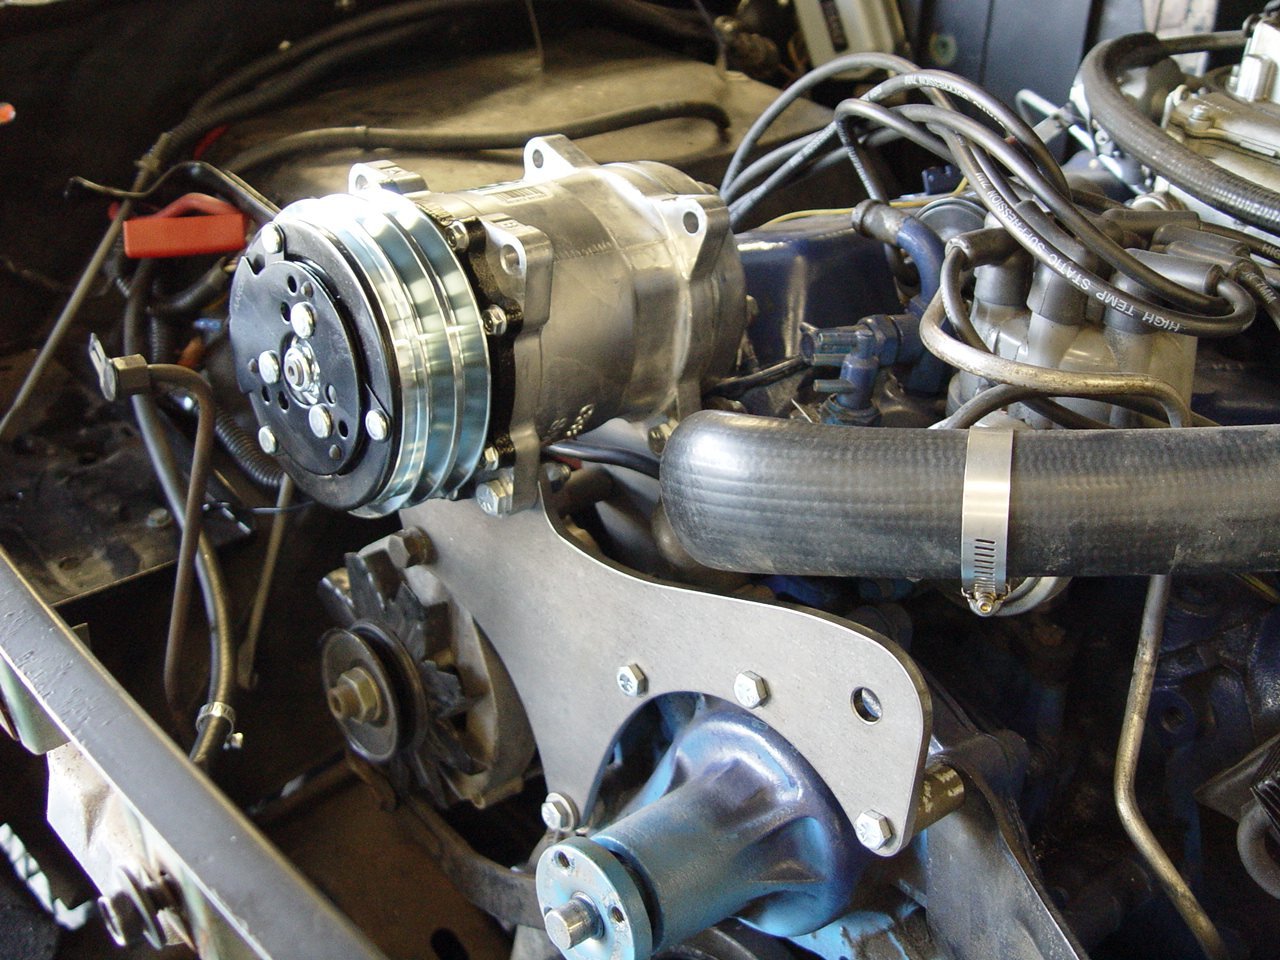
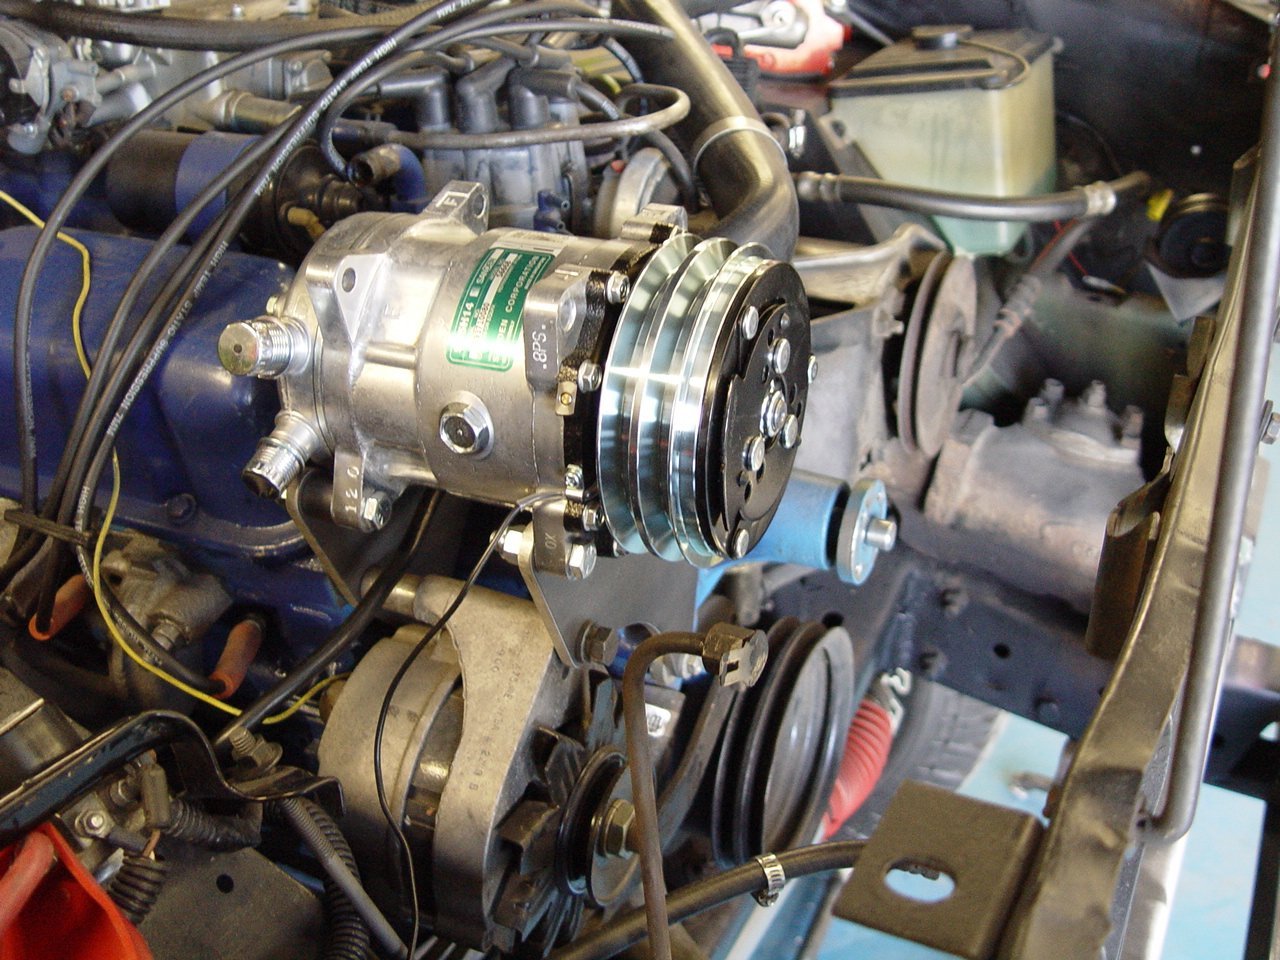
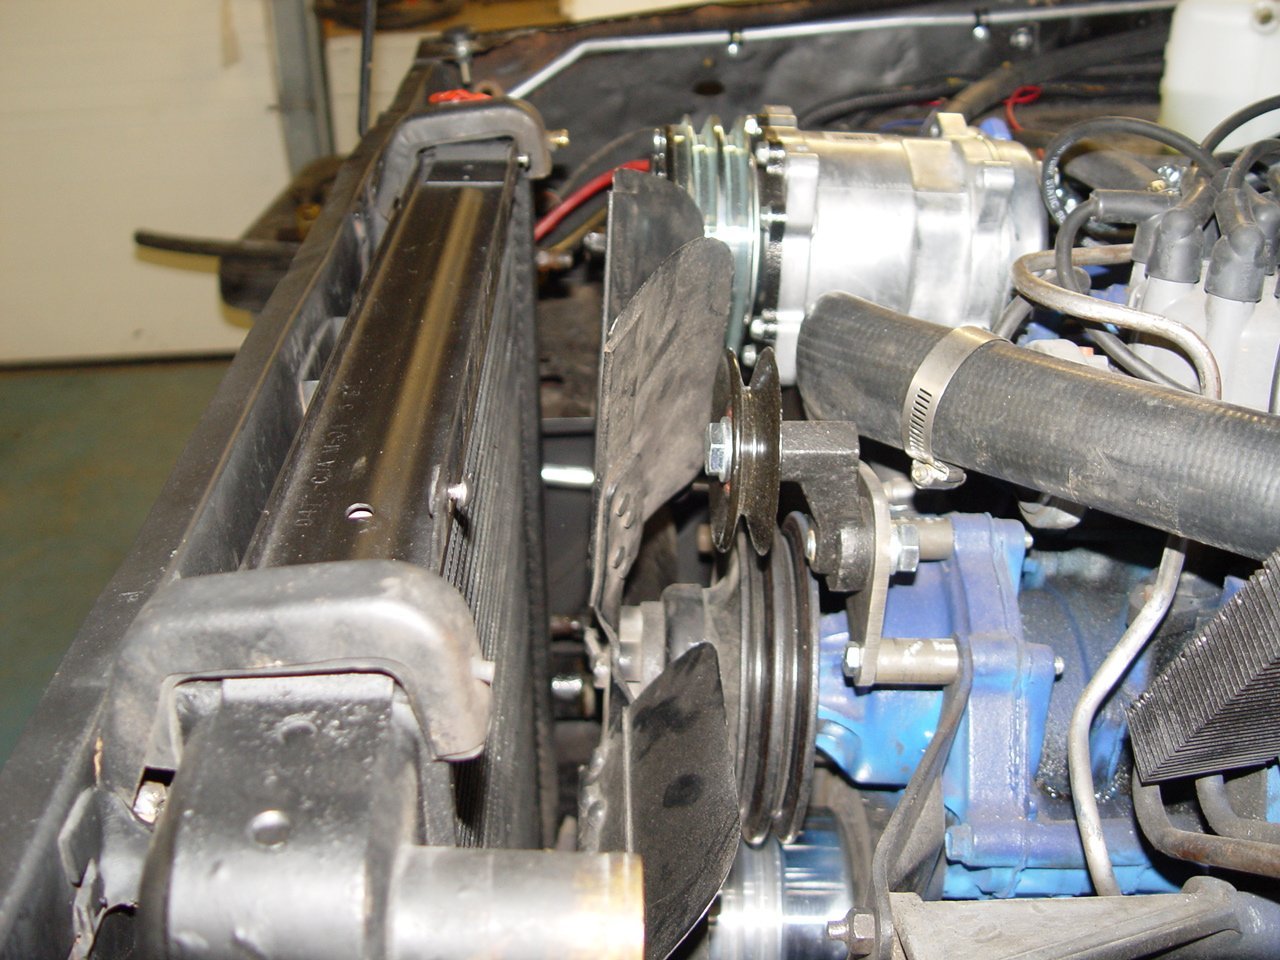
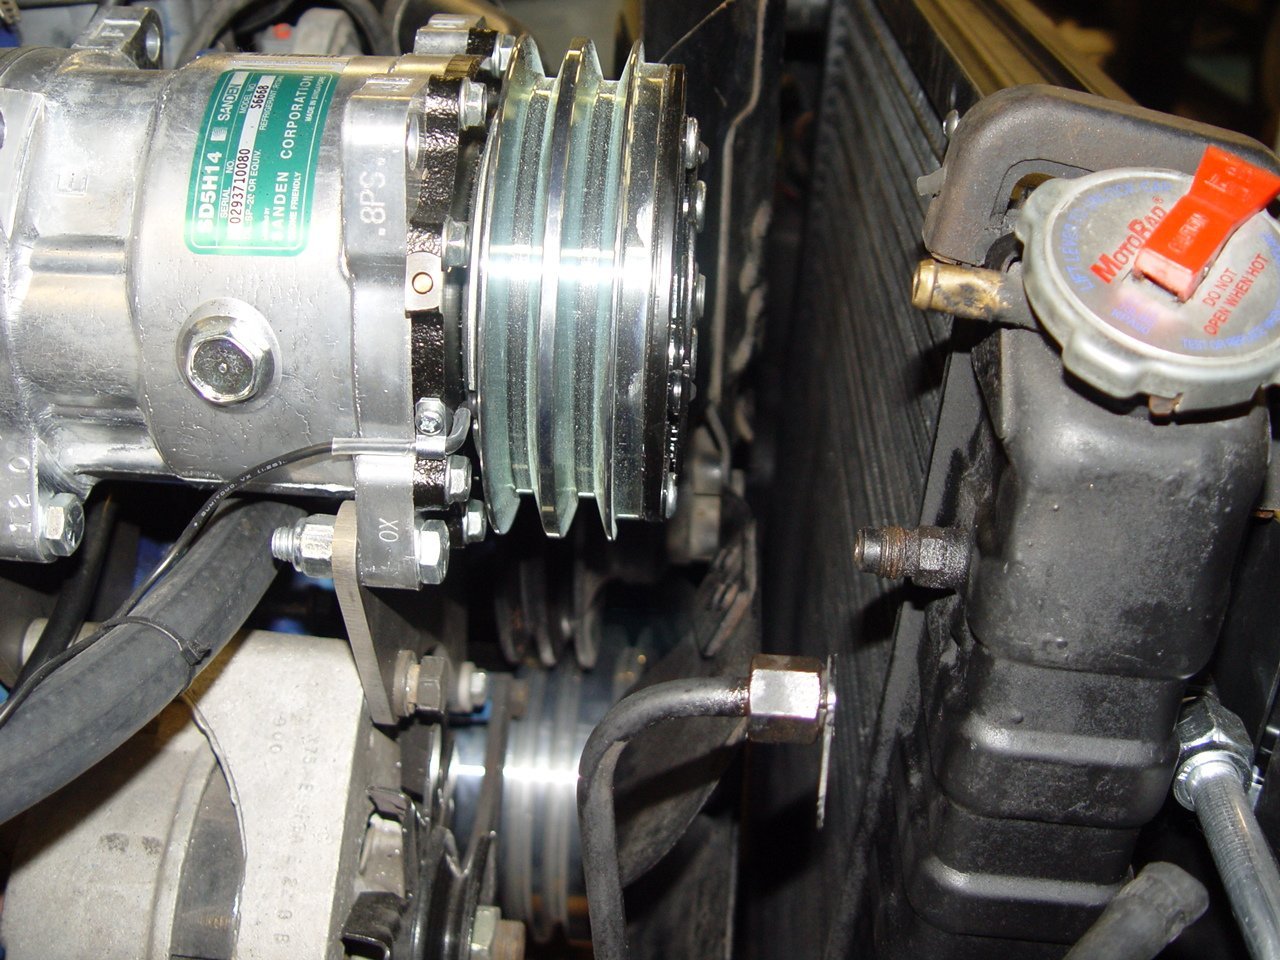
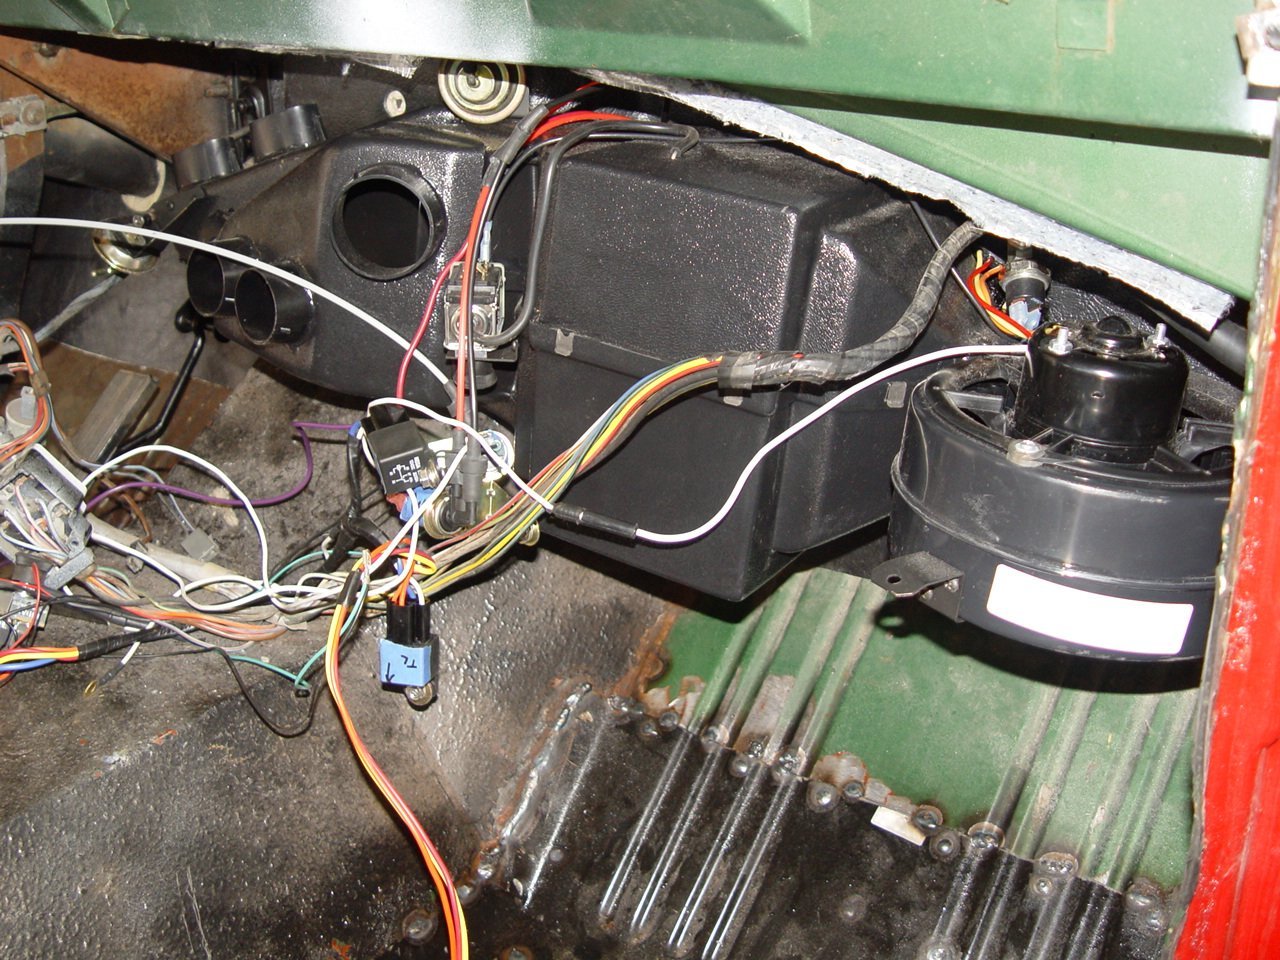
In this particular case, it appears that the only things making this a "Sure Fit" system is the inclusion of custom bracketry for mounting the evaporator box, bracketry and hard lines for mounting the condenser and hoses with one of the ends already swaged into place. The evaporator box mounted easily enough. The hoses (for heat and A/C) are routed through the existing fresh air box (which requires removal of the right front fender). The compressor mounting brackets mounted well - with the exception of a missing spacer (which we fabricated). Mounting the condenser required cutting of some bracketry in the core support.
Once we had everything mounted, we discovered a clearance problem with the engine-mounted cooling fan. We've run into this before with Vintage Air compressor mounts. As equipped, the original fan does not clear the compressor pulley. Spacers are commercially available in 1/2", 1" and 2". In our case, we required a 1 1/4" spacer. So, we had a 2" spacer machined down to fit. This Bronco retains its original 3-row core radiator and with our 1 1/4" spacer, the fan clears both the compressor and radiator. It remains to be seen if enough clearance would be available if/when a 4-row core radiator is installed.
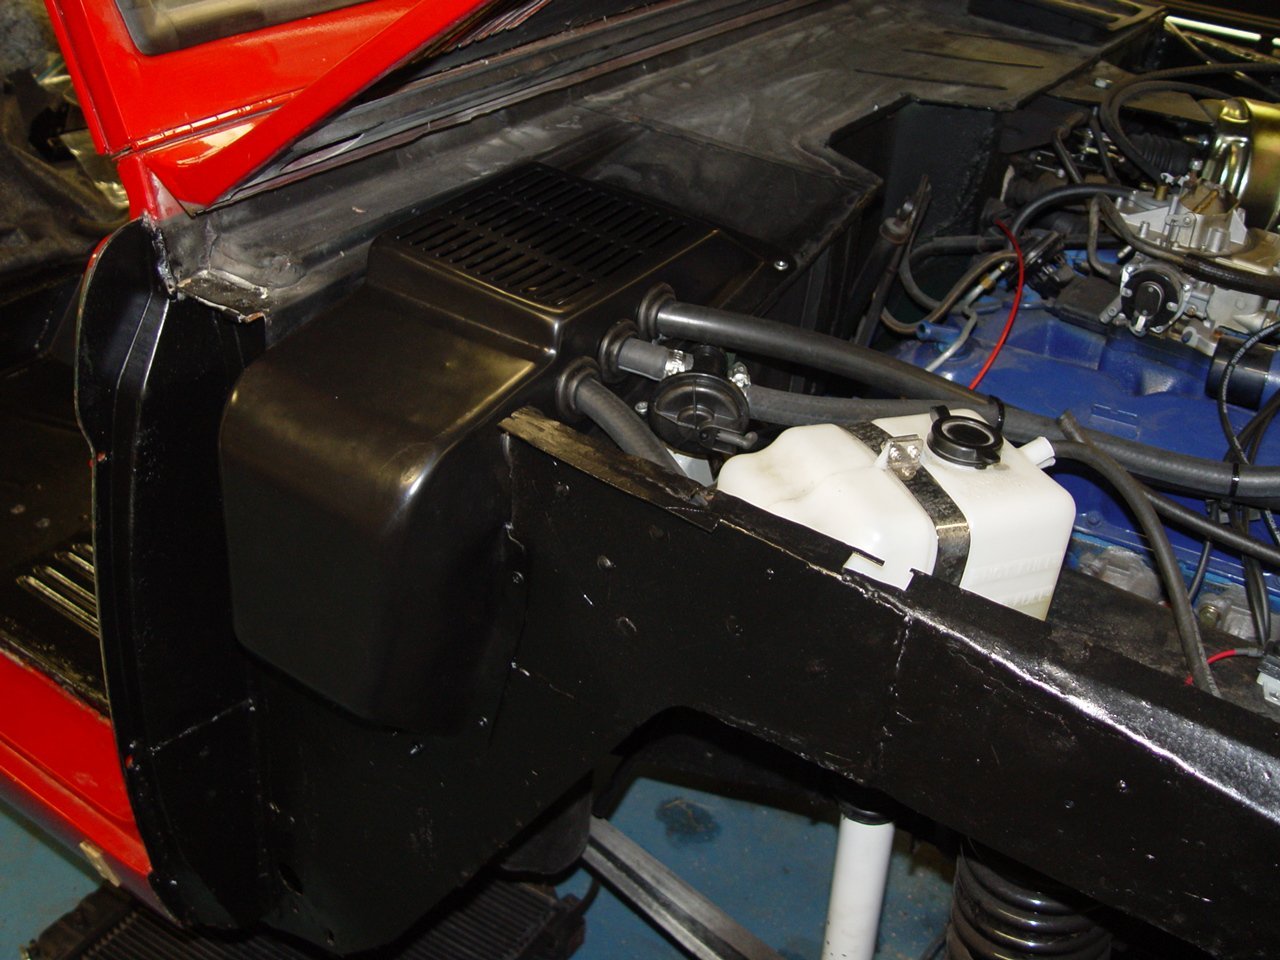
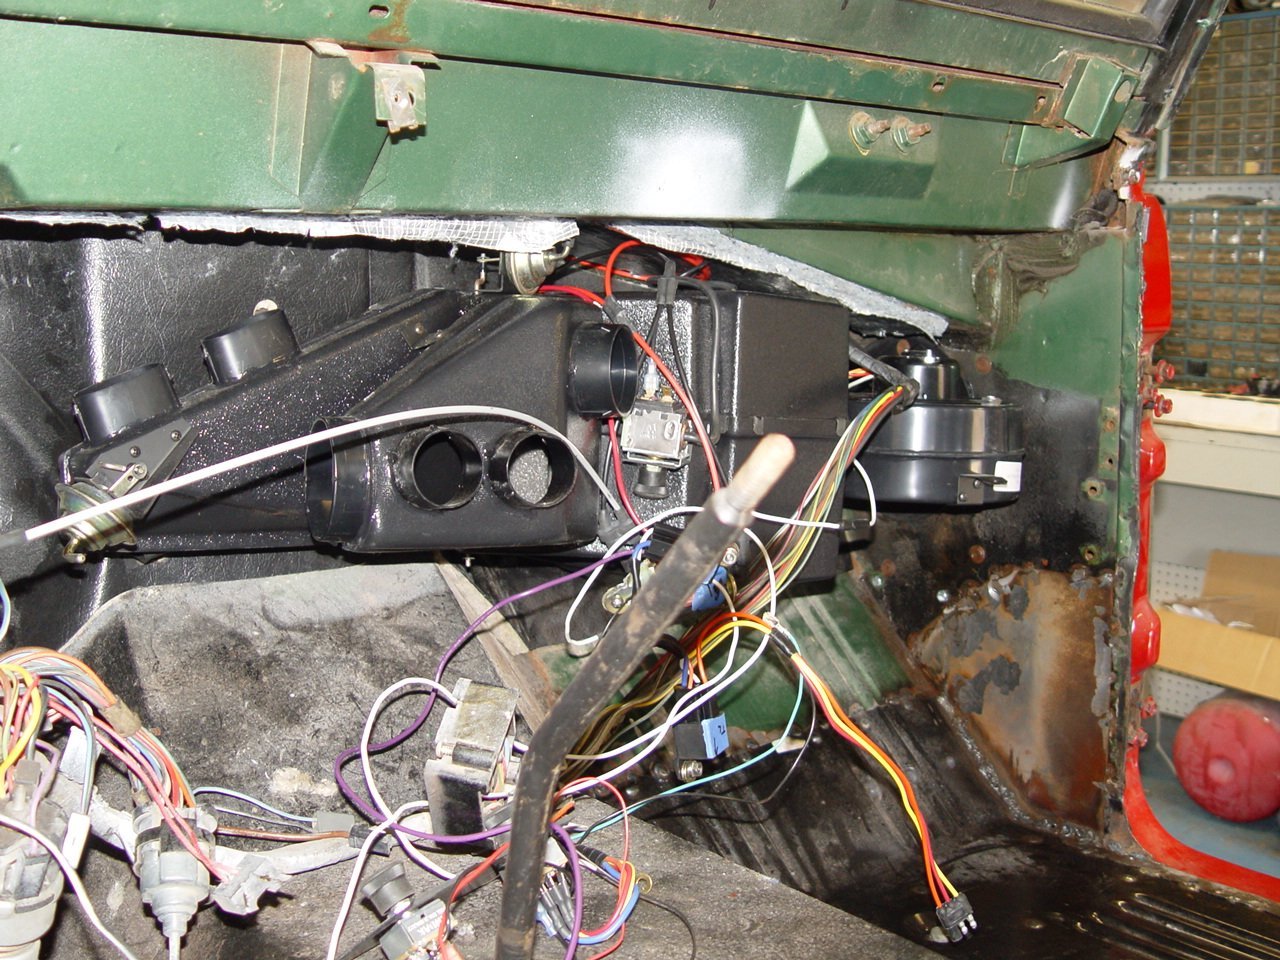
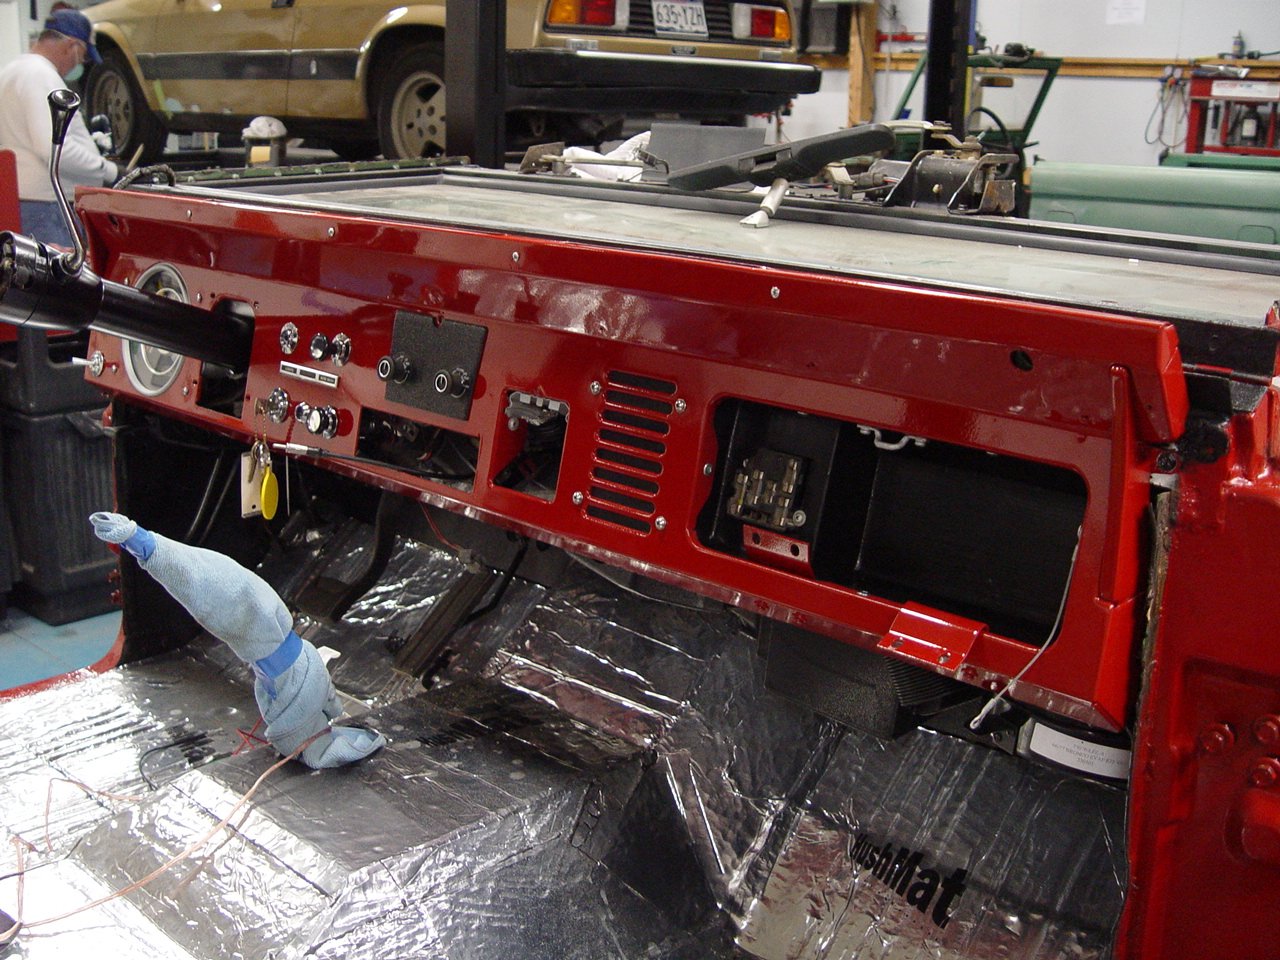
The evaporator/heater box that mounts under the dash occupies a lot more space than the original heater box. Because of this, Vintage Air provides a truncated glove box to replace the original. Also, we discovered that the new AM/FM/CD stereo we had purchased would no longer fit. While we had cut out the proper opening in the dash and welded mounting brackets on the back side, we were surprised to find that with the new evaporator/heater box, there wasn't enough depth remaining for a standard size stereo. Fortunately, we were able to come up with a mounting kit facia spacer that pushed the radio far enough out of the dash to provide clearance. The aftermarket radiator shroud also required some serious "trimming" to clear the compressor.
So, the lesson to be learned is that even when using a "Sure Fit" system from Vintage Air, you will likely still have to do some cutting of the original metal and other fabrication to complete the installation. With that being said, all our experiences with Vintage Air products have been very positive. It's just worth pointing out that "Sure Fit" does not mean direct bolt-on installation.
When we were finished, the system was charged with R-134A as per Vintage Air's specifications. When finished, we tested the A/C's output and were seeing 28.9 degrees out of the vents with the blower set to the lowest fan speed and an ambient shop temperature of 85 degrees.
After charging and testing the A/C, we lowered the idle back down to something reasonable (it was set way too high when it first arrived) and discovered that it stalled when in gear at anything below 1500 rpm. Some diagnostics revealed that: 1) the carburetor was full of debris (see photo), 2) the spark plugs were gapped anywhere between .022" and .048", and 3) the points were set with the gap too tight. After cleaning out the carb and adjusting the gaps of the points and plugs, we cranked it back up, set the timing (also way off) and were able to get it to run much better and idle a something below stratospheric revs.
|
||||||
 |
 |
 |
 |
 |
||
 |
 |
 |
 |
 |
||
 |
 |
 |
 |
 |
||
 |
 |
 |
 |
 |
||
| Click on an image for a larger view | ||||||
INTERIOR | ||||||
|
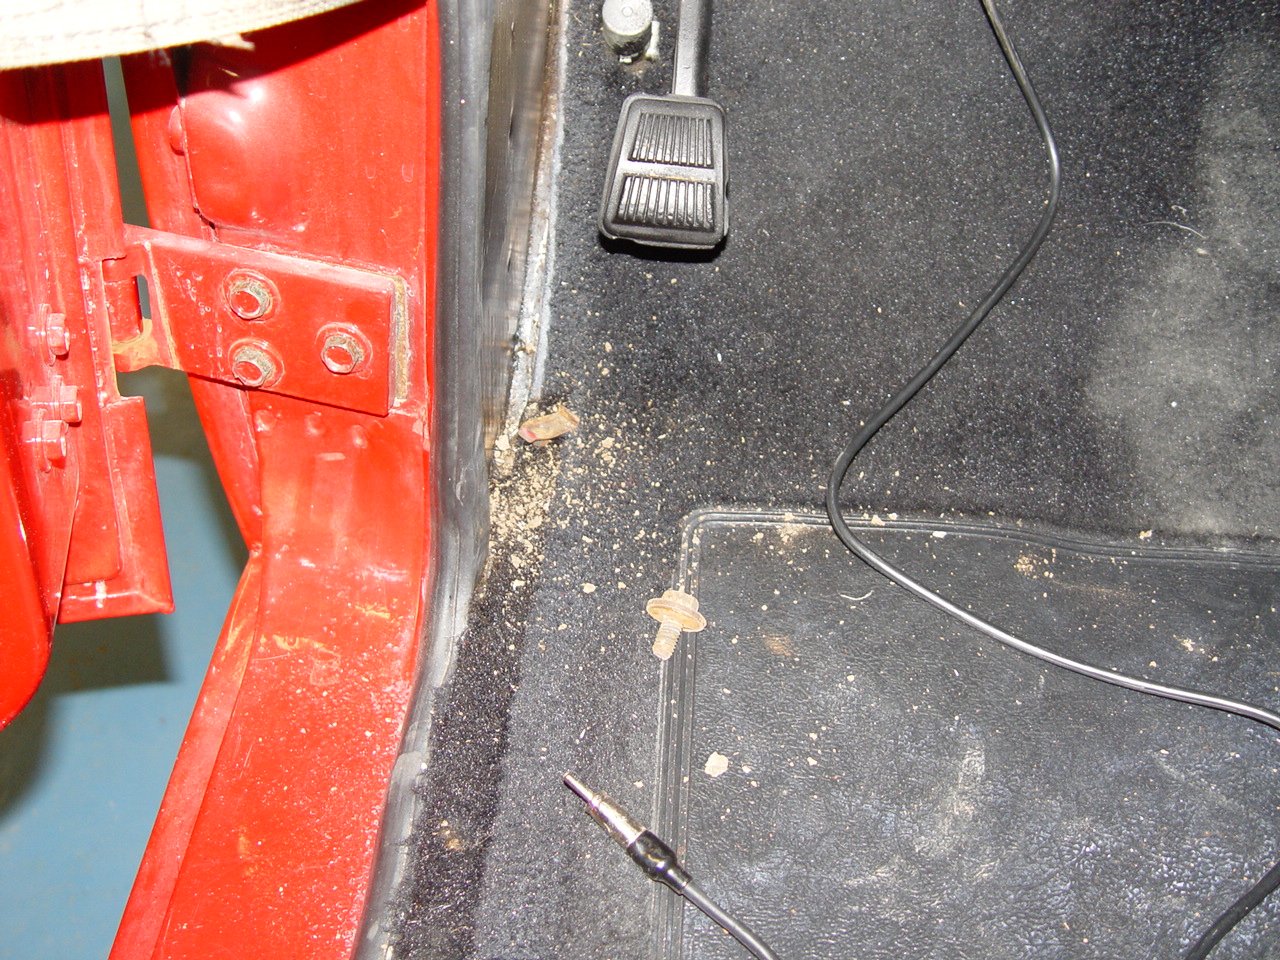
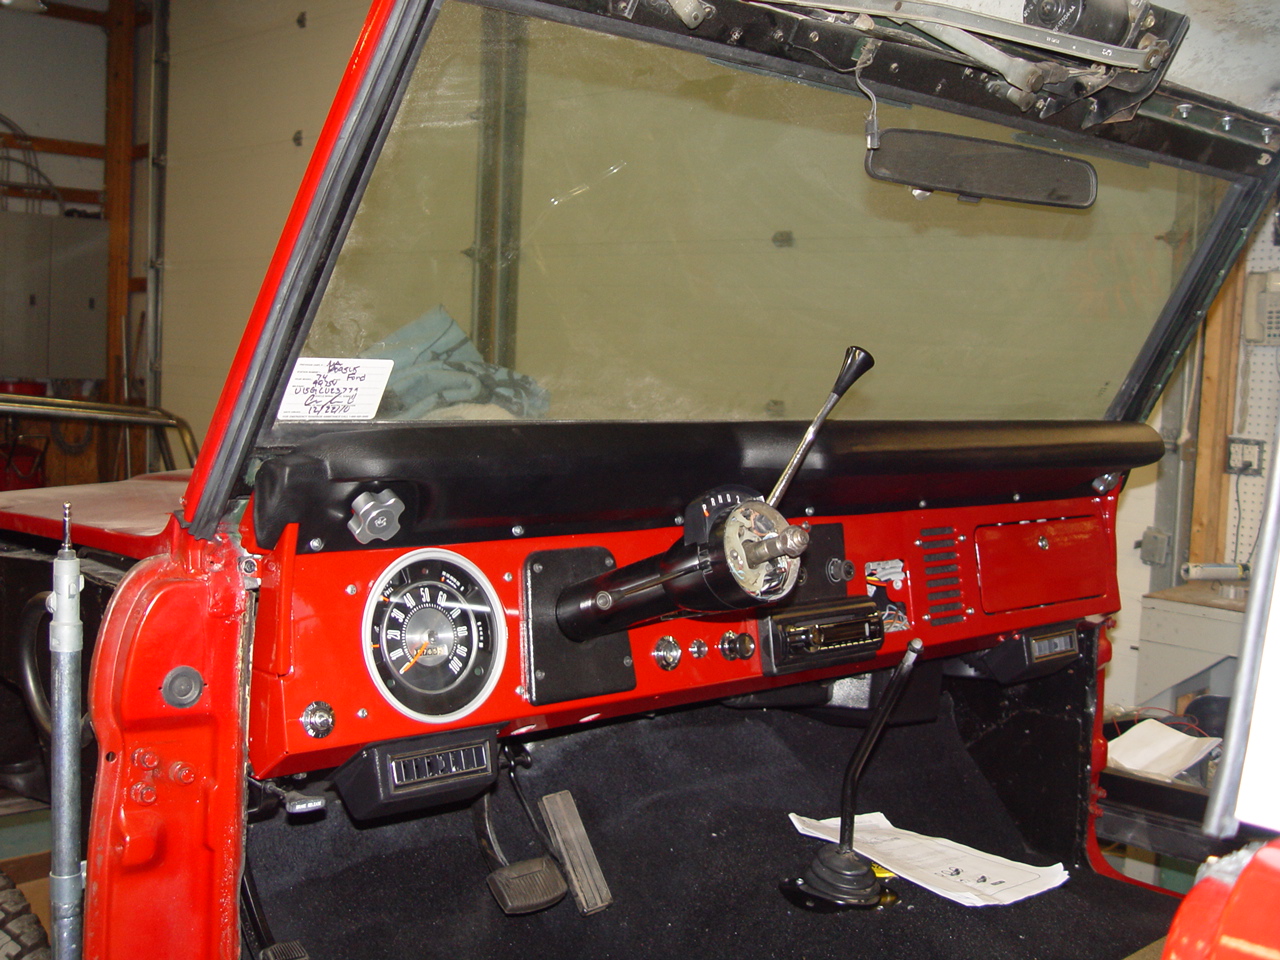
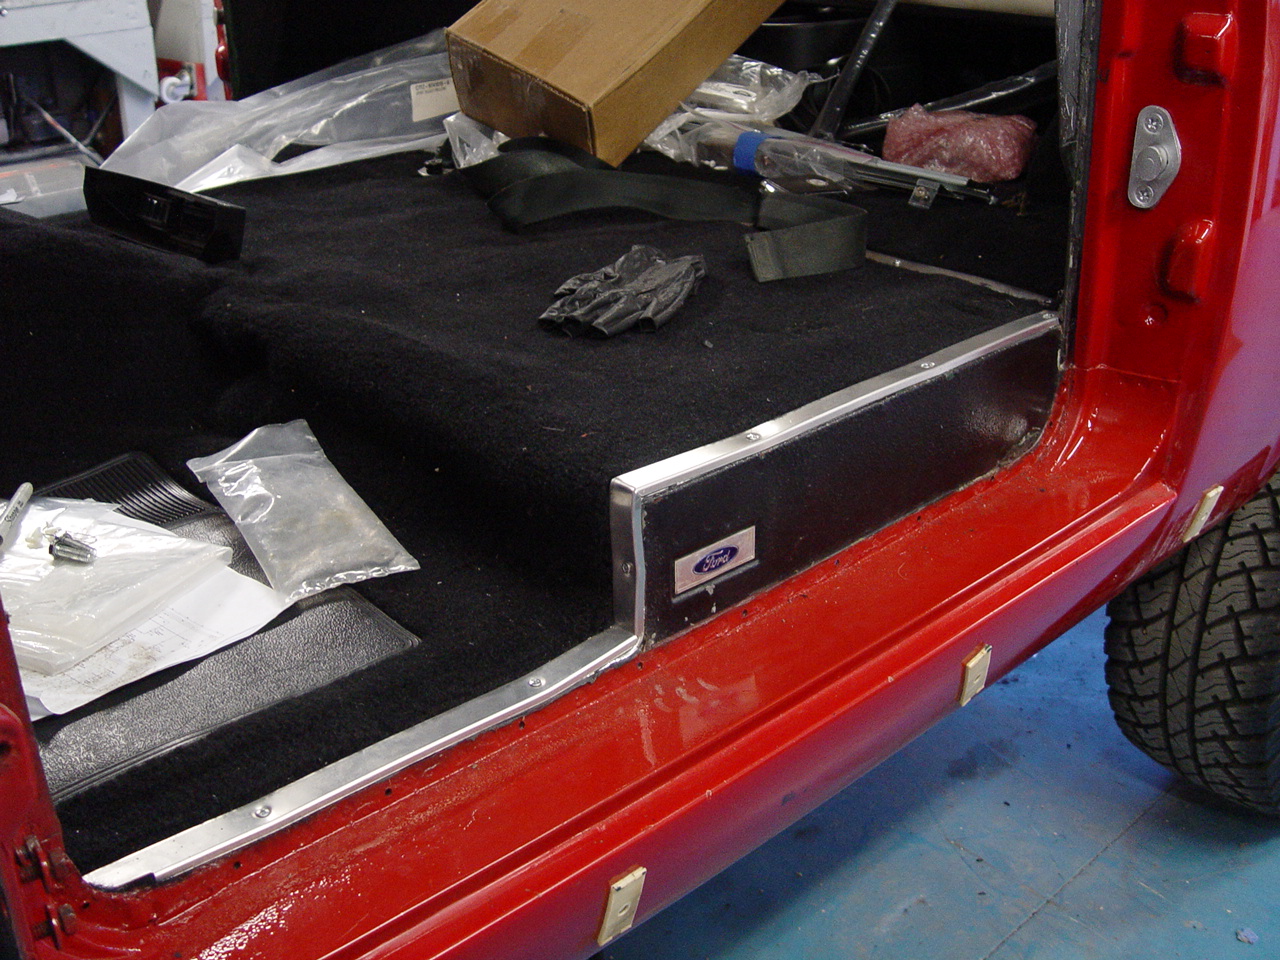
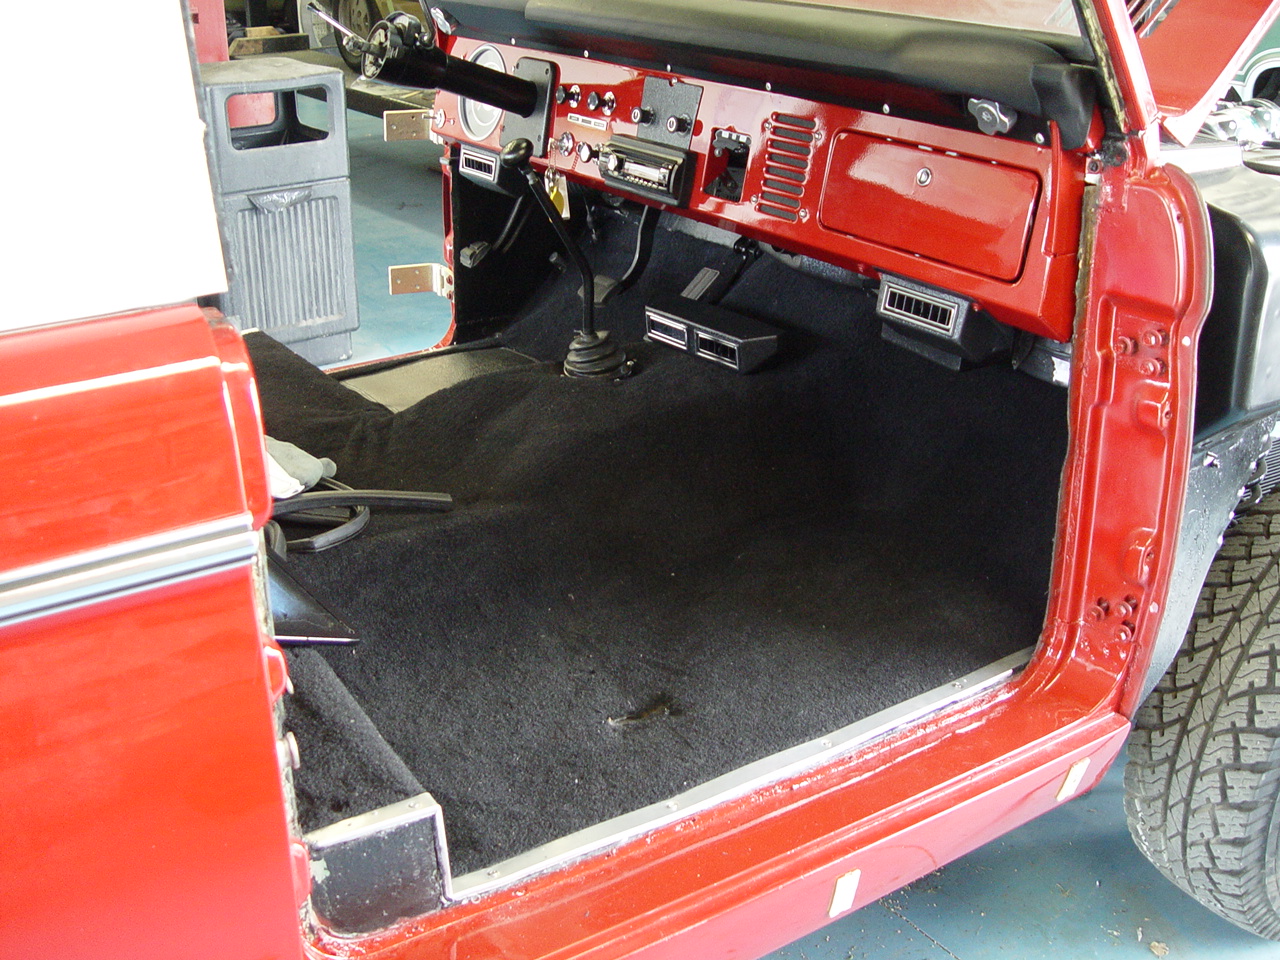
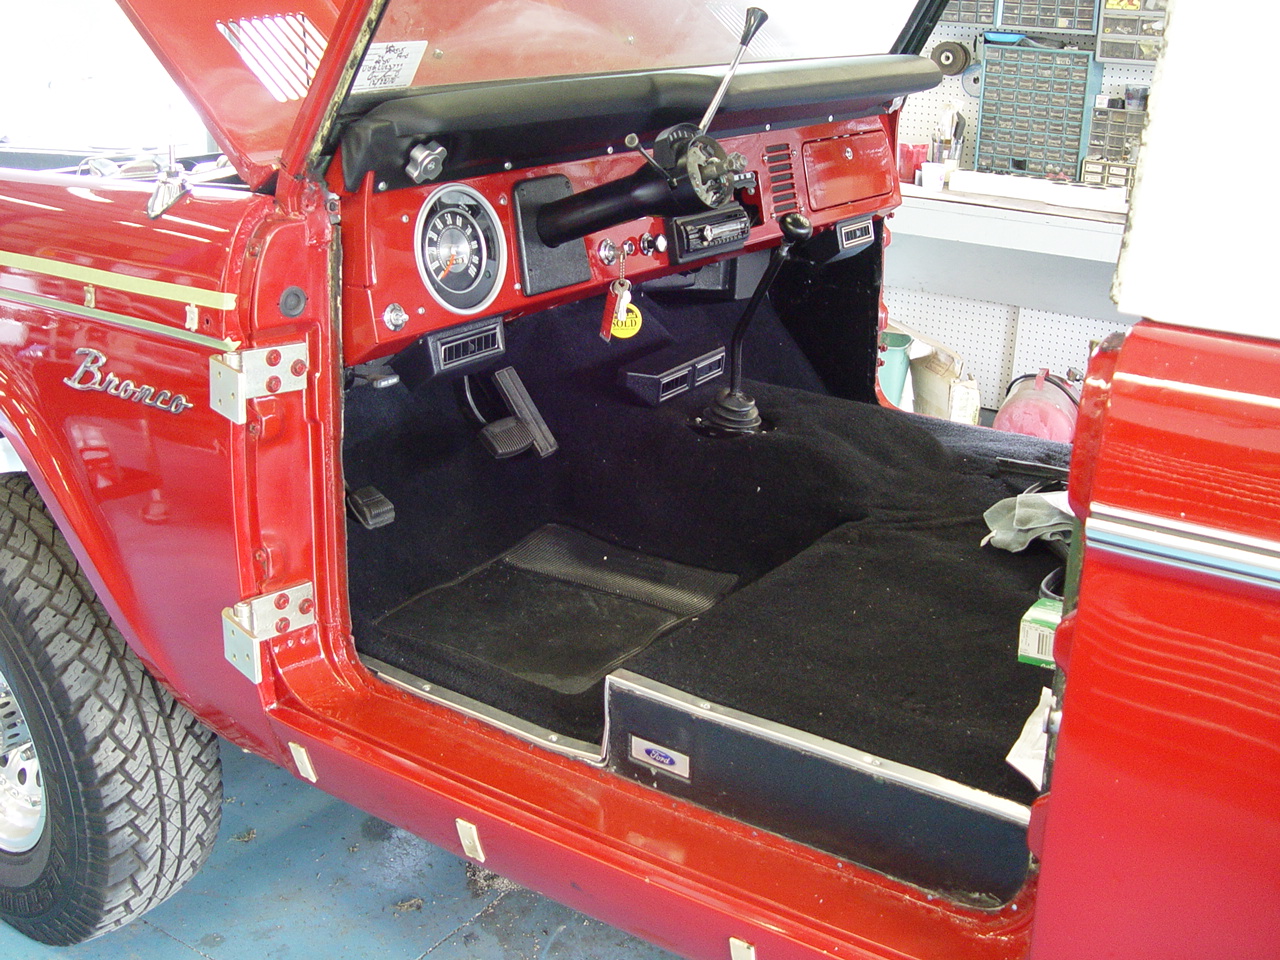
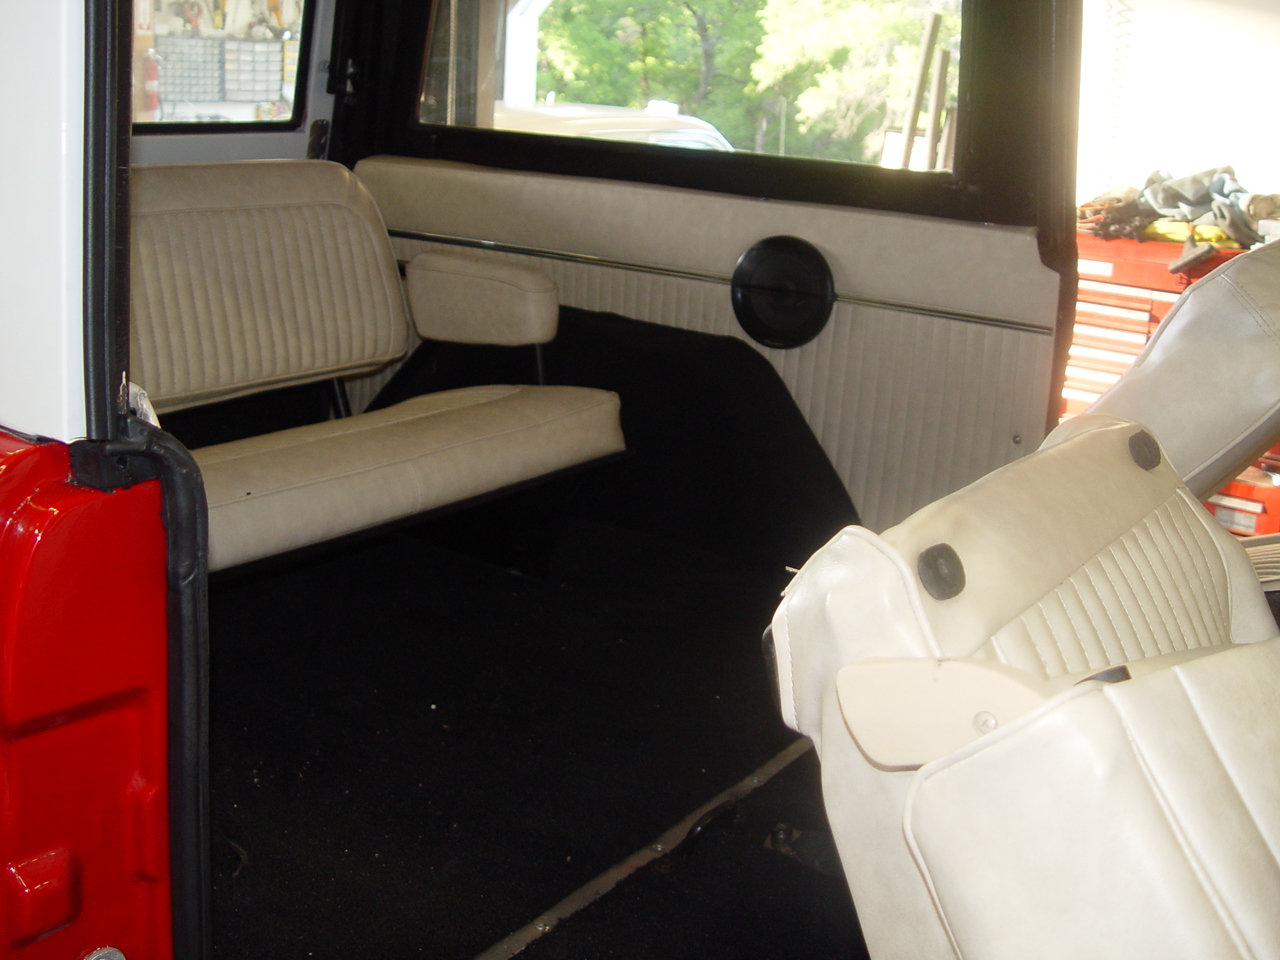
When Big Red came to us, it already had fresh upholstery on the seats and what looks like new carpet. New door and rear side panels were provided by the owner for us to install. Since this was actually the first work we started on the project, the teltale rust that fell out from under the dash when we began our work provided an ominous preview of what was to come.
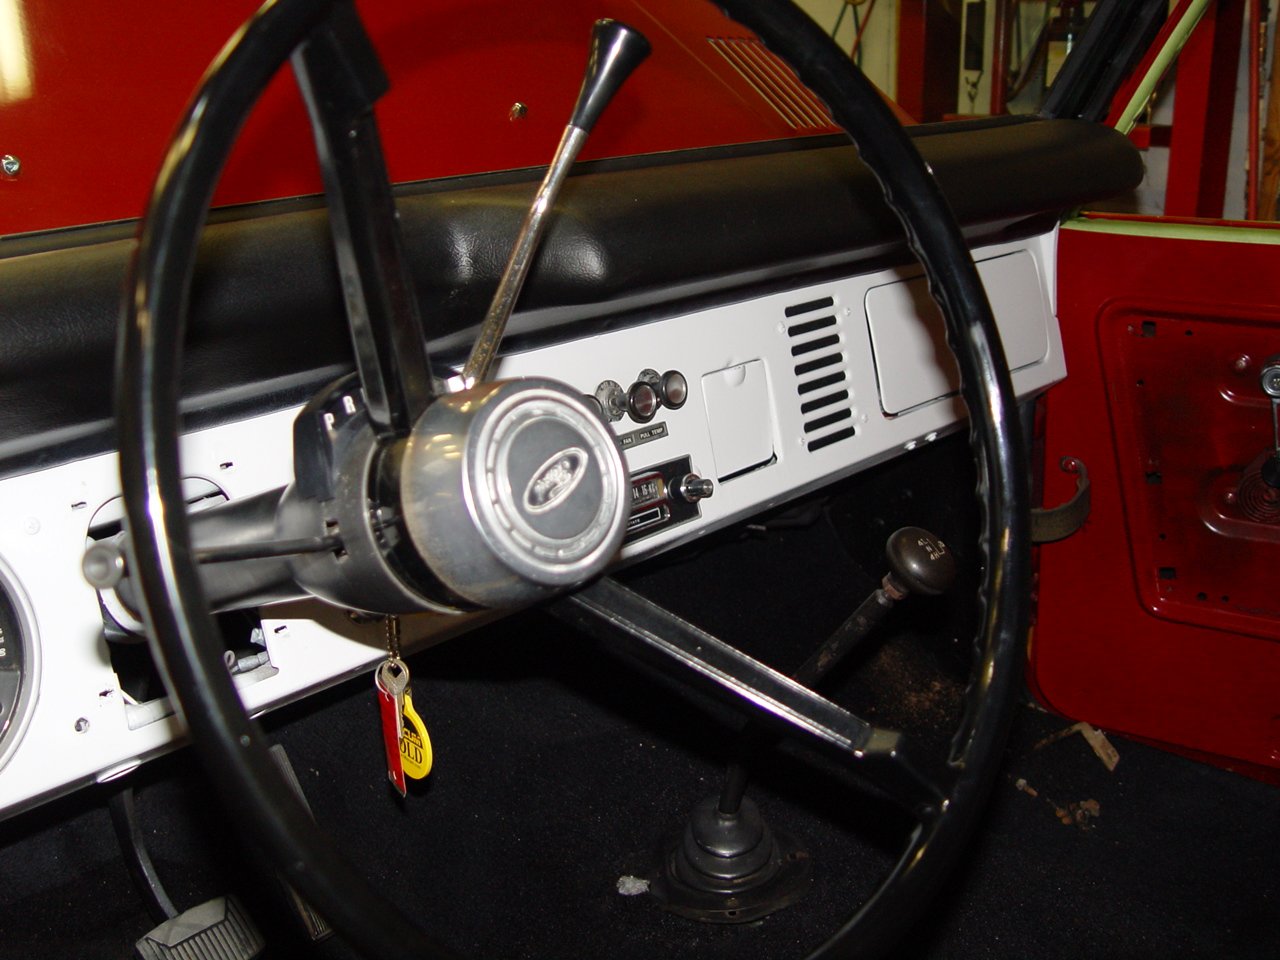
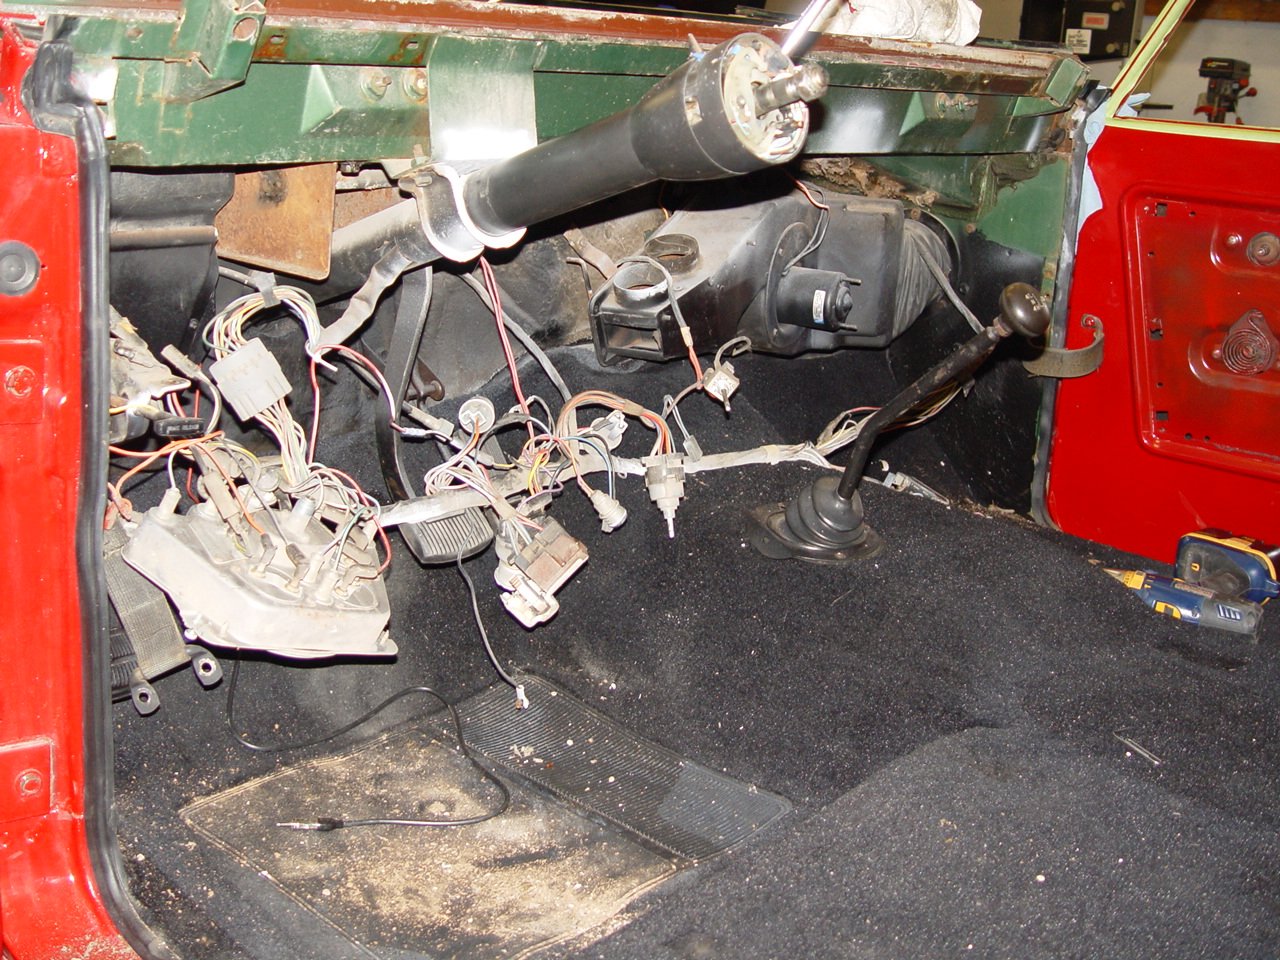
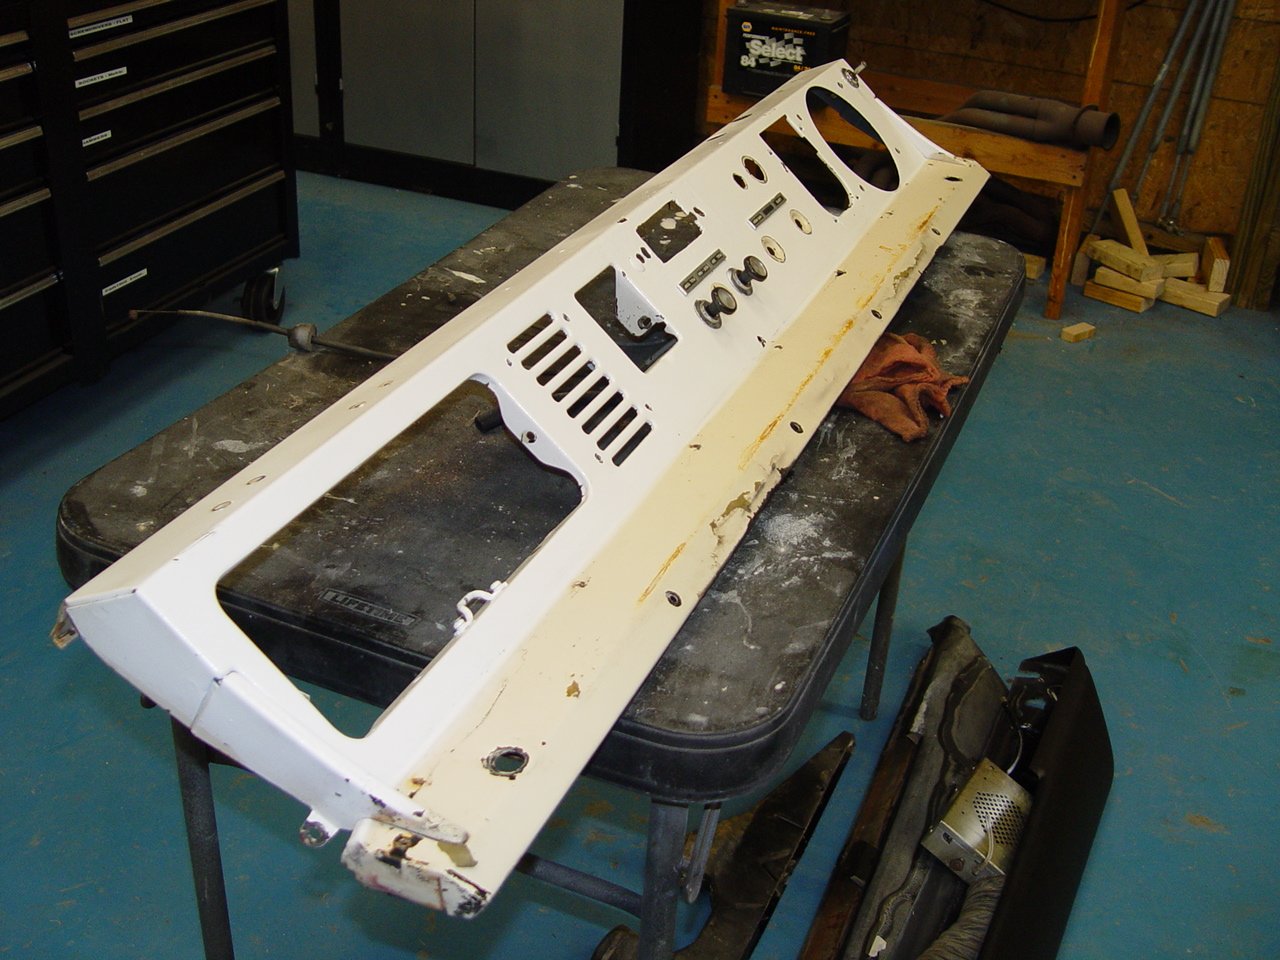
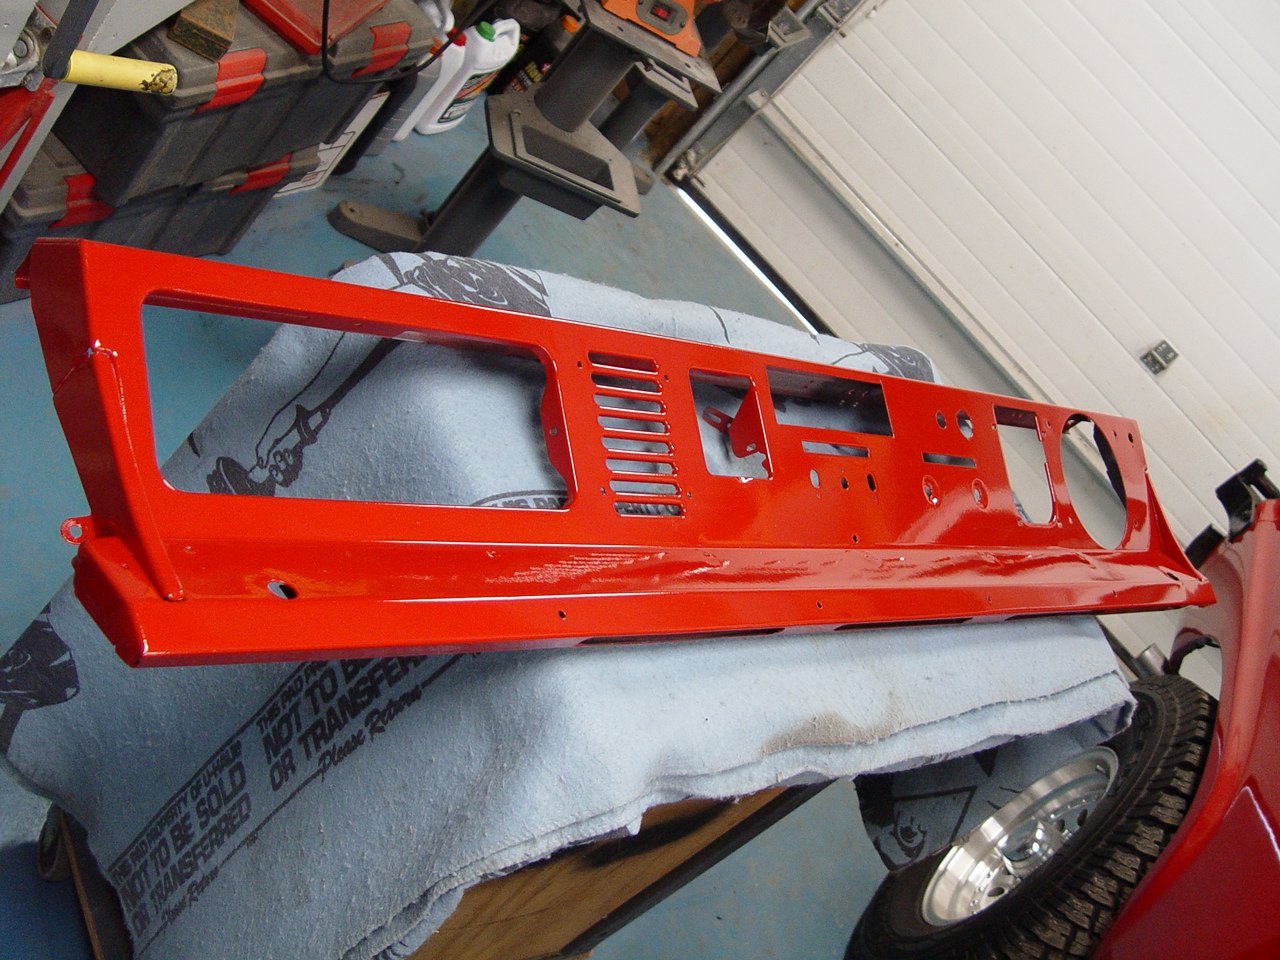
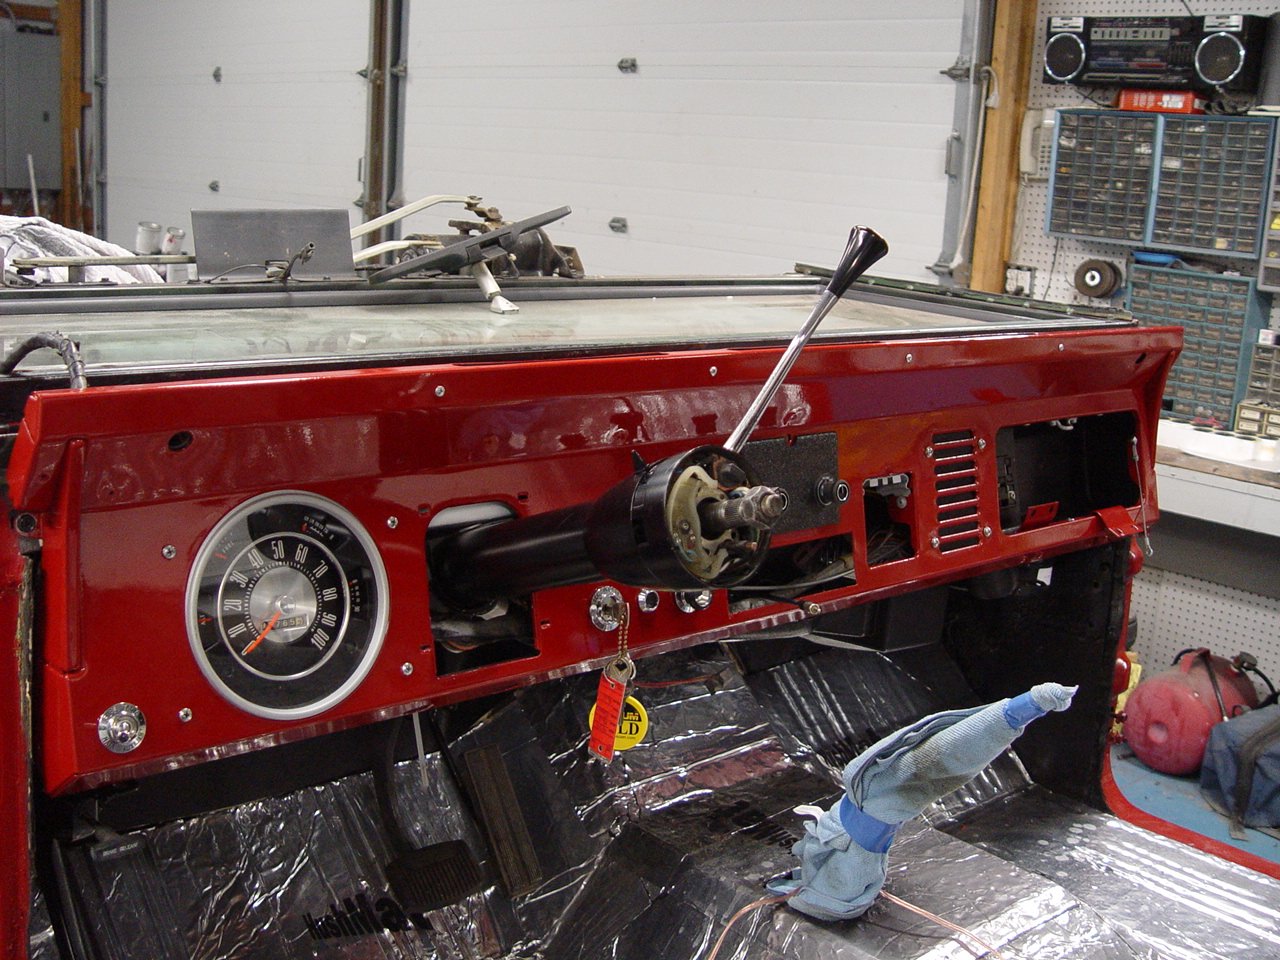
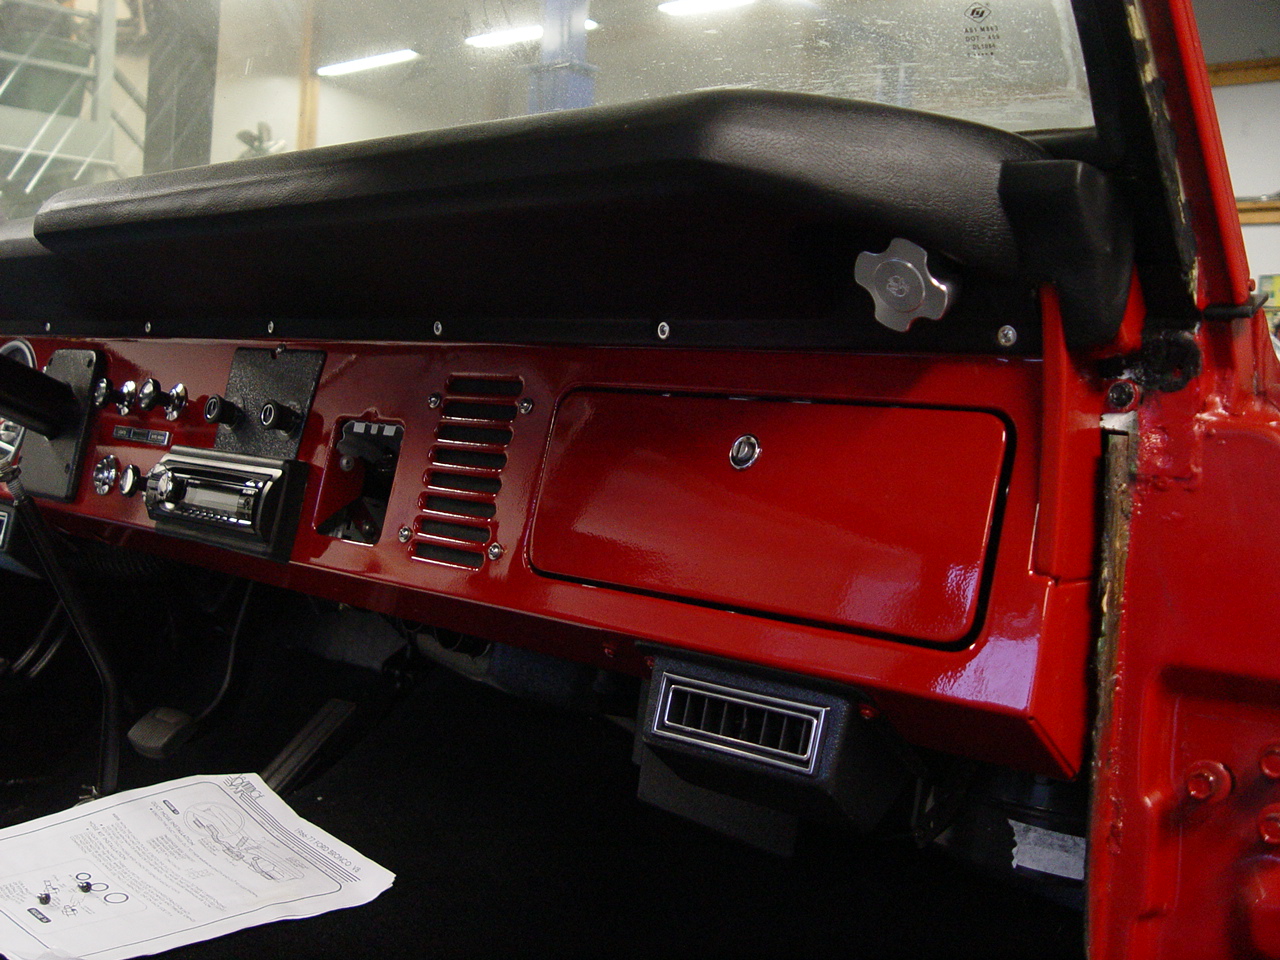
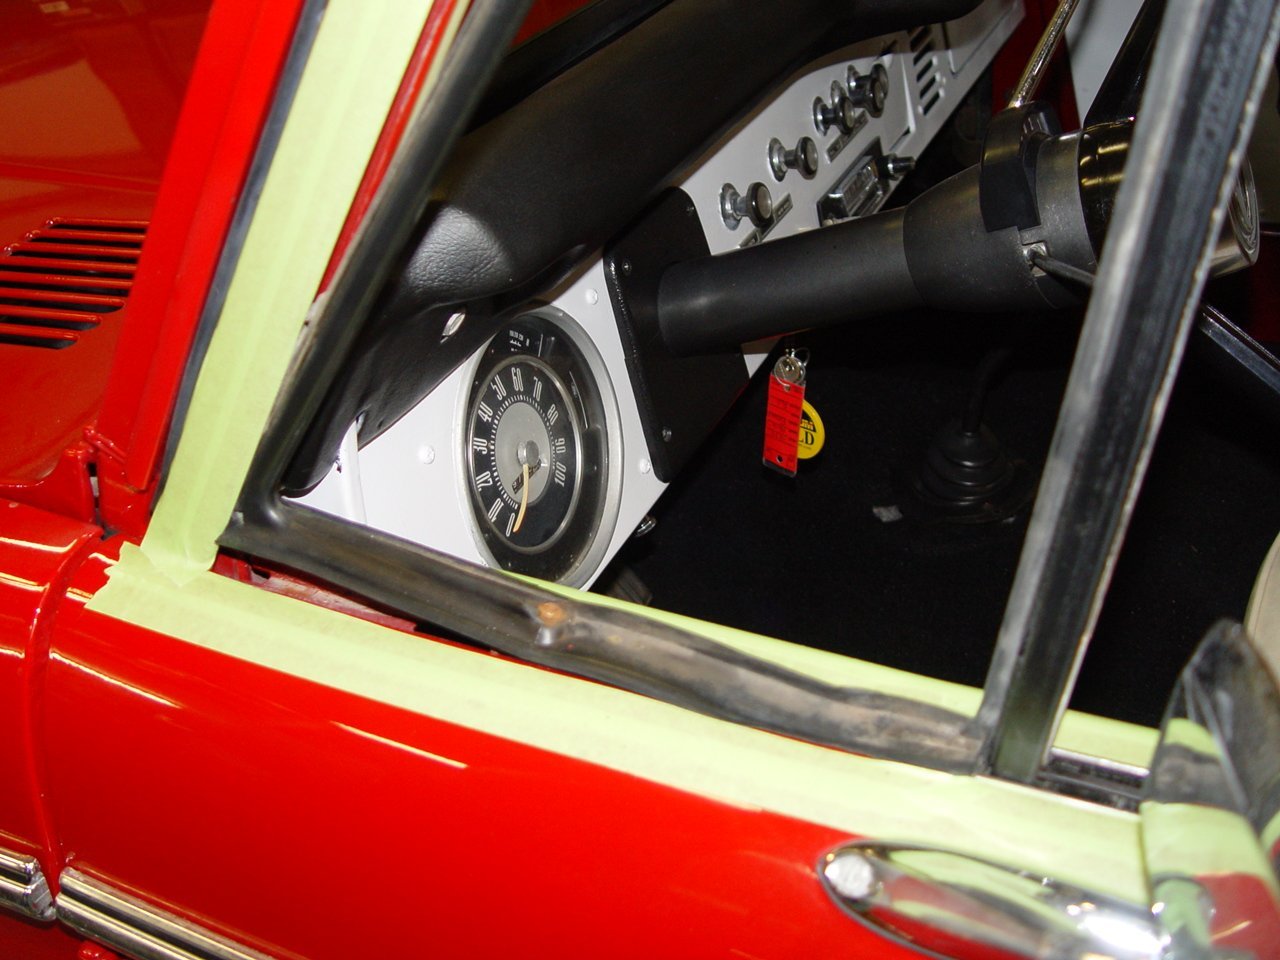
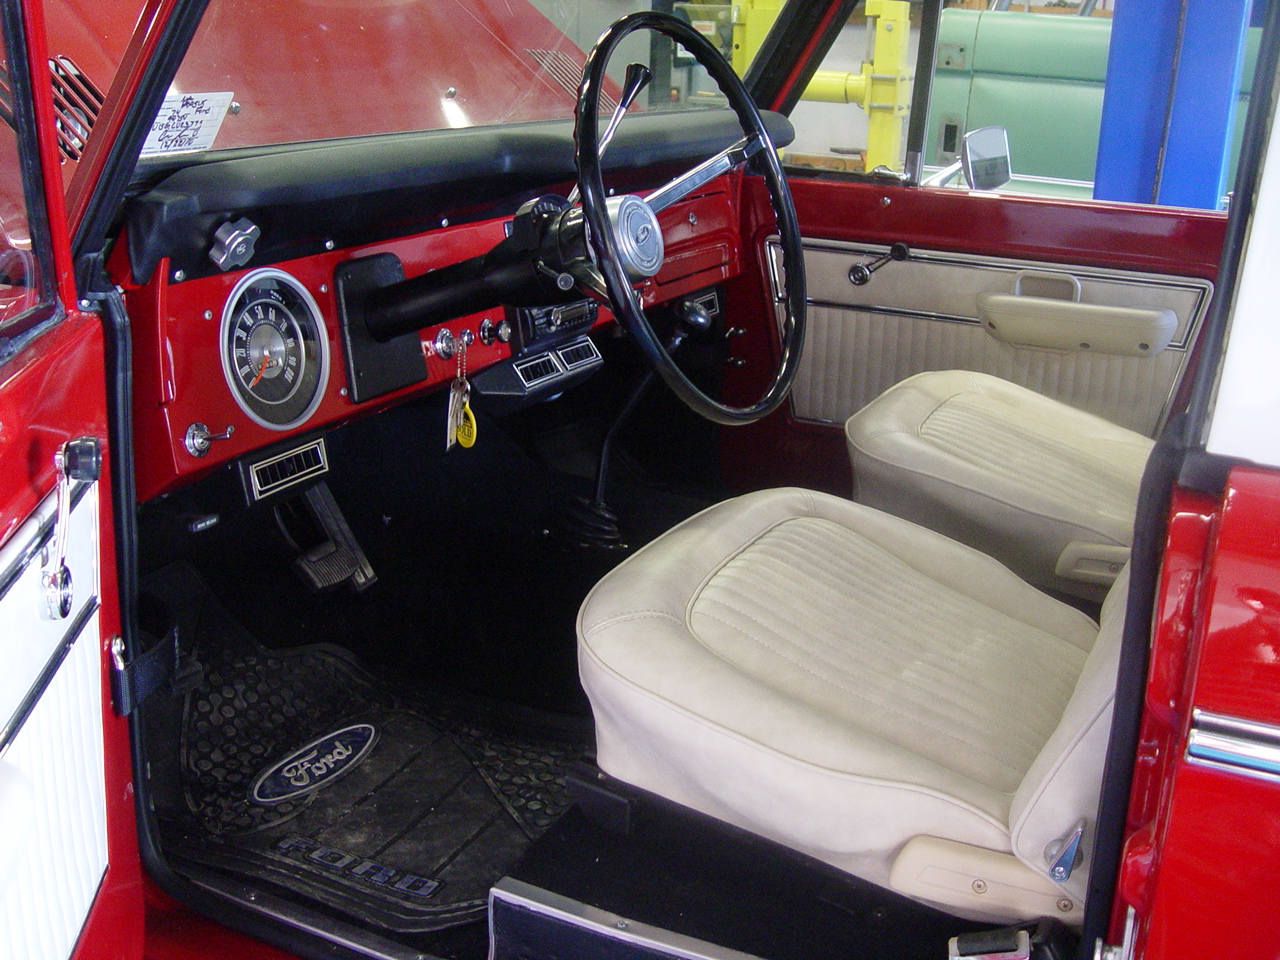
The dash came to us with a very poorly done white rattle-can paint job that had copious amounts of overspray on every knob, bezel and chromed surface. Since we would be removing the dash to install the Vintage Air system, we went ahead and stripped it to bare metal and painted it using a colormatched PPG Deltron 2000 basecoat/clearcoat paint system. Not only did the dash come out looking great, but the remaining colormatch paint would come in handy later on.
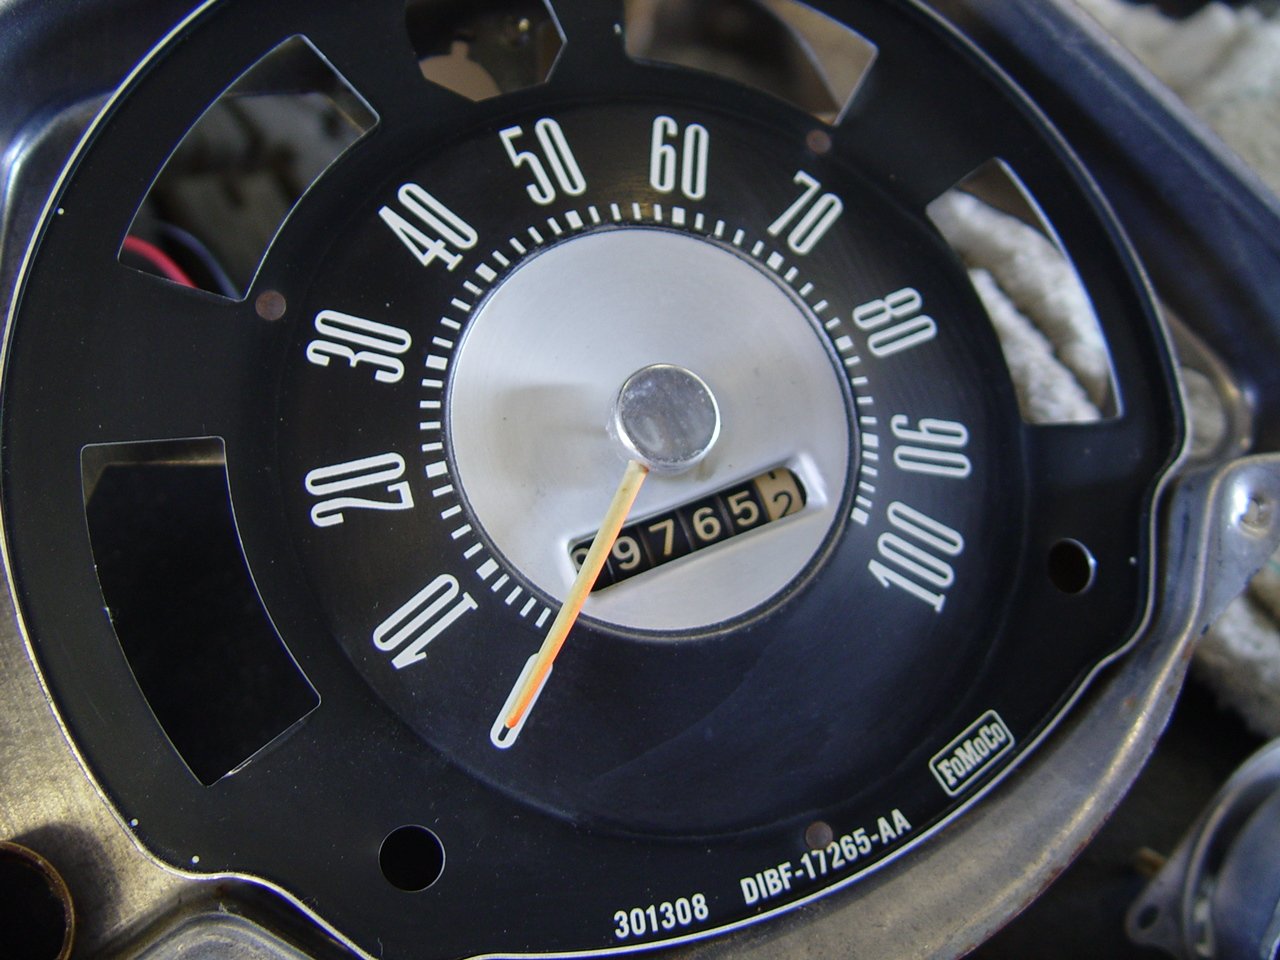
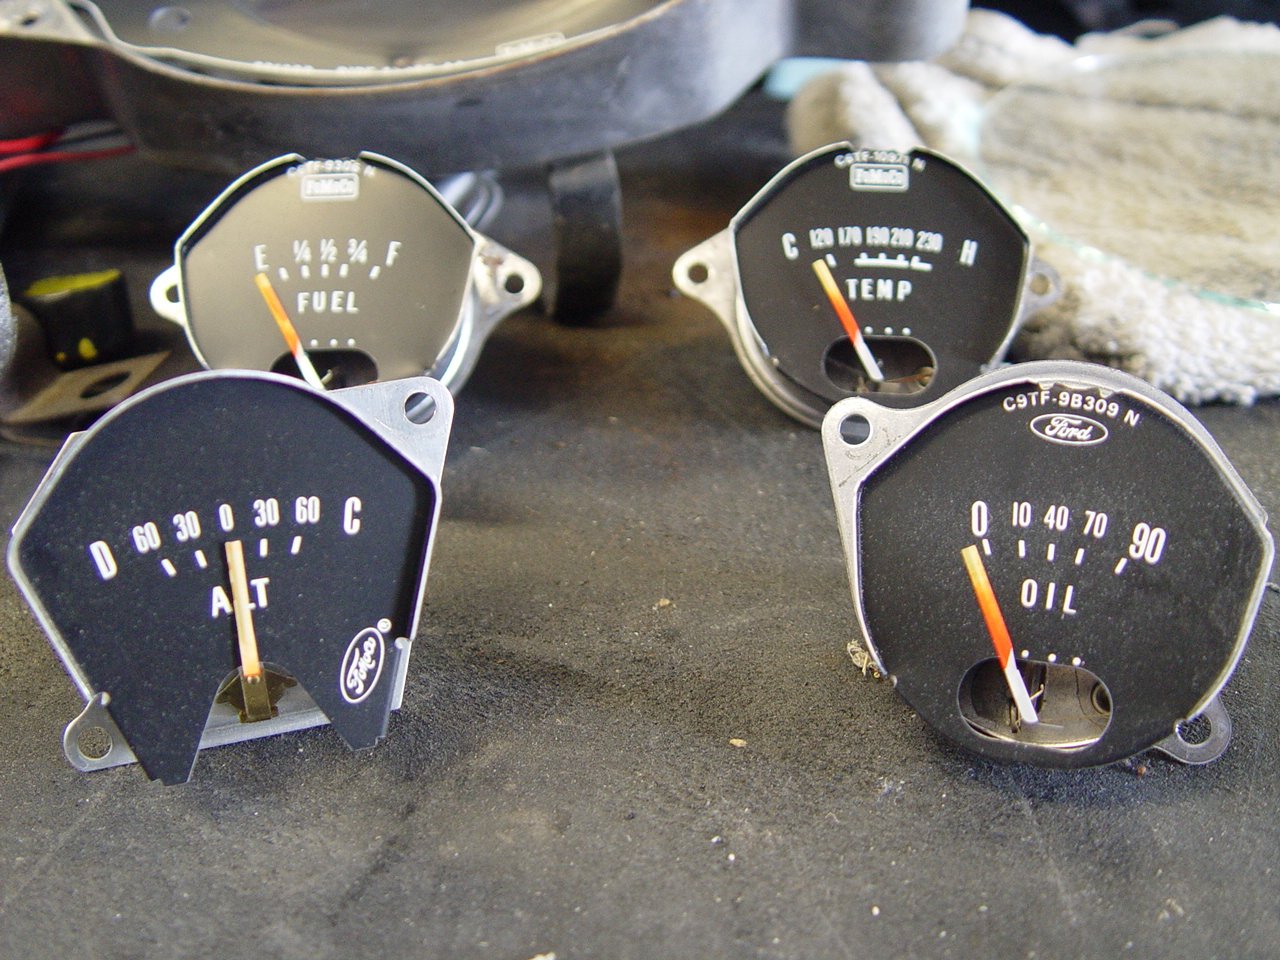
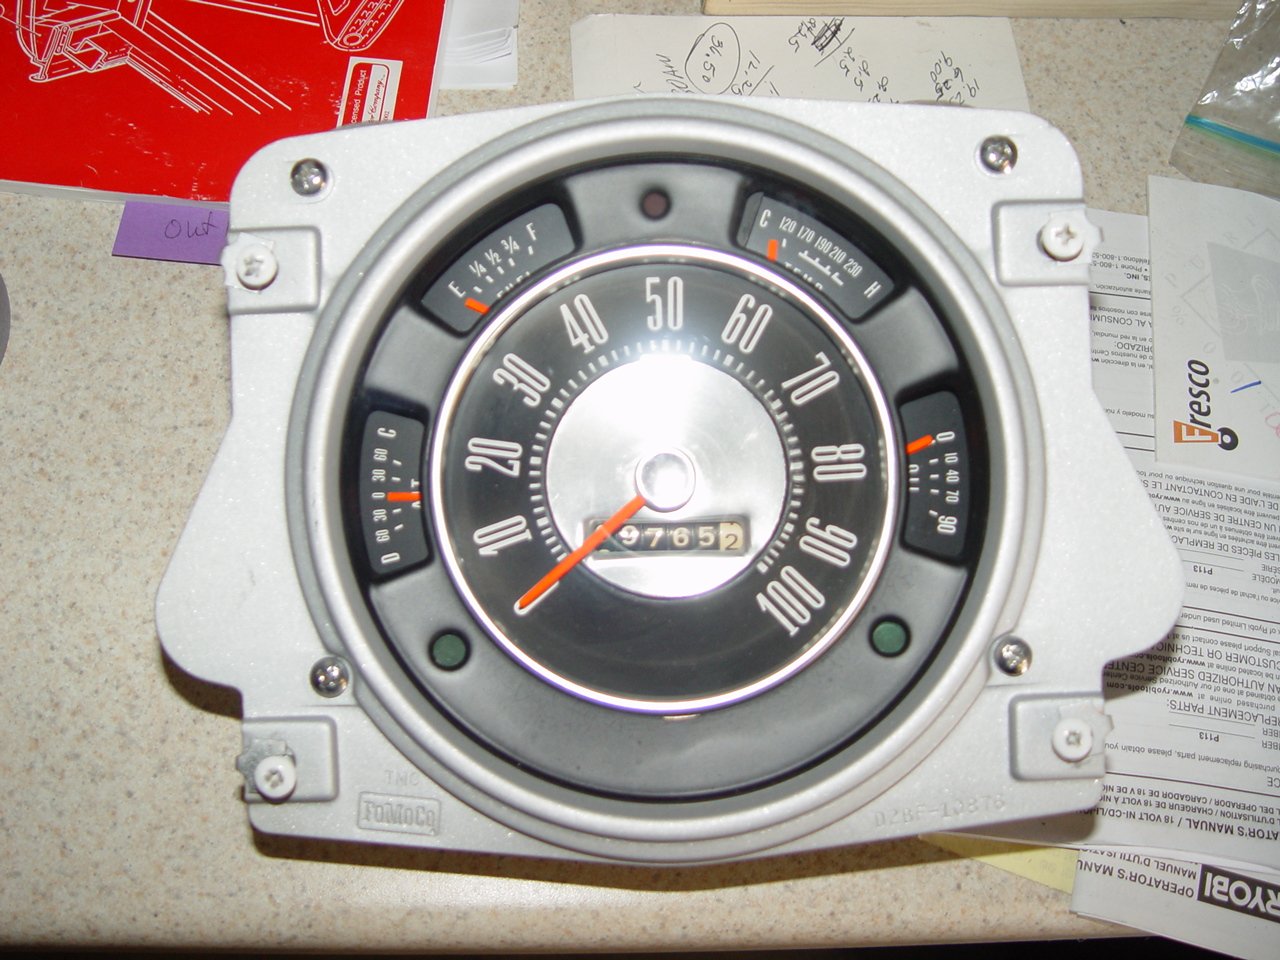
While we had the dash apart, the gauge assembly was disassembled, cleaned and the needles refinished with the appropriate dayglo orange paint. Nearly all the knobs and bezels were replaced with new reproduction items. The radio cut-out was modified to accept a modern AM/FM/CD system - with mounting brackets welded to the back side of the dash. A faux screen was attached to the backside of the old speaker grill. The Vintage Air control panel was modified to accept the new stereo installation. And, the new cigar lighter was given a new home next to the parking brake warning light (which is inoperative because there is no switch at the brake pedal).
A new firewall insulation pad was installed, and Hush Mat insulation was added to the floorboards forward of the door rear pillar. Foam insulation was also added between the roof and headliner.
|
||||||
 |
 |
 |
 |
 |
||
 |
 |
 |
 |
 |
||
 |
 |
 |
 |
 |
||
 |
 |
 |
 |
 |
||
 |
 |
 |
 |
 |
||
 |
 |
 |
 |
 |
||
| Click on an image for a larger view | ||||||
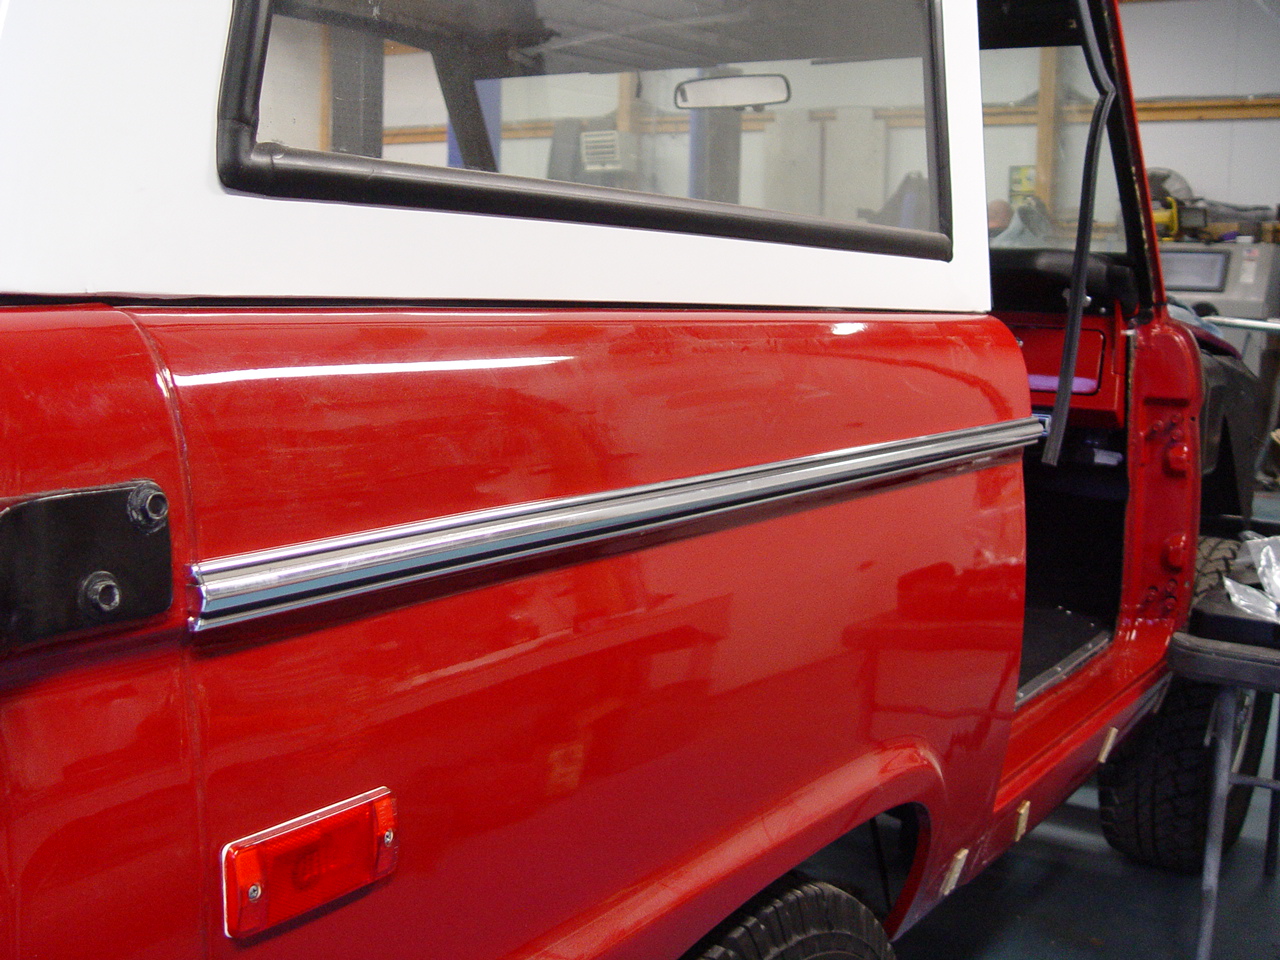
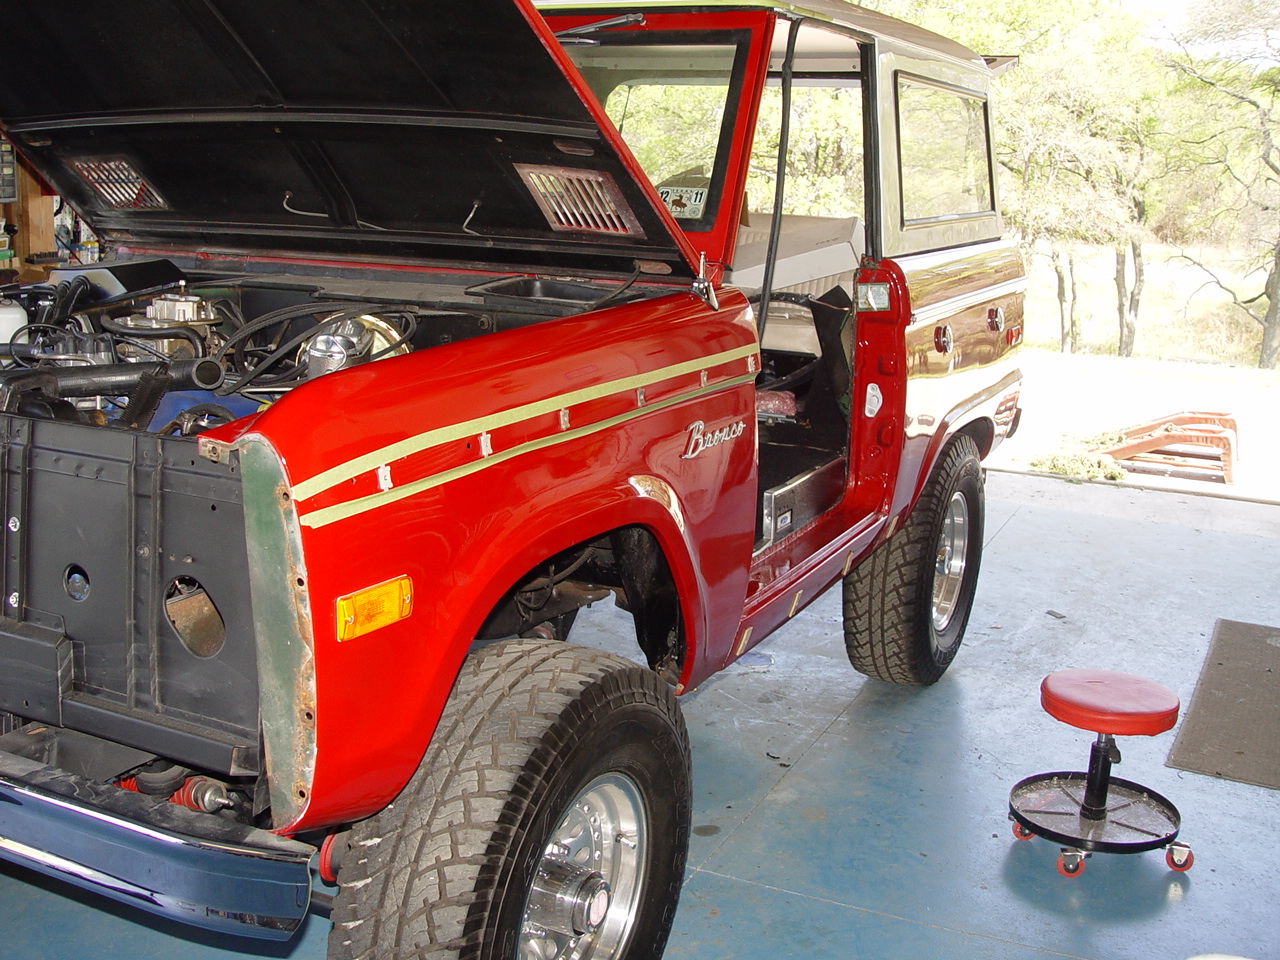
BODY | ||||||
|
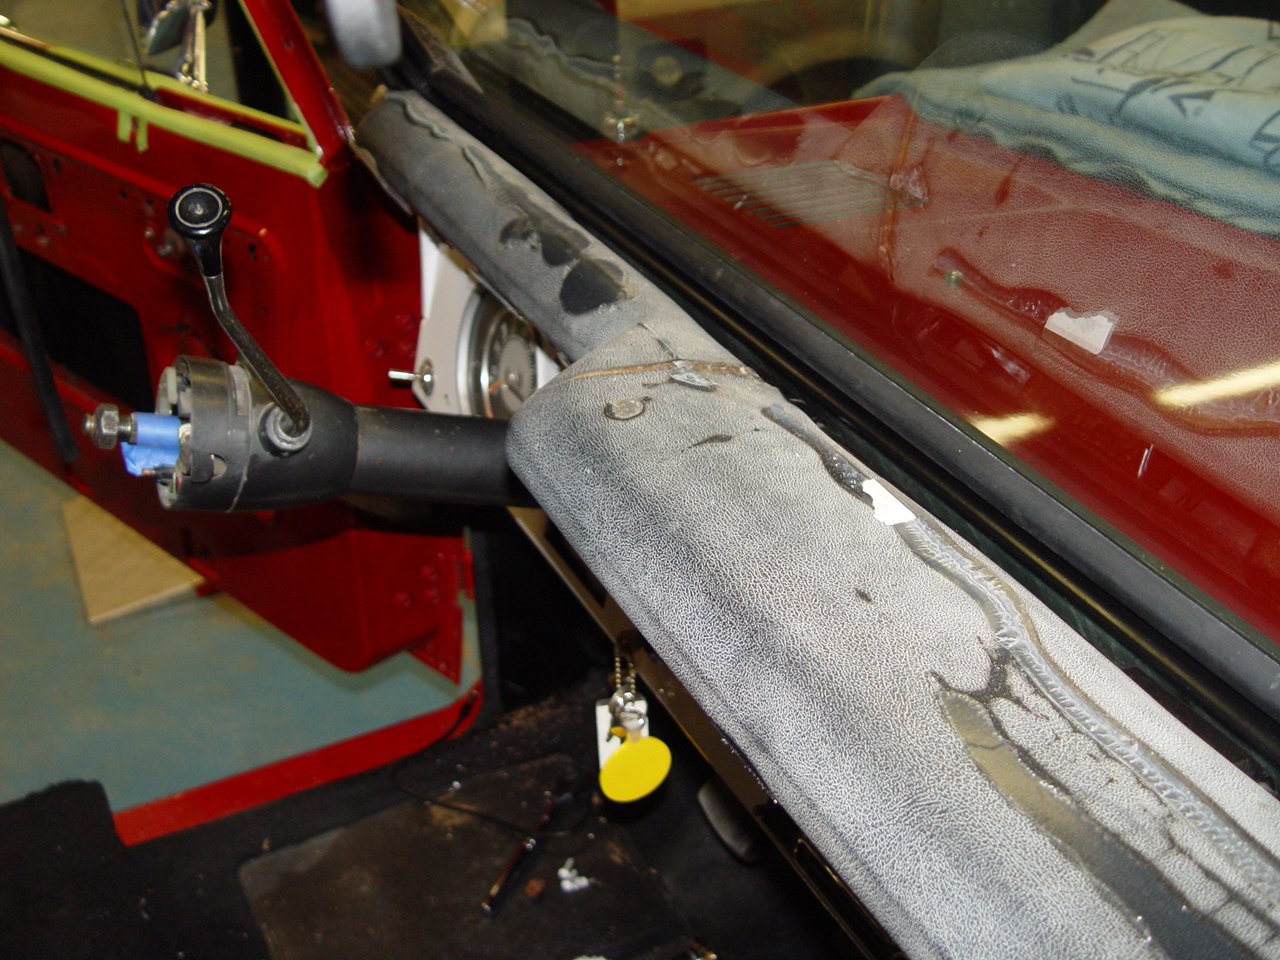
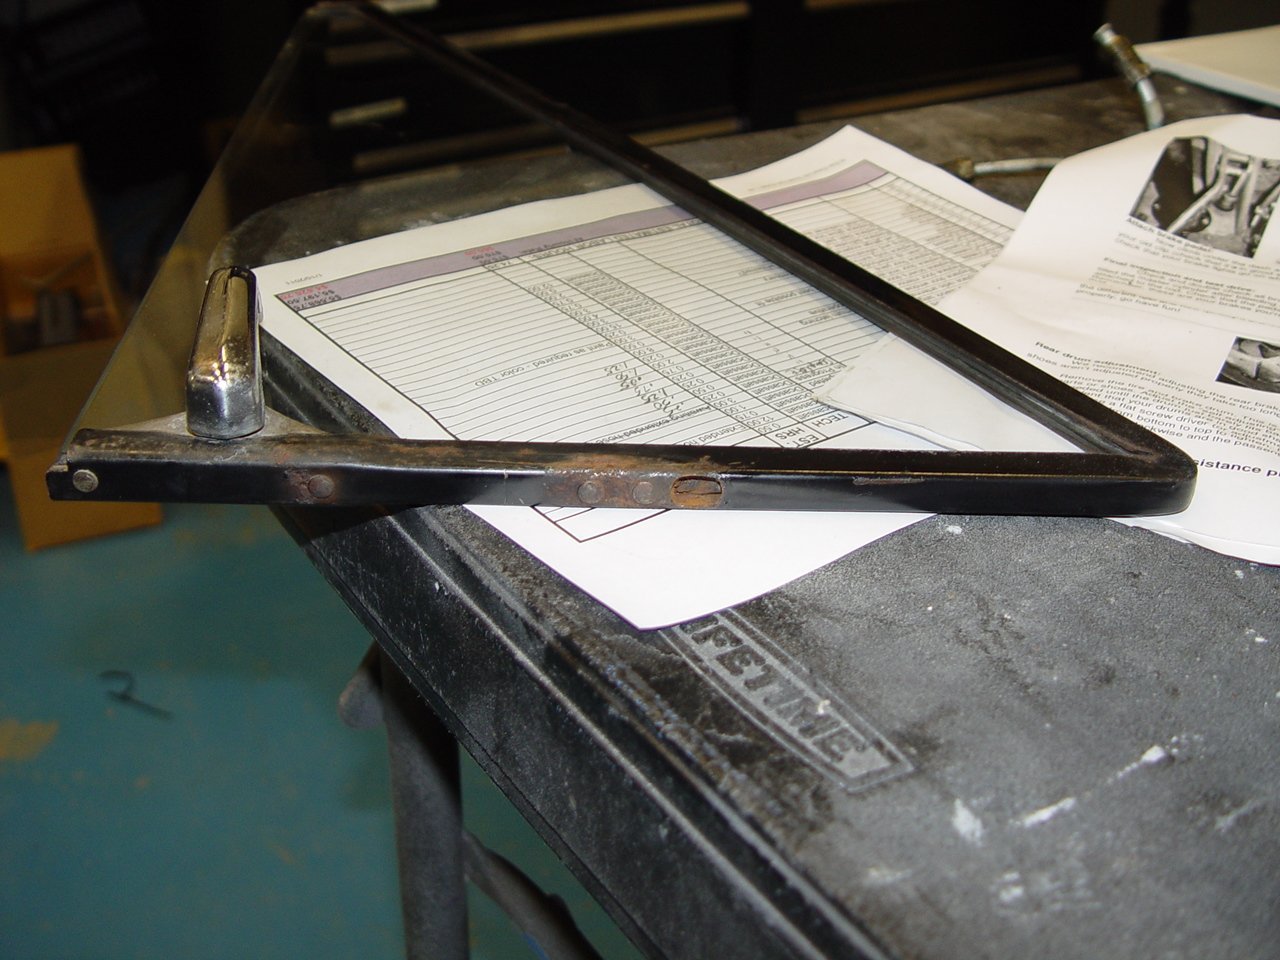
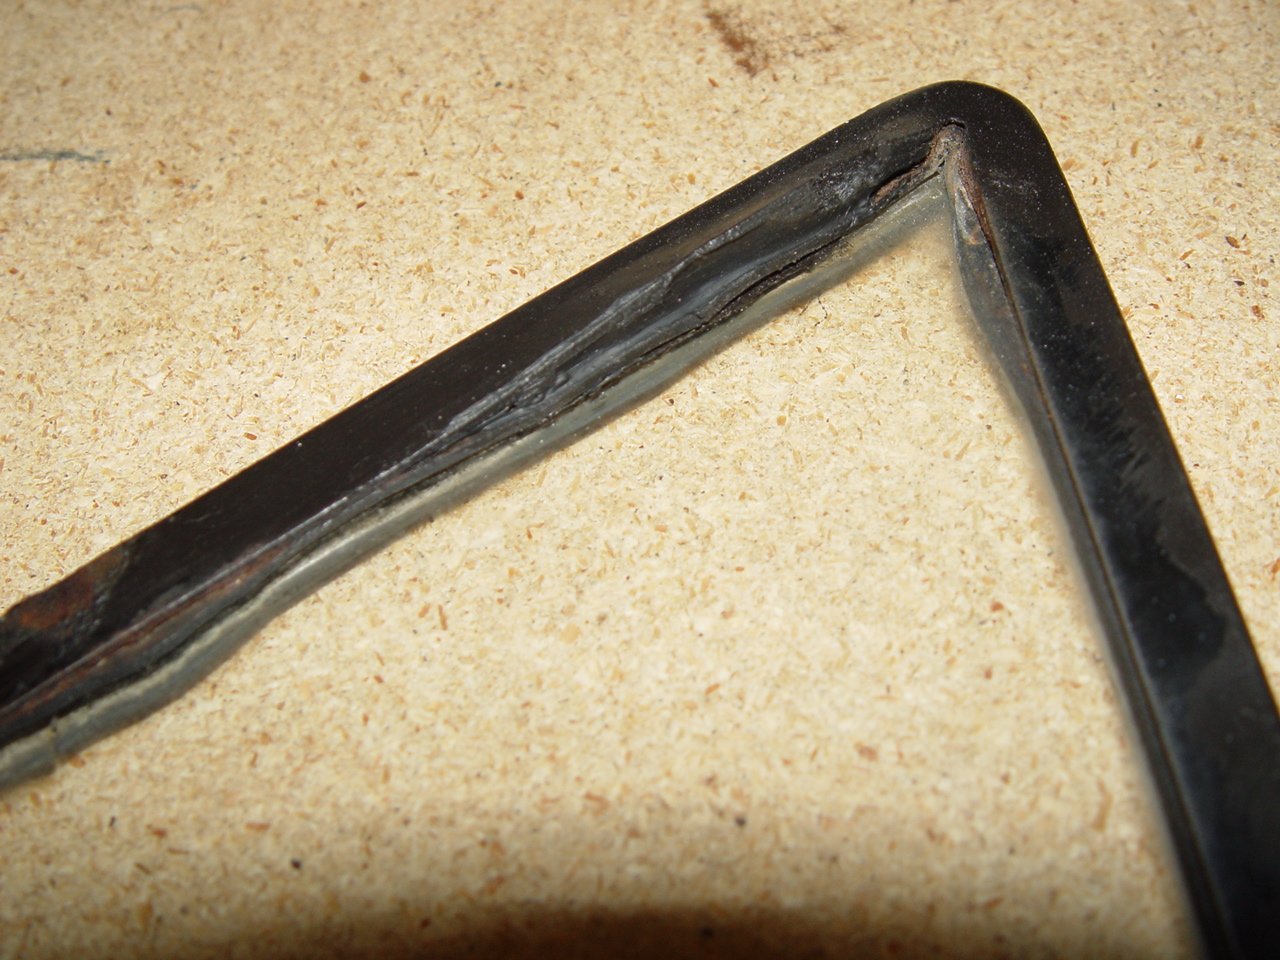
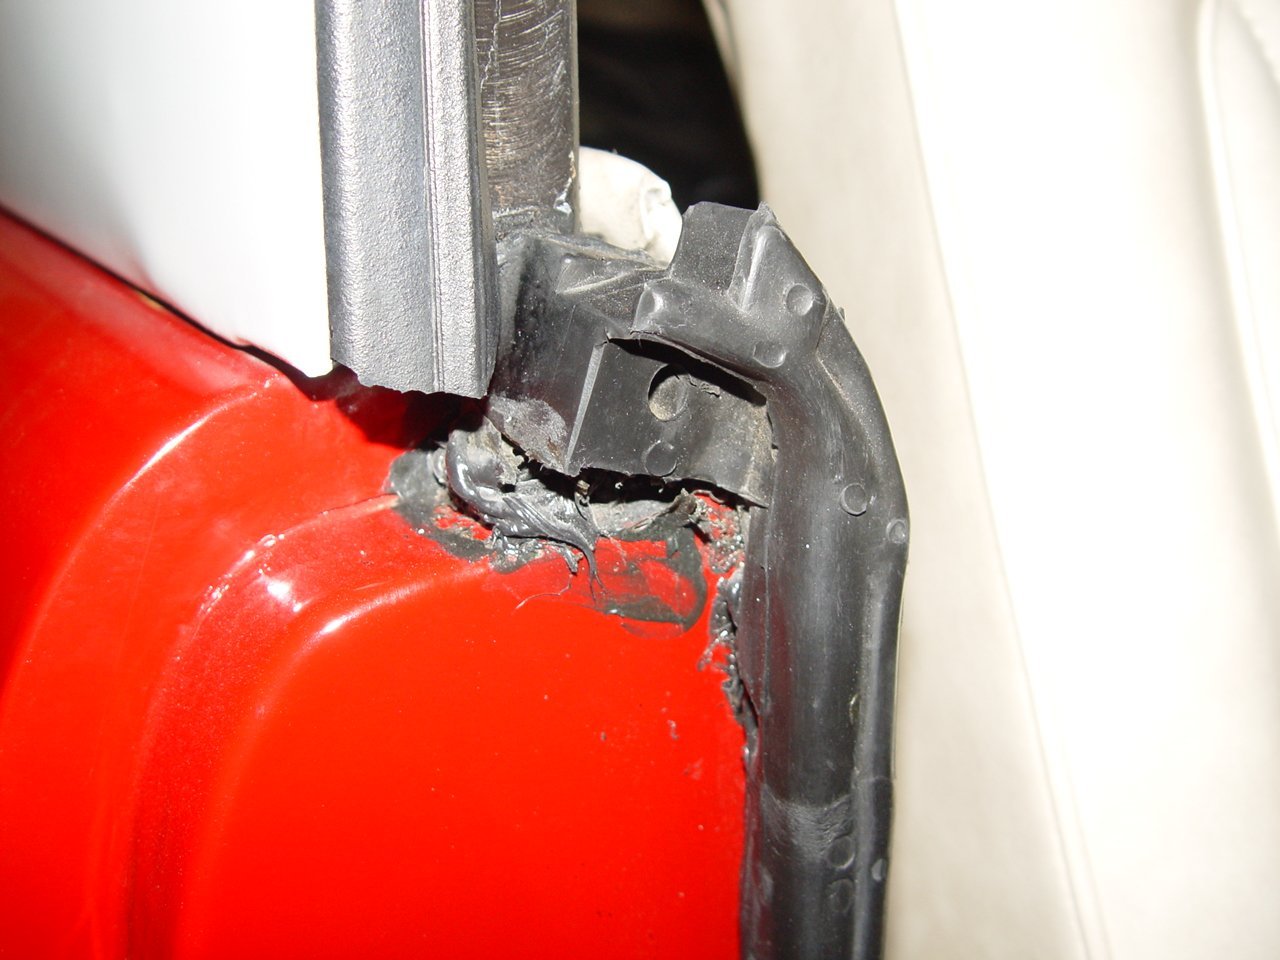
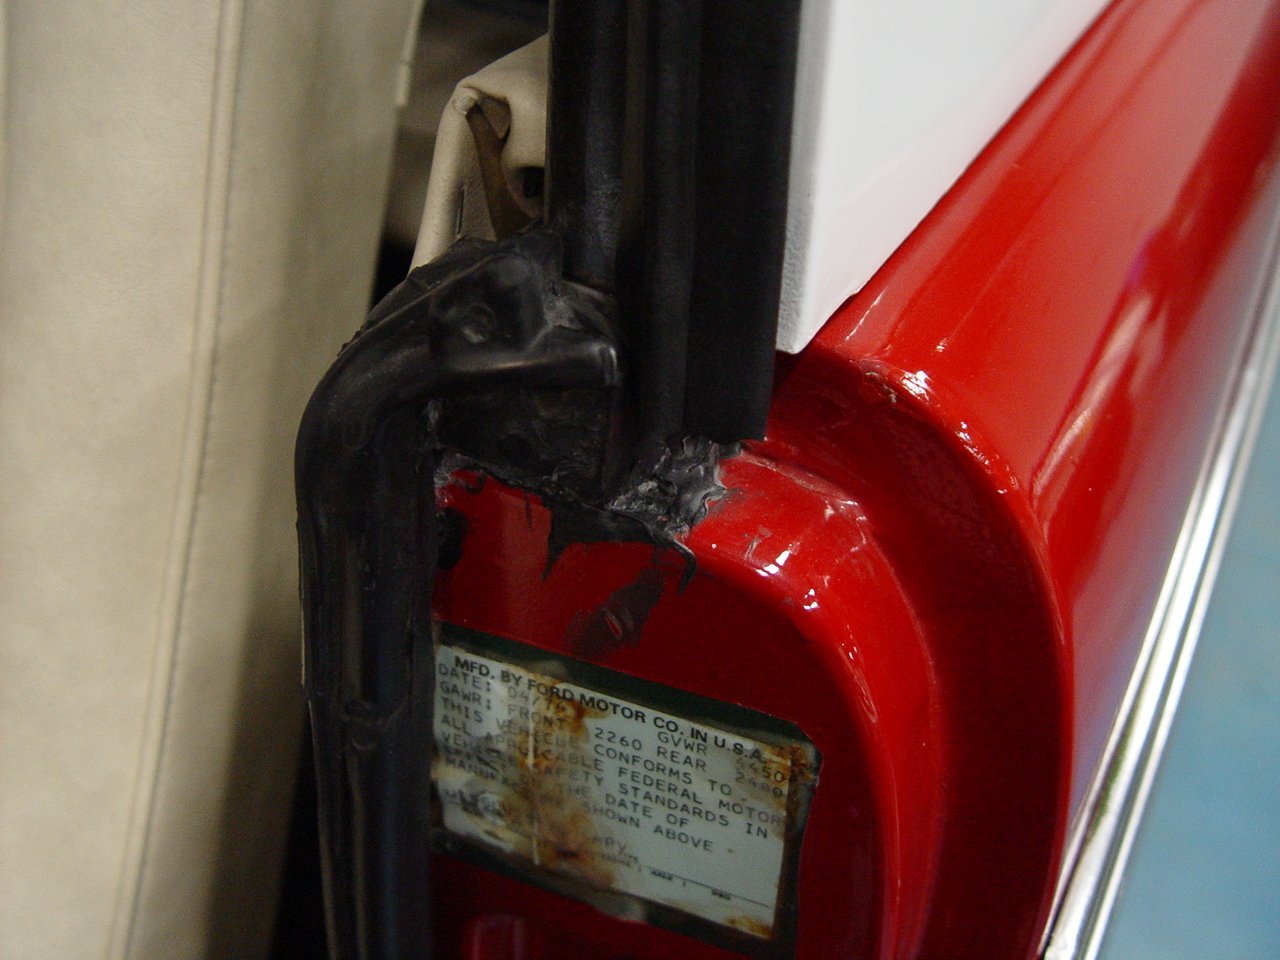
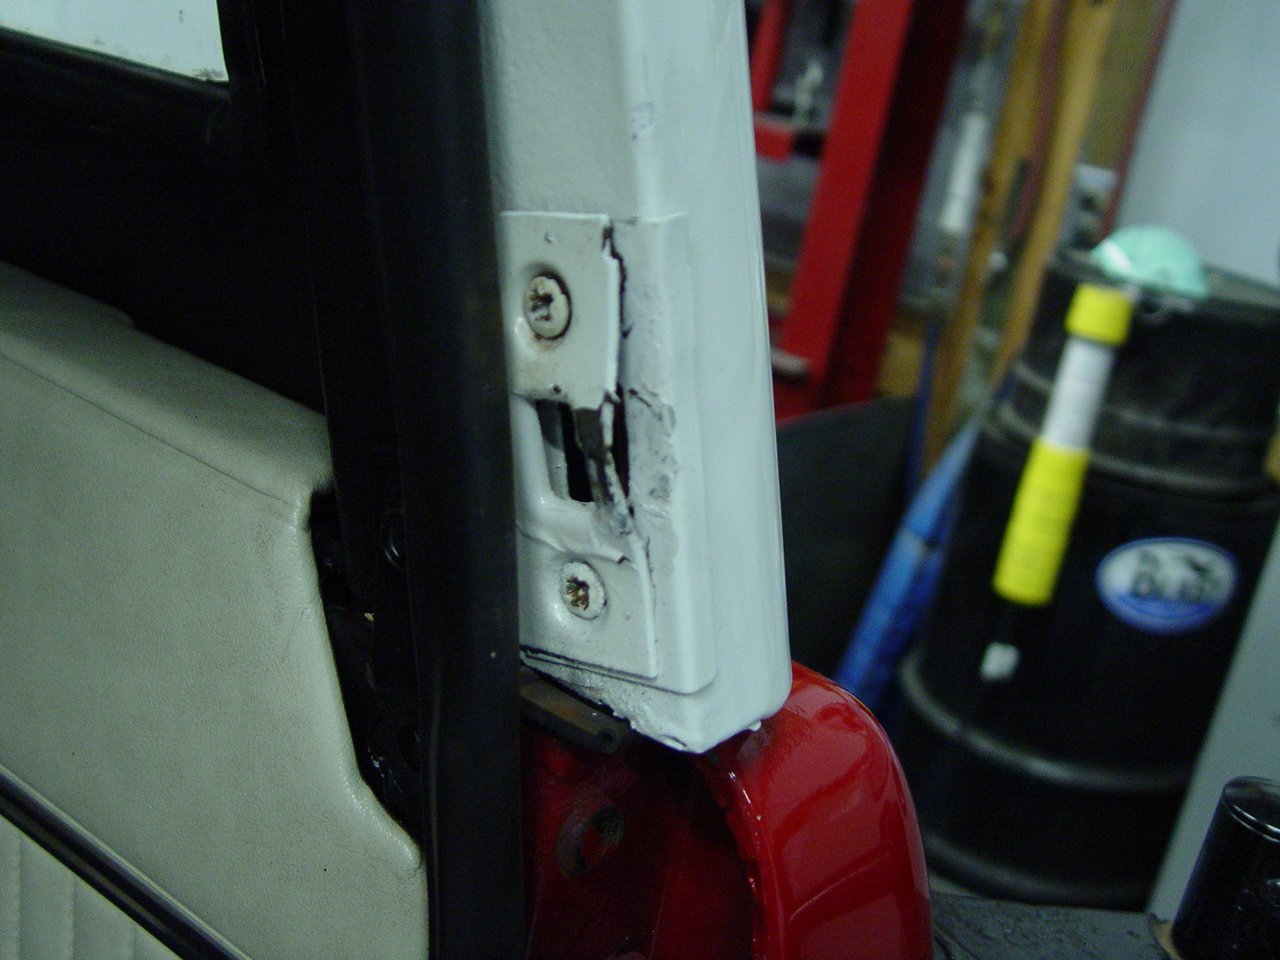
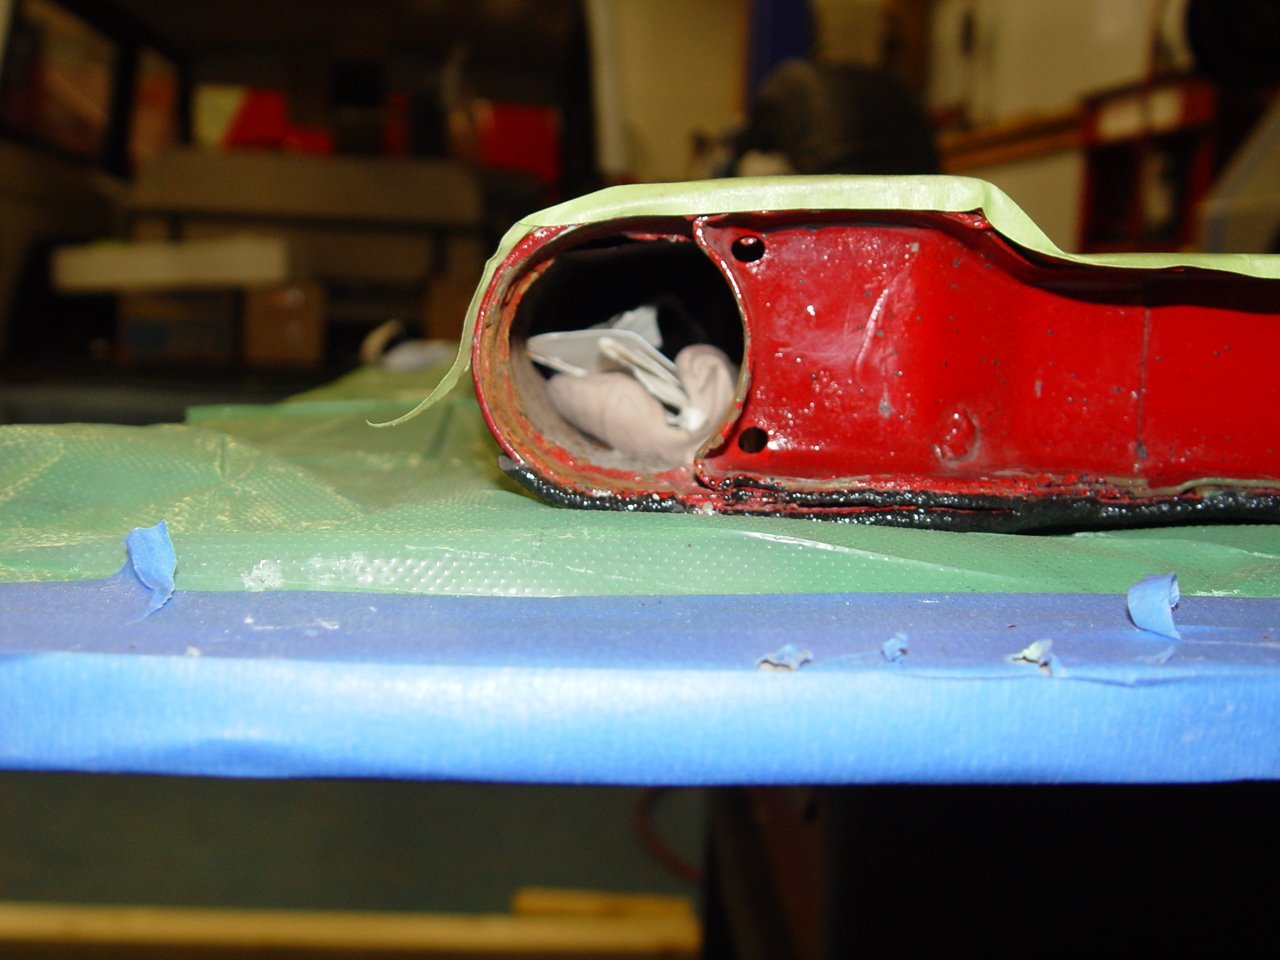
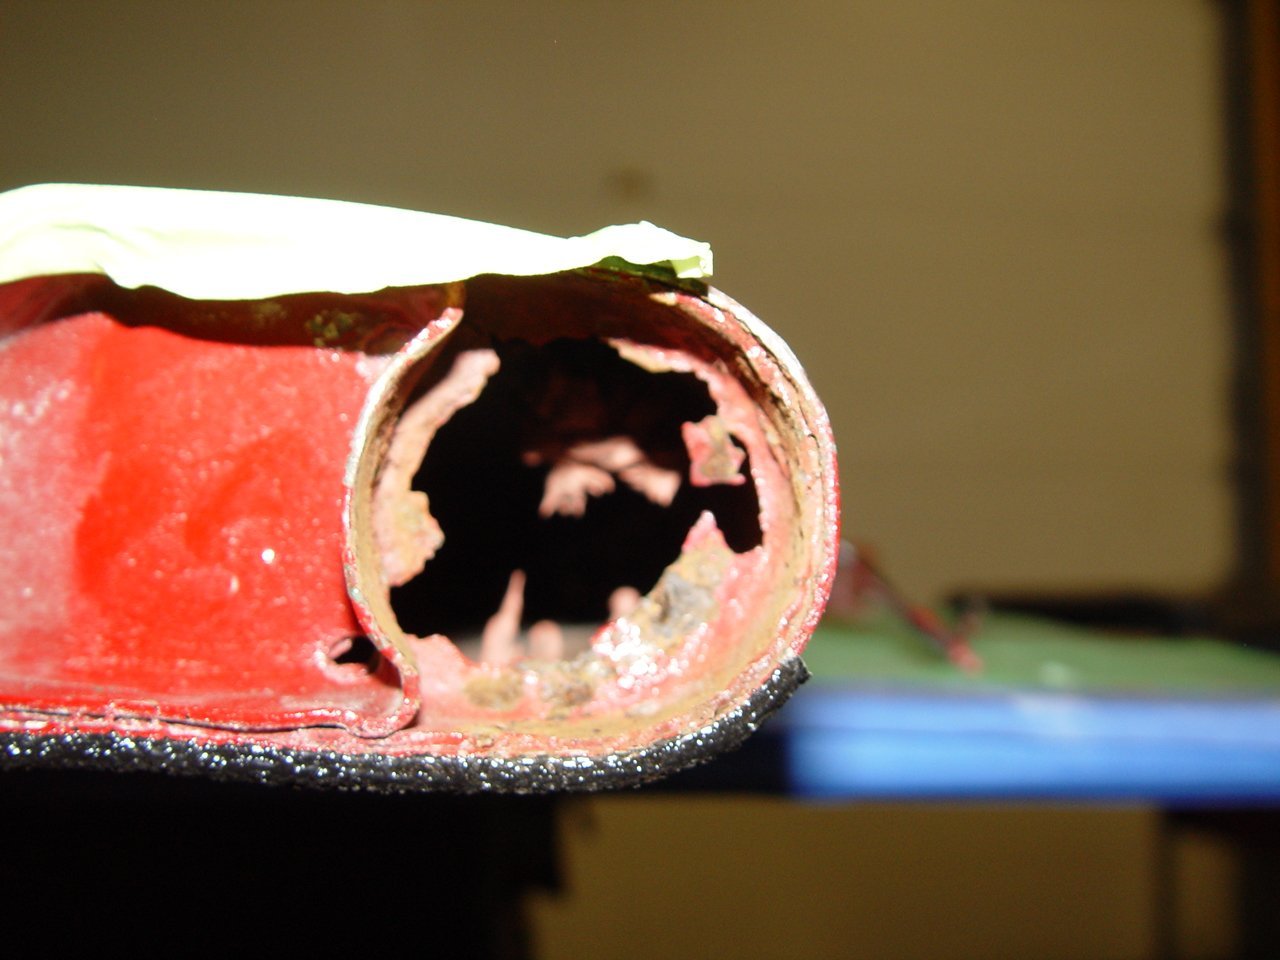
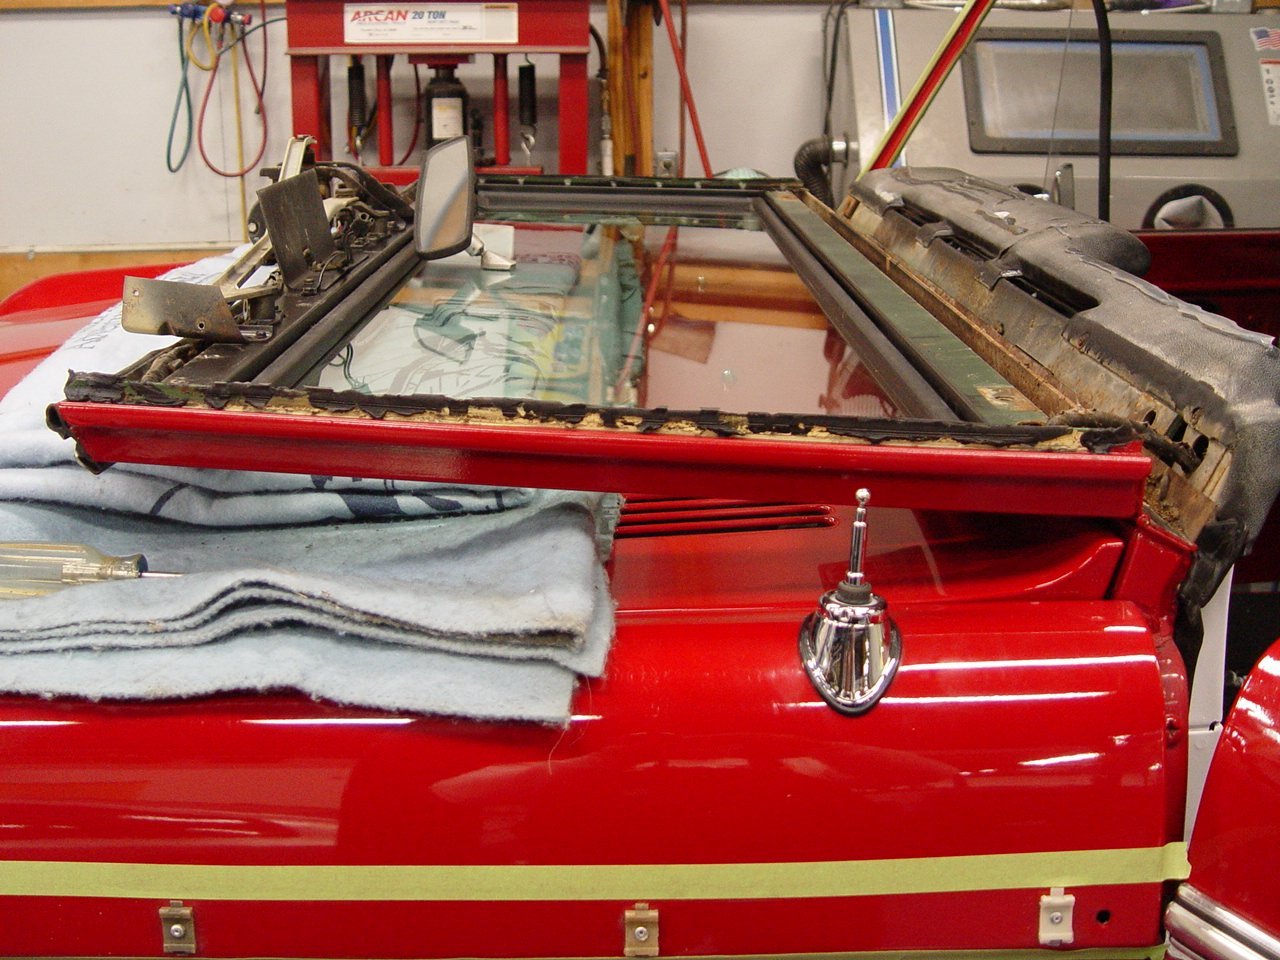
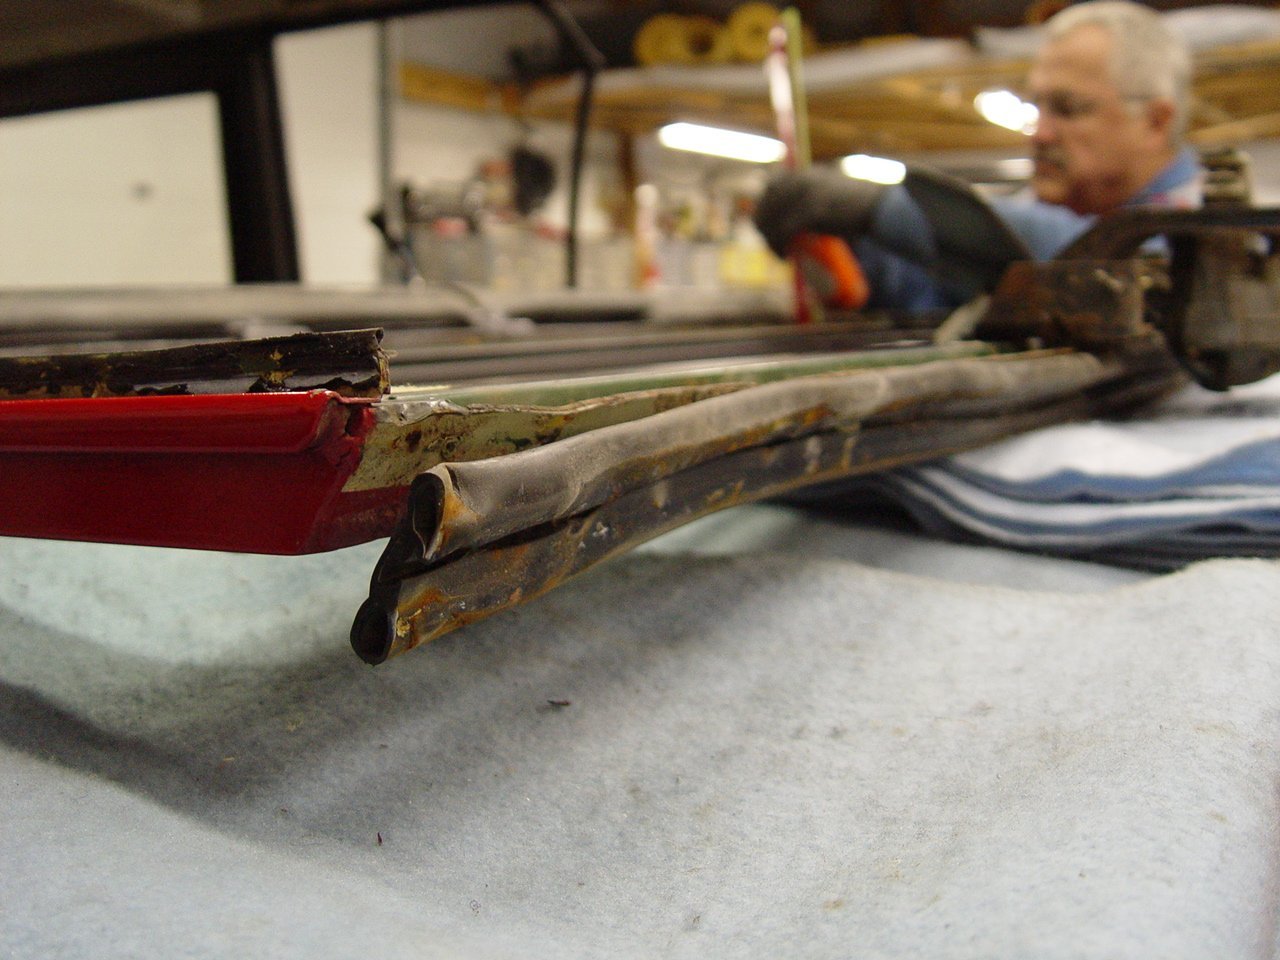
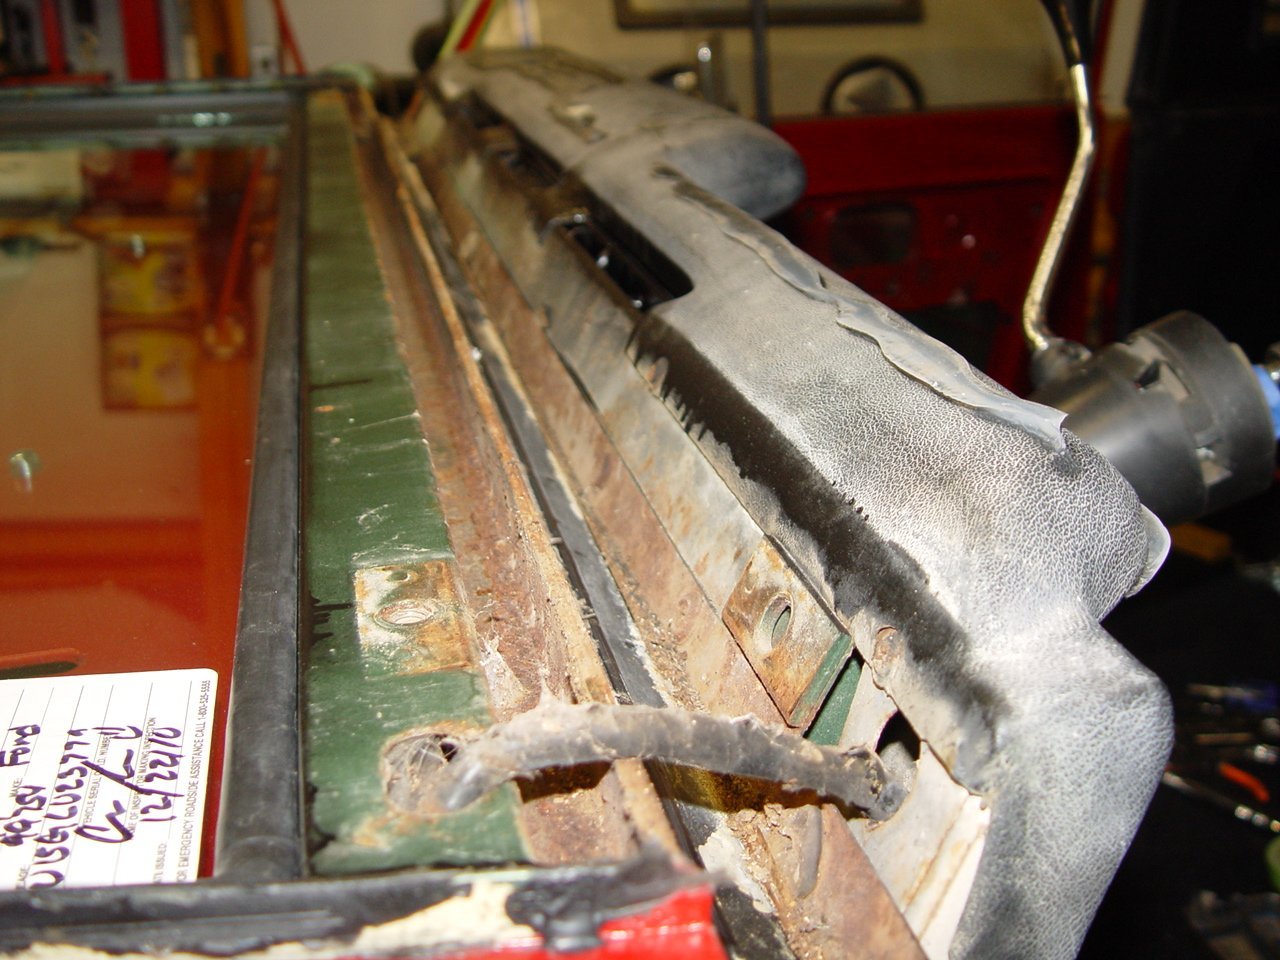
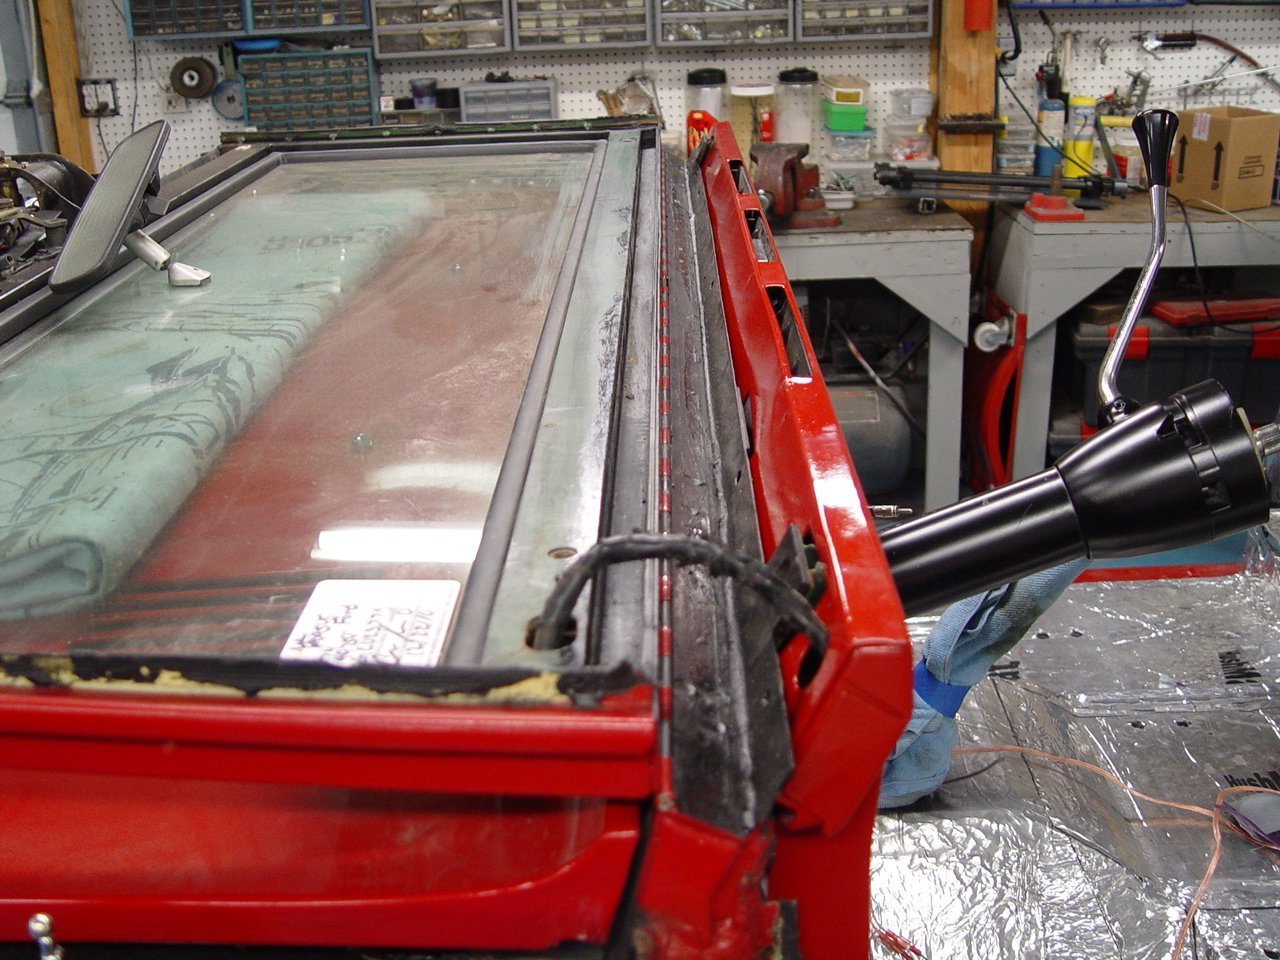
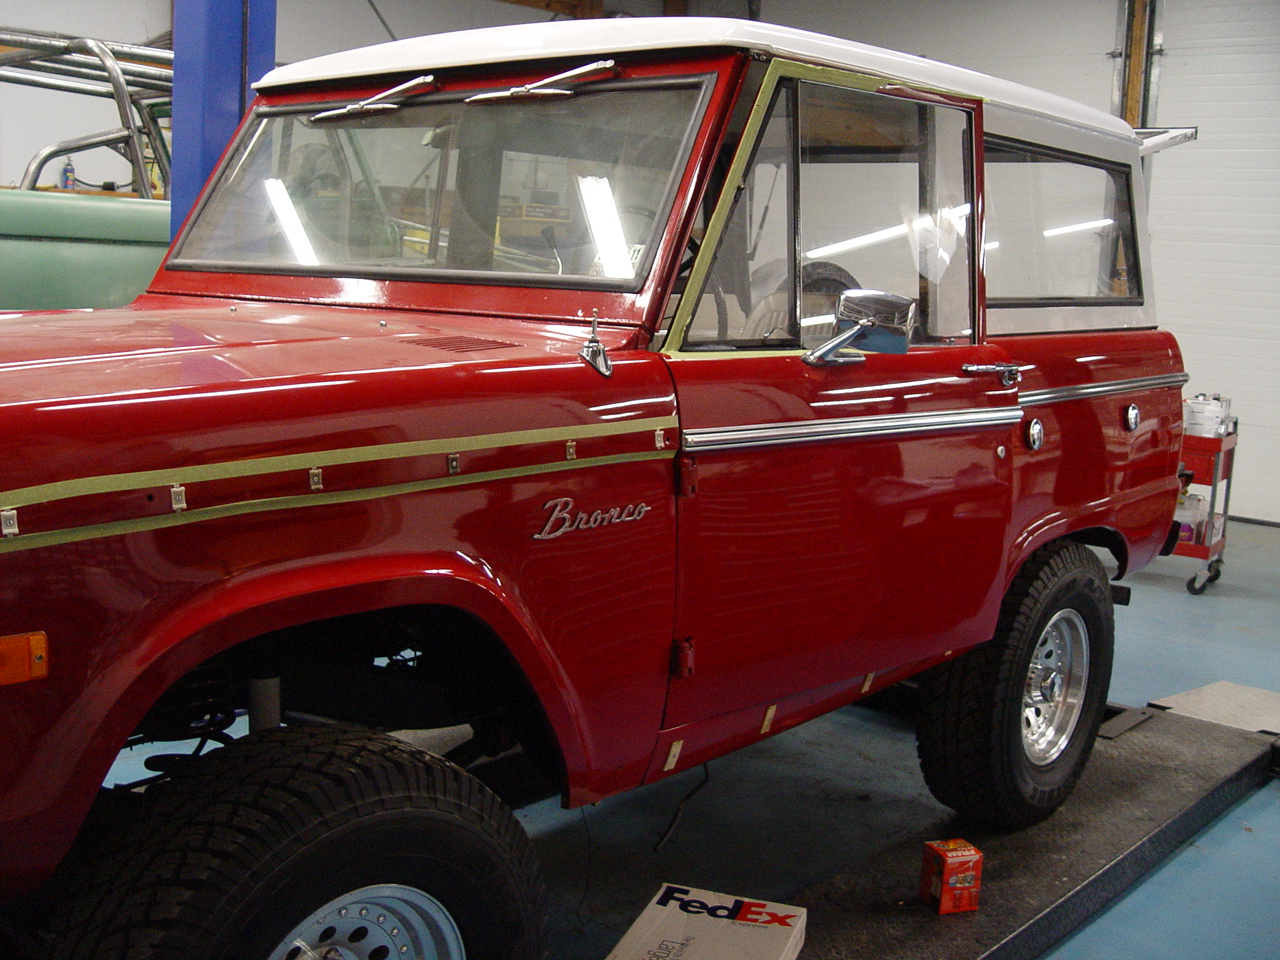
The original scope of work called for us to replace much of the body's stainless steel trim with reproduction parts provided by the owner. We were also asked to replace the vent window weatherstripping seals. Since we had to remove the hardtop in order to accomplish the requested dash work (see Interior section), both the top and bottom windshield weatherstripping seals and the top-to-body seals would also be replaced. As we had already come to expect with Big Red, more was revealed as we started disassembling to perform the assigned tasks.
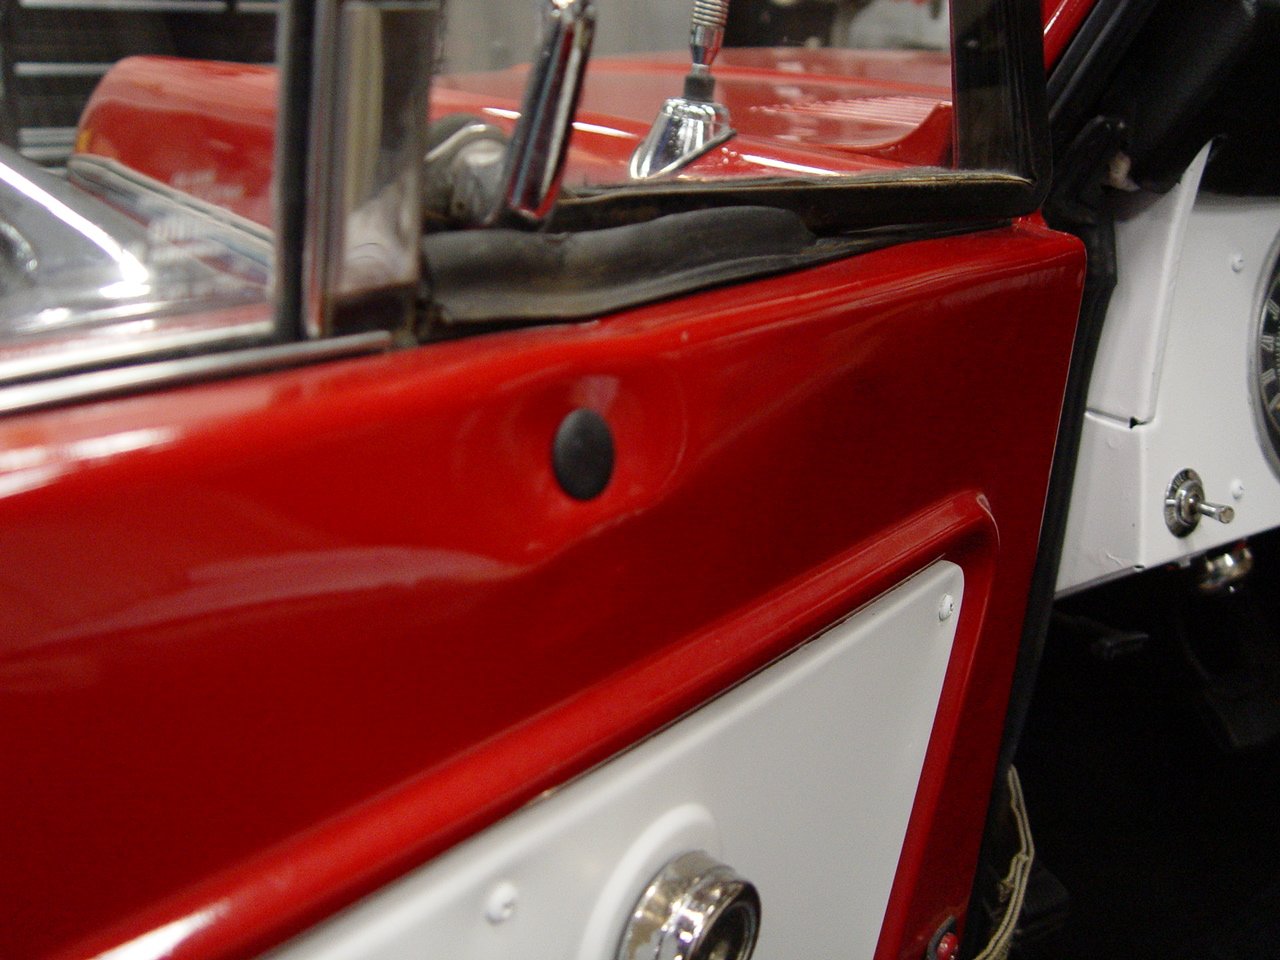
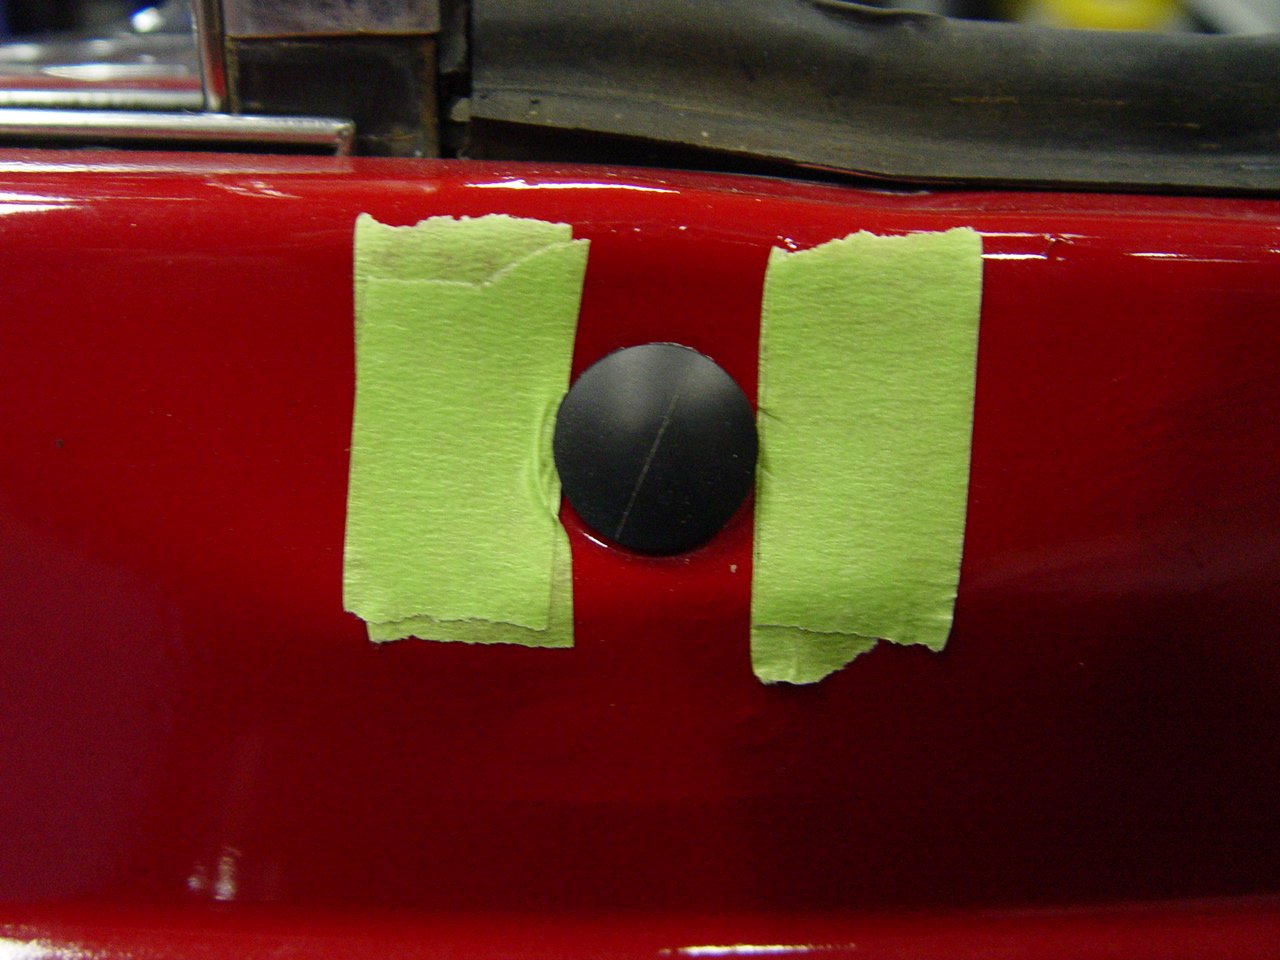
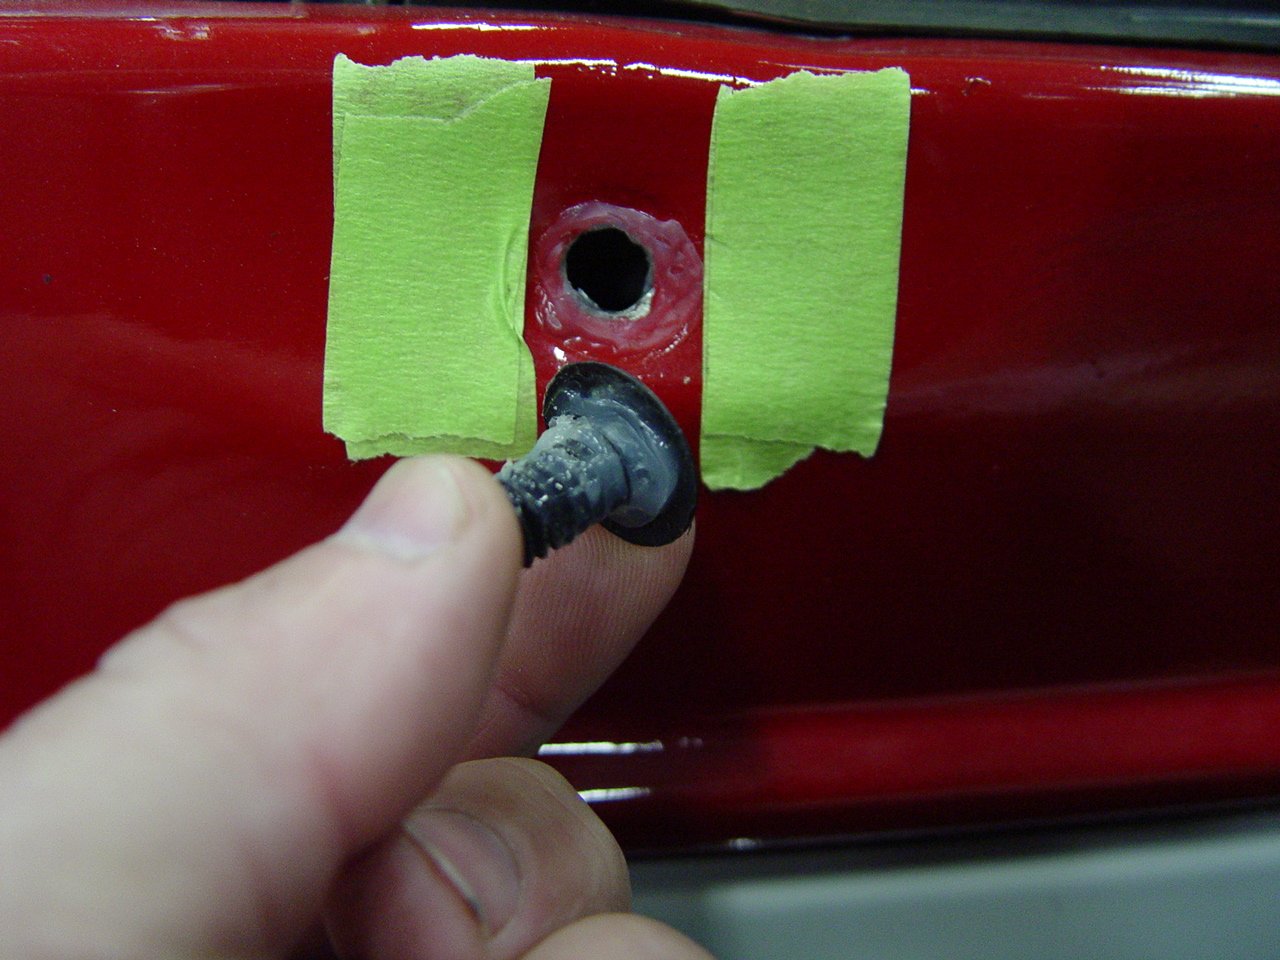
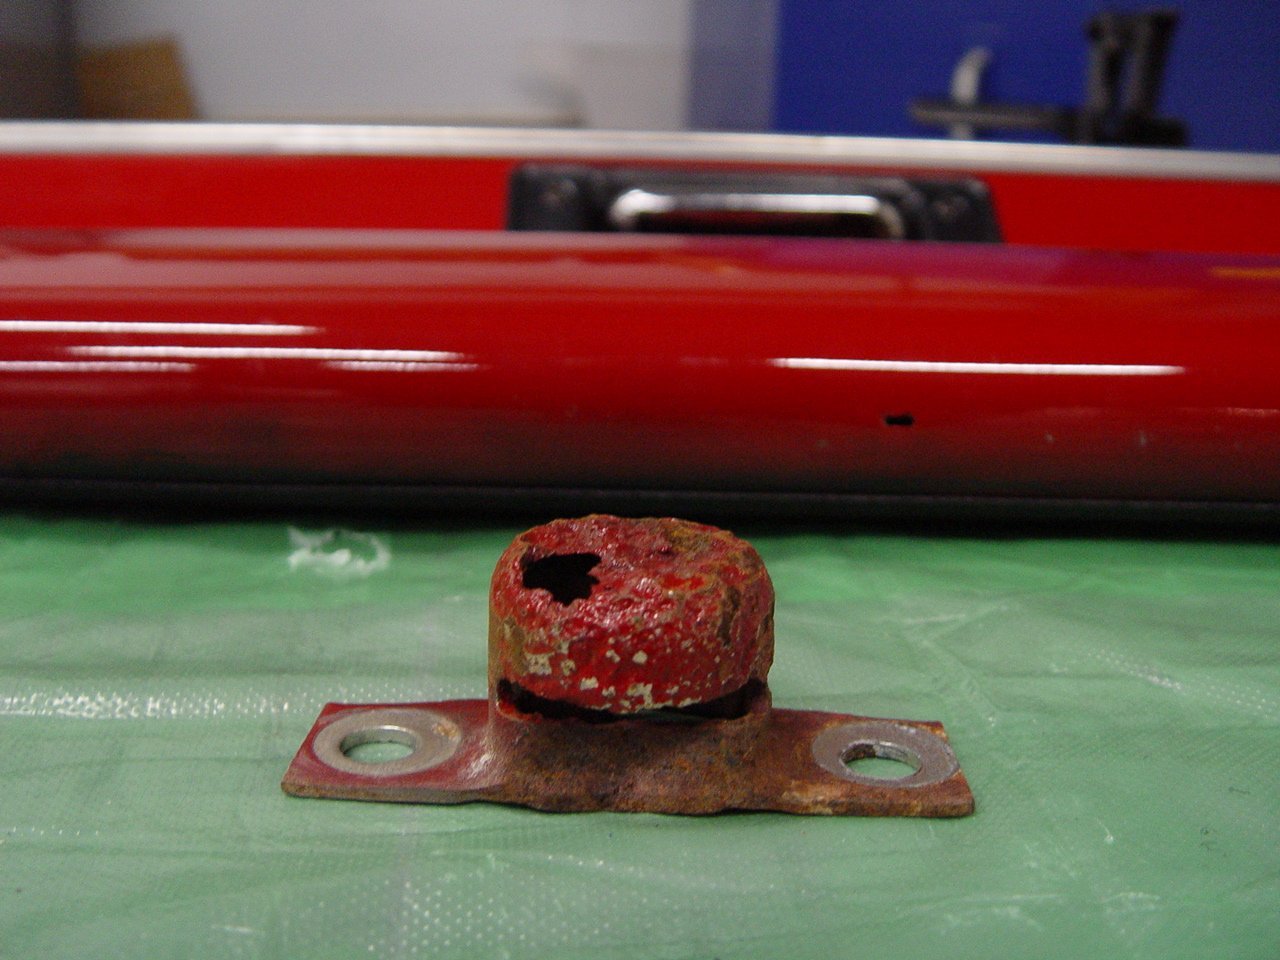
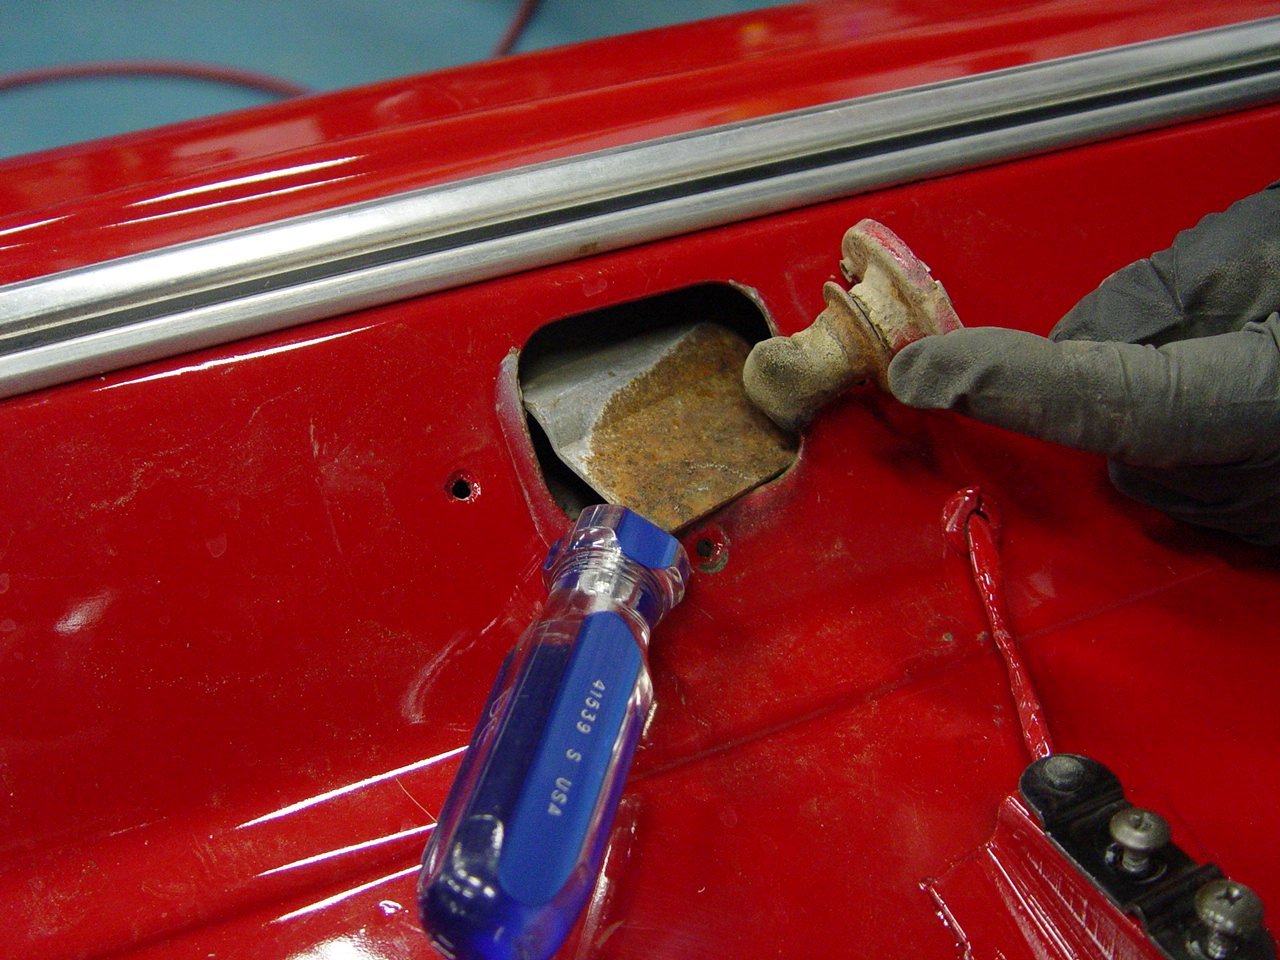
First we found that the black button on the inside top of the driver's door was a jury-rigged plug to cover the hole where a long attachment screw normally resides to secure the rear of the vent window assembly. Since the inside metal of the door was tweaked (from what we have no clue), the standard screw would not work. We'll have to see what we can do to remedy this situation.
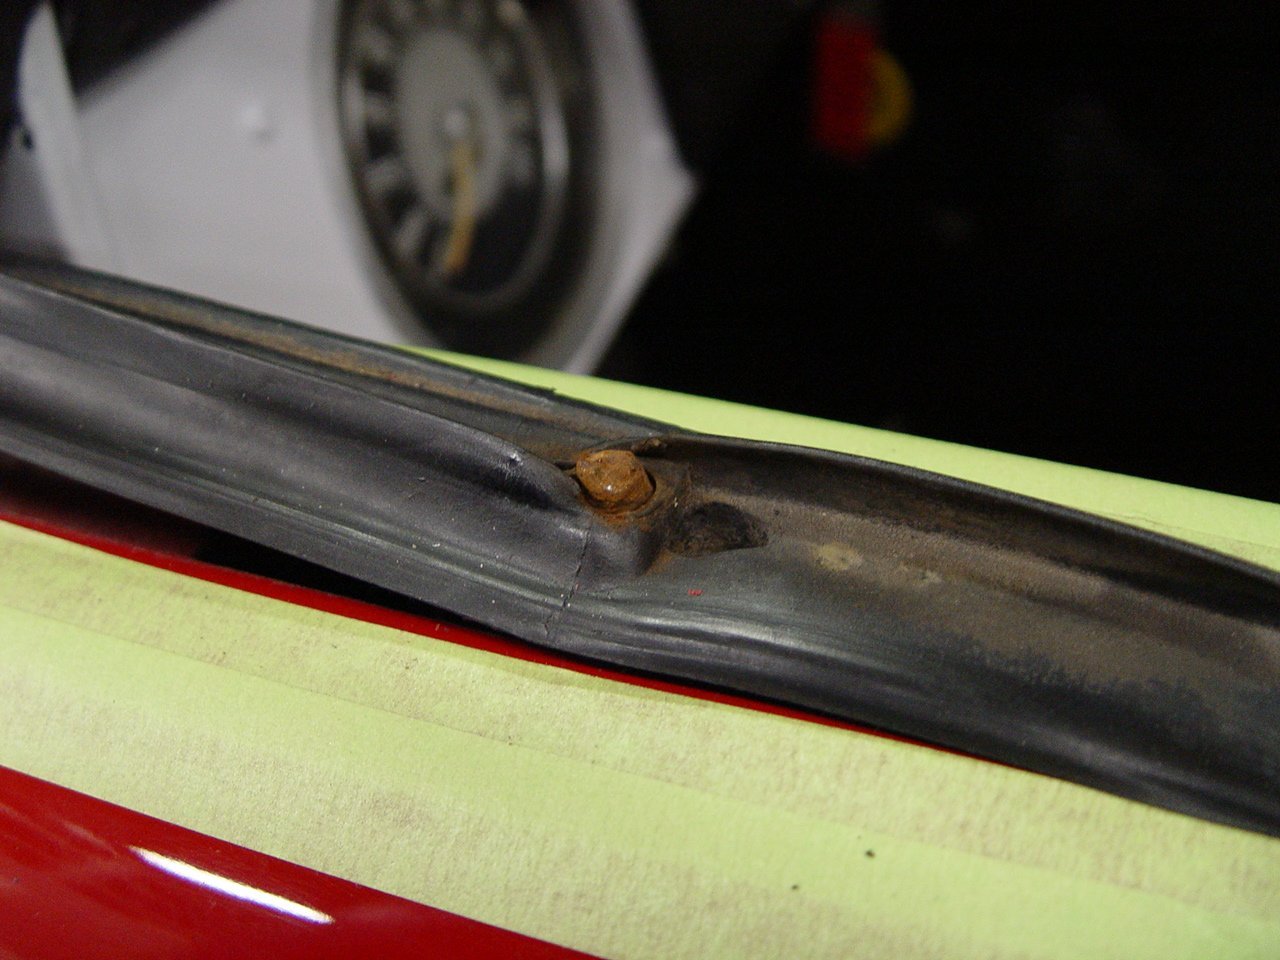
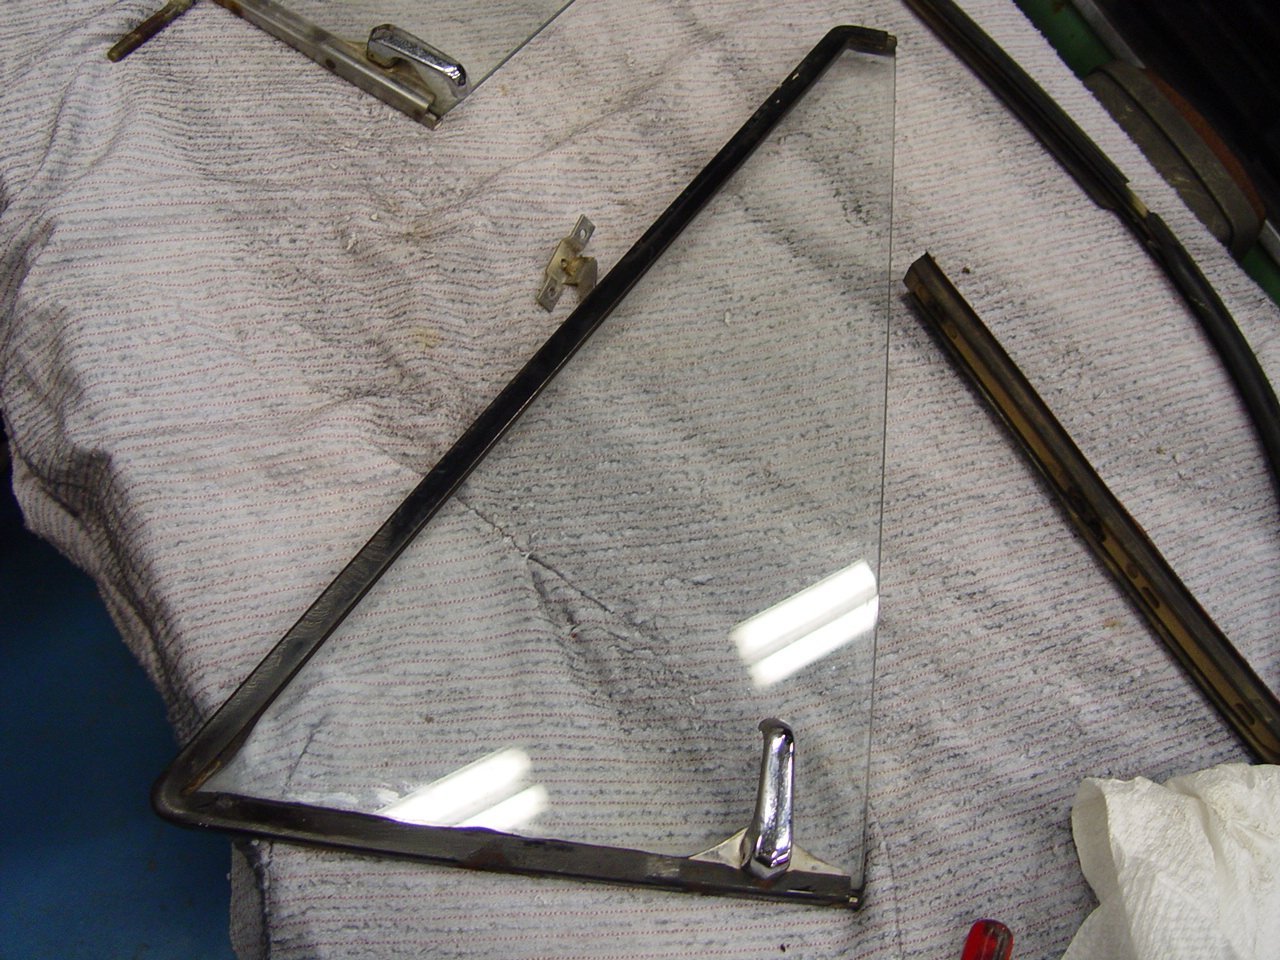
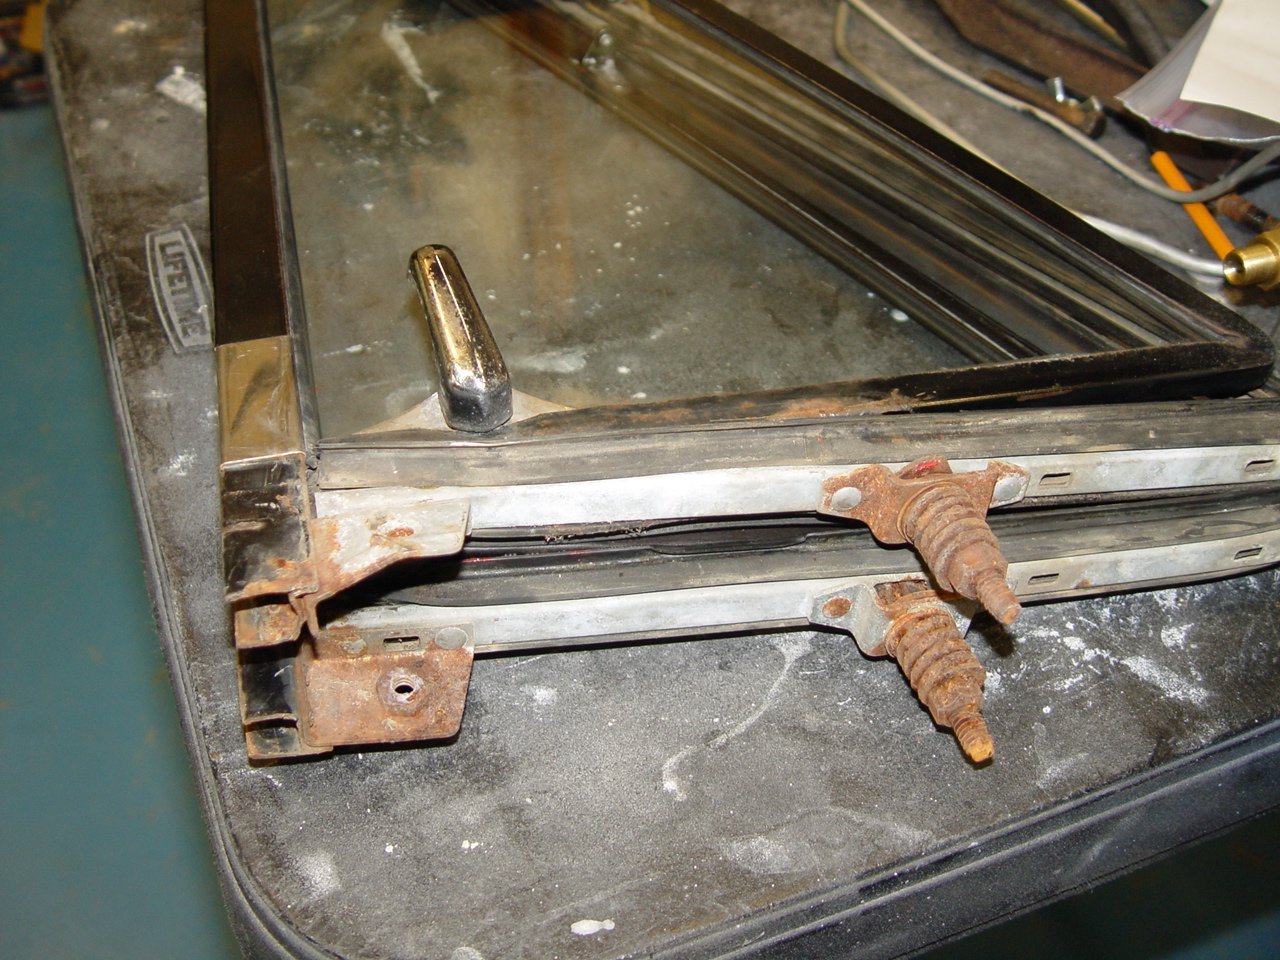
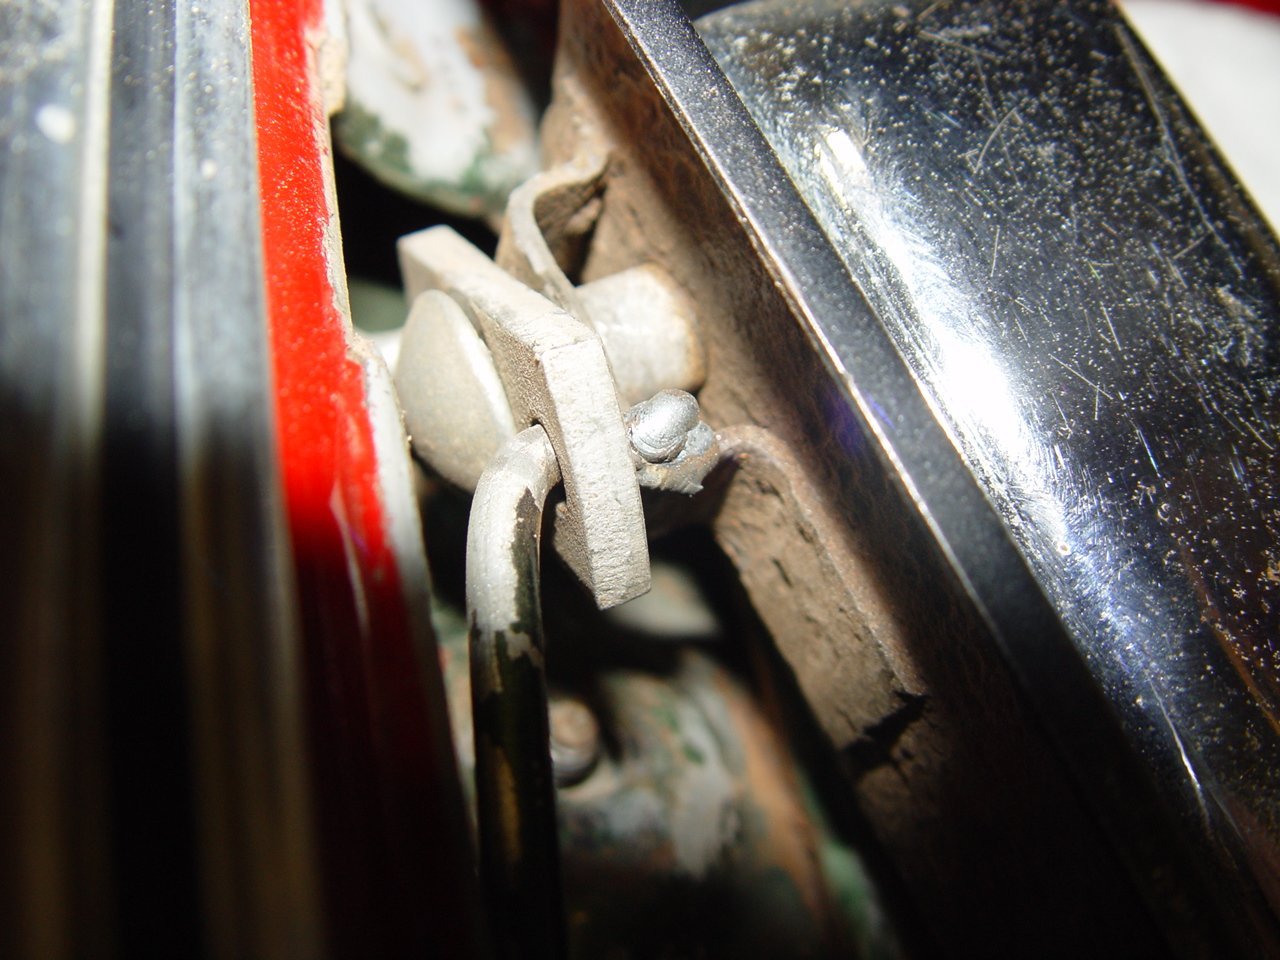
Next, as we removed the vent window assembly, we discovered that the pivot pins that are riveted into each of the vent window channels had rusted away - leaving them free to pivot simply on the remains of the pin sticking into the hole of the window channel. Since we happened to have had two other Bronco projects in the shop at the time (Project Buckshot and Swamp Thing) we had a look at their vent windows and found them to be in the same condition. So, this appears to be a very common problem with Broncos. New pins had to be ordered along with the brackets that hold the latch handles that secure the windows when closed. Since those handles were rust pitted and worn at the pivot points (notice the washer used to shim one of them closed), we elected to replace them as well. Upon closer inspection, the passenger-side vent window channel was found to be rusted through in places. So, a used window assembly (out of which only the window channel was truly worth using) was acquired as a replacement. Since vent window glass was cheaper than the time that would be required to try and save the old glass when we removed them from their channels (required to replace the pivot pin), we simply shattered the old glass to expedite disassembly and replaced them with new. With new glass, pivot pins, springs, latch brackets and handles, the assemblies will essentially be fully rebuilt.
Big Red's new owner complained of a bad fit with both the tailgate and lift gate. Note in the photo how the lift gate latch plates have been bent inwards to actually catch. We'll see if we can remedy this poor fit by properly aligning the top when it is reinstalled.
The tailgate was another story. First we removed it to replace the pivots with some rattle-free units provided by the owner. We found that the original pivots were rotted through. We also found that the tailgate pivot holes had rusted through (you're not supposed to be able to see through) and you could see "bondo worms" inside the bottom of the tailgate. Obviously there had been some serious rust issues that were "repaired" by the cheapest means available. But, we'd leave well enough alone with the tailgate - except for shaking the rust out of it. When we started shaking (and dumping a boatload of rust), we heard a very loud noise inside. What we eventually coaxed out through the latch handle opening was a large heavy gauge backing plate intended for the spare tire mount's latch. Rather than attempt to unbolt the latch and reattach it using this backing plate, we just set the plate aside to give back to the owner when we're finished. If you look closely at one of the pictures, you'll see another jury-rigged repair we found in the latch. Someone elected to weld a bead on the end of the actuator rod rather than insert a cotter pin. Again, we left well enough alone...but this also is a big reason why we passed on trying to remount the spare tire latch using the backing plate. There just wasn't sufficient access without being able to remove the tailgate latch because of the welded actuator rod. See how cheesy repairs cascade into other problems?
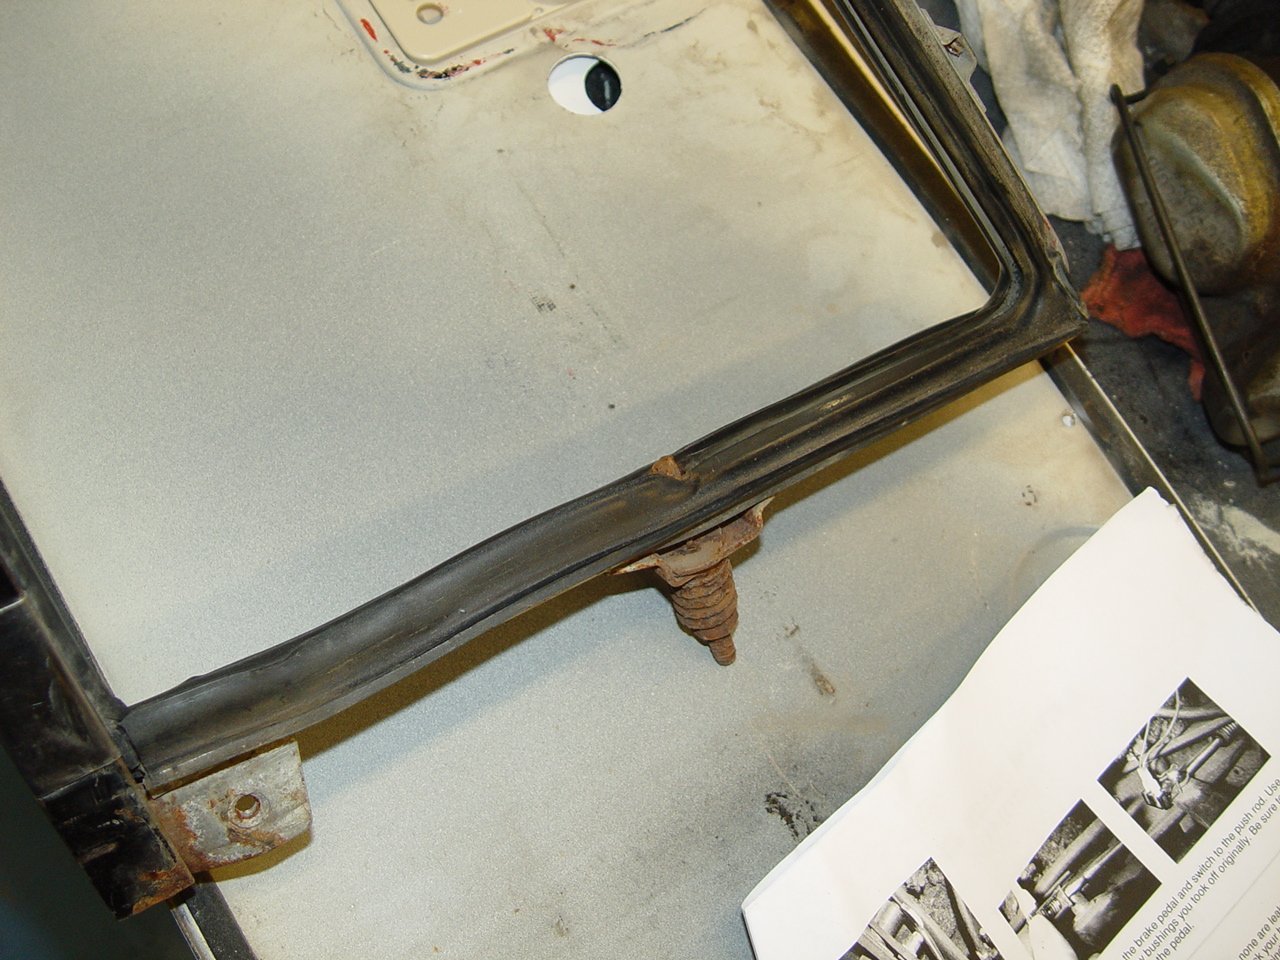
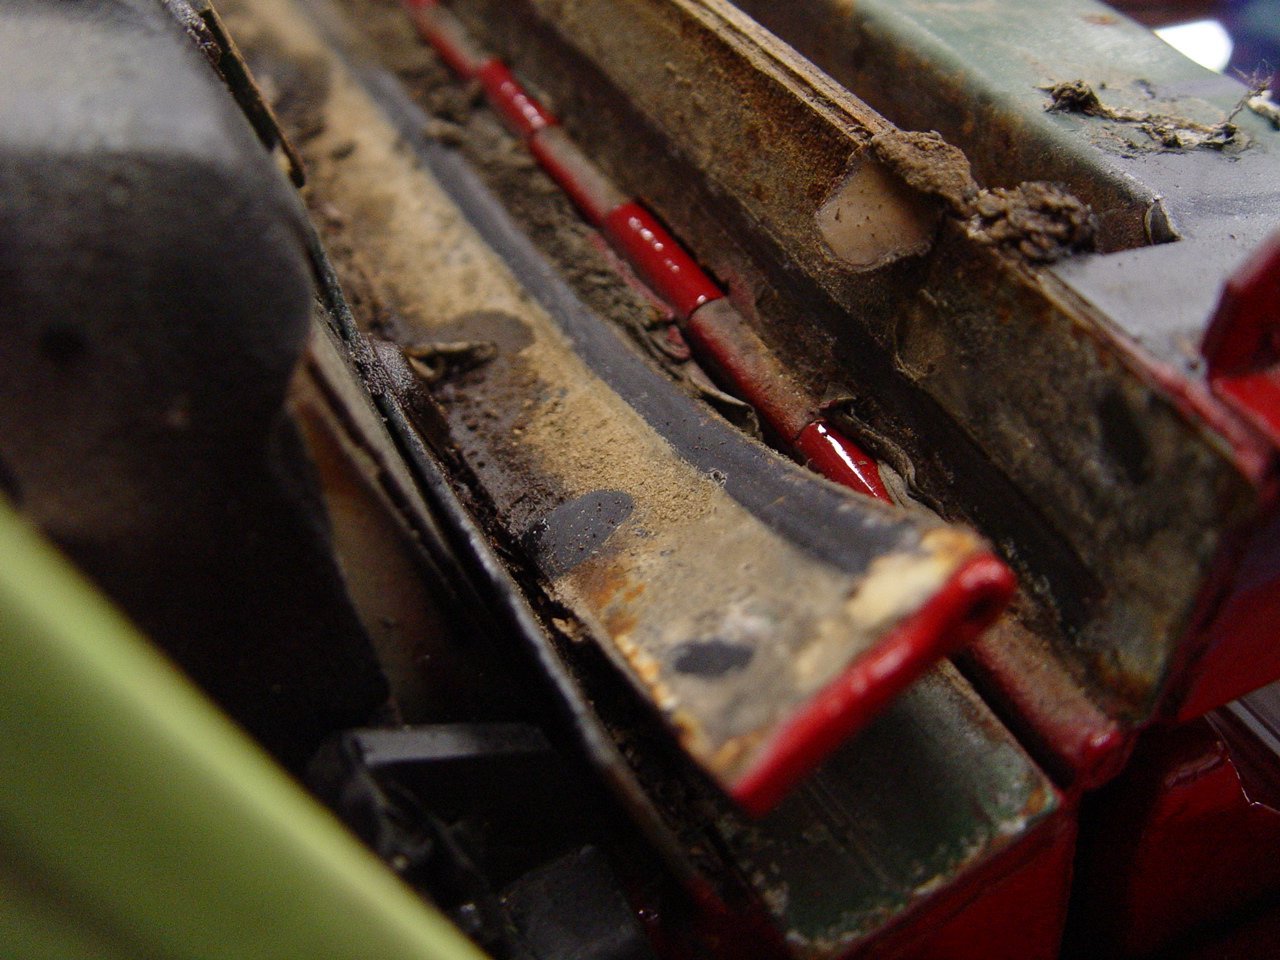
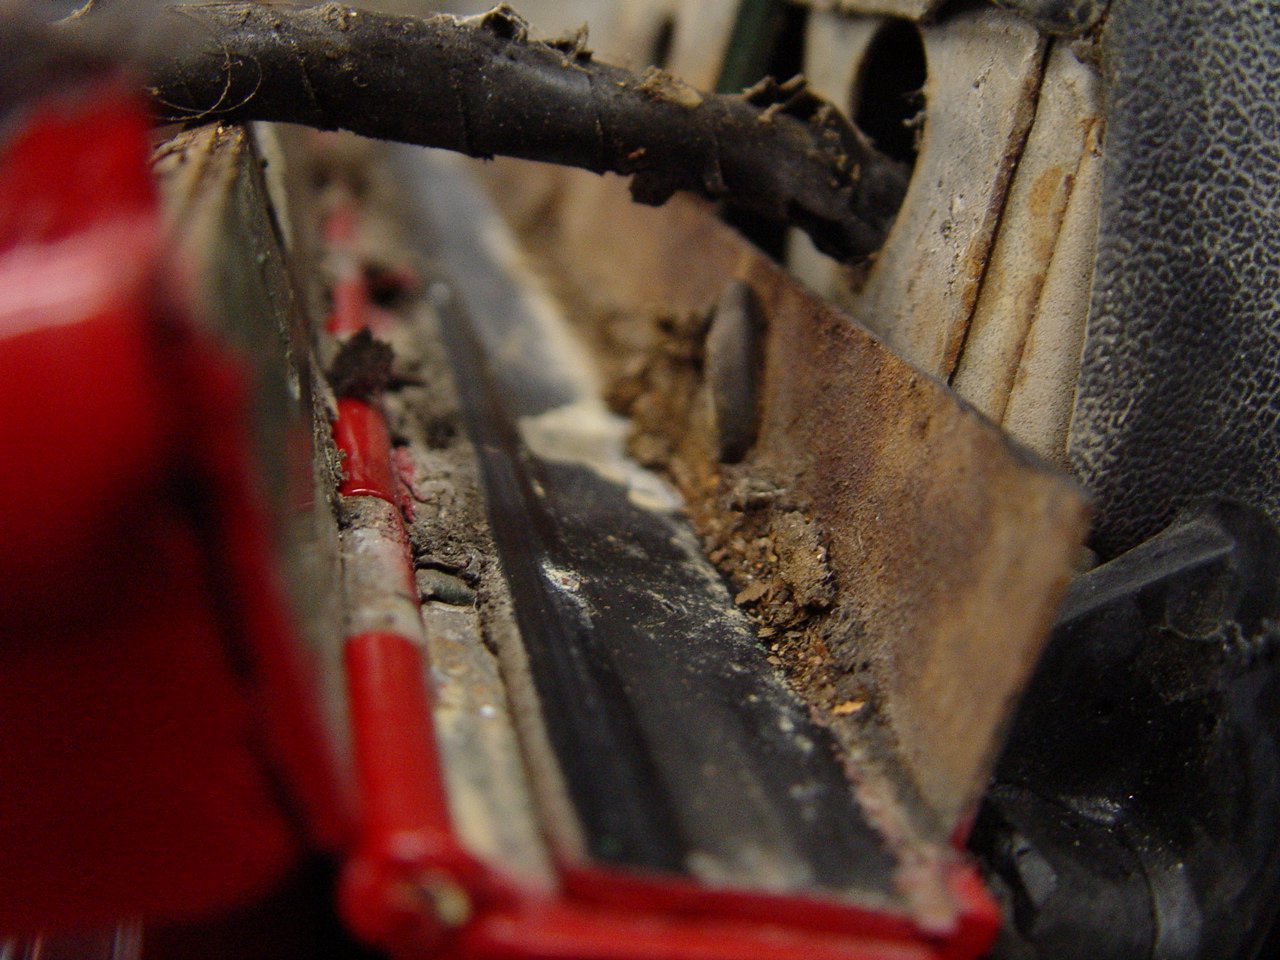
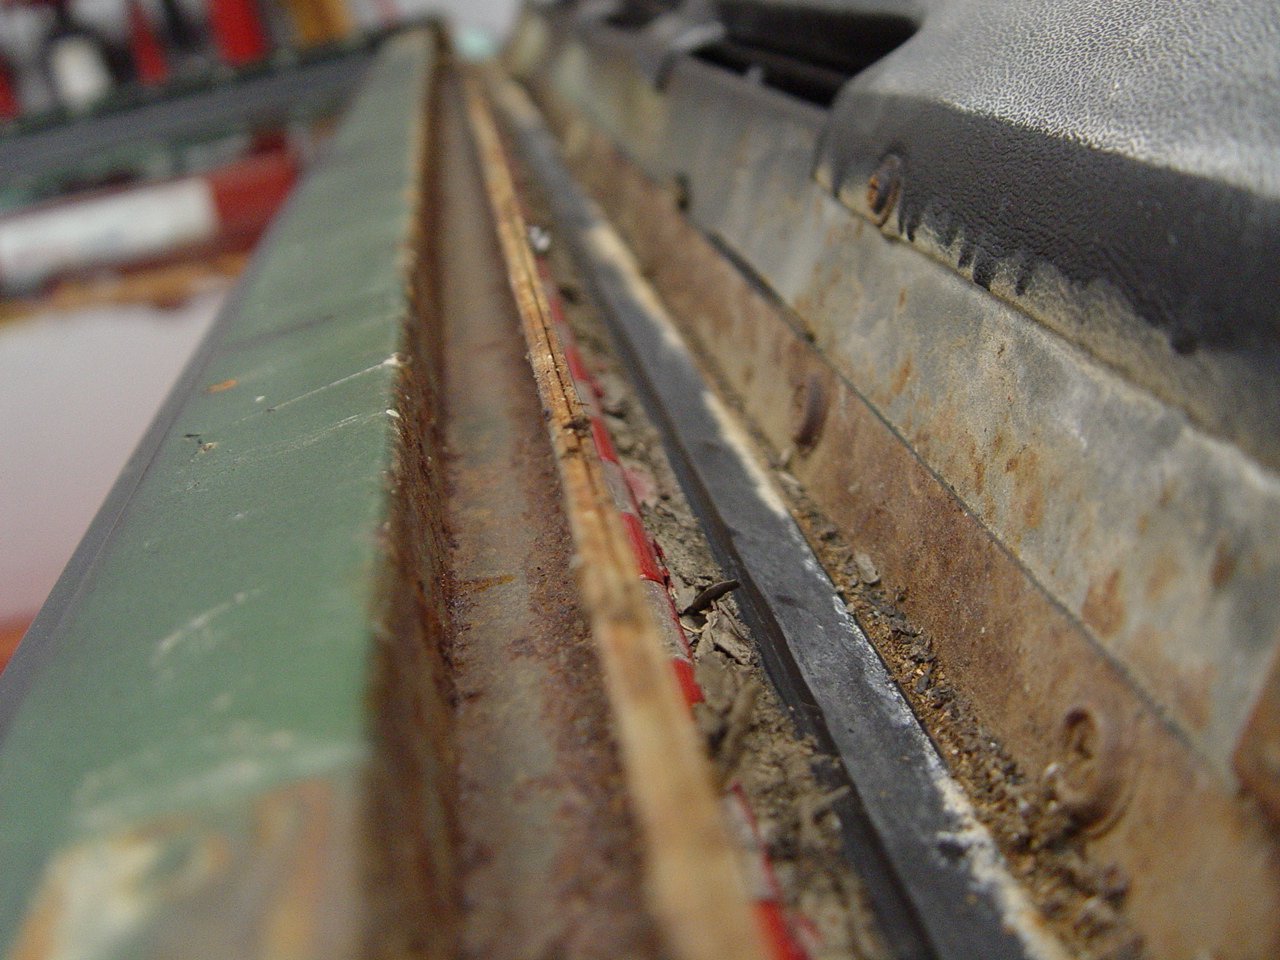
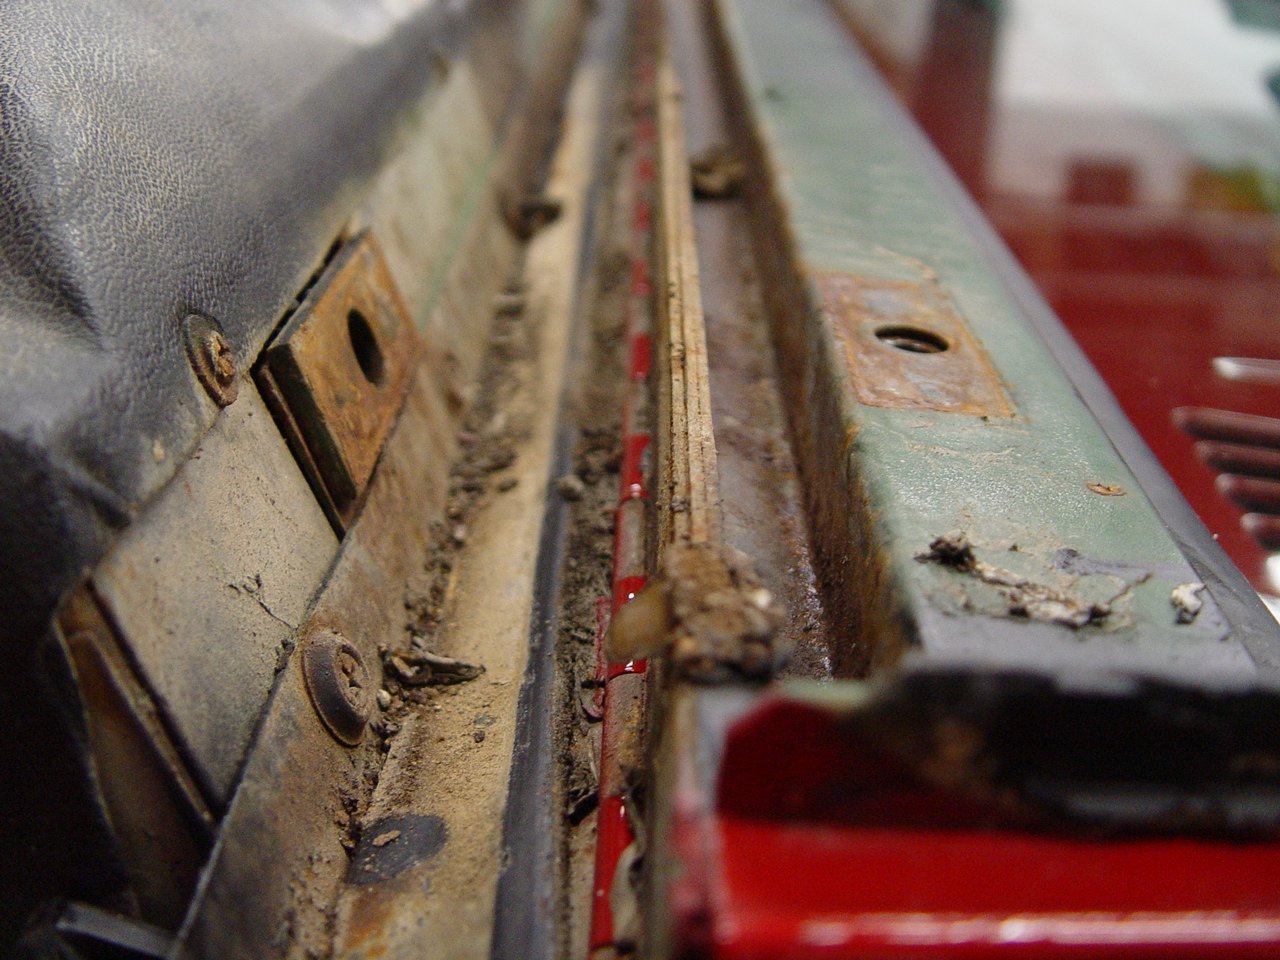
When we lowered the windshield (required in order to remove the dash), we found a considerable amount of rust in the bottom windshield channel. This was our first real clue that the prior "restoration" was really nothing more than a quick dress-up in order to sell it at auction. We cleaned out the channel, treated it for rust prevention and coated everything with POR-15 before installing new weatherstripping seals.
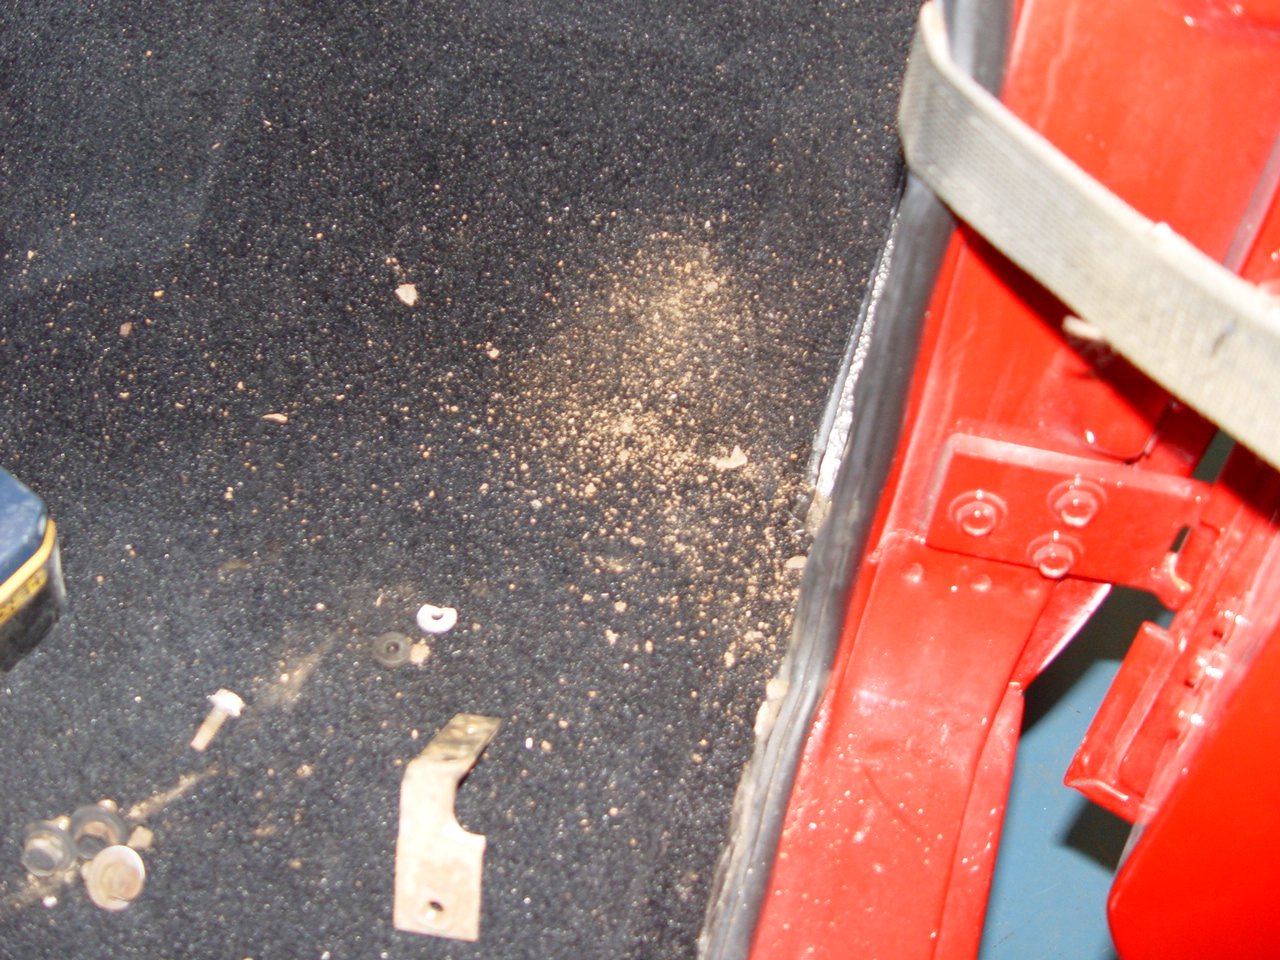
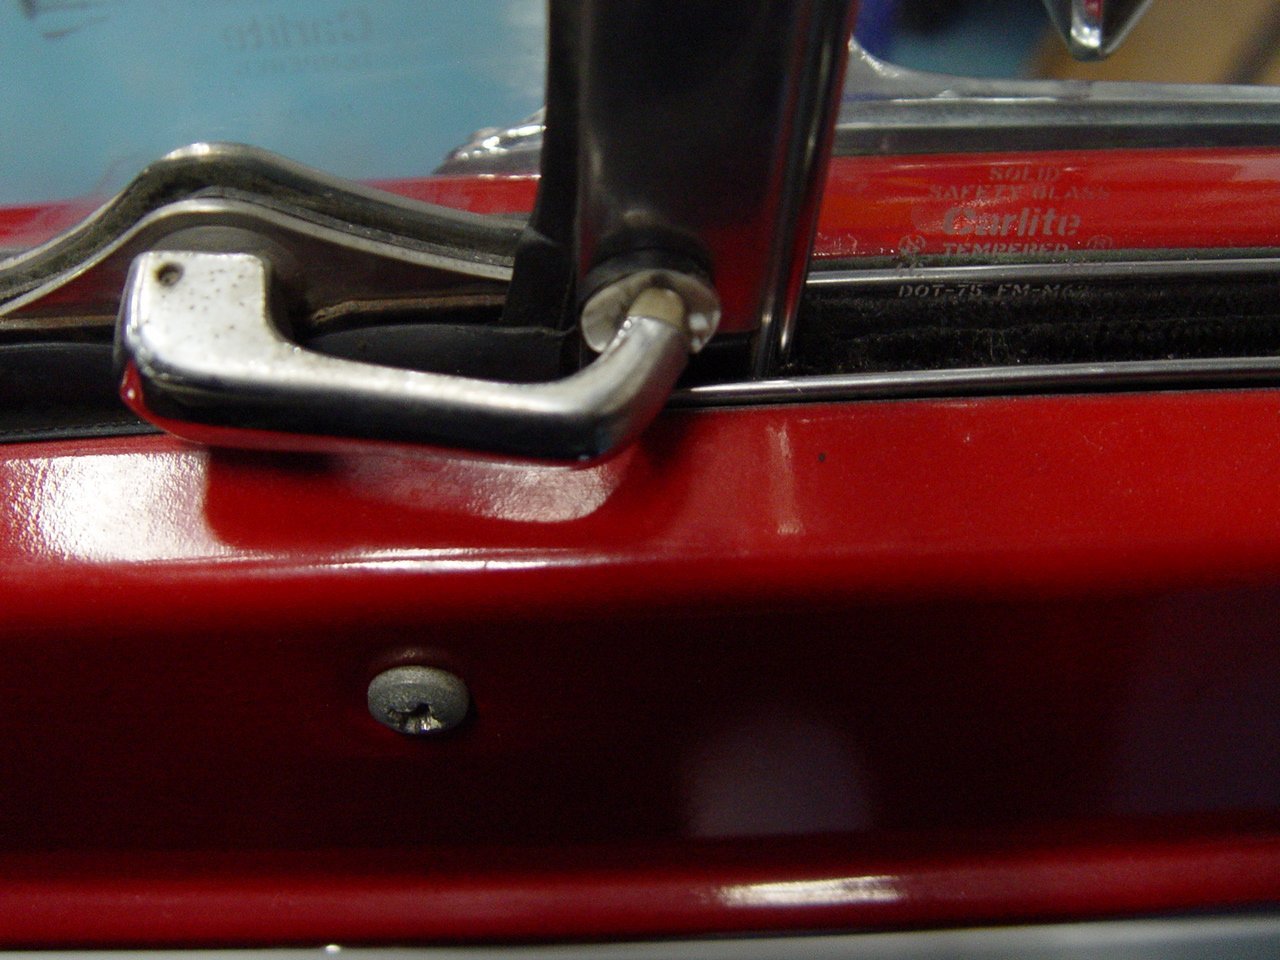
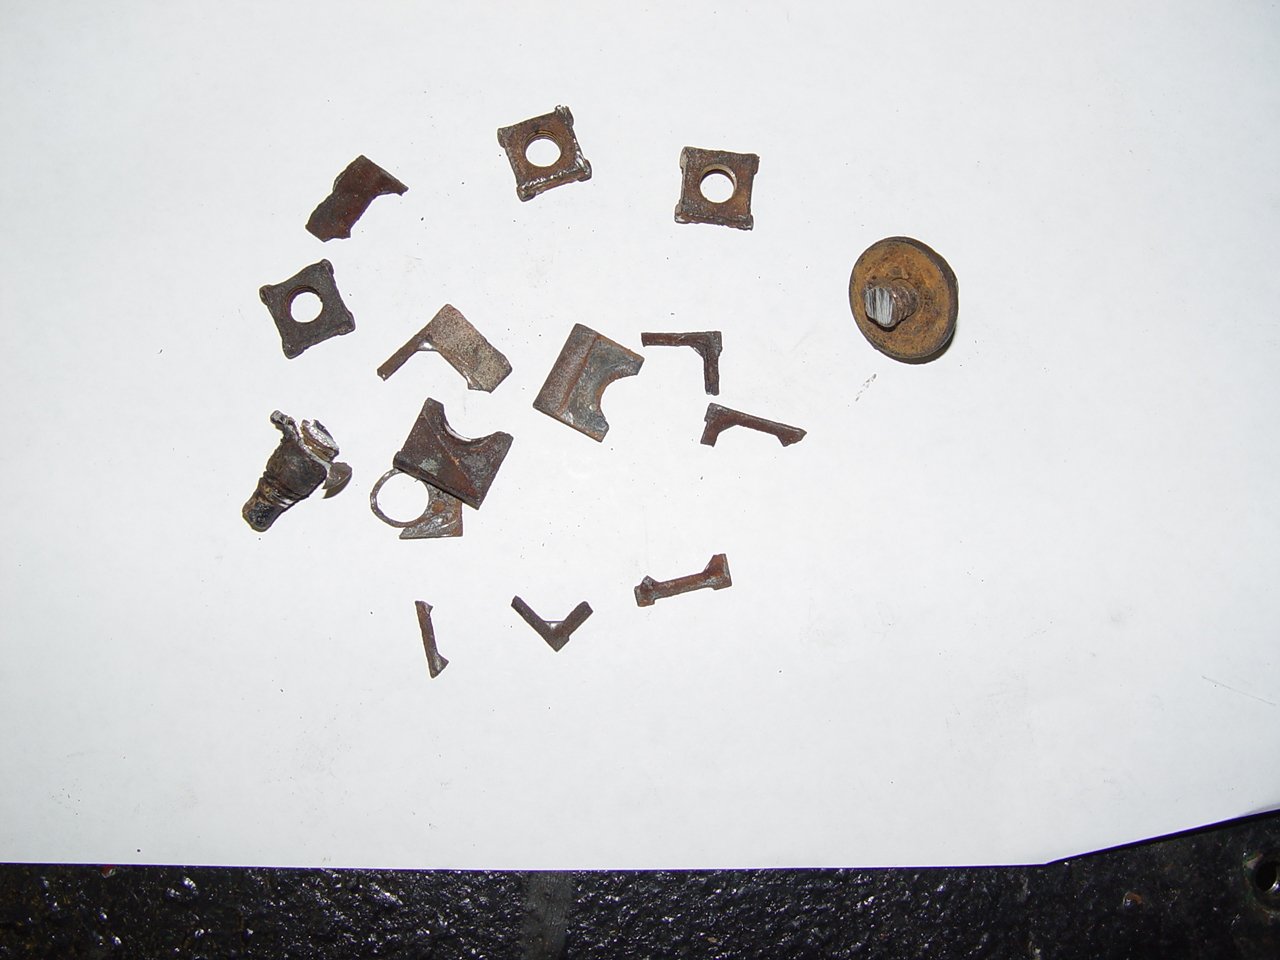
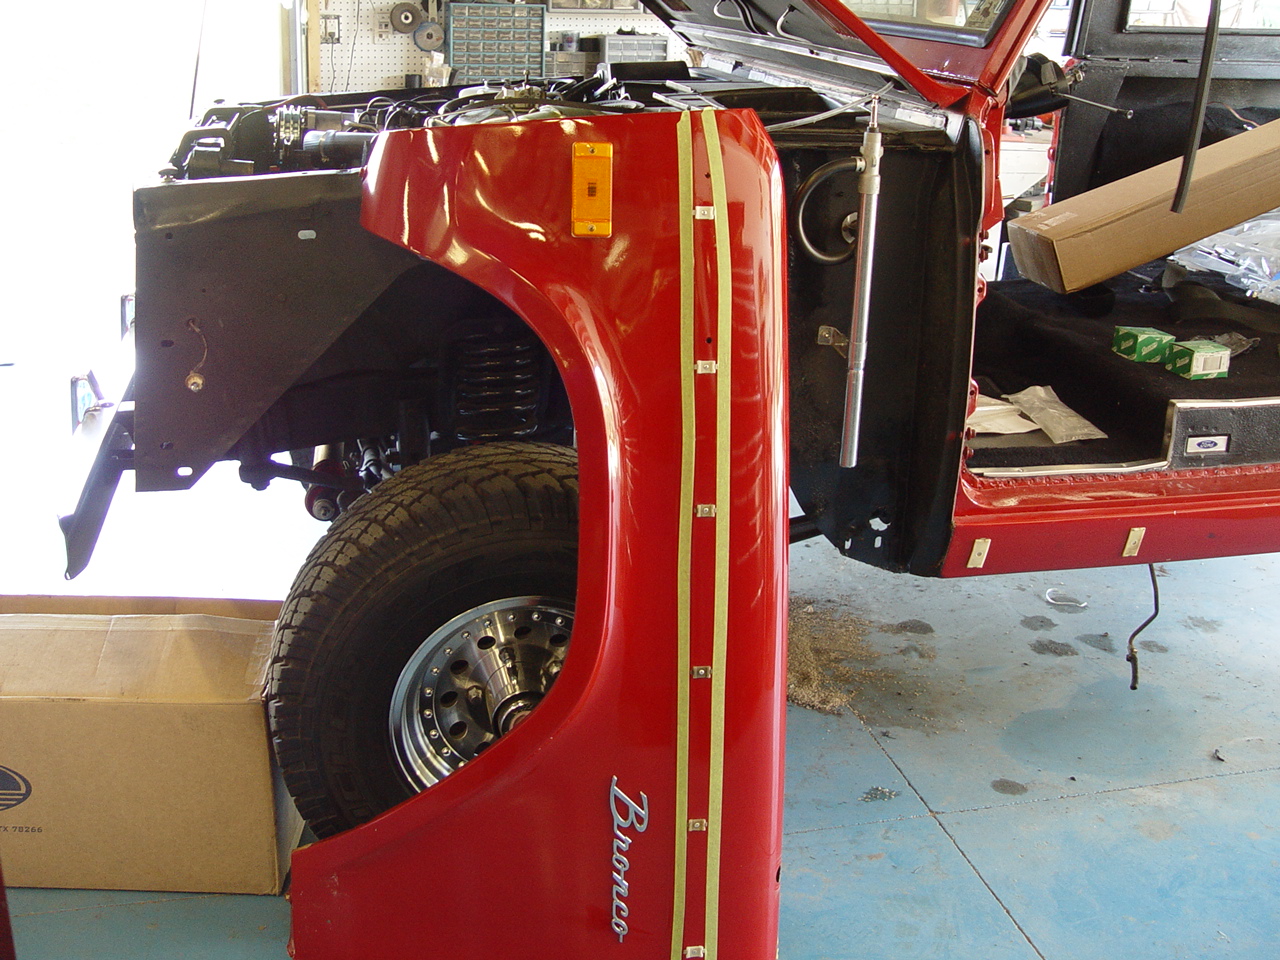
It's not at all unusual to run into stubborn fasteners when disassembling a classic car or truck body. What is unusual is that when we removed Big Red's front clip, roughly 80% of the body bolts had to cut or ground off. The u-nuts as well were useless when we took everything apart. So, nearly all the bolts used to attach the front clip will be replaced.
Also, in another cheesy move, the prior shop elected to fill the gap between the front fenders and rocker panels with seam sealer prior to painting it. So, when we went to remove the fenders, we had to first cut through the paint and seam sealer.
|
||||||
 |
 |
 |
 |
 |
||
 |
 |
 |
 |
 |
||
 |
 |
 |
 |
 |
||
 |
 |
 |
 |
 |
||
 |
 |
 |
 |
 |
||
 |
 |
 |
 |
 |
||
 |
 |
 |
 |
 |
||
| Click on an image for a larger view | ||||||
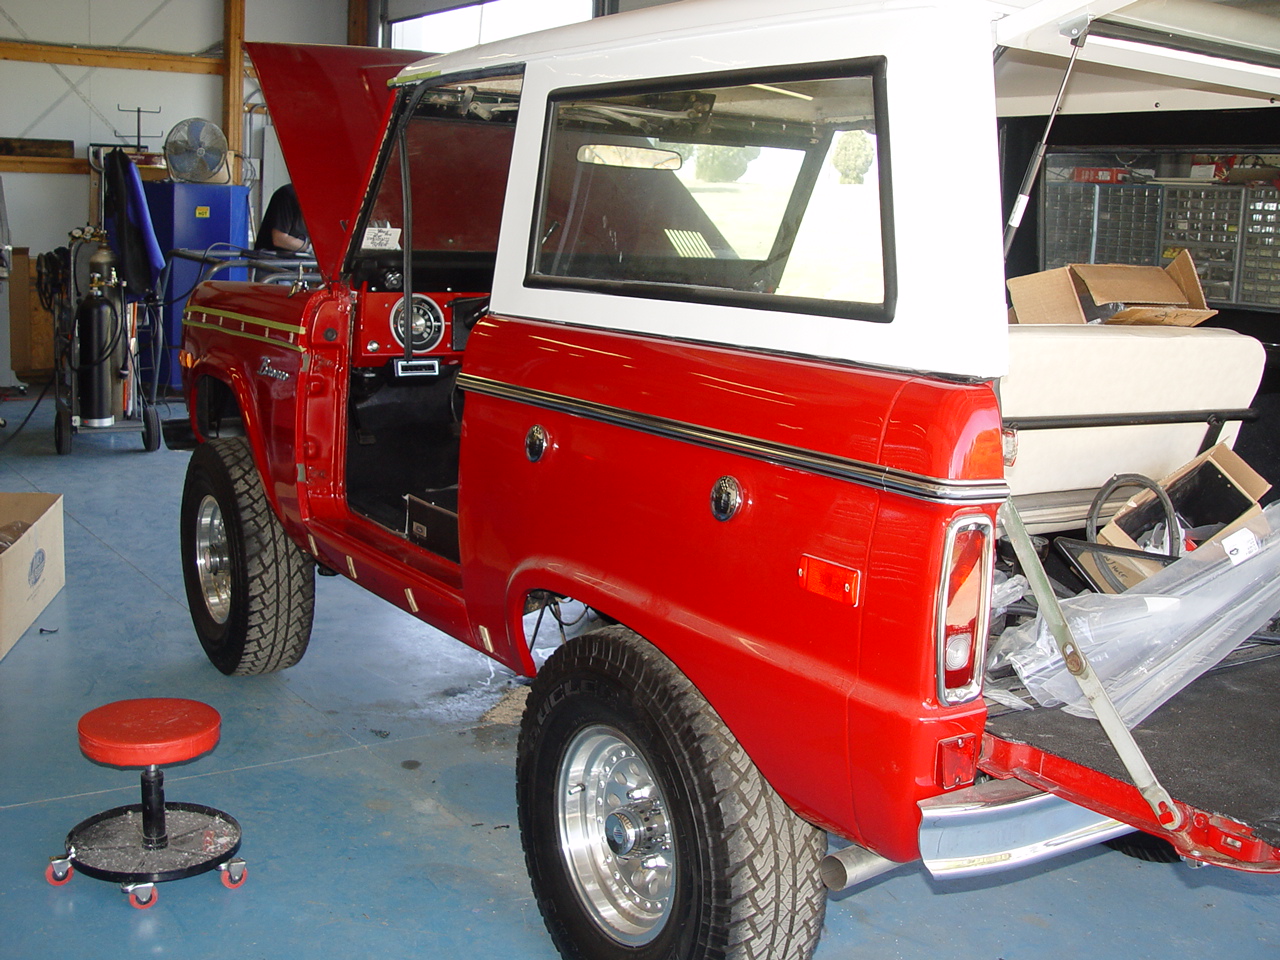
COMPLETION | ||||||
|
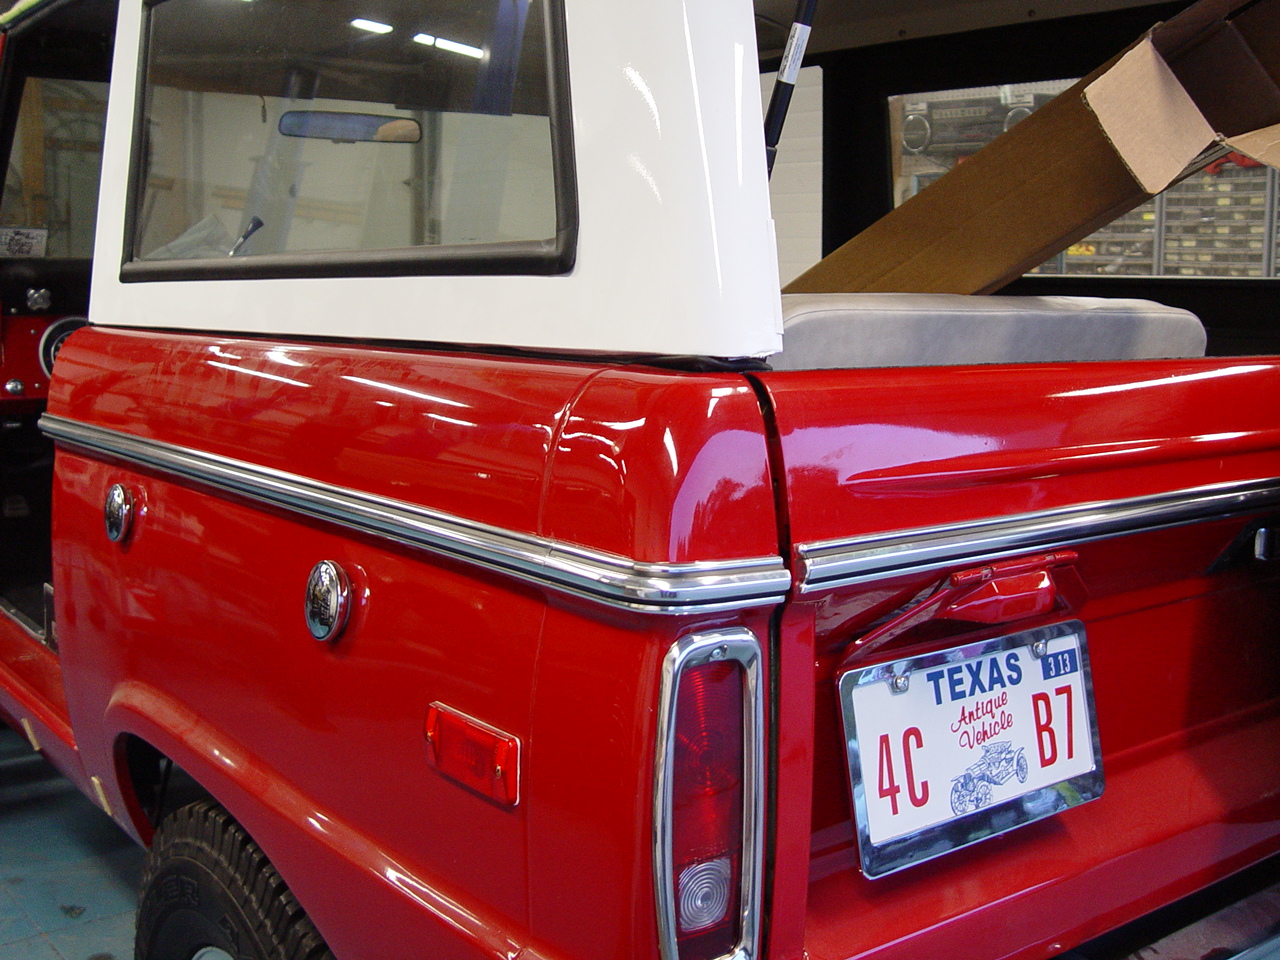
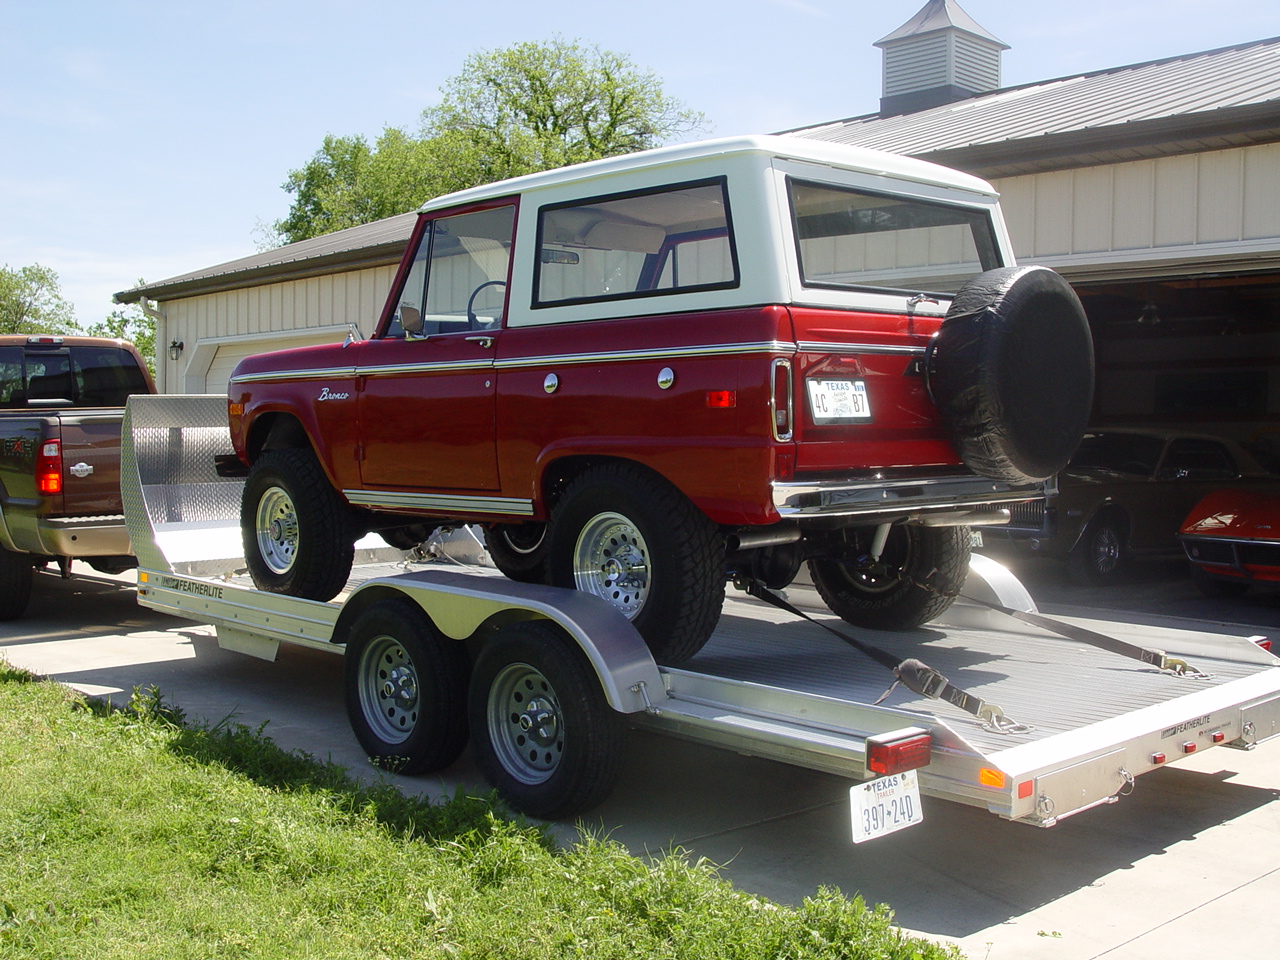
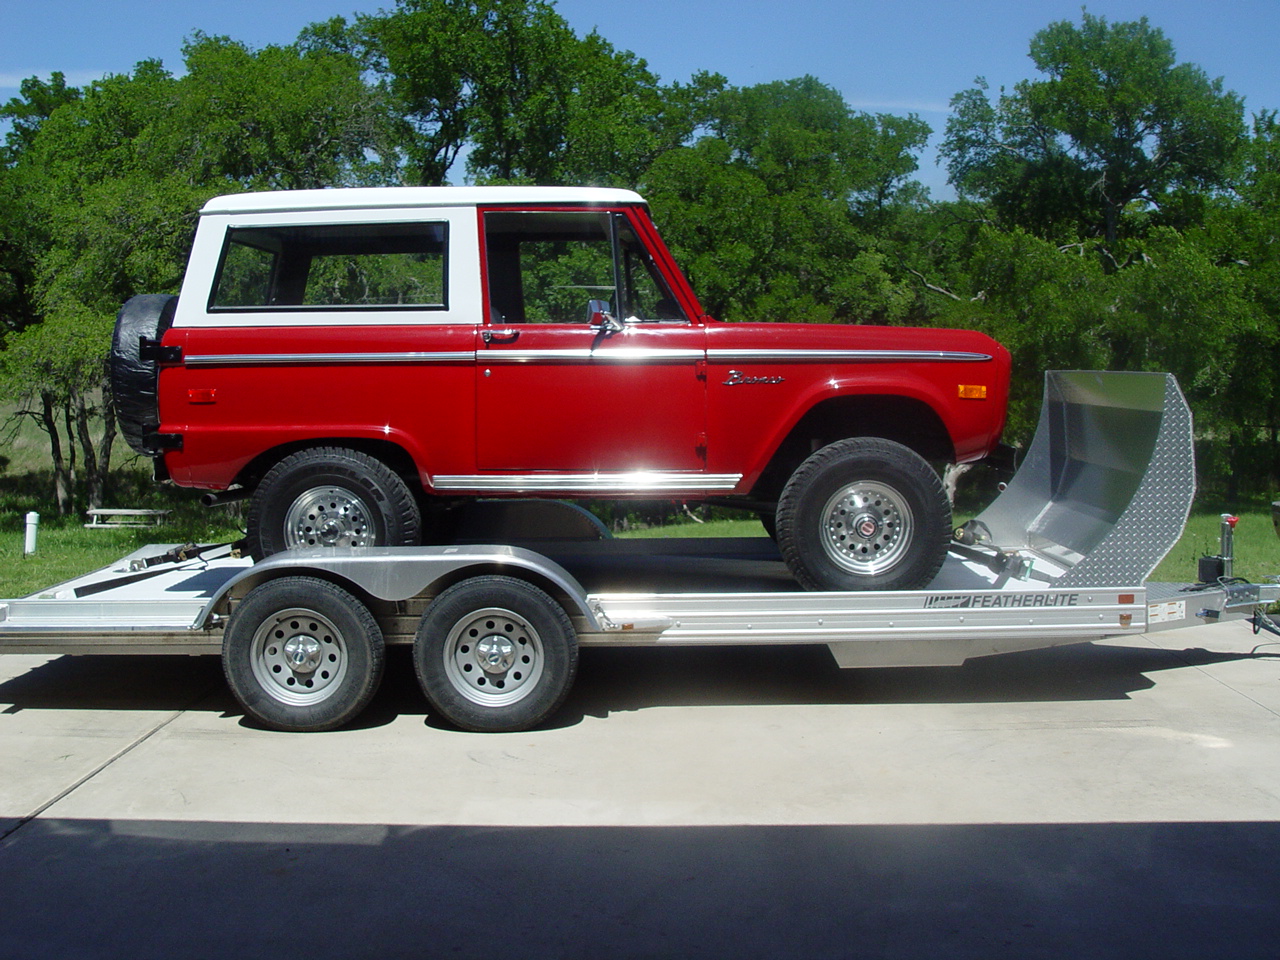
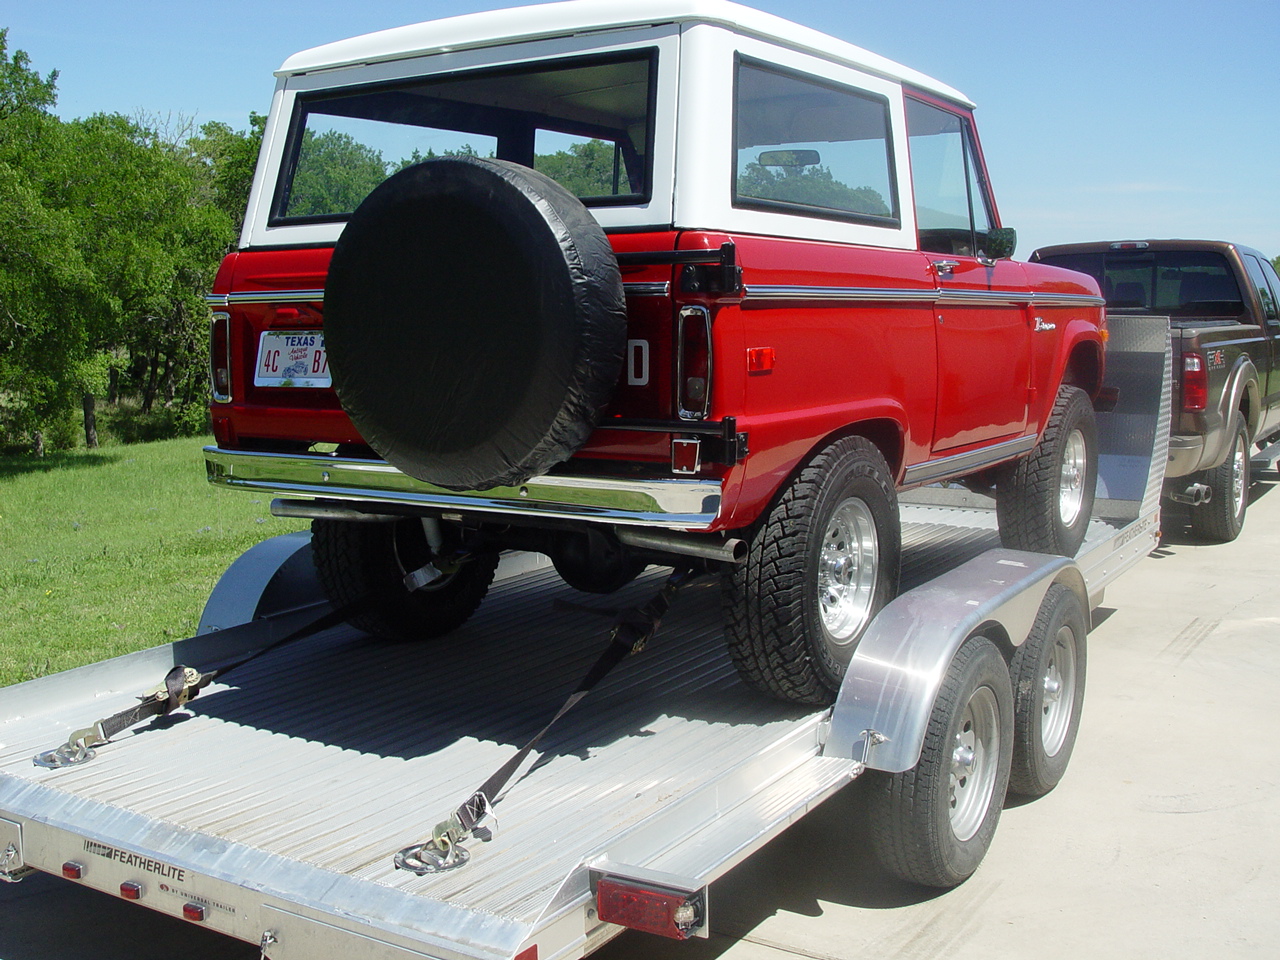
While we could never claim that Big Red was actually "restored" by Midlife Classics, we can certainly lay claim to being responsible for making it right and bringing it to "the next level of restoration"
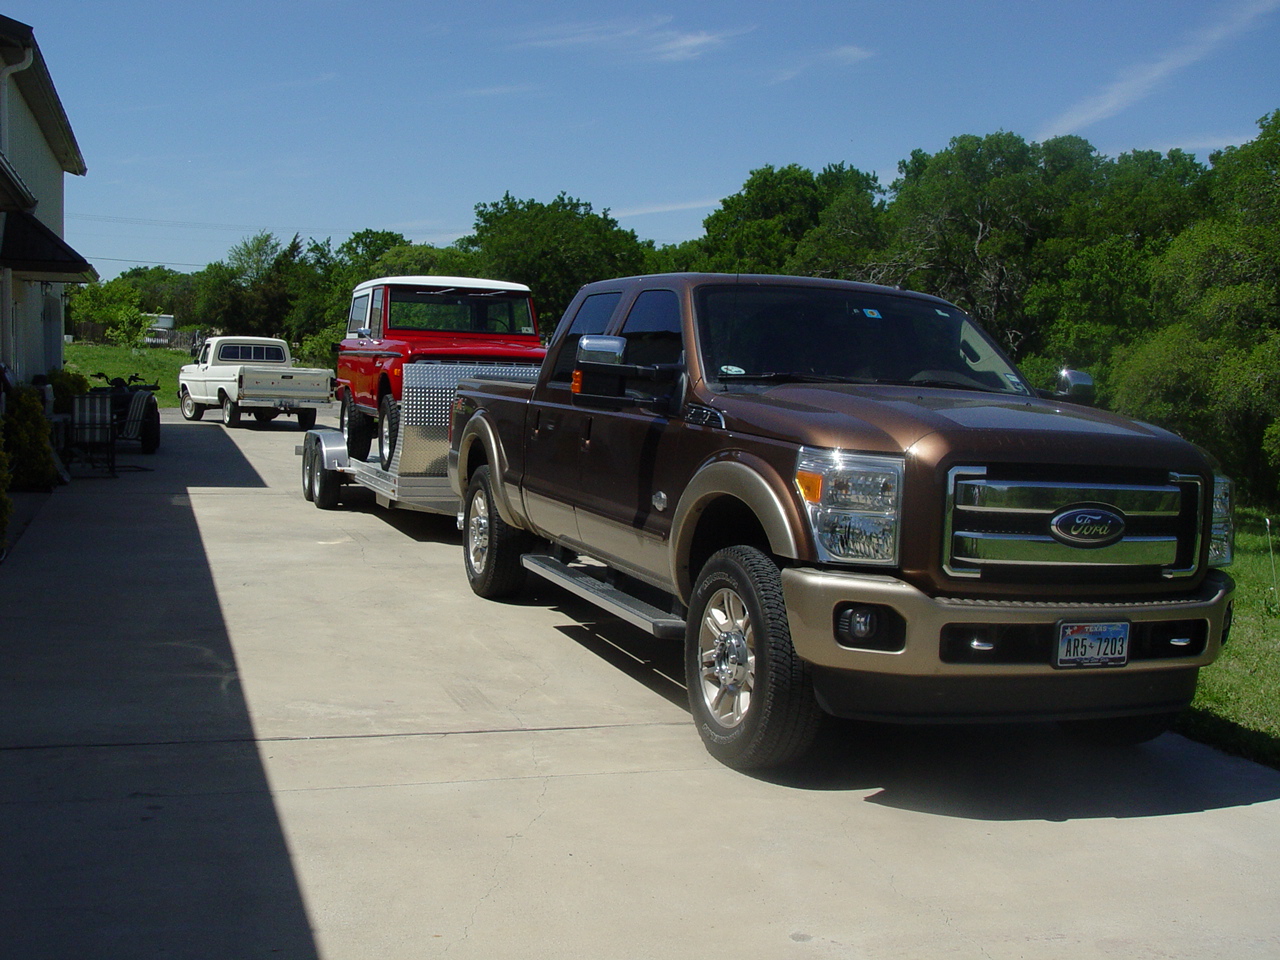
In these final photos, you'll see it loaded up on the client's trailer ready to head for the alignment shop. In the background of one of the photos, you'll see a white 1971 Ford F-100 Pickup that the client dropped off with us as his next project. Keep an eye out for its project page.
|
||||||
 |
 |
 |
 |
 |
||
 |
 |
 |
 |
 |
||
| Click on an image for a larger view | ||||||
| |
| Send Mail to |
| bob@midlifeclassics.com |
| |