
| Home | Current Inventory | Projects | Services | Company | Stuff | Bob's Car Collection | Contact Us |
|
on Facebook |
"Full Inventory" (Projects, Completions and Personal Collection) |
 77 Lancia Scorpion |
 67 Camaro RS Conv. |
|
68 Austin Healey Sprite |
 68 Cougar |
 69 Corvette |
 70 Opel GT |
 69 Marcos 3000GT |
 86 TVR 280i |
 73 TVR 2500M |
 90 Buick Reatta |
1975 FORD
|
"Project Buckshot" |
Client Project |
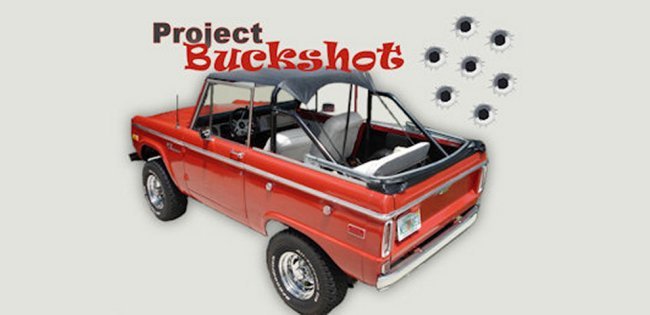 |
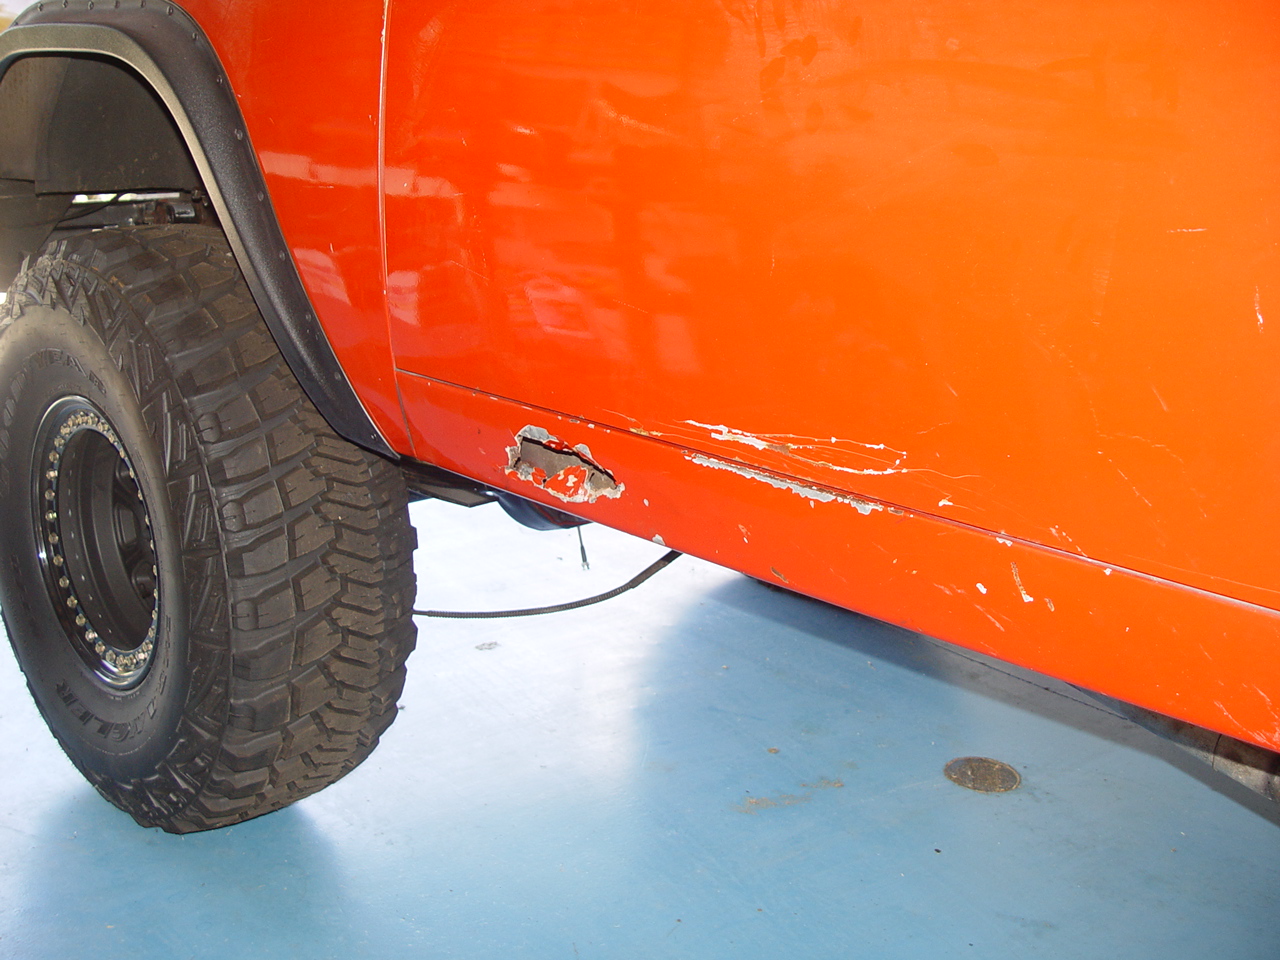
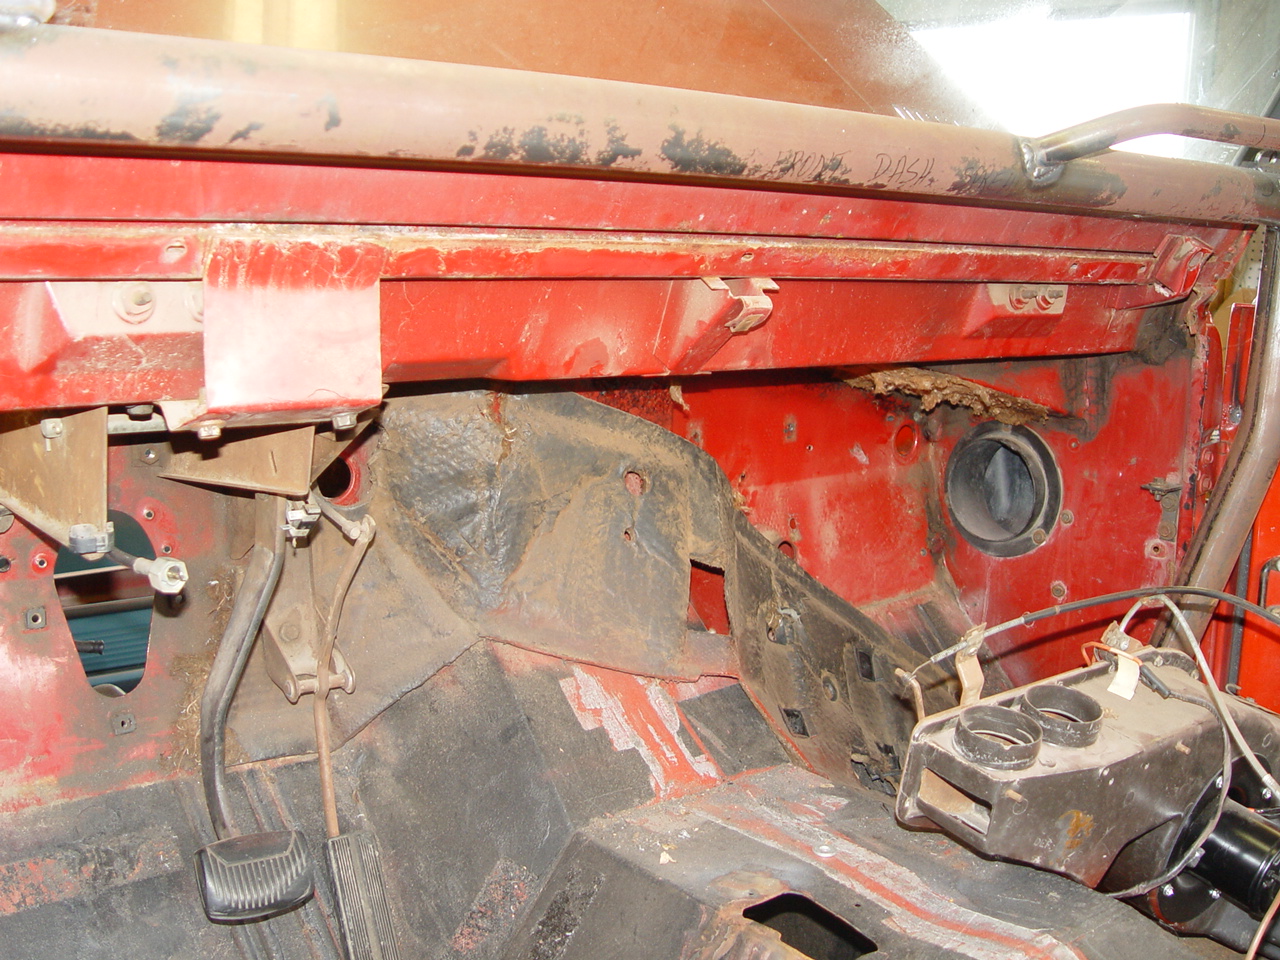
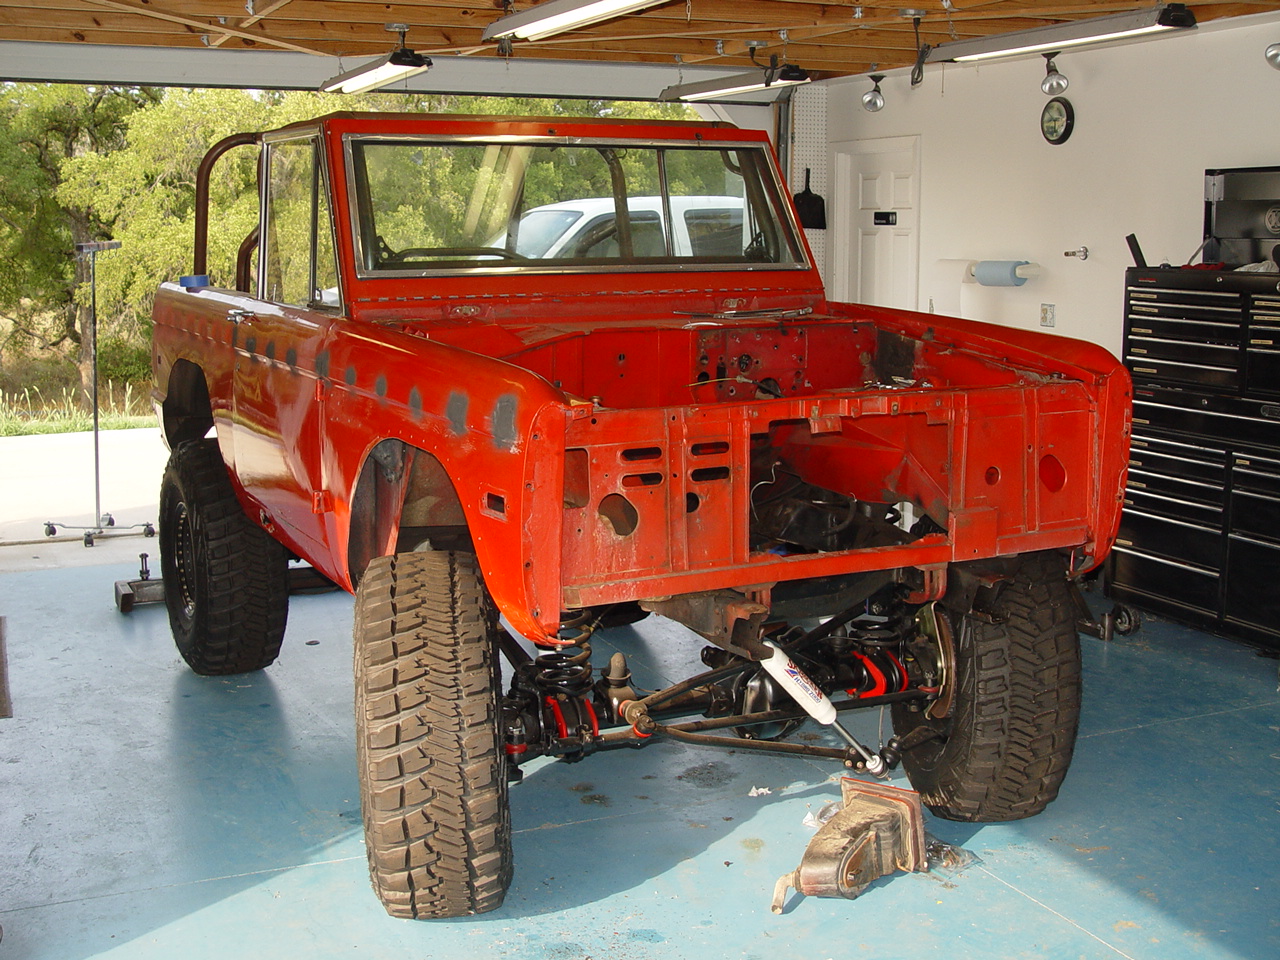
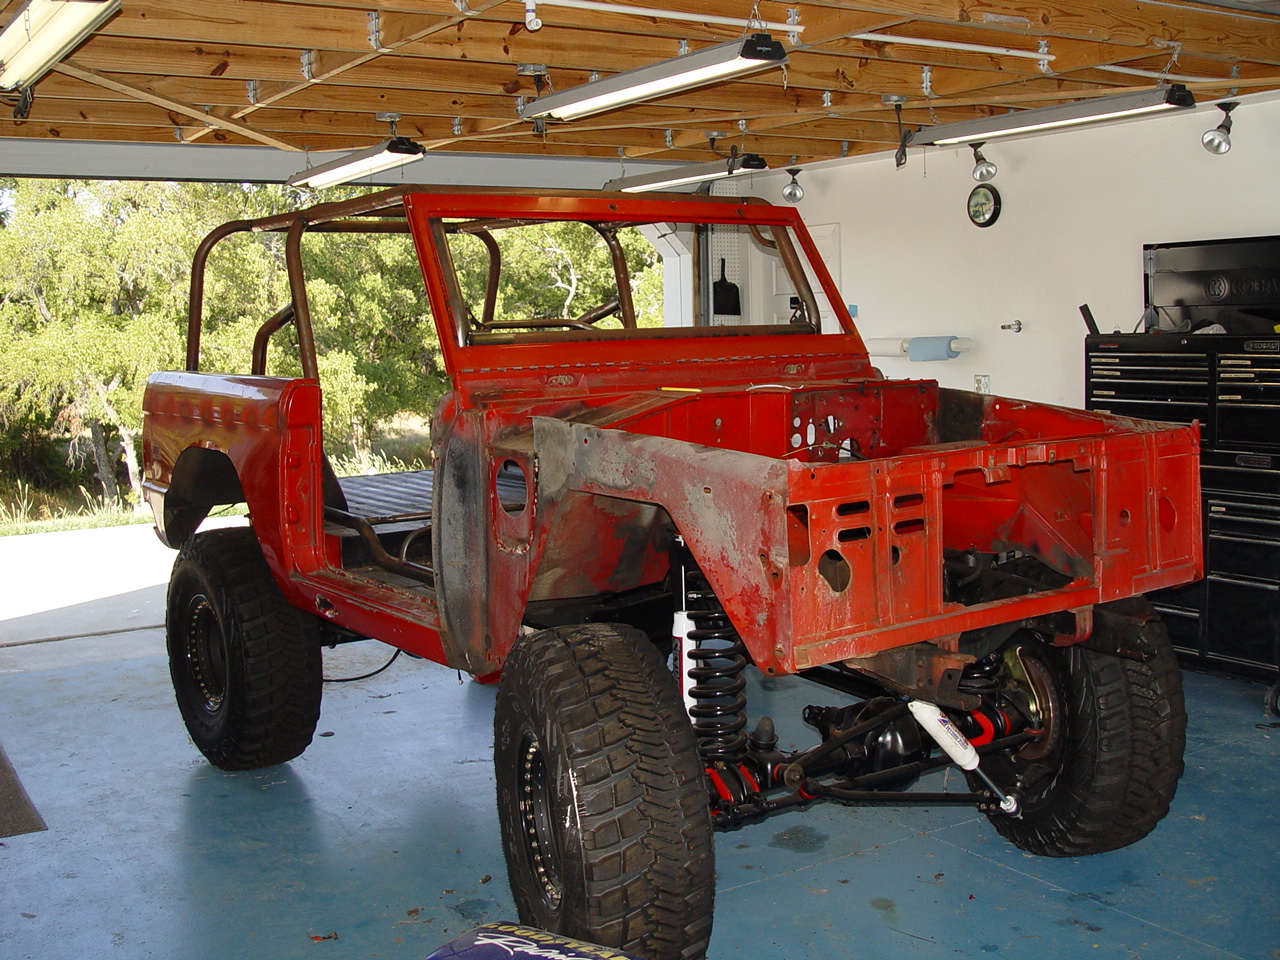
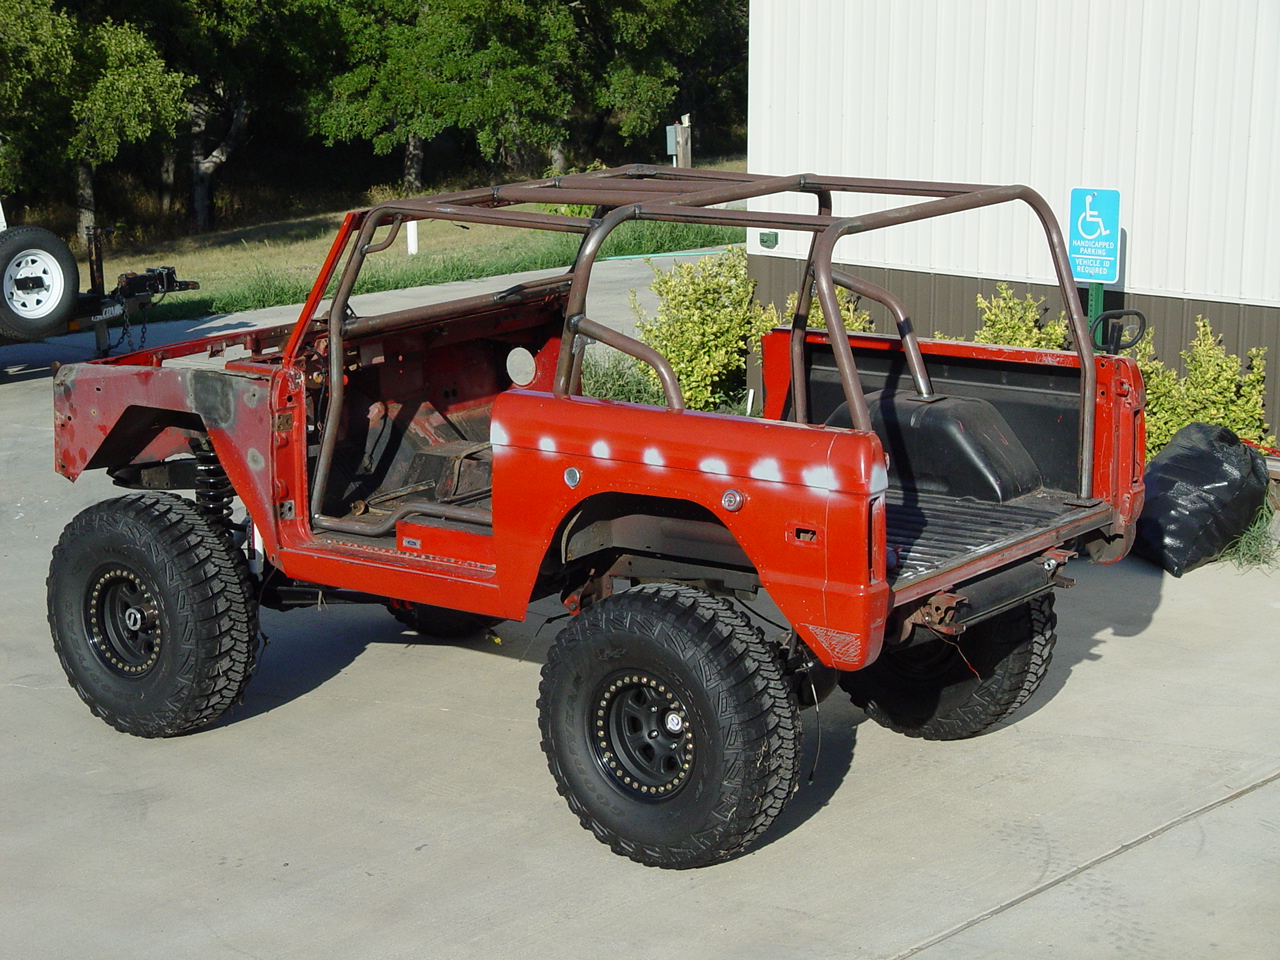
"Project Buckshot" comes to Midlife Classics courtesy of Rick Webster, editor of 4X4Review Offroad Magazine.
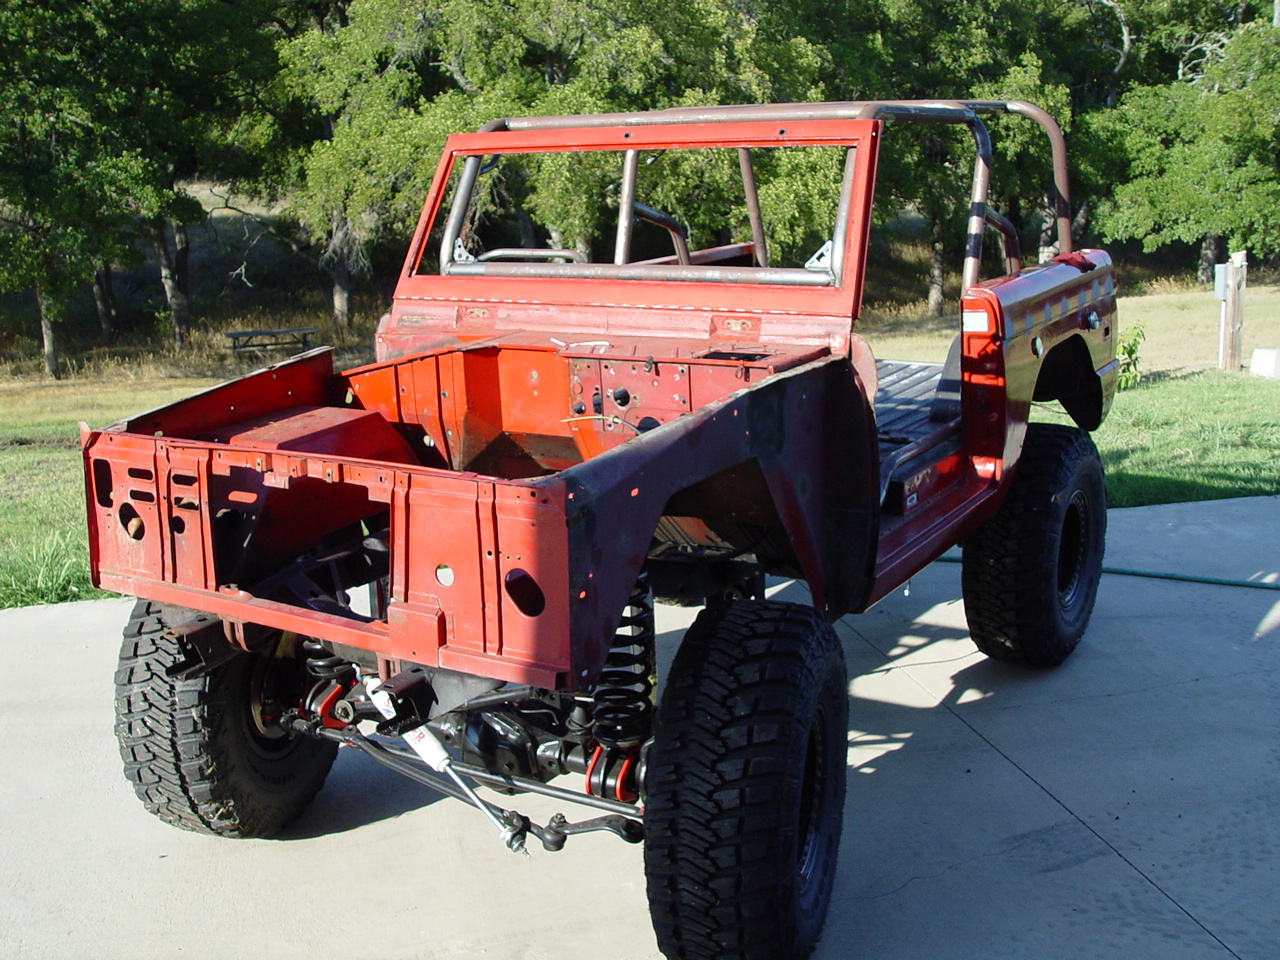
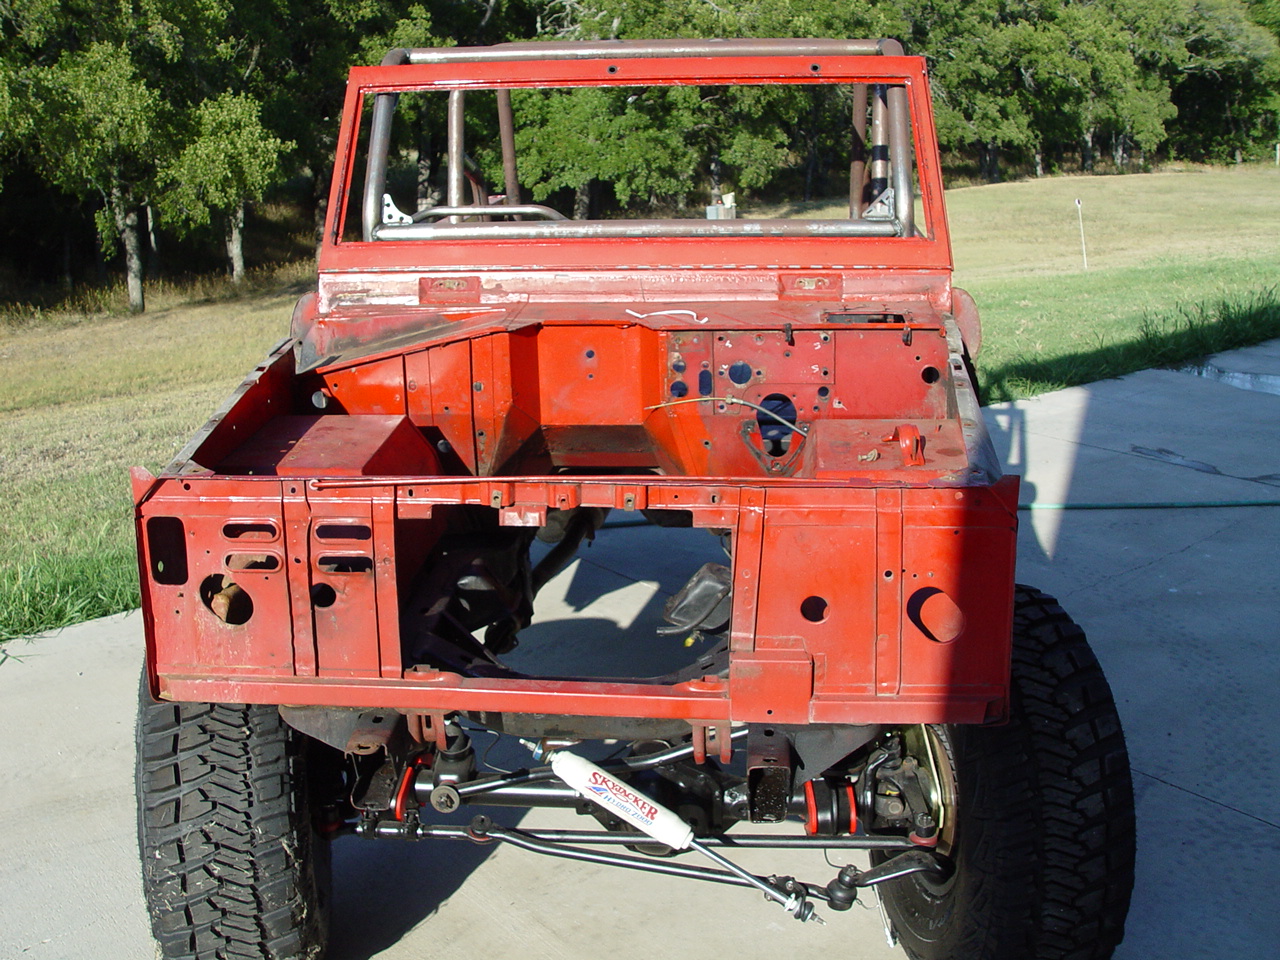
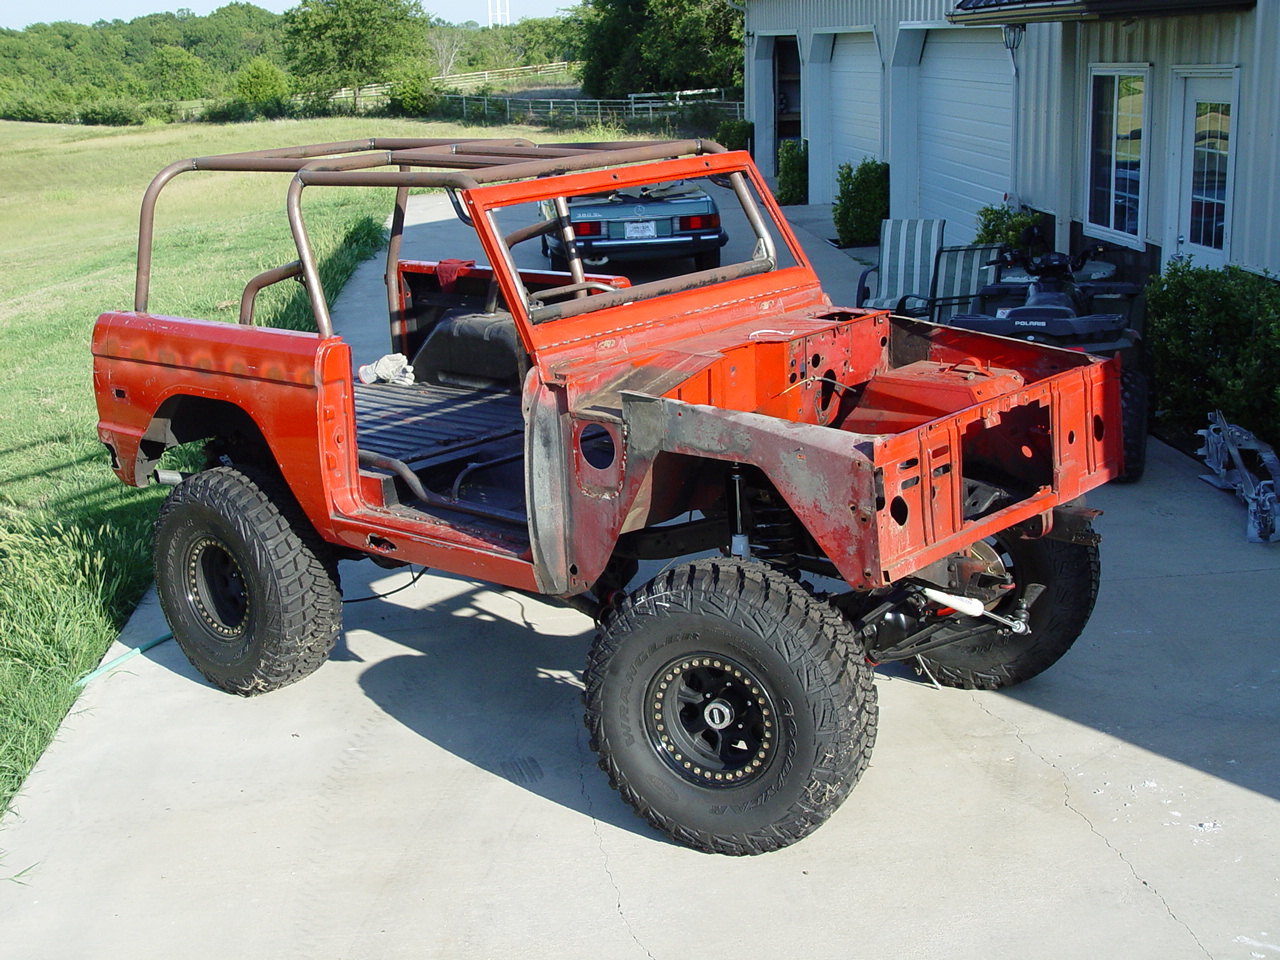
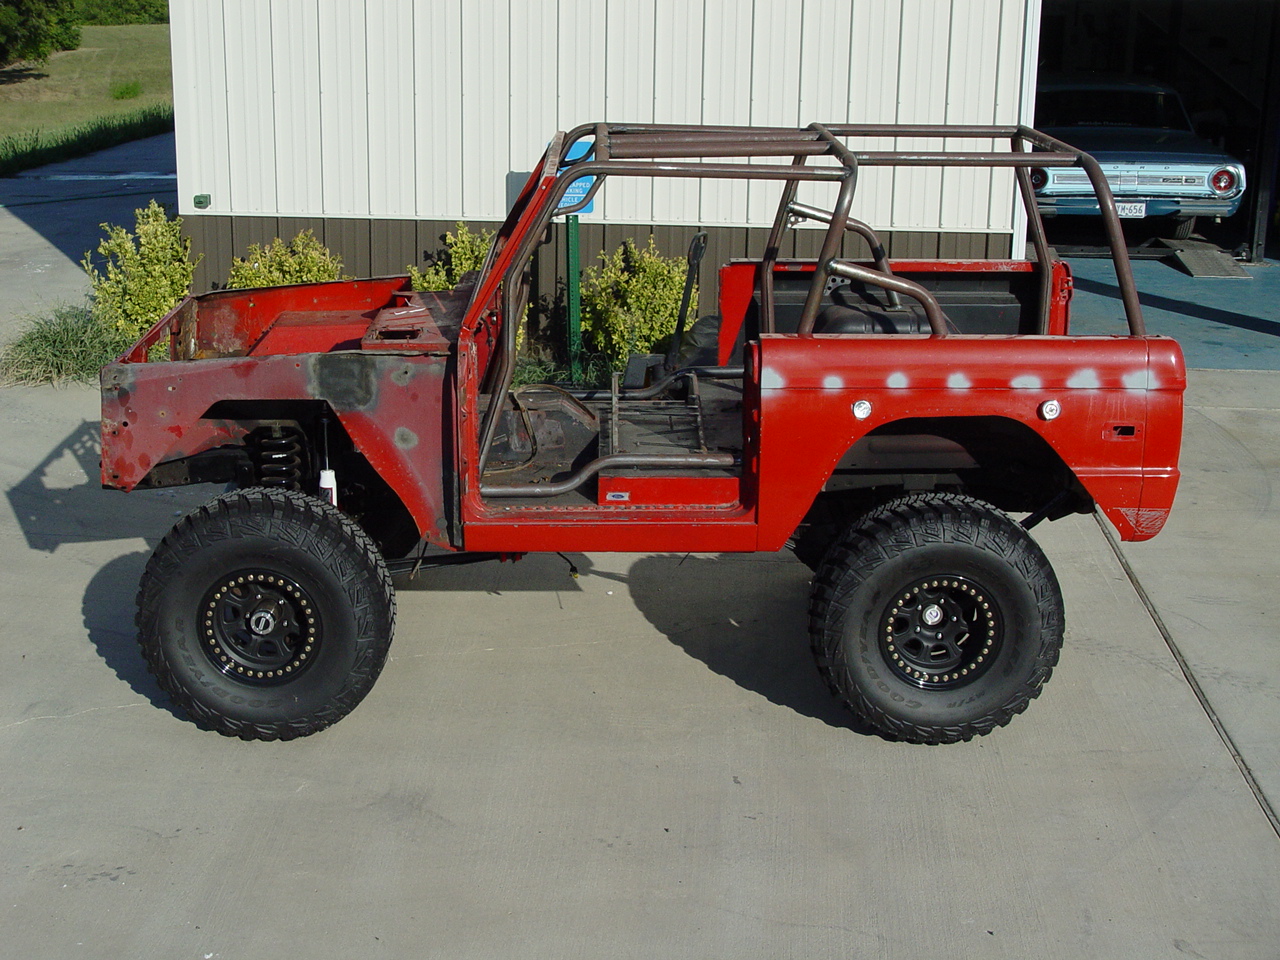
Our mission is to strip, massage and finish off the body in the owner's choice of color so that 4X4Review Offroad Magazine can then complete the project. We will begin by removing the body from the frame so that we can mount it on our rotisserie. That will provide us with unencumbered access to the entire body. Then we will sodablast it down to bare metal - everywhere - so that we can start from a clean slate. The owner does not have a complete history on this Bronco, so there's no telling what we'll find under the old paint. We've already seen evidence of prior work and - as you'll see in the photos - rust has taken its toll on the right rocker panel and passenger-side floorboard. Any rusted body panels will be cut out and replaced with new sheet metal. Following the necessary bodywork, we will paint the exterior in the owner's chosen color (a gun-metal gray). The underside will likely be coated with POR-15's "Chassis Black" for maximum protection. The coating for the interior floor is - as yet - undecided, but since it will eventually be carpted, the finish itself is unimportant so long as it is properly protected against rust. While we have the Bronco apart, we will inspect the frame and perform any restoration deemed necessary. Once finished, we will reassemble the body and frame prior to returning it to 4X4Review Offroad Magazine.
|
BEFORE | ||||||
|
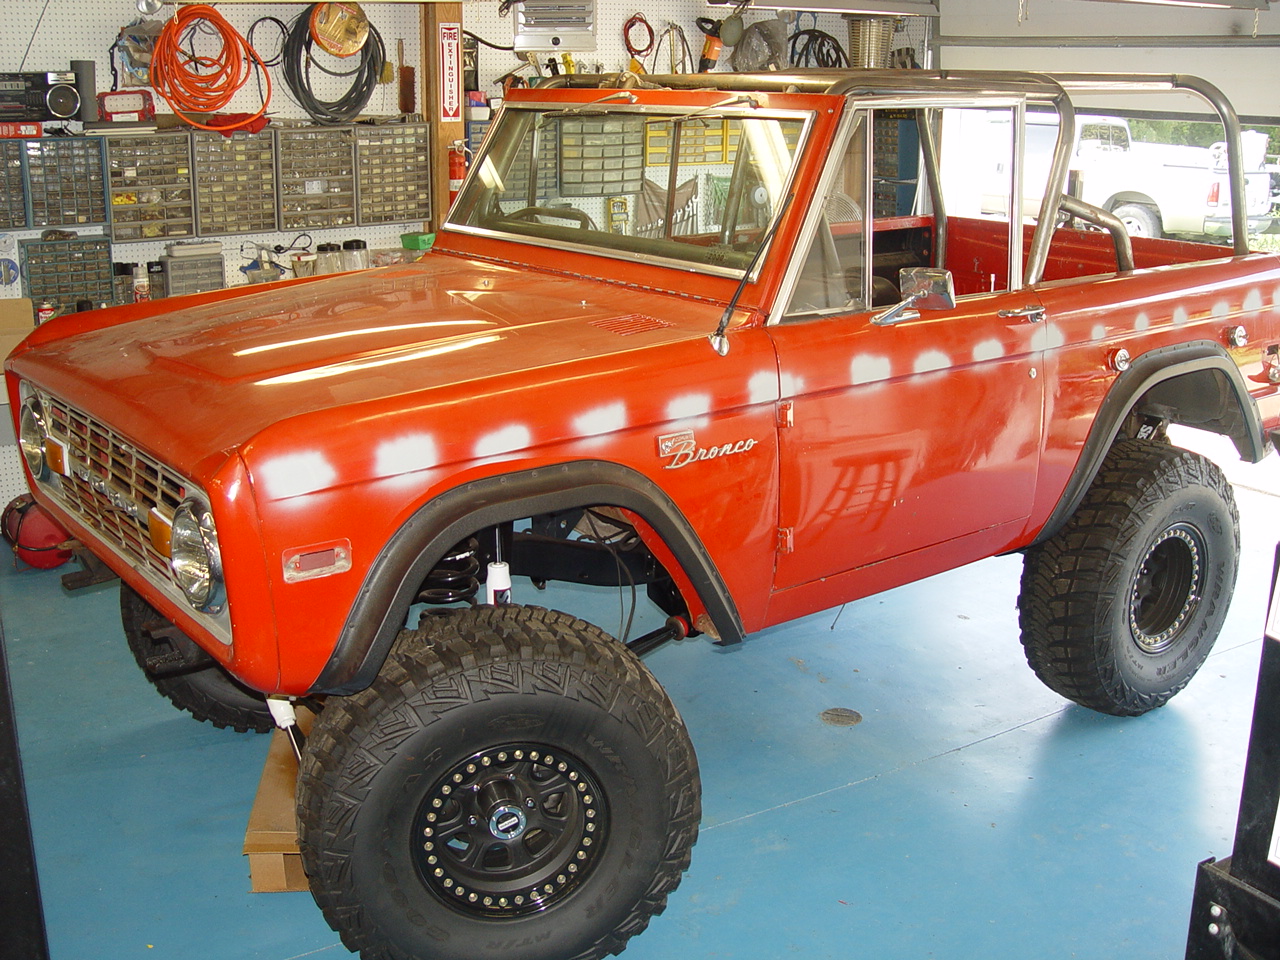
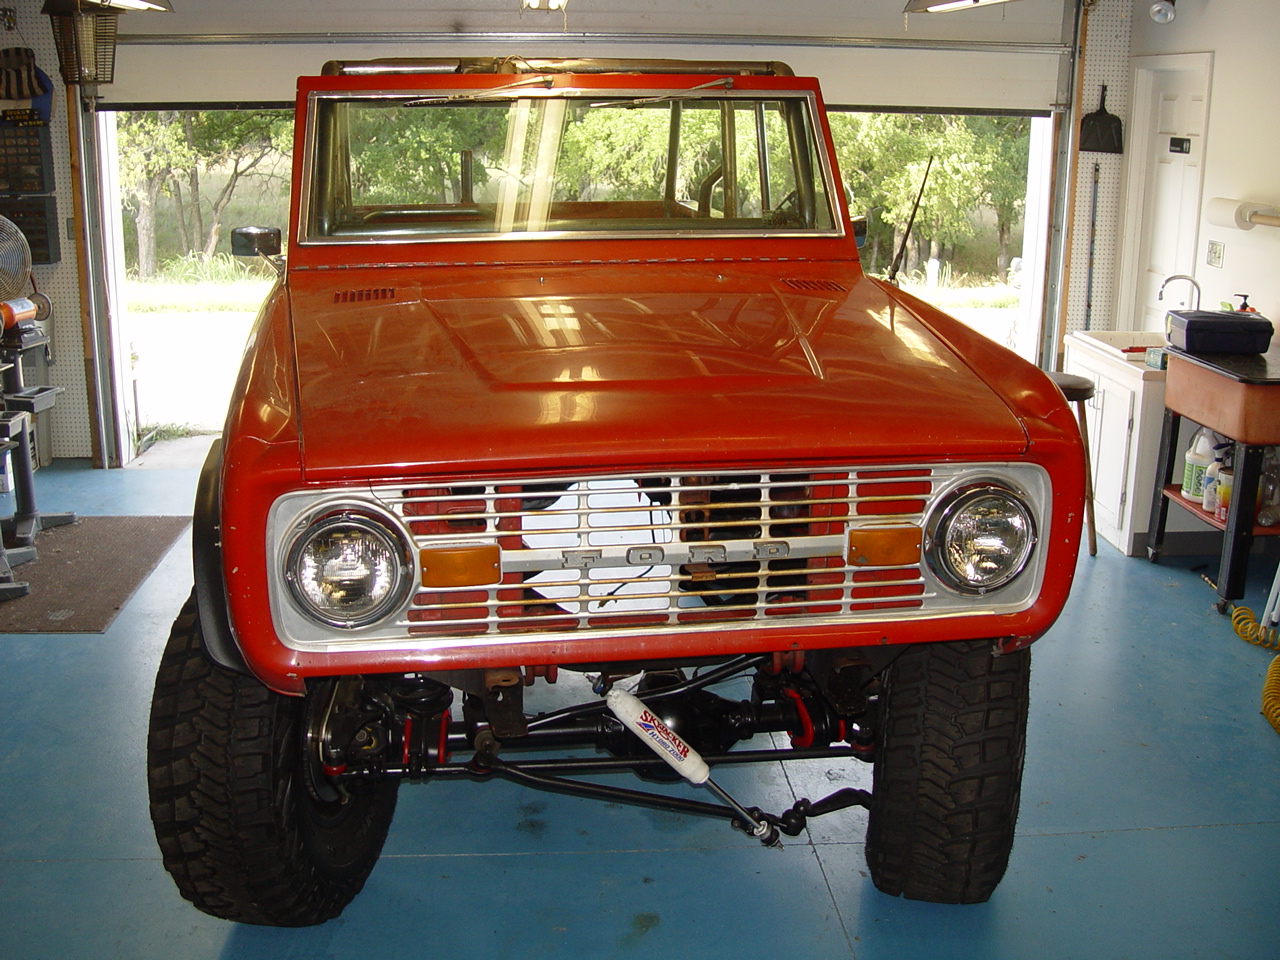
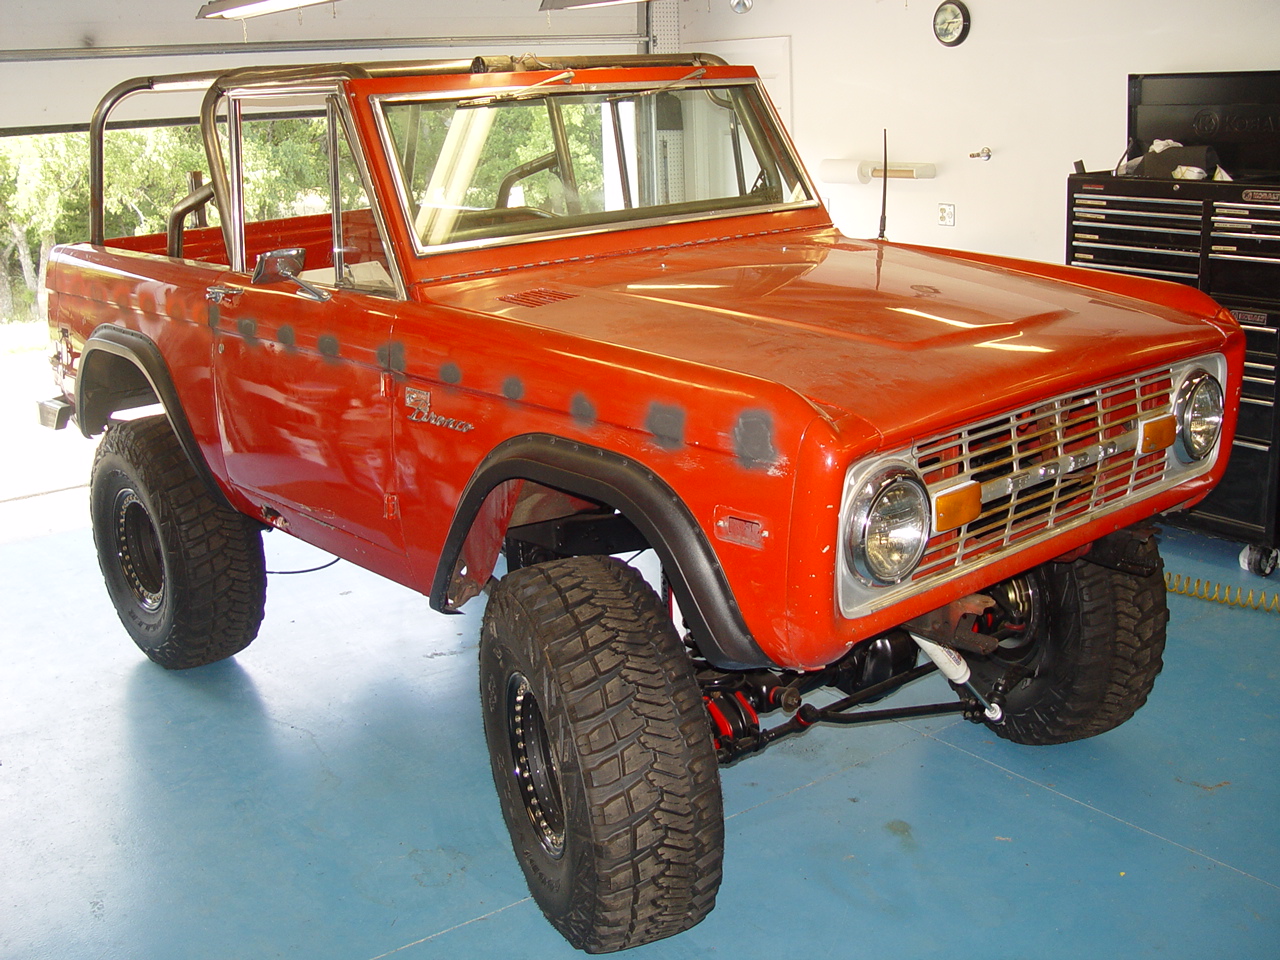
This is what Project Buckshot looked like when it arrived.
|
||||||
 |
 |
 |
 |
 |
||
 |
 |
 |
 |
 |
||
| Click on an image for a larger view | ||||||
DECONSTRUCTION | ||||||
|
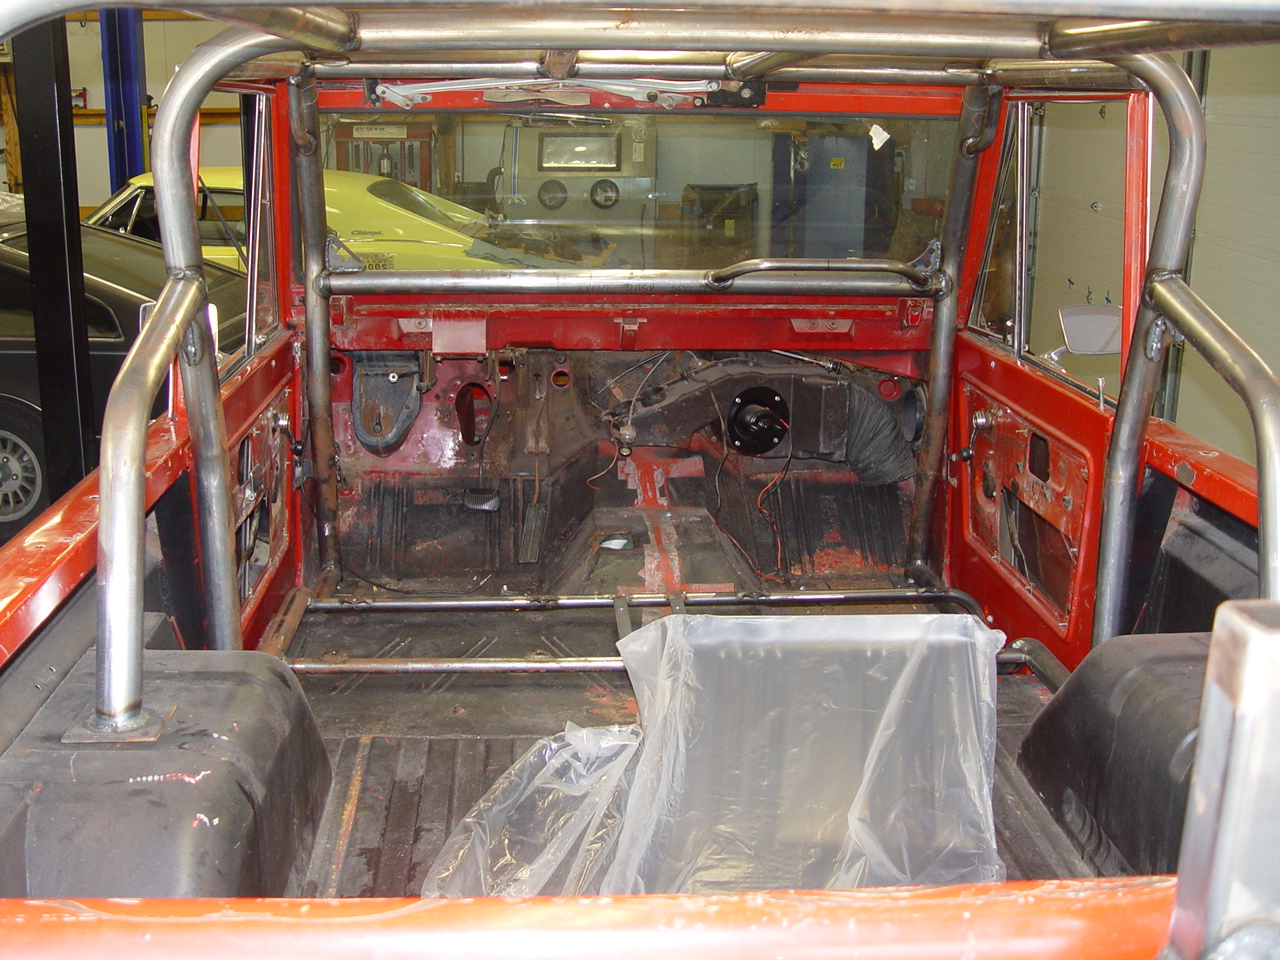
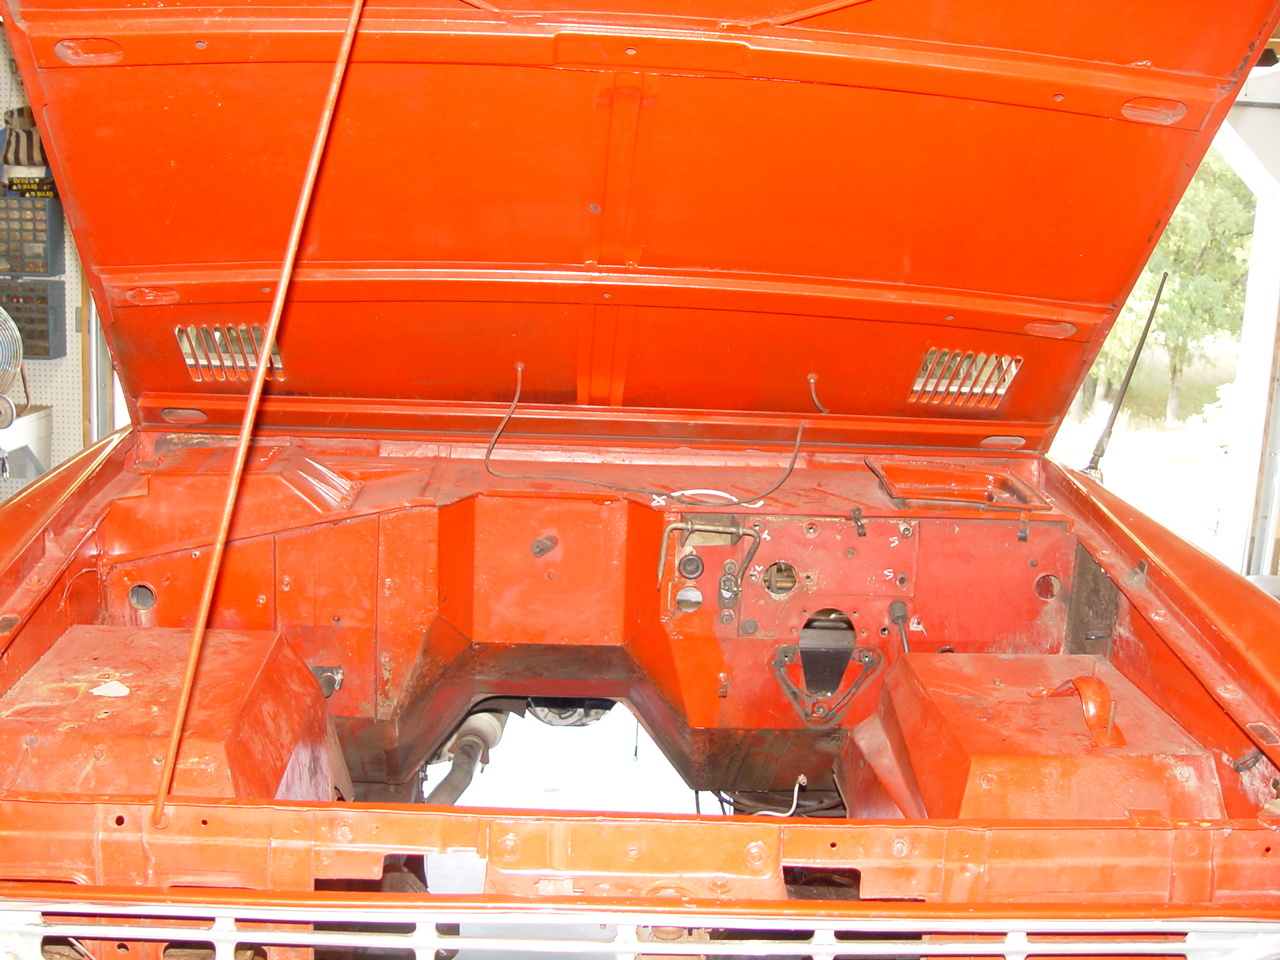
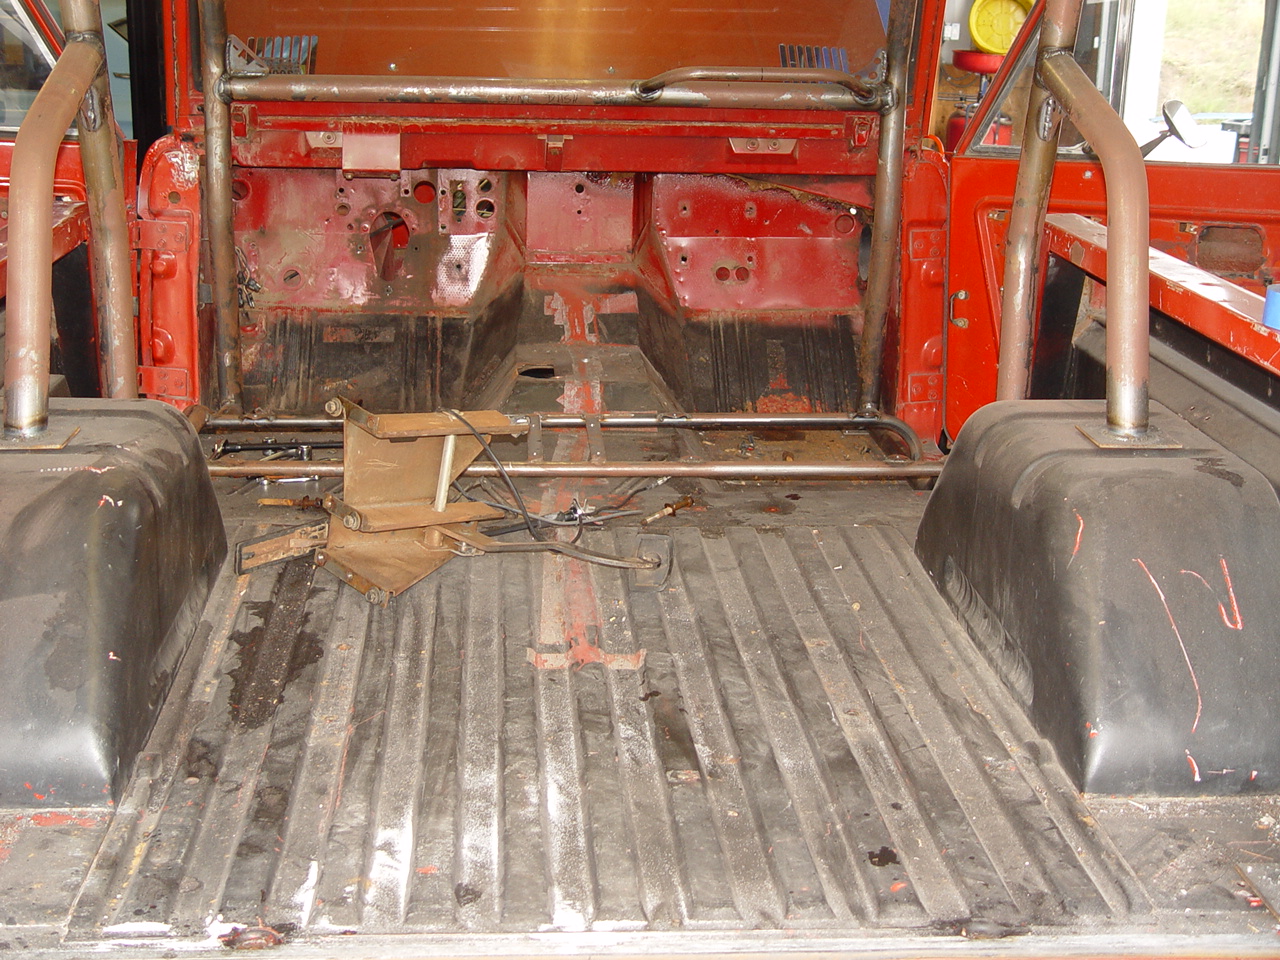
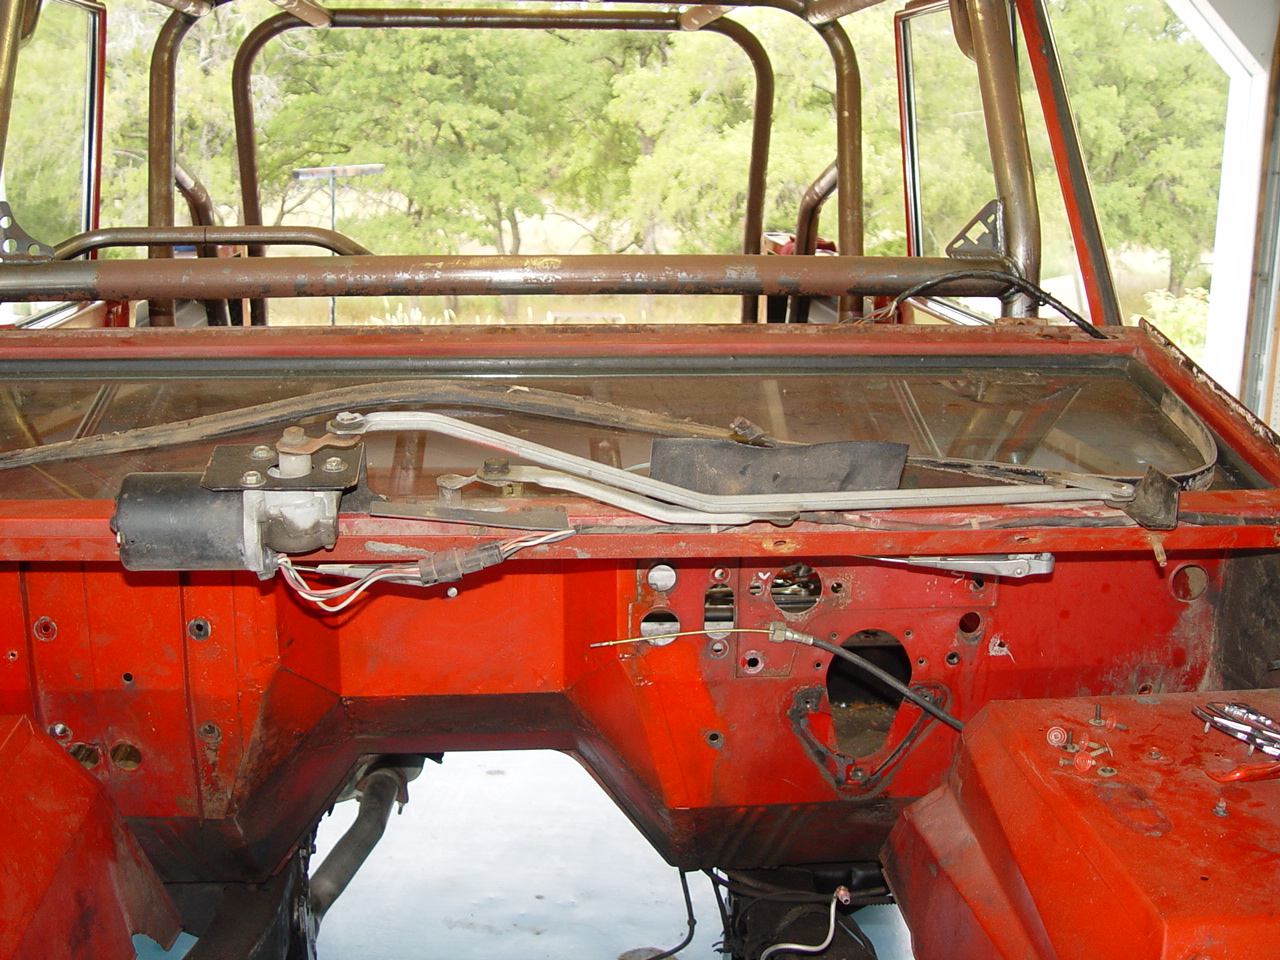
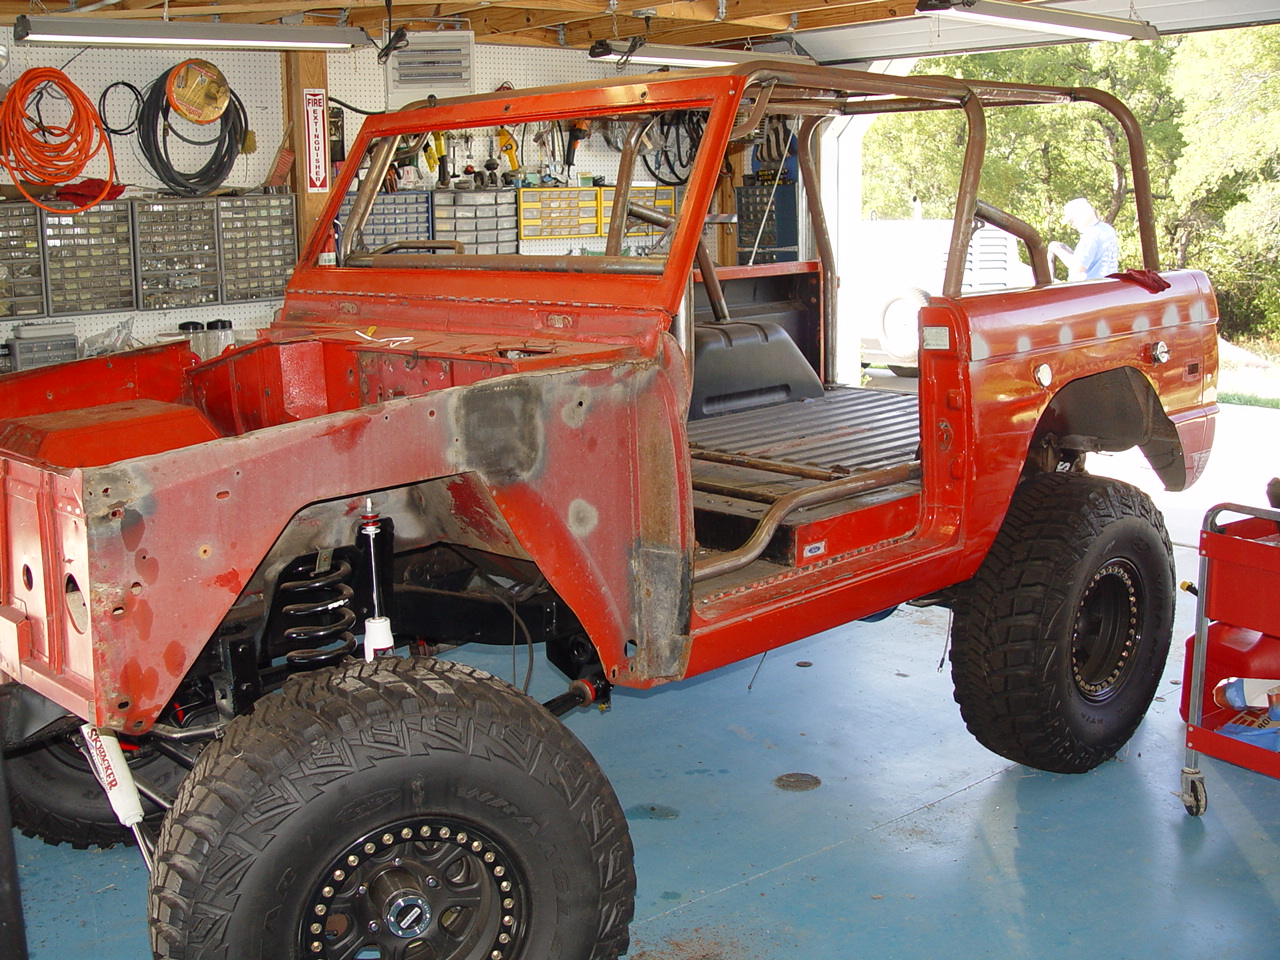
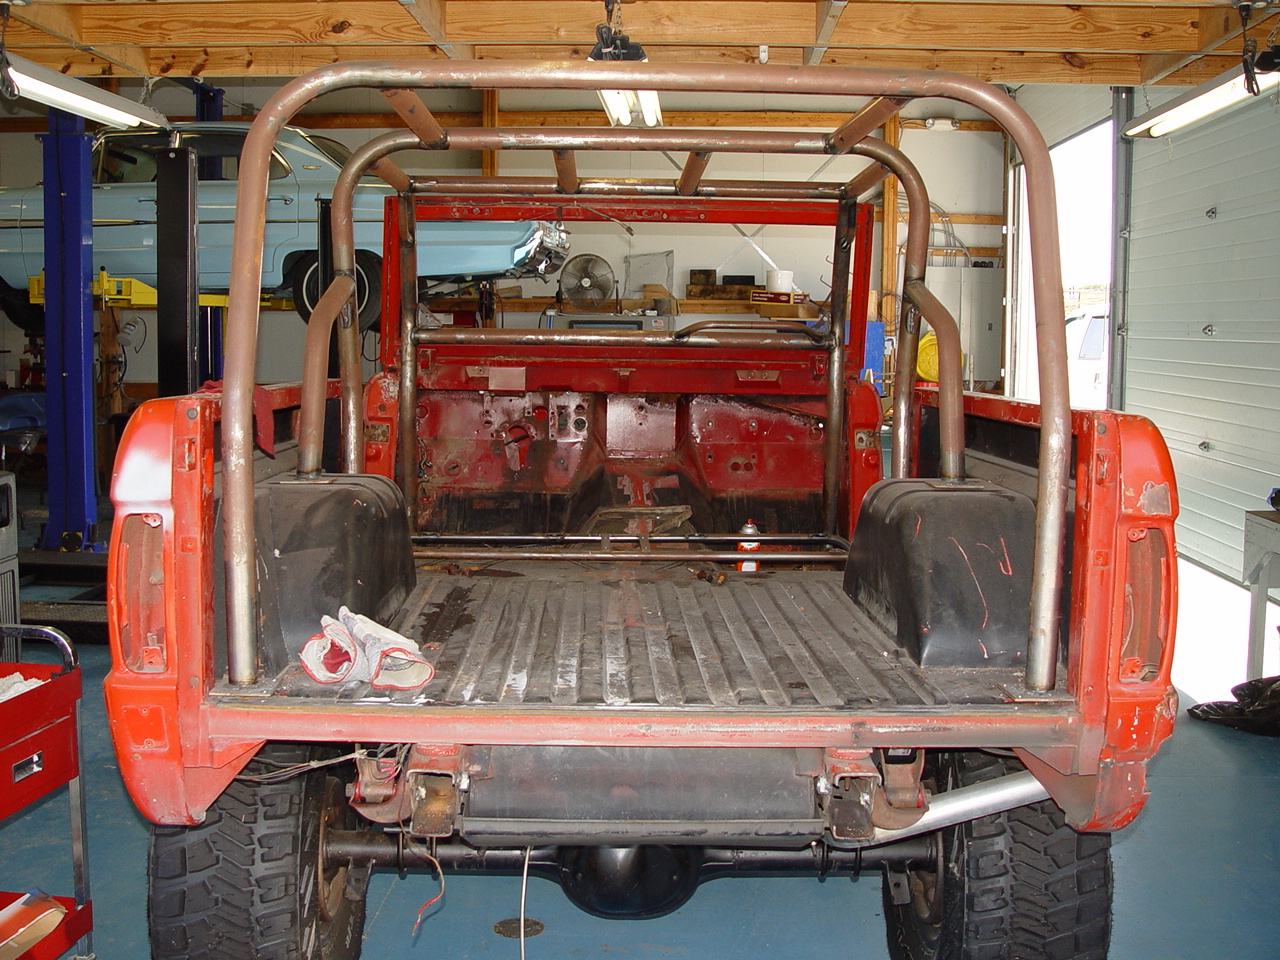
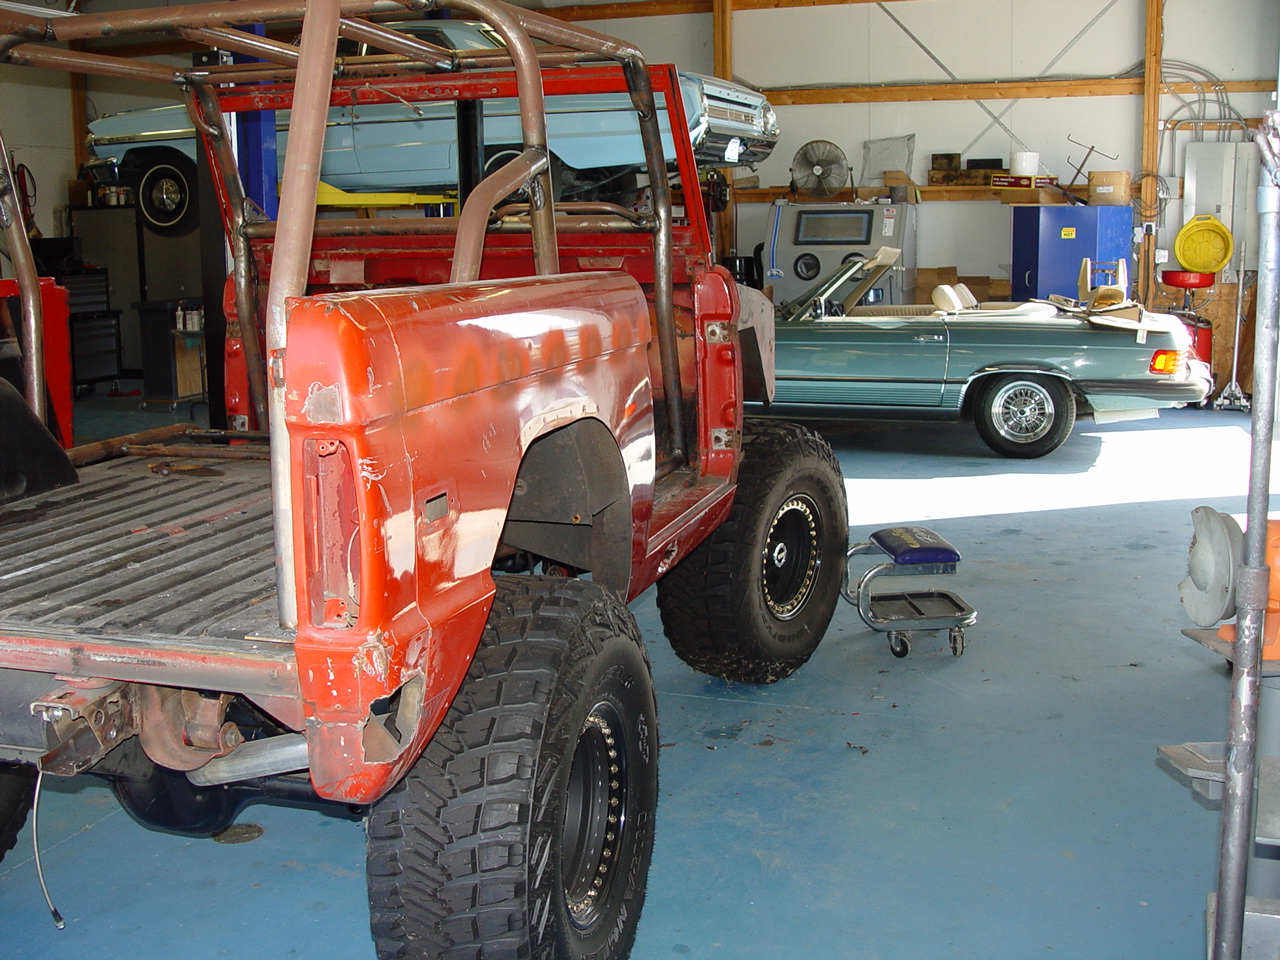
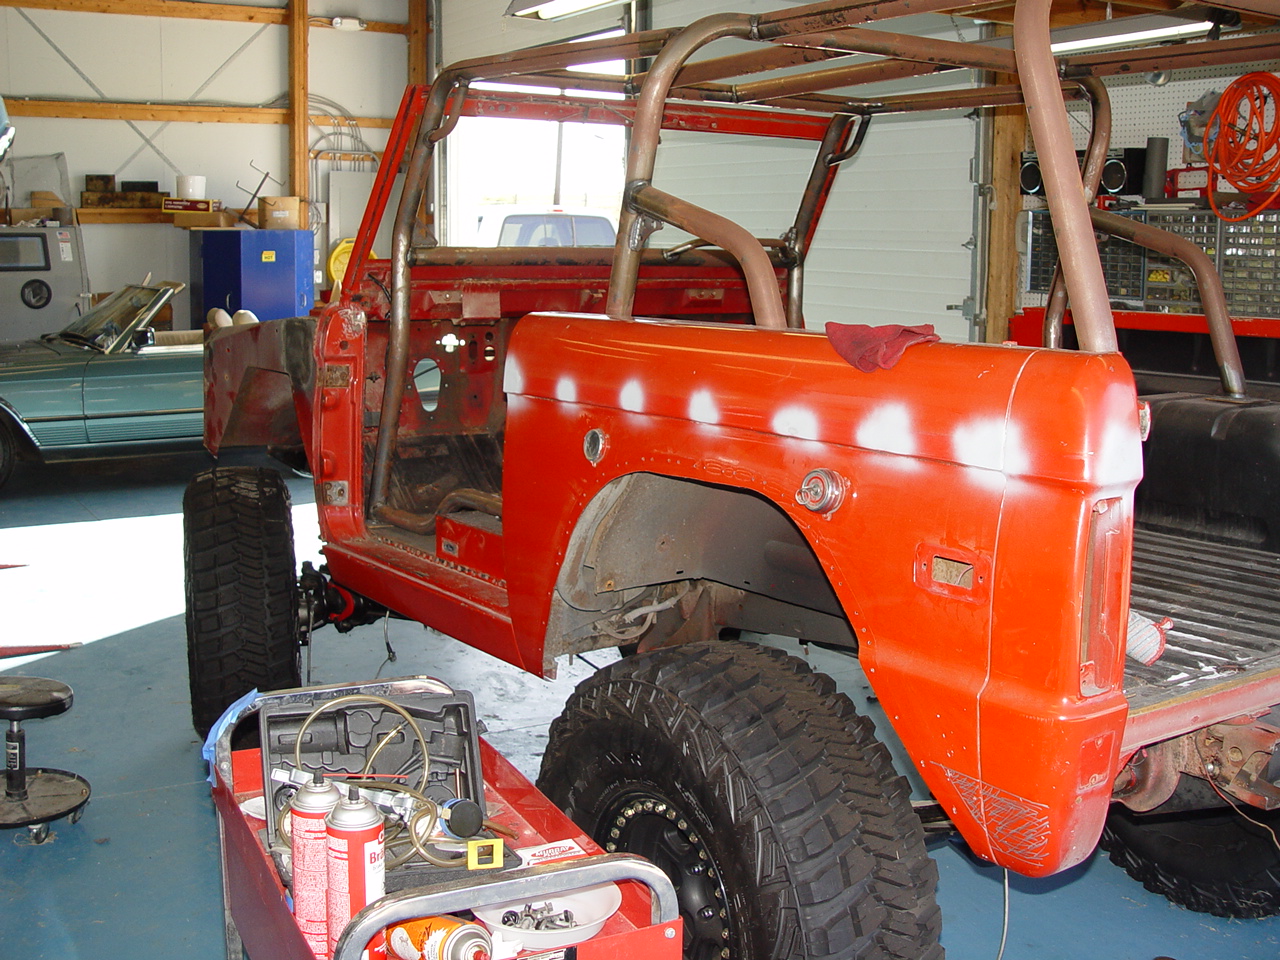
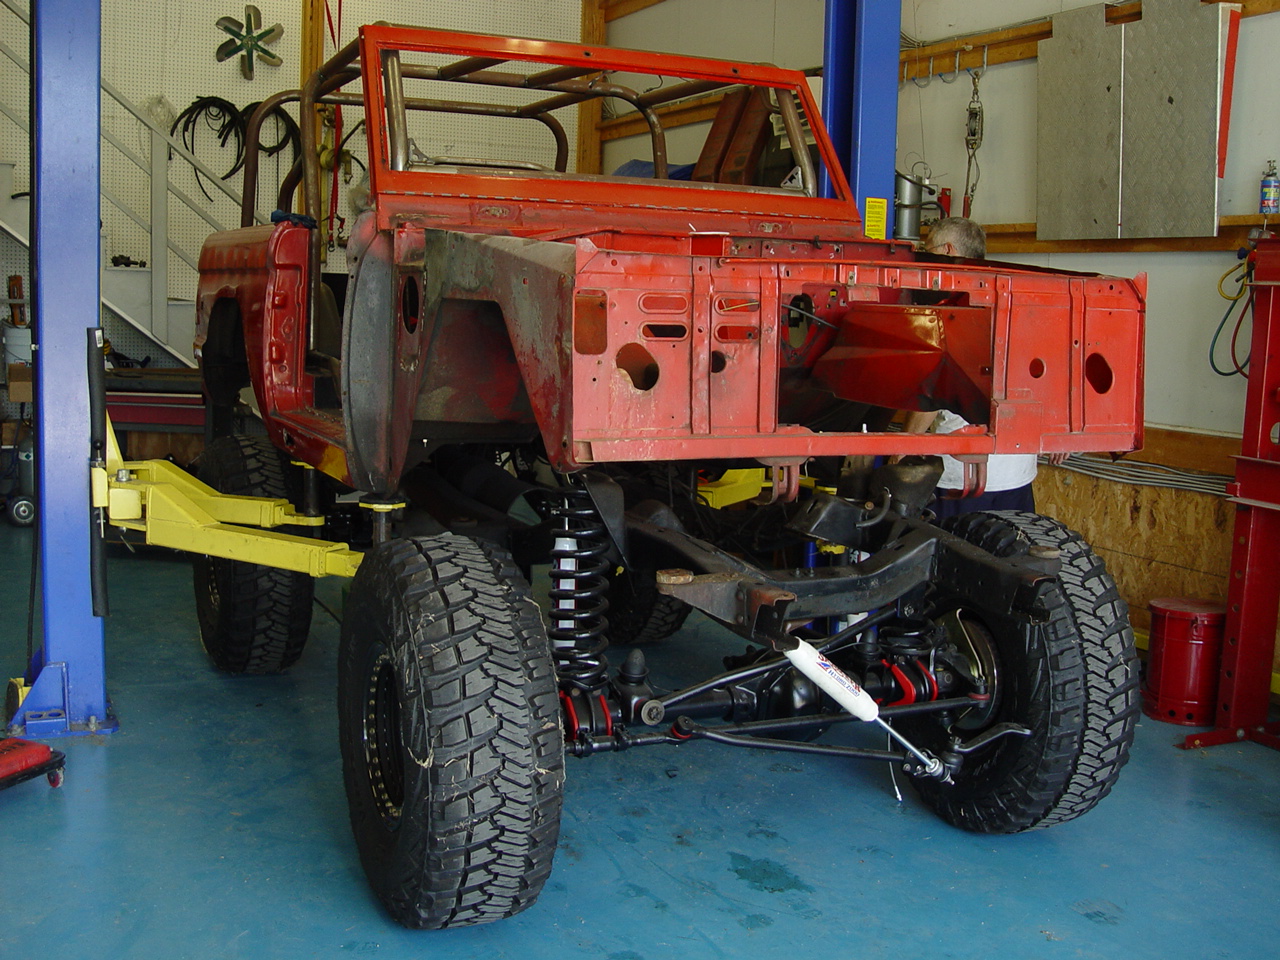
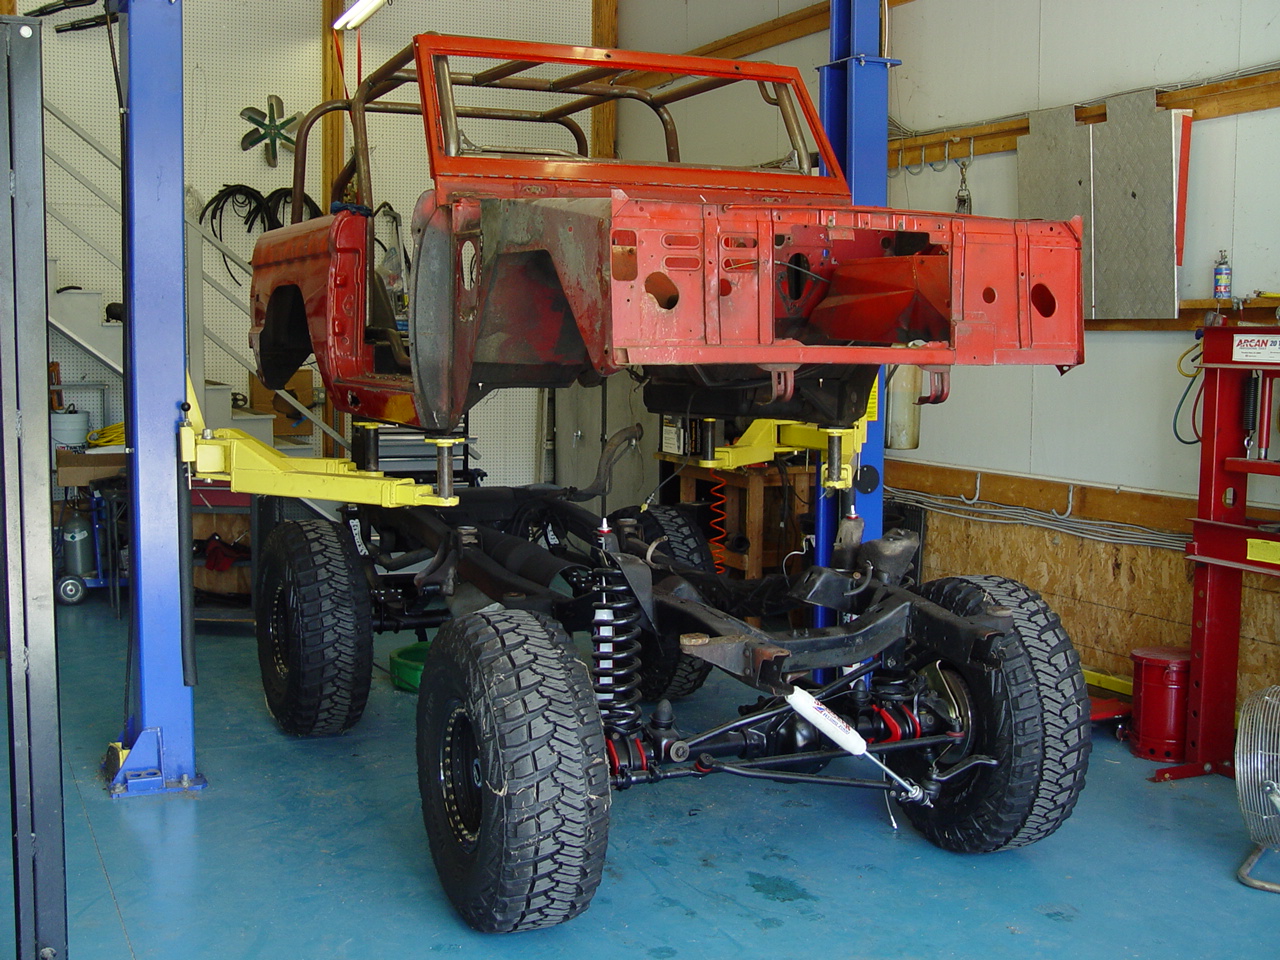
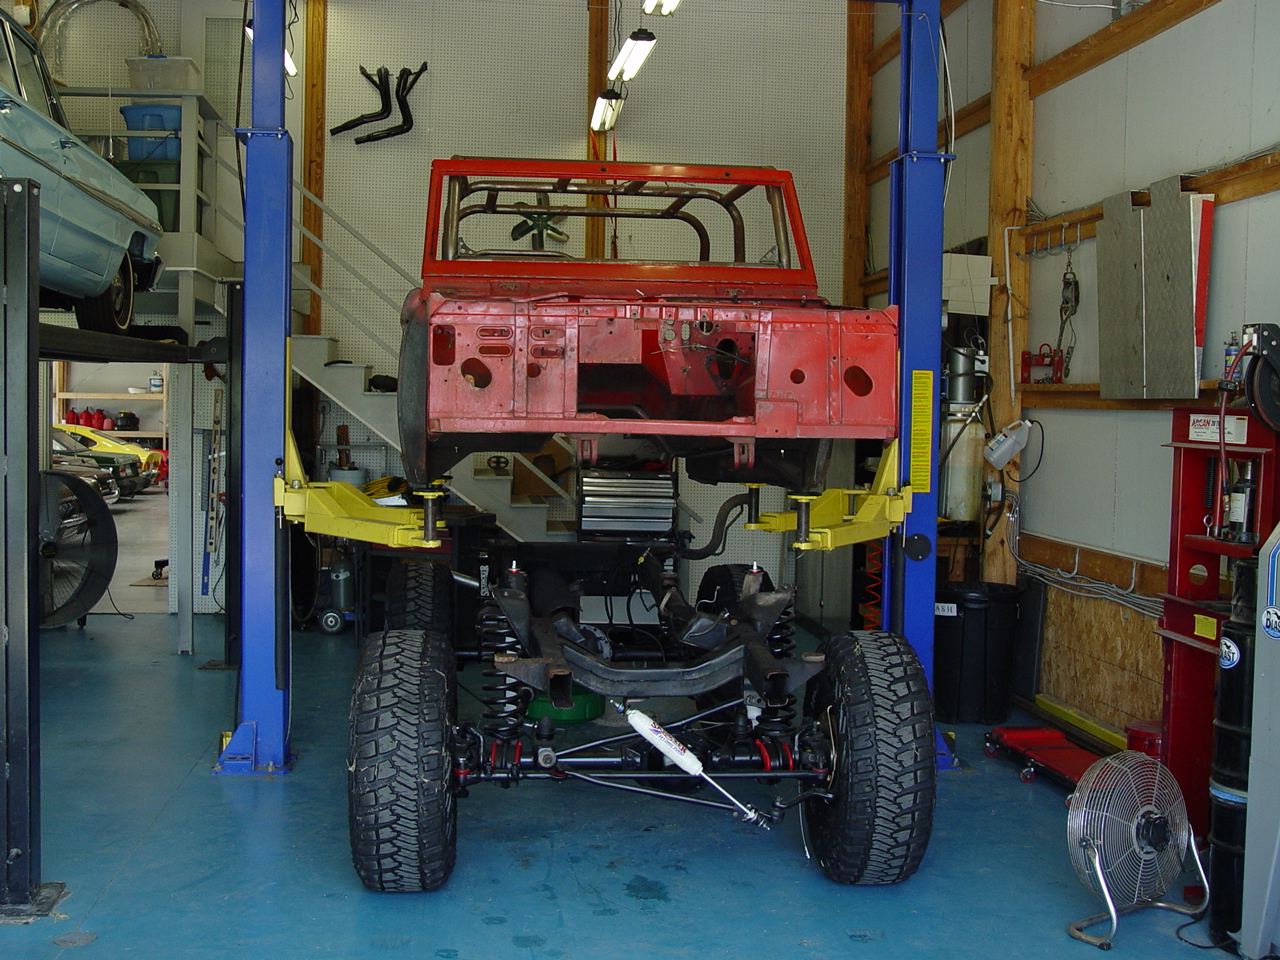
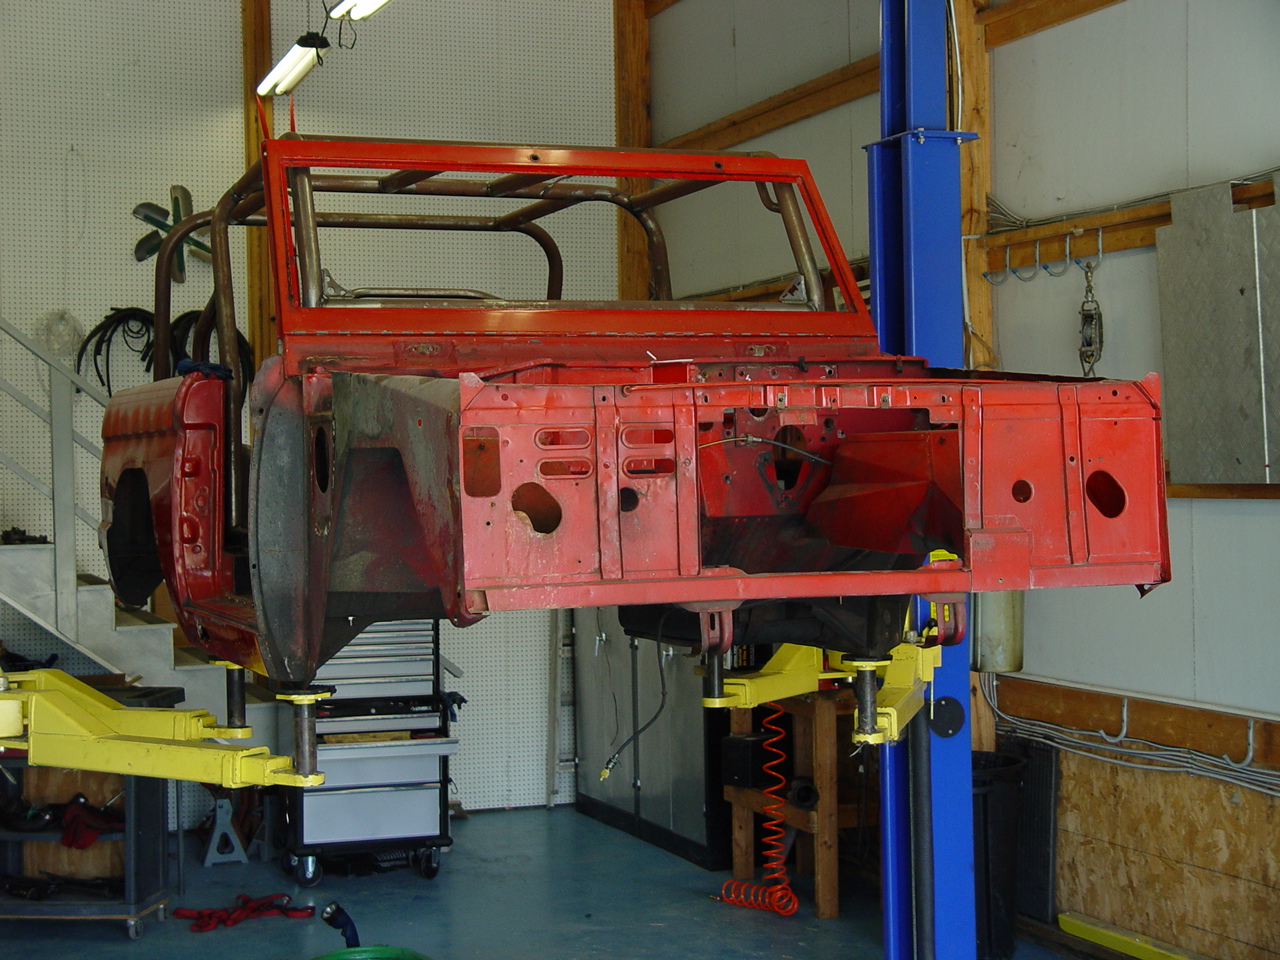
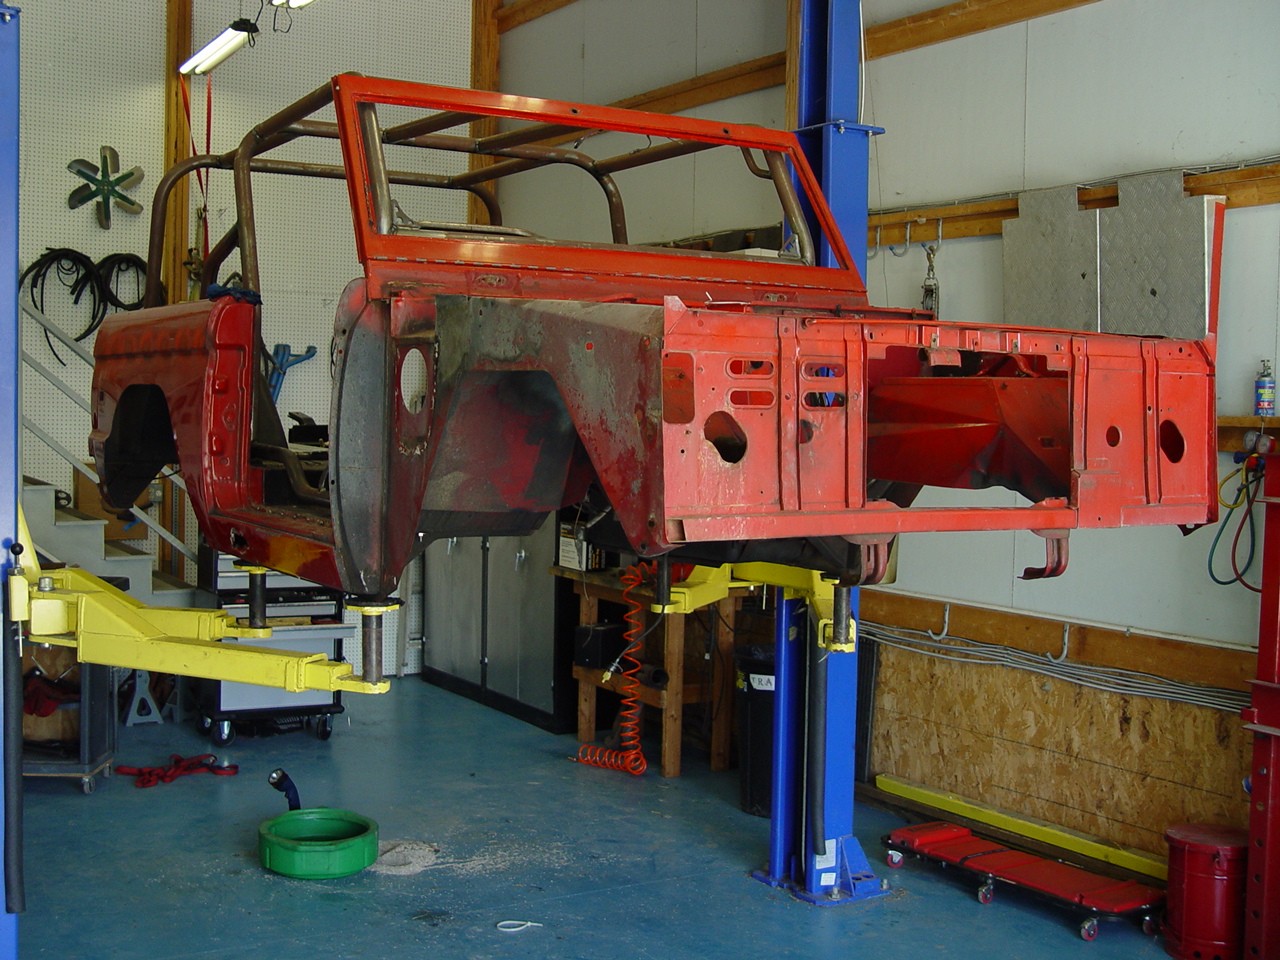
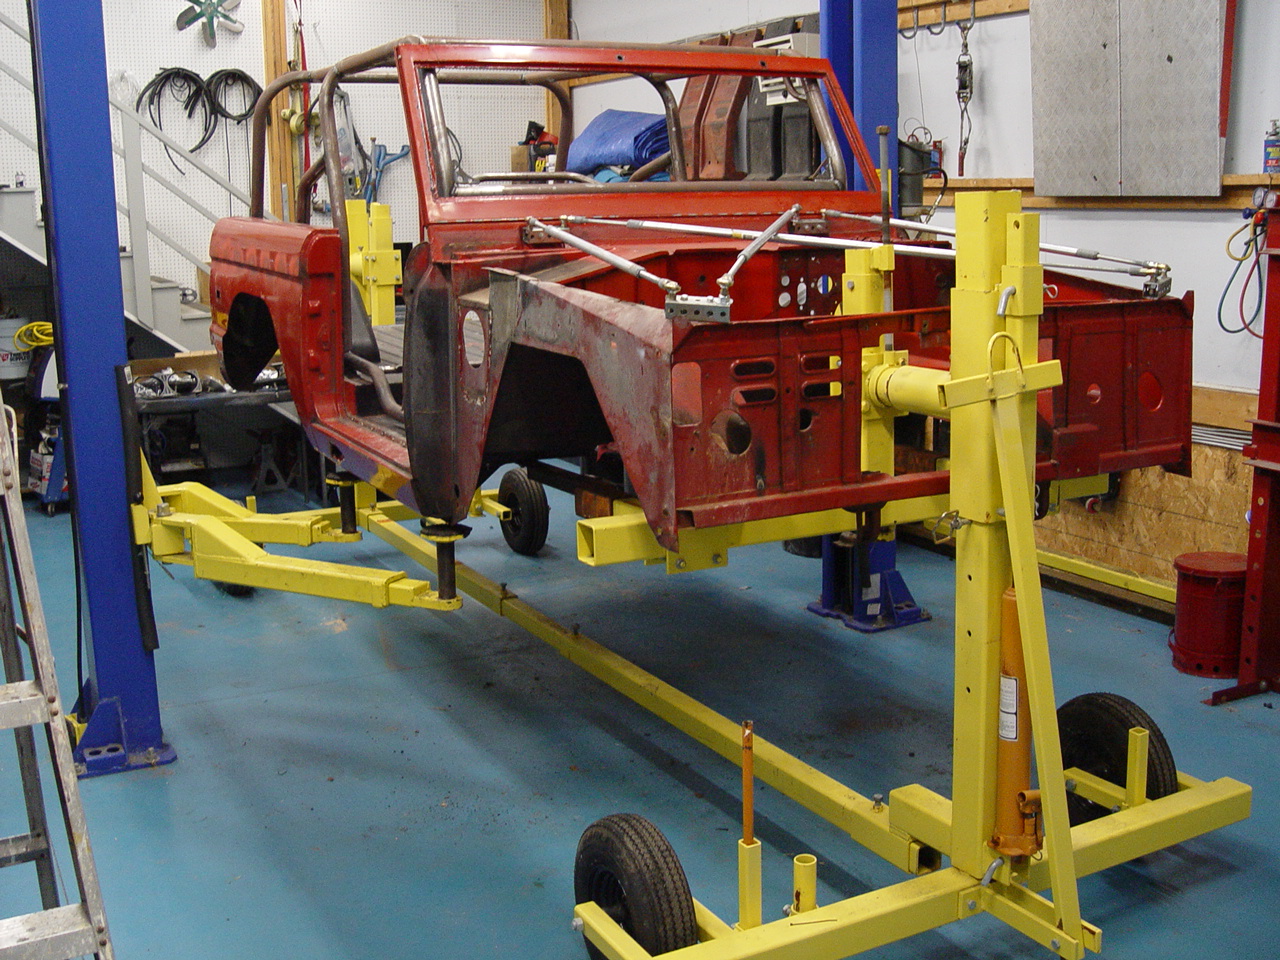
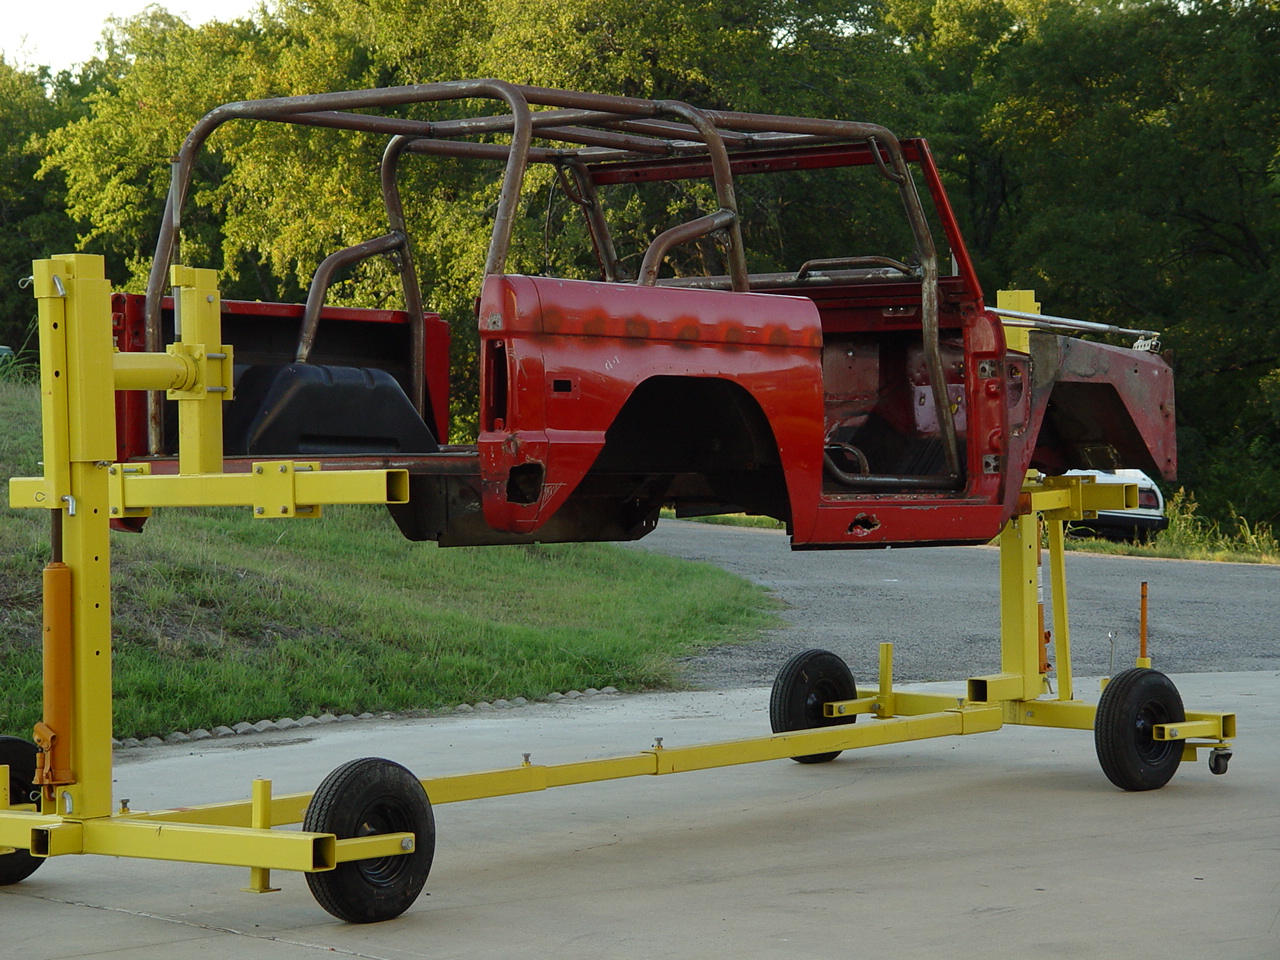
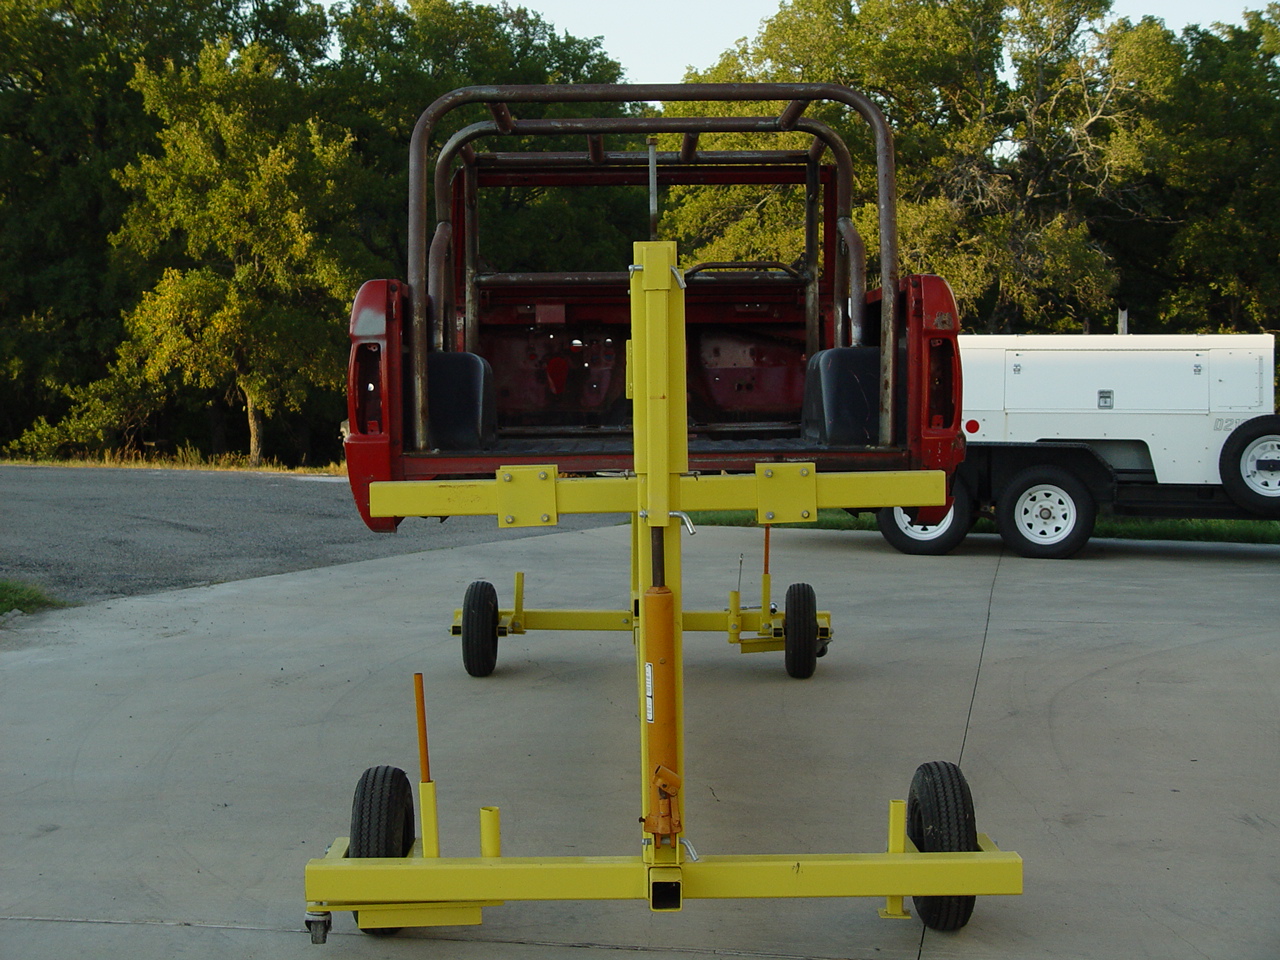
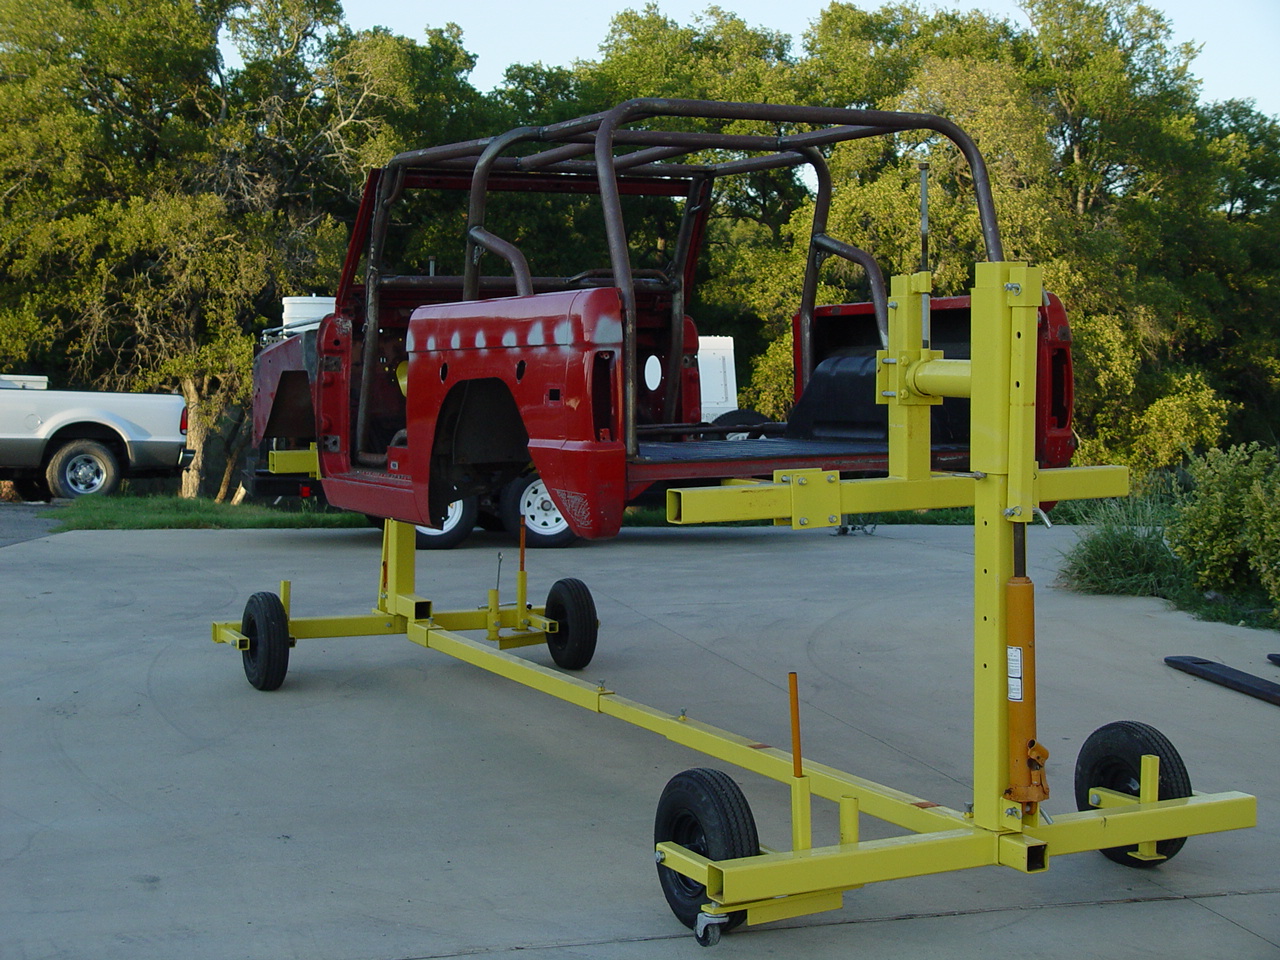
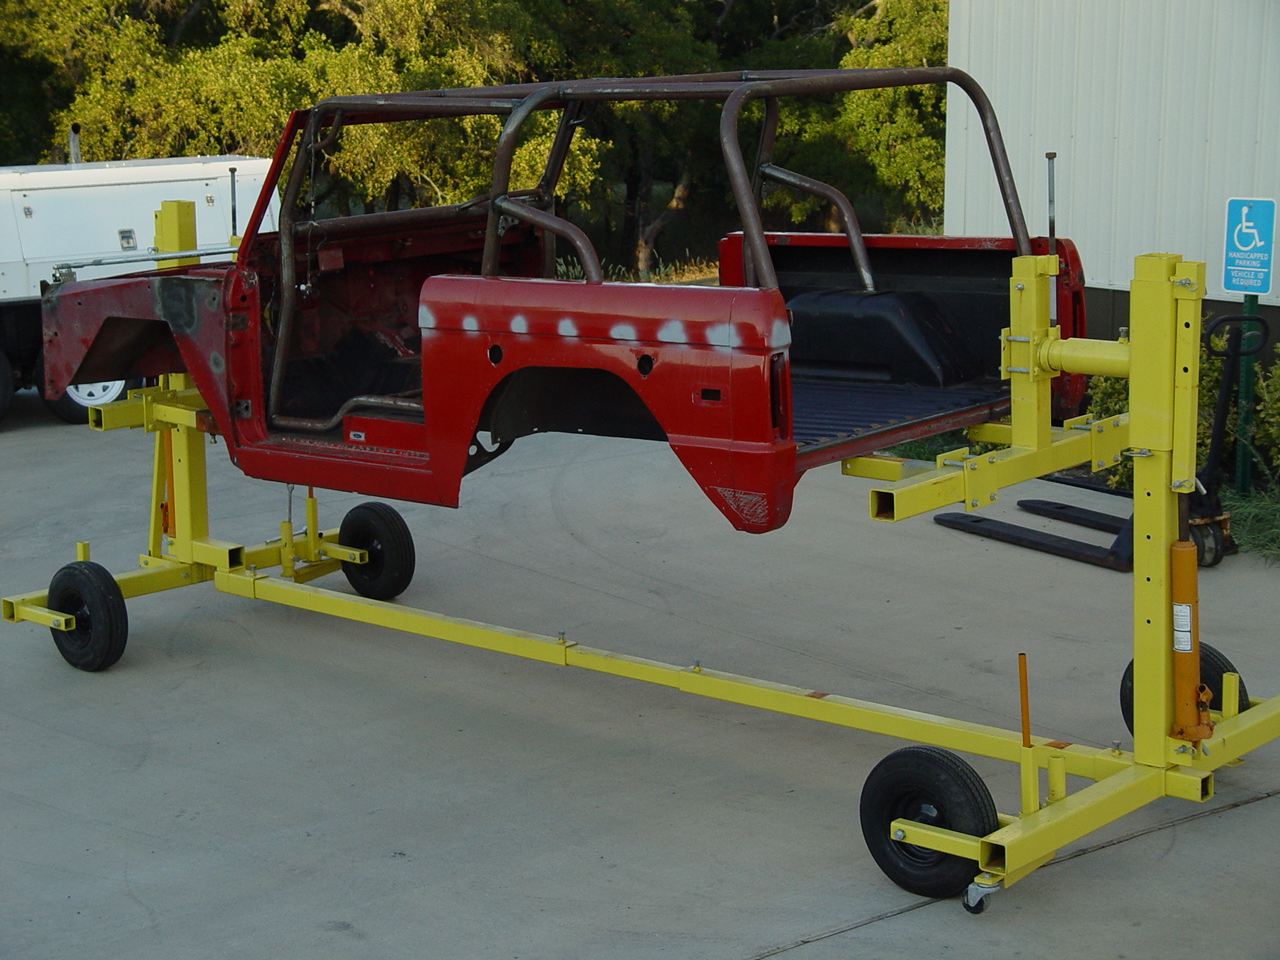
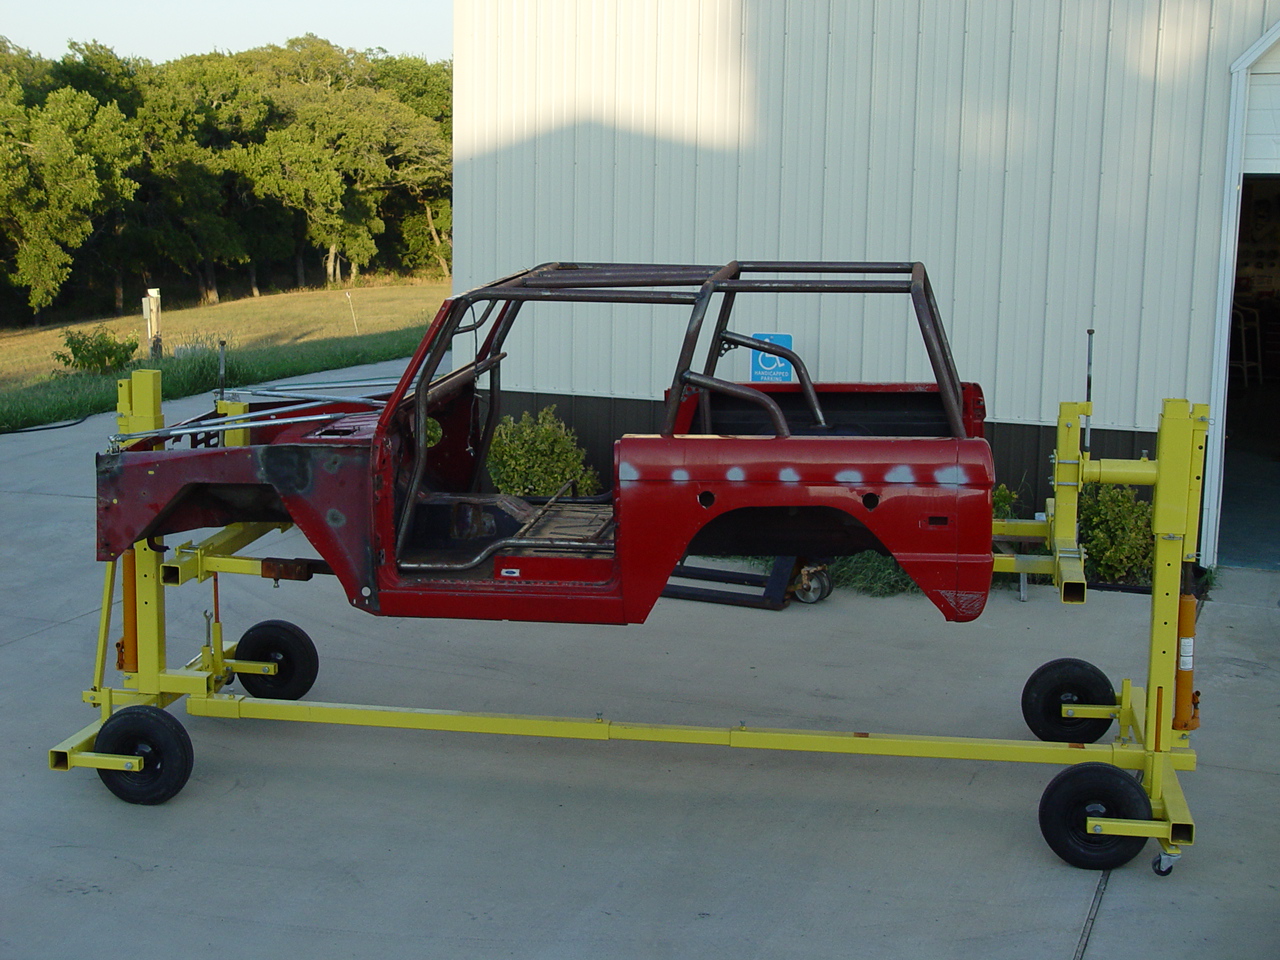
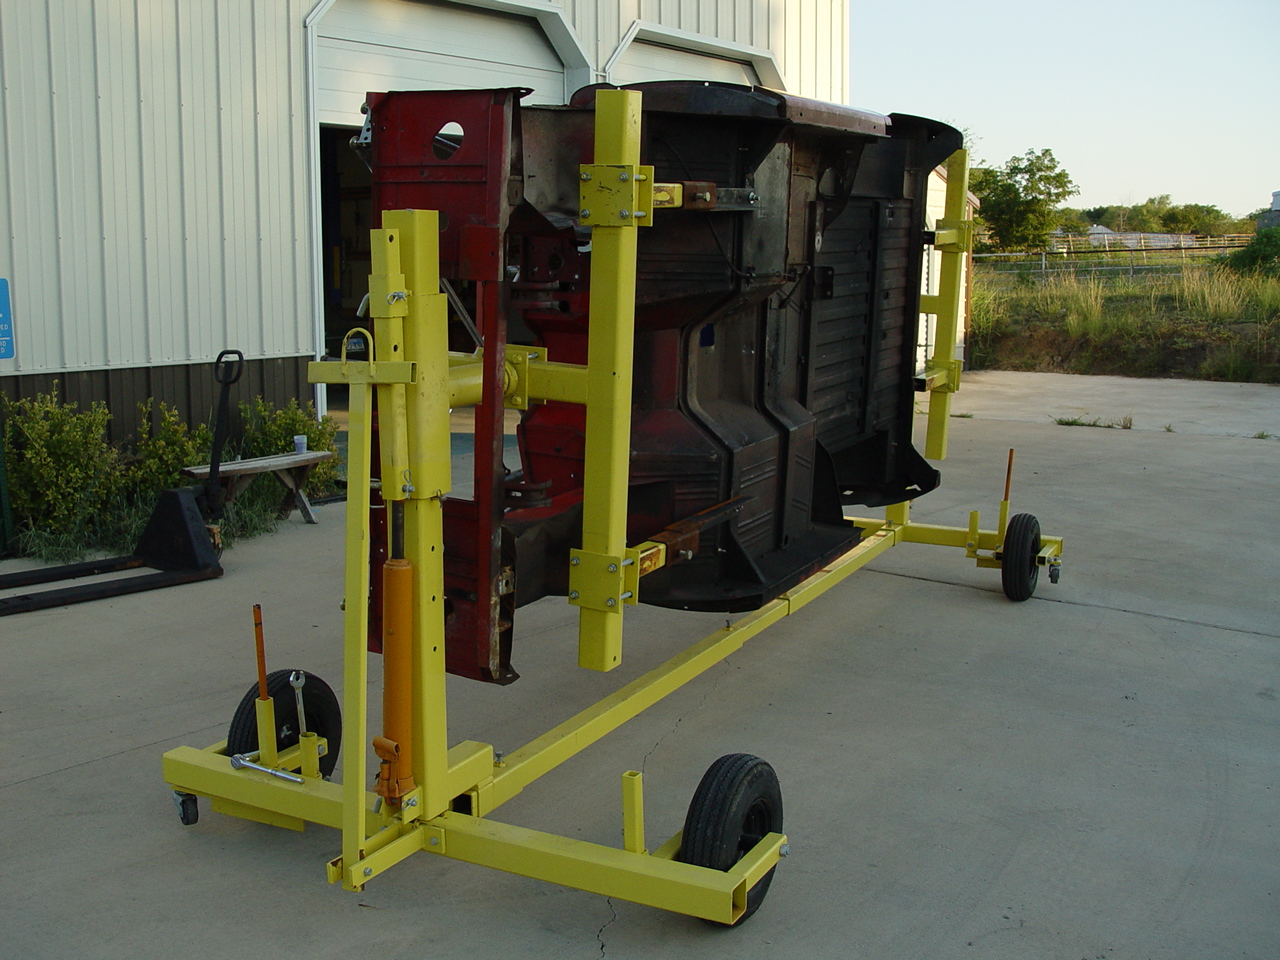
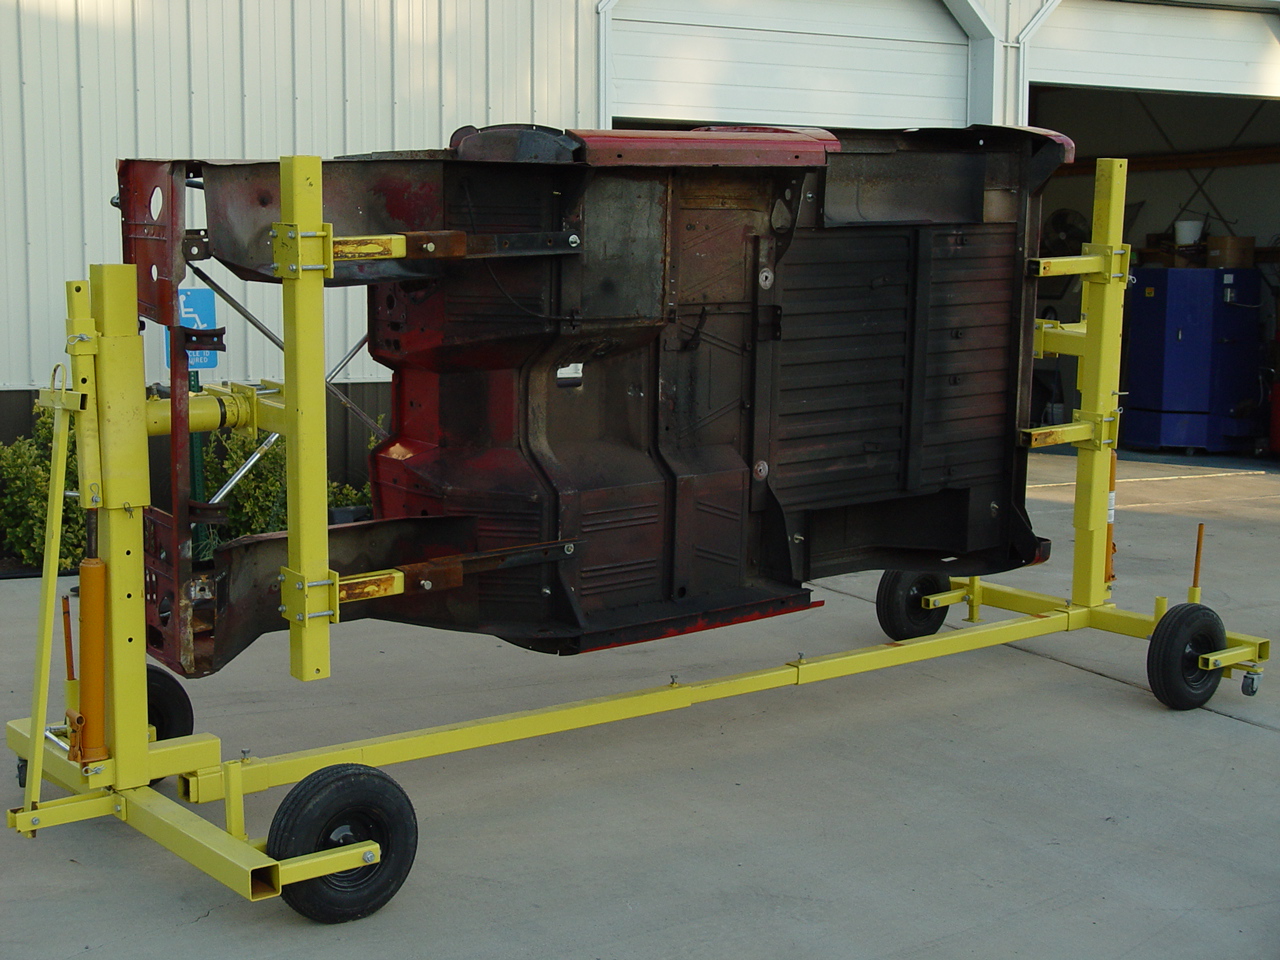
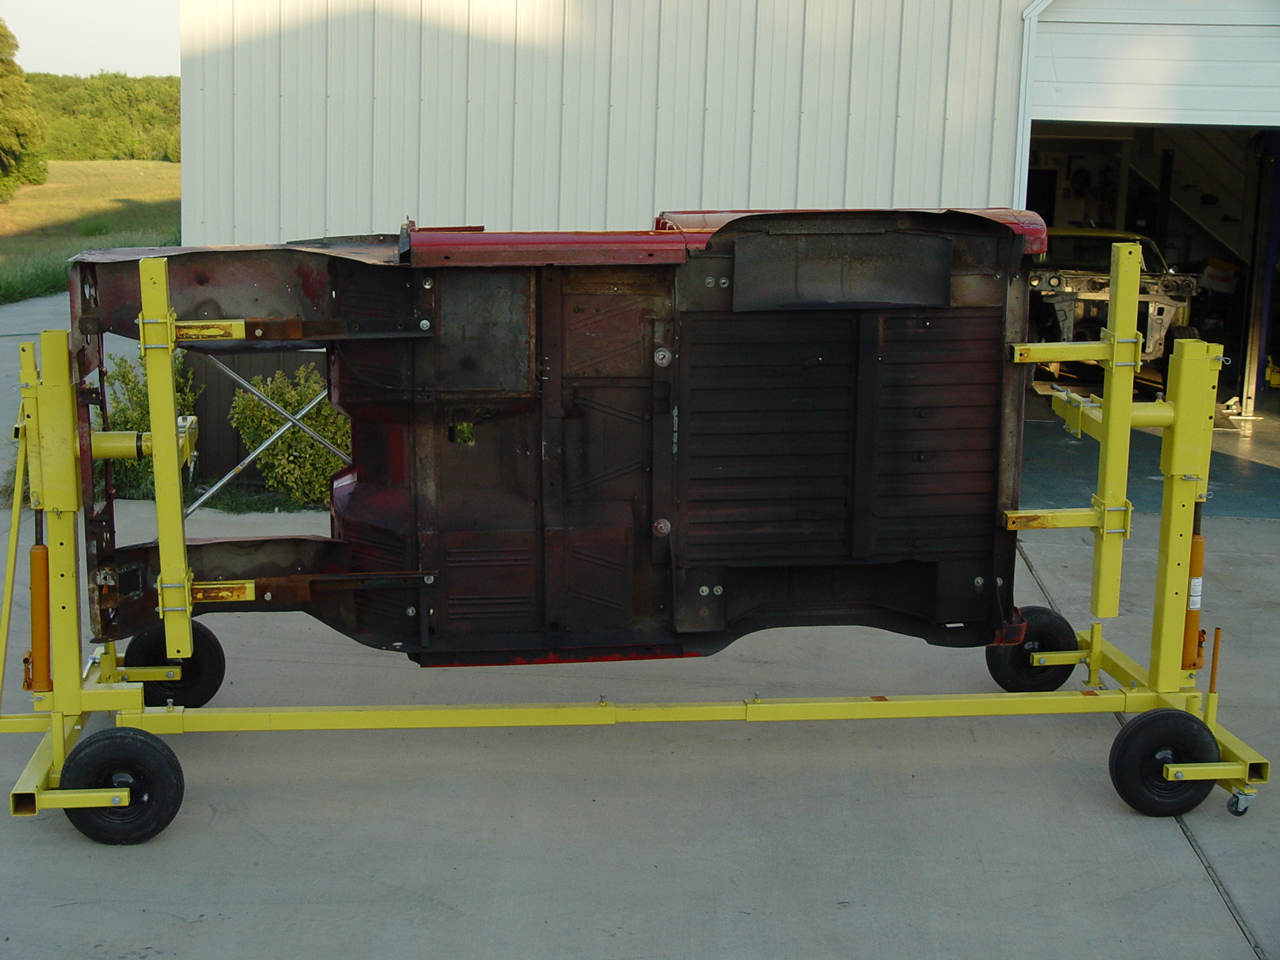
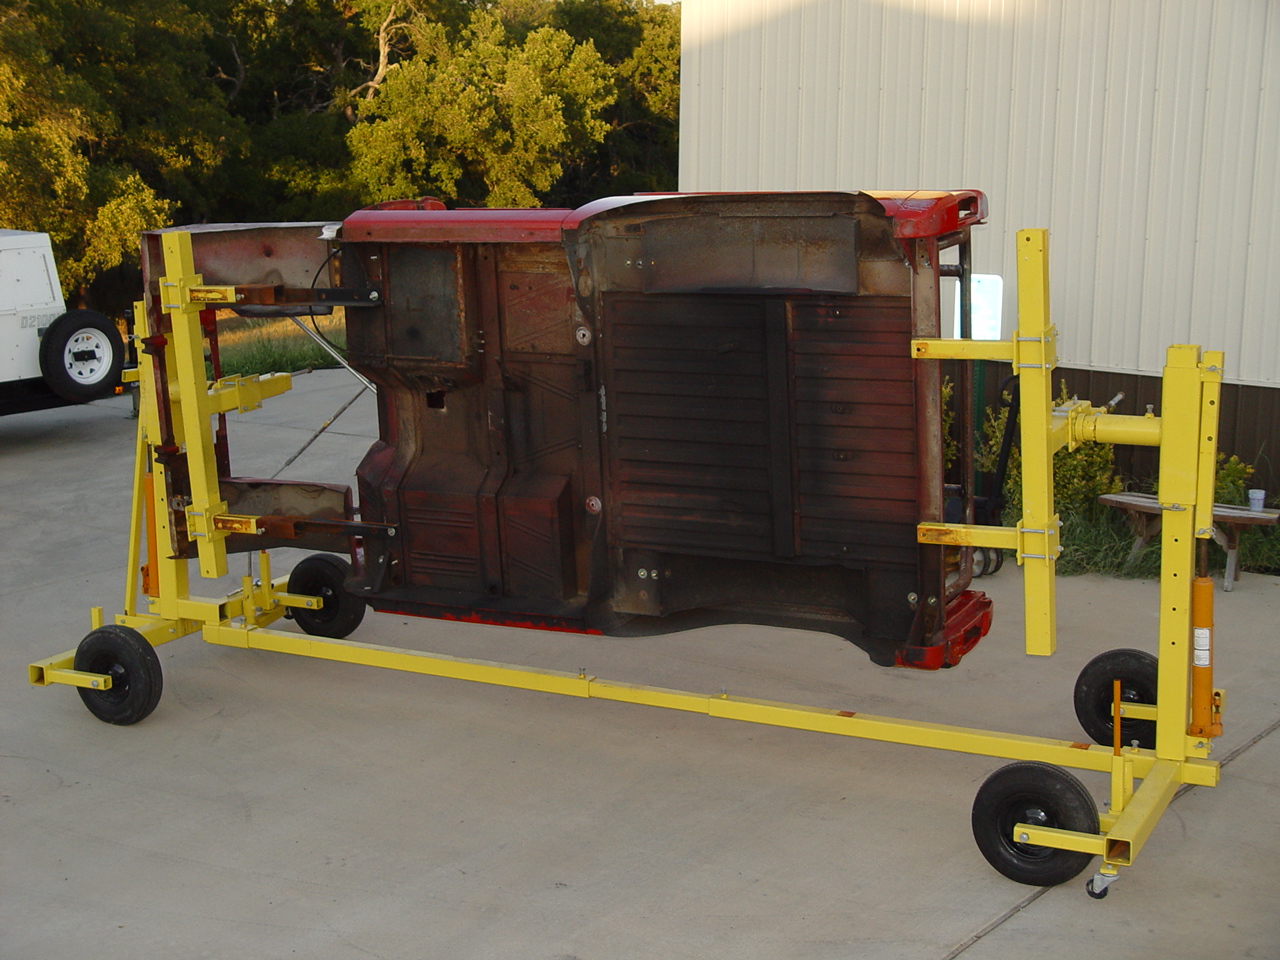
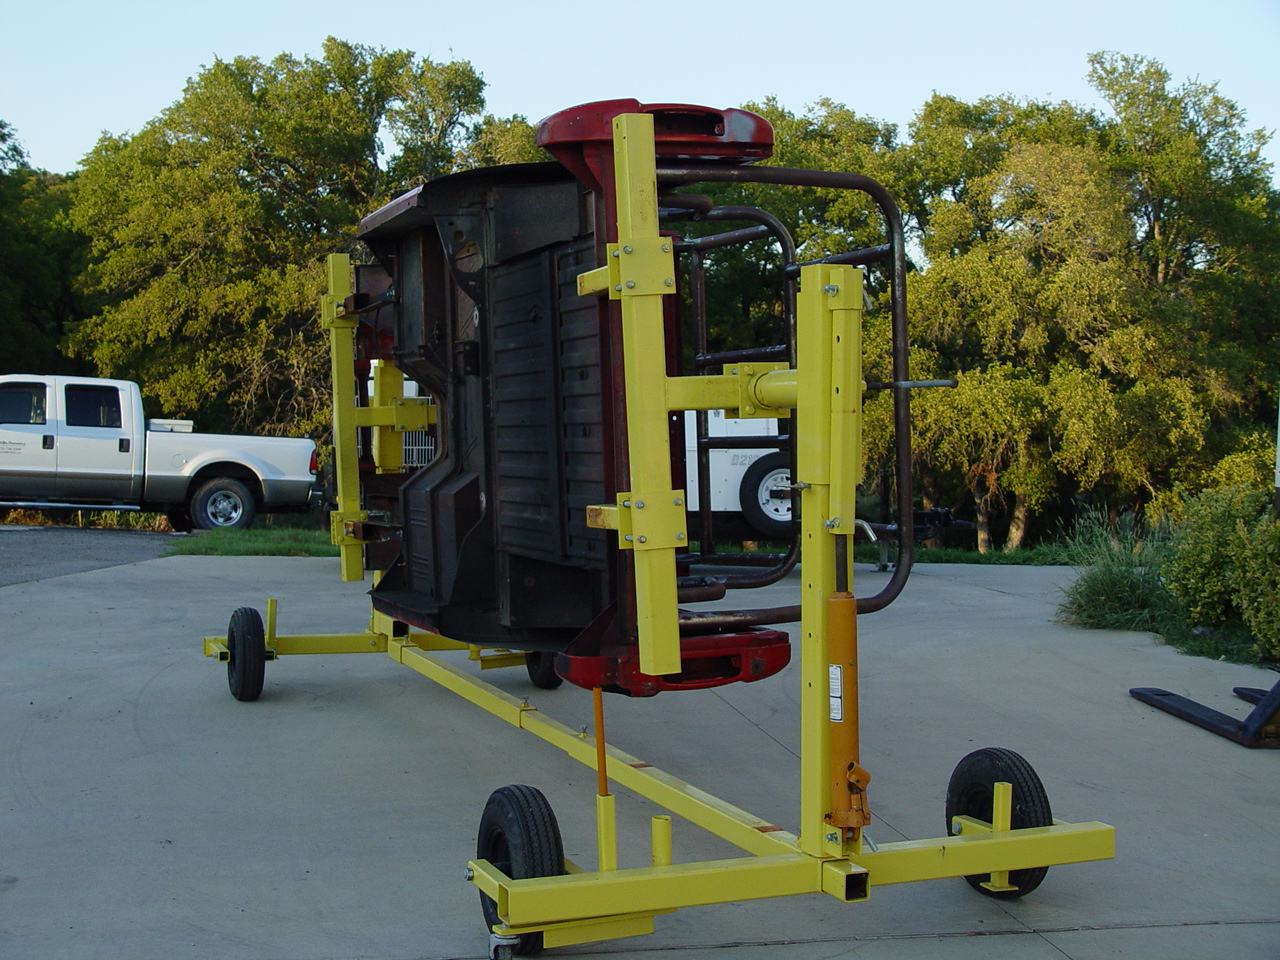
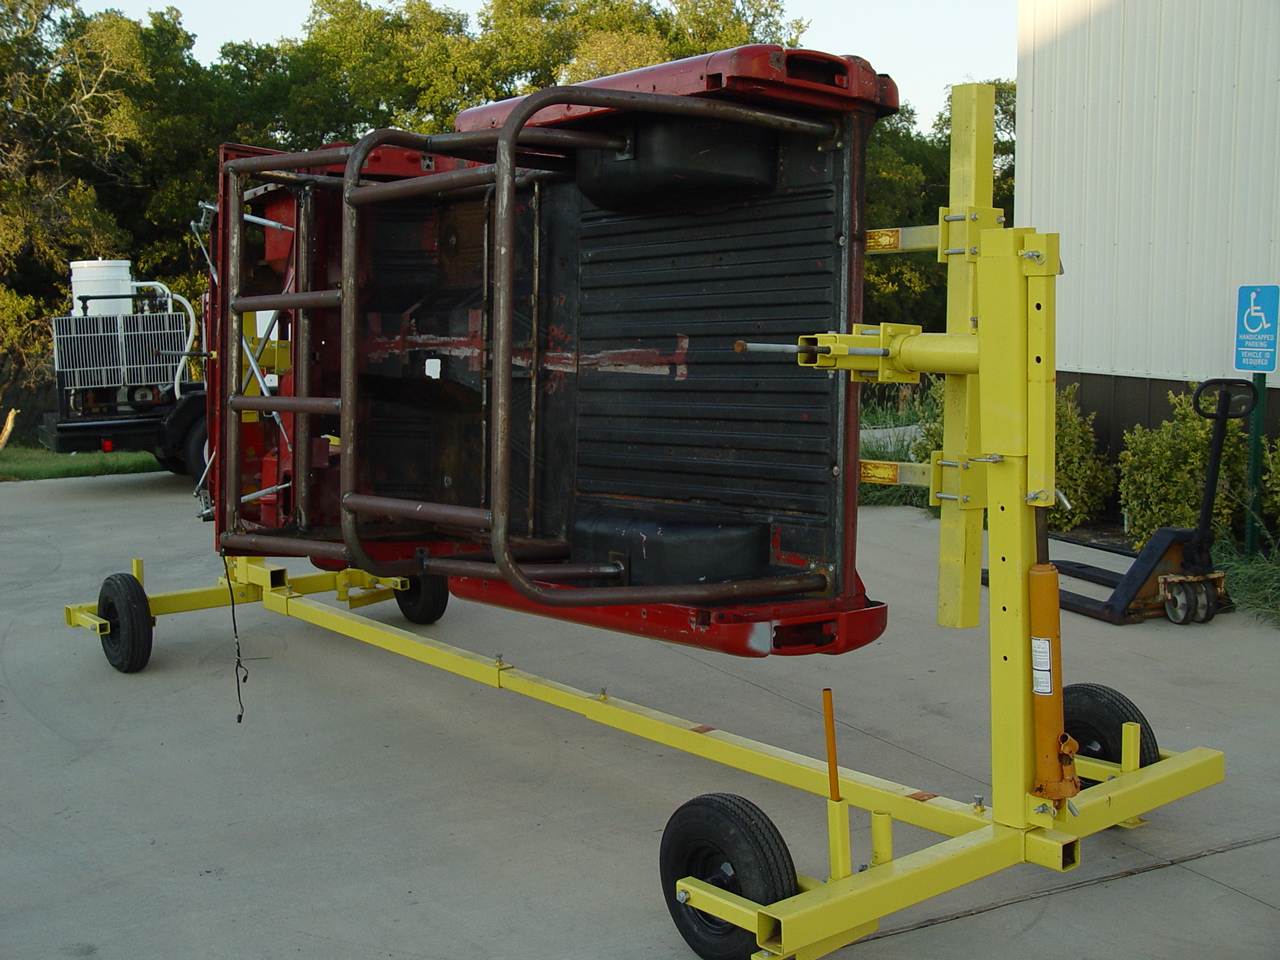
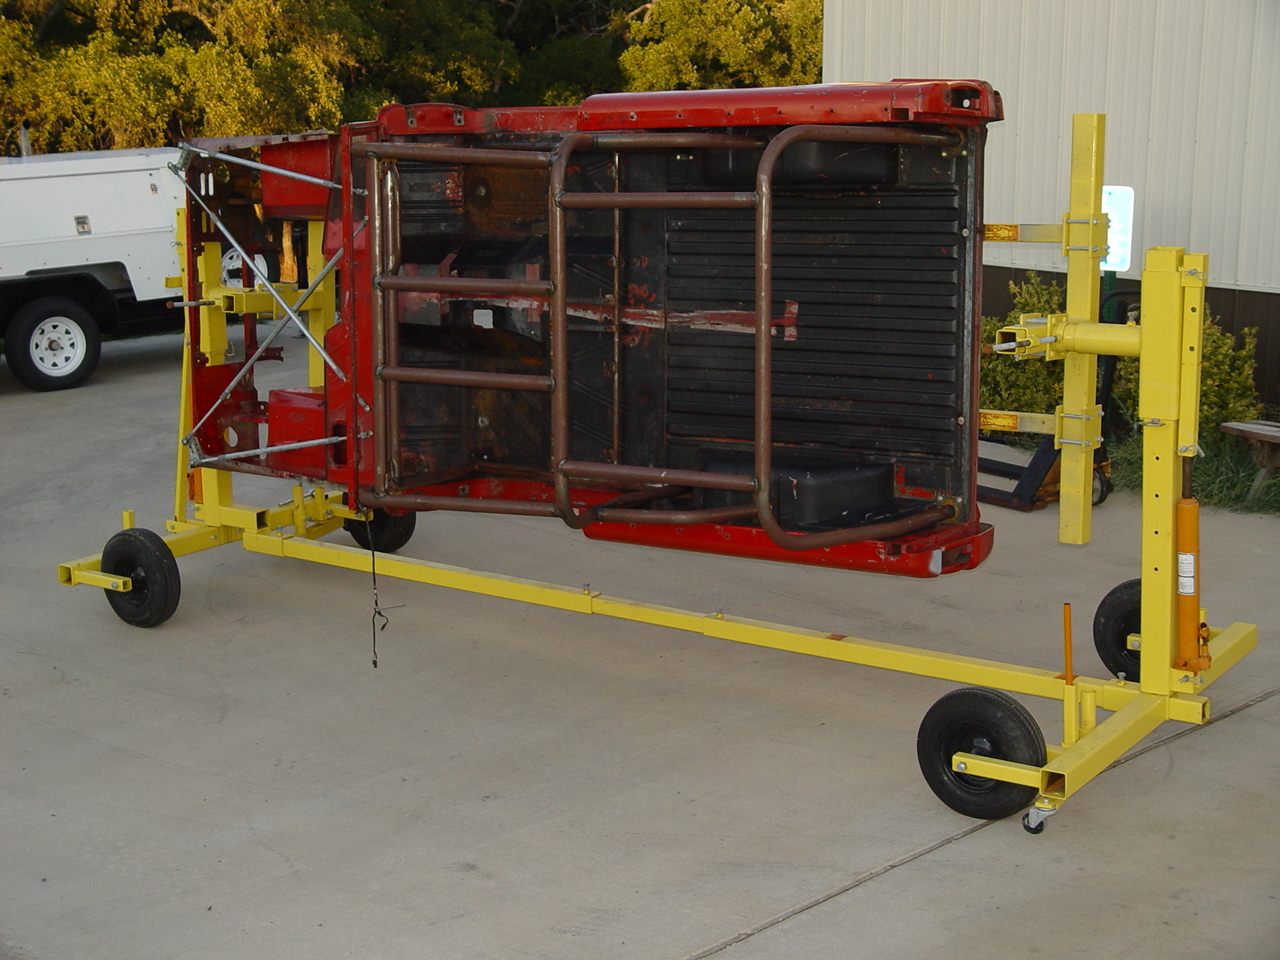
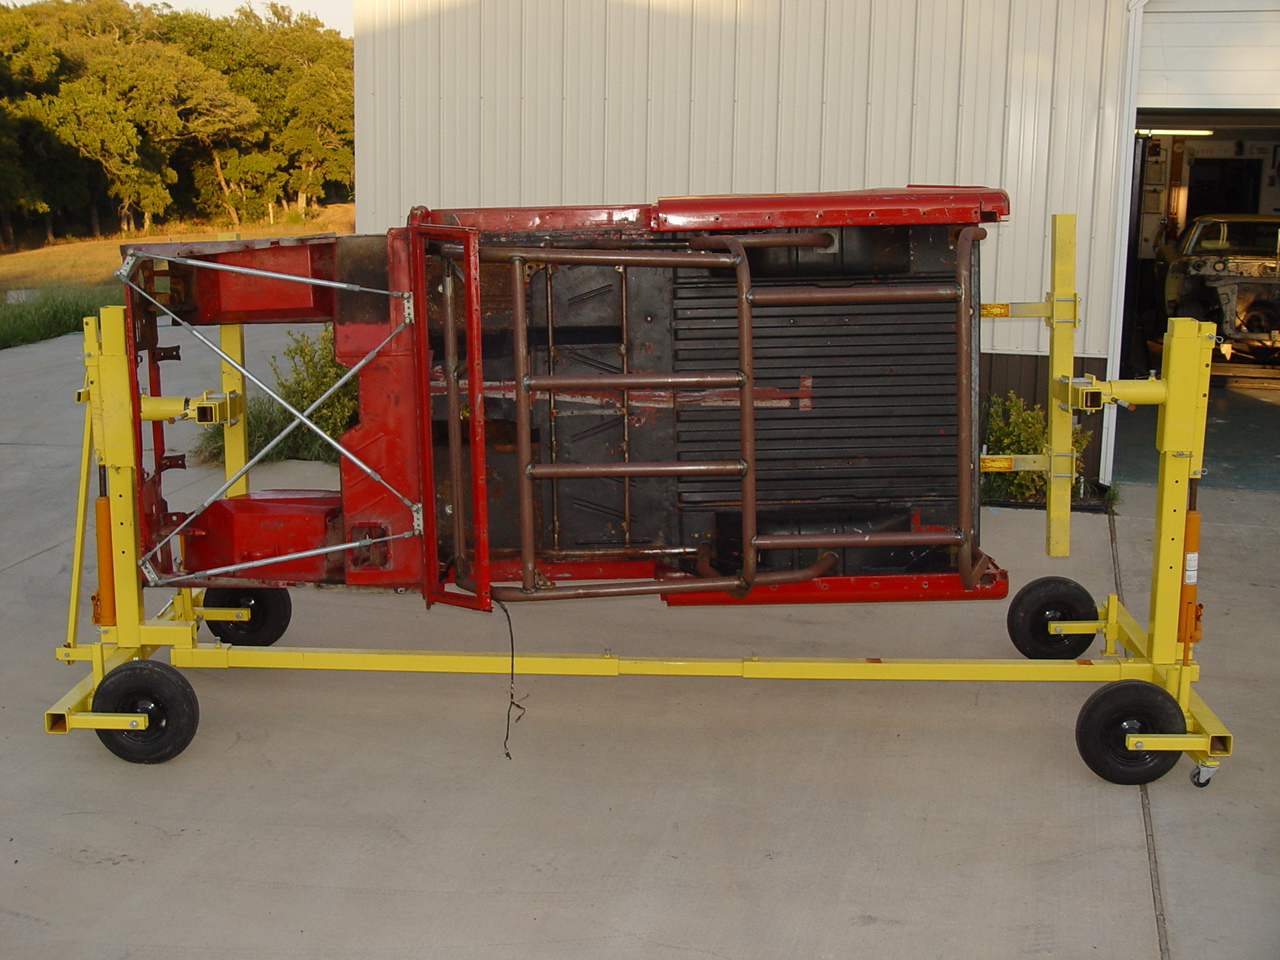
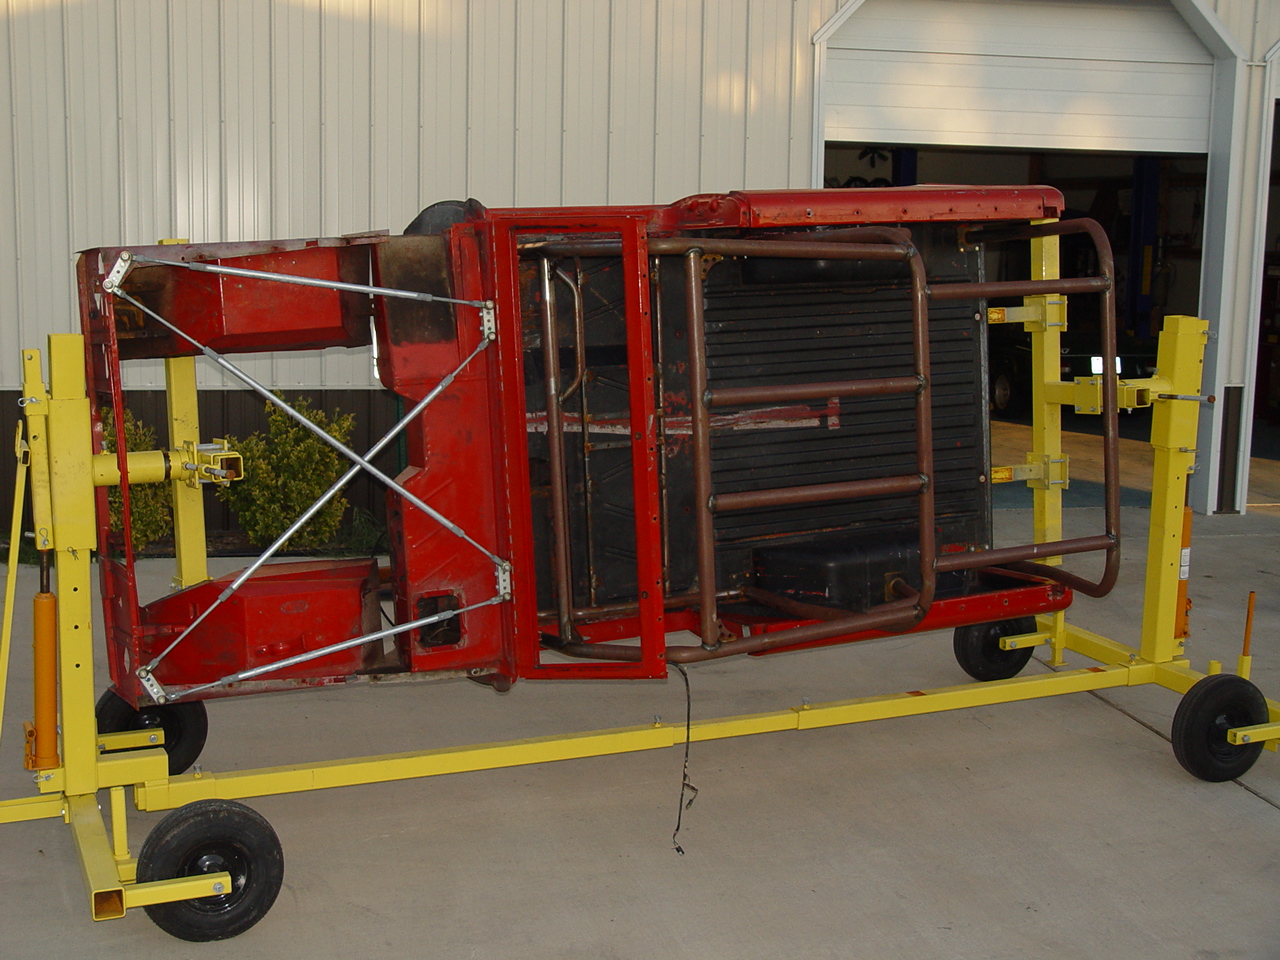
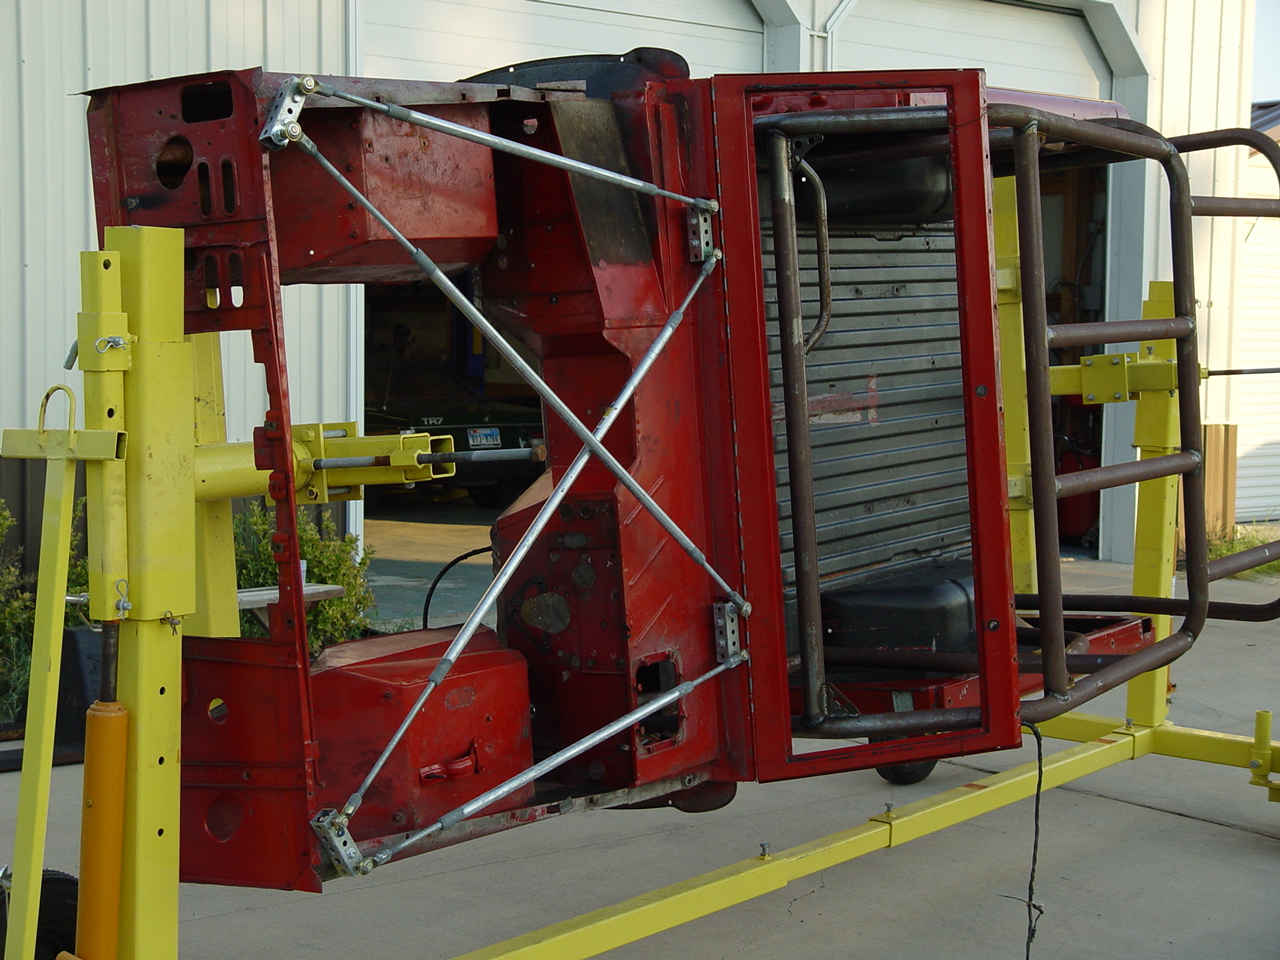
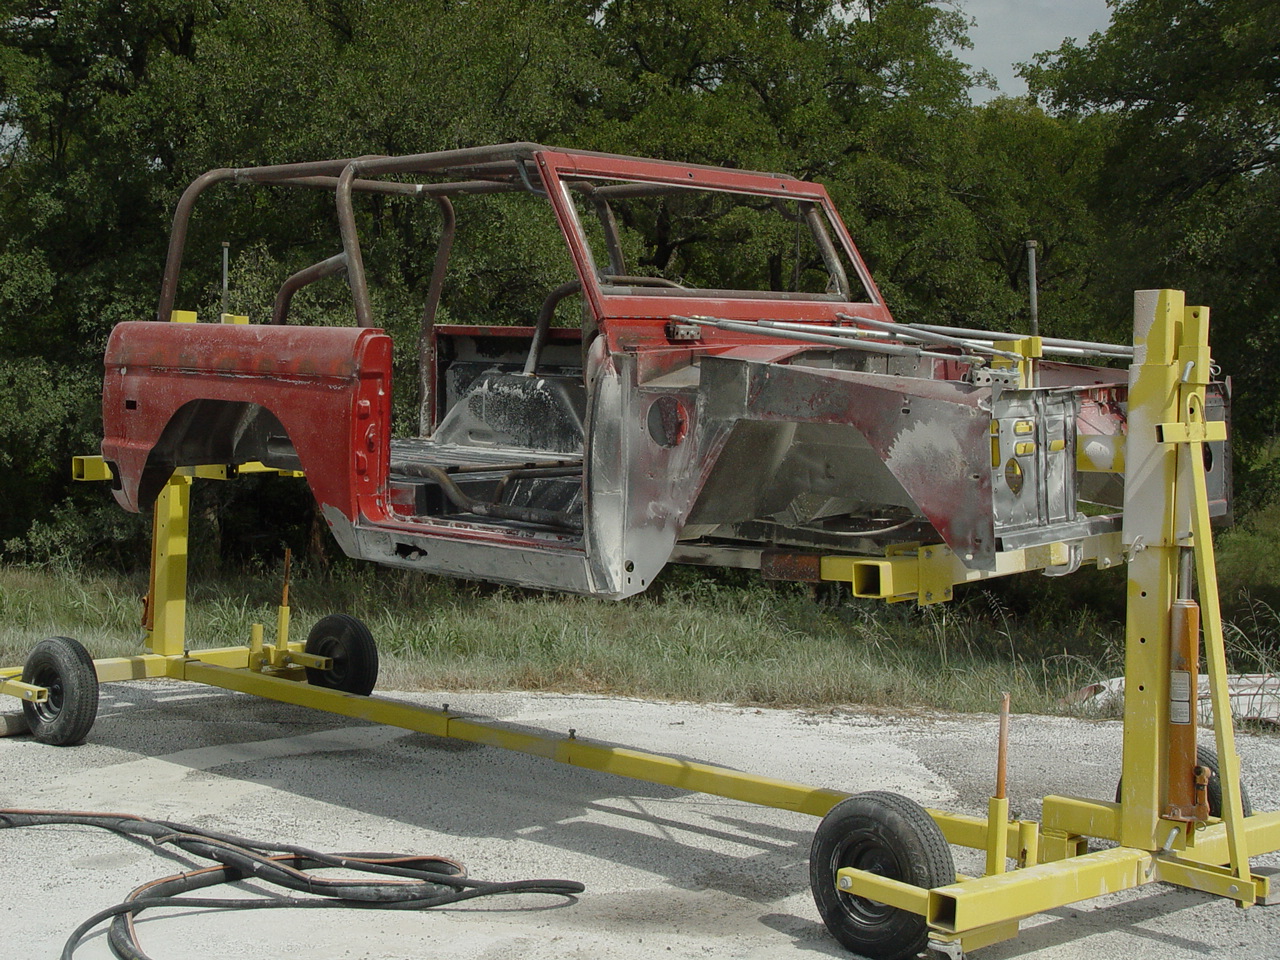
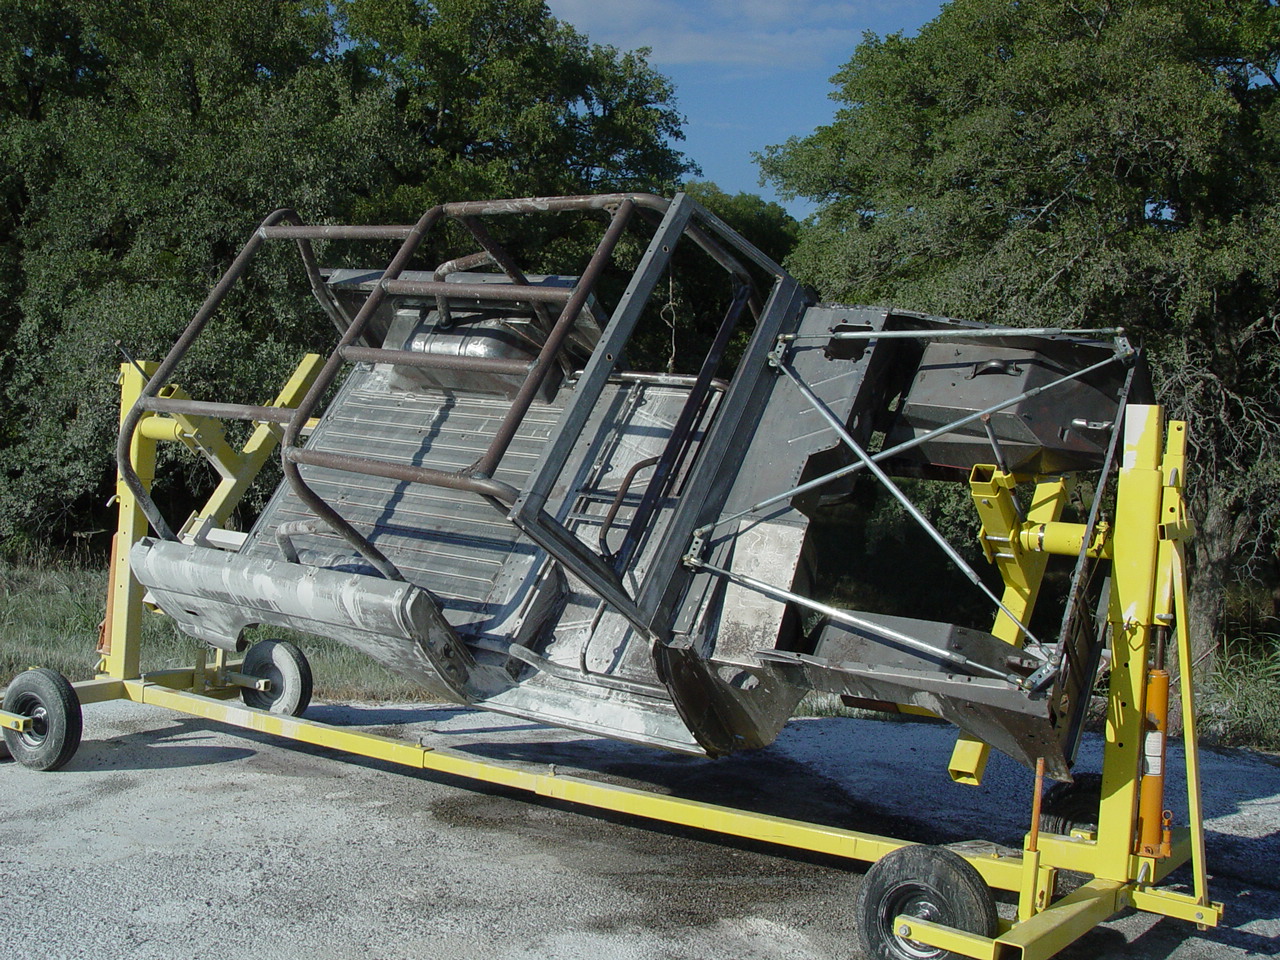
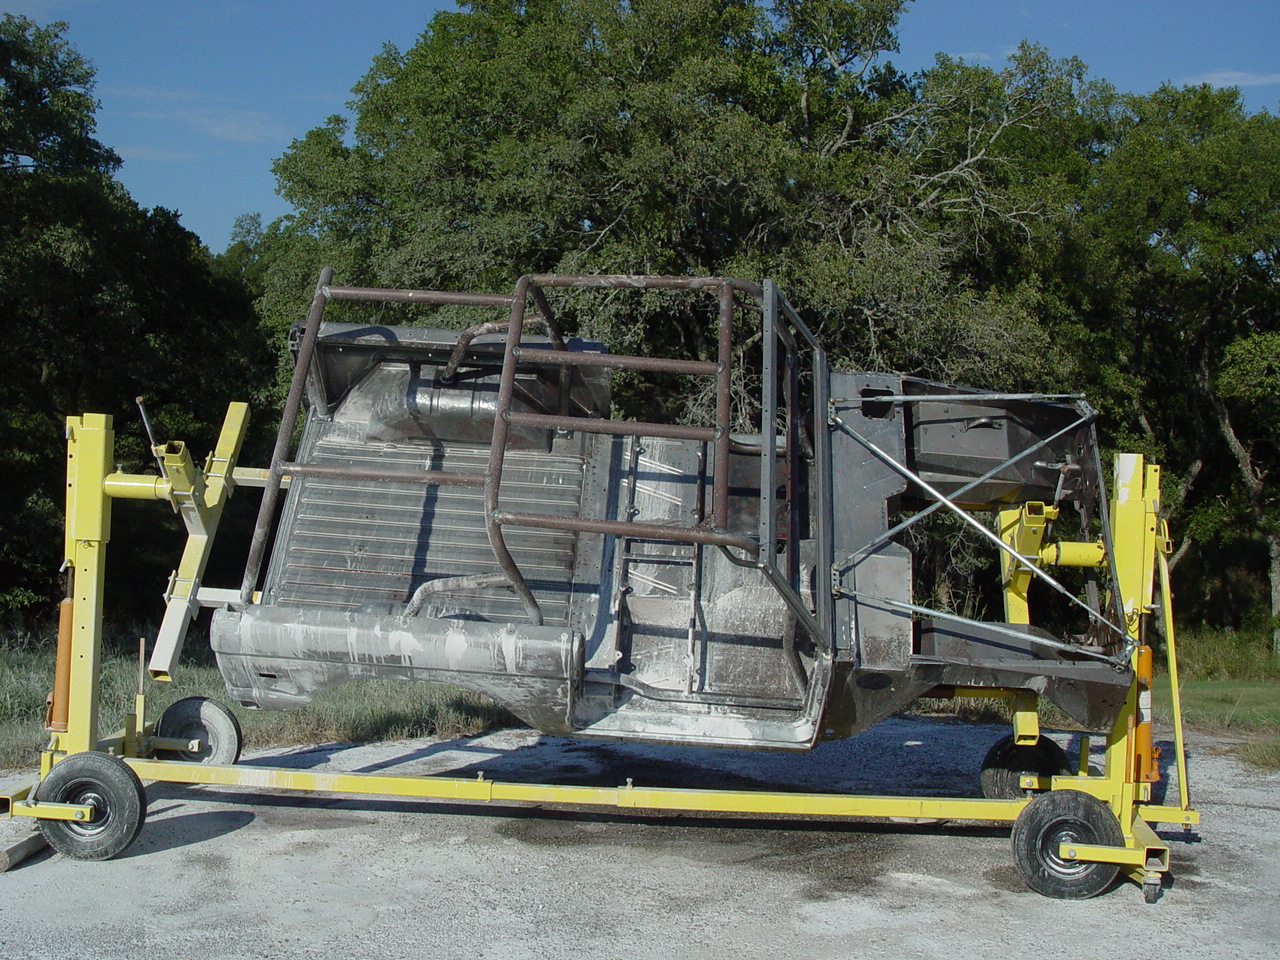
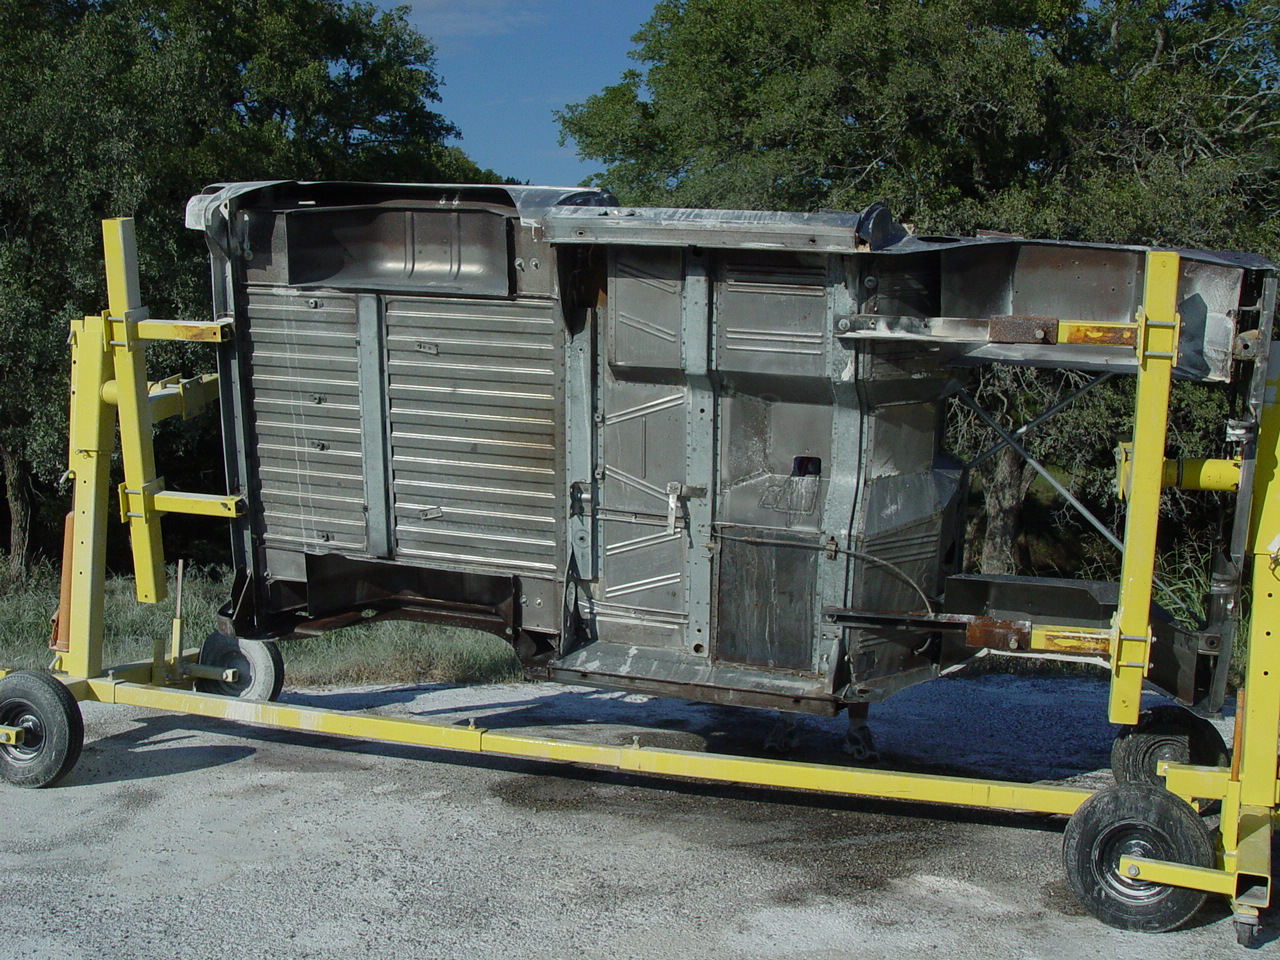
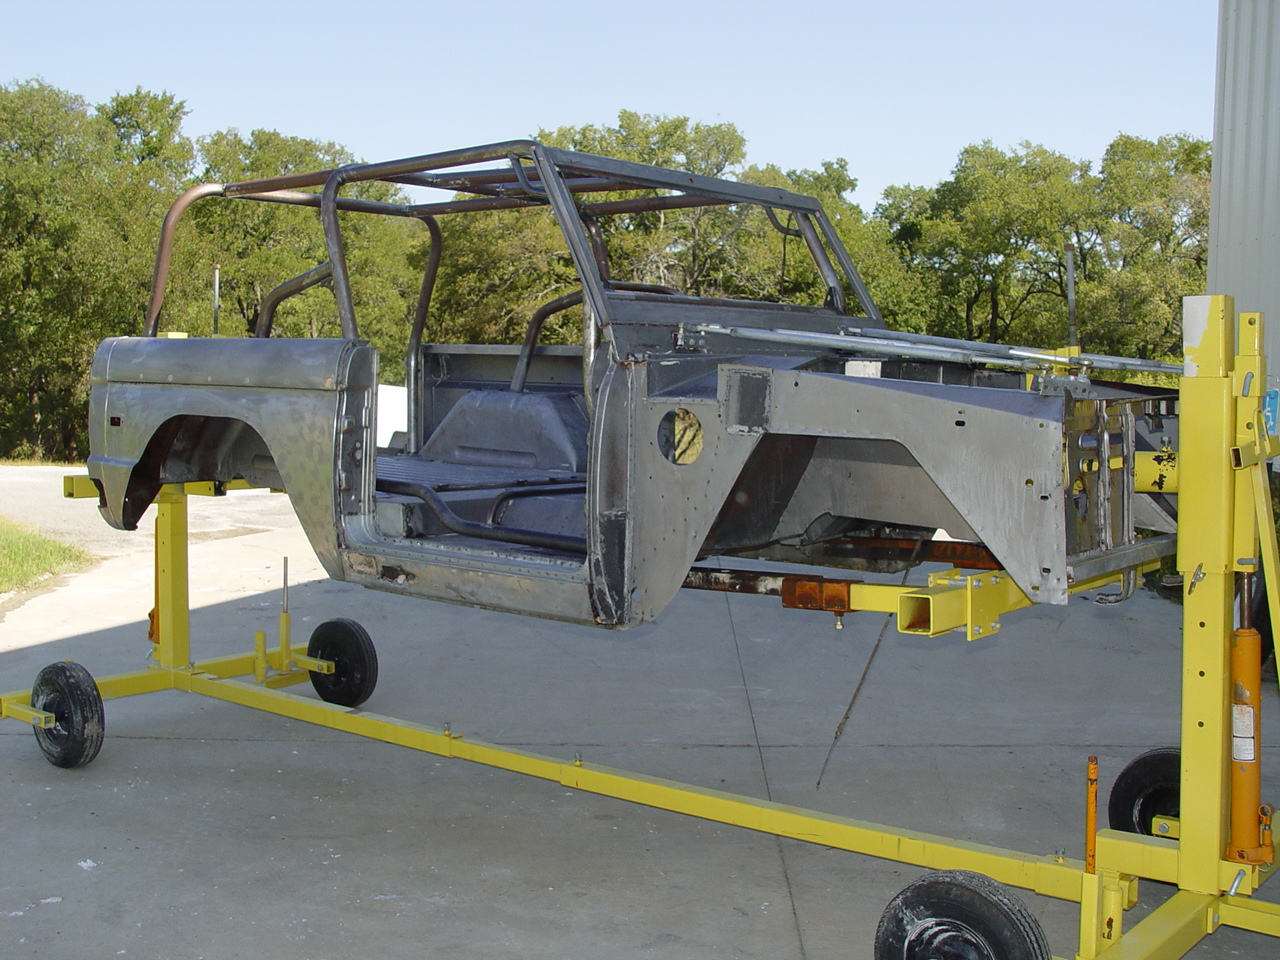
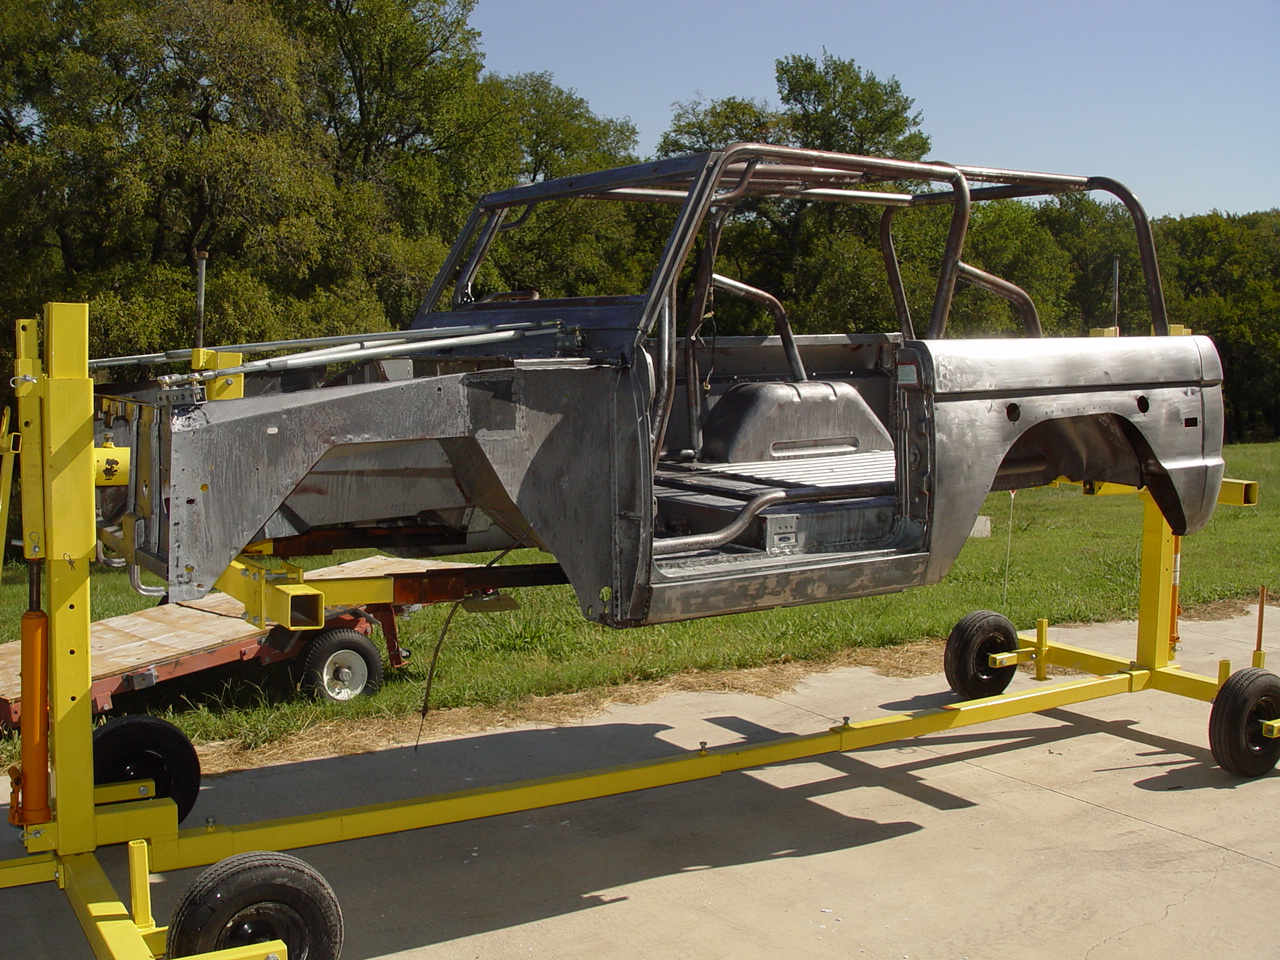
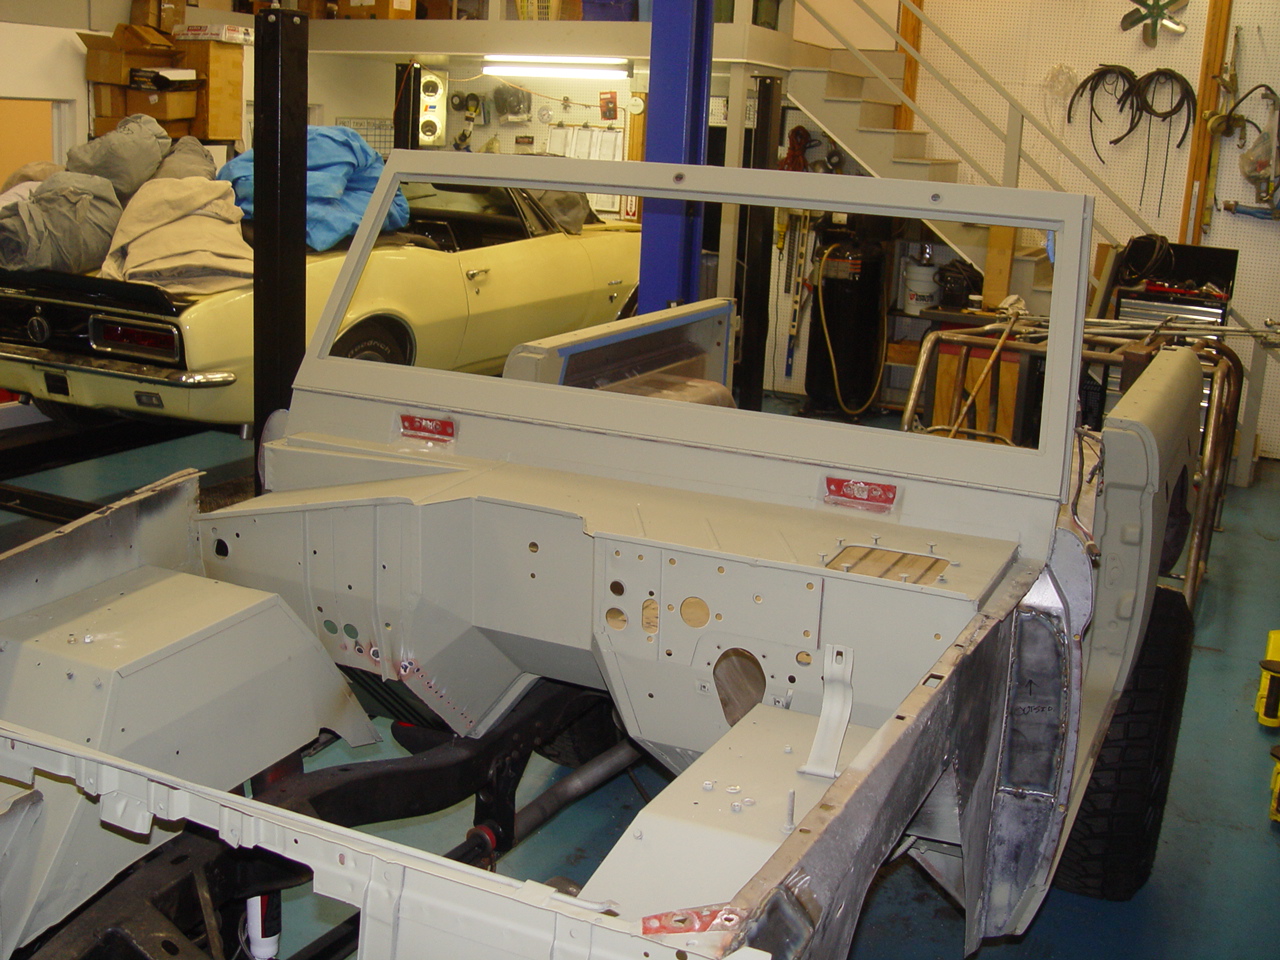
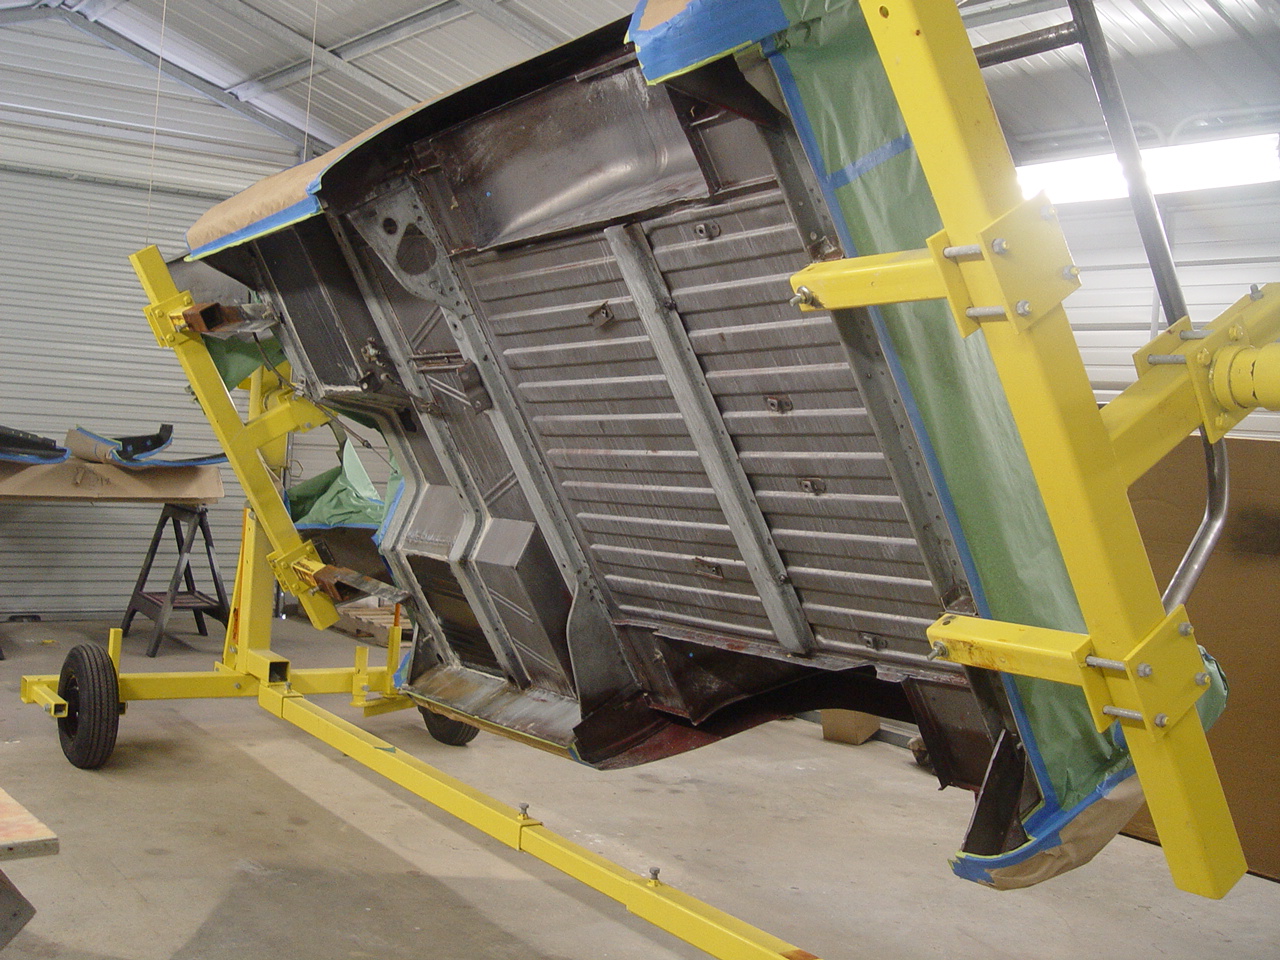
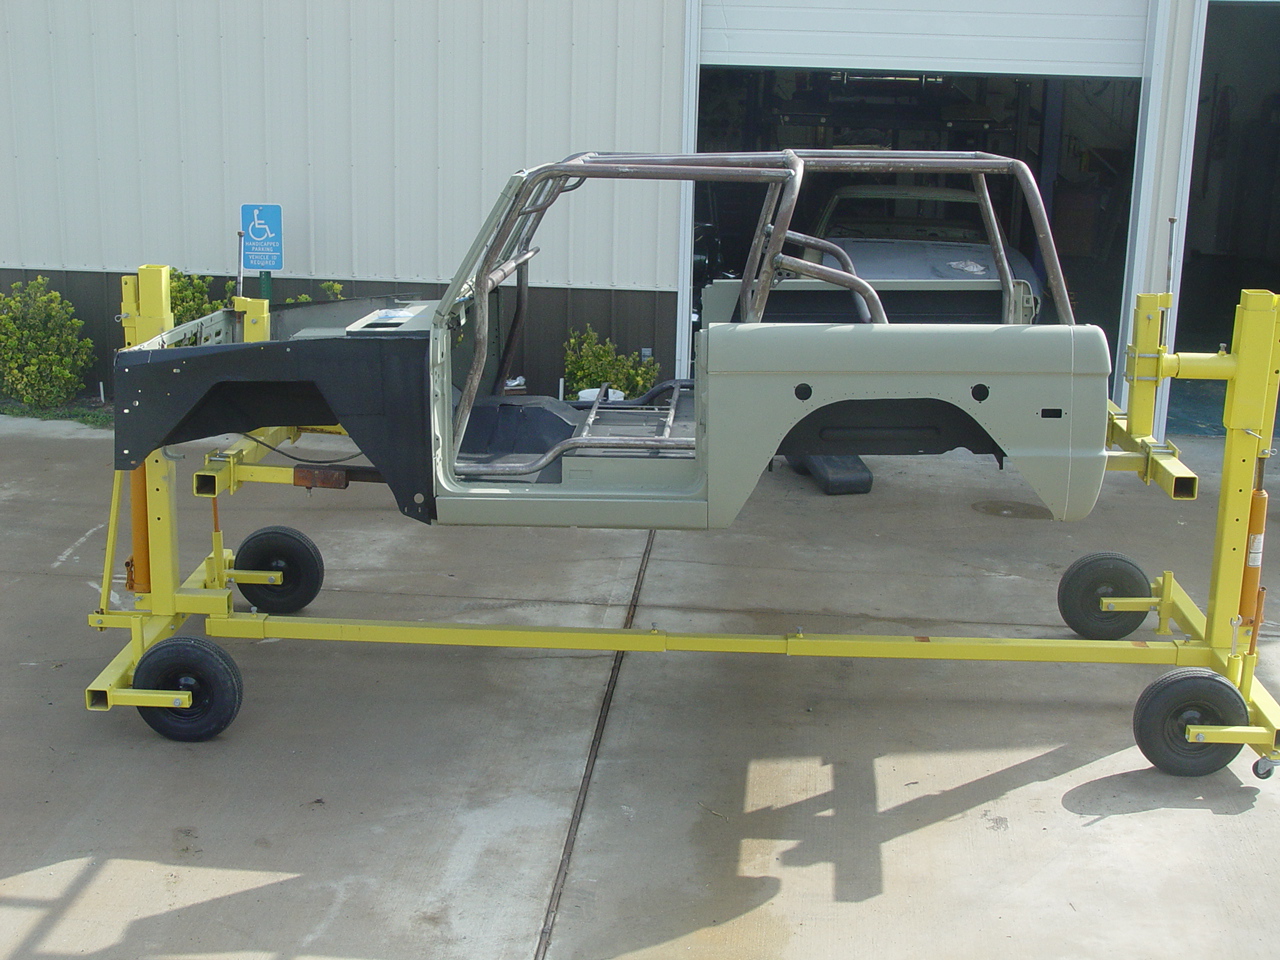
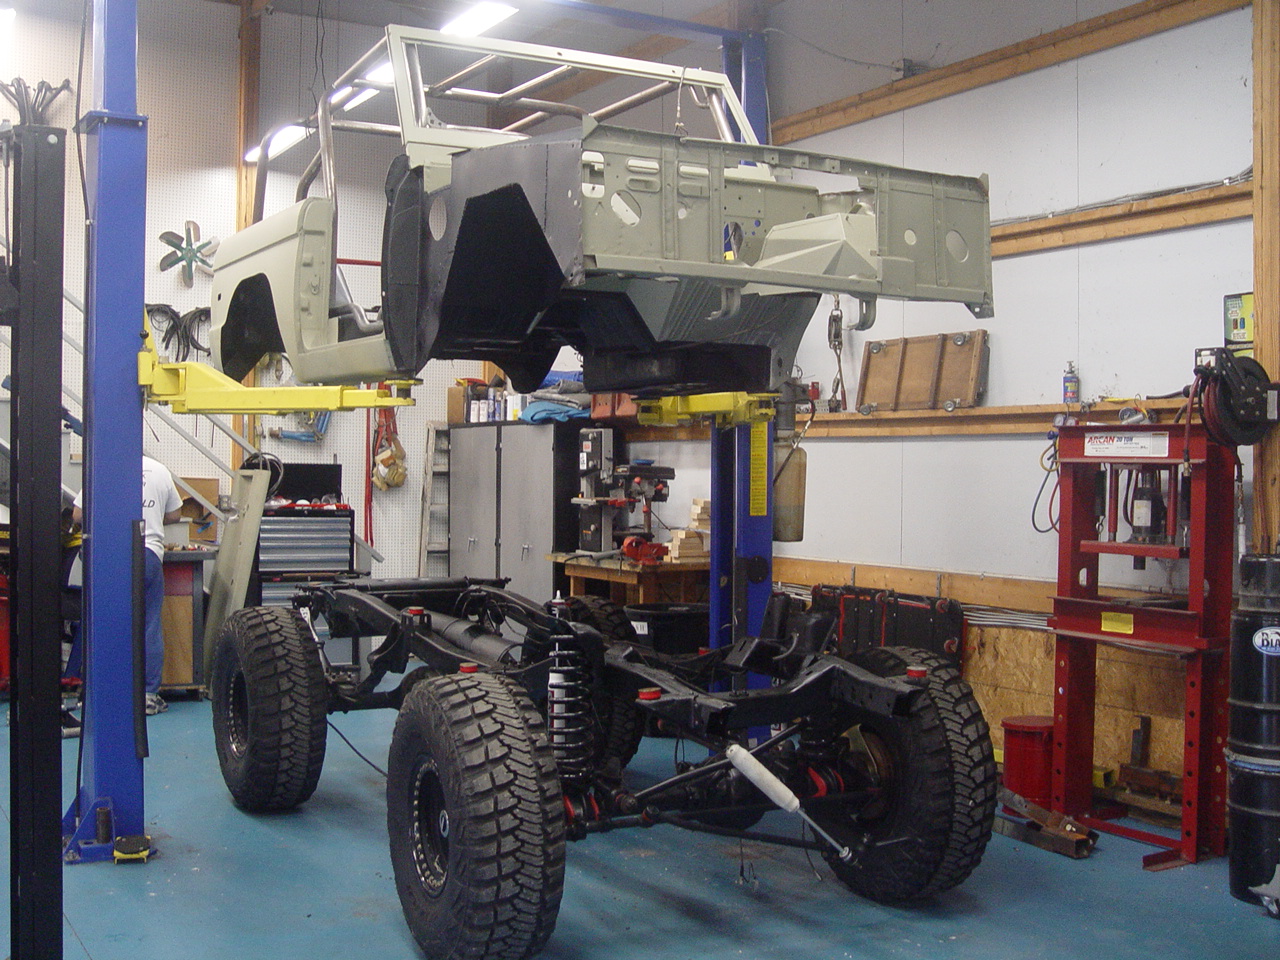
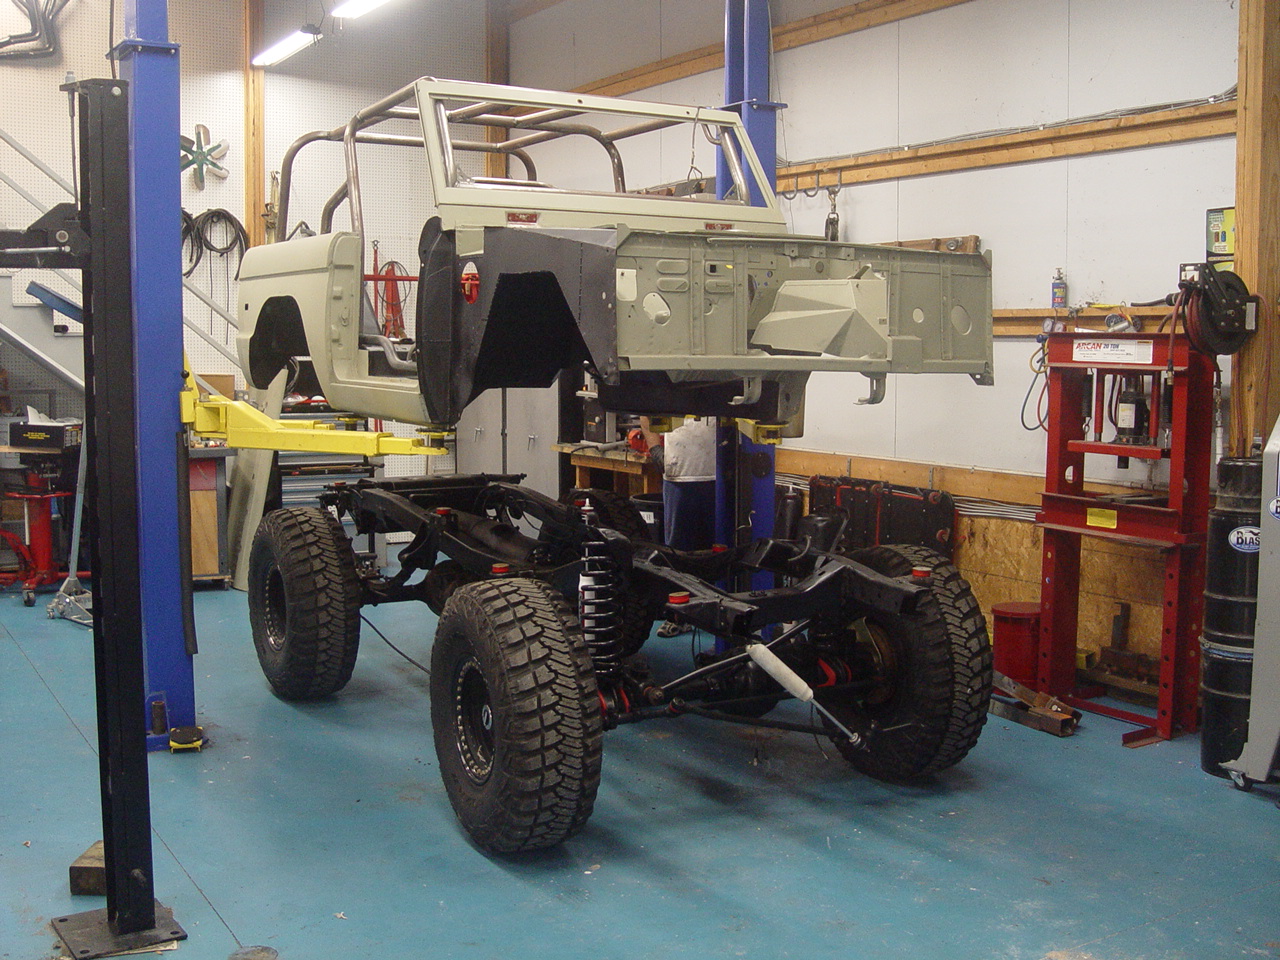
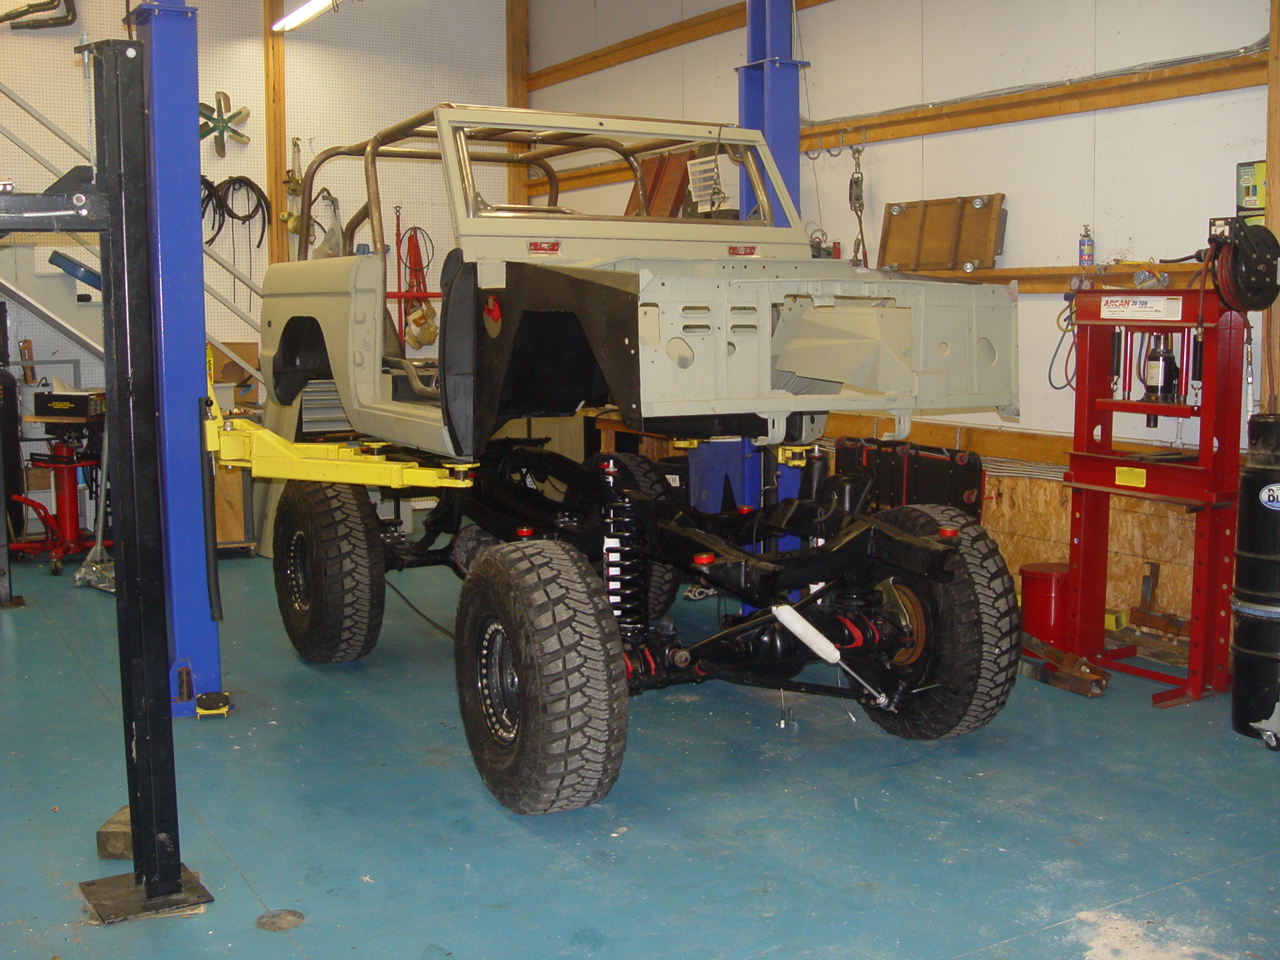
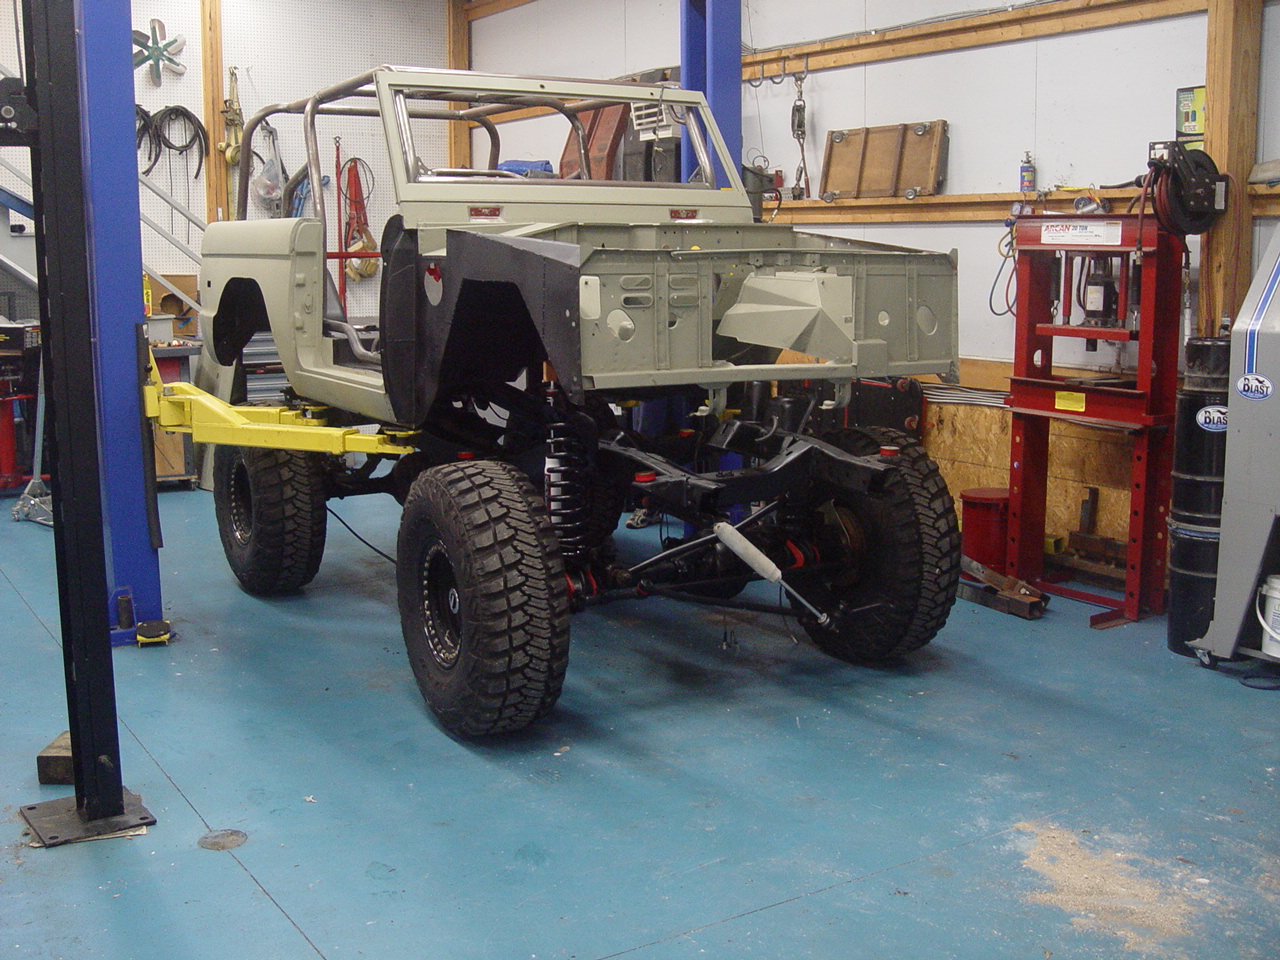
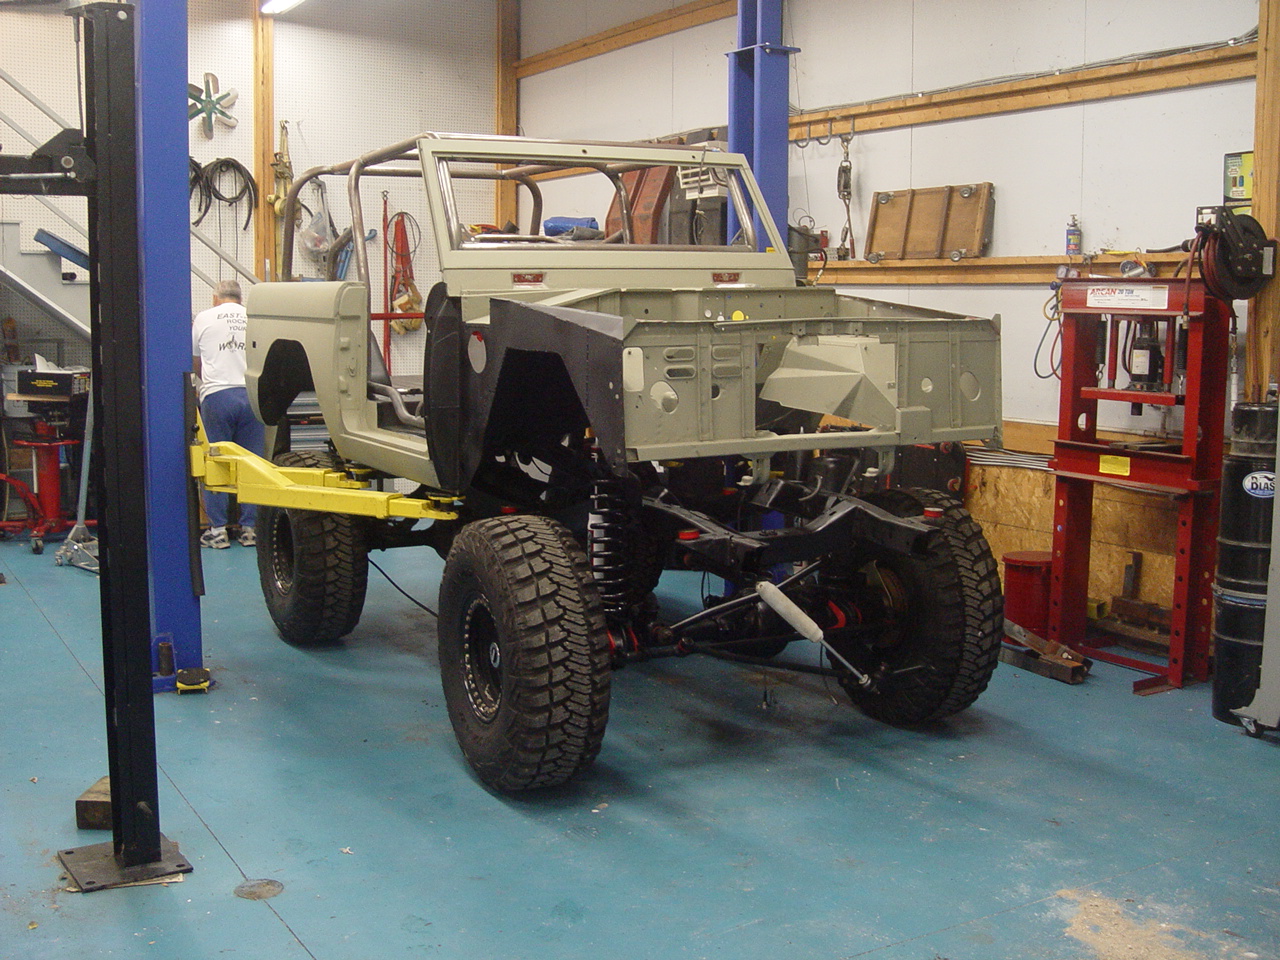
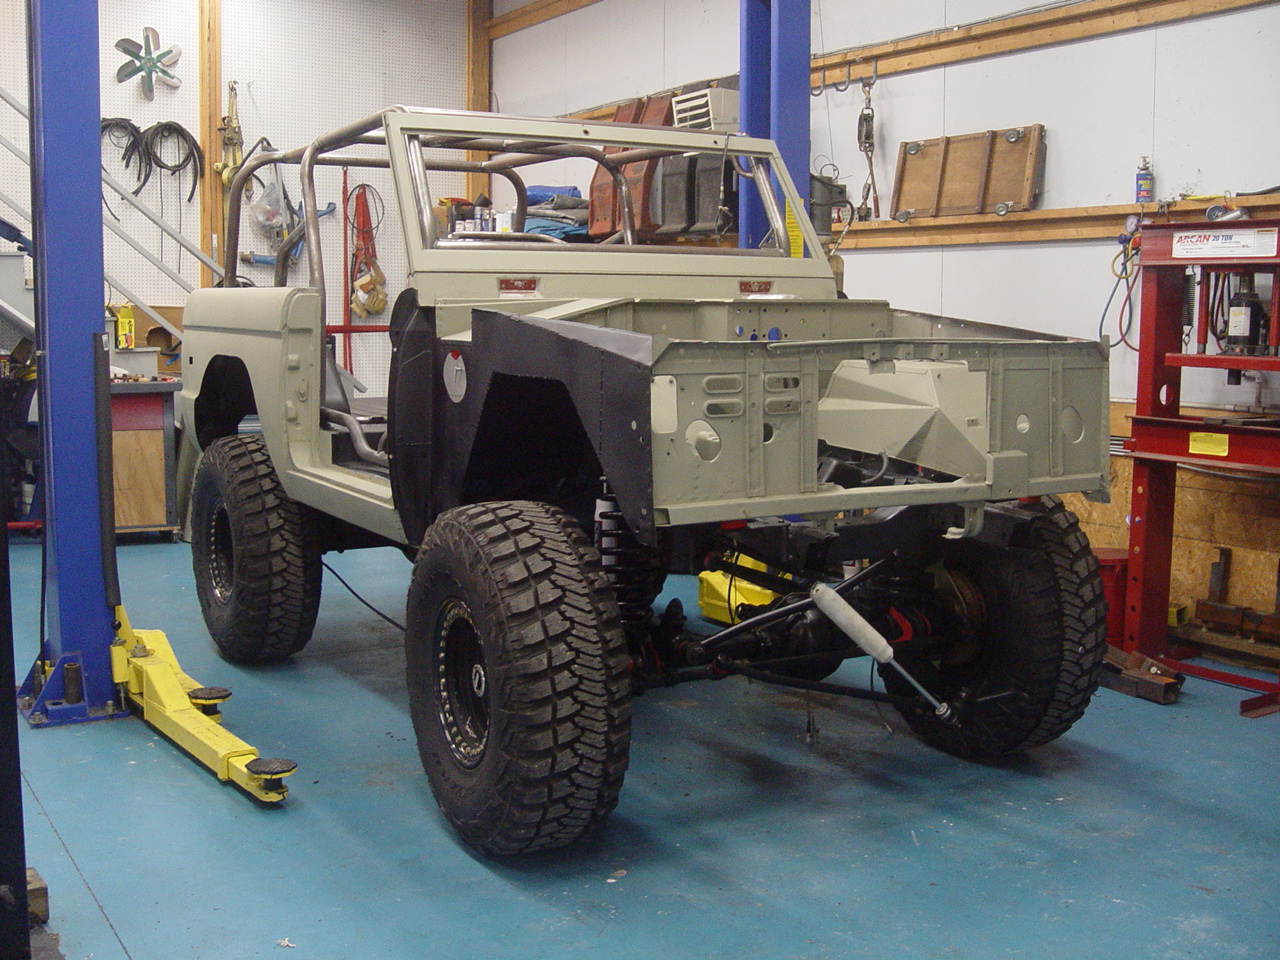
Before we can strip the body "naked" in preparation for bodywork and paint, it must first be "deconstructed" and then mounted on a rotisserie for complete and total access to every inch of the body. After removing the front fenders, doors (after gutting them), hood, tailgate and windshield, we were ready to remove the body from the chassis.
As a safety precaution, we always lift bodies off of their frames in small incremental steps. Every phase of the process is cross-checked by at least two people to ensure that nothing is missed. As one person operates the lift to raise the body, another keeps a watchfull eye on the body and frame. After lifting the body approximately 1" off of the frame, we stop and inspect everything to ensure - first of all - that nothing is still connected or binding. Secondly, we check to make sure that the body will be able to support itself without the frame. This is particularly critical on convertibles since there is no roof to keep the body from folding in half at the door openings.
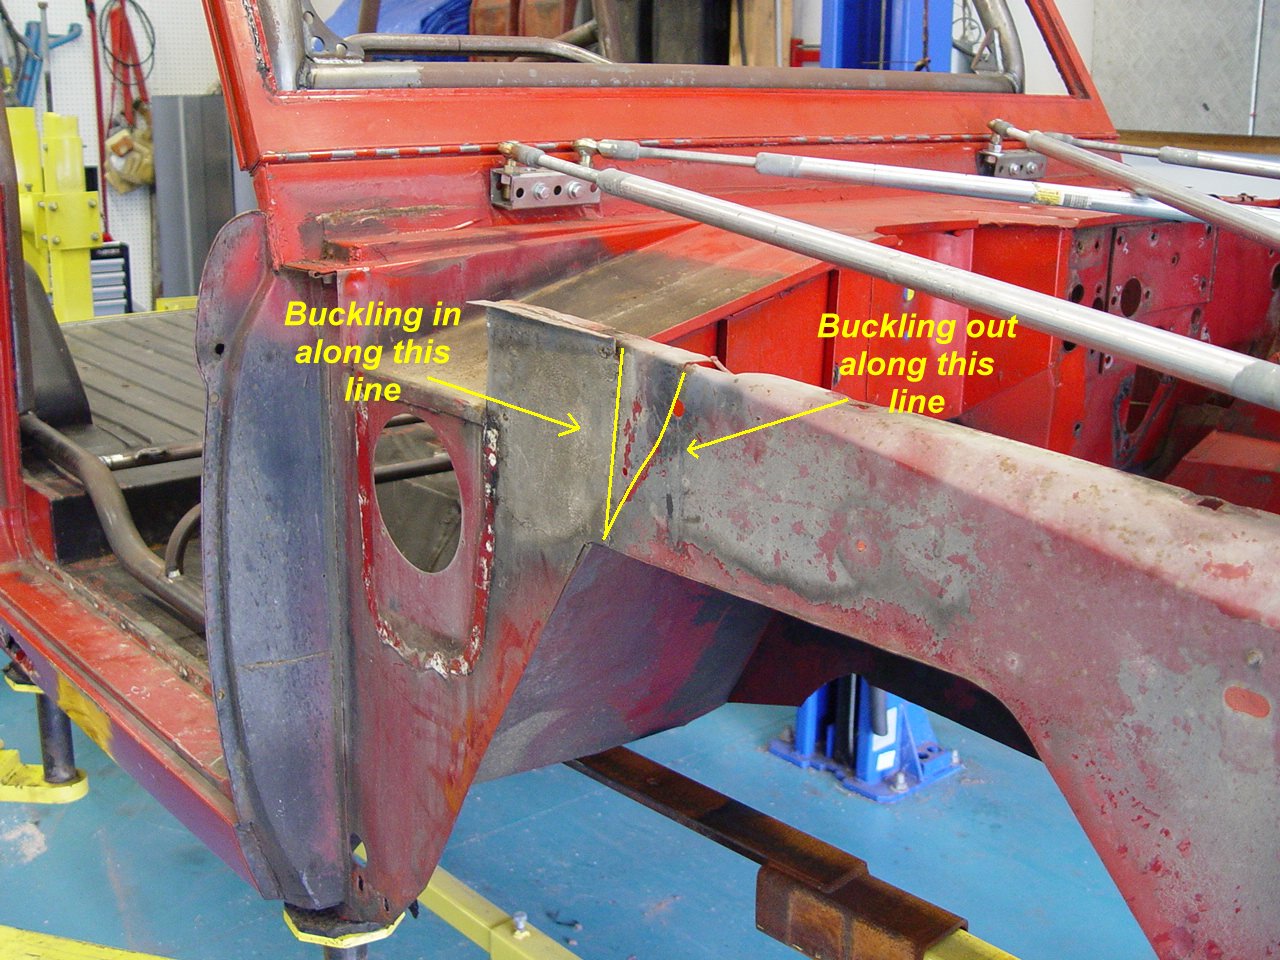
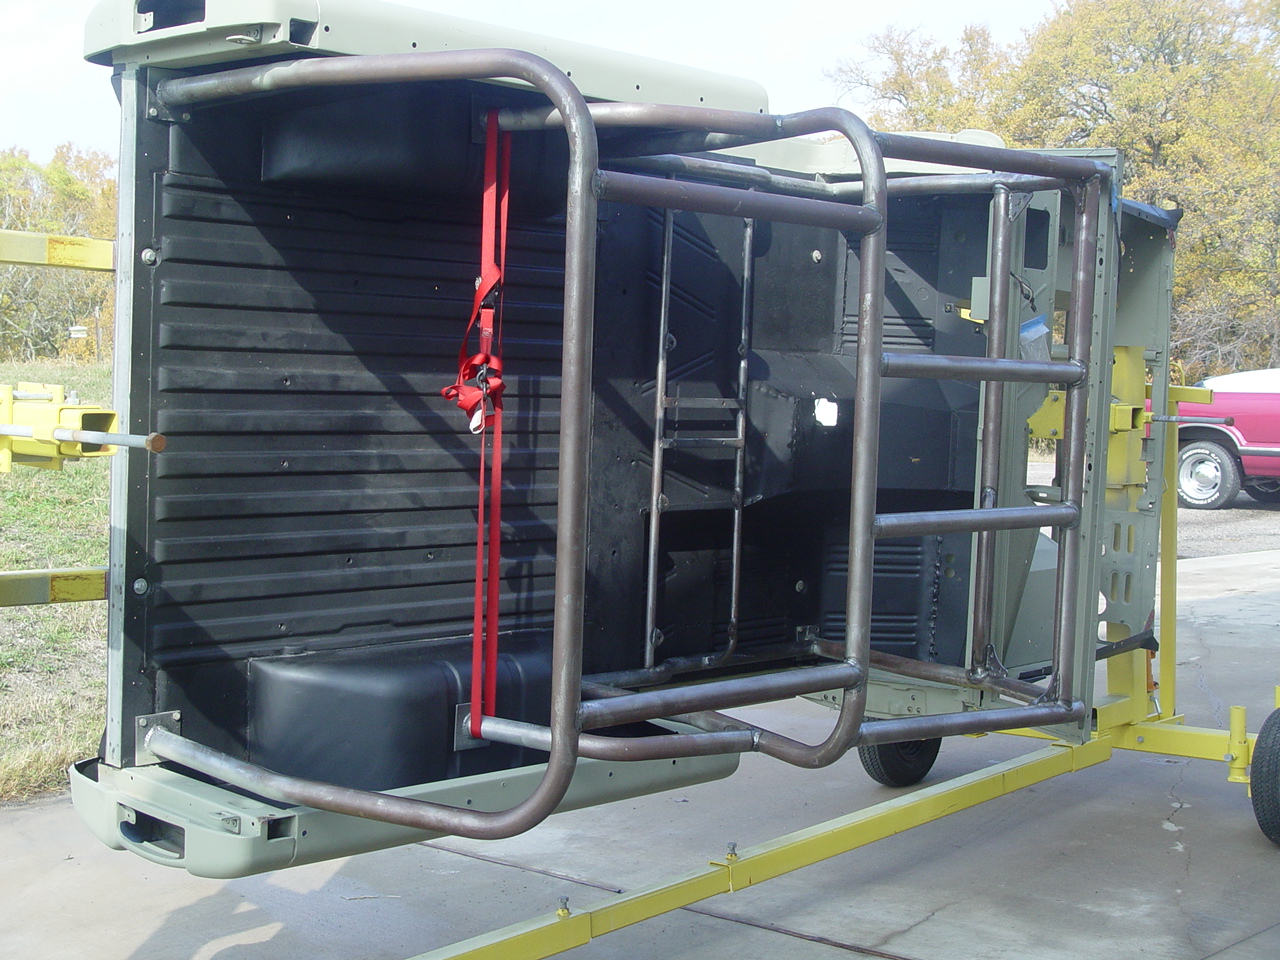
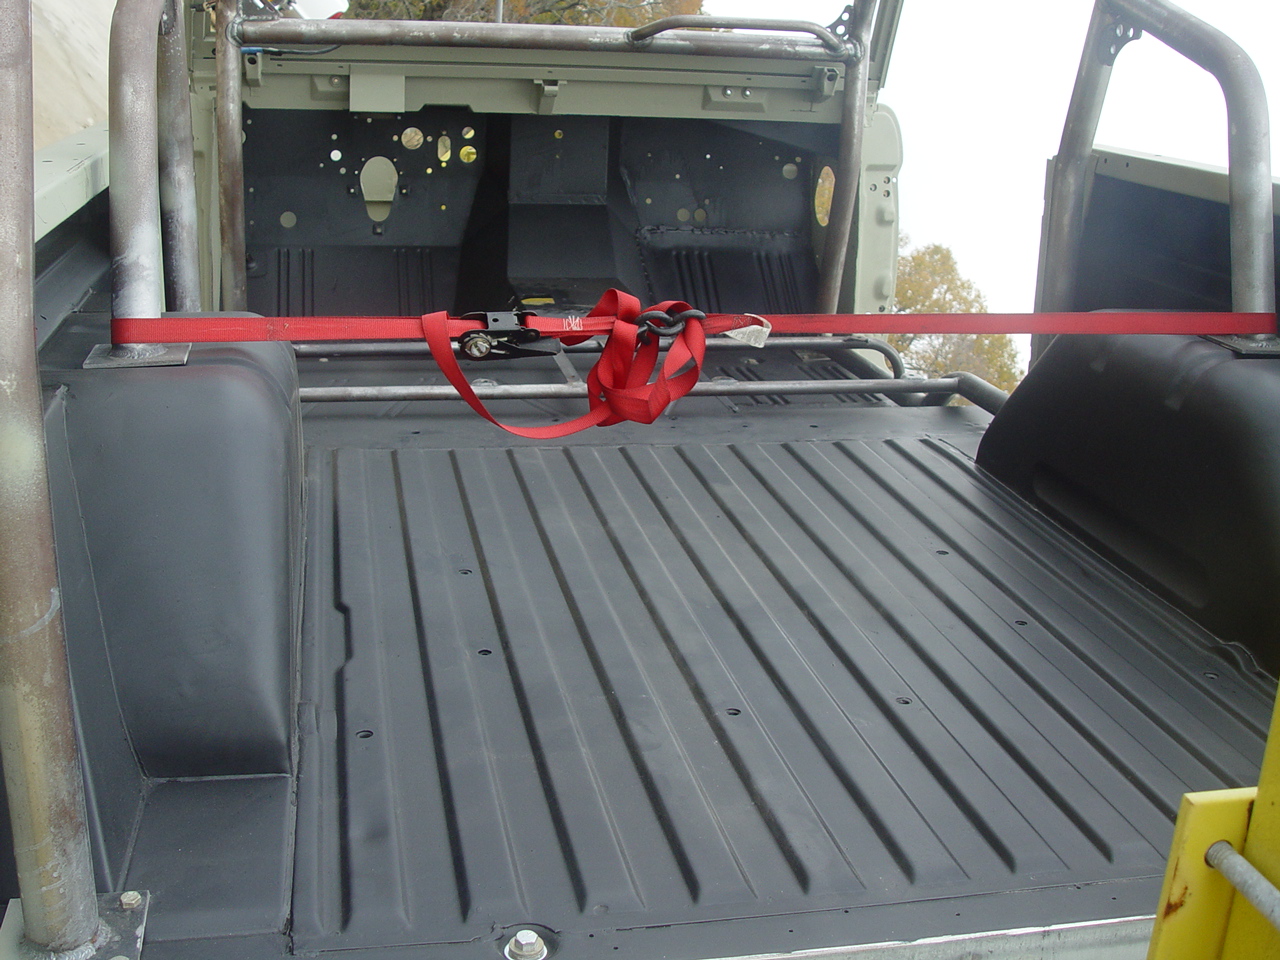
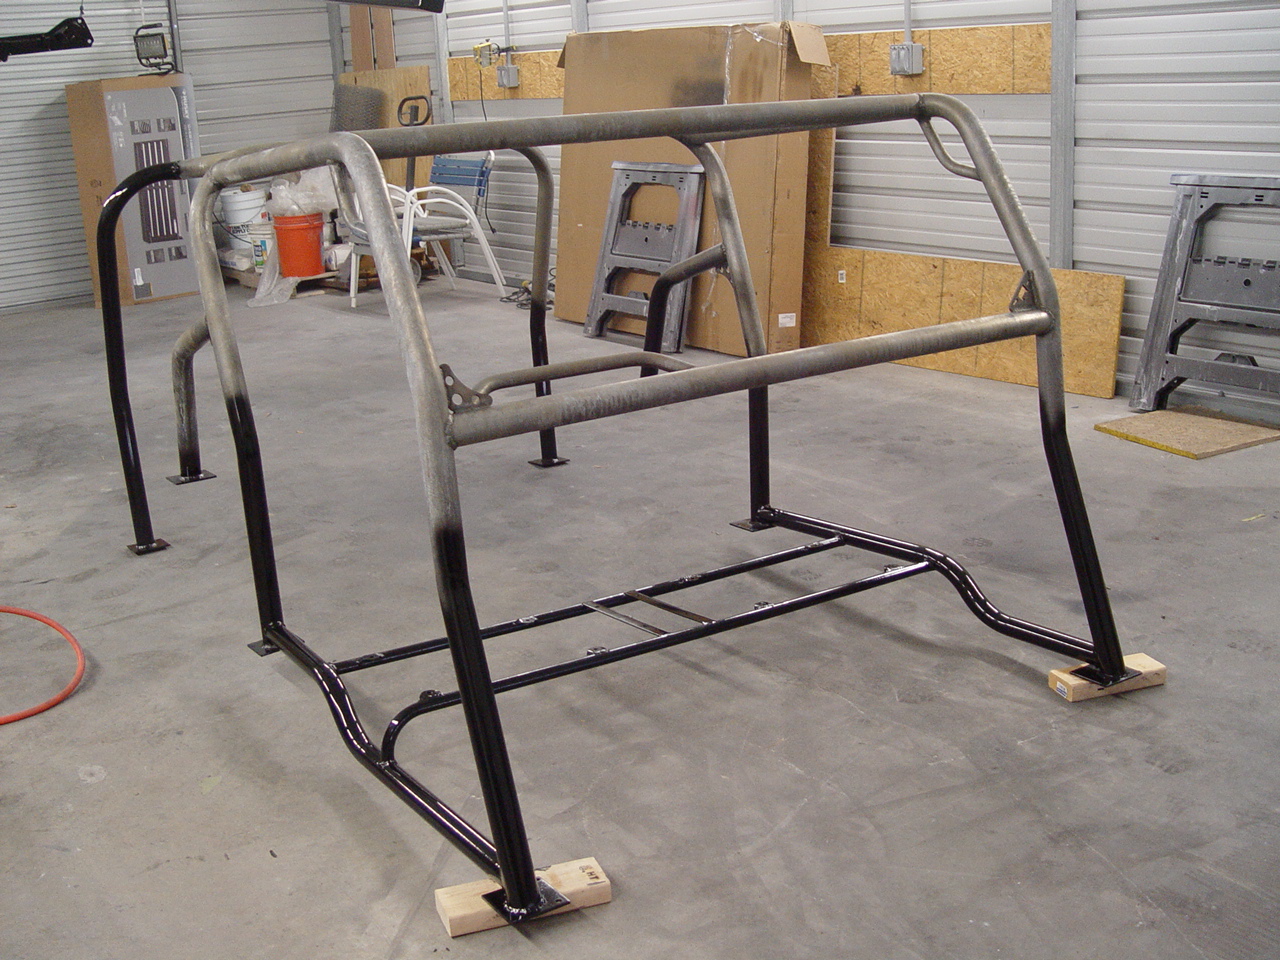
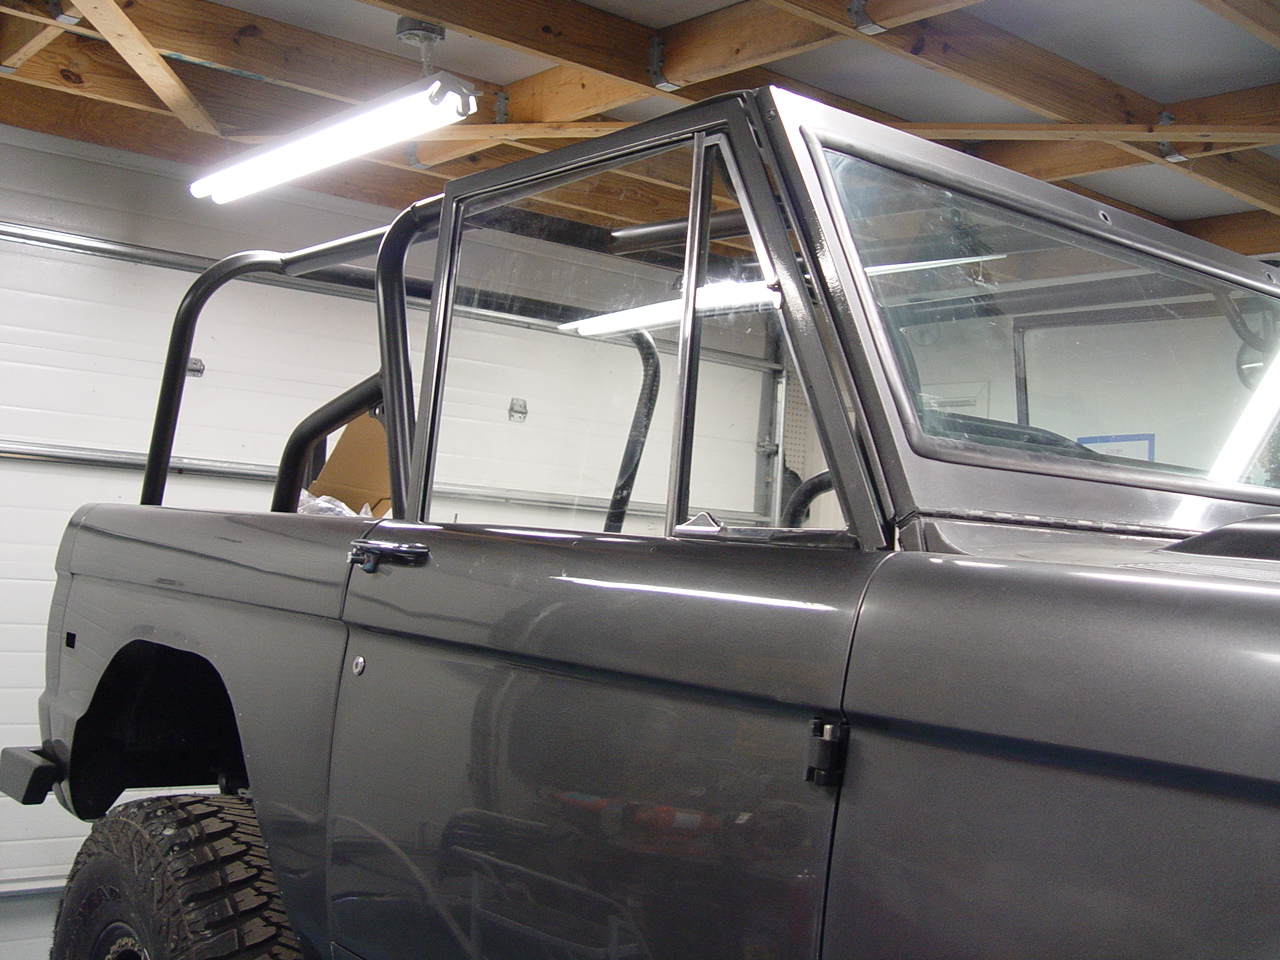
While we encountered no binding at all, with the body just one inch off the frame, we realized that the rear half of the body (the truck bed) had absolutely no support. The standard method of using door bracing that works well on convertibles wouldn't work here because the body wanted to buckle at the rear fender openings. So, we lowered the body back down and - after some head-scratching - we realized that Rick's custom roll cage was the perfect support structure. Of course, this would mean that we would have to defer painting of the floor and roll cage until after we have the body reattached to the frame. It was certainly the best solution. So, after almost three hours of work mounting the rollcage, we were able to lift the body clear of the frame.
|
||||||
 |
 |
 |
 |
 |
||
 |
 |
 |
 |
 |
||
 |
 |
 |
 |
 |
||
 |
 |
 |
 |
 |
||
 |
 |
 |
 |
 |
||
 |
 |
 |
 |
 |
||
 |
 |
 |
 |
 |
||
 |
 |
 |
 |
 |
||
| Click on an image for a larger view | ||||||
ROTISSERIE | ||||||
|
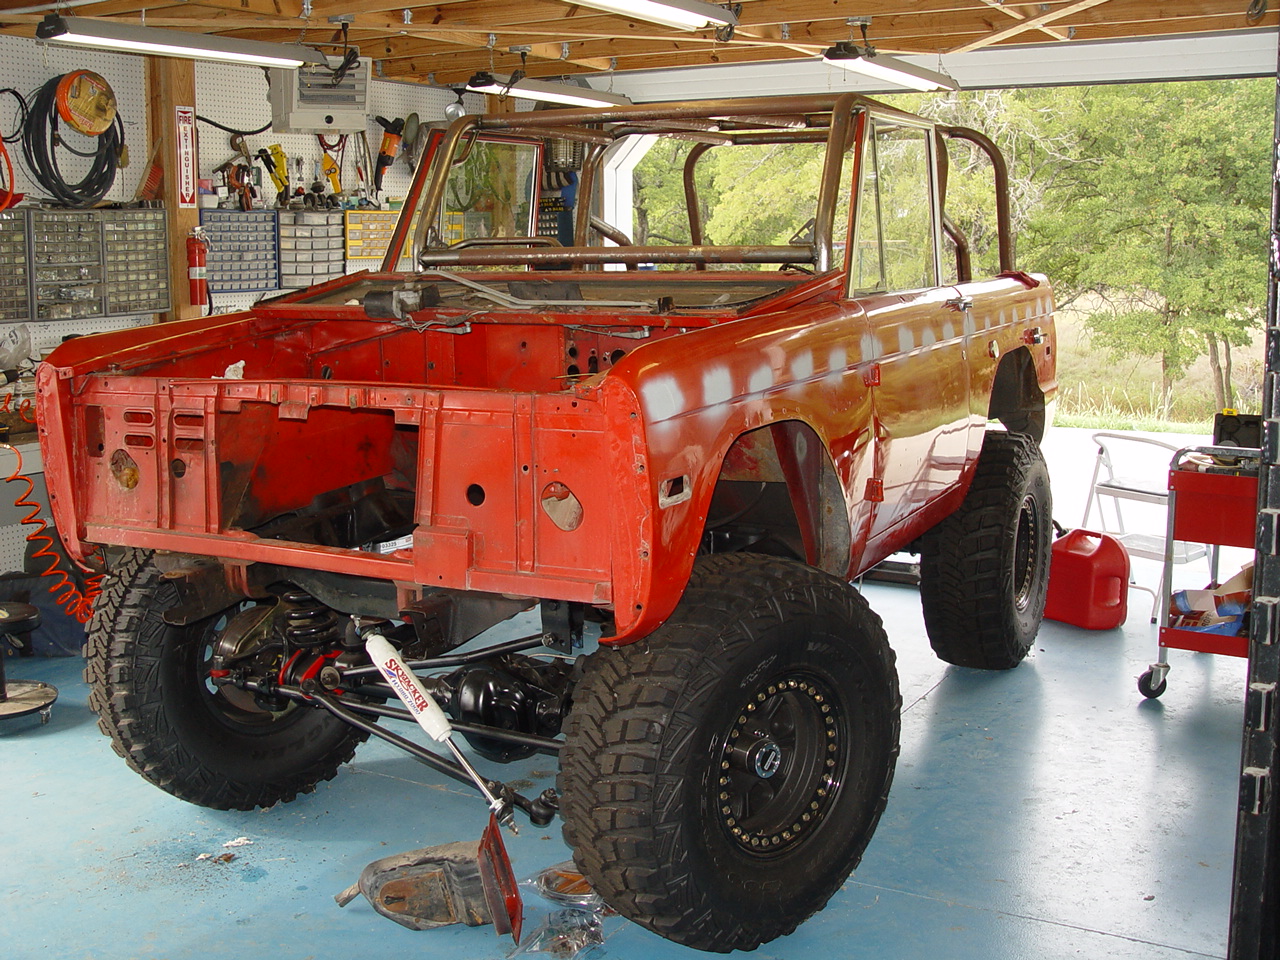
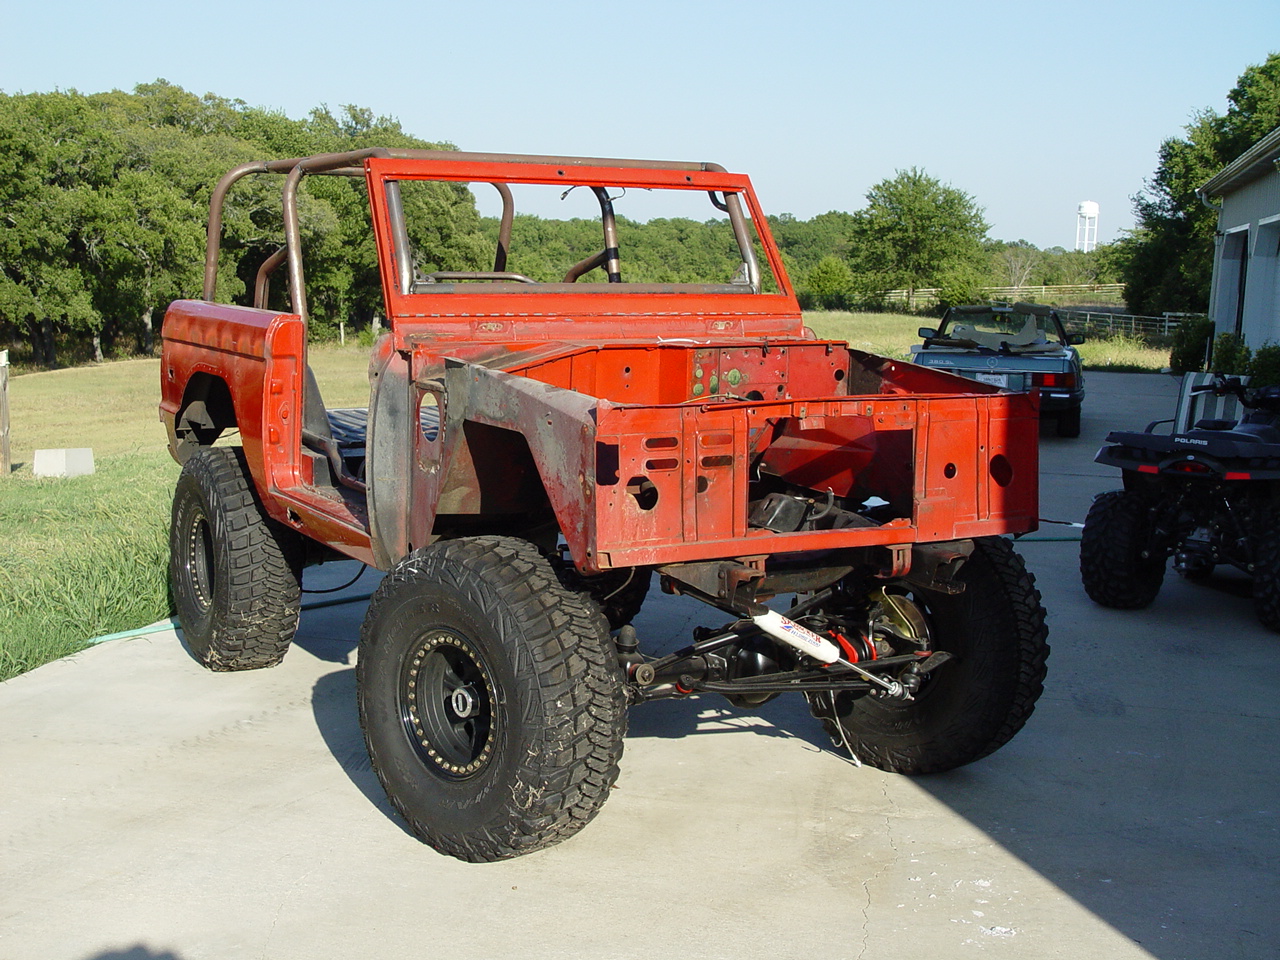
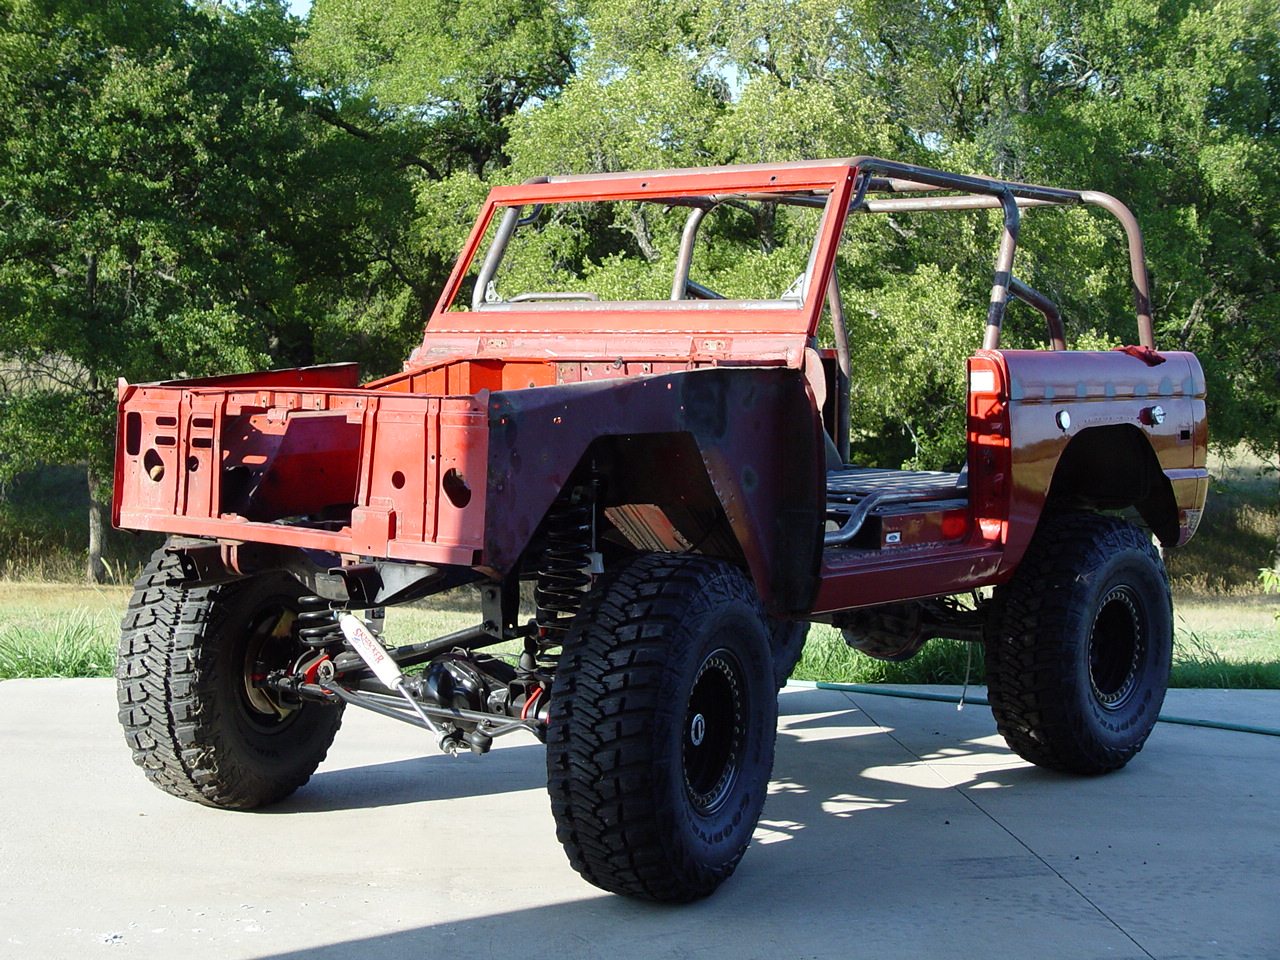
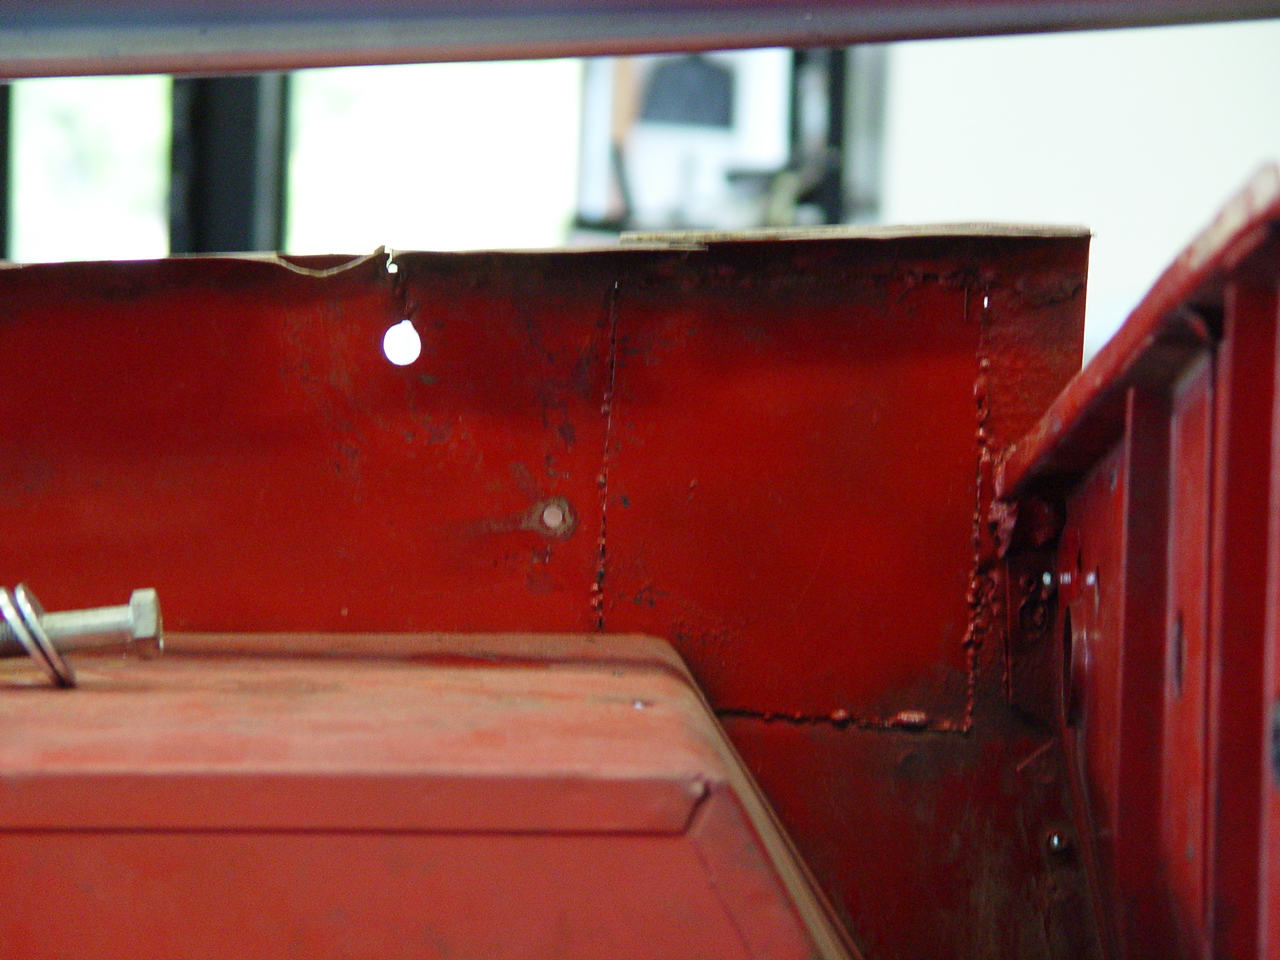
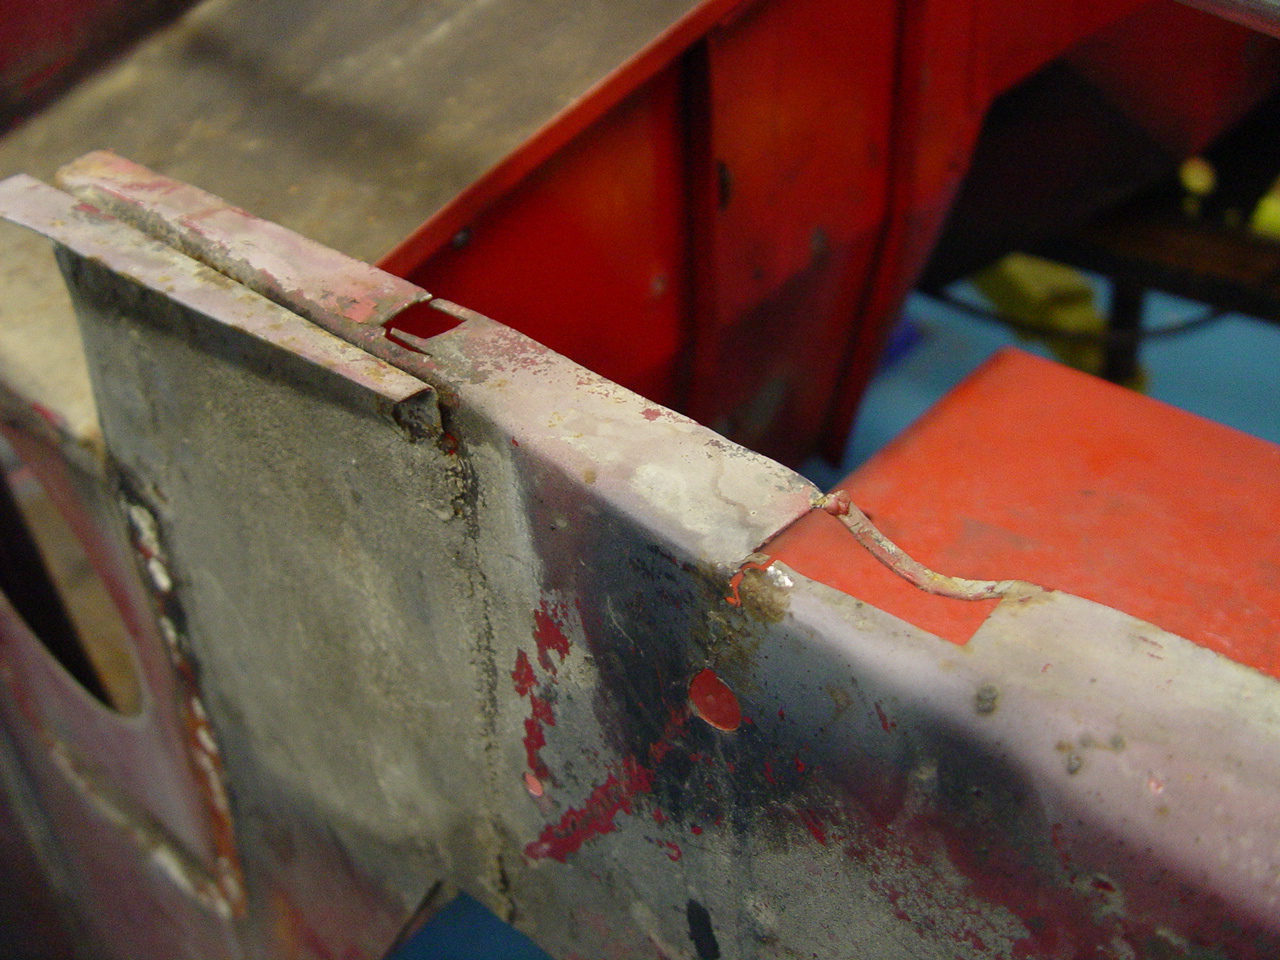
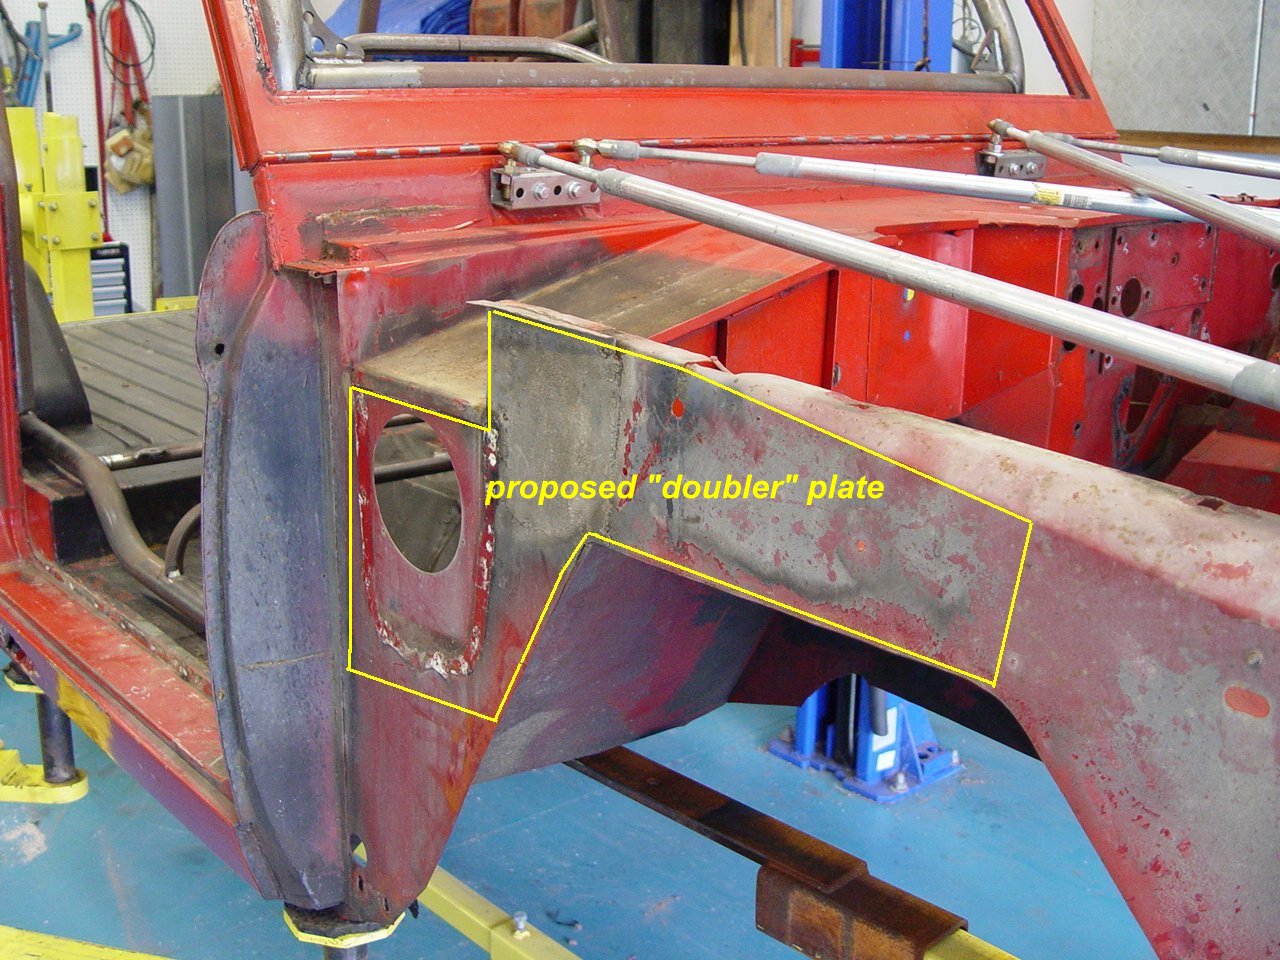
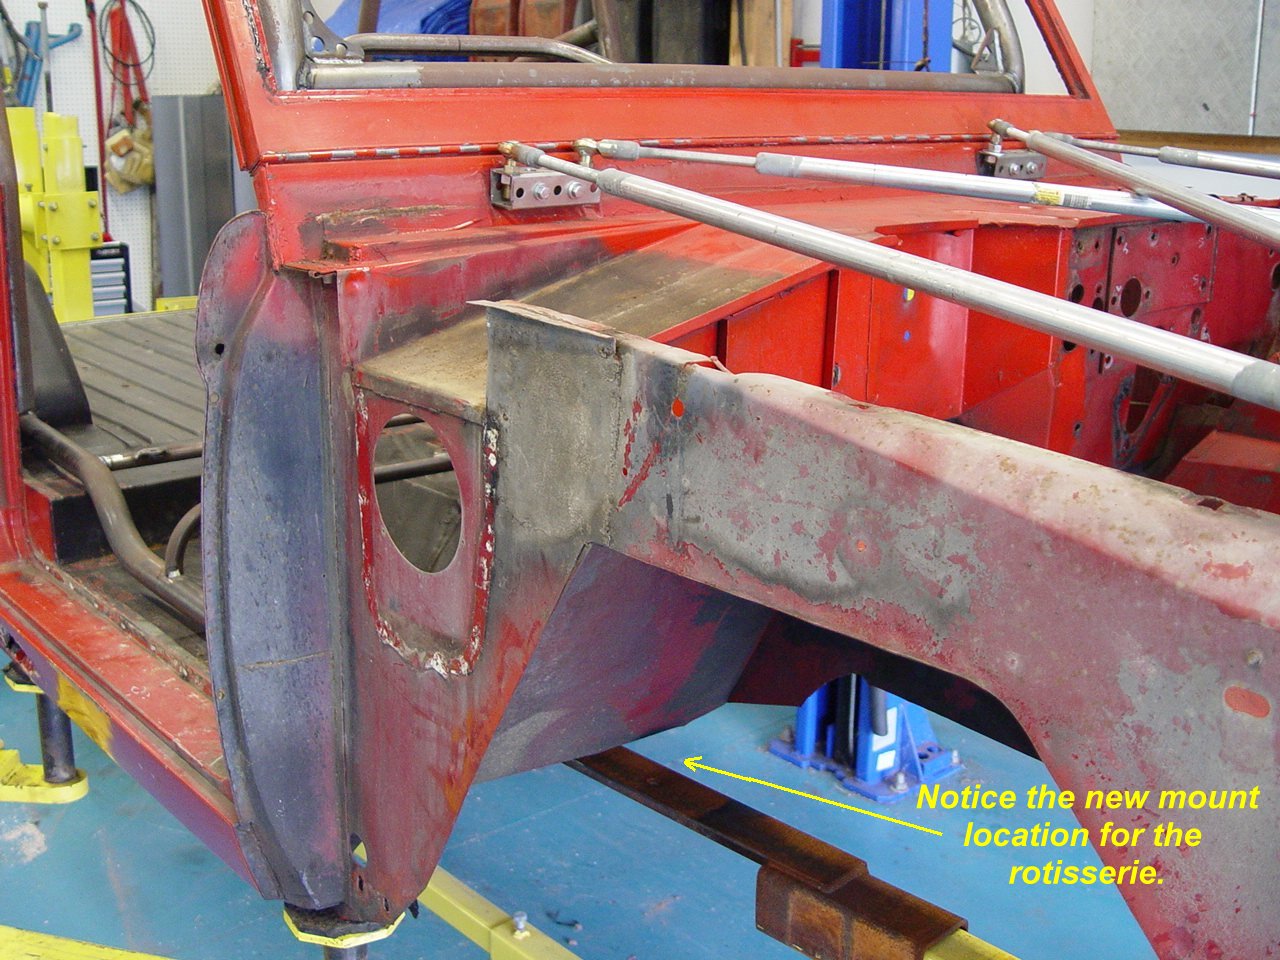
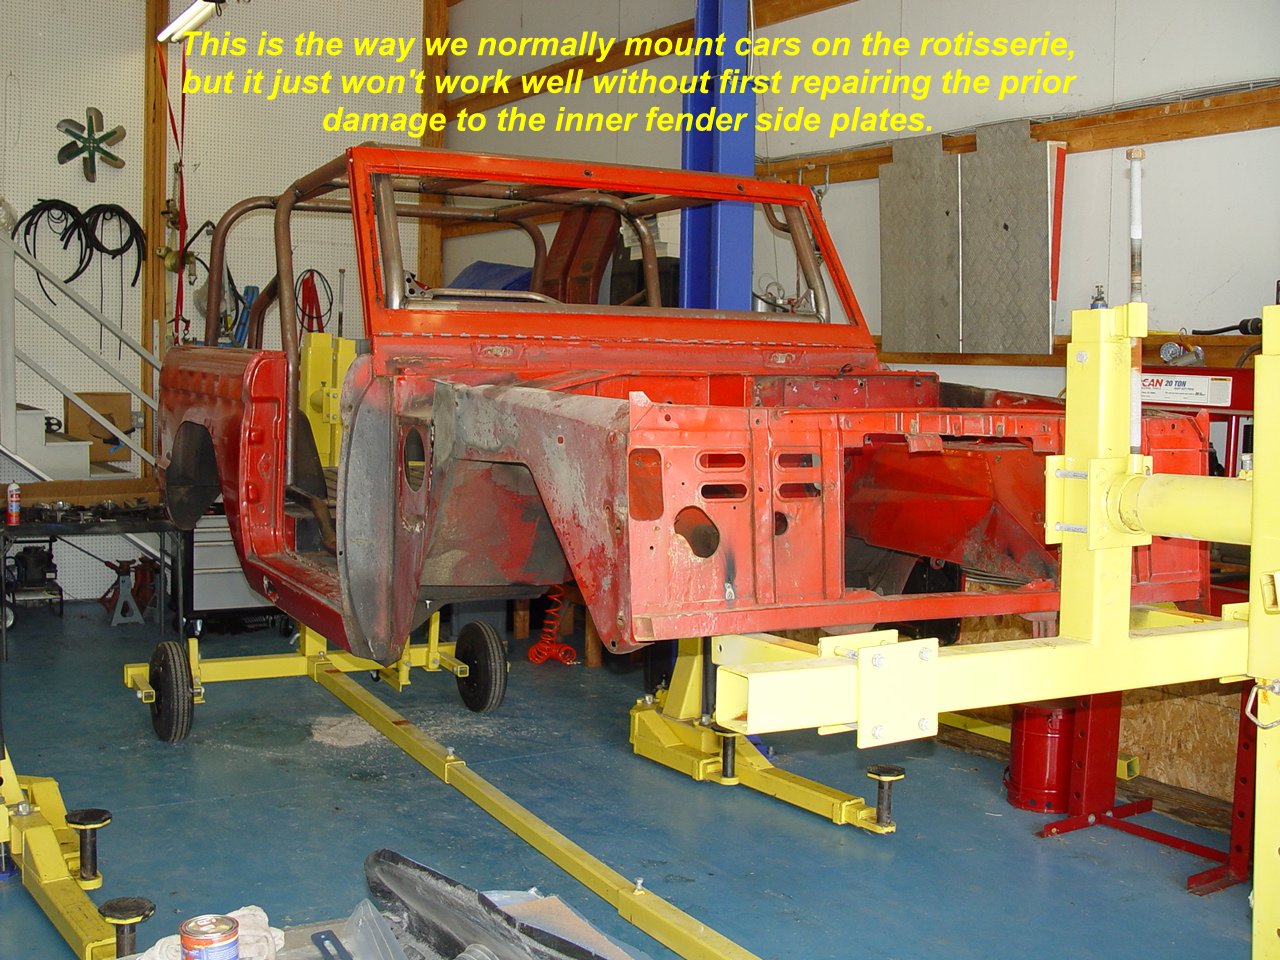
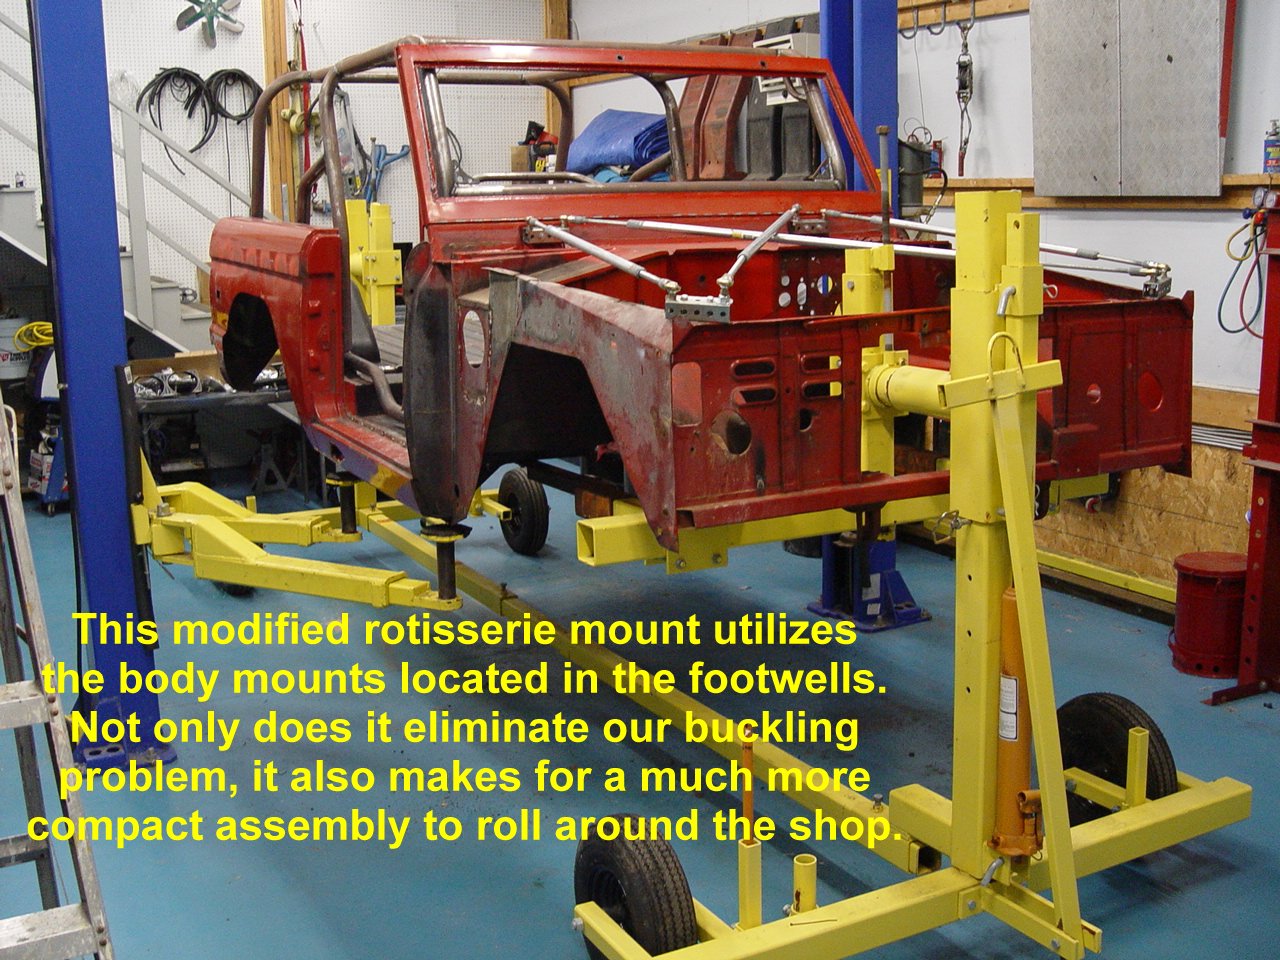
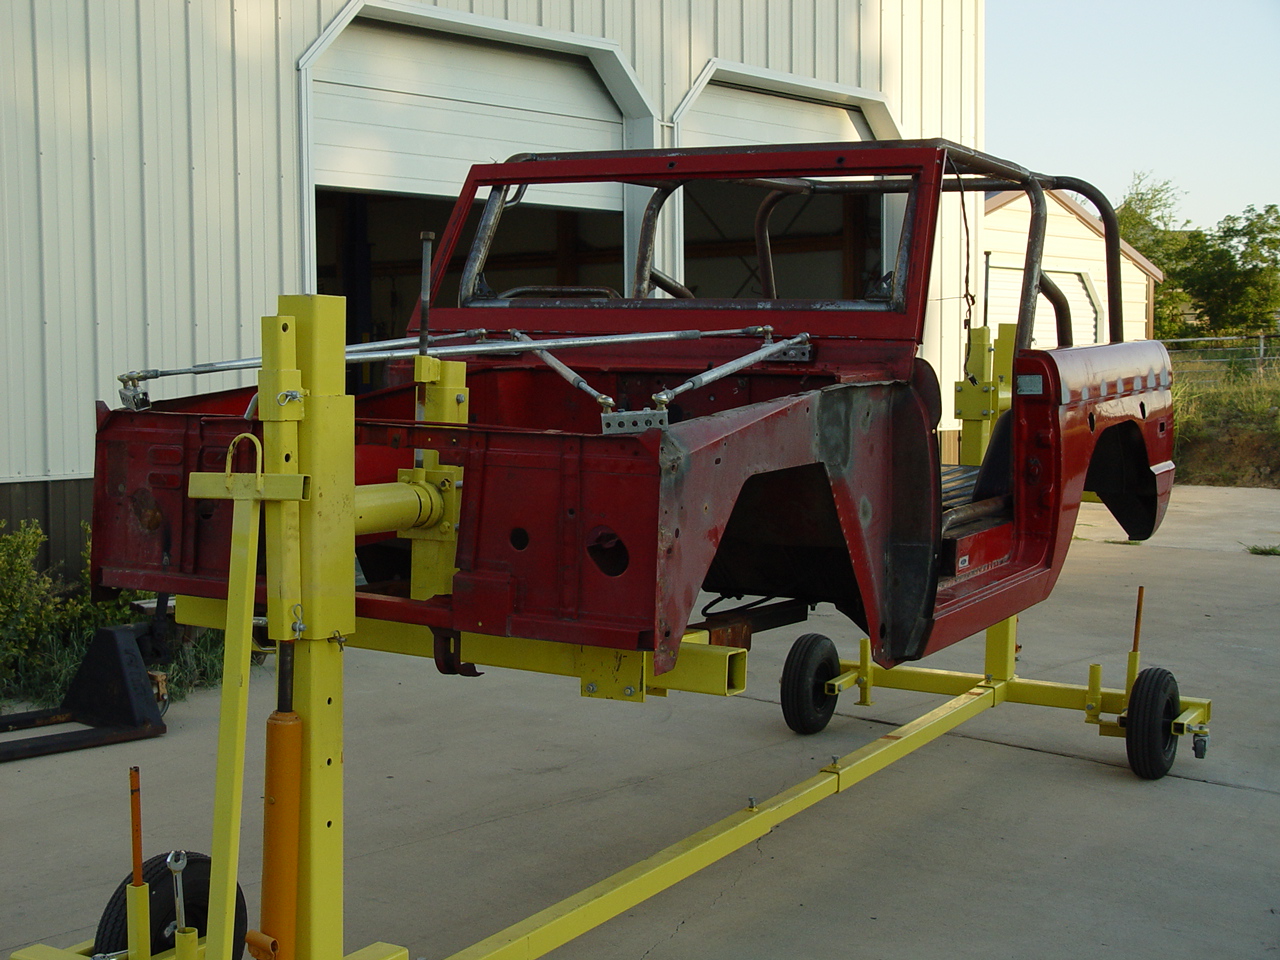
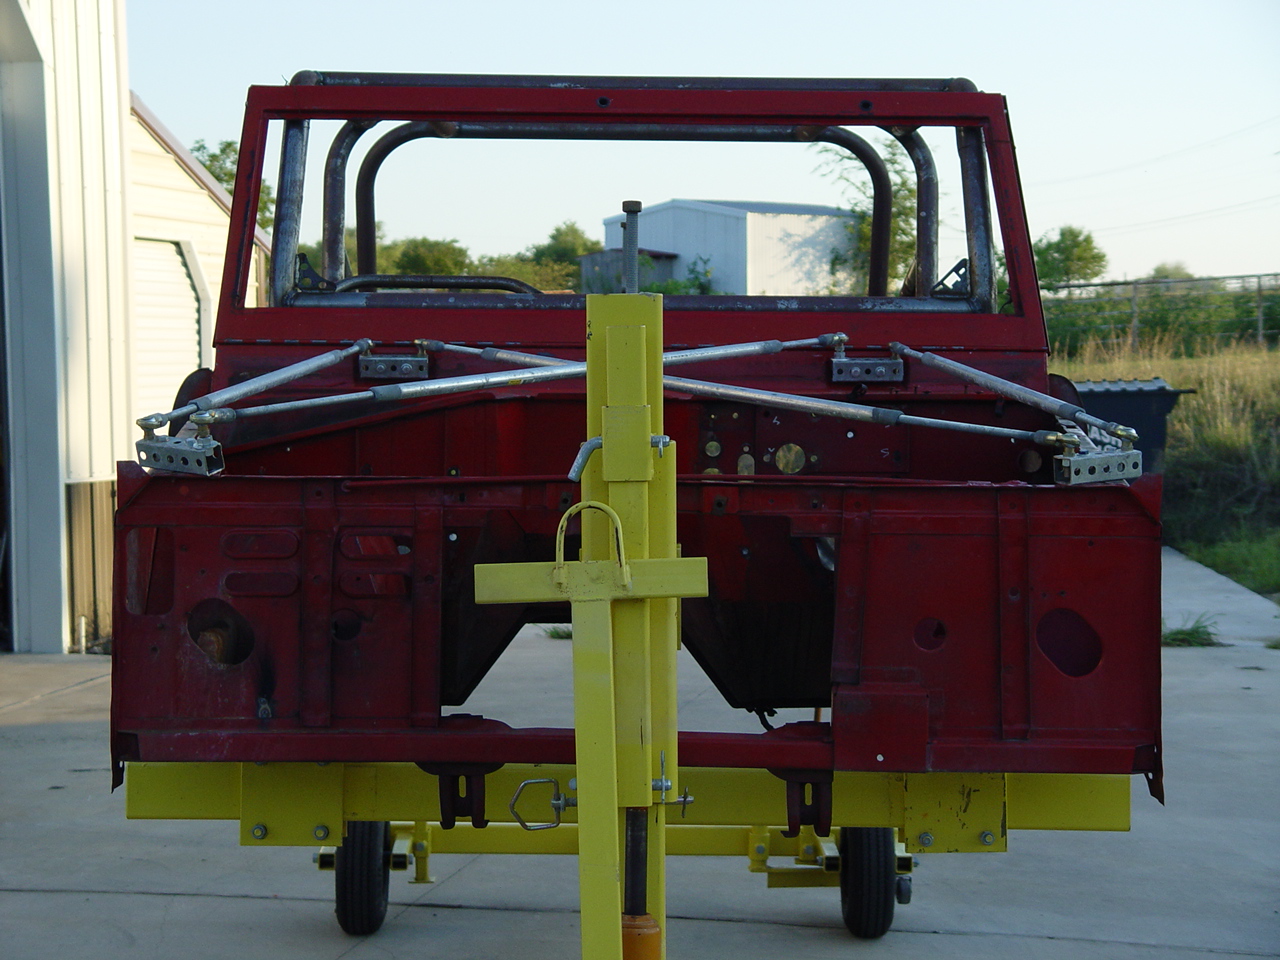
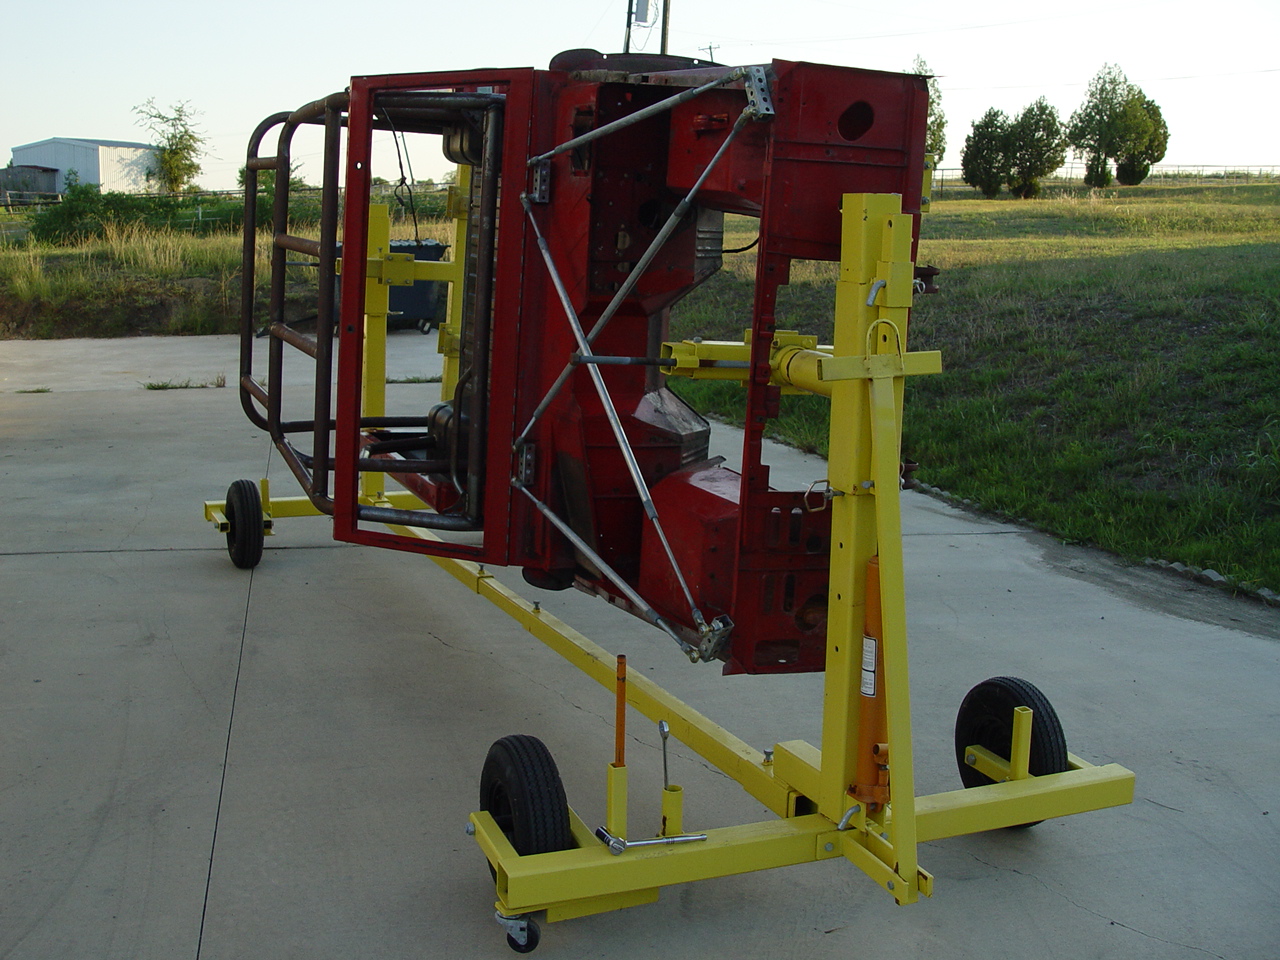
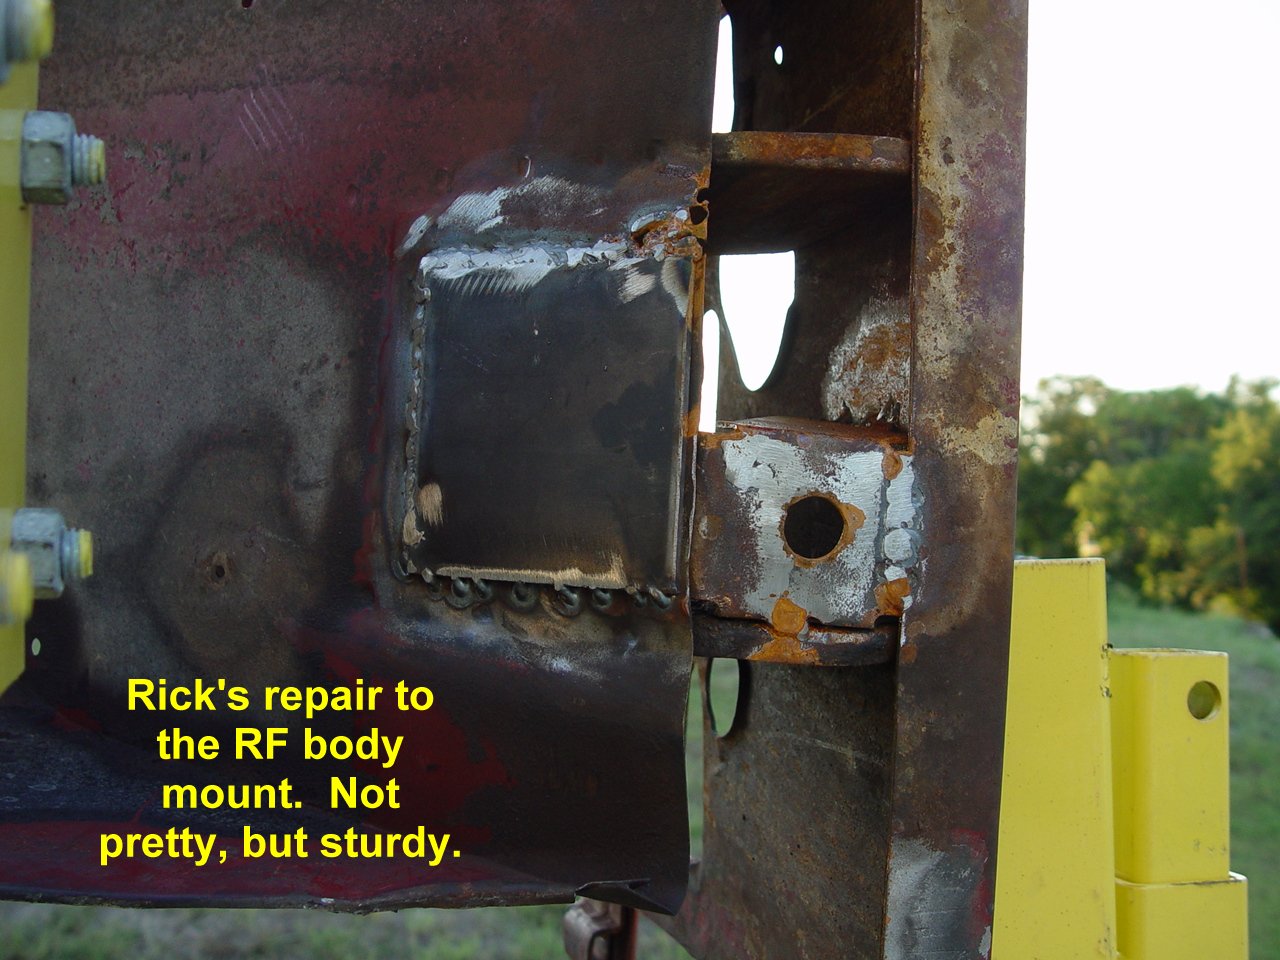
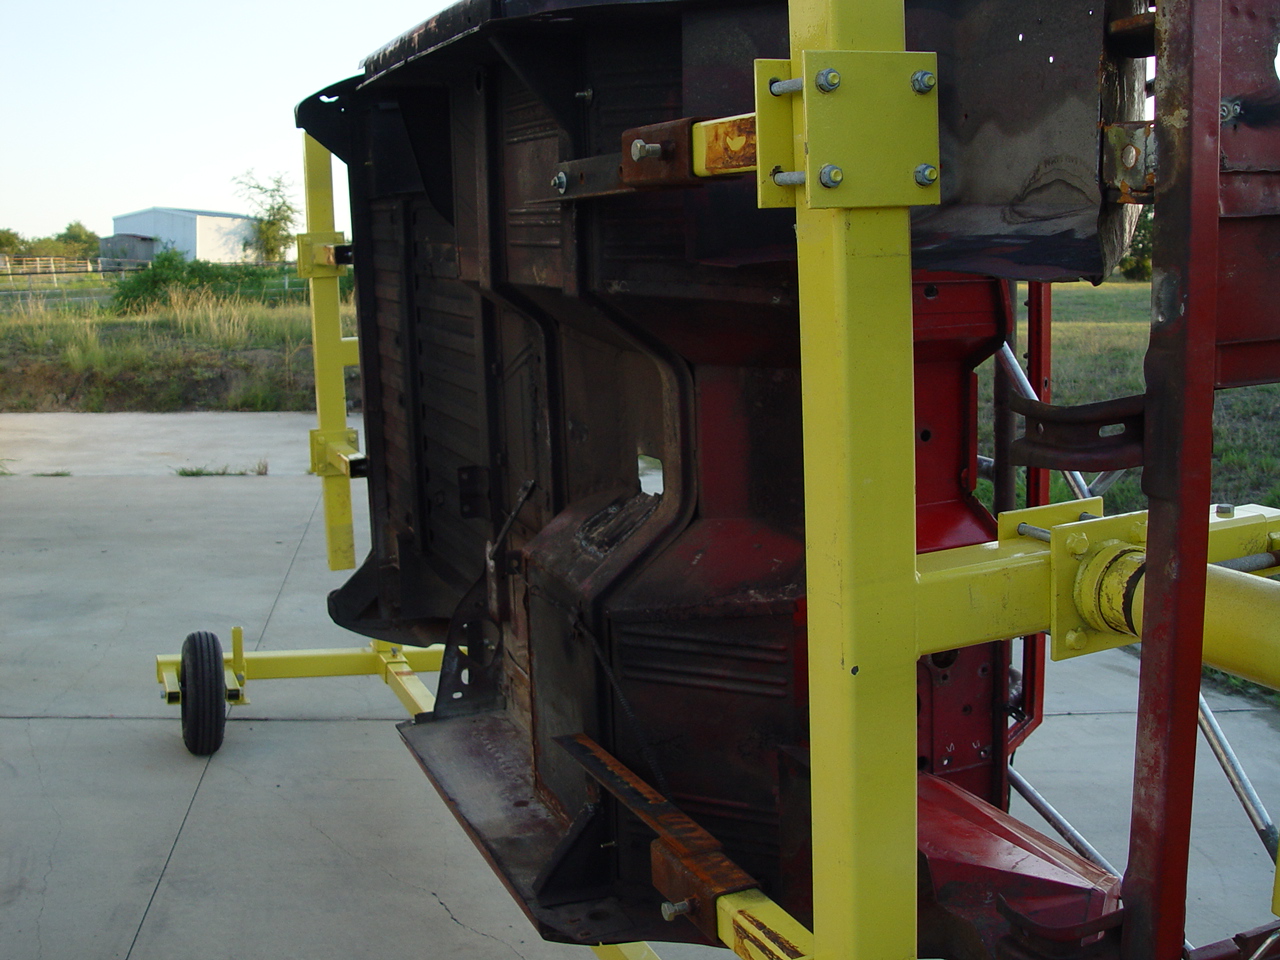
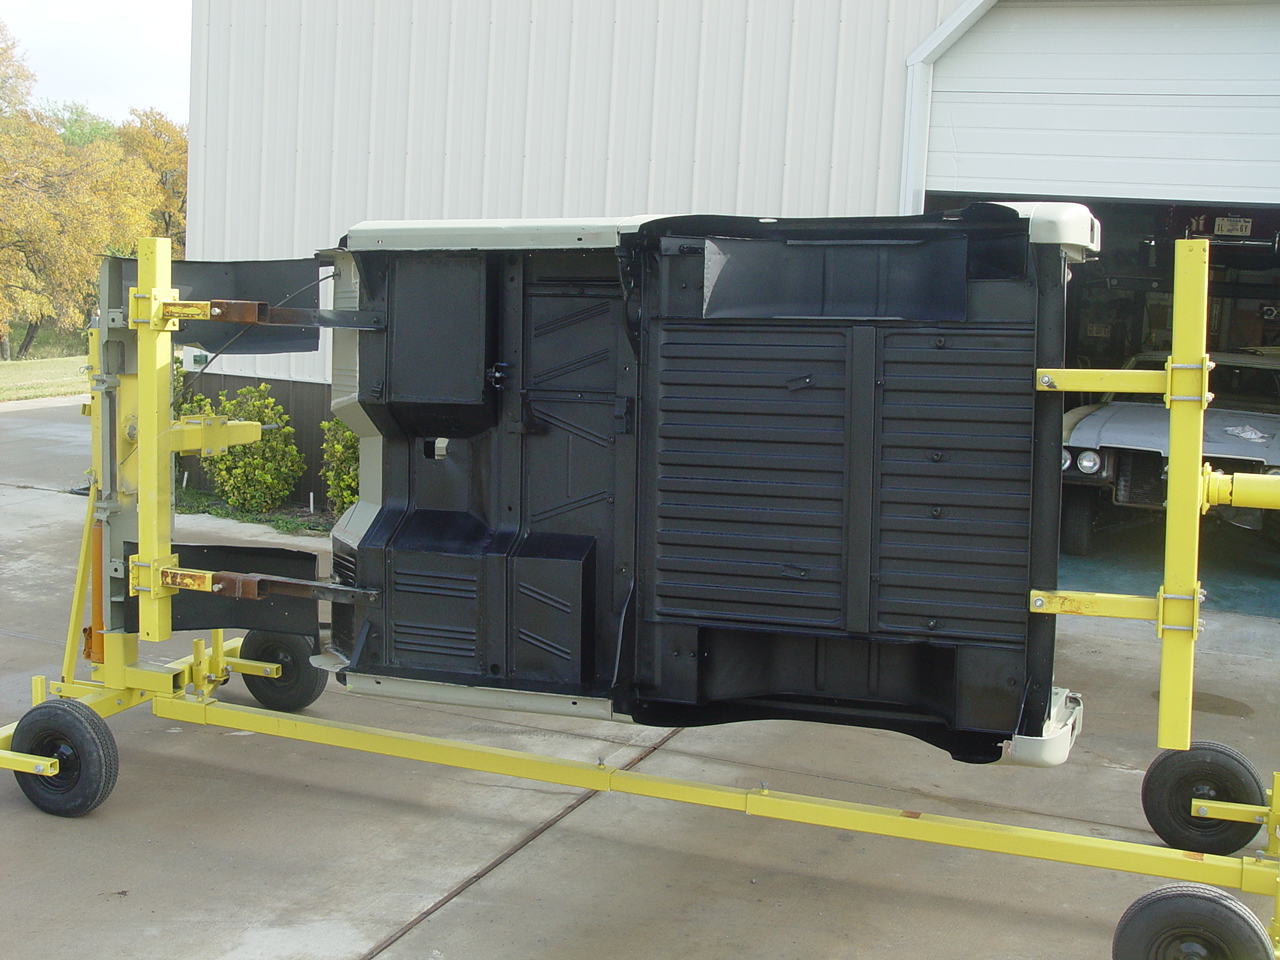
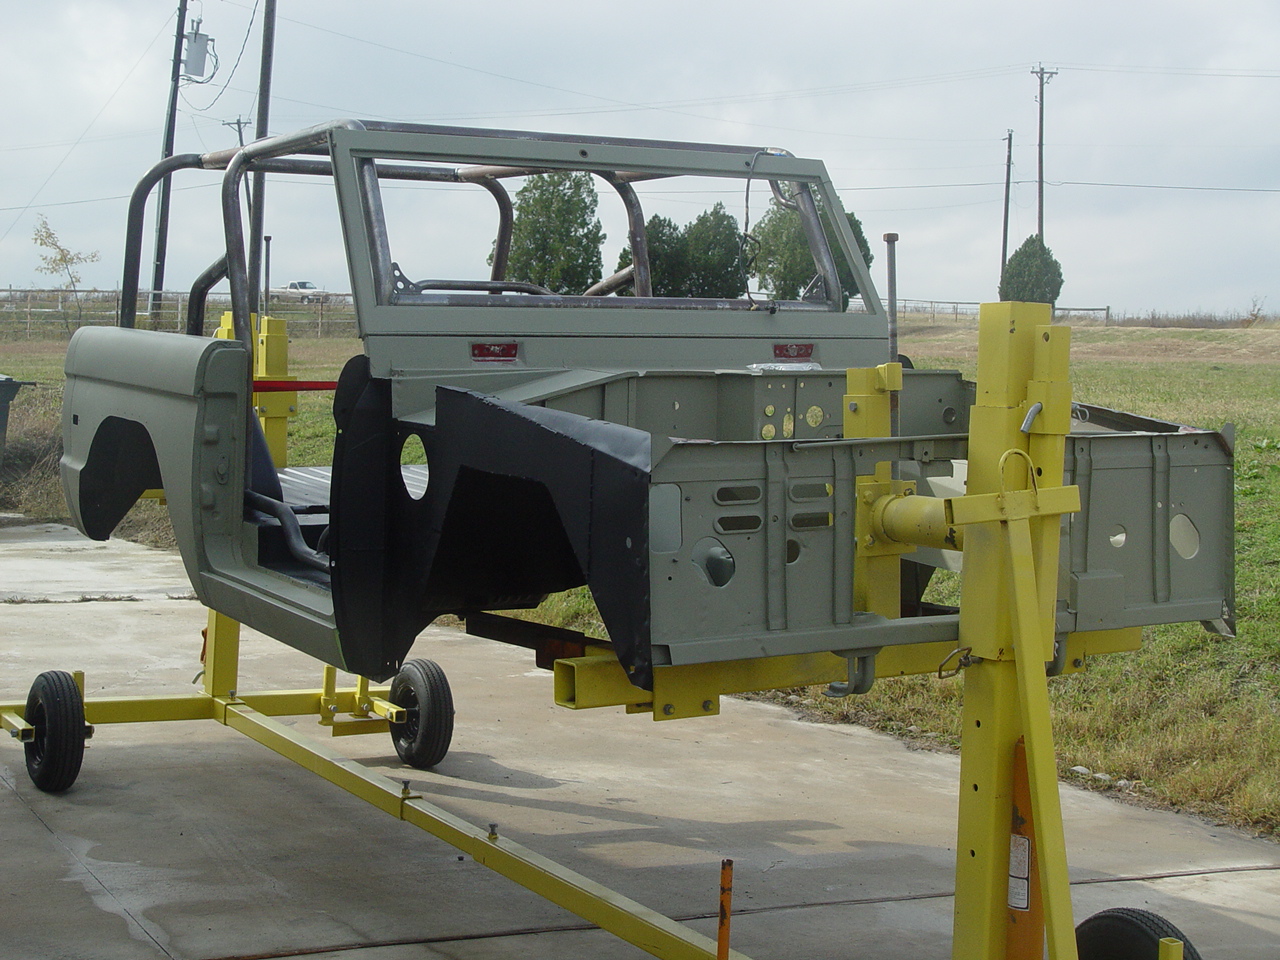
Next, we rolled in the rotisserie and mounted the body to it using the front and rear body mounts. All went well and we balanced the body so that one person could easily rotate it 360 degrees. The next day when we rolled it outside for photos, a couple of "POPS" raised our eyebrows. After some quick inspection, we discovered that an old and poorly-done repair at the rear of both inner fender wells was giving way - at least on the passenger's side. So, we rolled it back inside (very gingerly) and did some more head scratching. Some out-of-the-box thinking (thanks Dennis) resulted in us remounting the rotisserie to the body mounts under the front footwells. We also used a door brace kit to provide some additional support to the structure forward of the firewall for additional protection until we can properly repair the old damage and return the structural rigidity to the front of the body.
|
||||||
 |
 |
 |
 |
 |
||
 |
 |
 |
 |
 |
||
 |
 |
 |
 |
 |
||
 |
 |
 |
 |
 |
||
 |
 |
 |
 |
 |
||
| Click on an image for a larger view | ||||||
SODABLASTING | ||||||
|
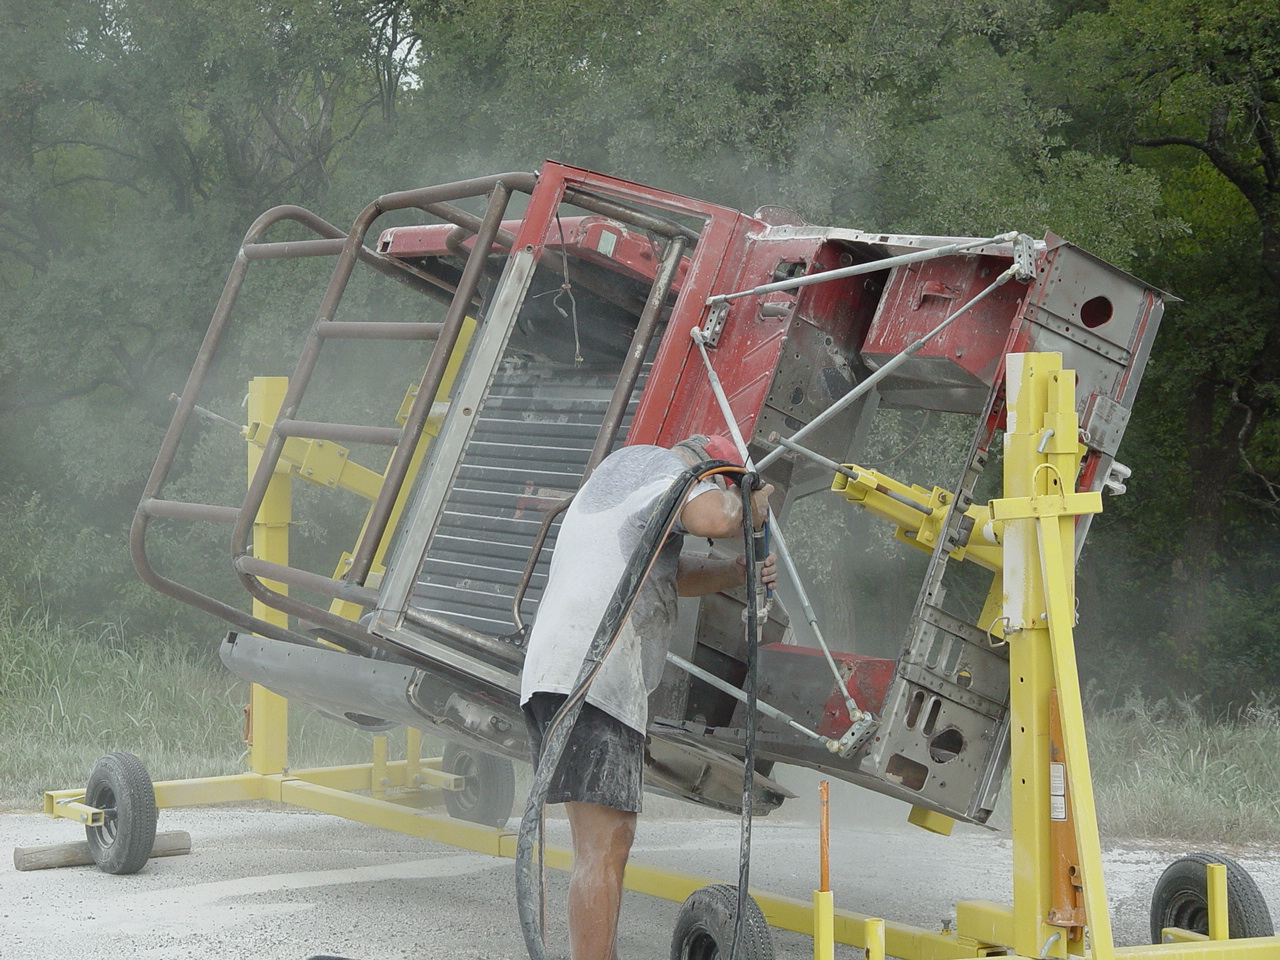
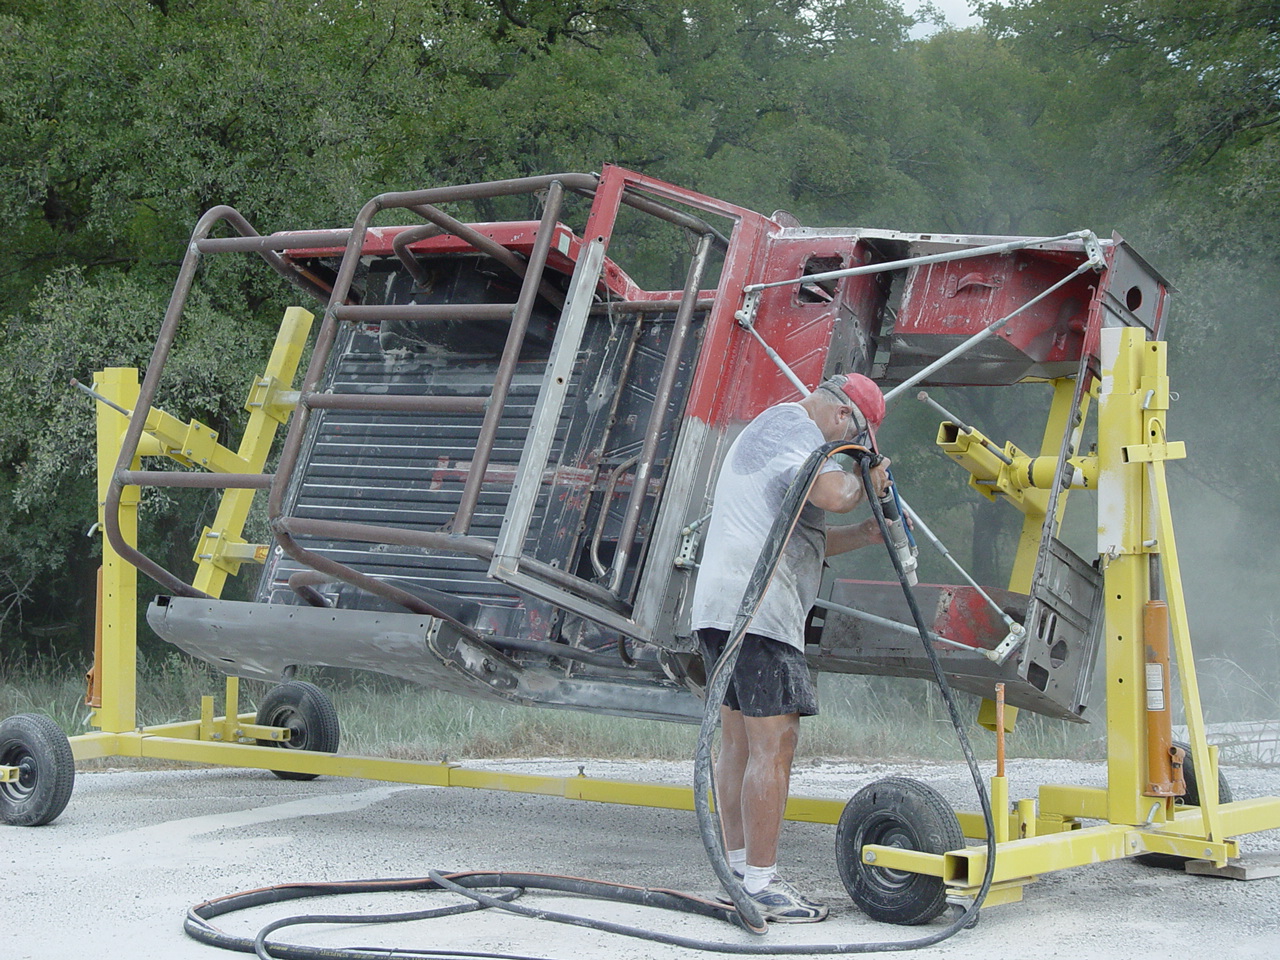
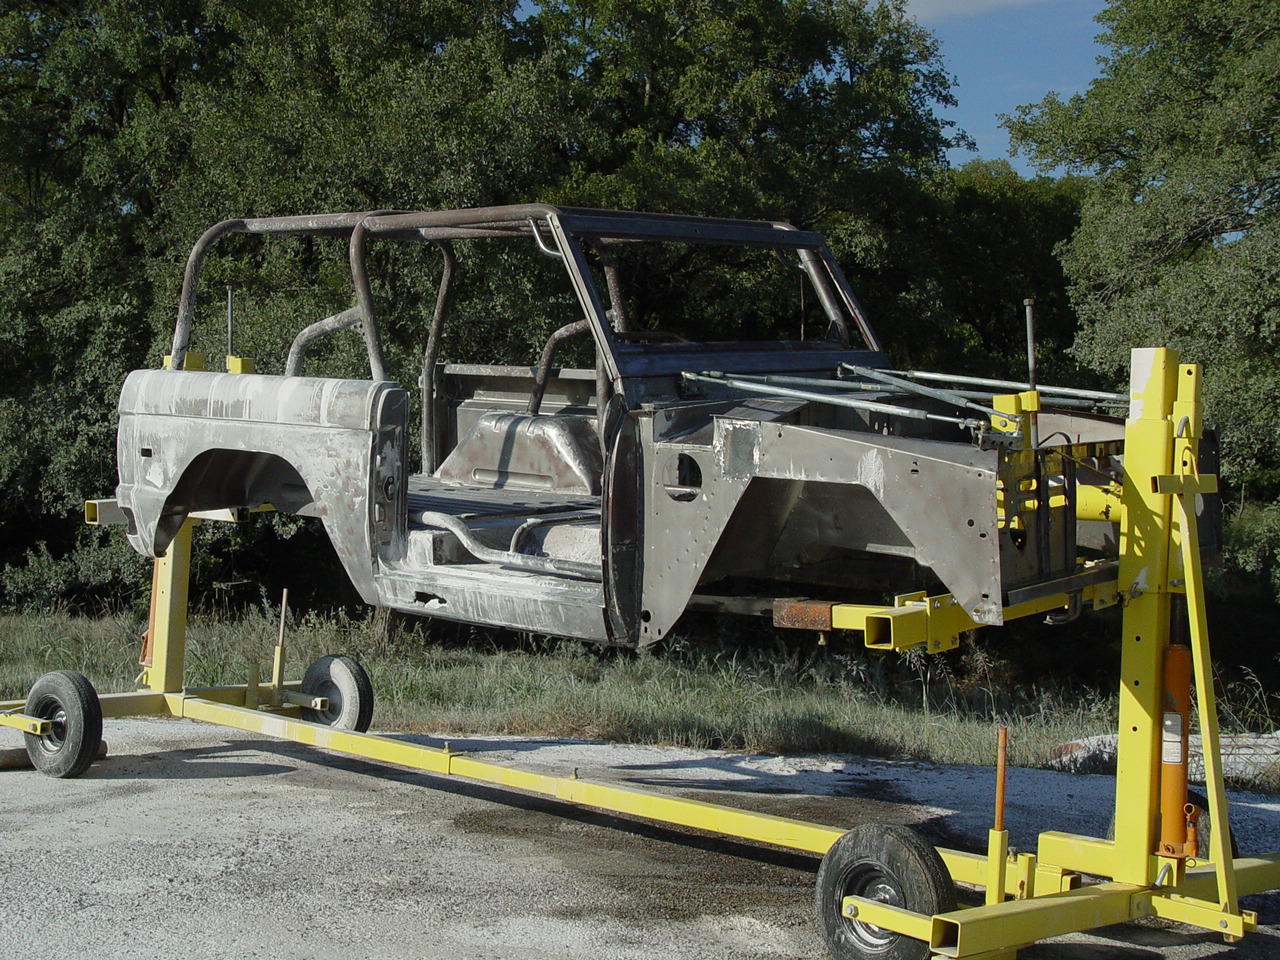
With Buckshot on the rotisserie, we had full access to every nook and cranny. This level of access makes sodablastingmuch easier. The sodablasting rig we use makes quick work of getting rid of every trace of the original paint job and any body filler that may have been used in previous repairs.
The entire sodablastingprocess took just 7 hours. Compare that to how long it might have taken using conventional sanding or chemical stripping methods. And, conventional methods would never have resulted in such a thorough stripping of every surface. Once completed, we had a bare-metal shell that was ready for us to start working some magic.
|
||||||
 |
 |
 |
 |
 |
||
 |
 |
 |
 |
 |
||
| Click on an image for a larger view | ||||||
SODABLASTING VIDEOS | ||||||
| Click on an image to view the video | ||||||
BODYWORK | ||||||
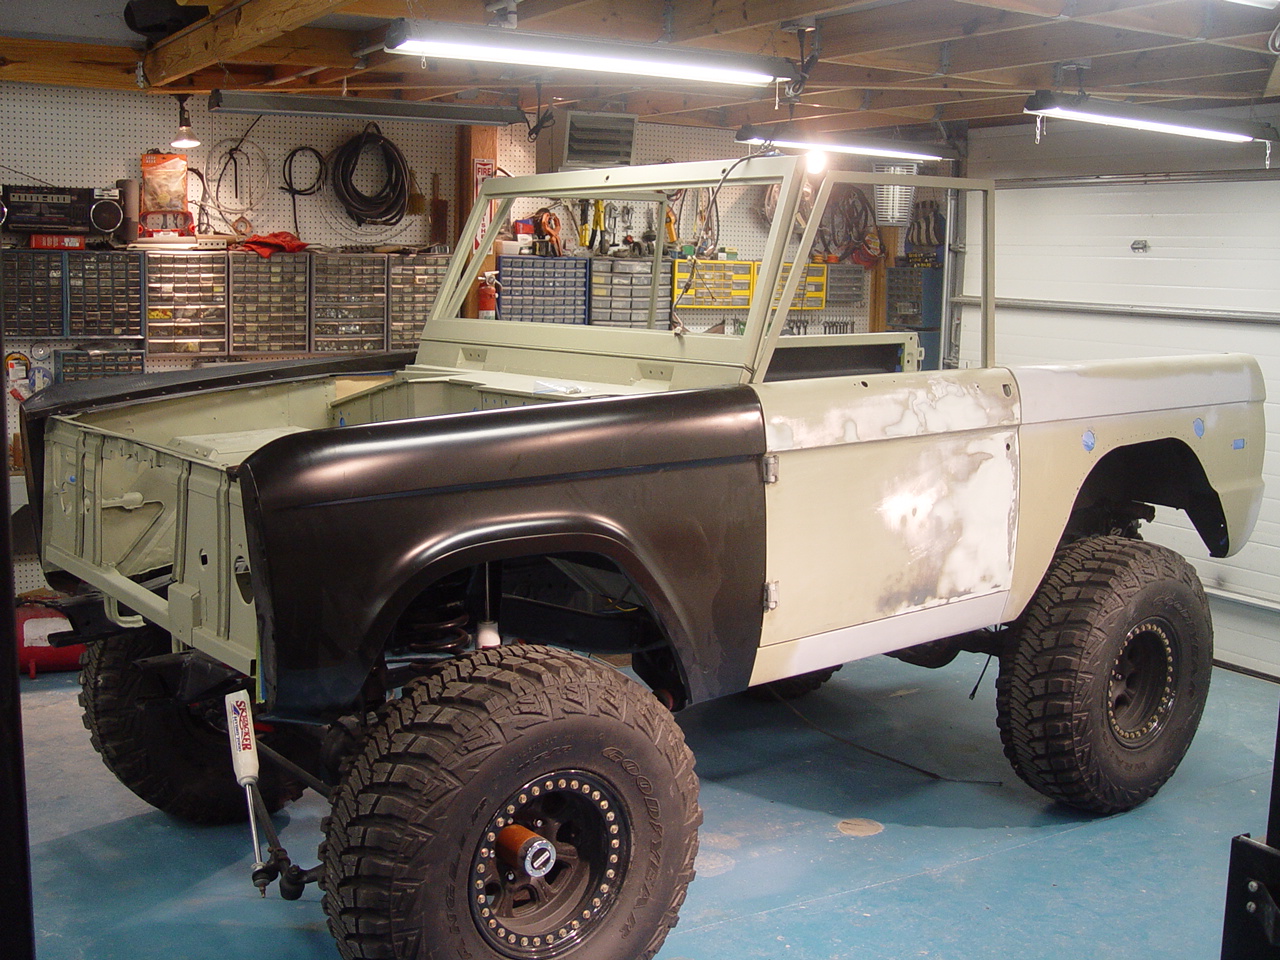
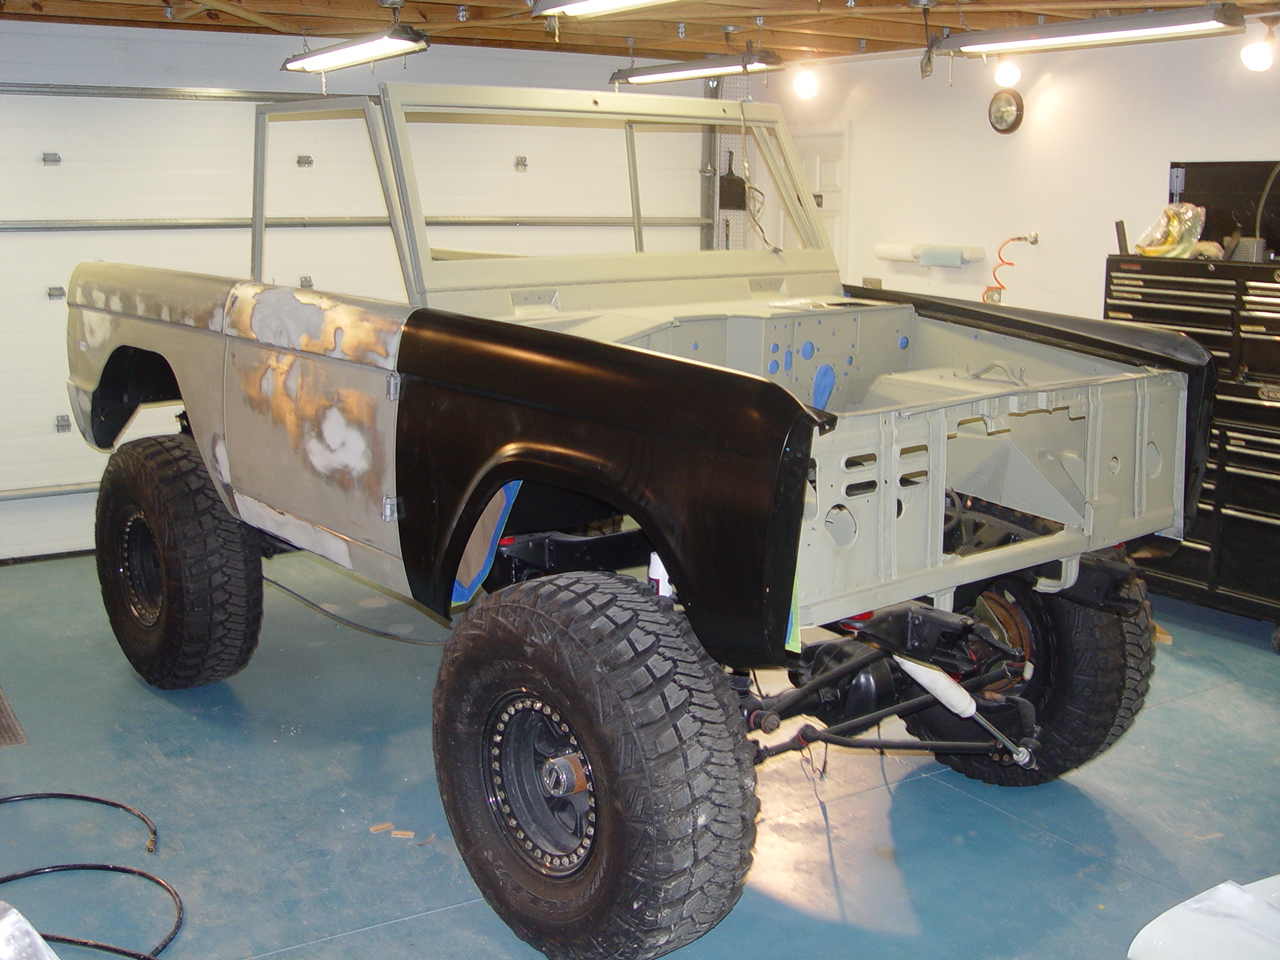
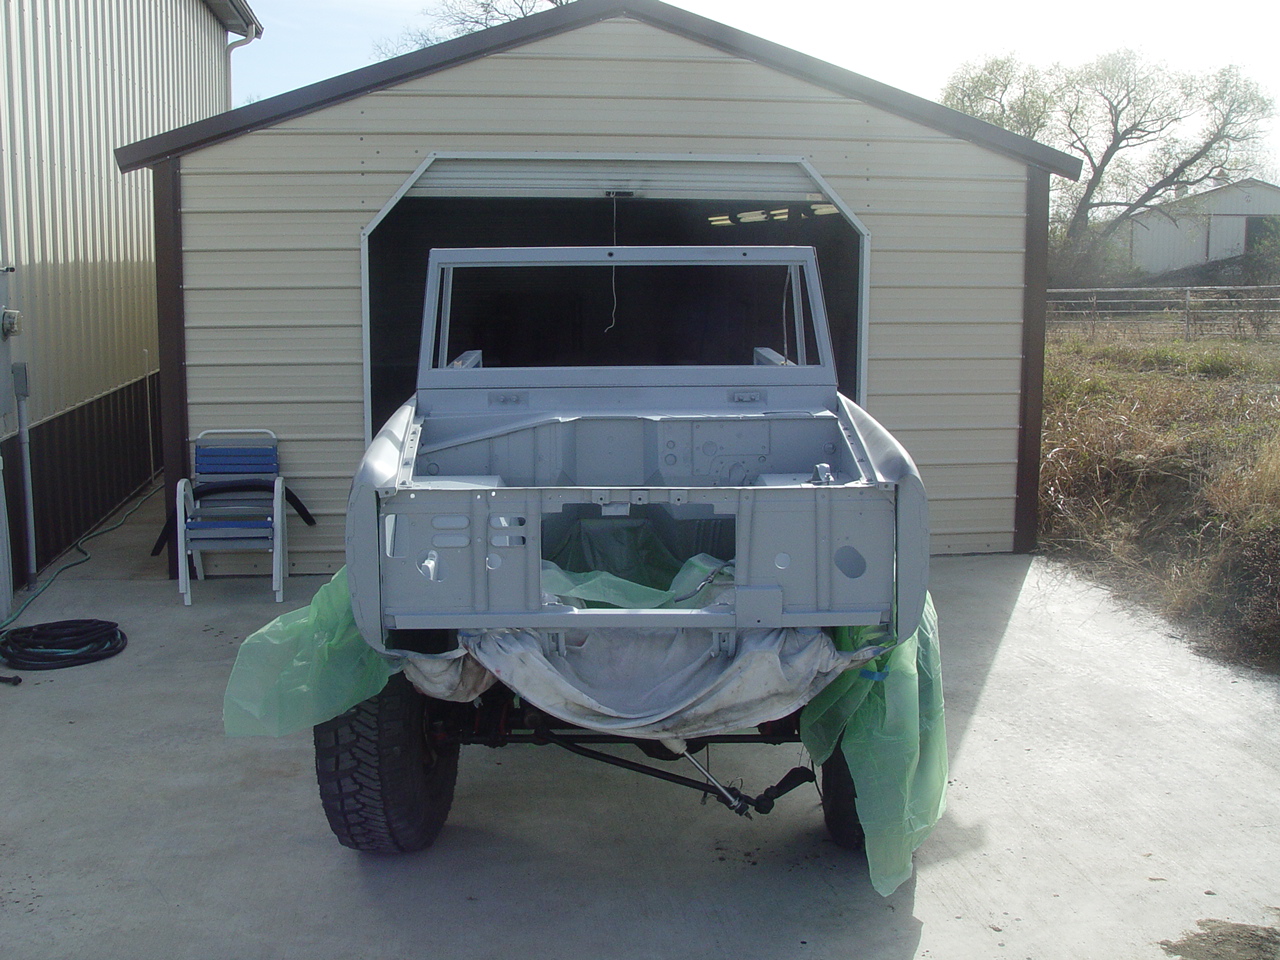
|
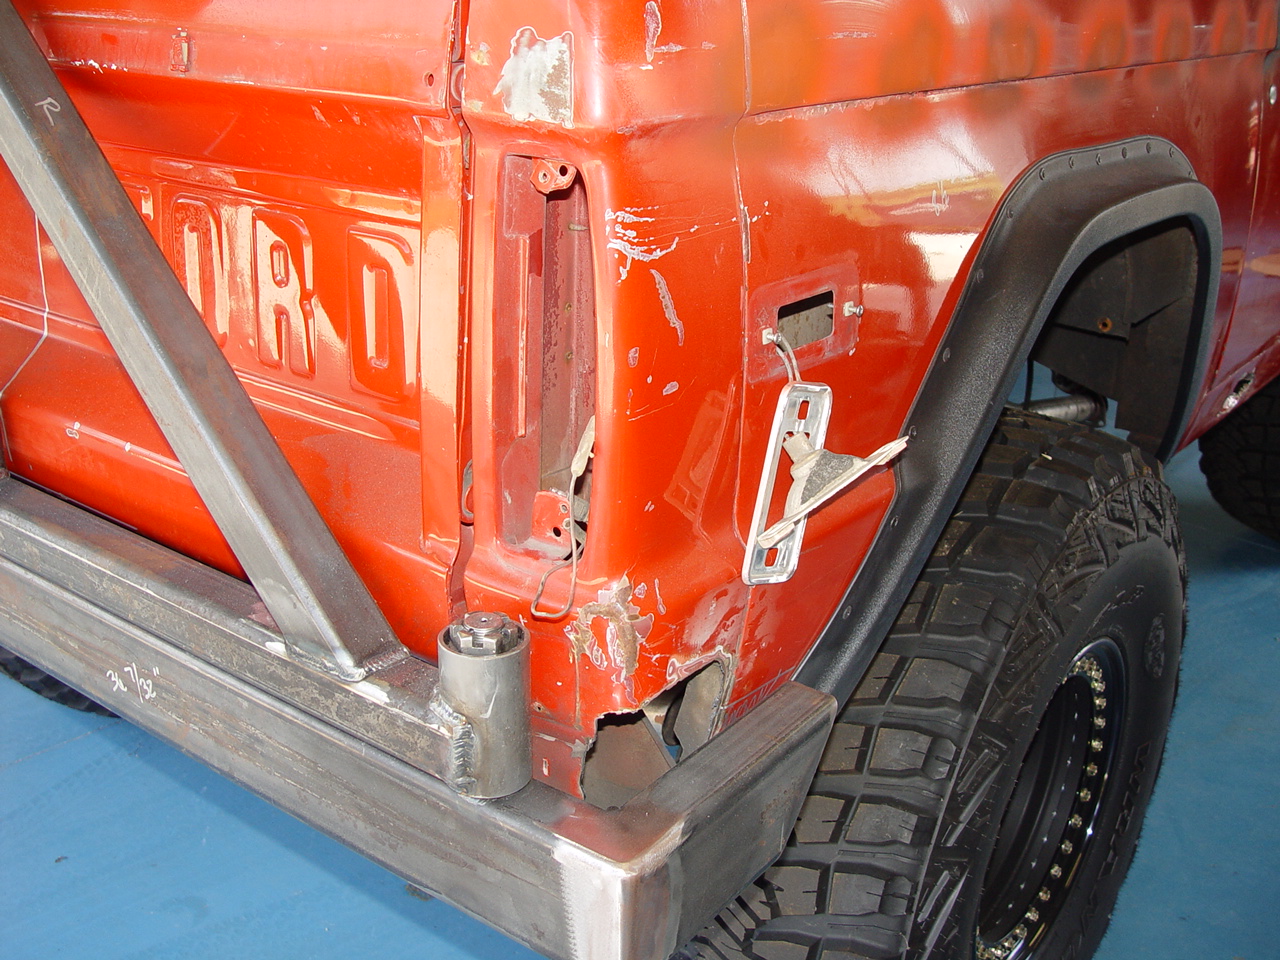
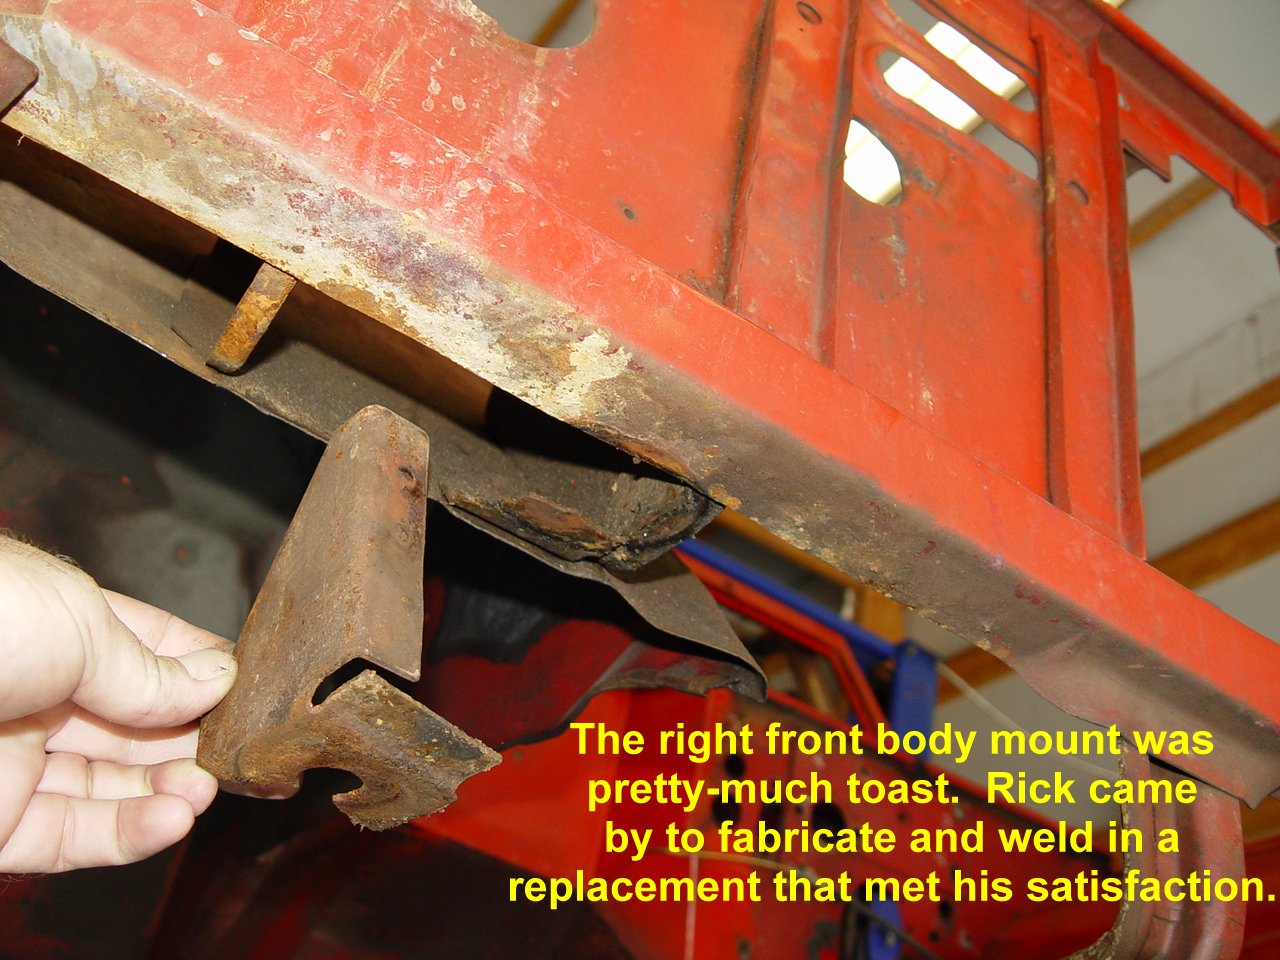
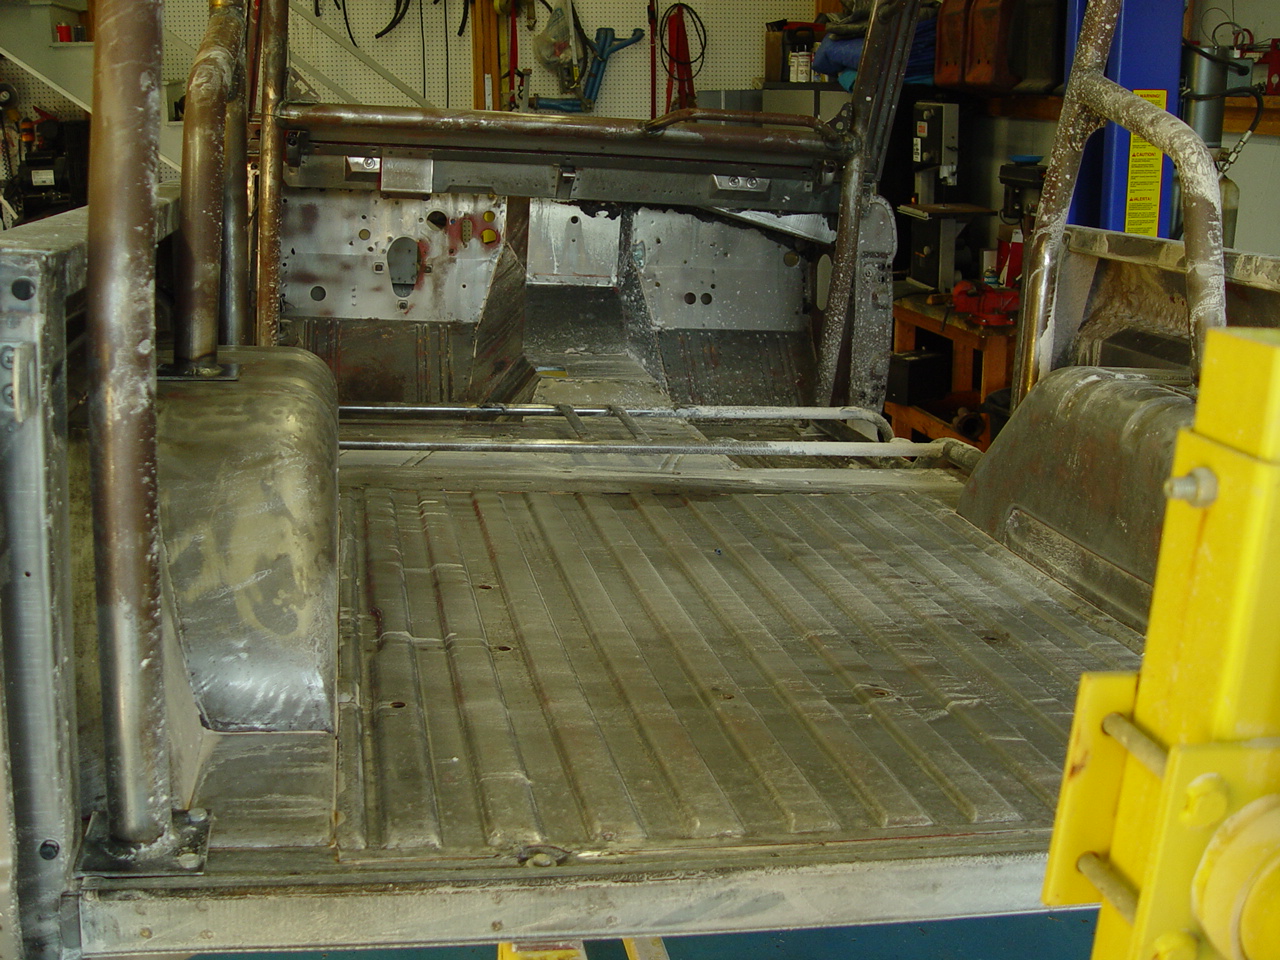
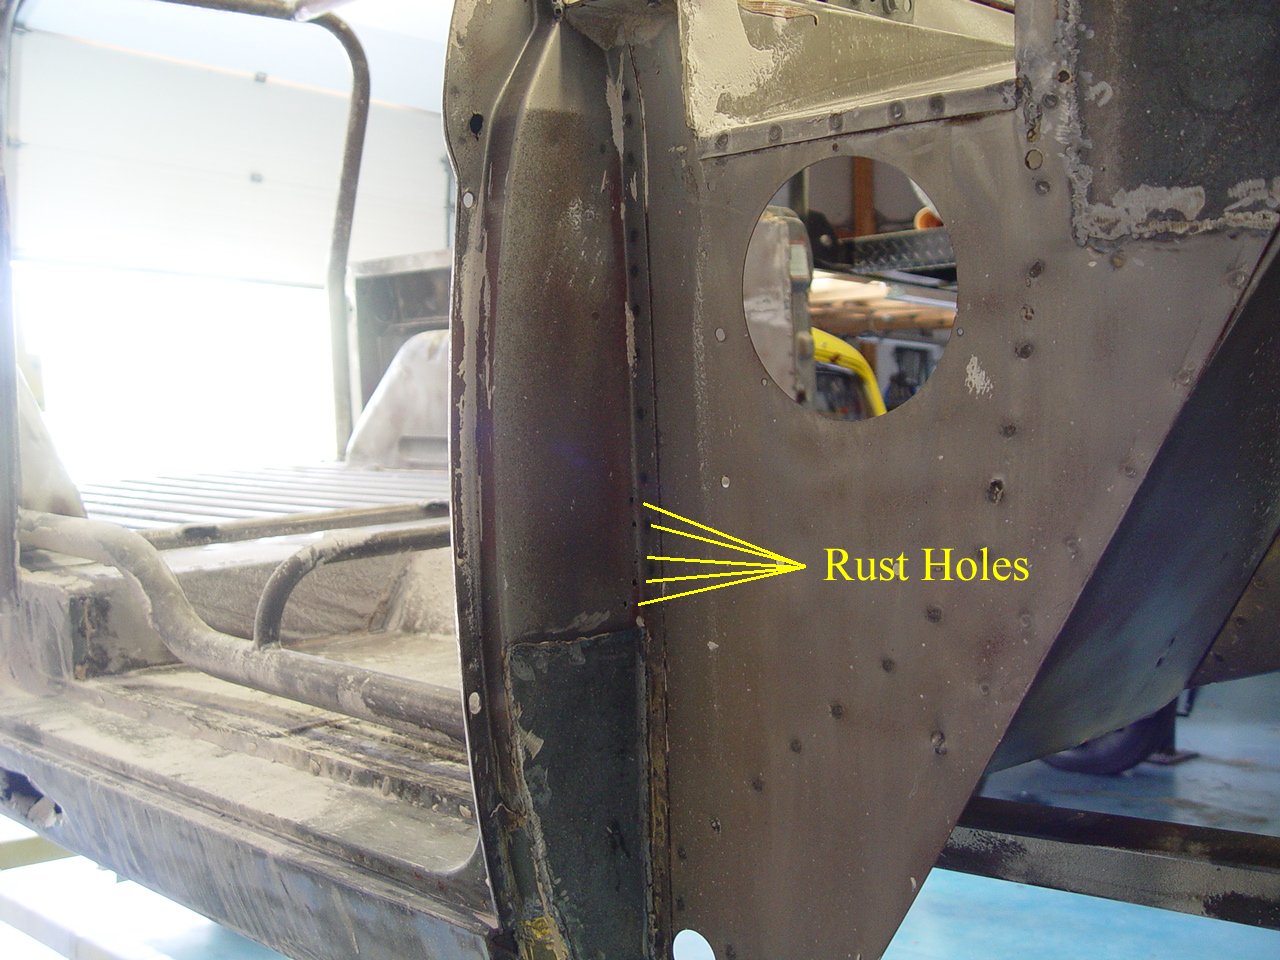
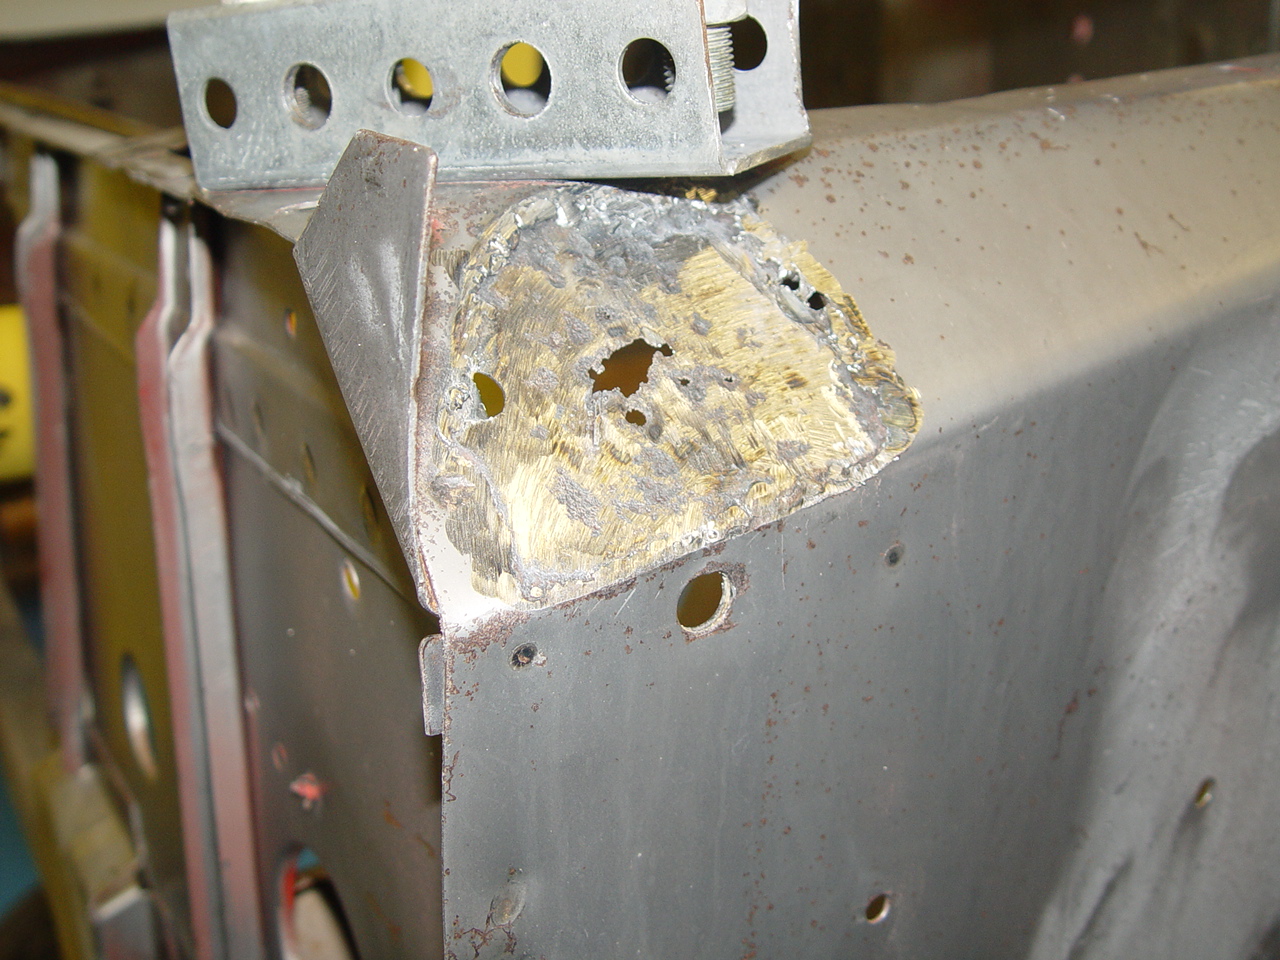
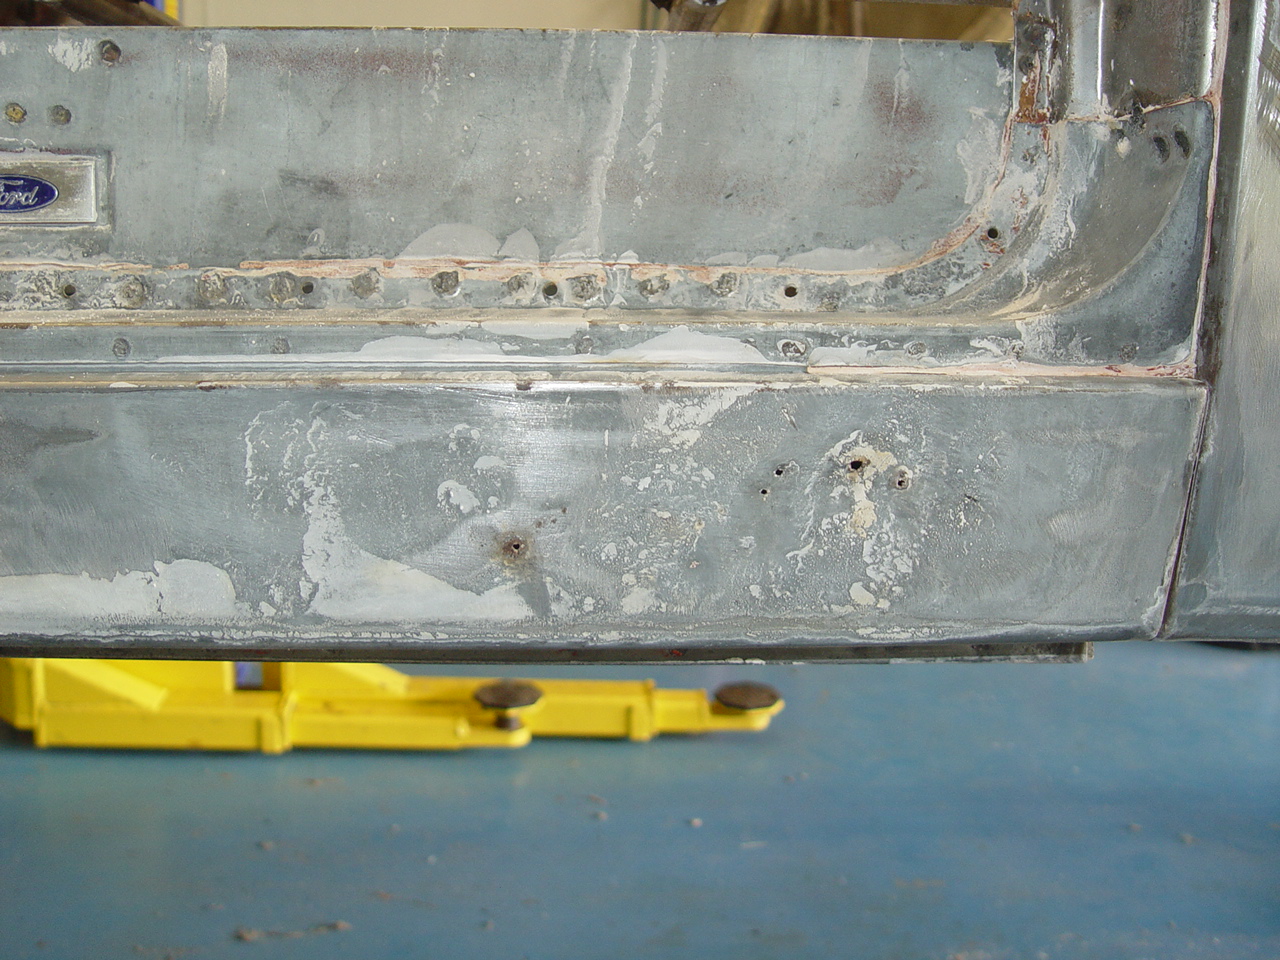
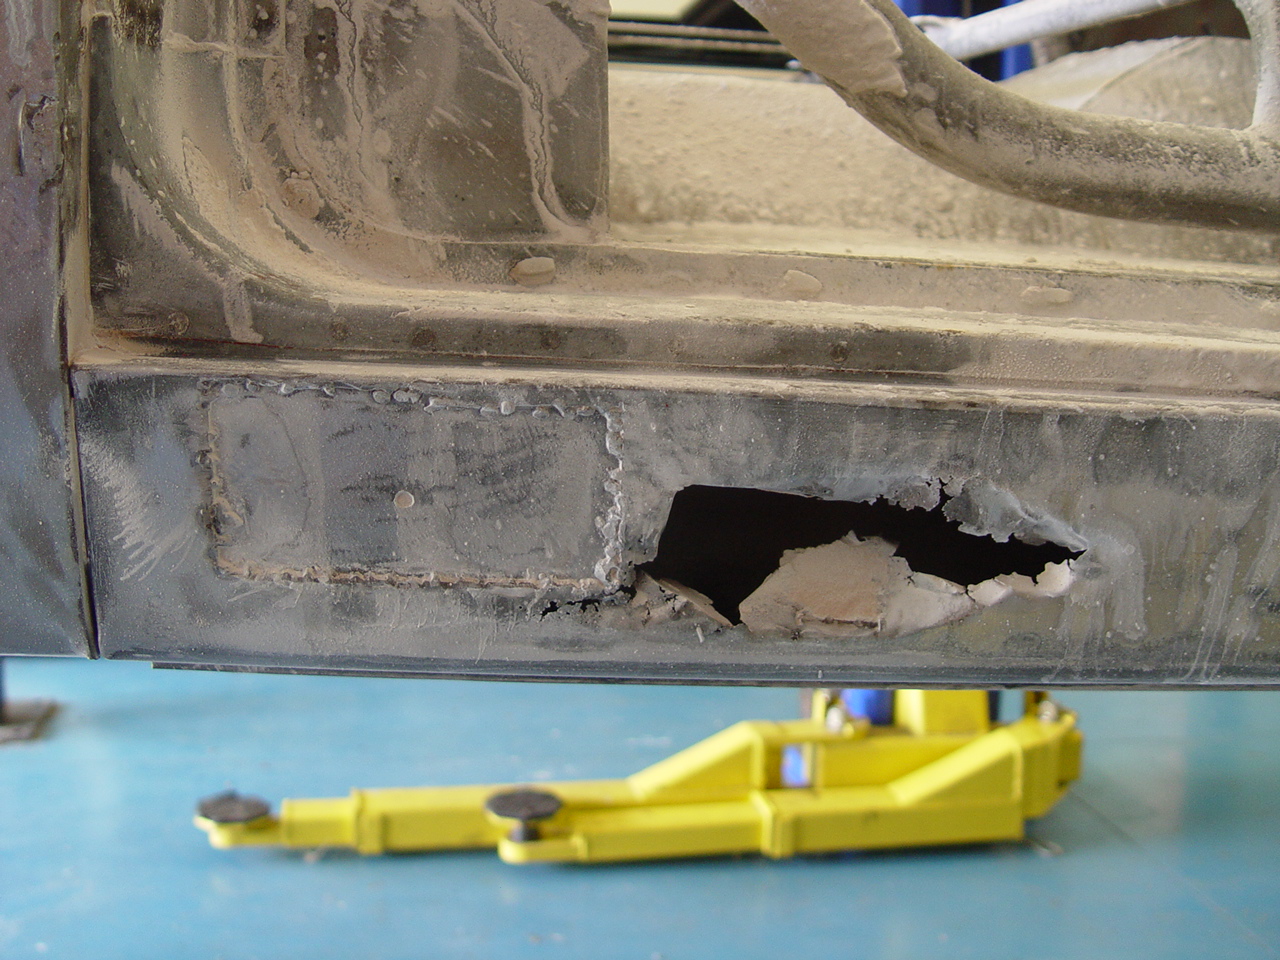
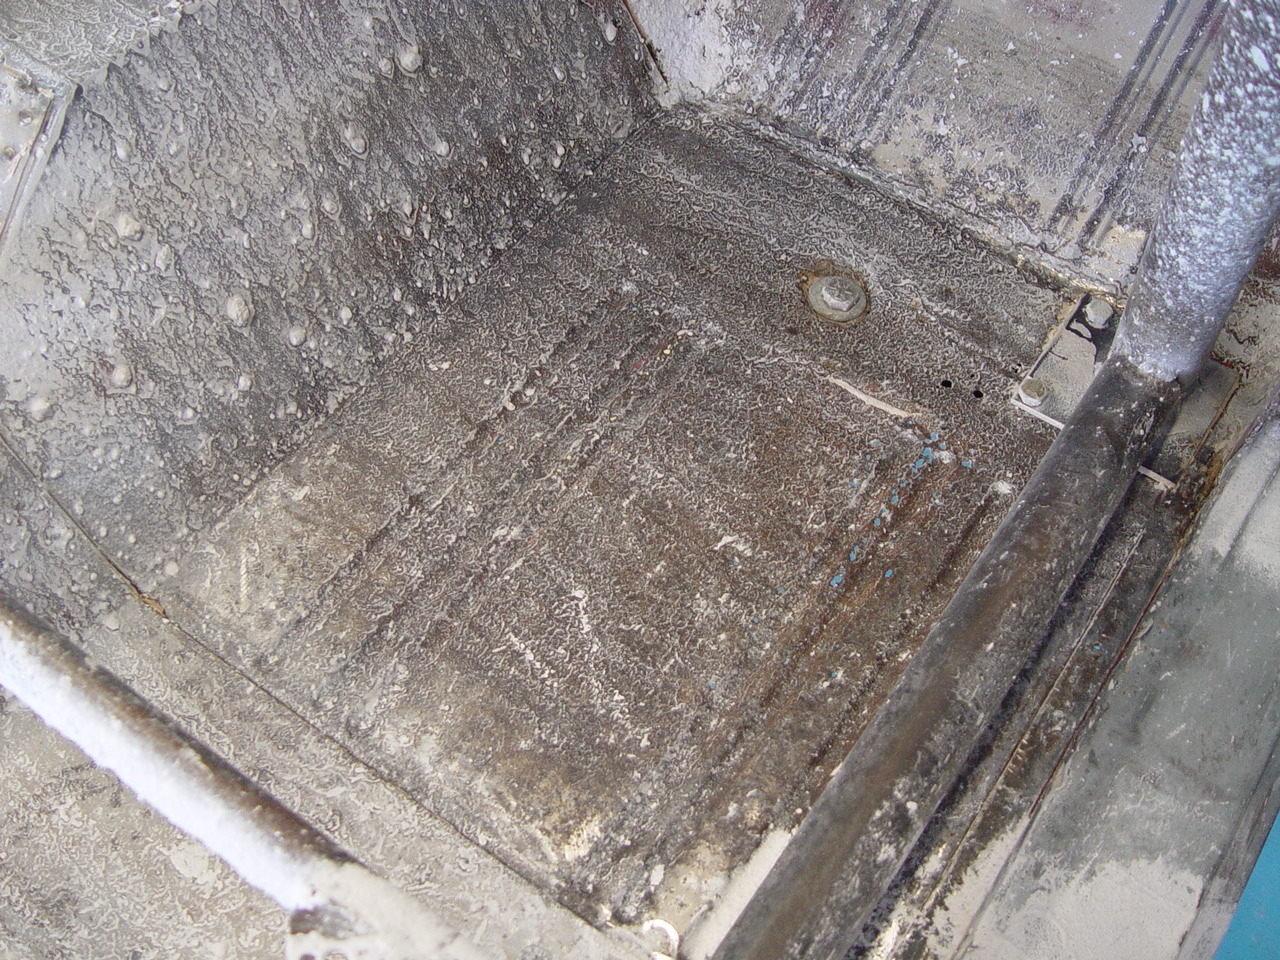
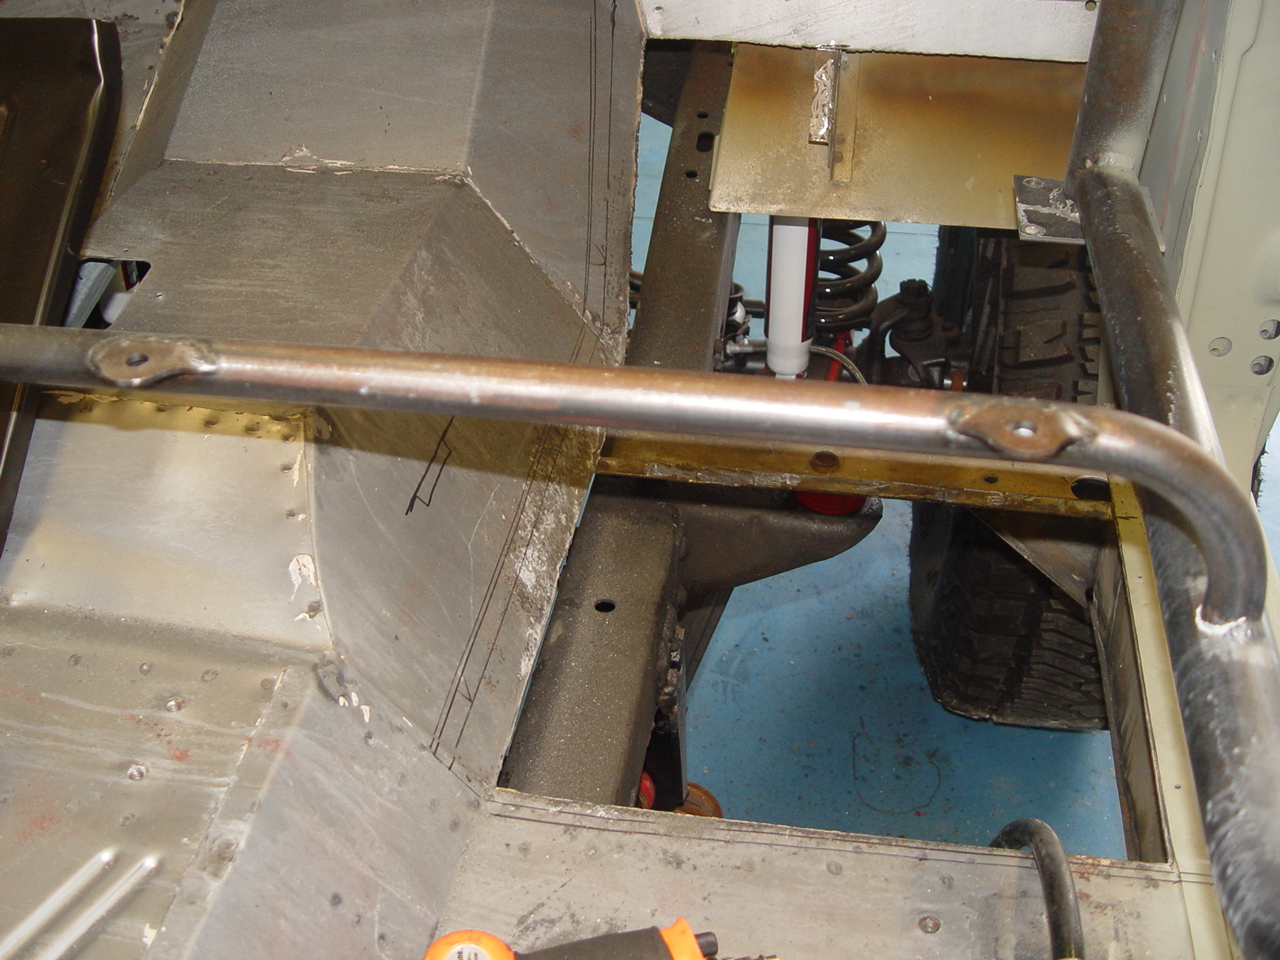
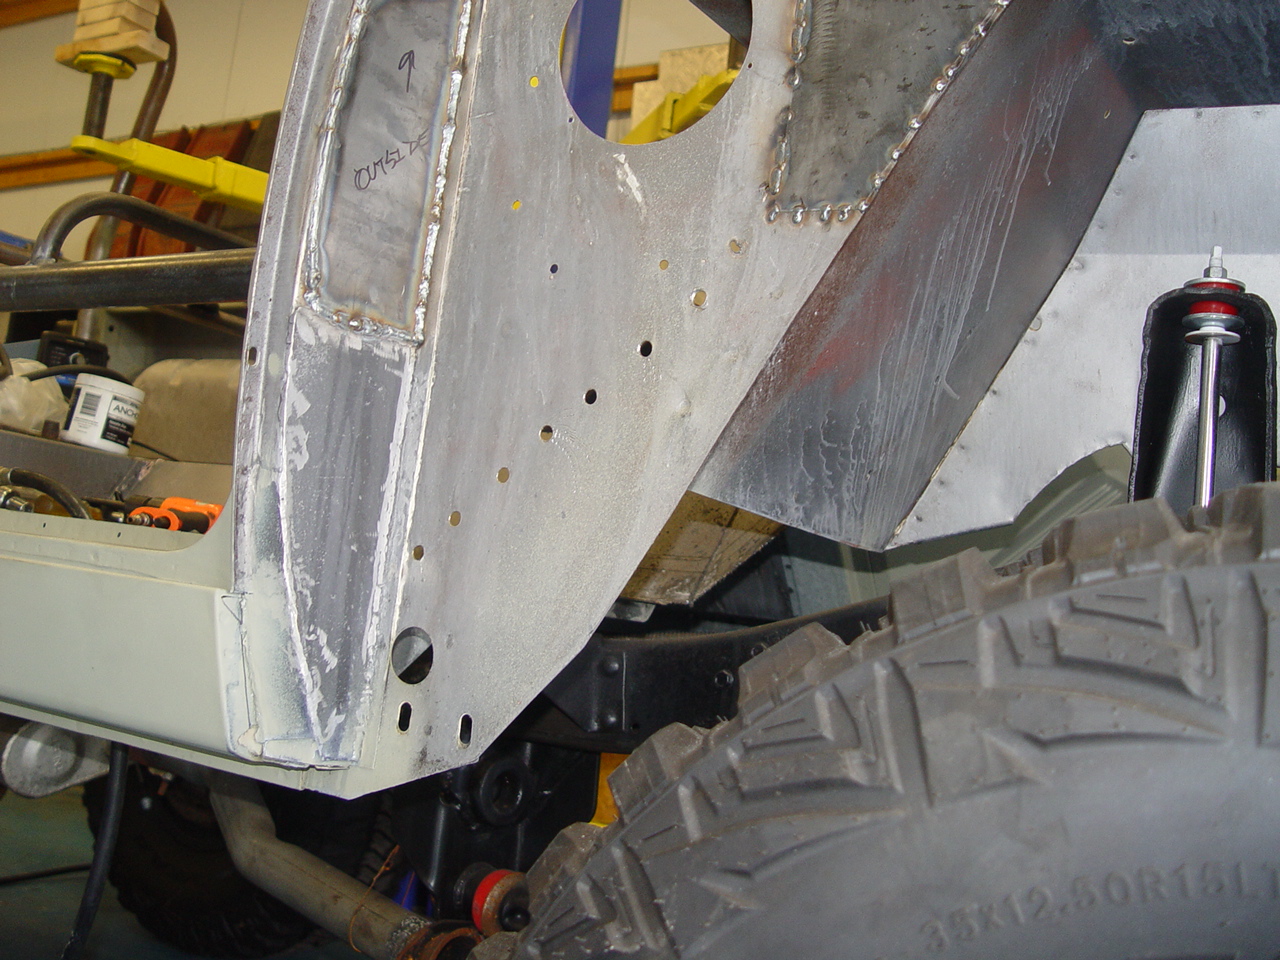
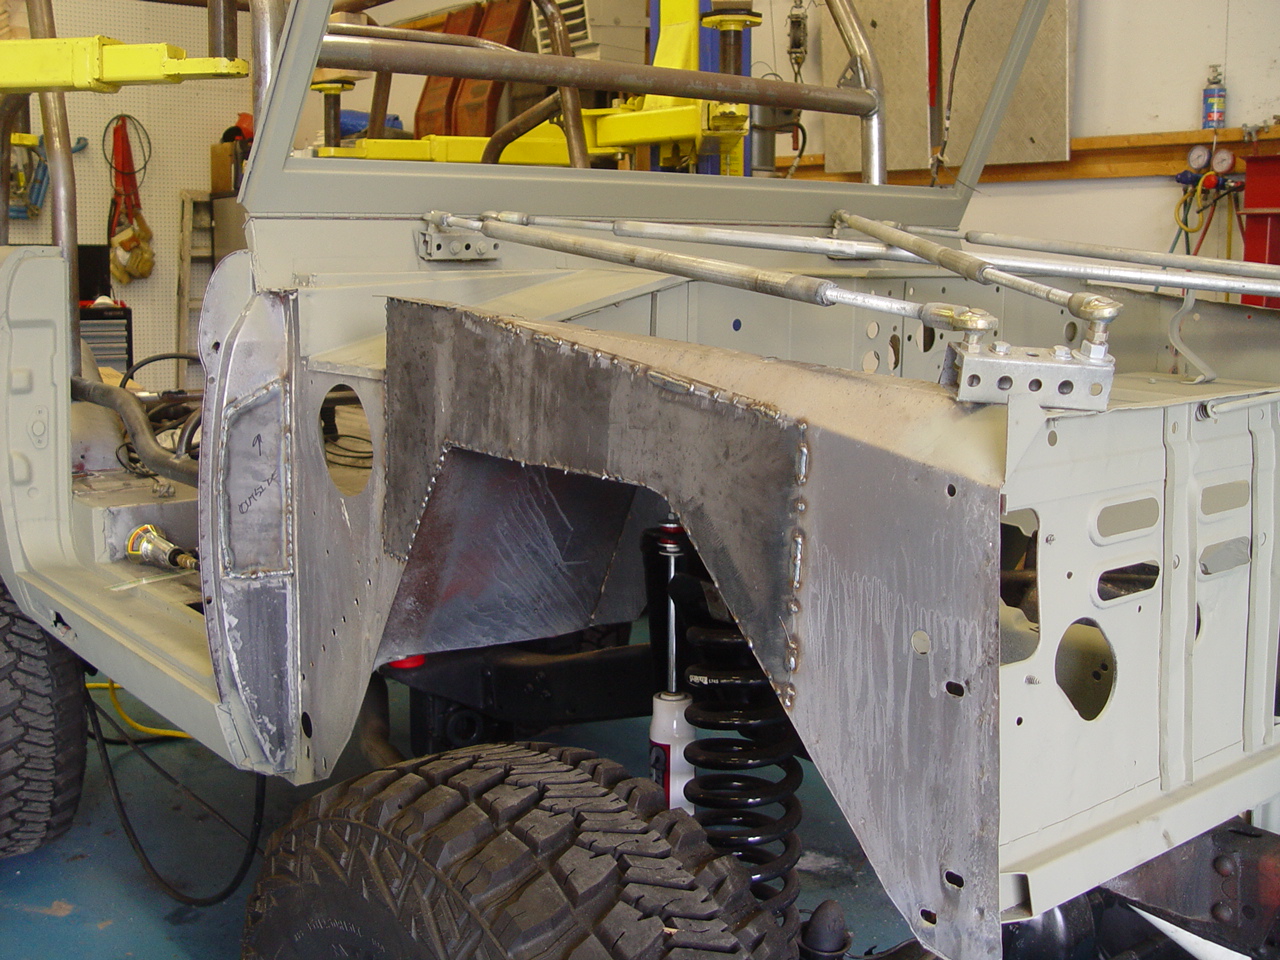
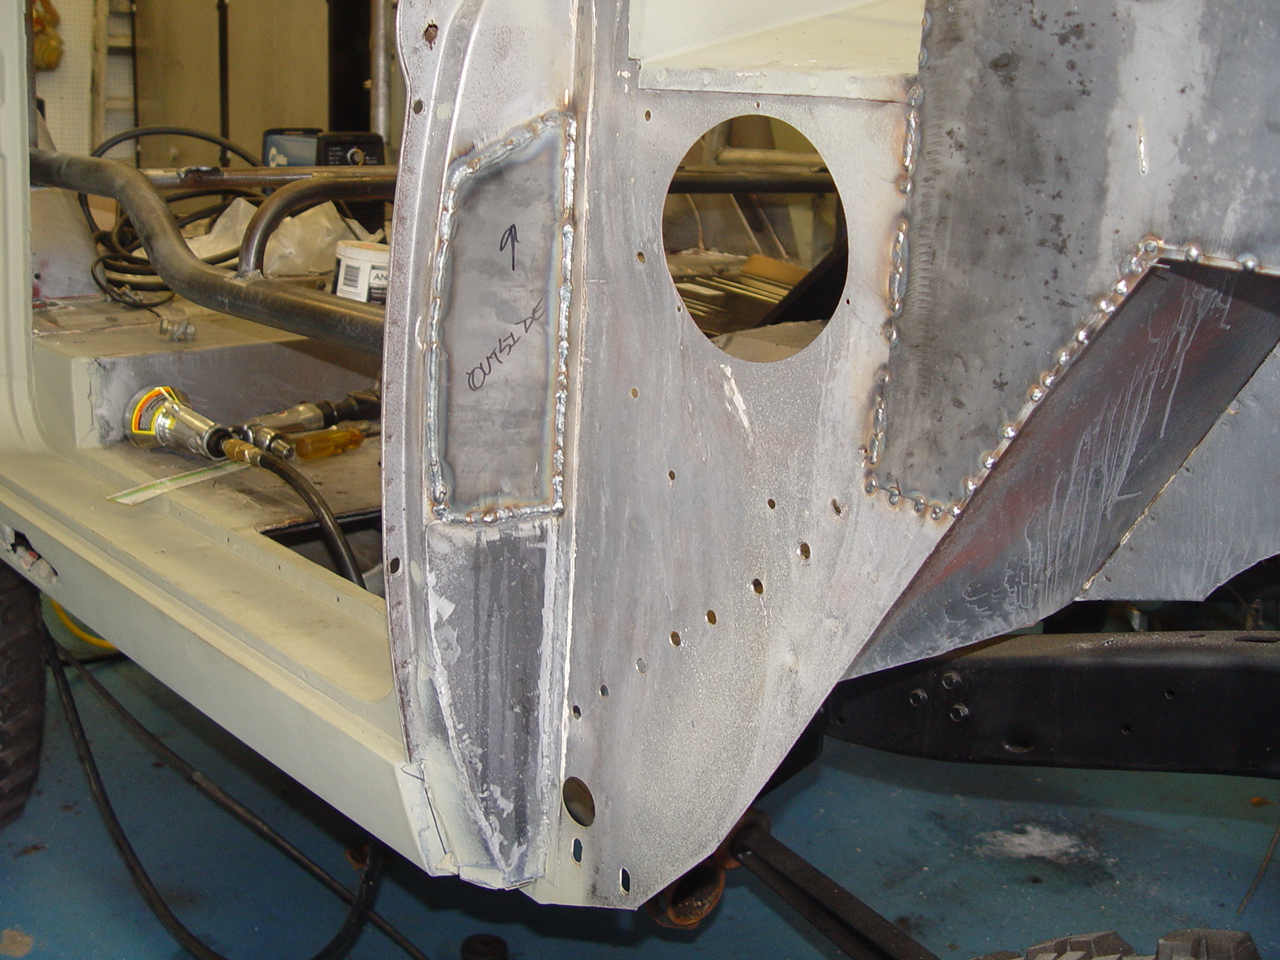
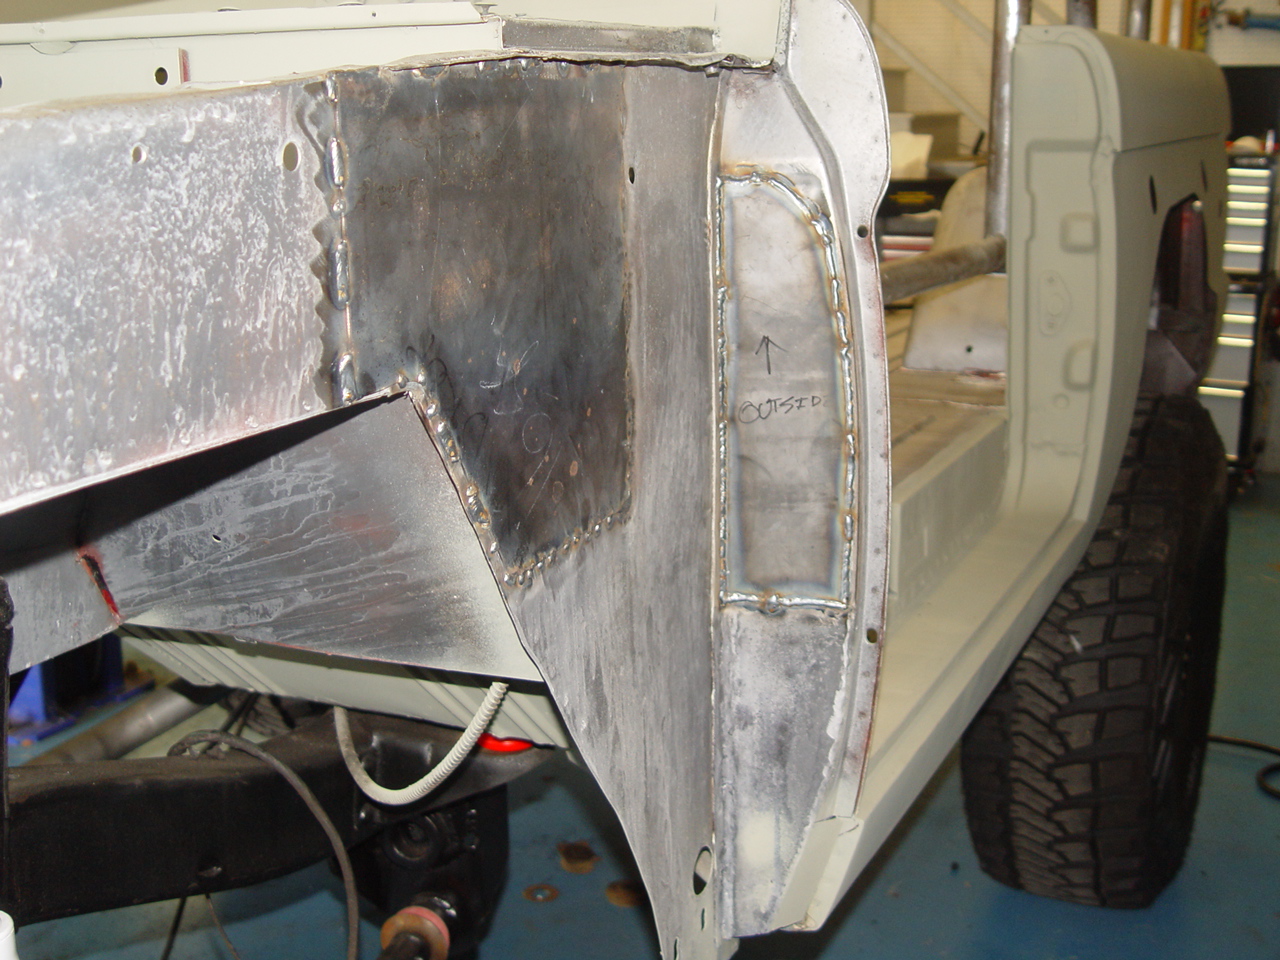
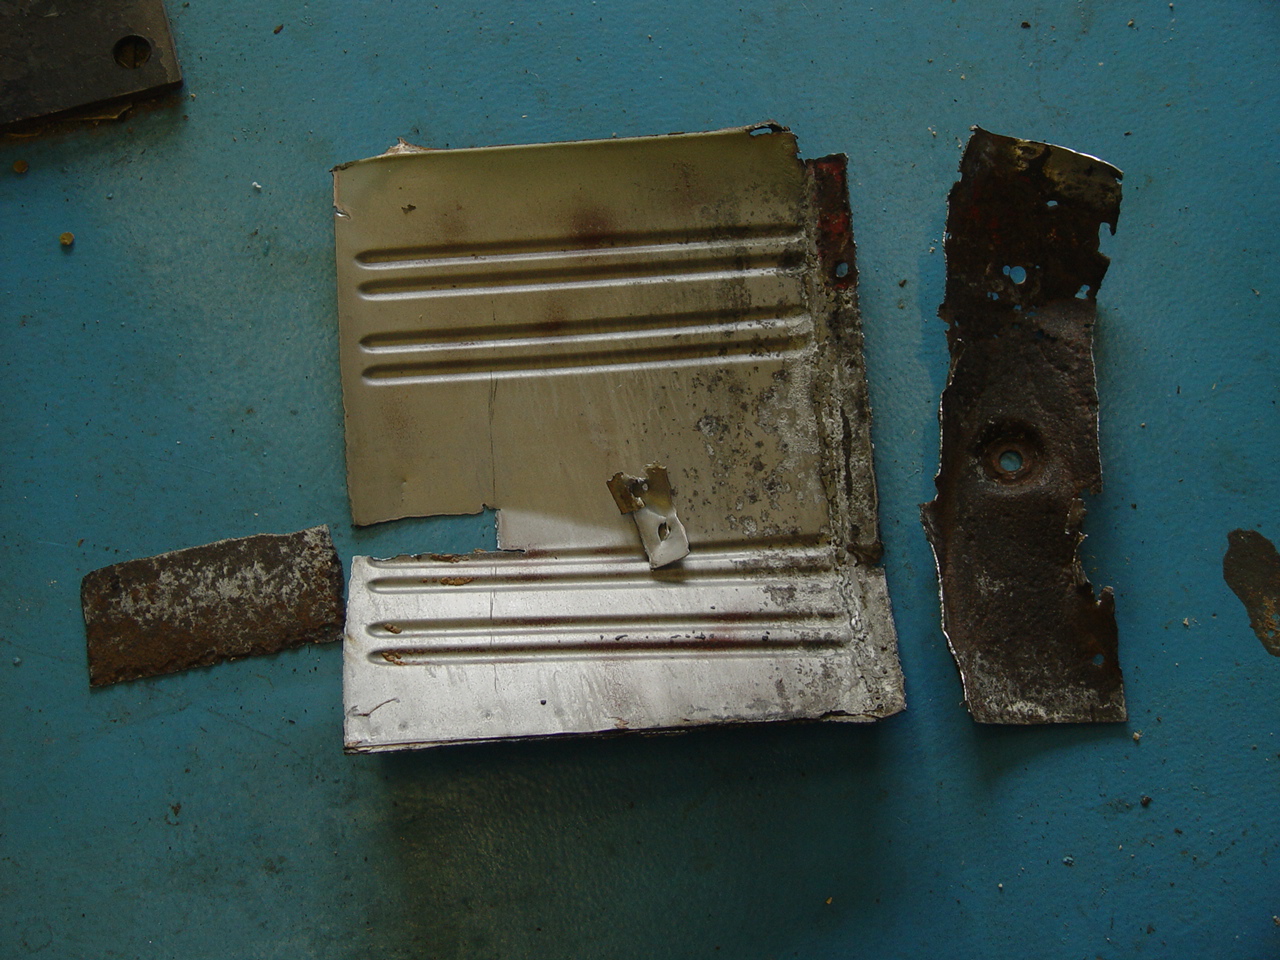
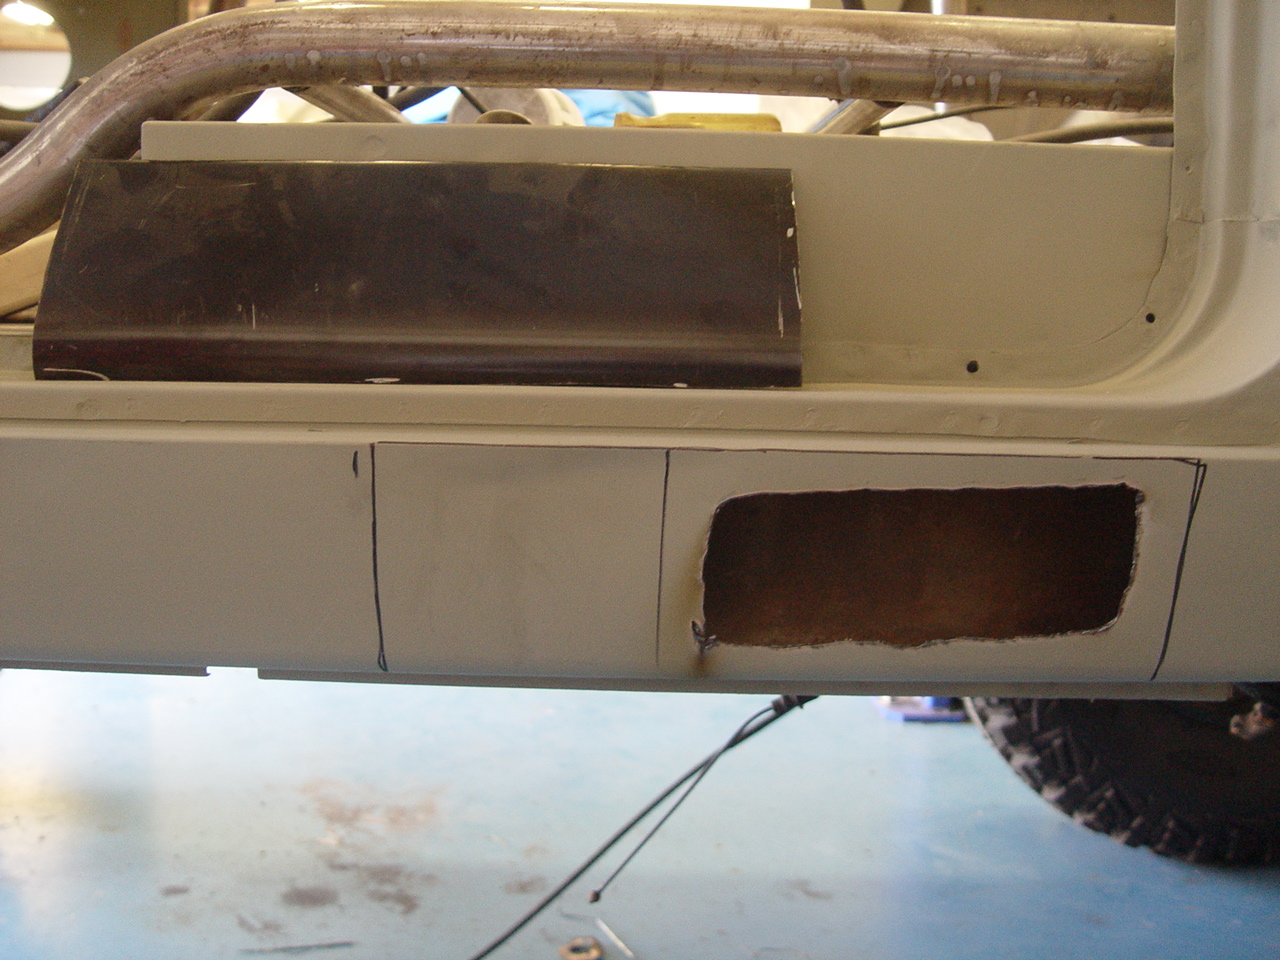
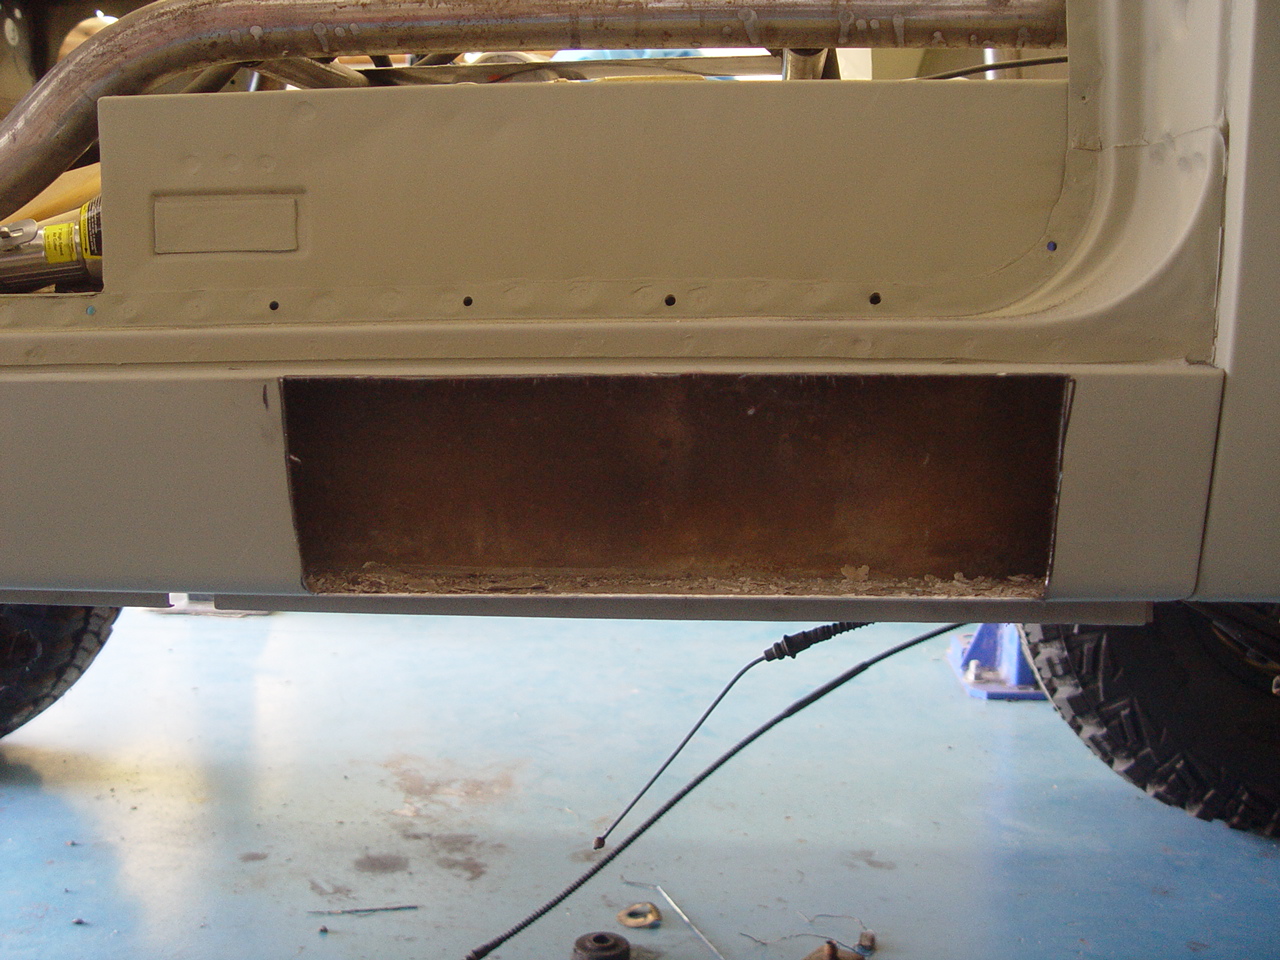
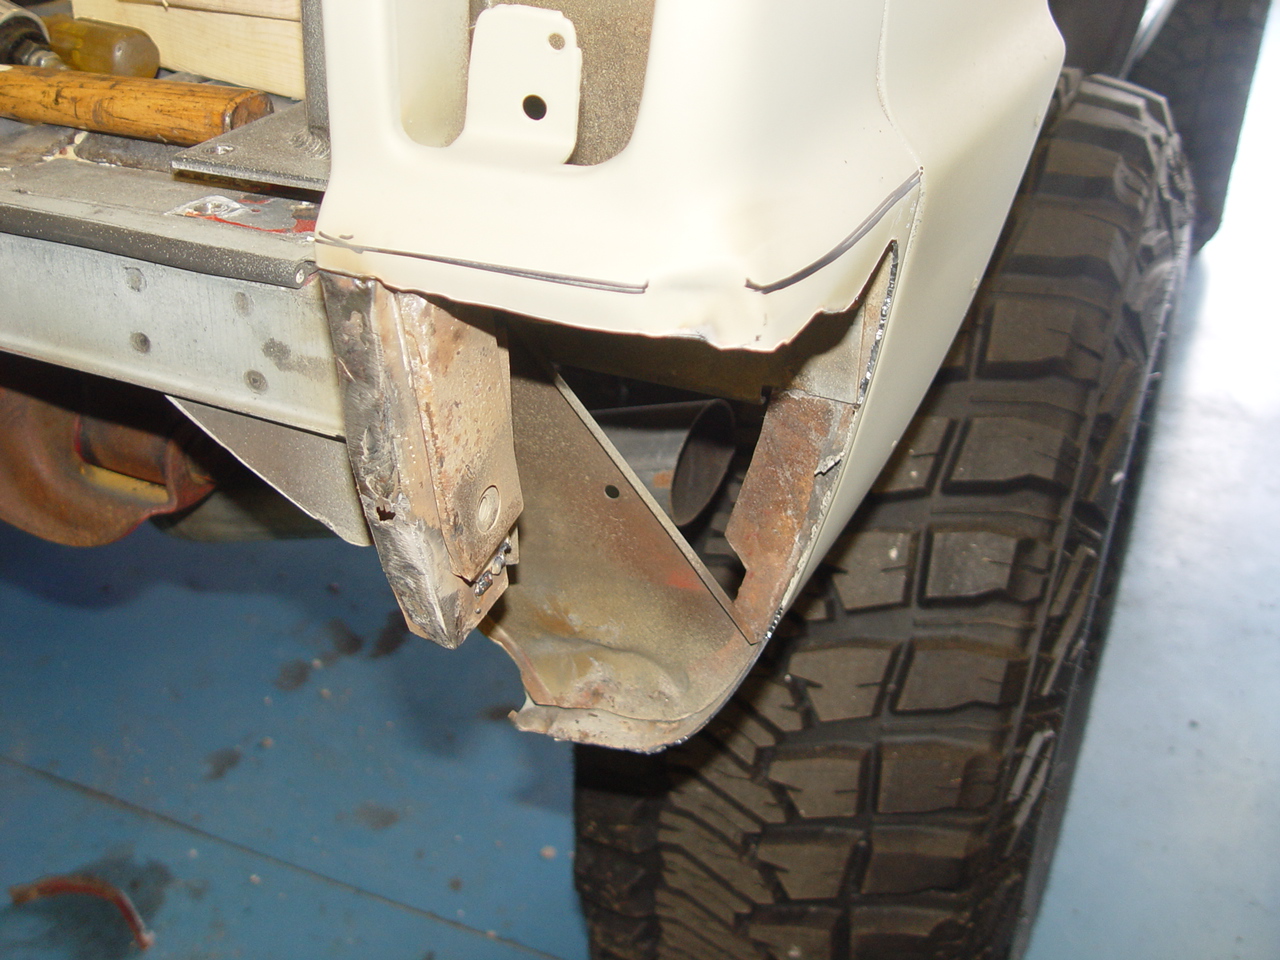
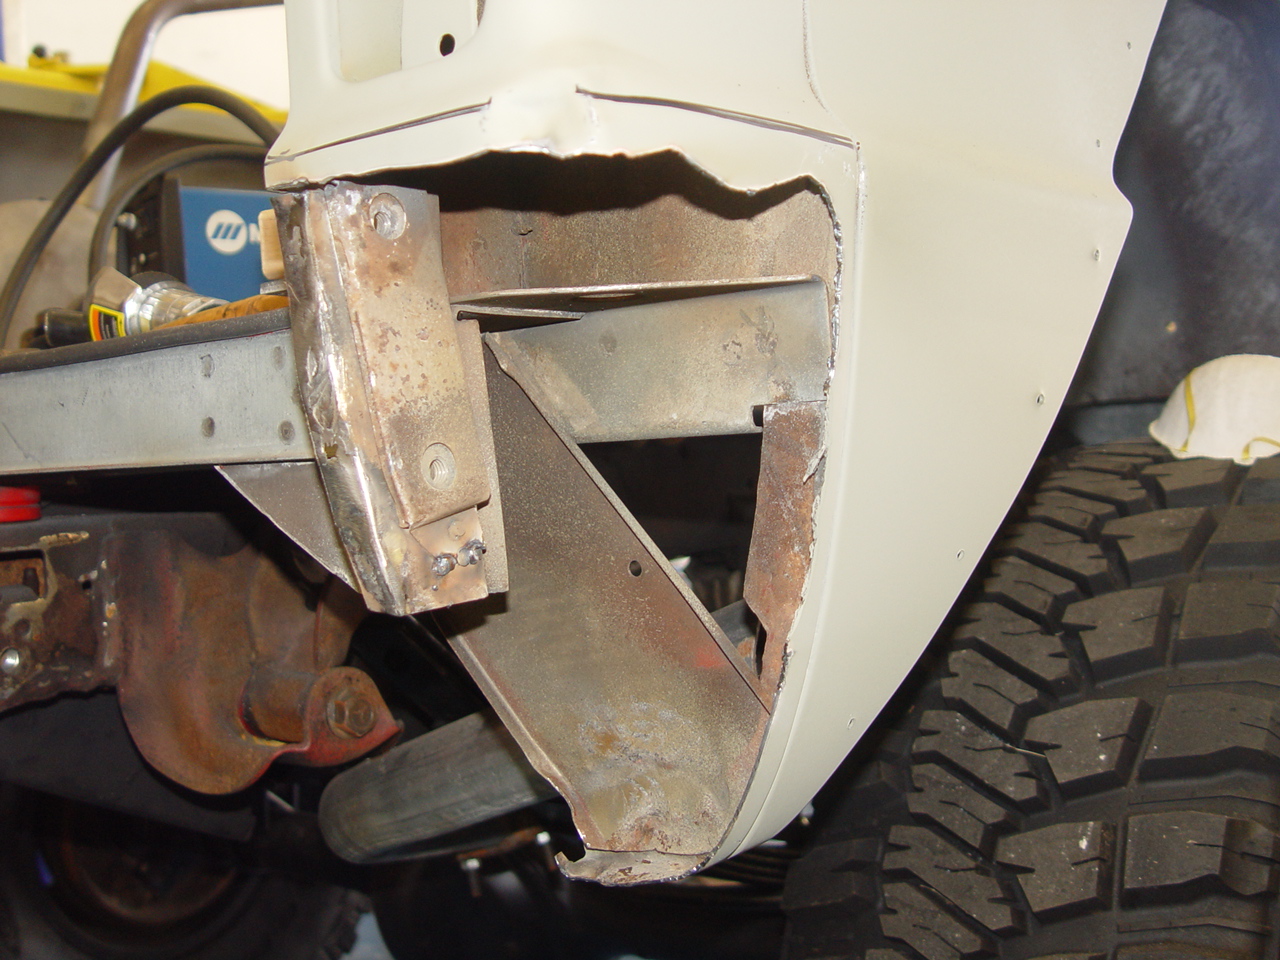
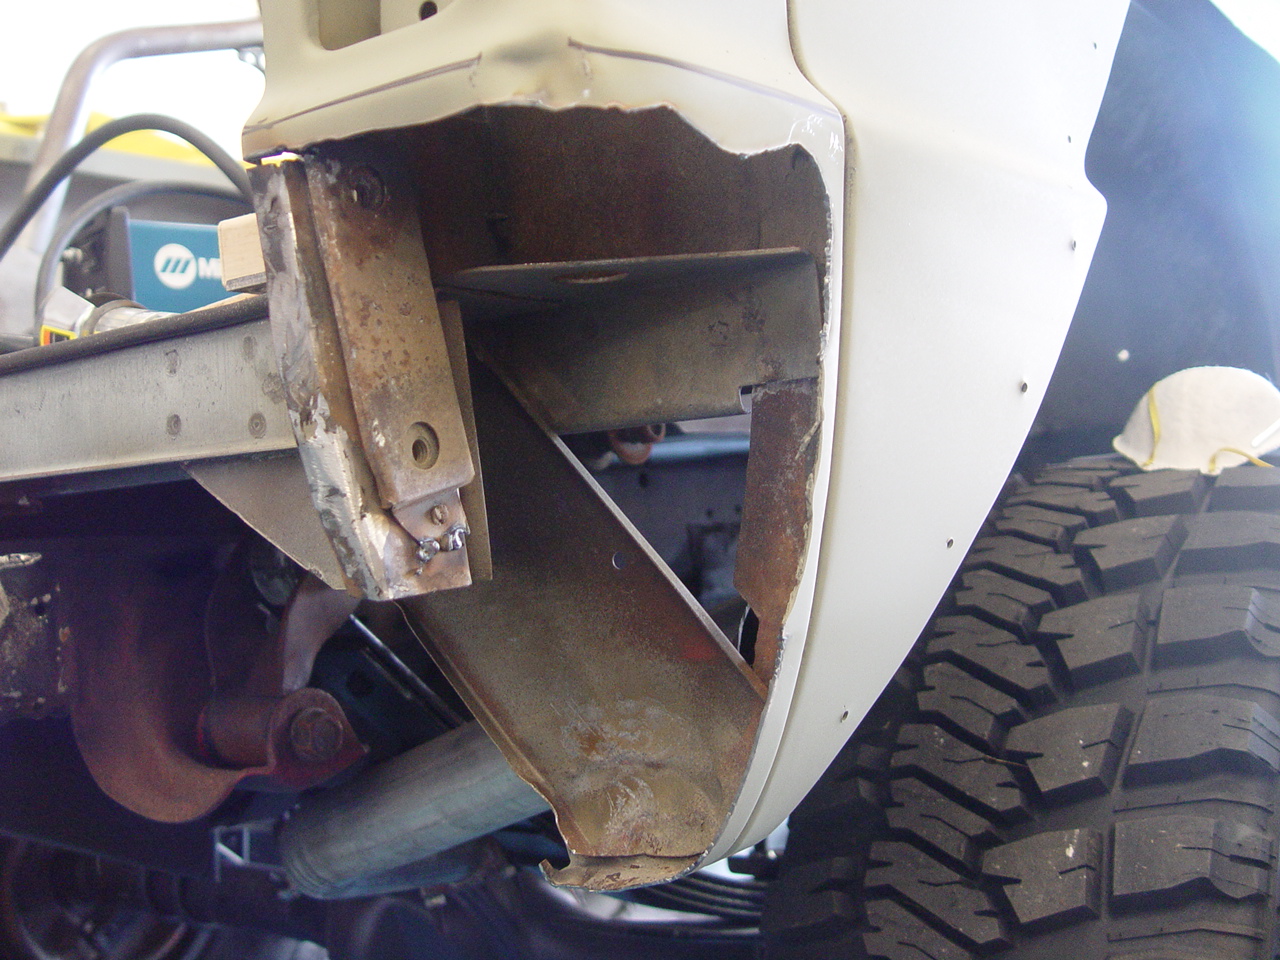
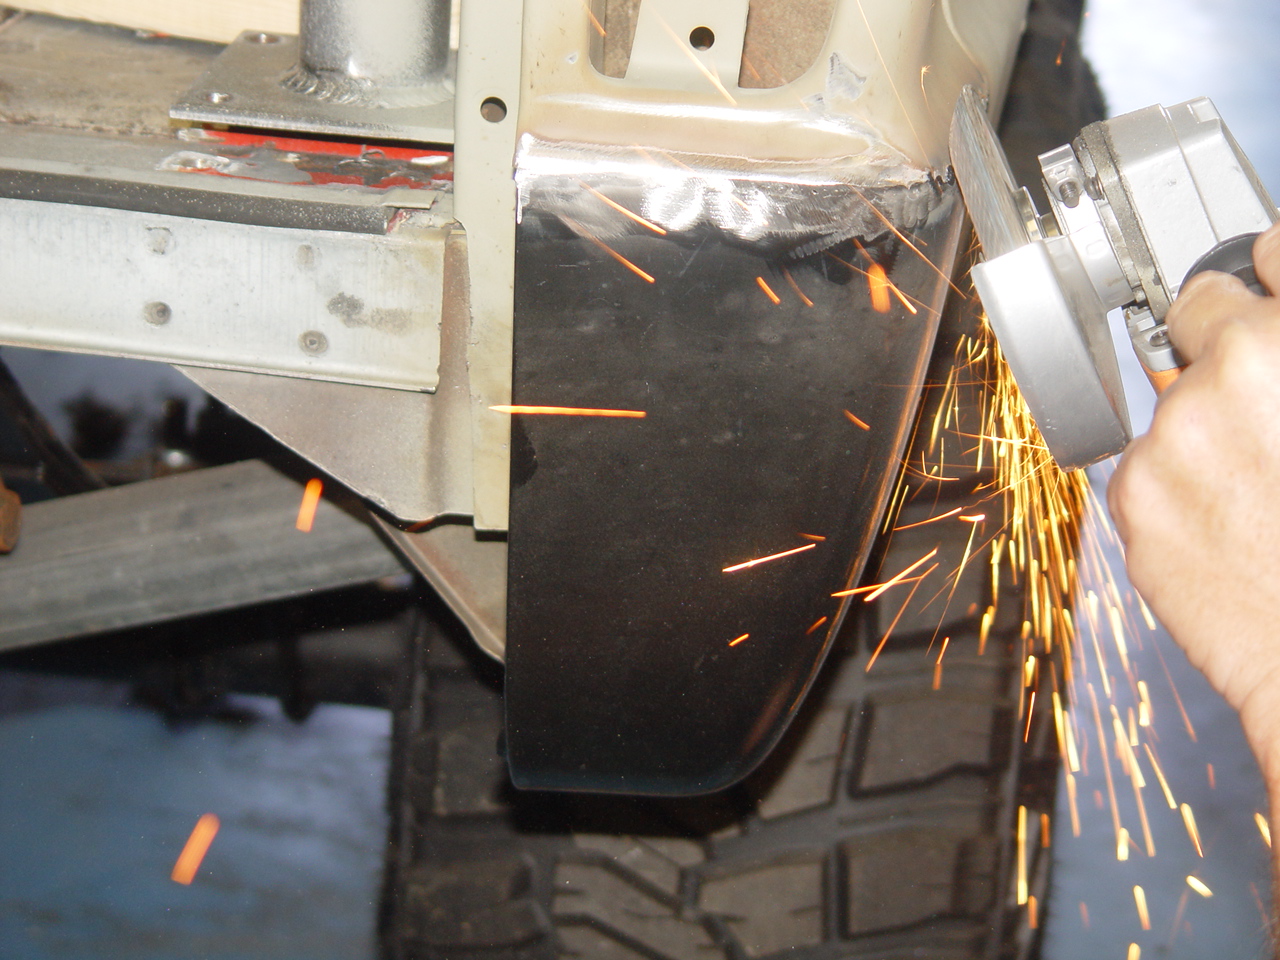
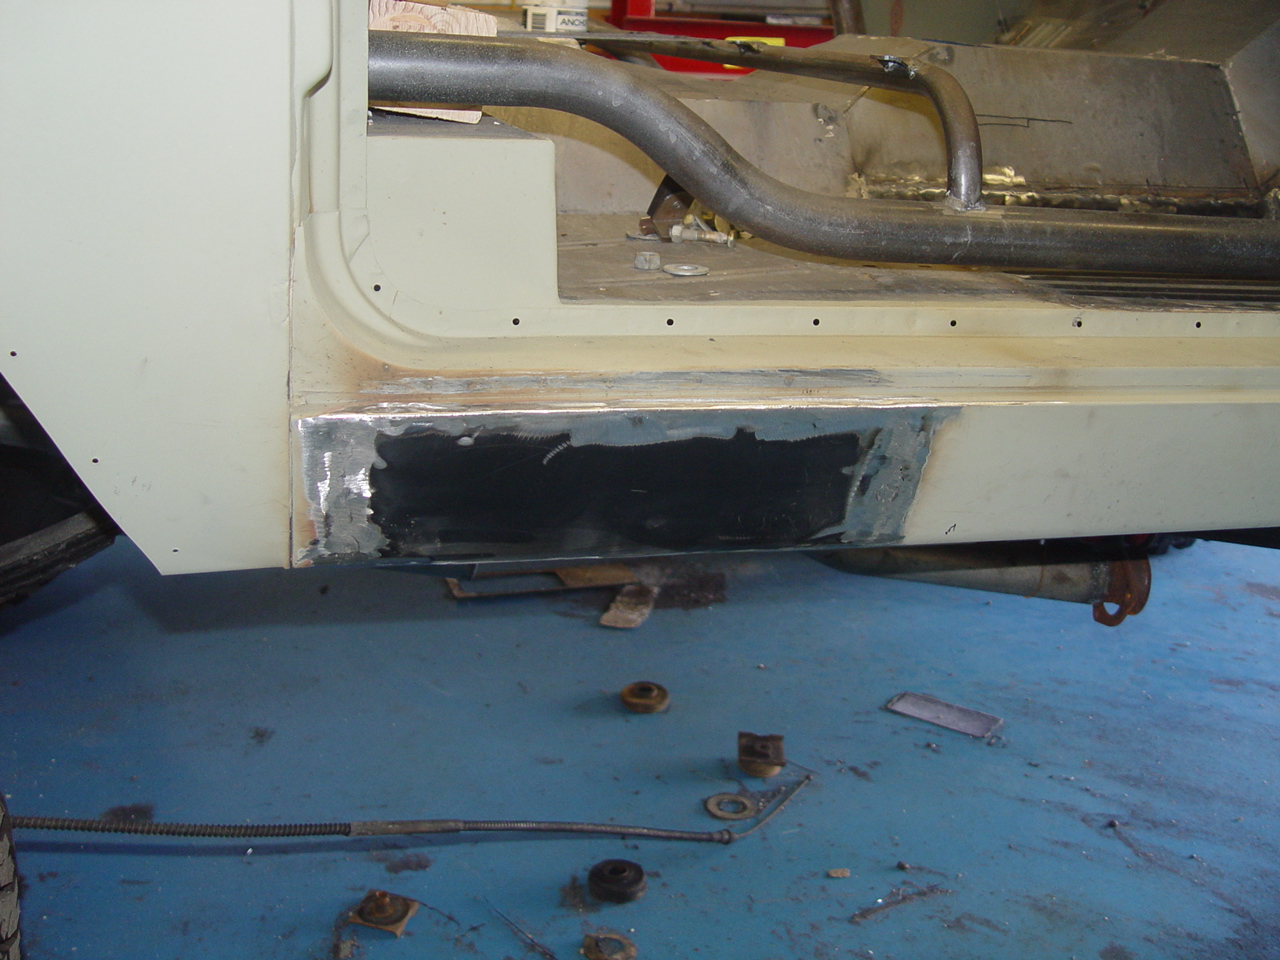
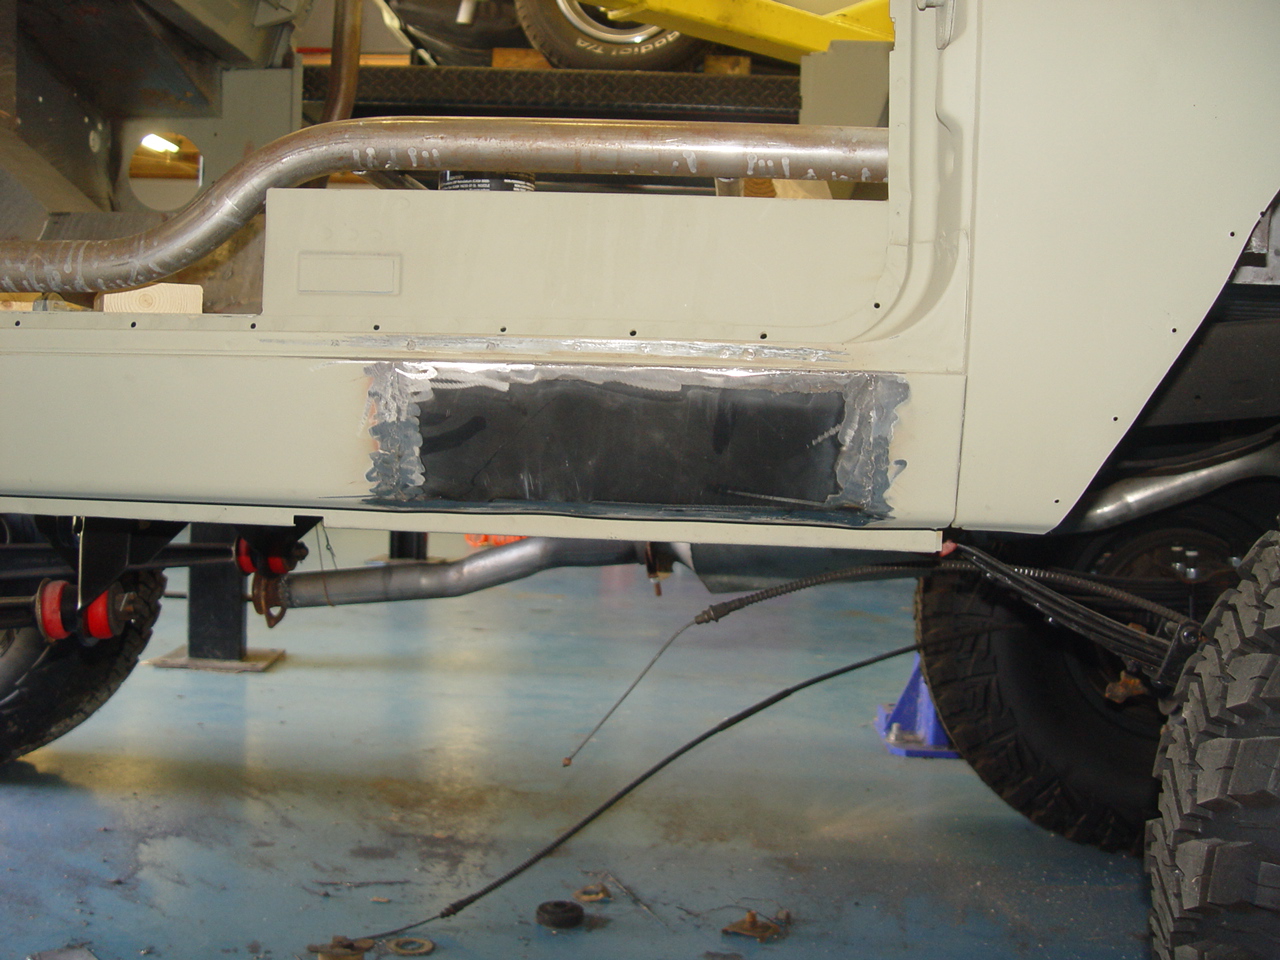
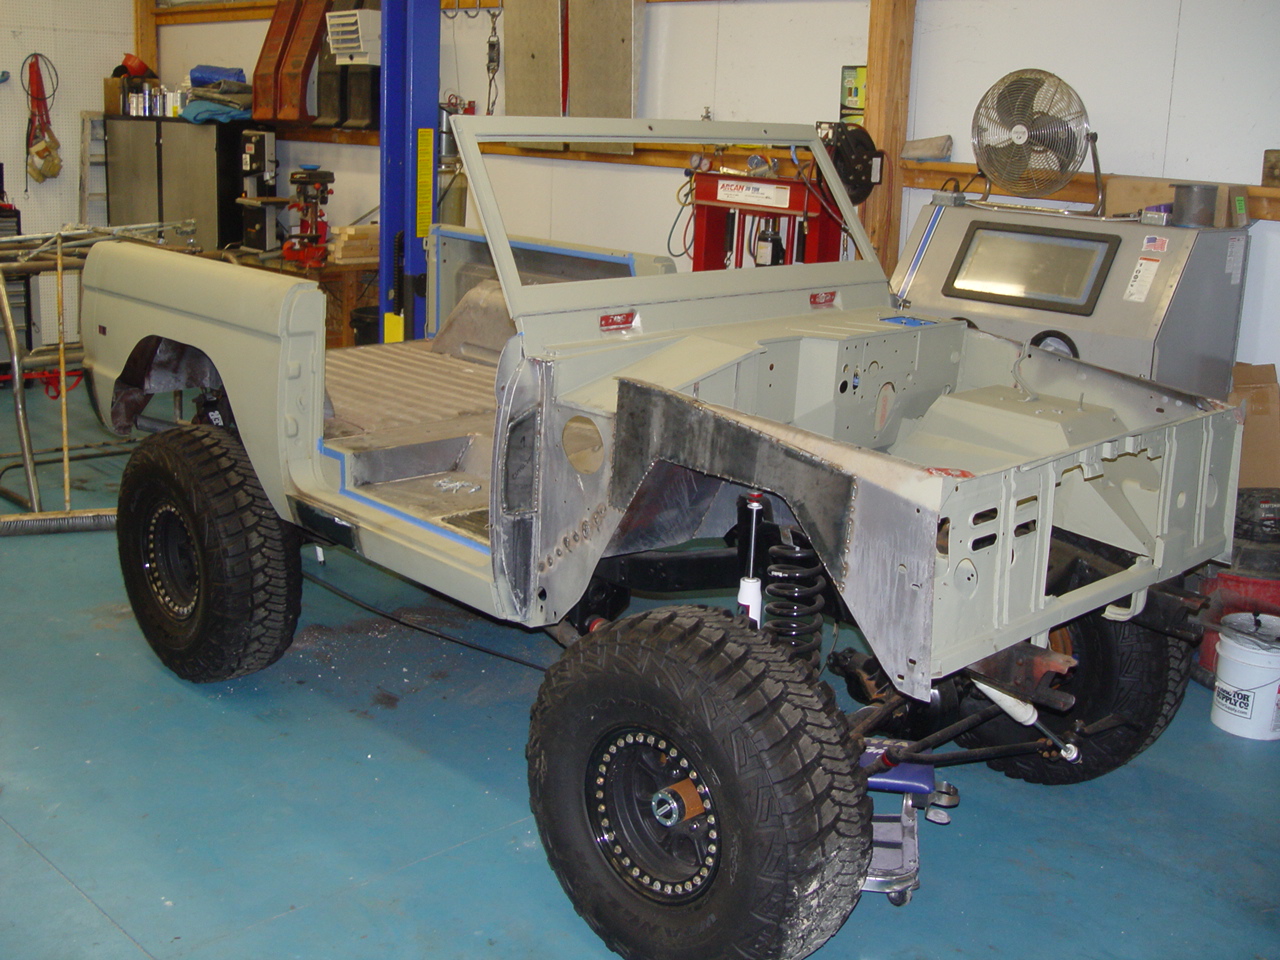
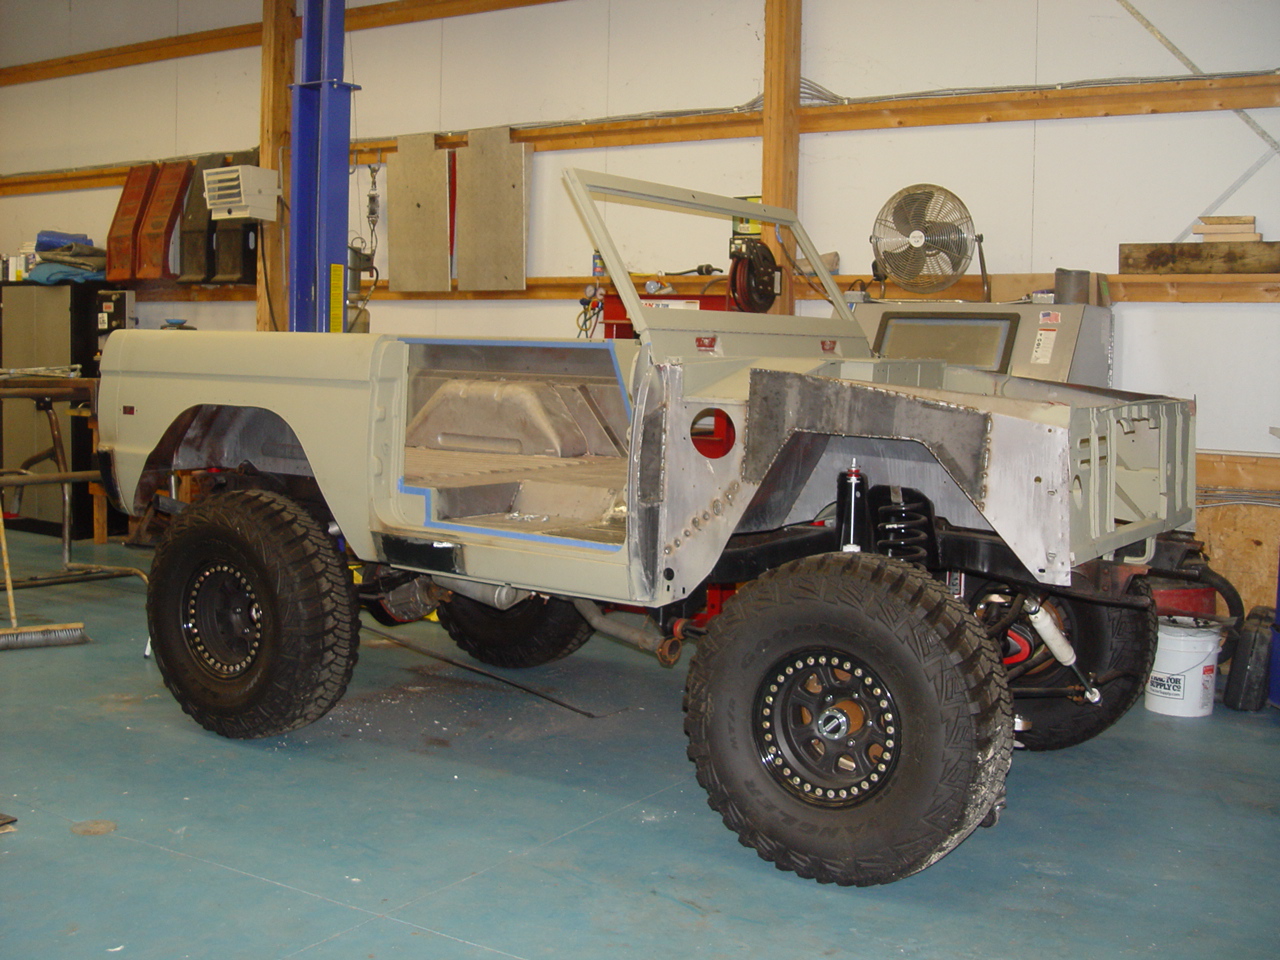
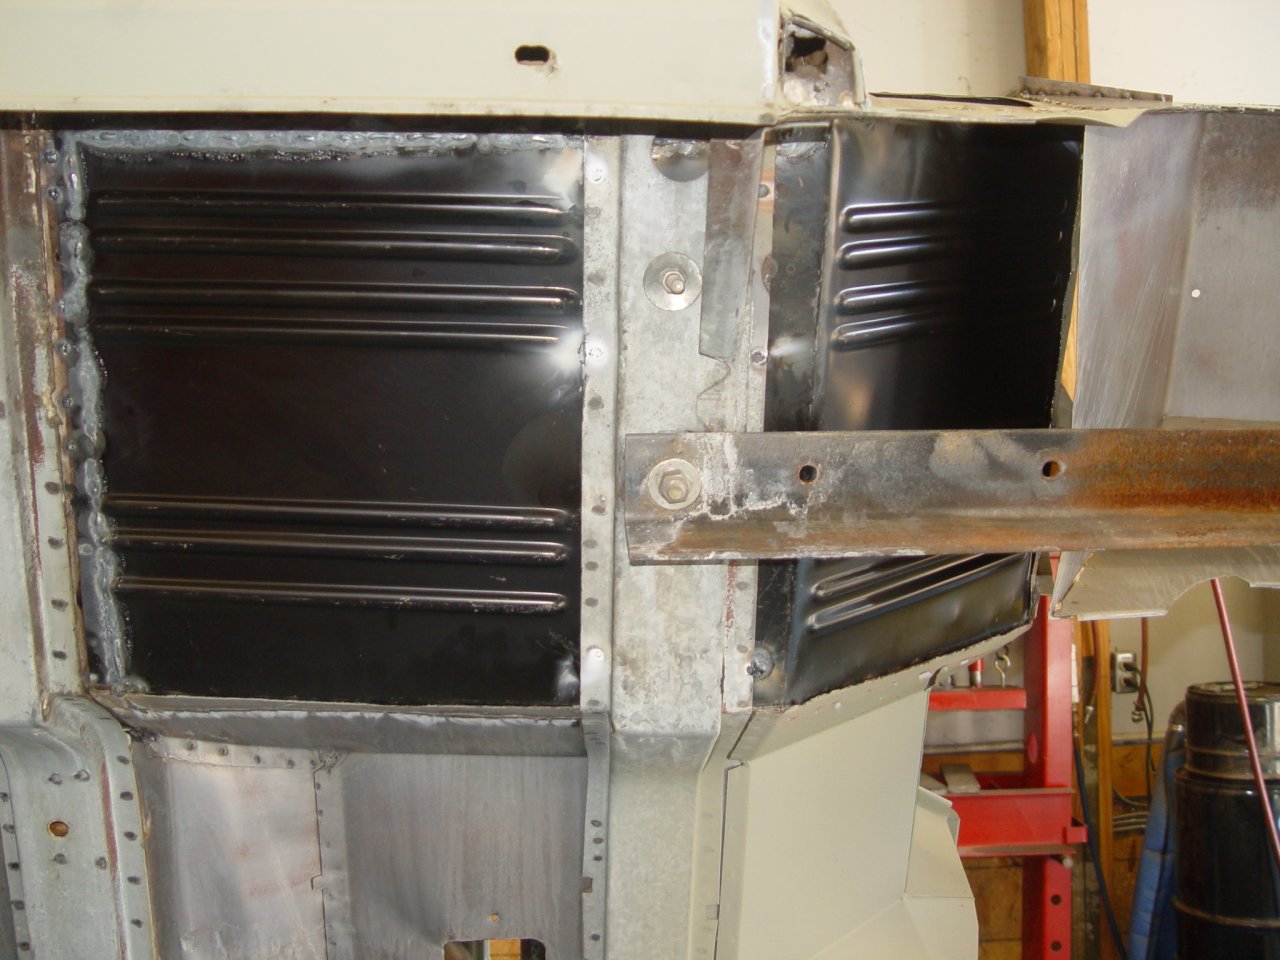
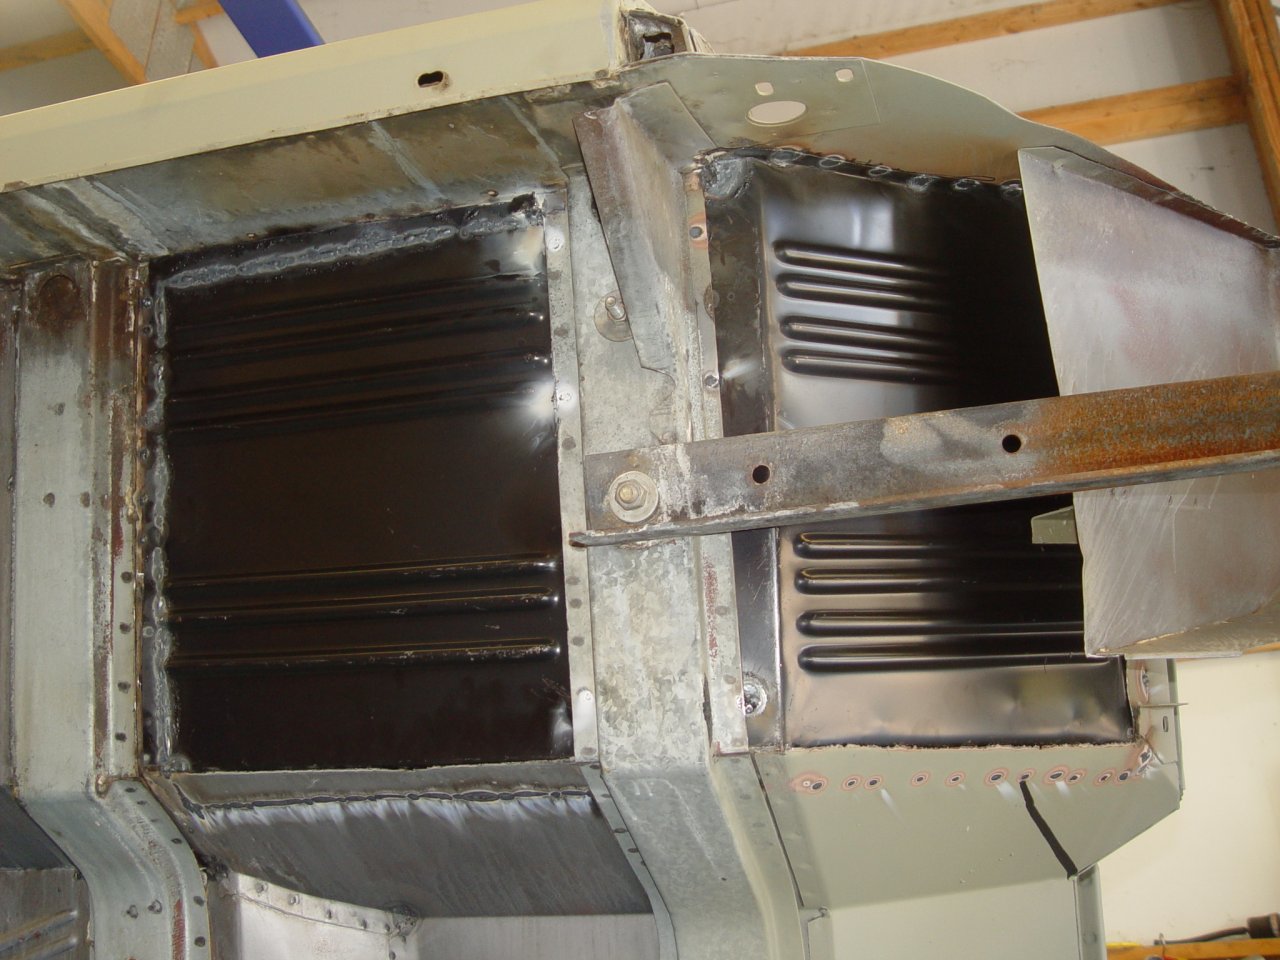
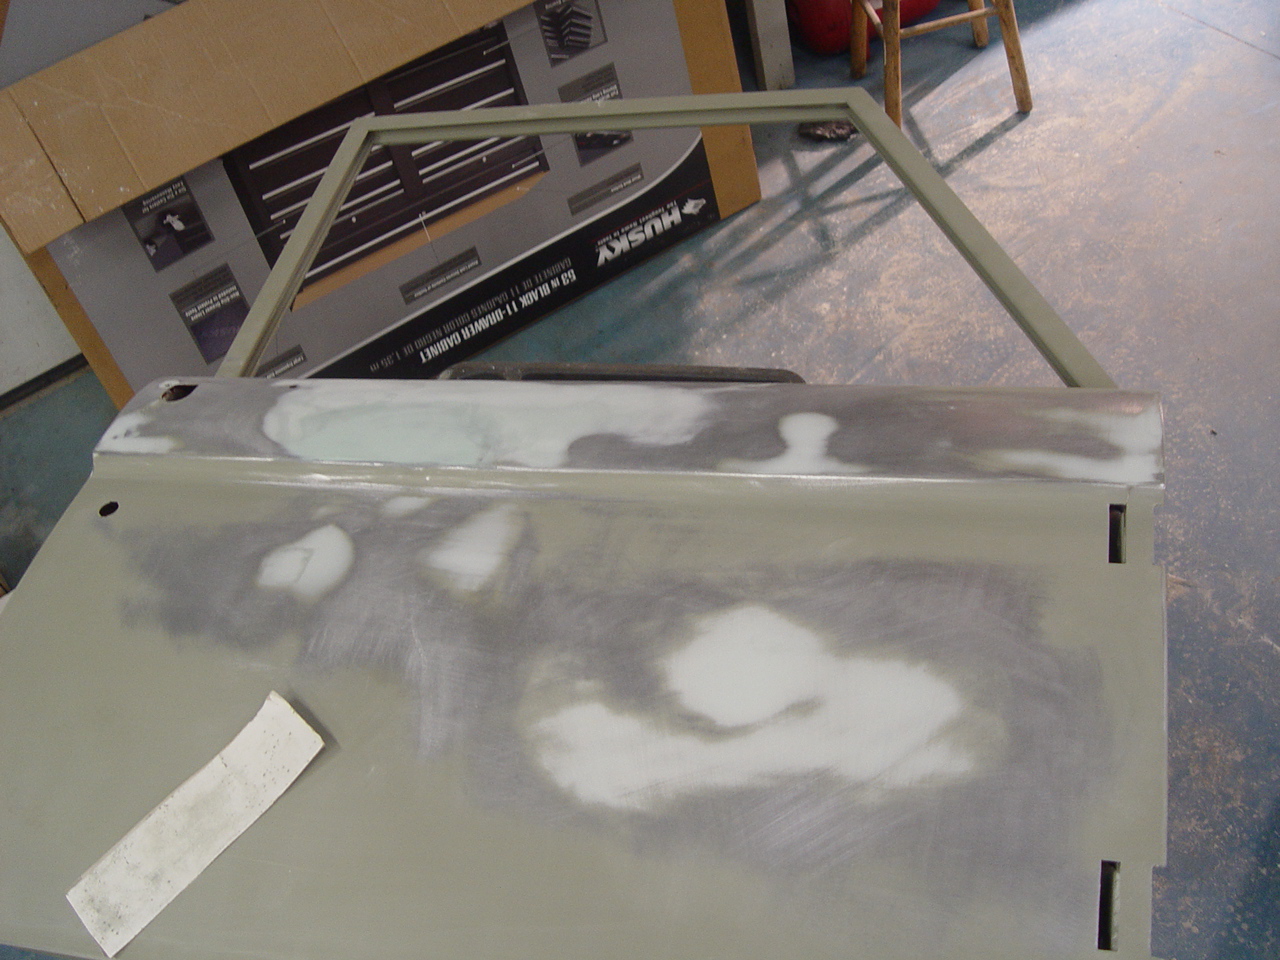
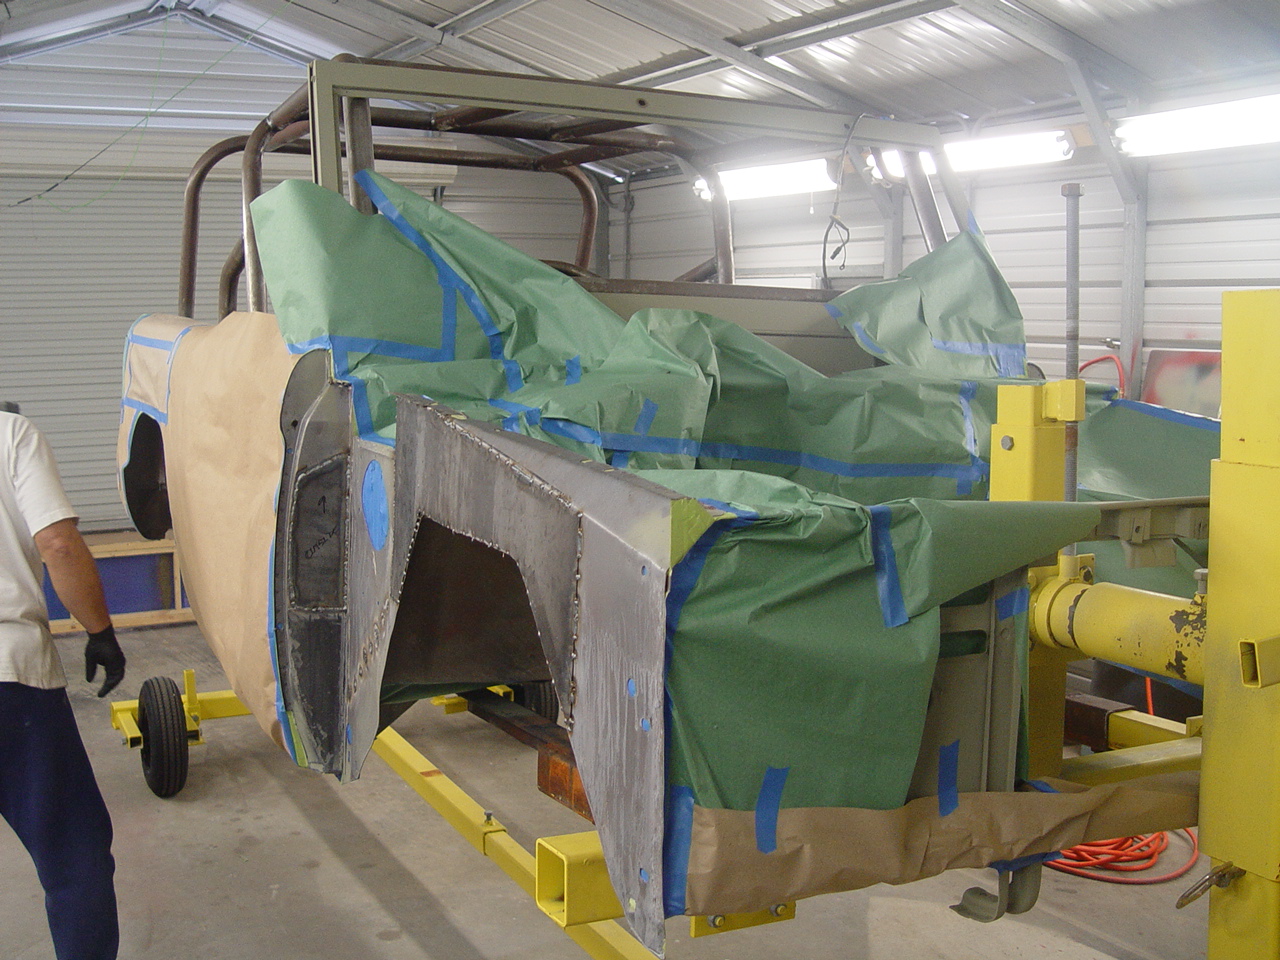
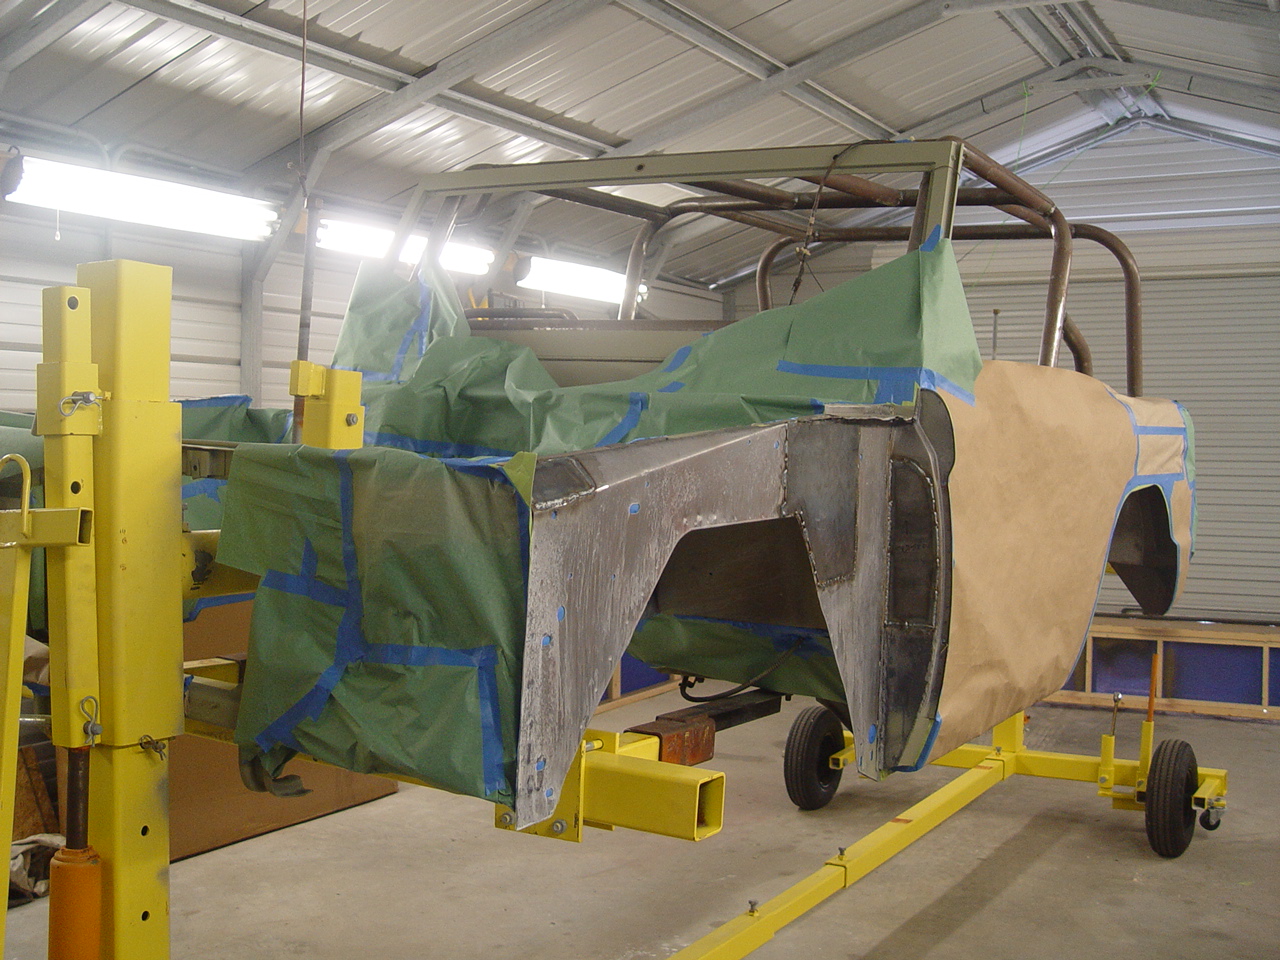
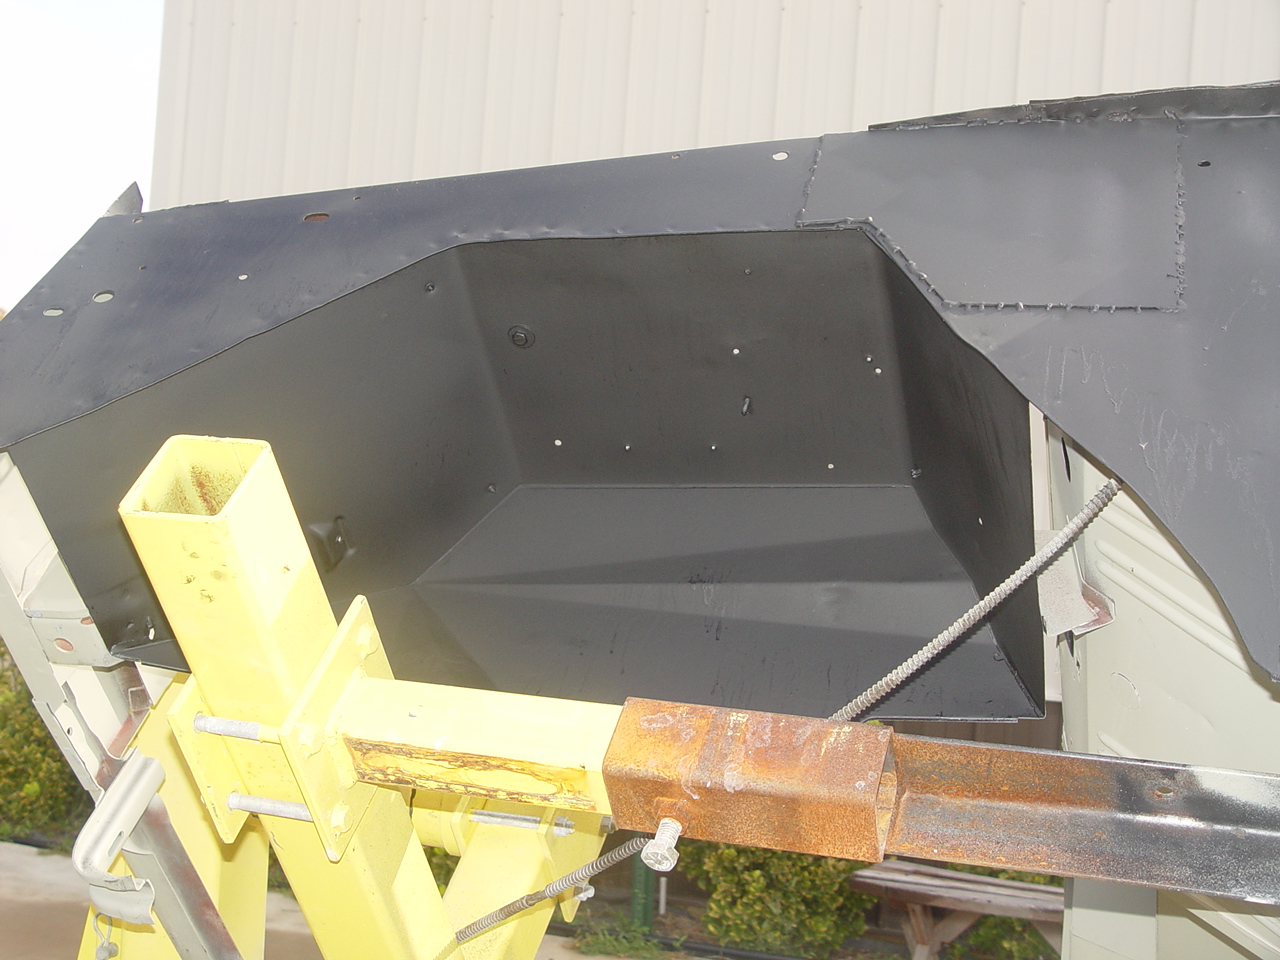
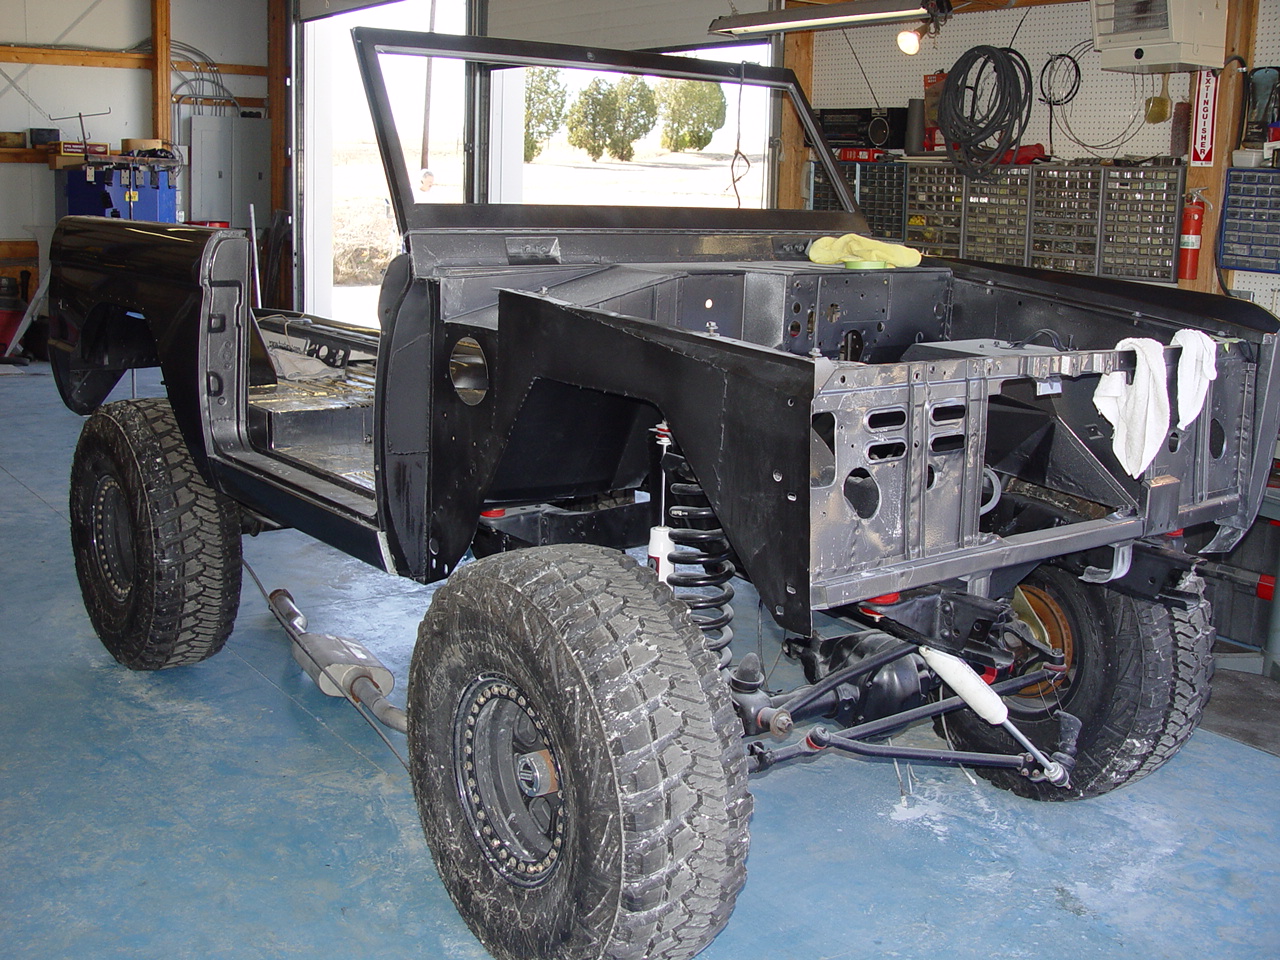
With the entire body stripped to bare metal, it was easy to spot the areas that needed work. We were already aware of the hole in the right side rocker panel and at the bottom rear corner of the right rear quarter panel. But, with all the paint removed, we were also able to spot rust holes in the left rocker panel and more holes on the front side of both A-pillars - opposite the door hinge mounting points. We were also able to get a better look at the bad patches that had been applied to the front of the left radiator core support and the vertical panels of both front inner fender wells. The full extent of the rust damage to the right floorboard was also exposed.
The repairs started with Rick coming by and using his plasma cutter (oh how we want one now) to fabricate doubler plates for the vertical panels of each front fender well. With these in place, Buckshot would no longer be the "Buckling Bronco" it was when we first mounted it to the rotisserie using the front body-to-frame mounts. Rick also cut out some plates to weld to the front of the A-pillars - after first cutting out all the rusted metal.
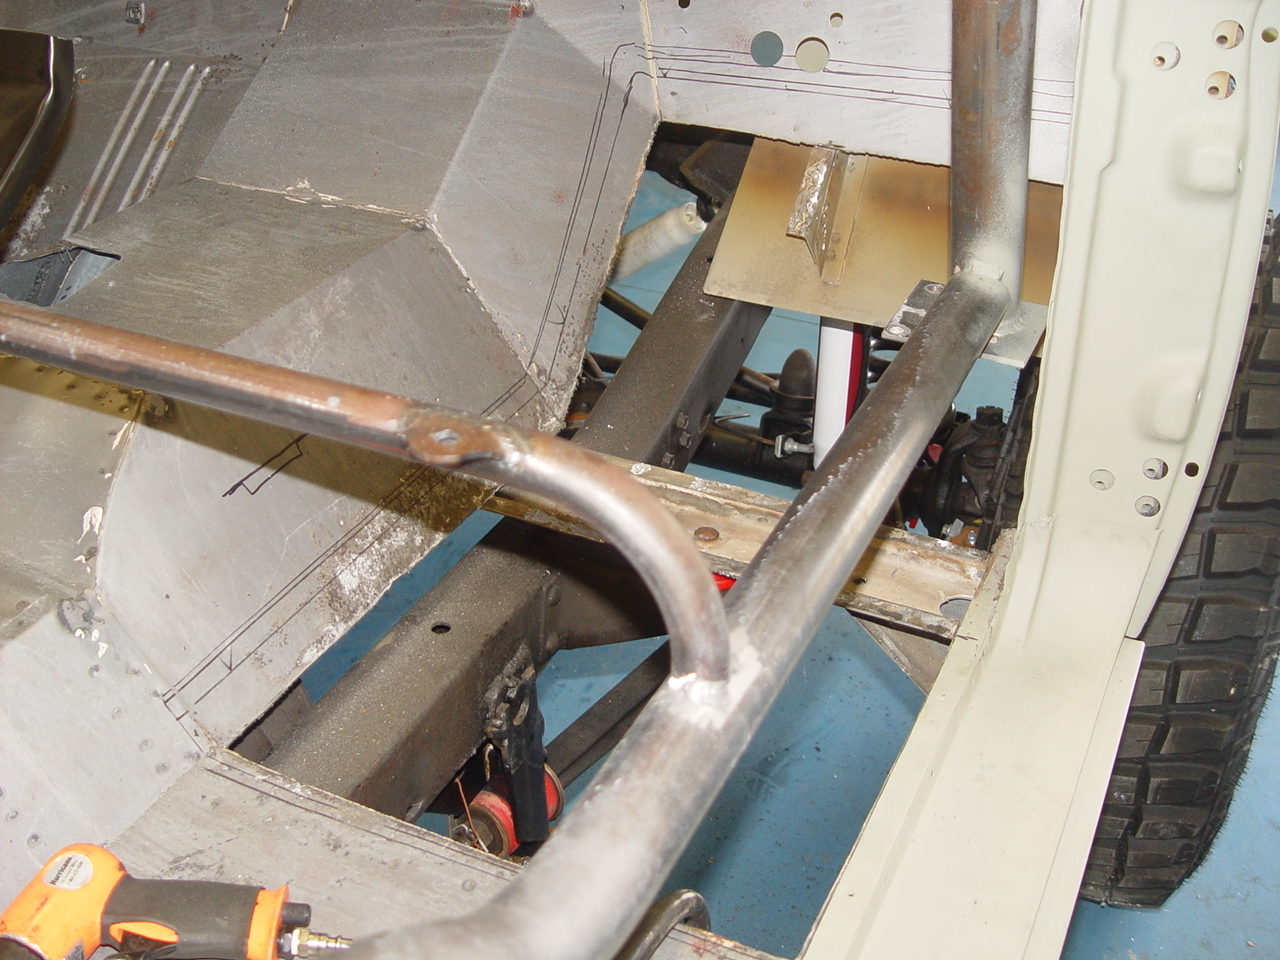
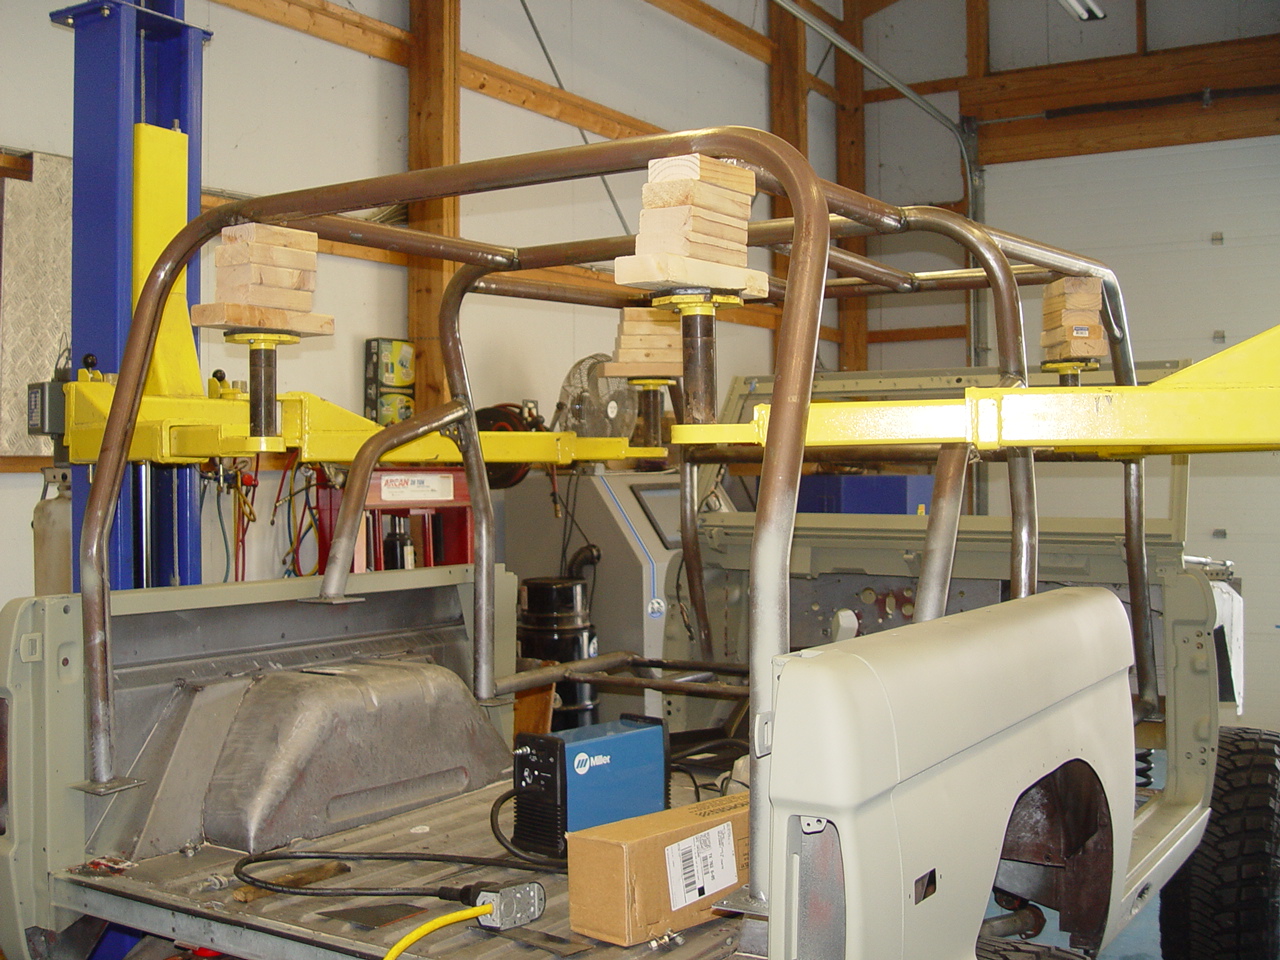
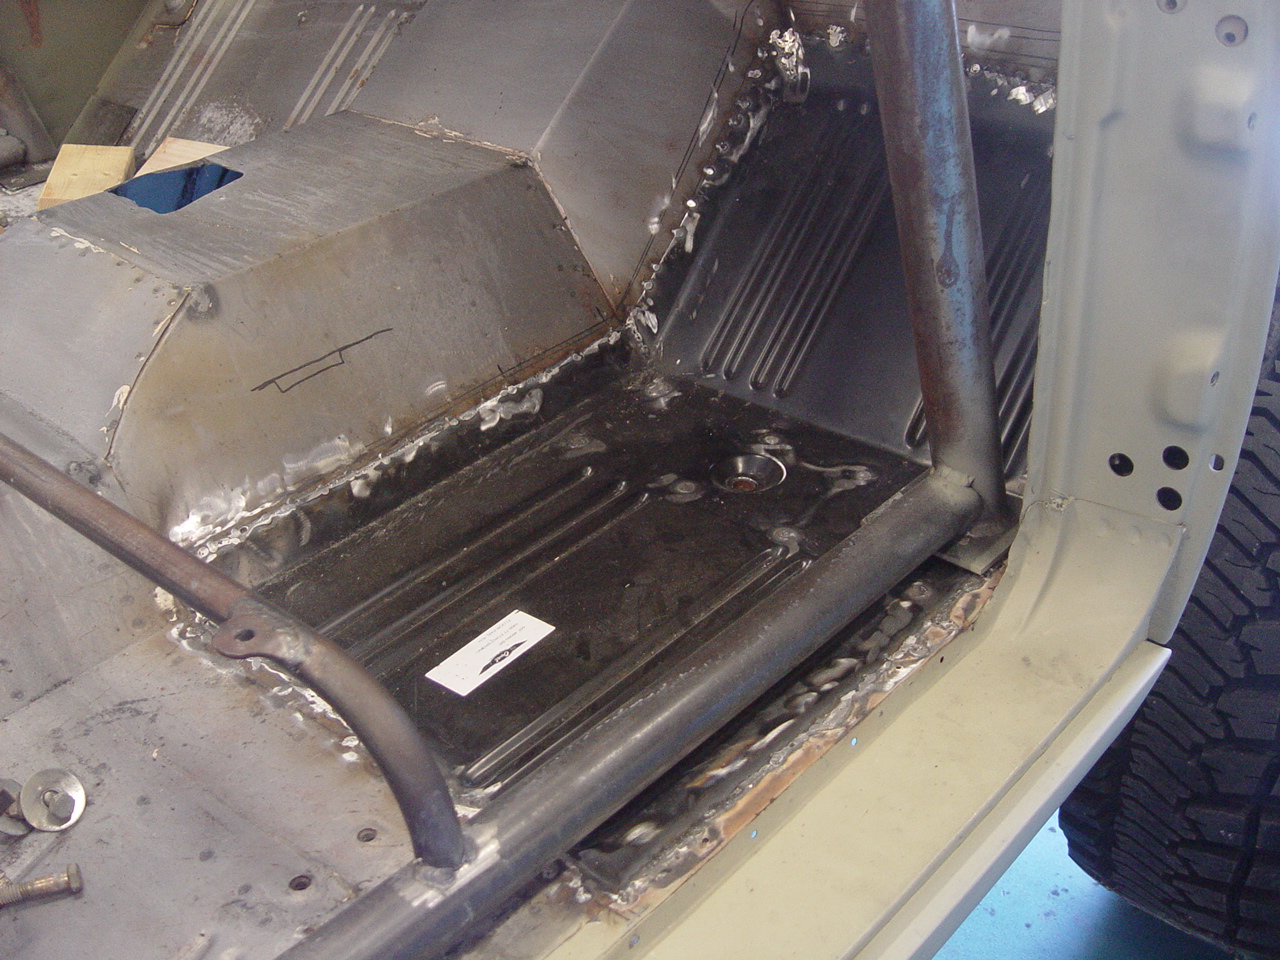
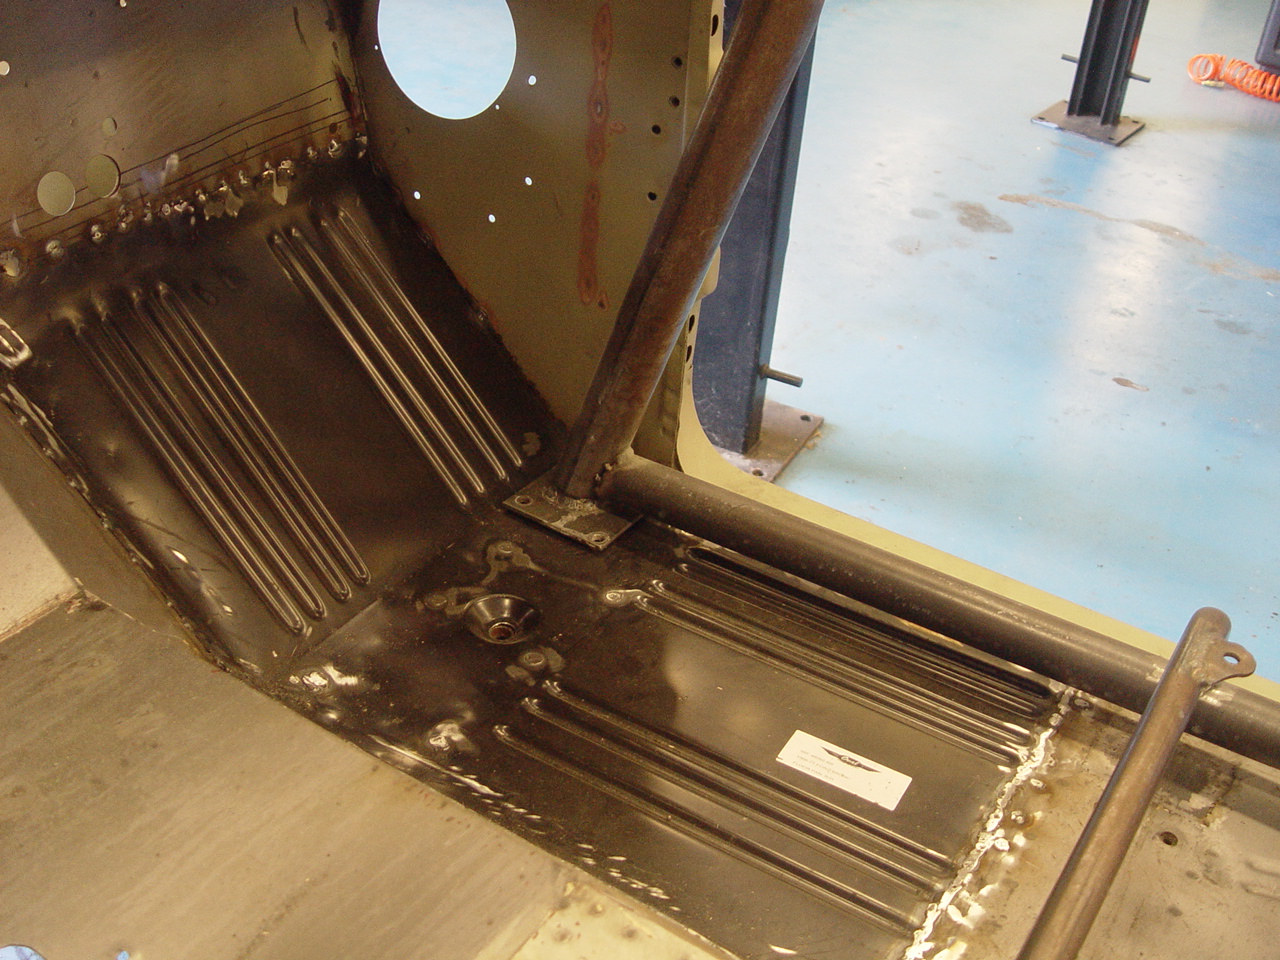
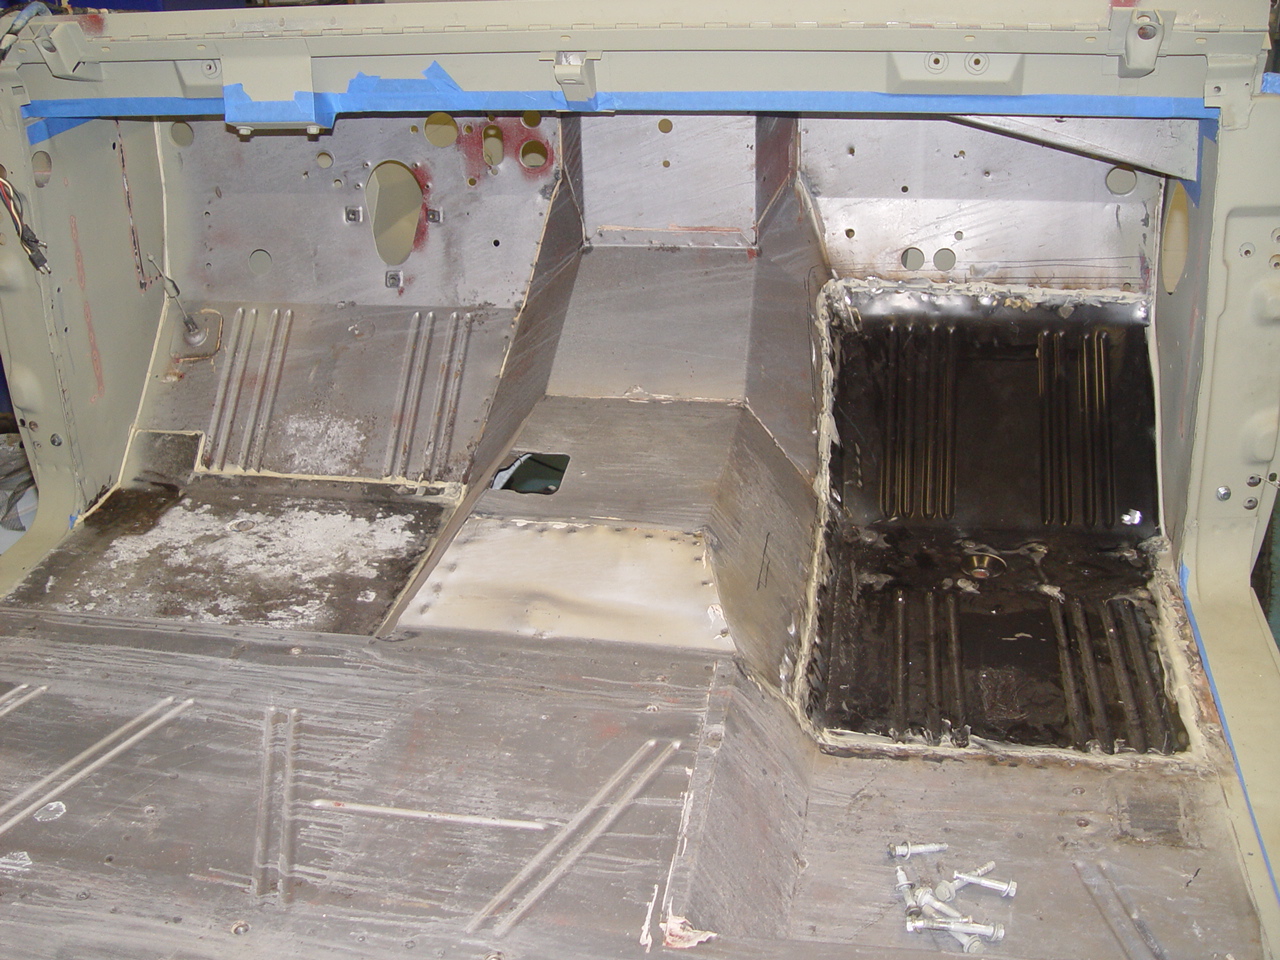
Unfortunately, since the body mounts at the front of the floorboards were utilized to mount the body to the rotisserie, we had to mount the body back onto the frame before we could cut out and replace the passenger floorboard. Also, the right-front vertical of the roll cage bolts into the very floorboard we needed to replace. So, we unbolted the roll cage from the body and used a lift (with the help of some 2x4 wood blocks) to raise the cage above the body far enough to gain access to the floorboard. Then, after all the metal work was finished, we again bolted in the roll cage, took the body off of the frame and remounted it to the rotisserie.
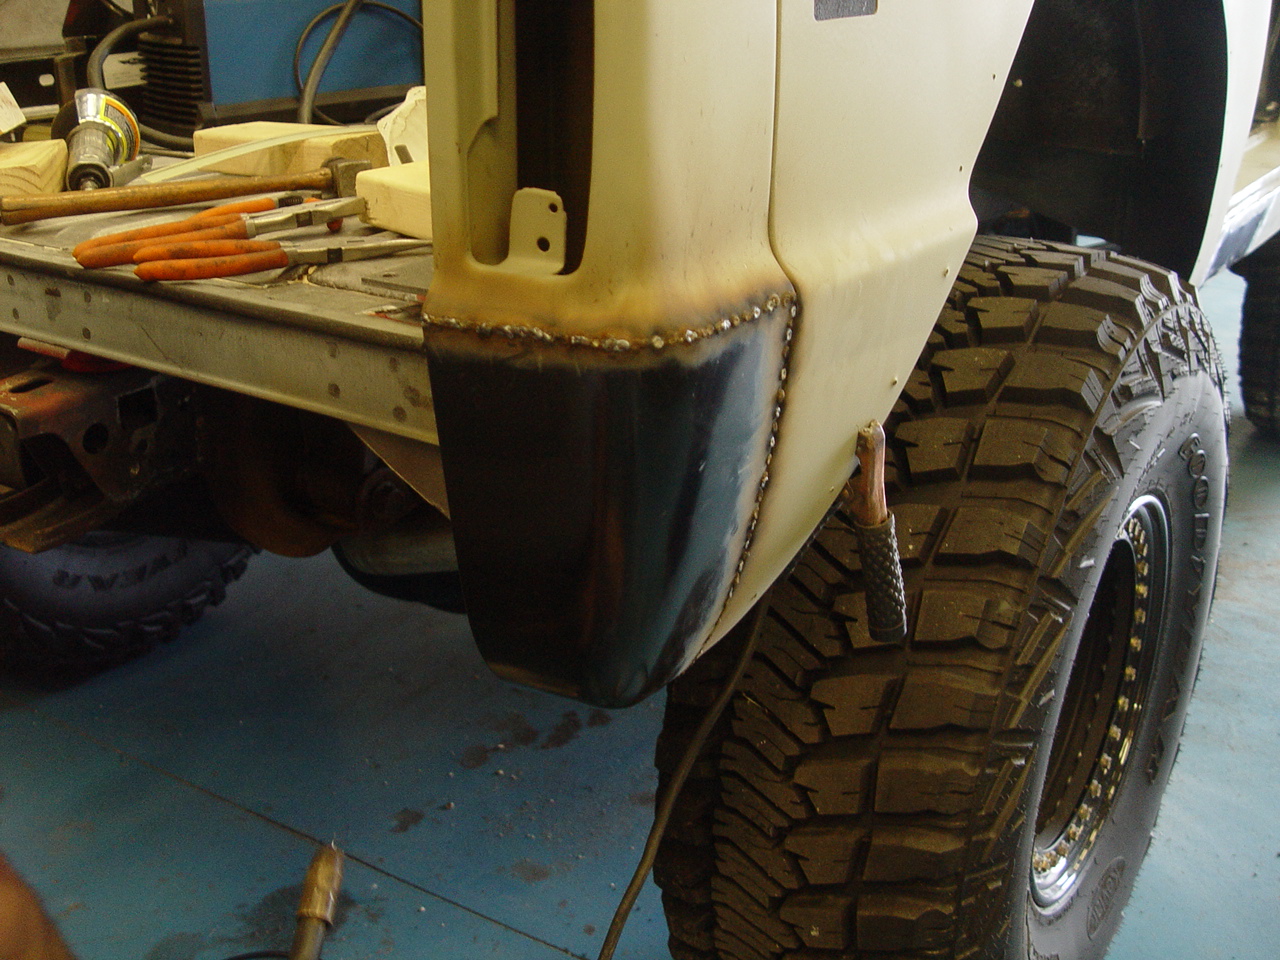
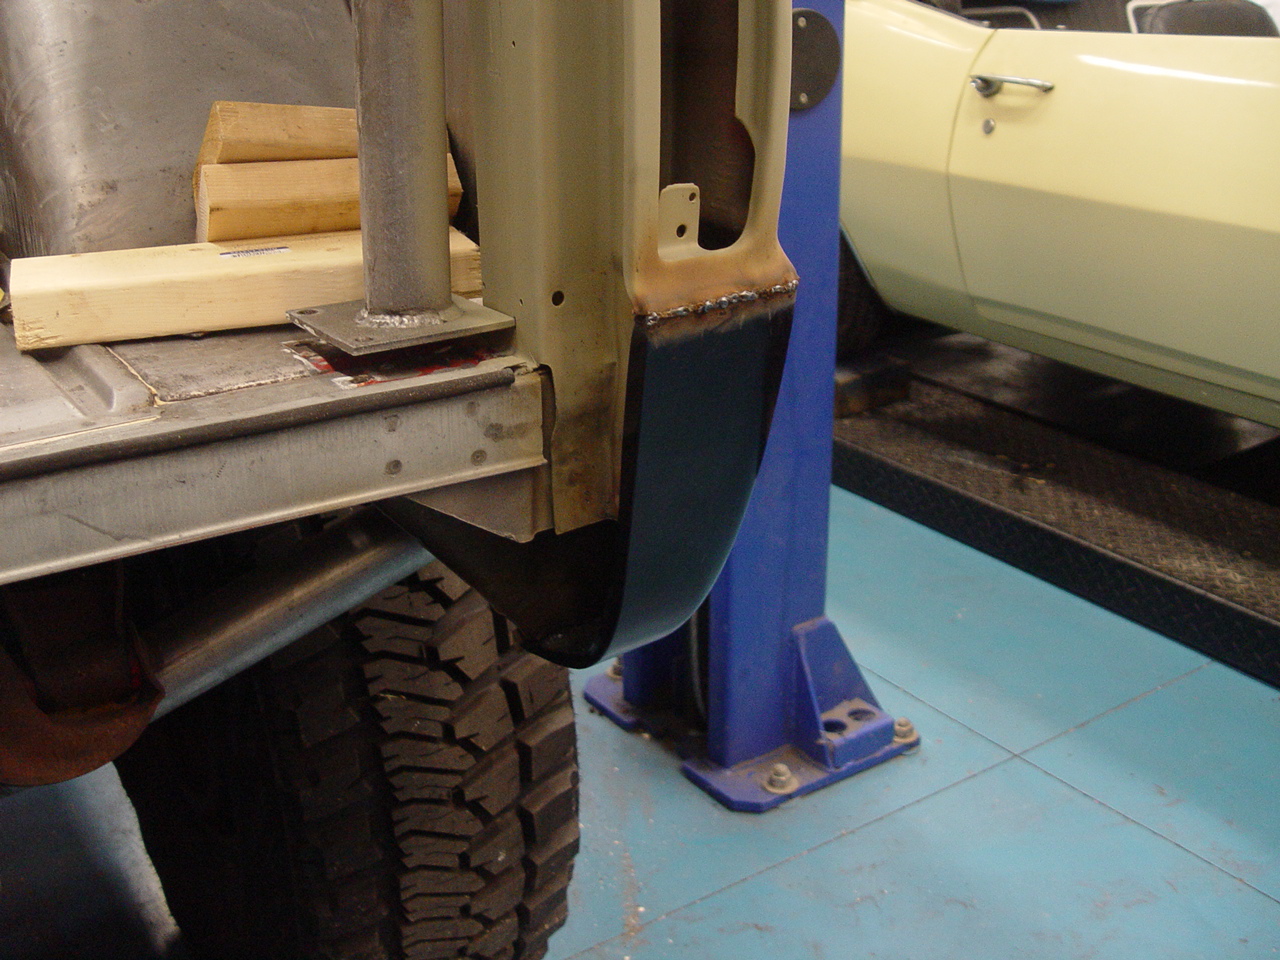
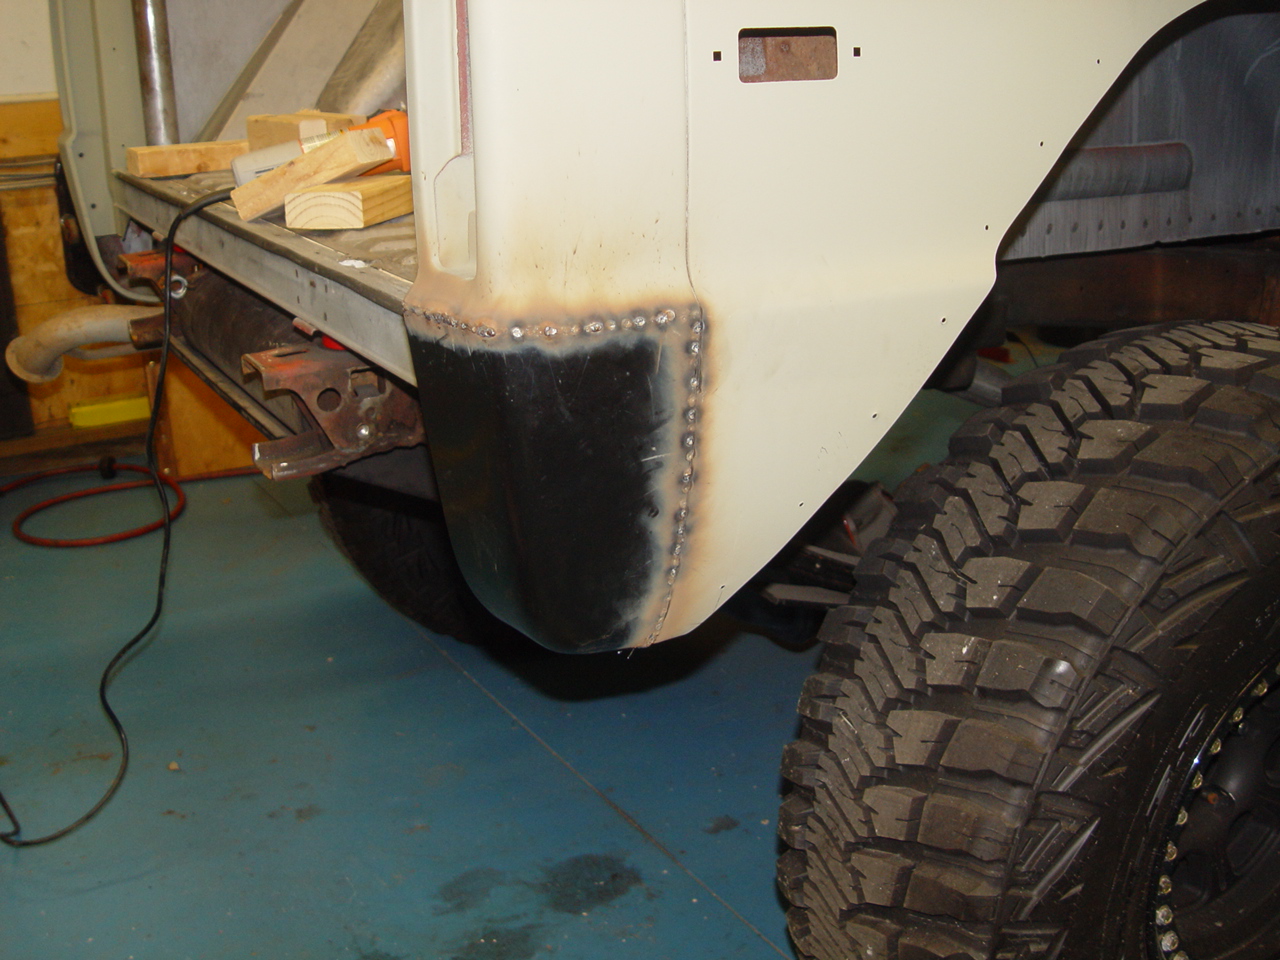
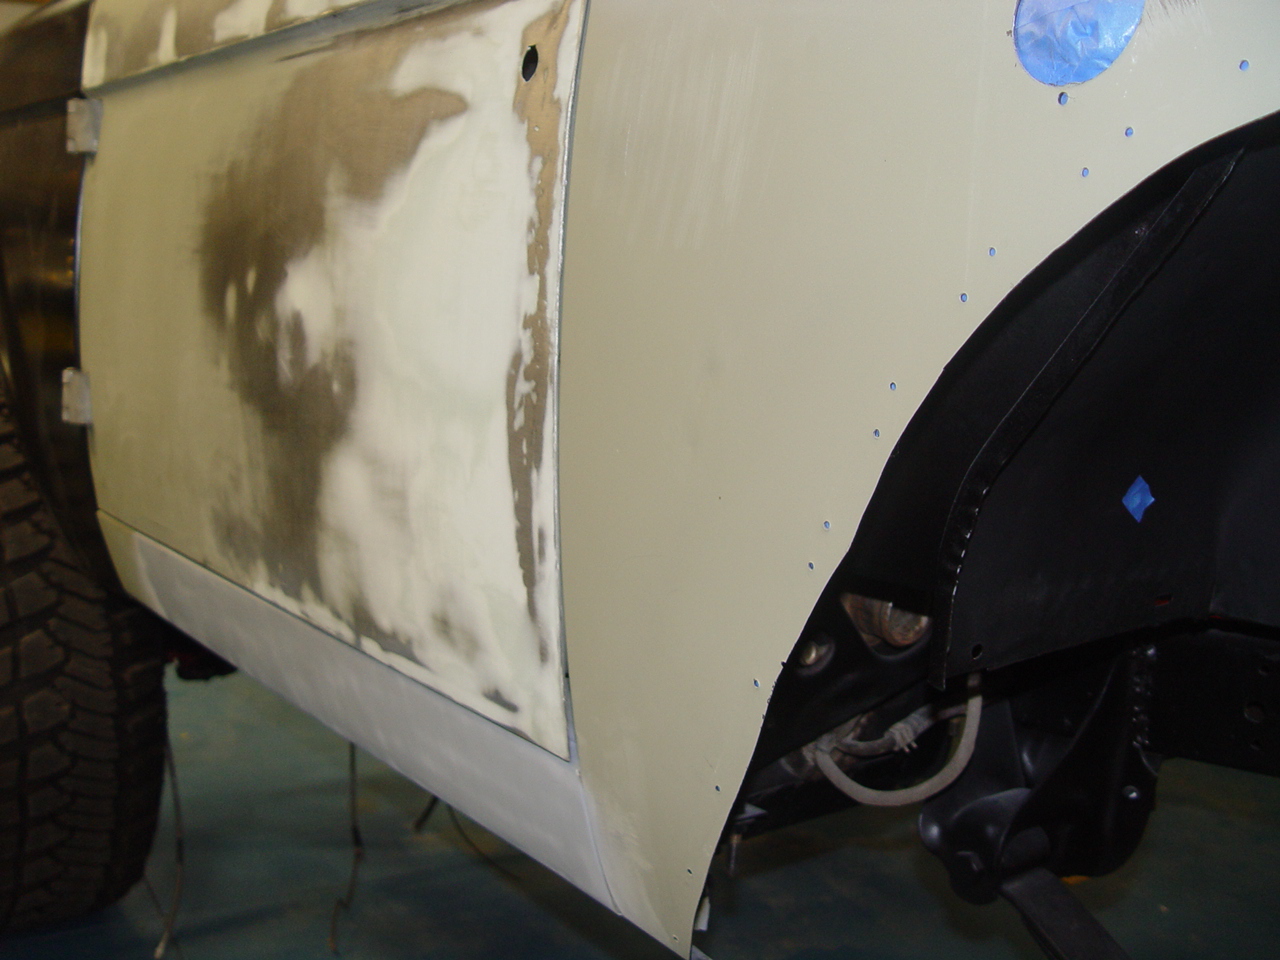
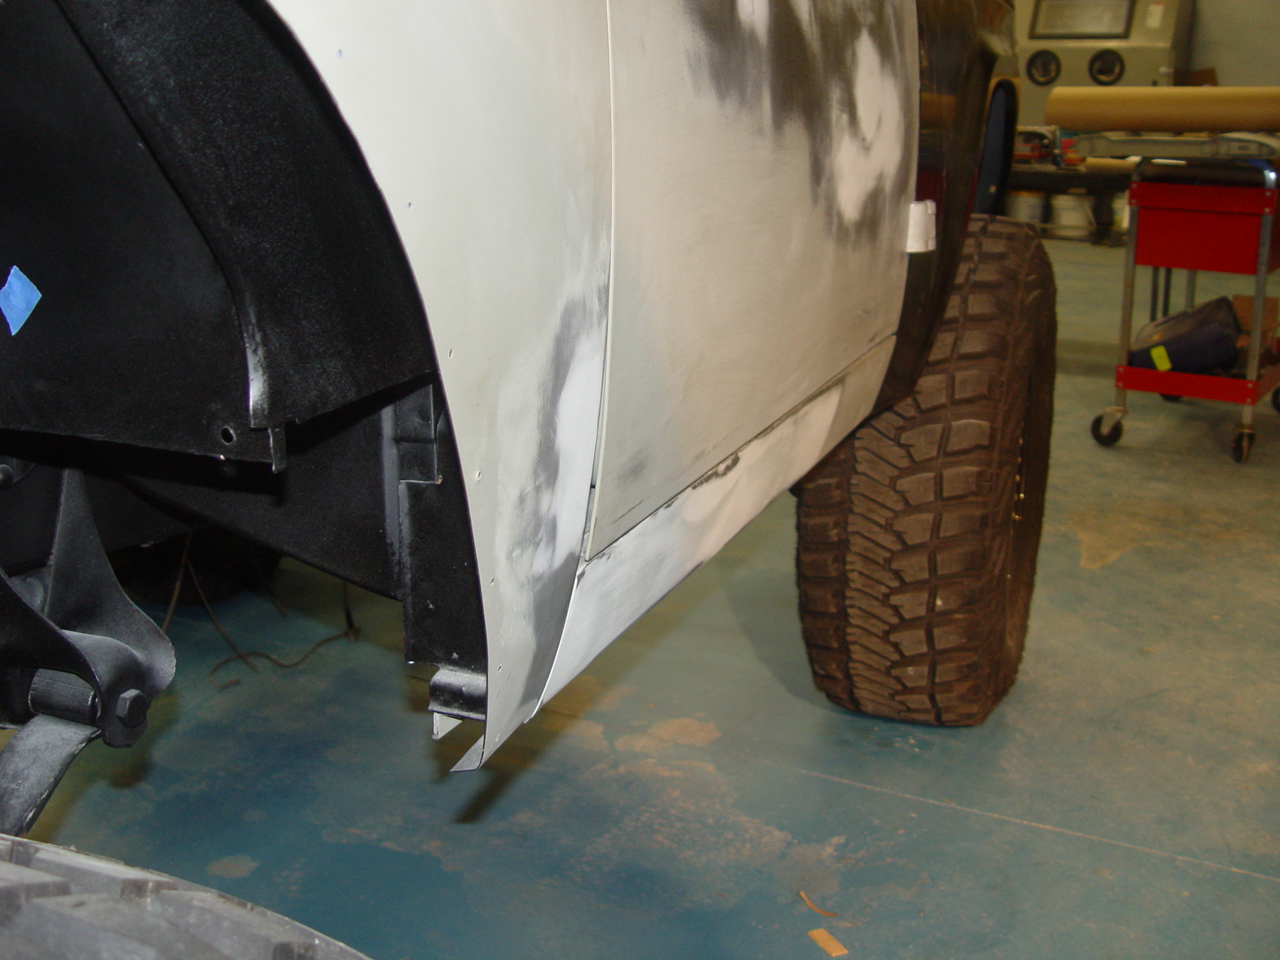
Rick was kind enough to leave his plasma cuttter with us for a week. We are now totally spoiled. With it, we were able to quickly cut out the passenger floorboard, rocker panels and the bottom corner of the right rear quarter panel. The new floorboard was welded in place and then sealed with seam sealer. The rocker panels and rear quarter panel were repaired using just portions of the reproduction replacements that Rick supplied. Fortunately, we were able to use the one replacement rocker panel to patch both rocker panels. After a bit of filler and some sanding, the sheet metal repairs looked great. The rest of the body was smoothed with body filler to hide the numerous dings and minor dents you'd expect in a truck of this vintage.
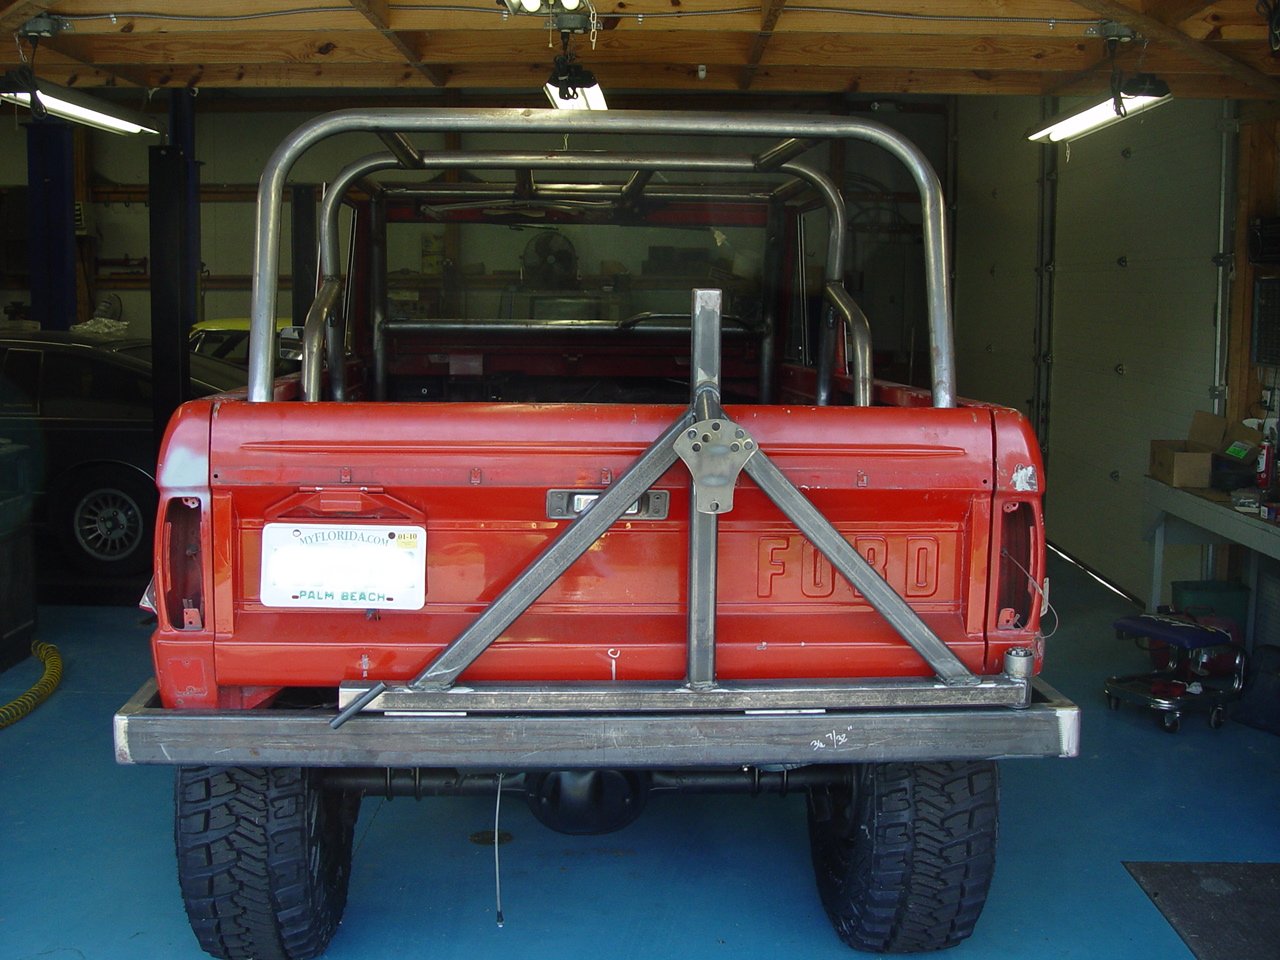
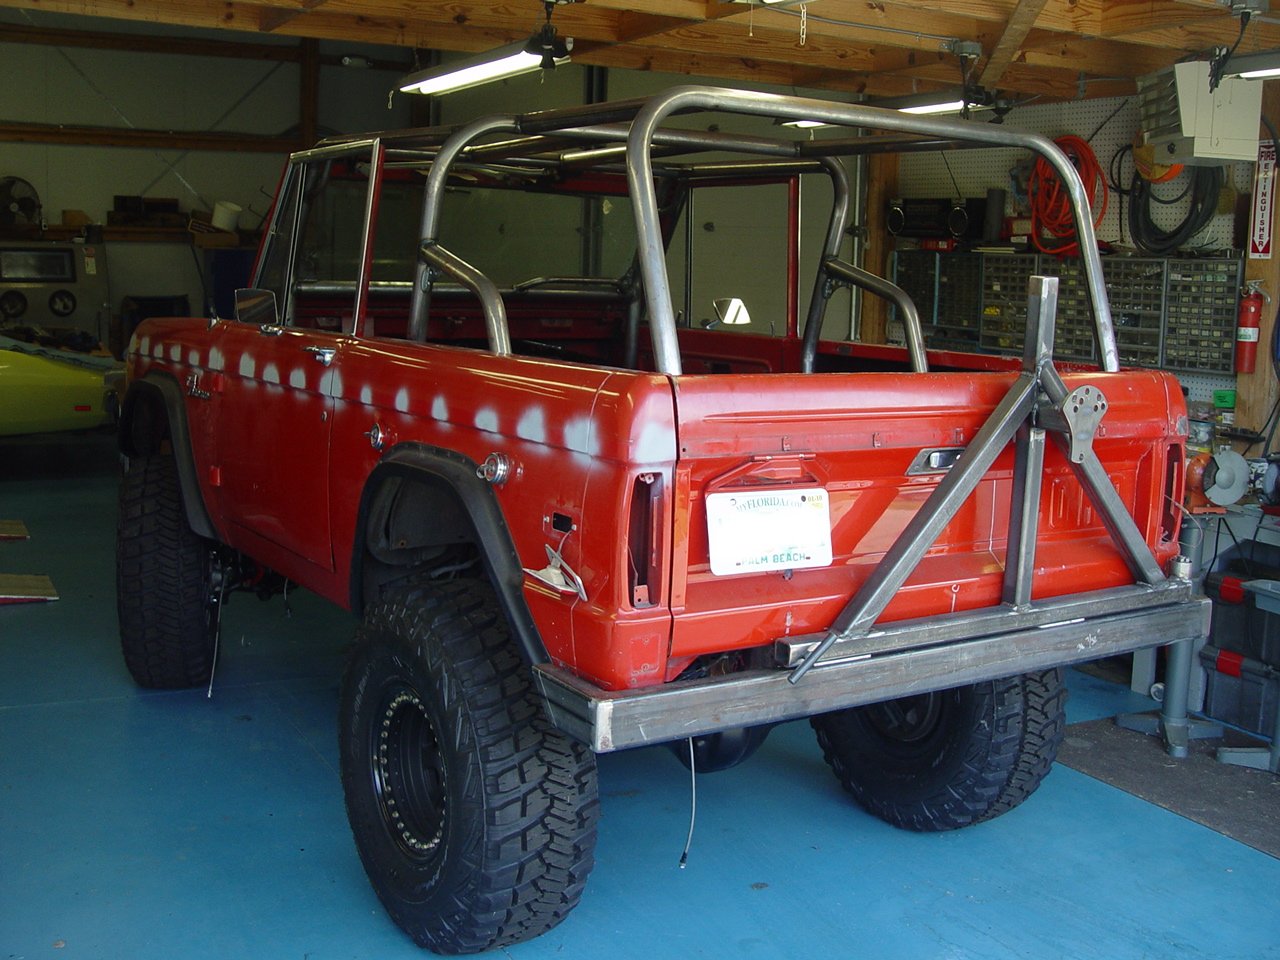
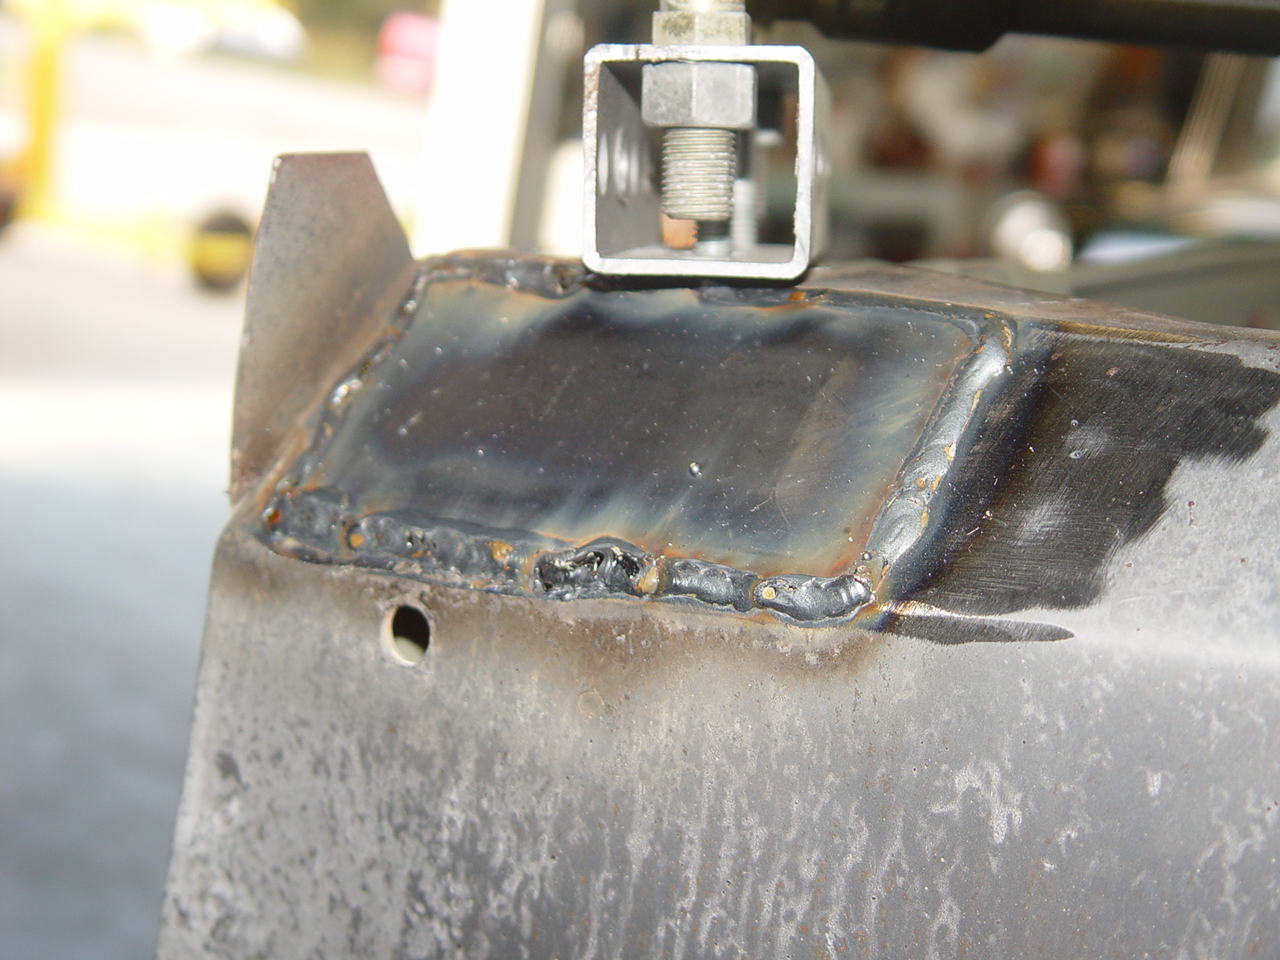
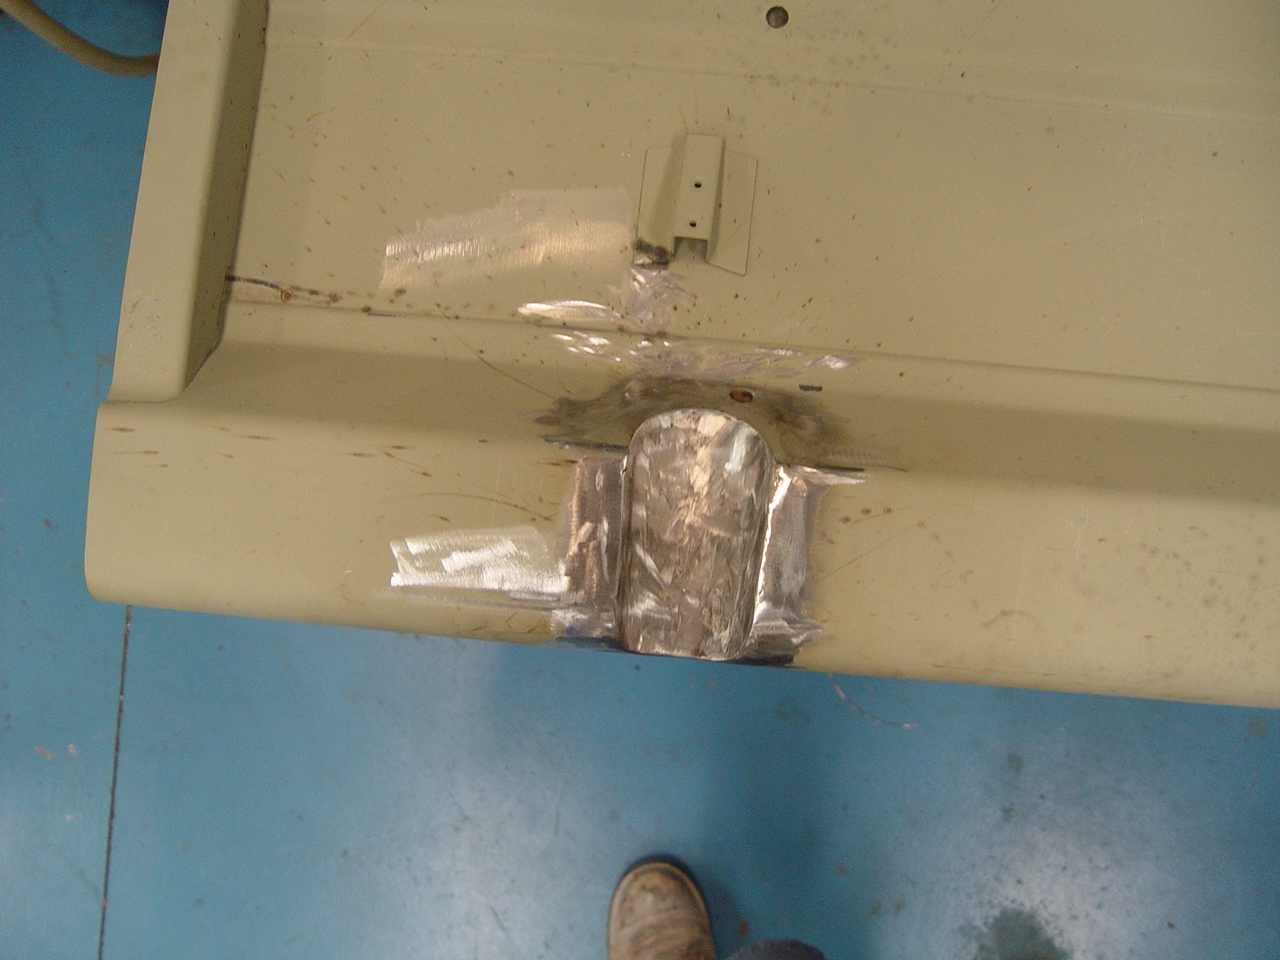
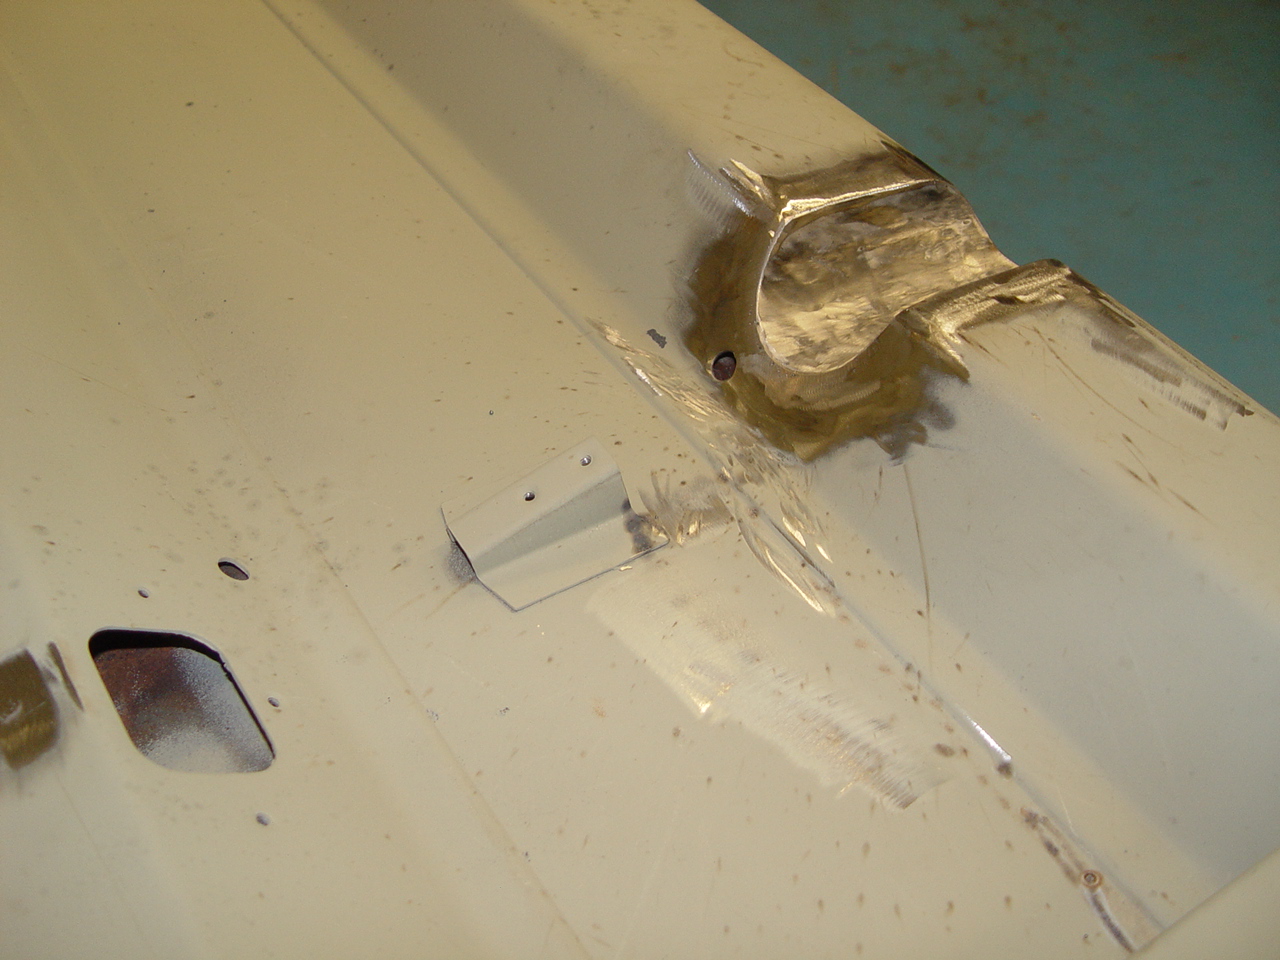
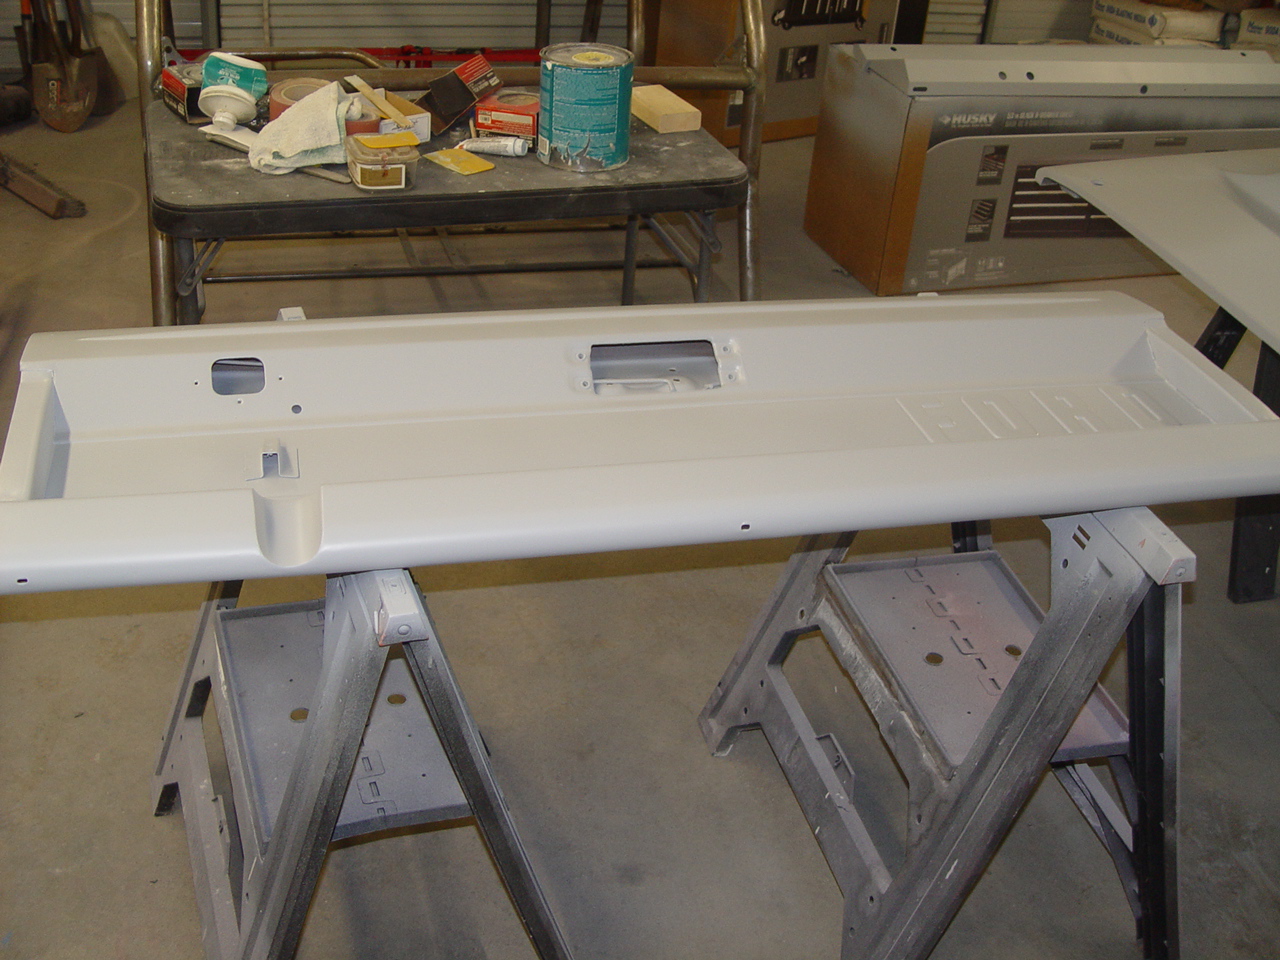
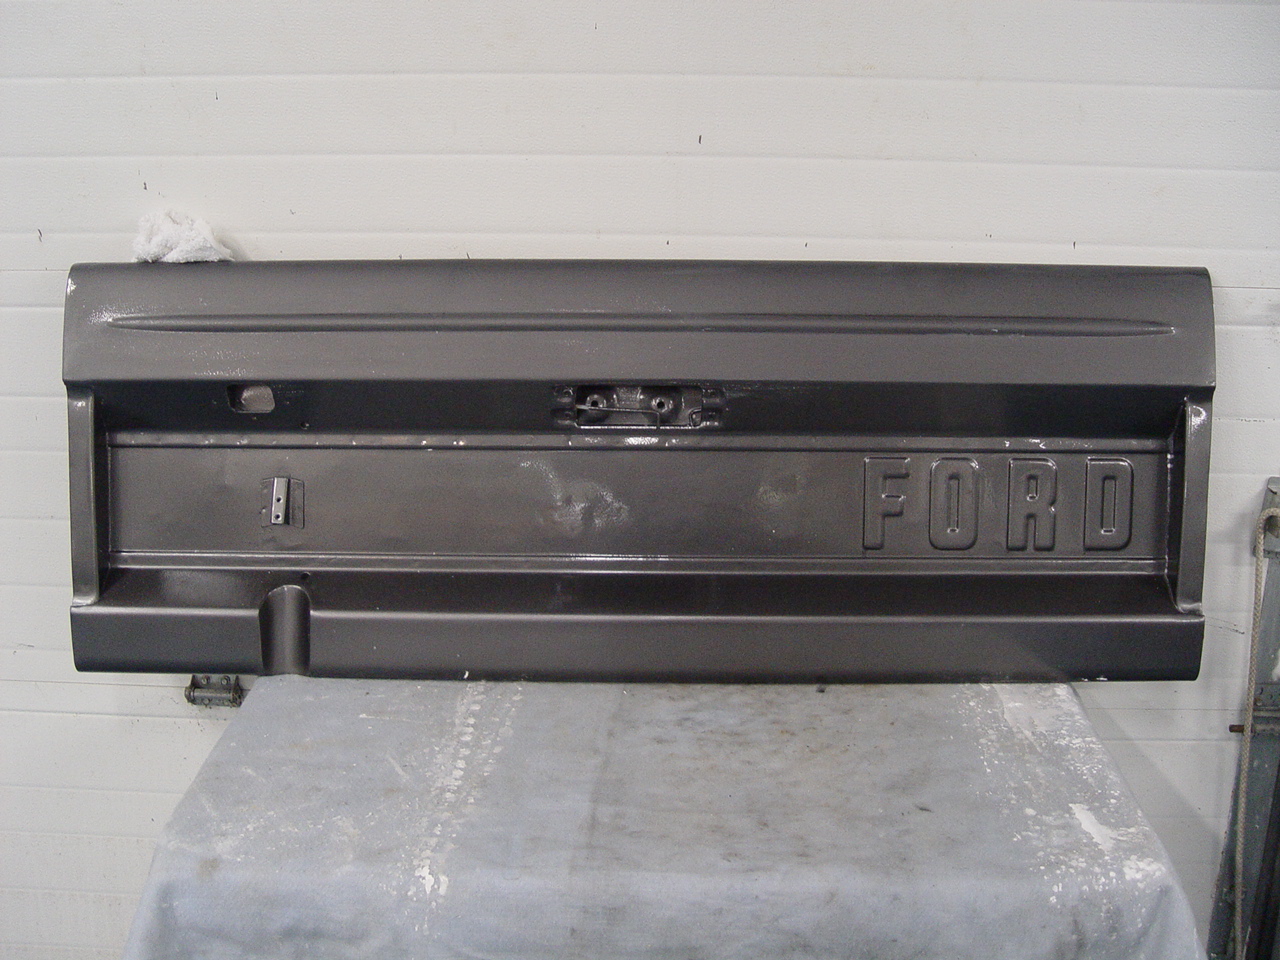
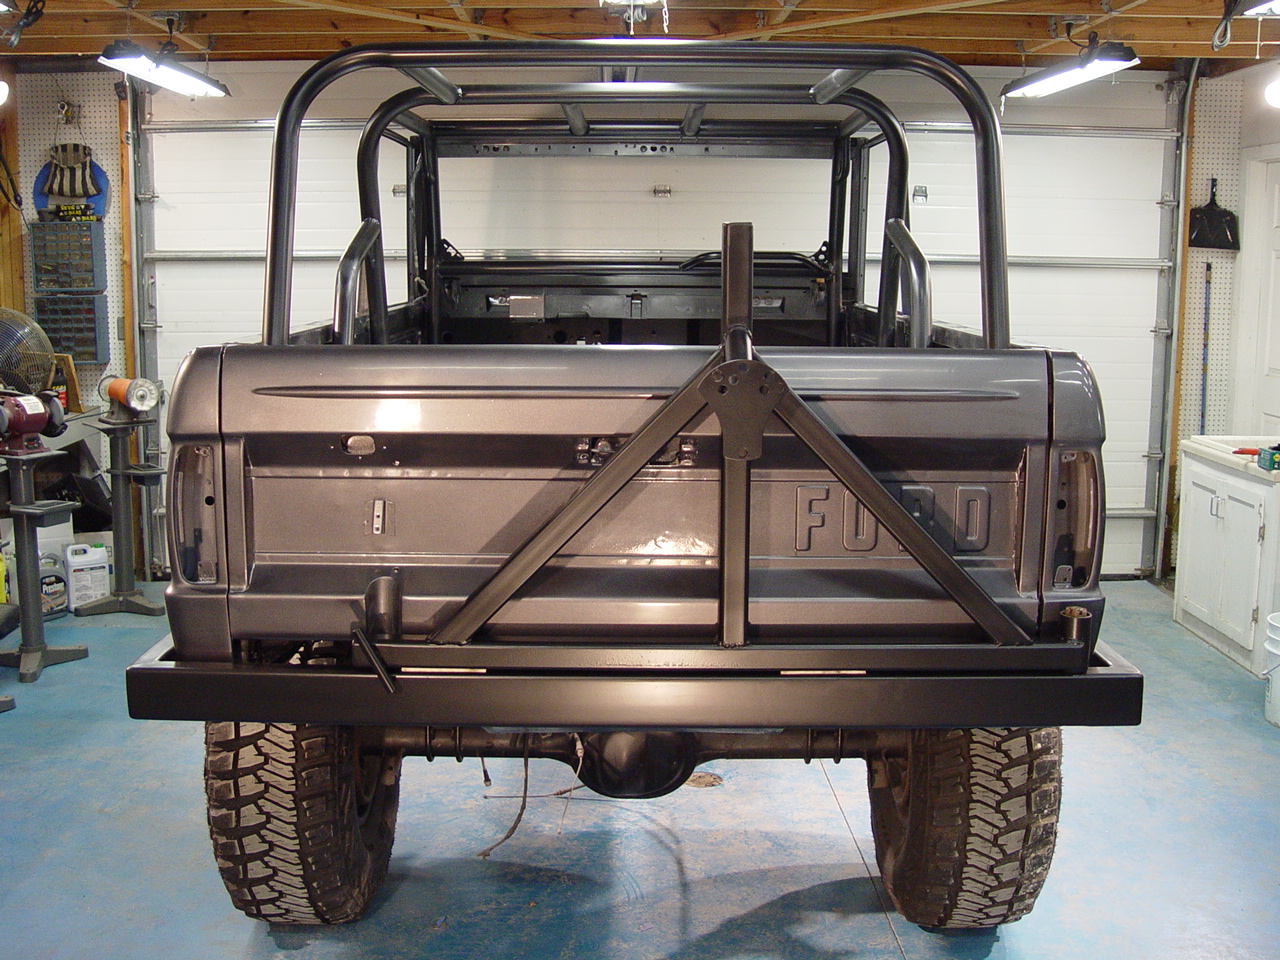
The tailgate received some special treatment. Rick's custom spare tire mount interfered with the tailgate when it was lowered. So, we cut out a vertical slot in the bottom of the tailgate where it hit the tire mount's bracket and welded in a section of 2" steel exhaust half-pipe. Dennis' welding and metalworking skills were put to the test, but the net result looks great.
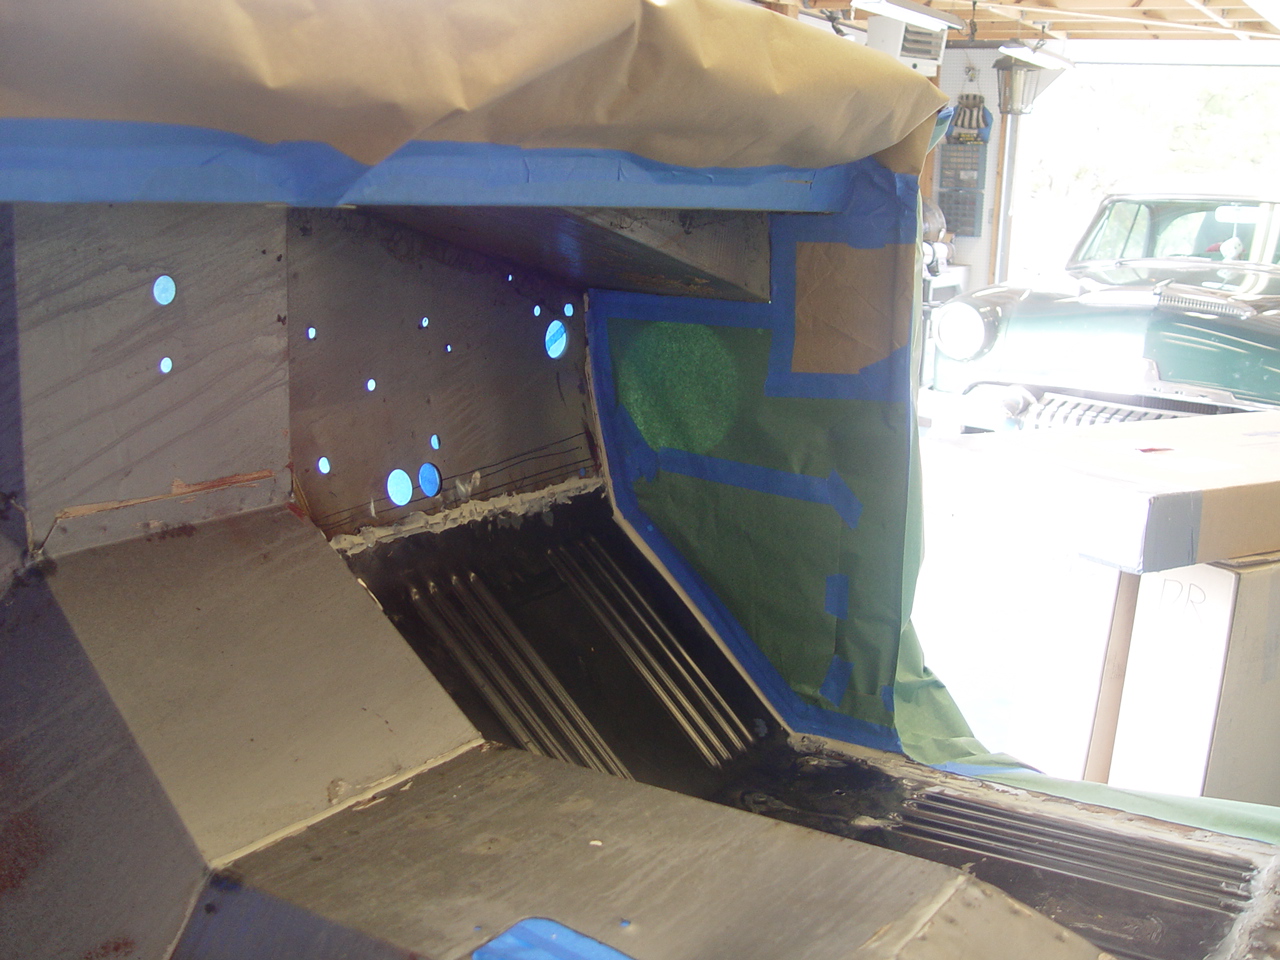
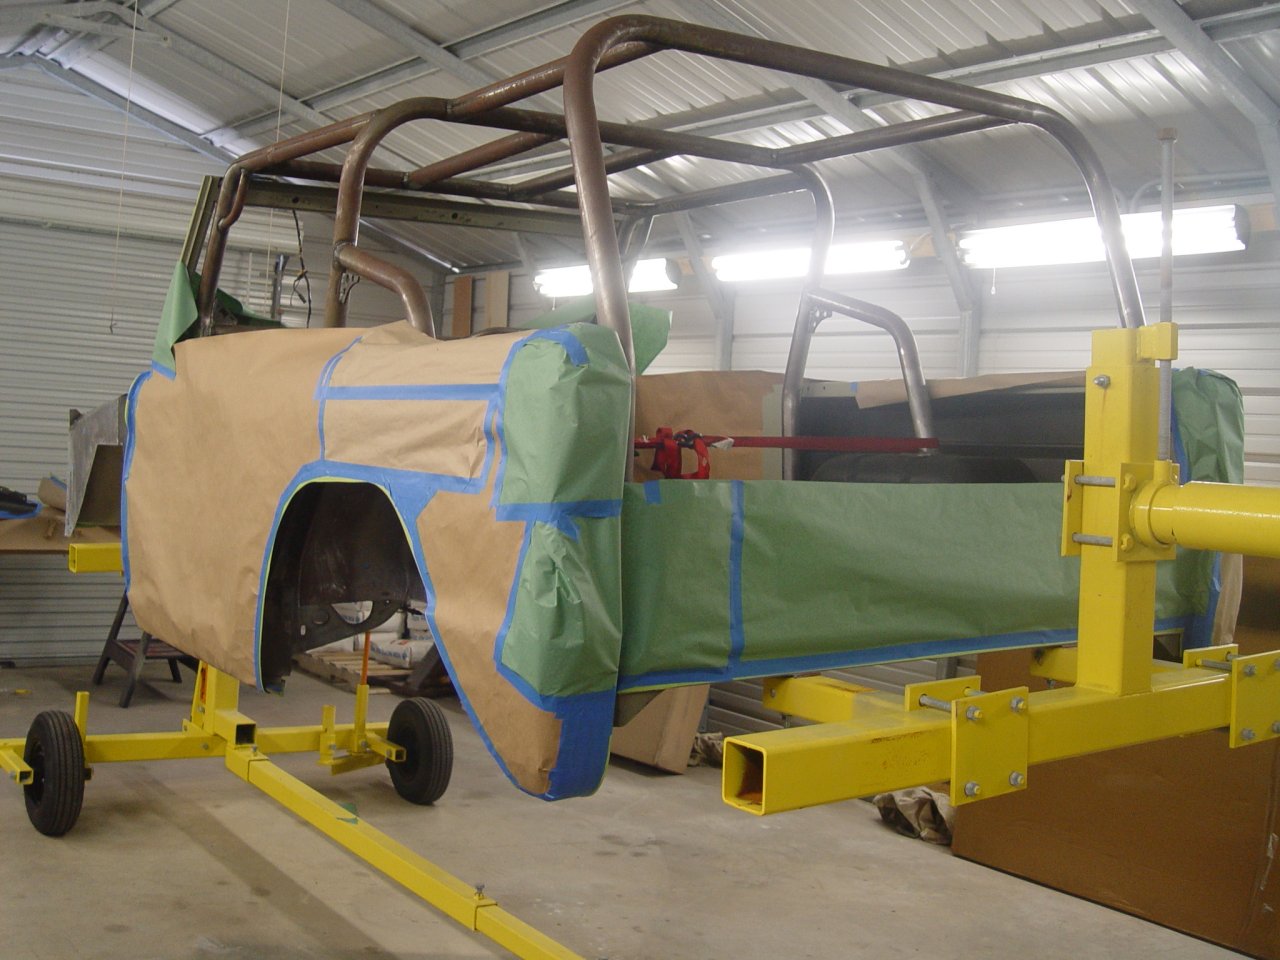
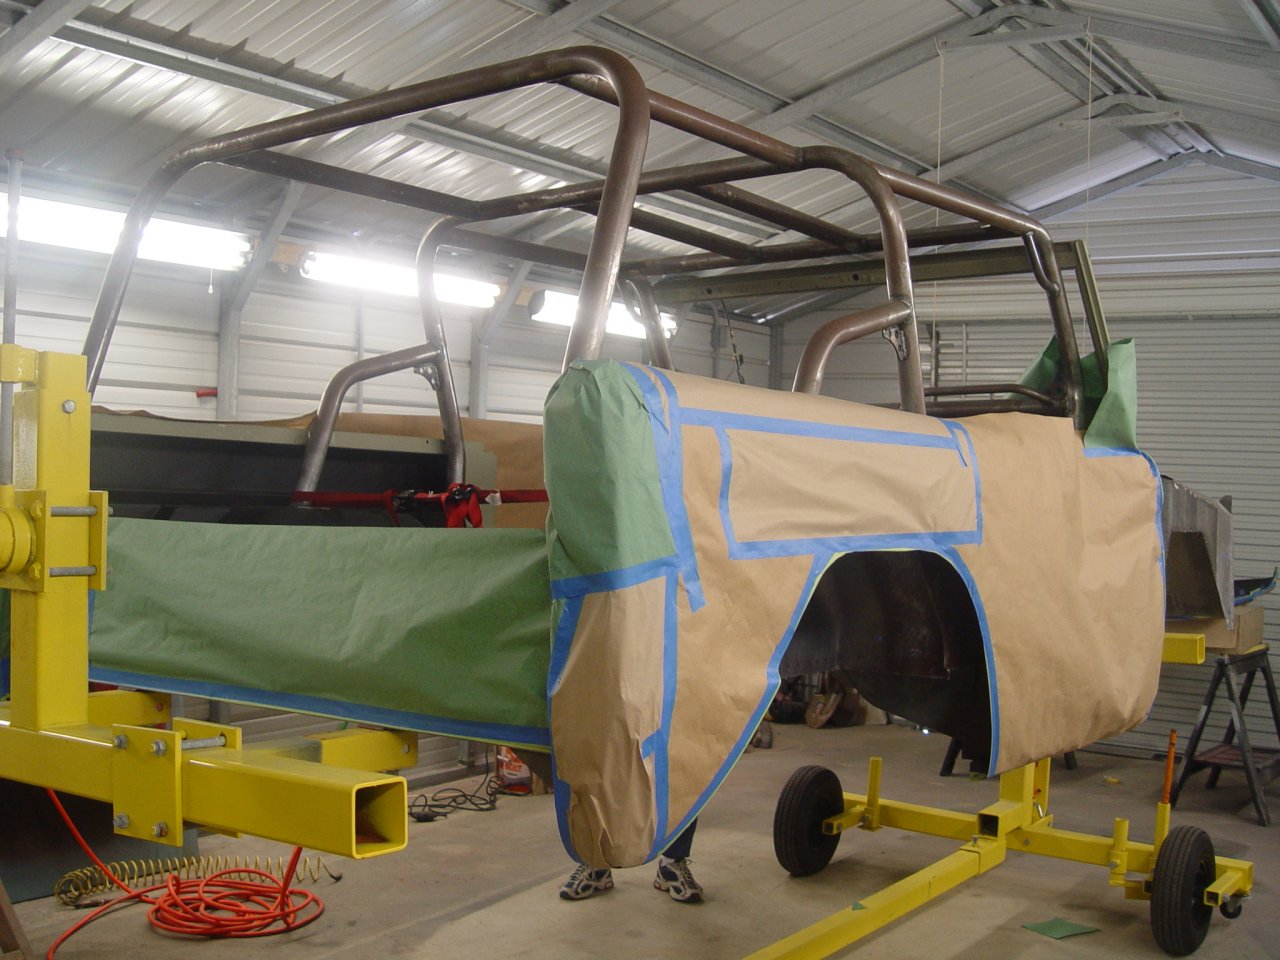
You'll notice that the exterior body was sprayed with a green primer. That's PPG's DPX-171 non-chrome self-etching primer. We laid that down prior to doing the metal work and body filling so that we could ensure both good corrosion protection, but also to give later layers of primer and paint a solid base that guarantees good adhesion to the metal body. Remember, sodablasting does not etch the metal, so something must be done to ensure that the paint layers have something to grab hold of.
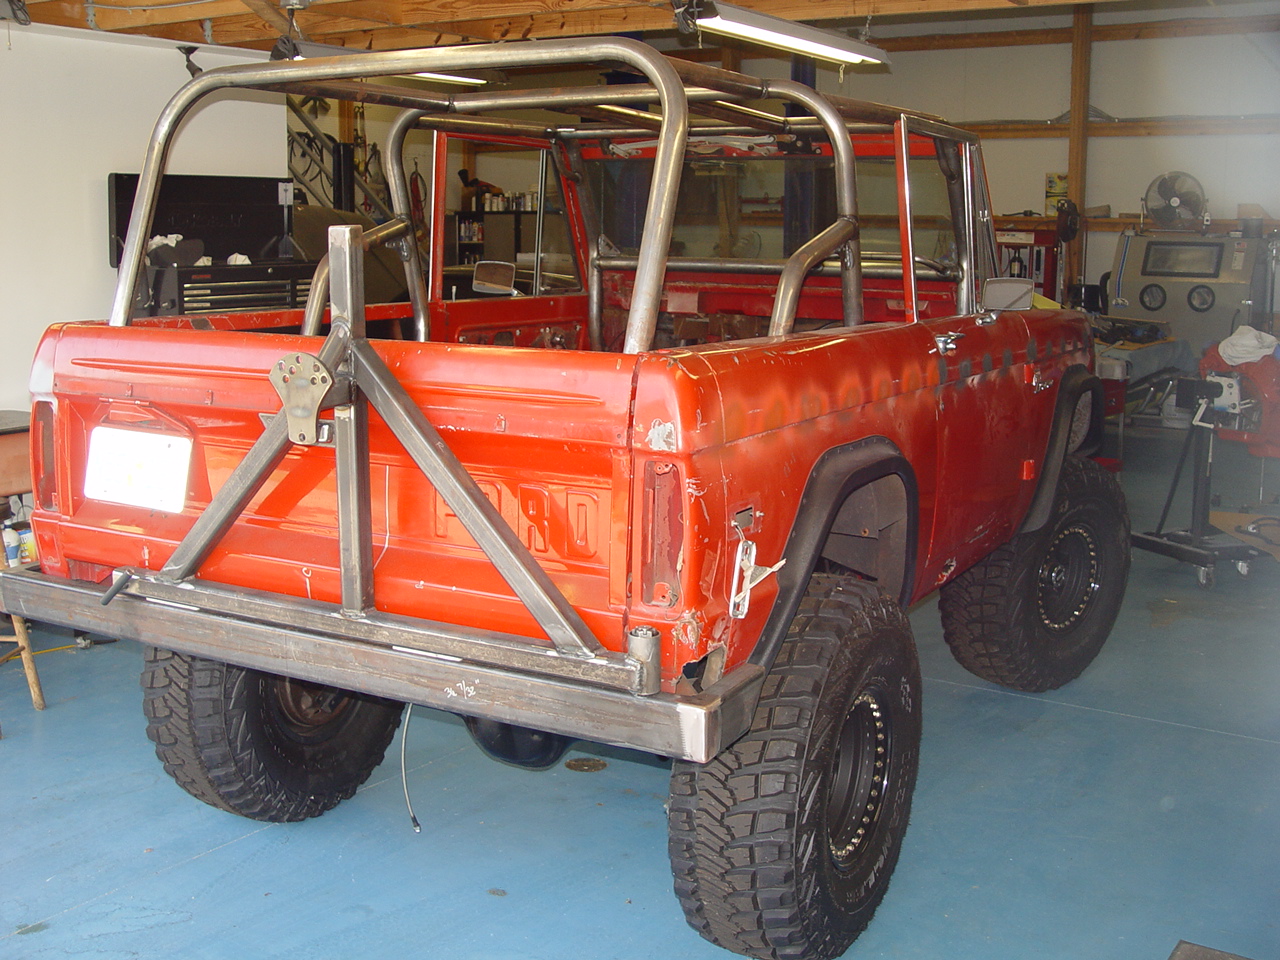
Finally, the front fenders were mocked up on the body so we could check for any fittment problems.
|
||||||
 |
 |
 |
 |
 |
||
 |
 |
 |
 |
 |
||
 |
 |
 |
 |
 |
||
 |
 |
 |
 |
 |
||
 |
 |
 |
 |
 |
||
 |
 |
 |
 |
 |
||
 |
 |
 |
 |
 |
||
 |
 |
 |
 |
 |
||
 |
 |
 |
 |
 |
||
 |
 |
 |
 |
 |
||
| Click on an image for a larger view | ||||||
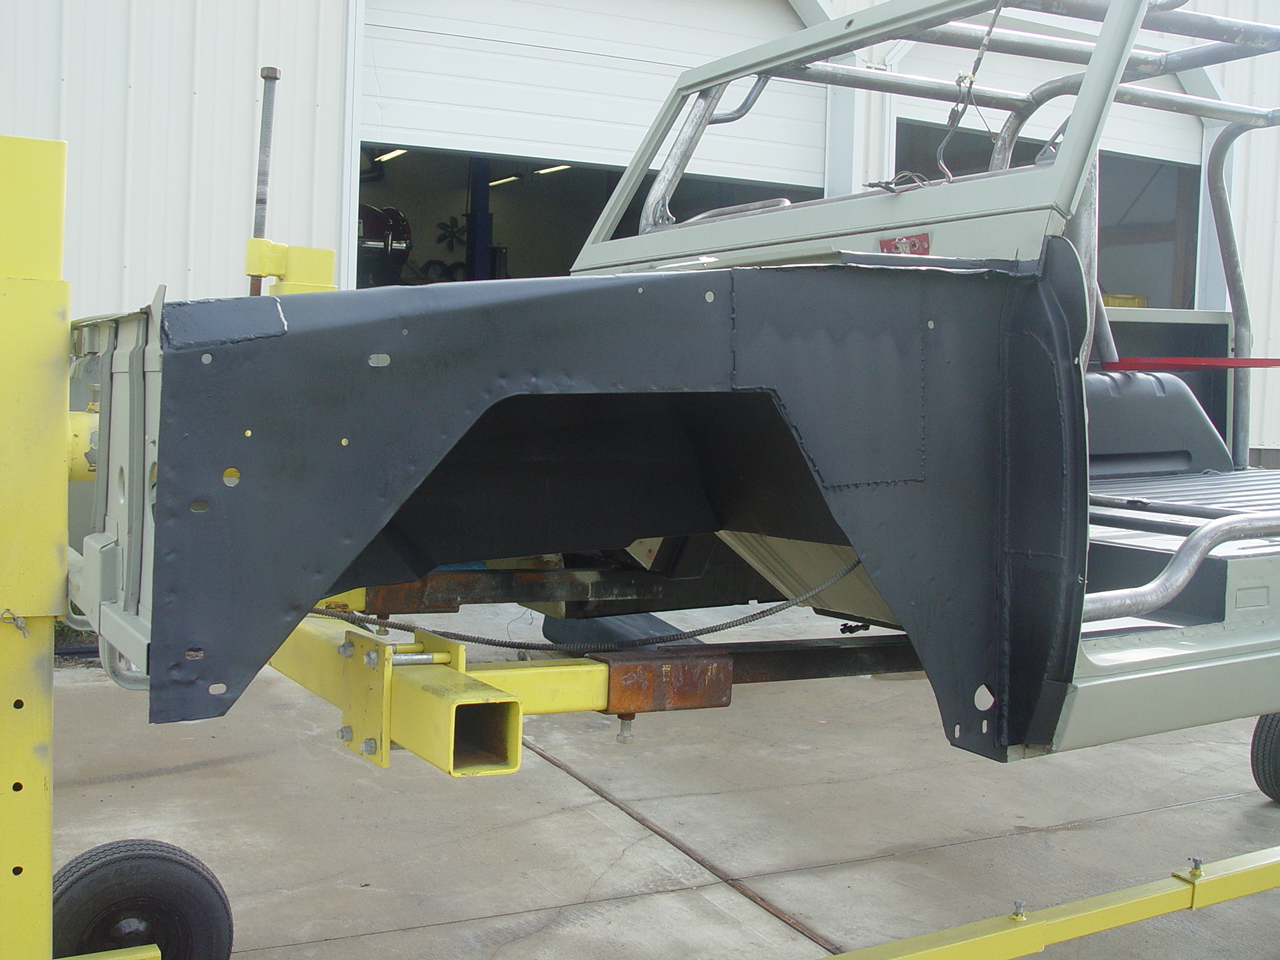
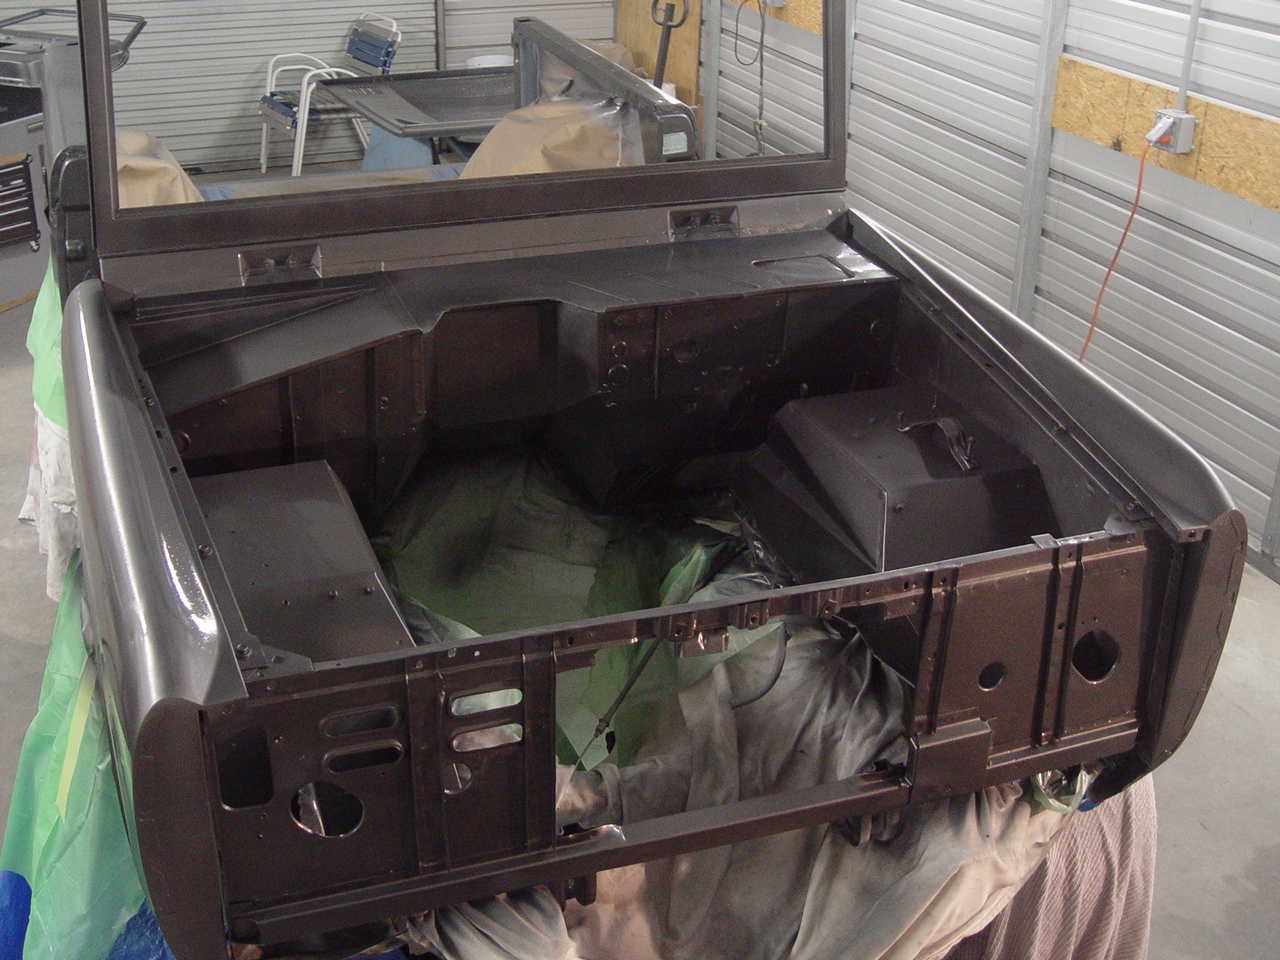
CORROSION PREVENTION | ||||||
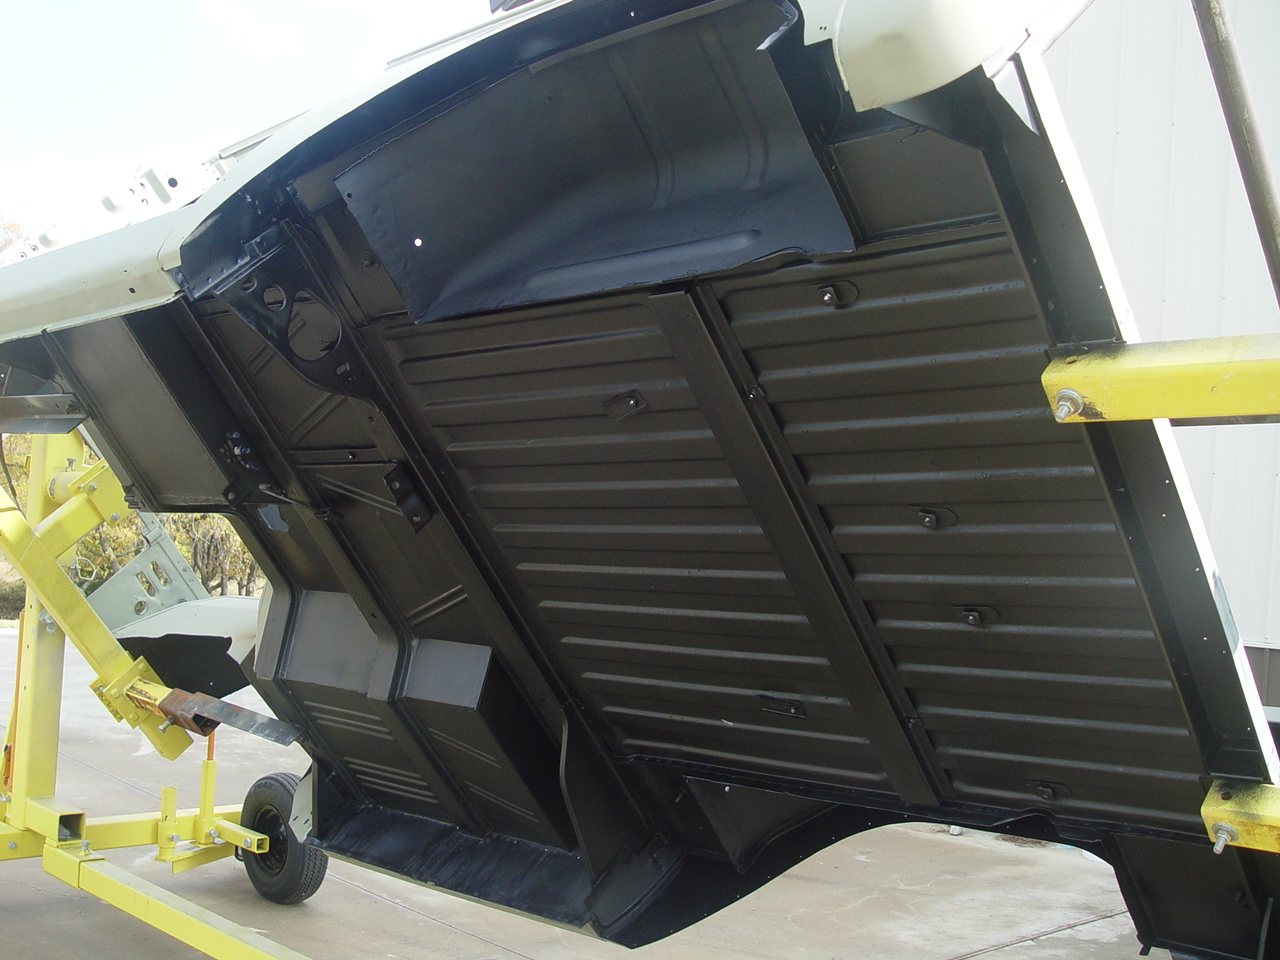
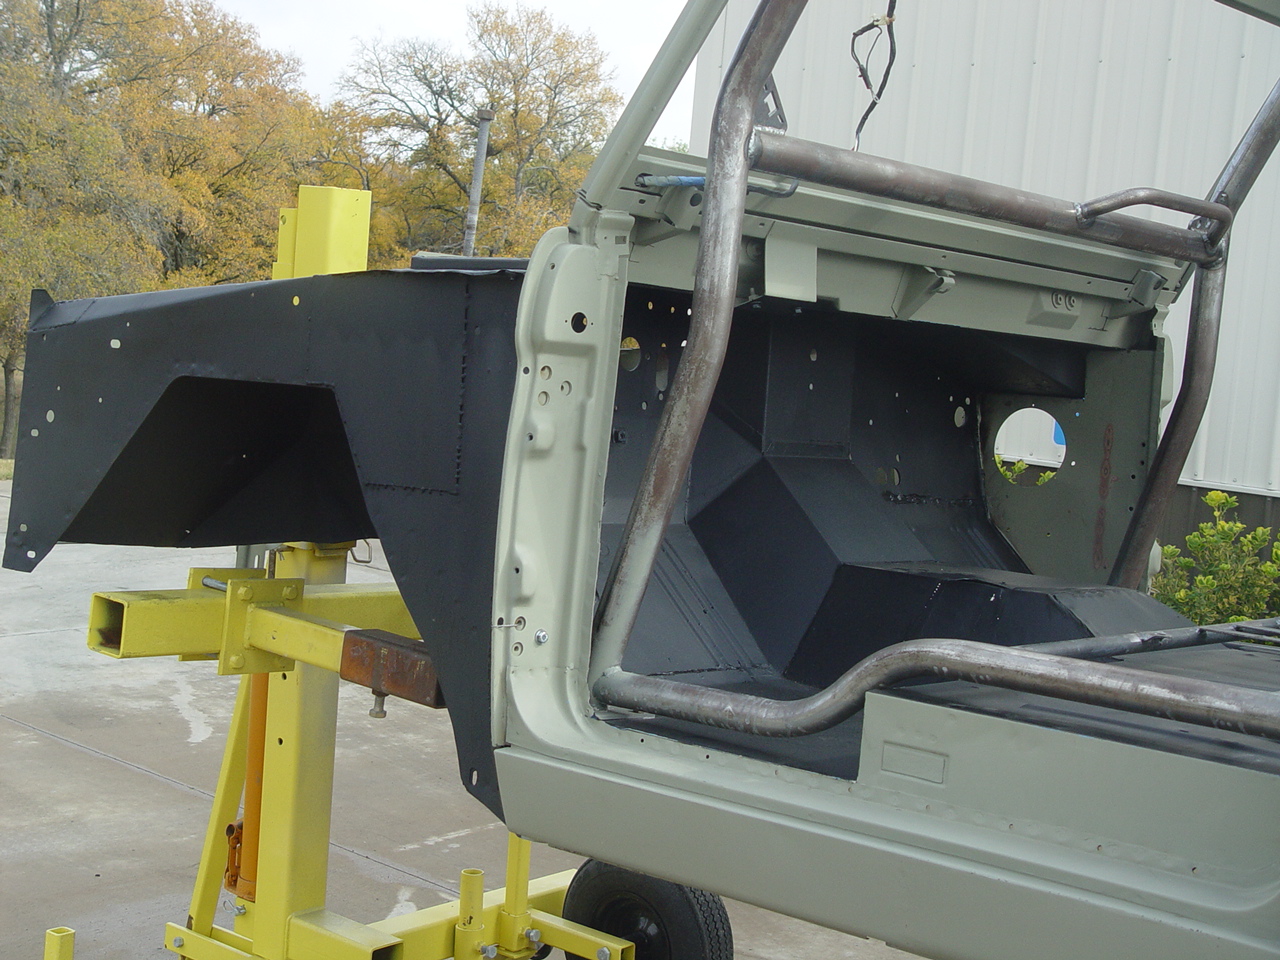
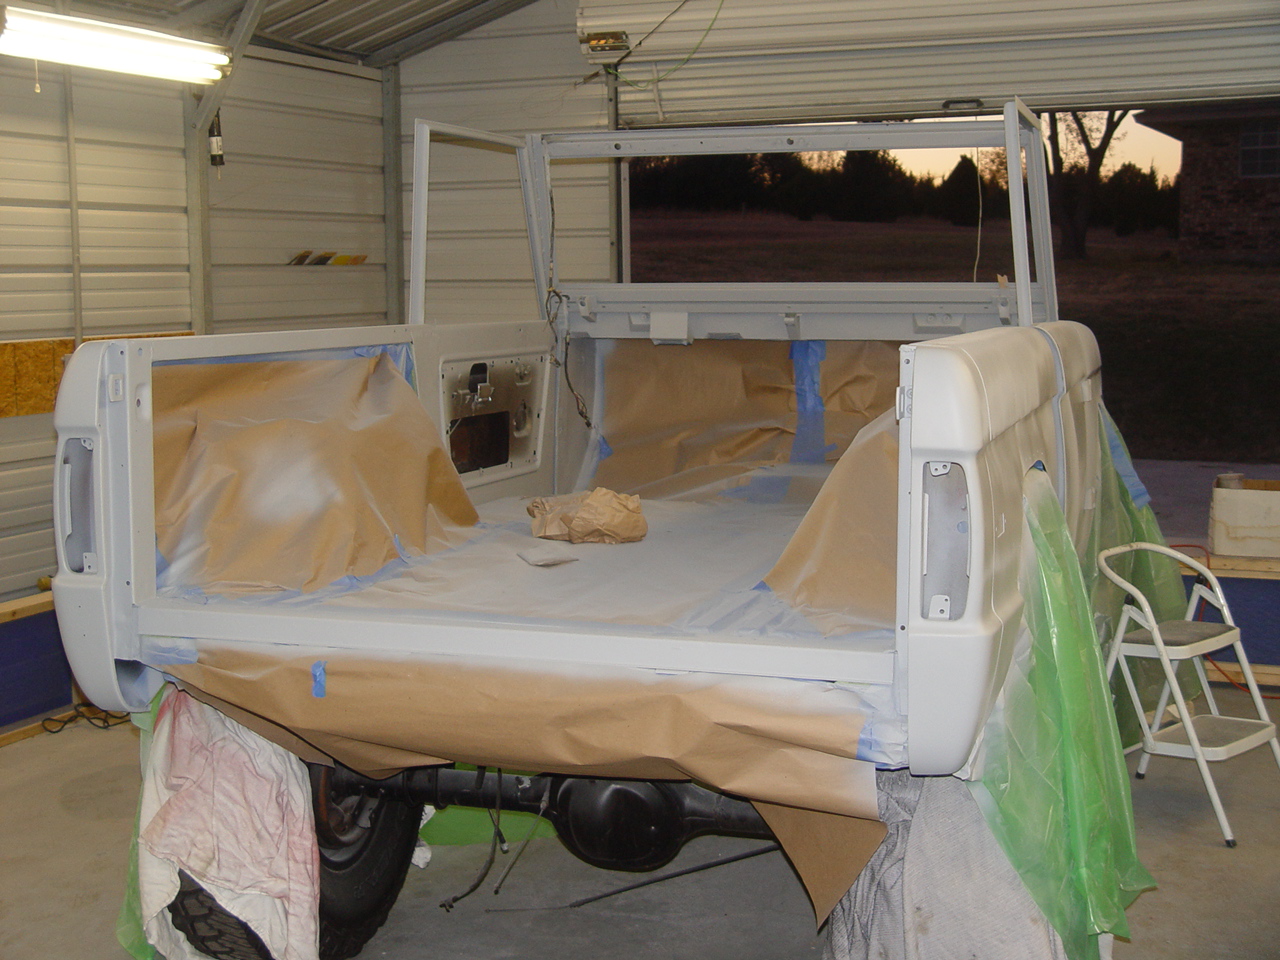
|
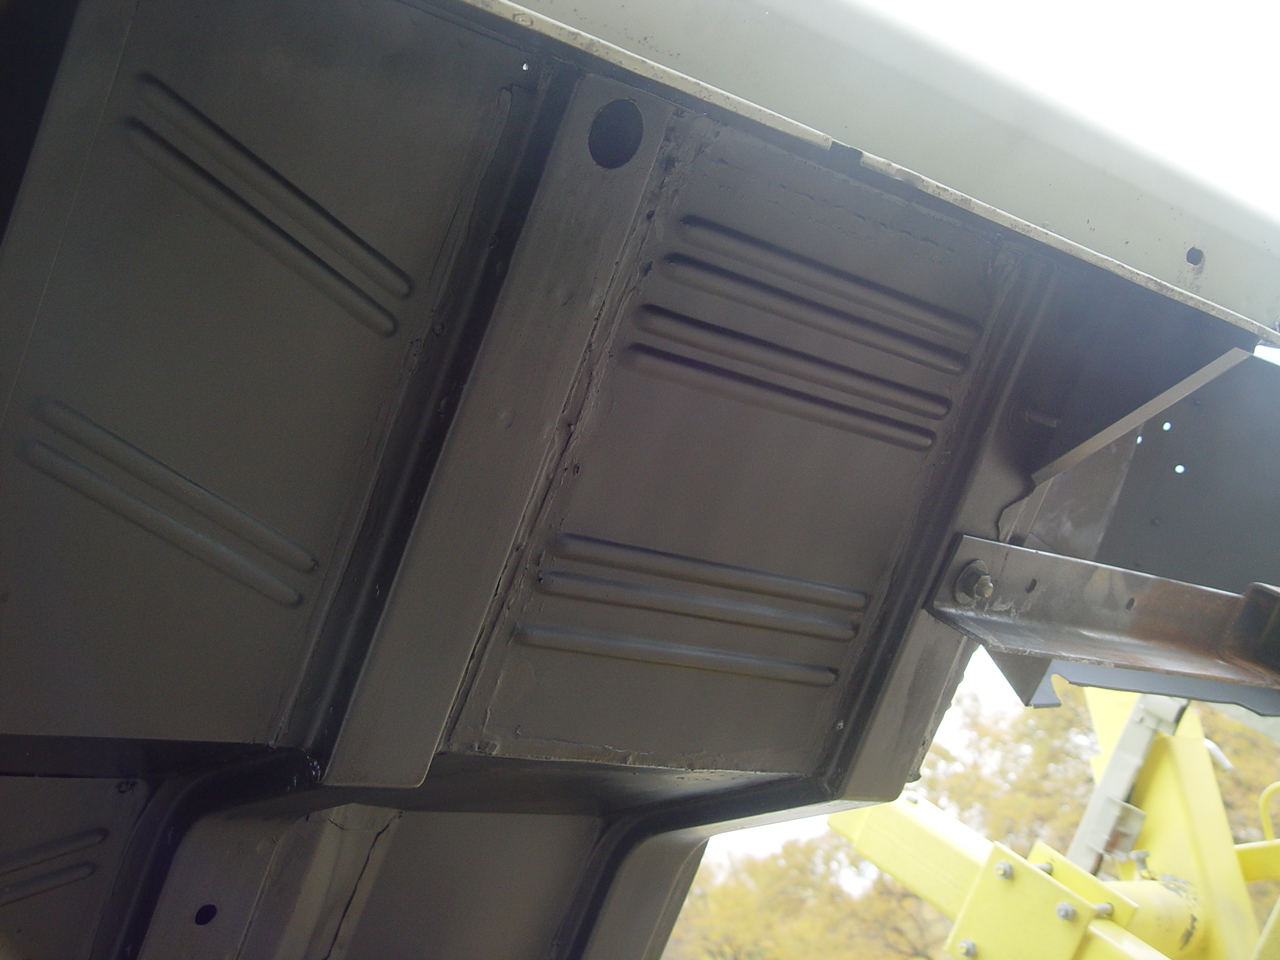
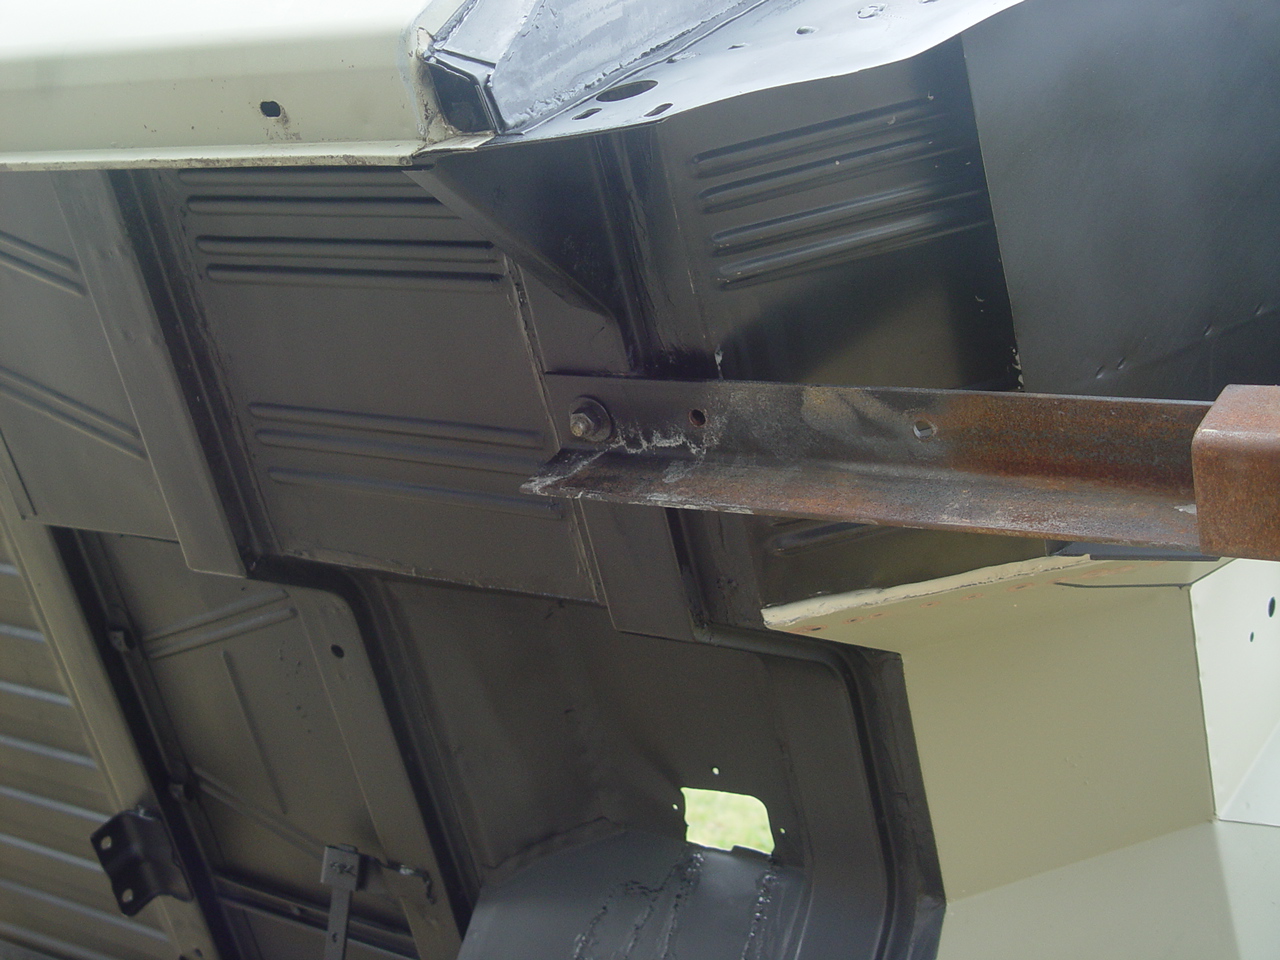
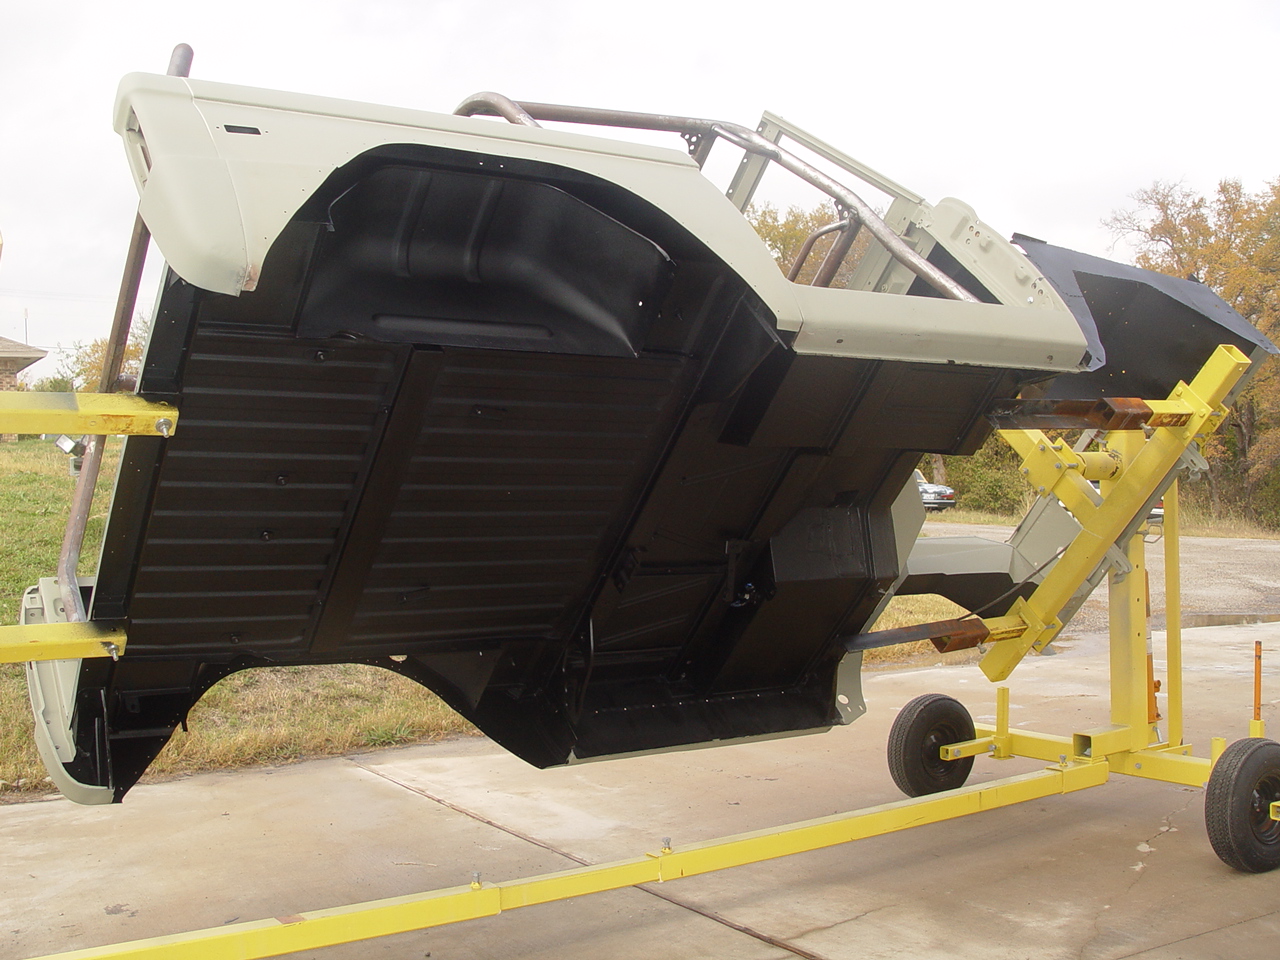
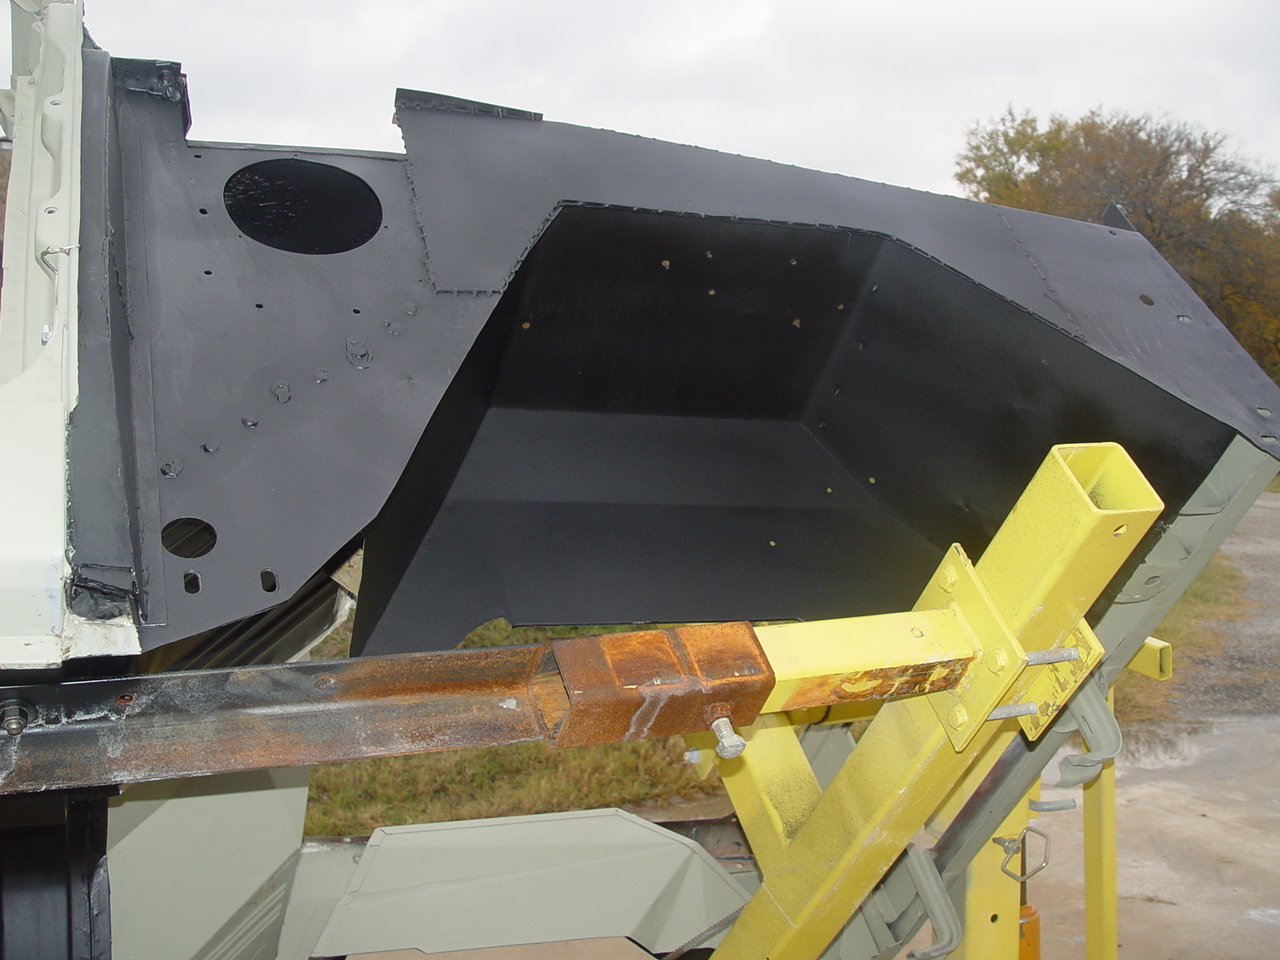
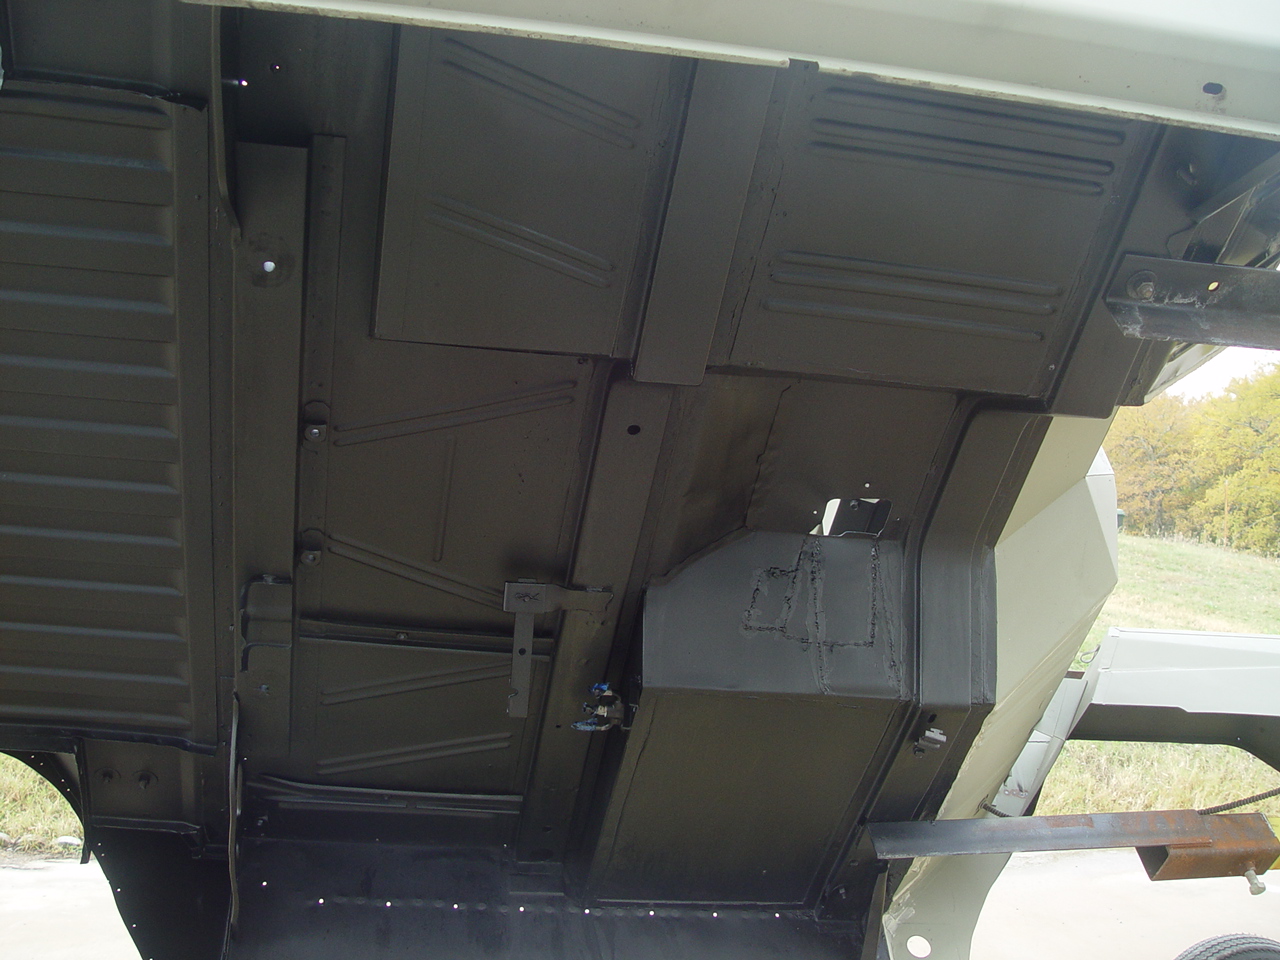
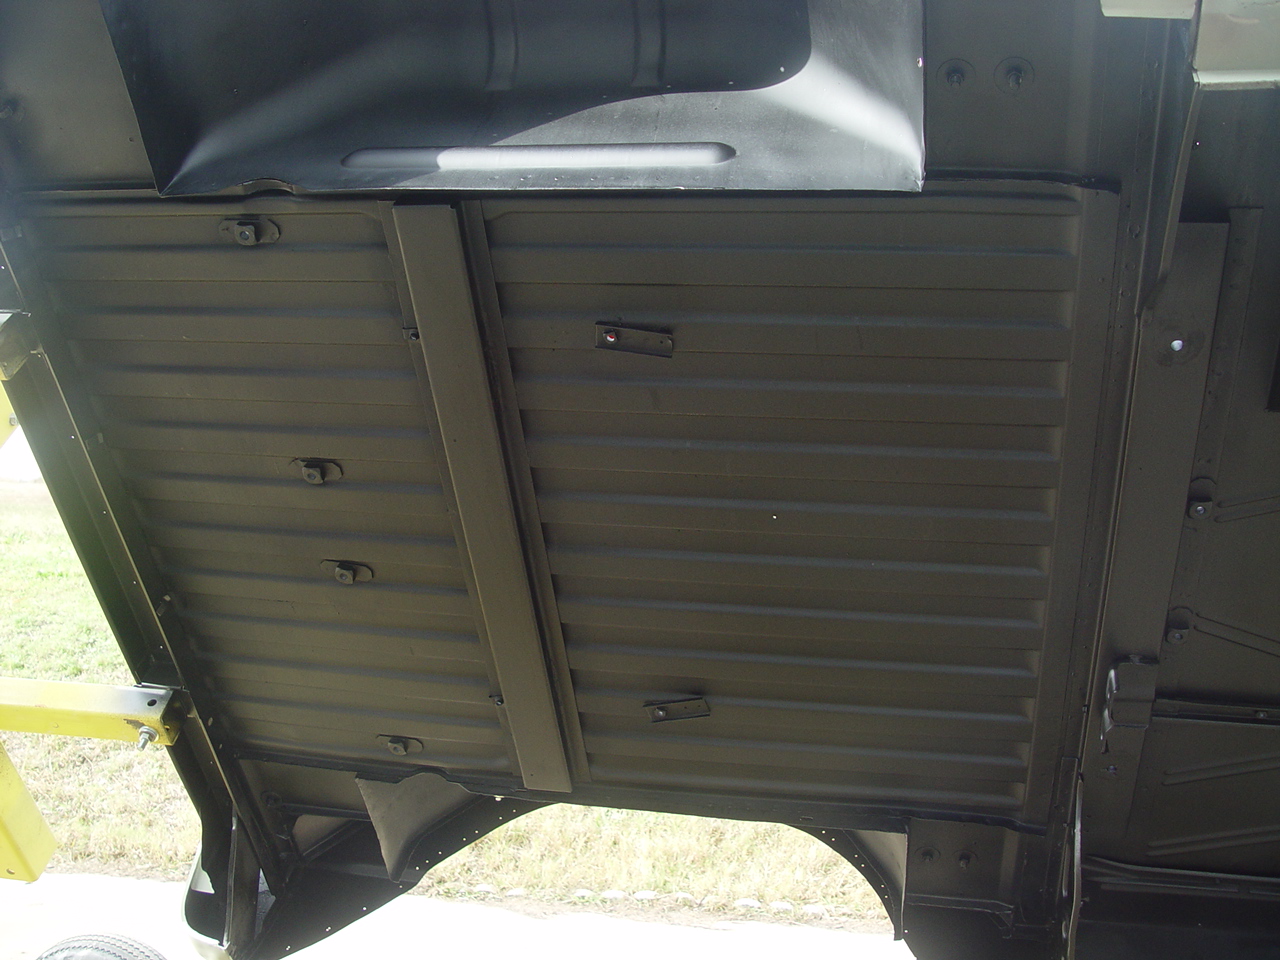
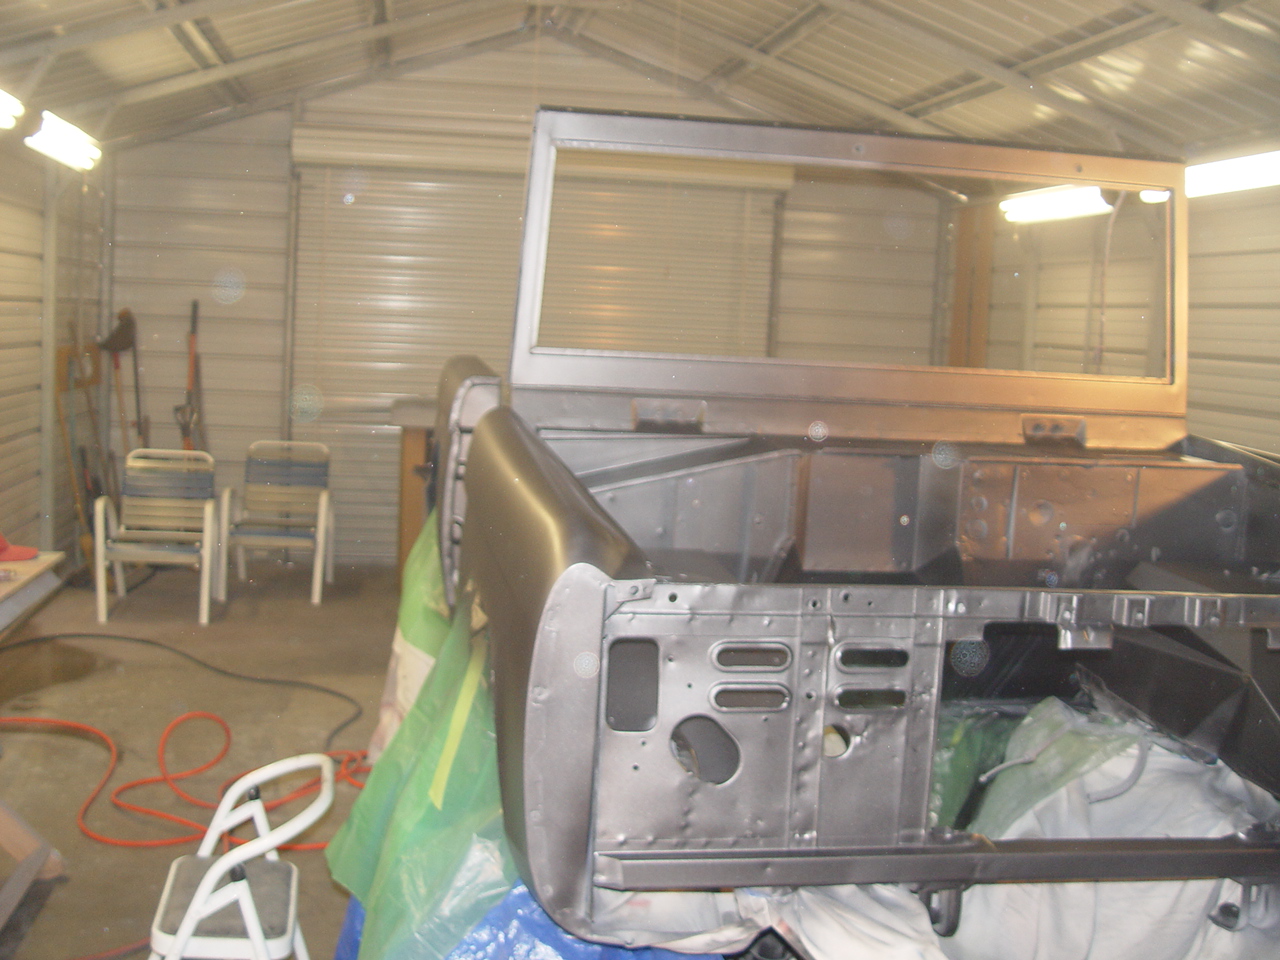
With the sheetmetal work complete, it was time to remount the body on the rotisserie and properly treat the underbody with our favorite rust-inhibiting coating - POR-15. If you've never used this stuff, you should give it a try. It's simply amazing. It's tough as nails (they refer to it as "hammer tough") and when properly applied (after using their "Marine Clean" product followed by their "Metal Prep"), it fully encapsulates any remaining rust with a non-porous barrier that keeps out air and moisture - thereby preventing rust from spreading. And, once it cures, no solvent (at least nothing we've used here) will remove it (POR-15's other motto is "We know permanent").
We had to wait until after replacing the floorboard, so we wound up mounting the body to the rotisserie twice (once for sodablasting and again for coating the underbody). Of course, we masked off all the green etch primer that we had applied to the outer body - especially since we know that any overspray would be permant.
We like this stuff so much that we prefer it to powder coating for just about anything we would want coated in black - especially engine compartments.
|
||||||
 |
 |
 |
 |
 |
||
 |
 |
 |
 |
 |
||
 |
 |
 |
 |
 |
||
 |
 |
 |
 |
 |
||
| Click on an image for a larger view | ||||||
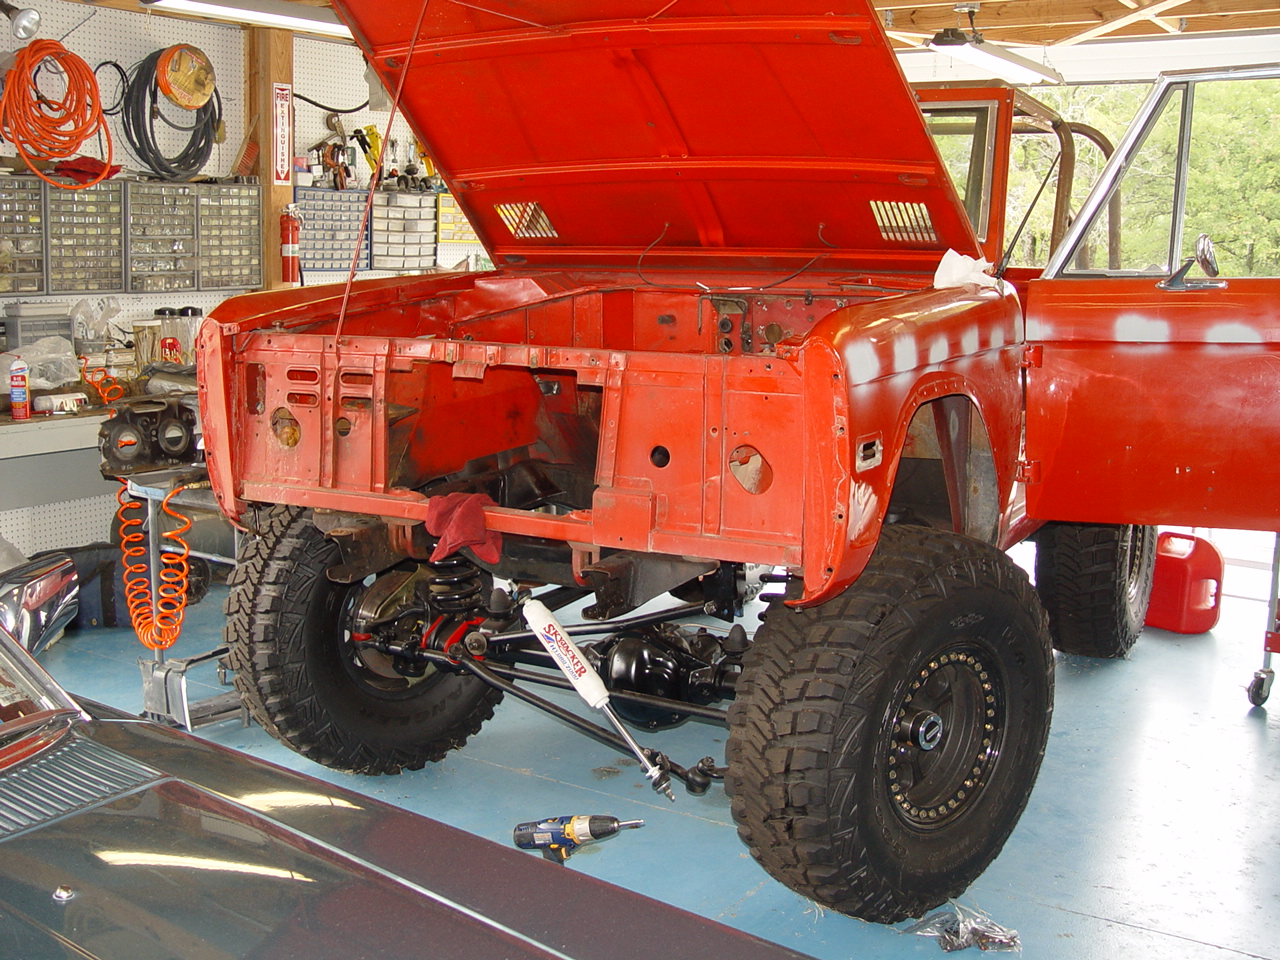
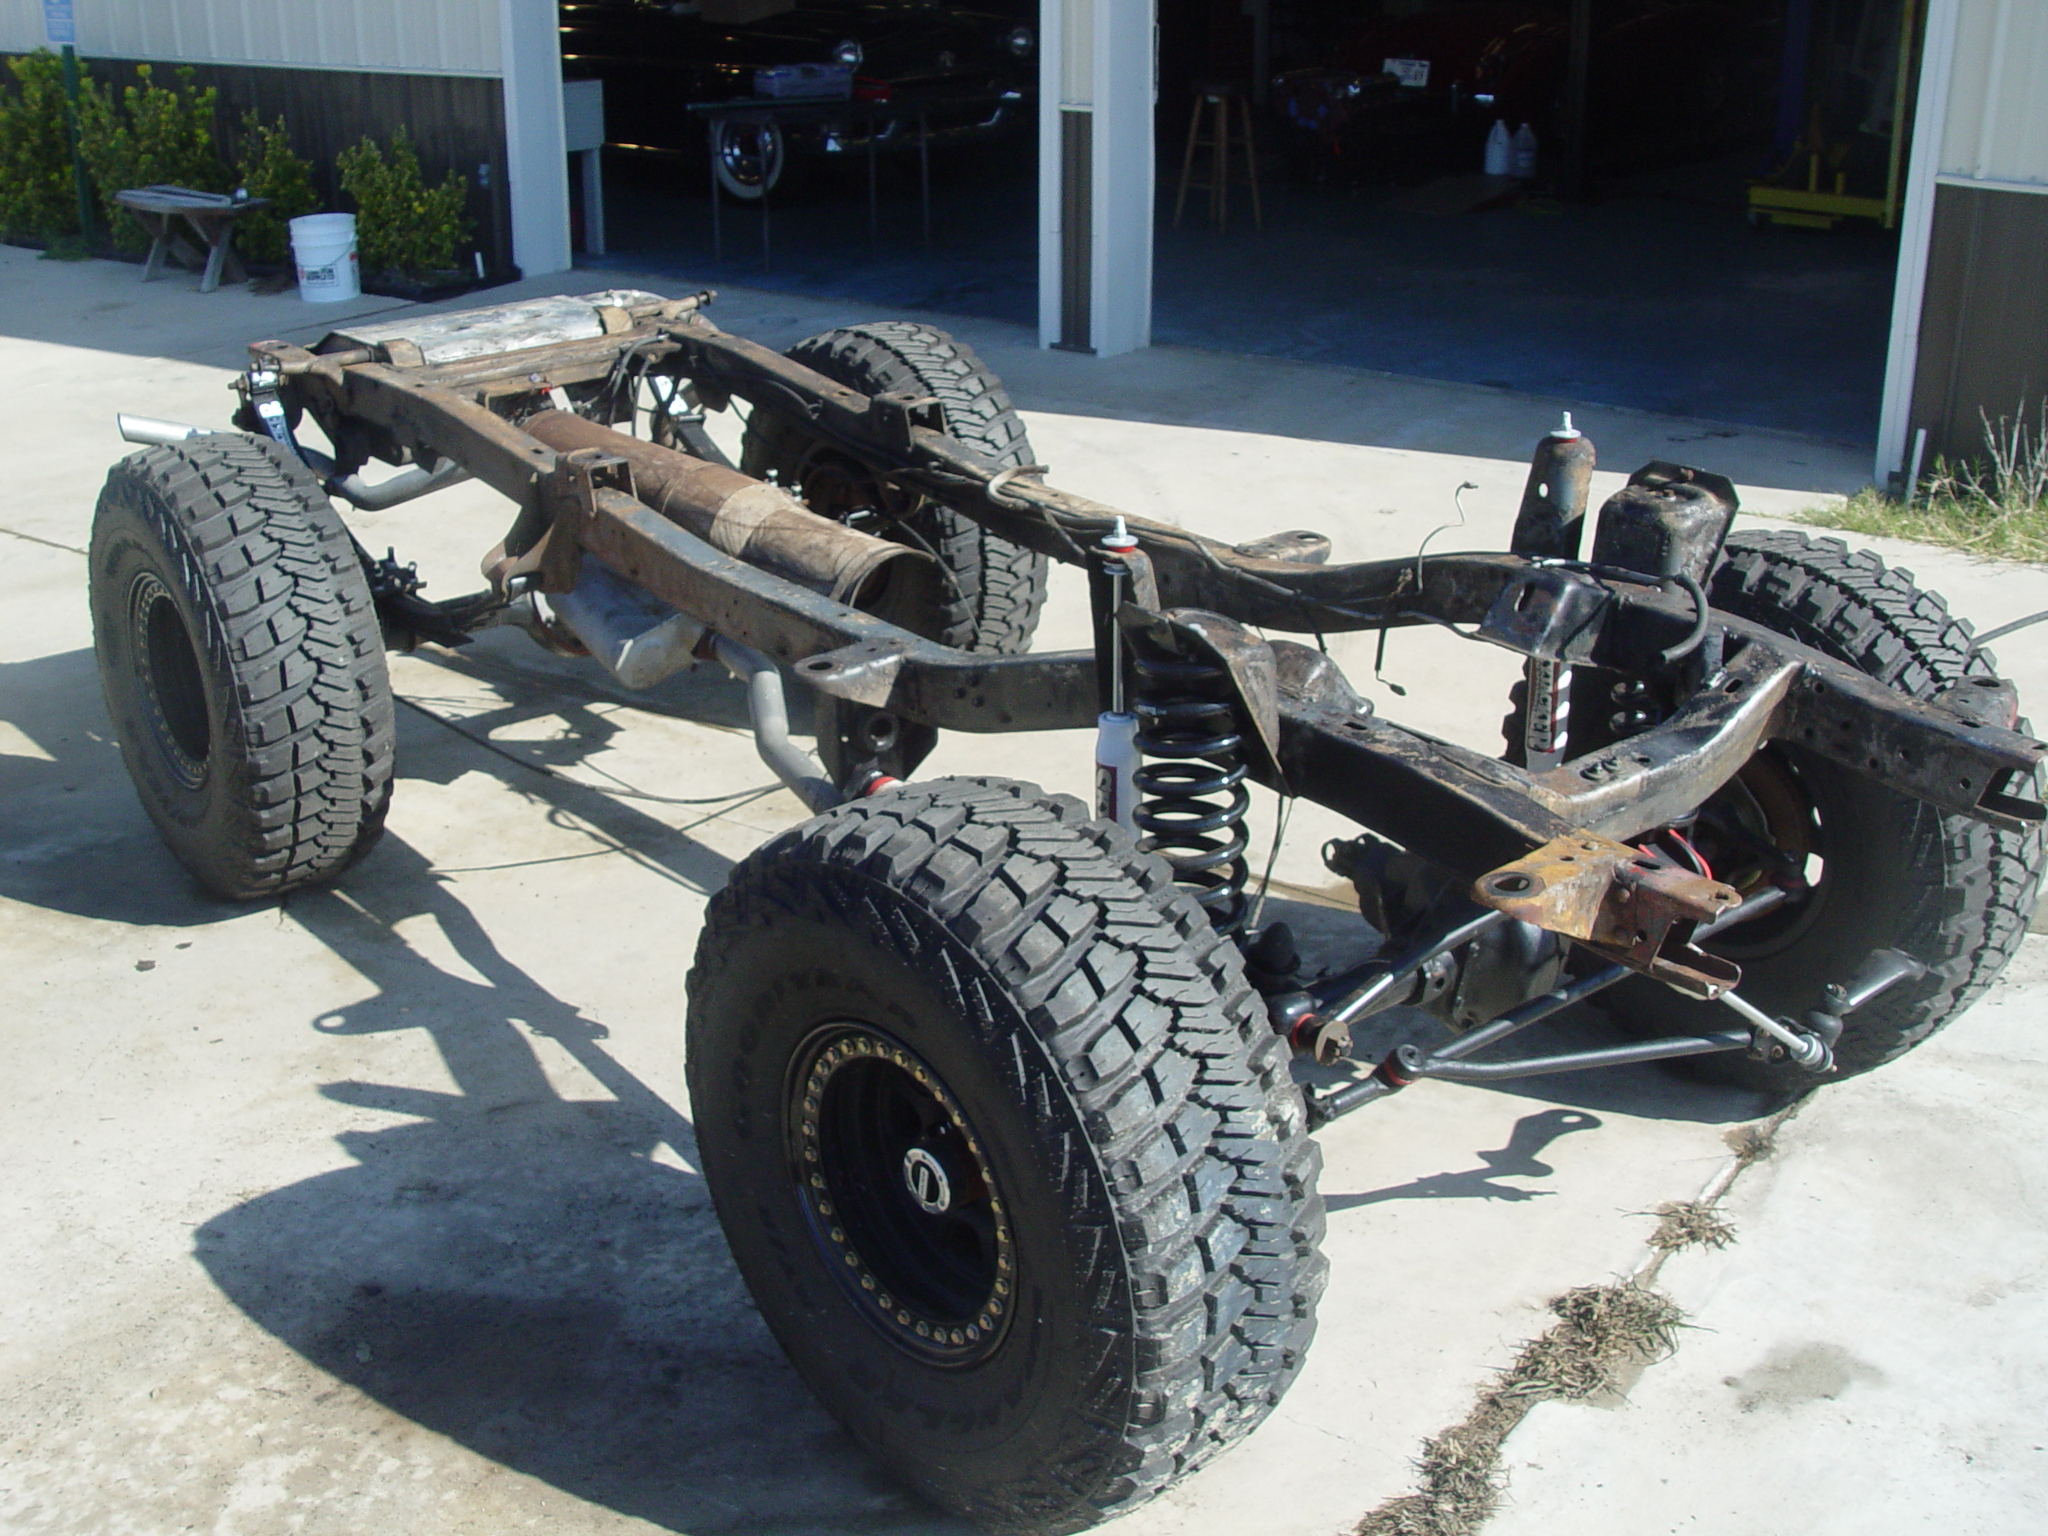
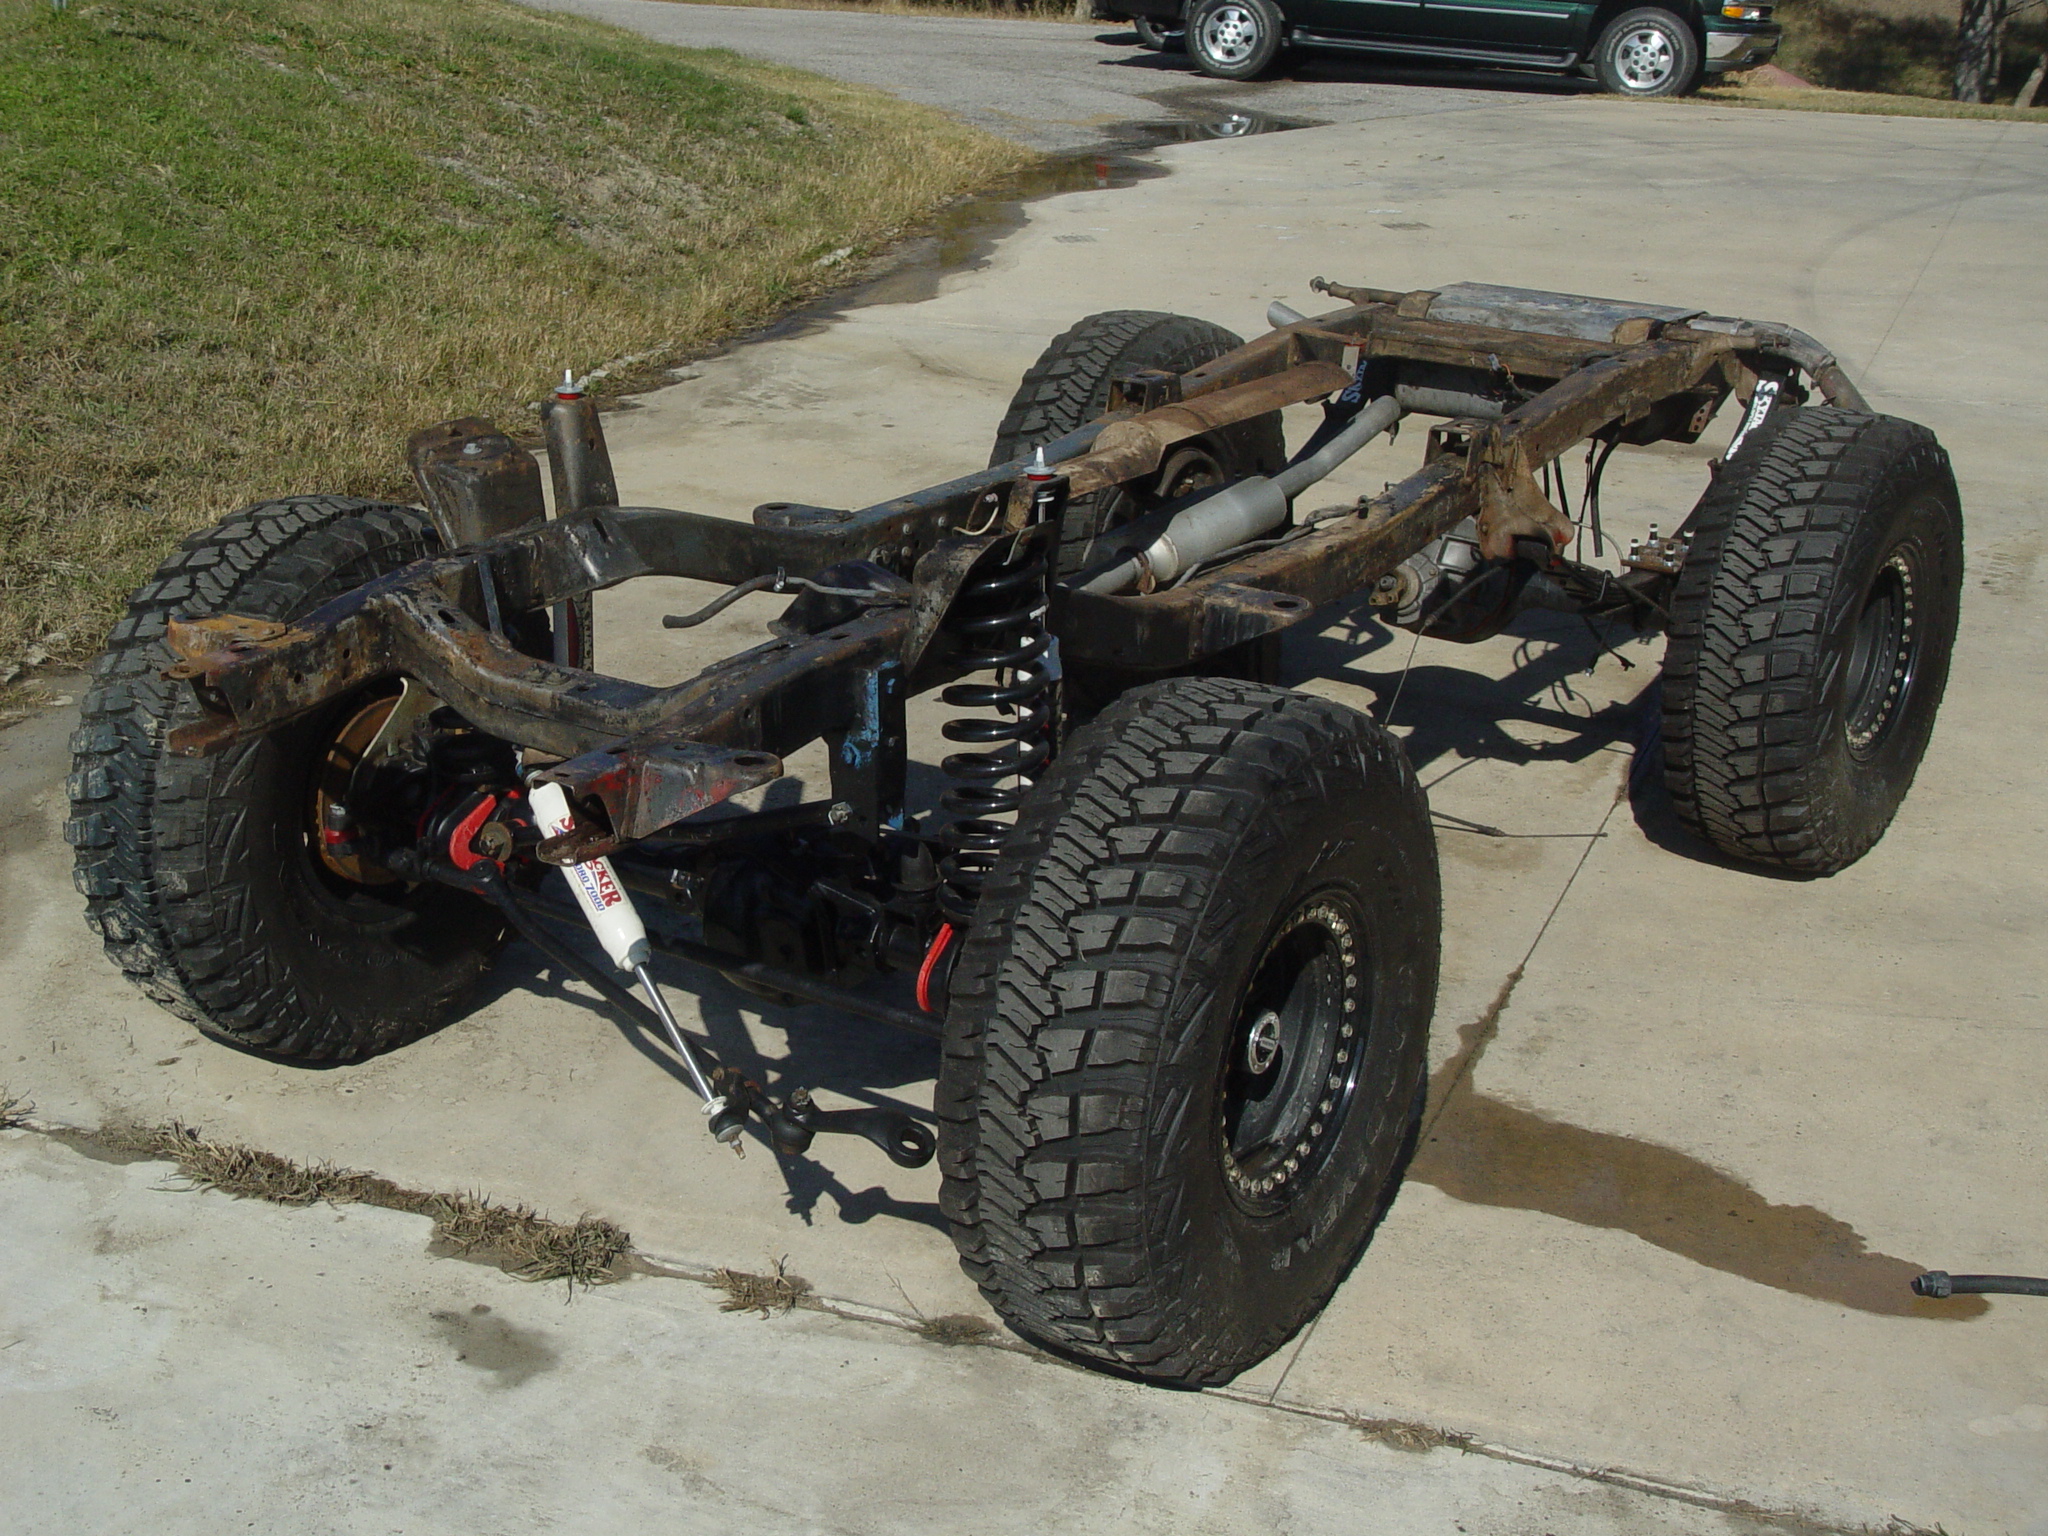
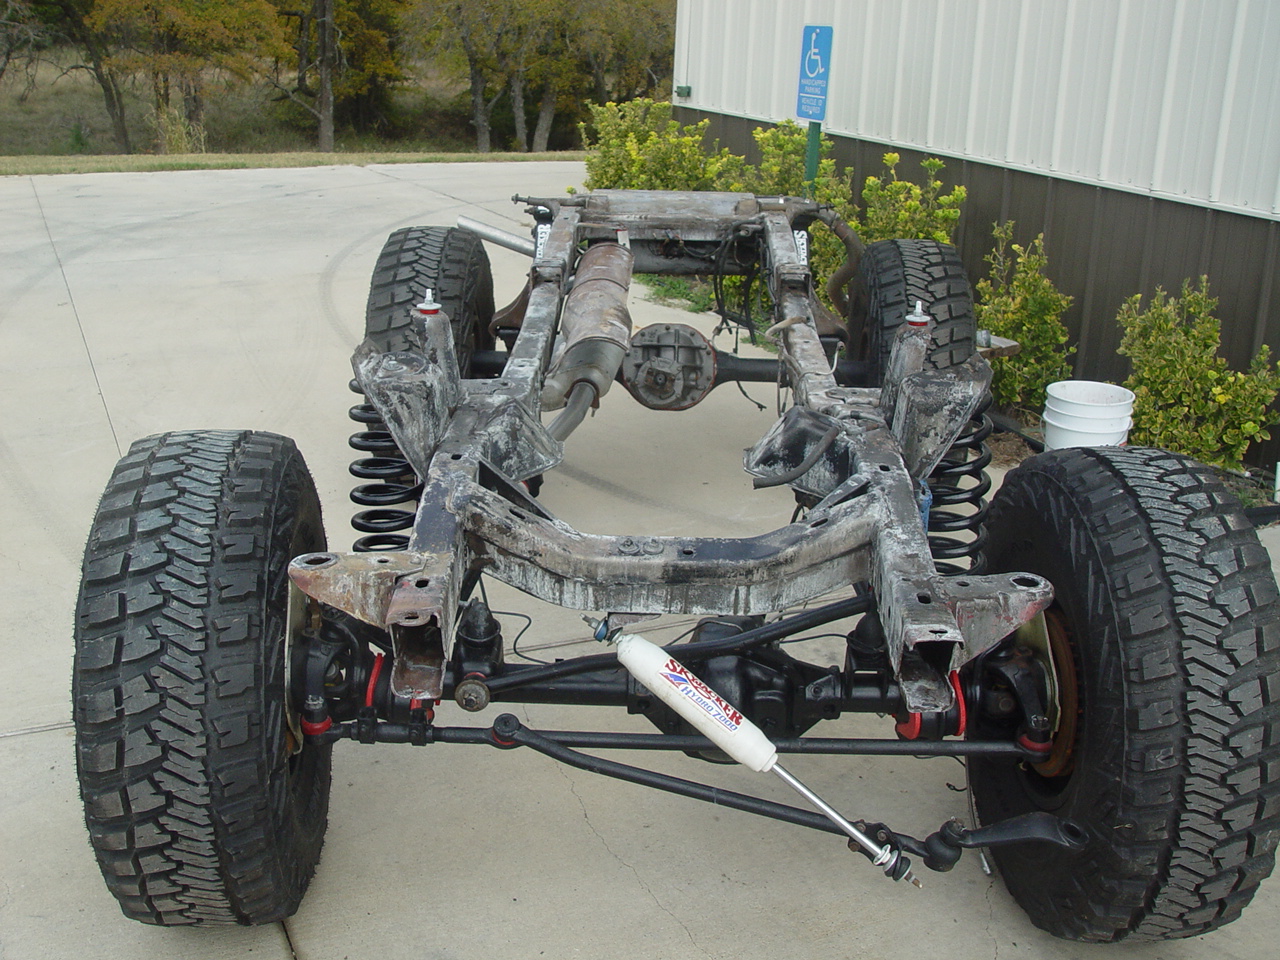
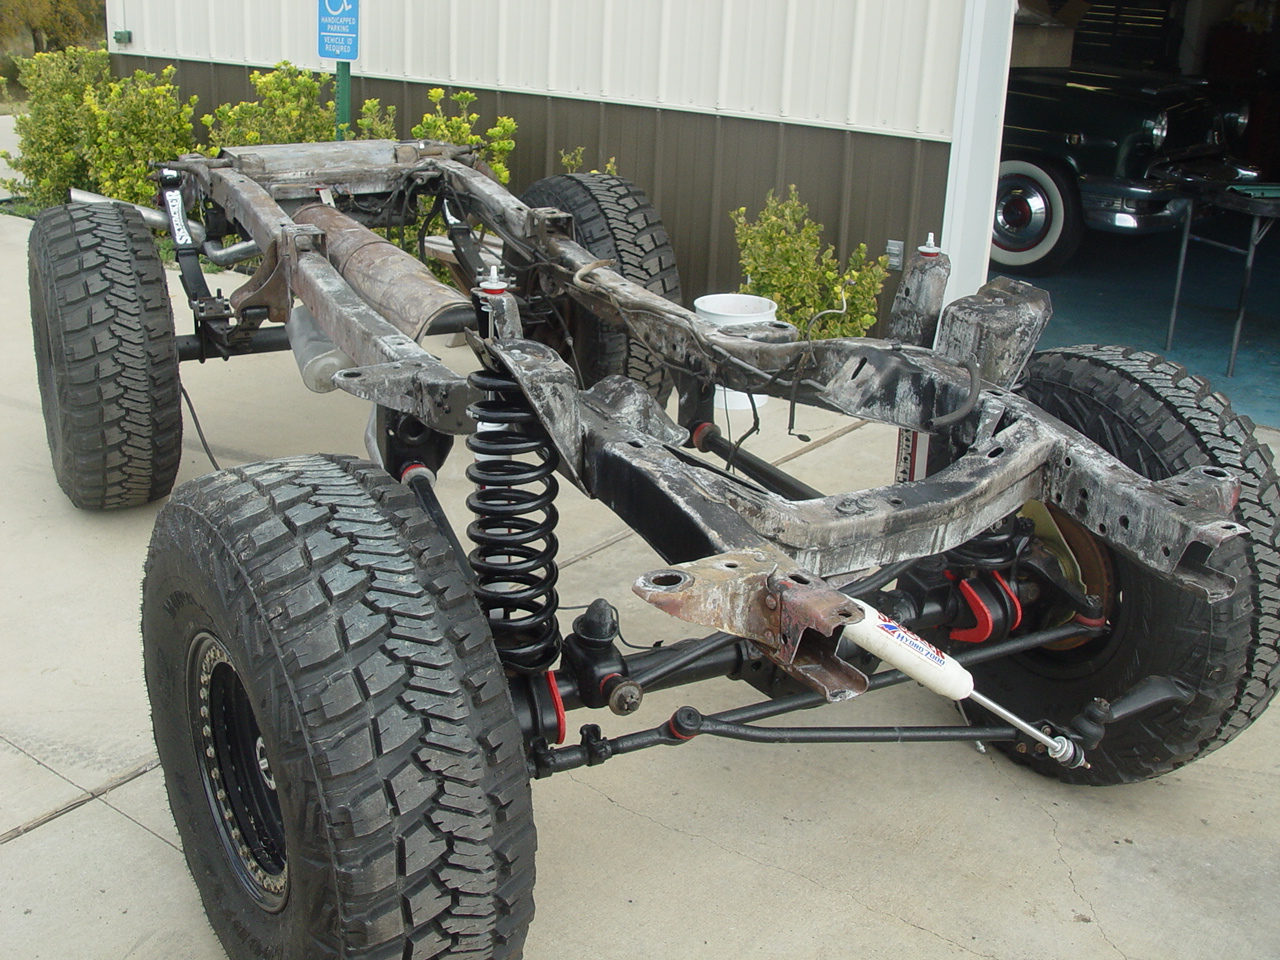
FRAME | ||||||
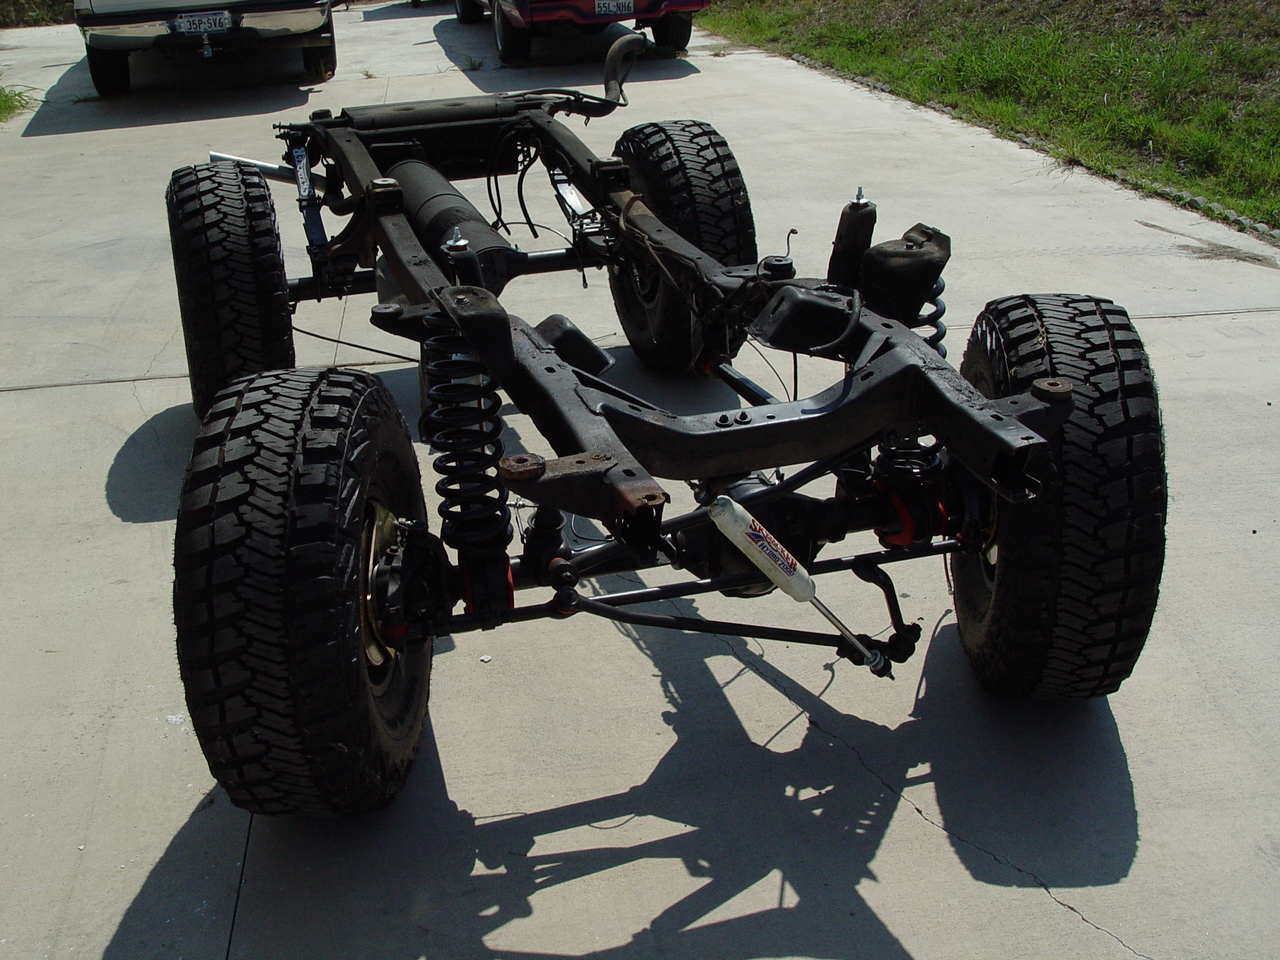
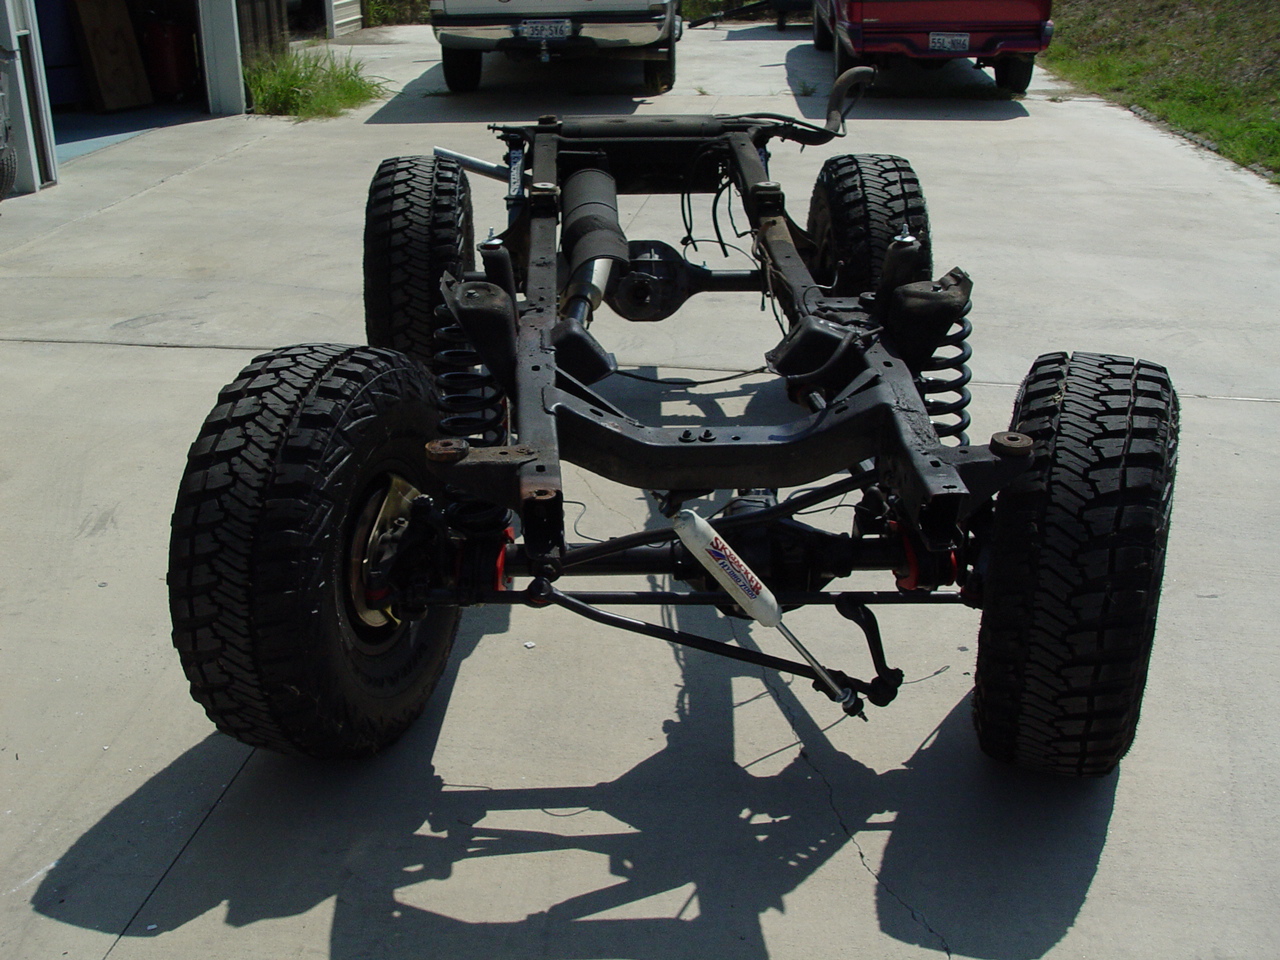
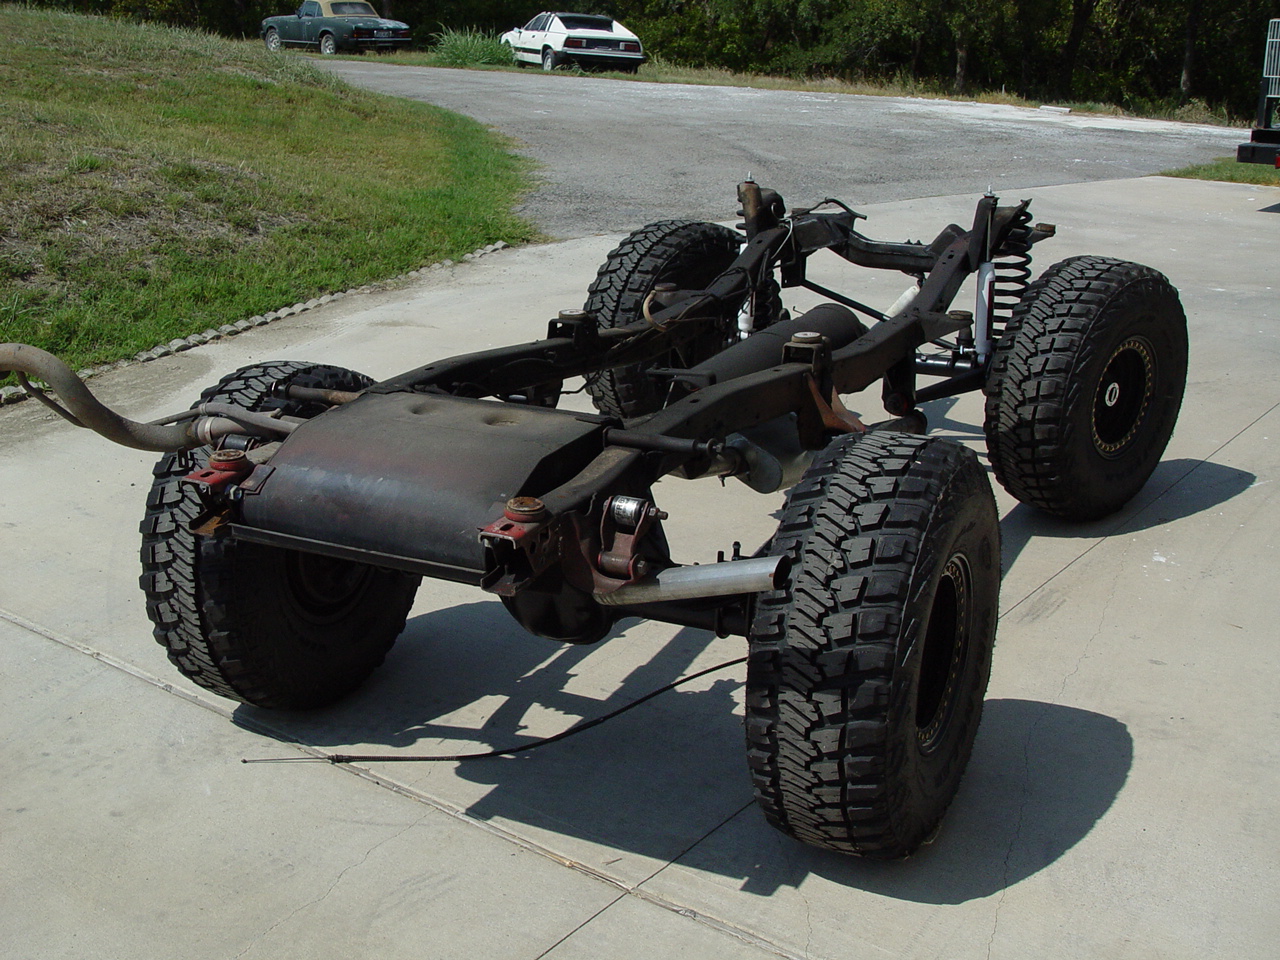
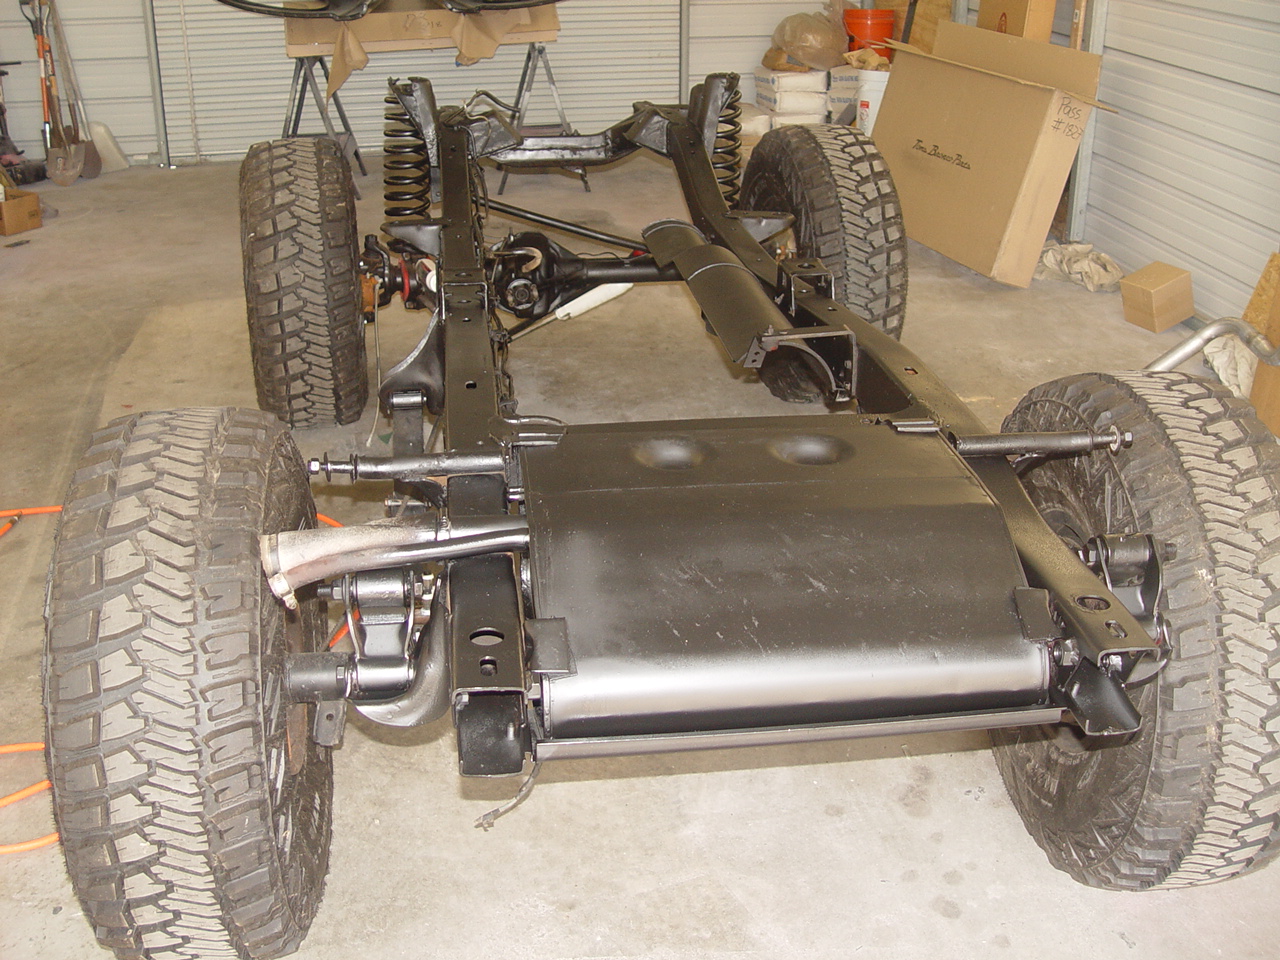
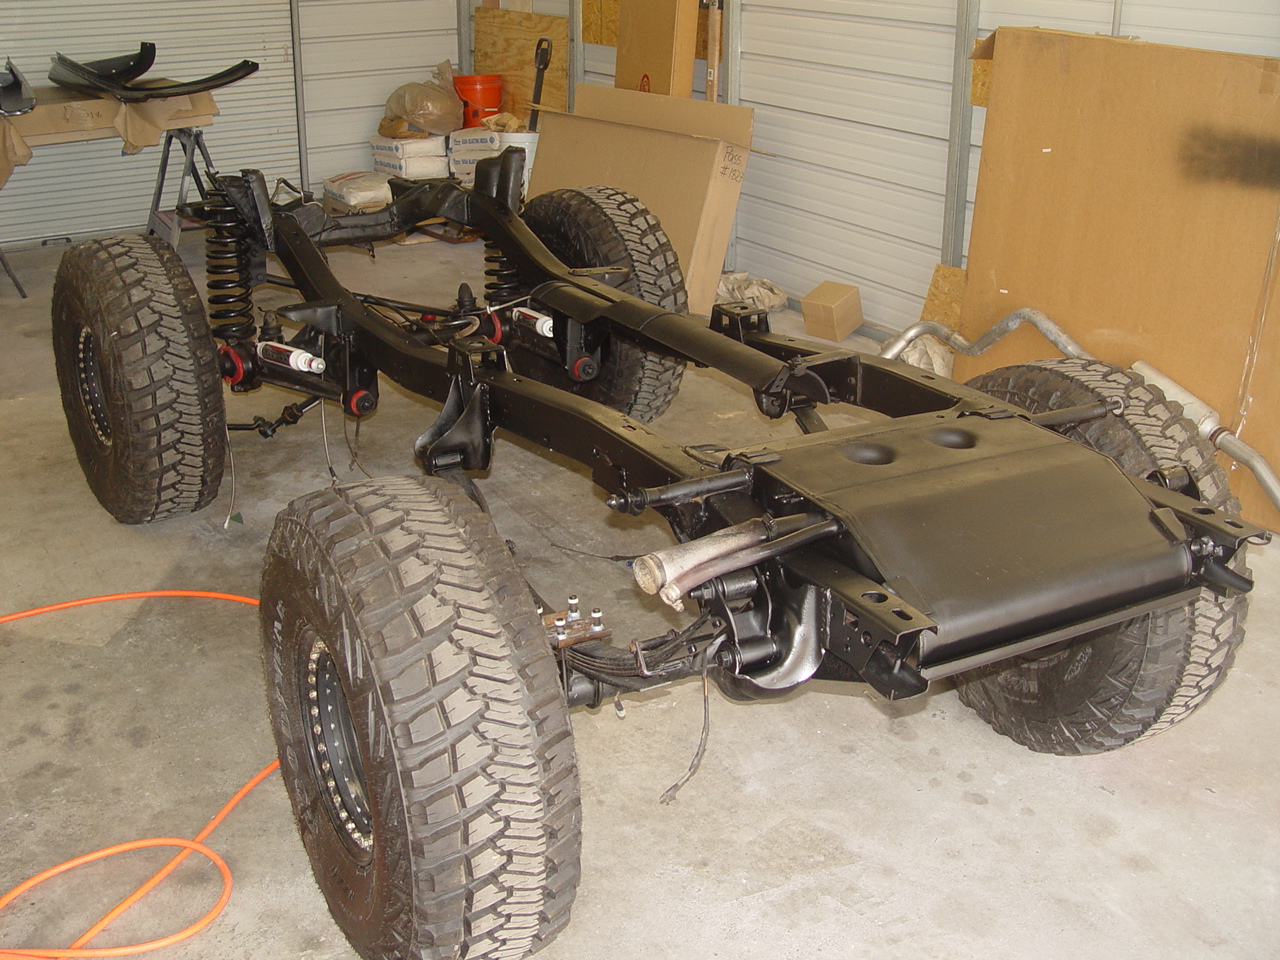
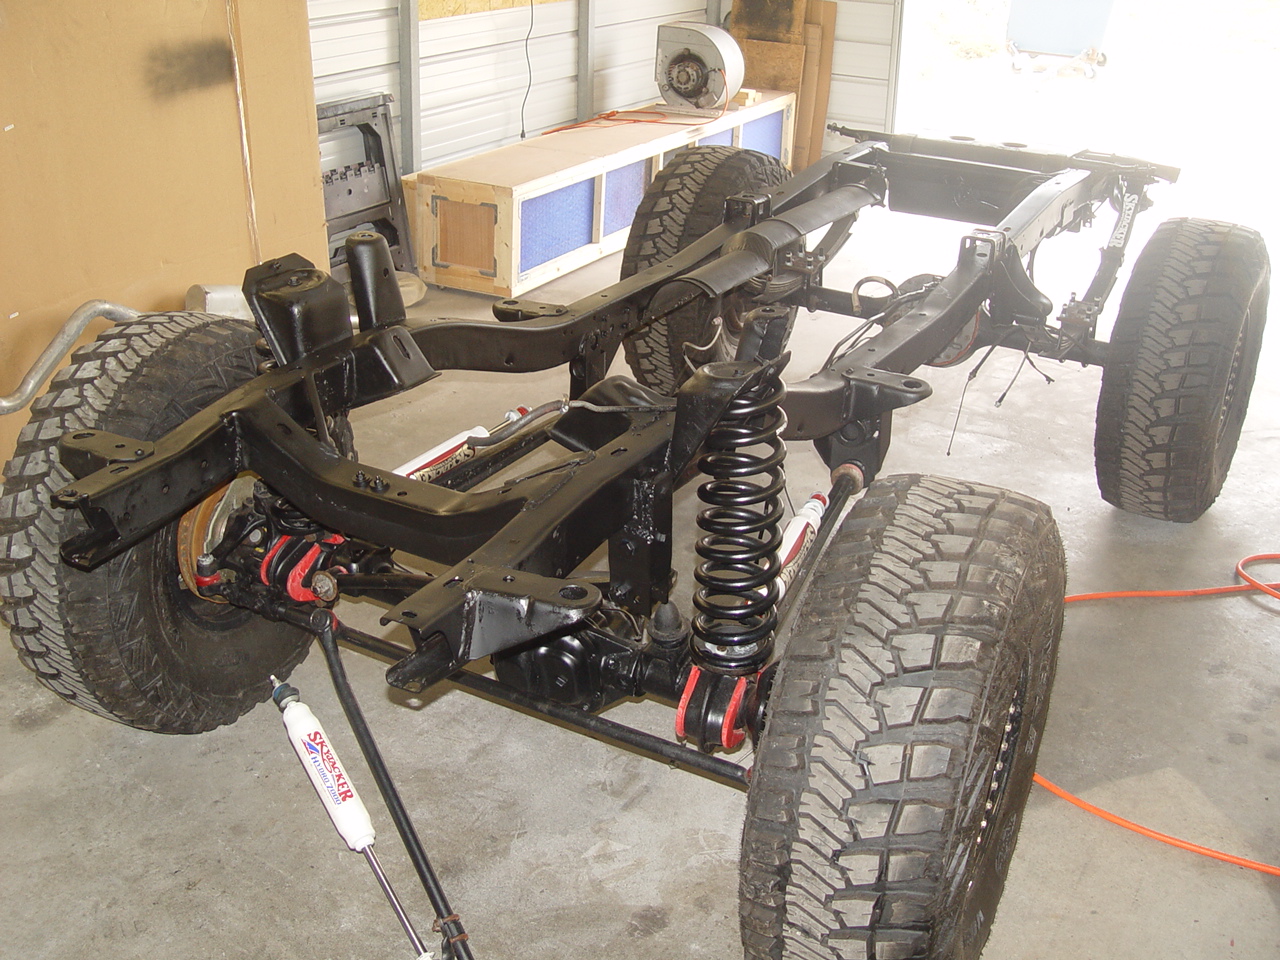
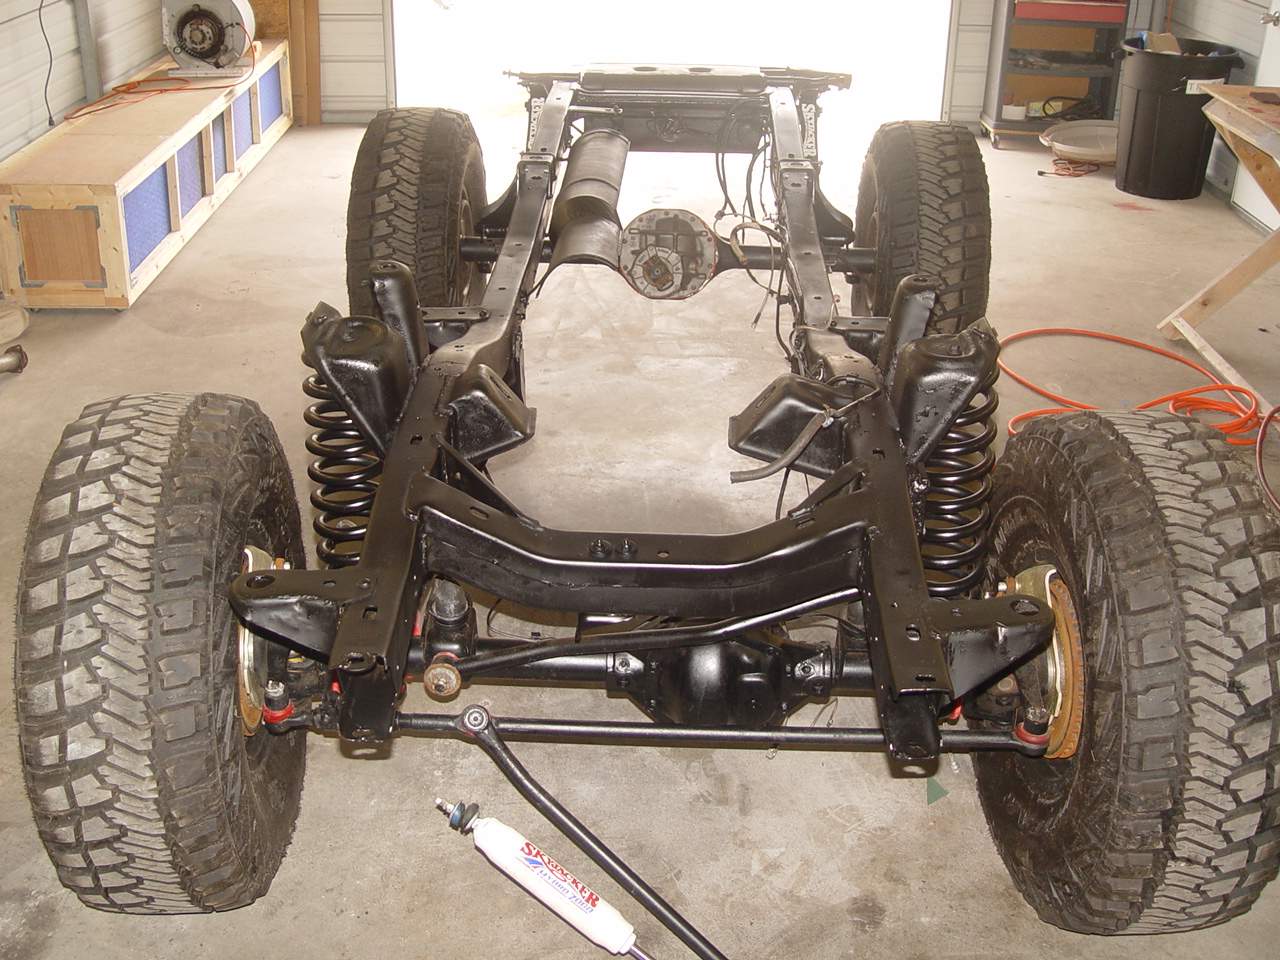
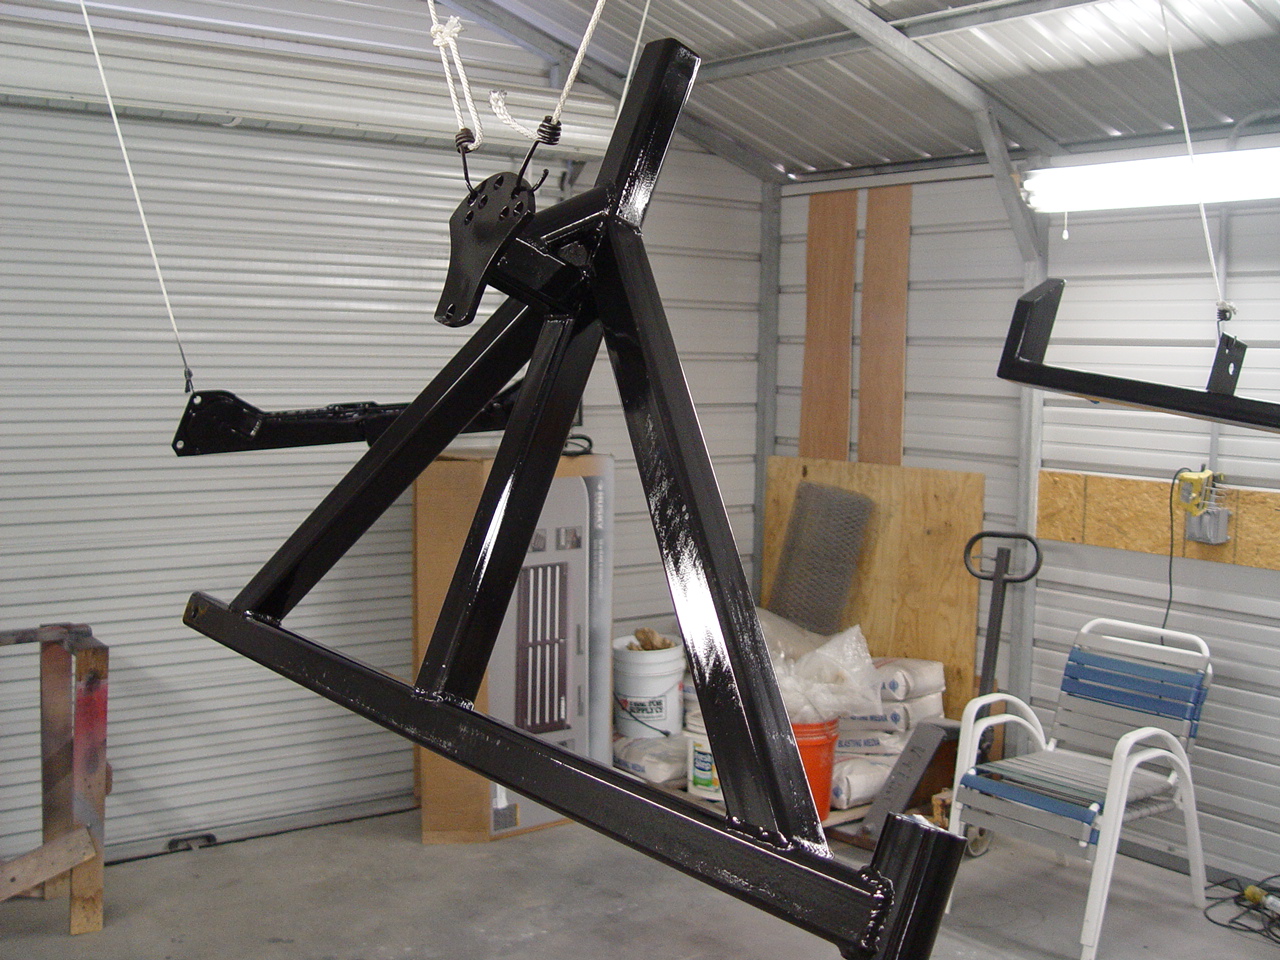
|
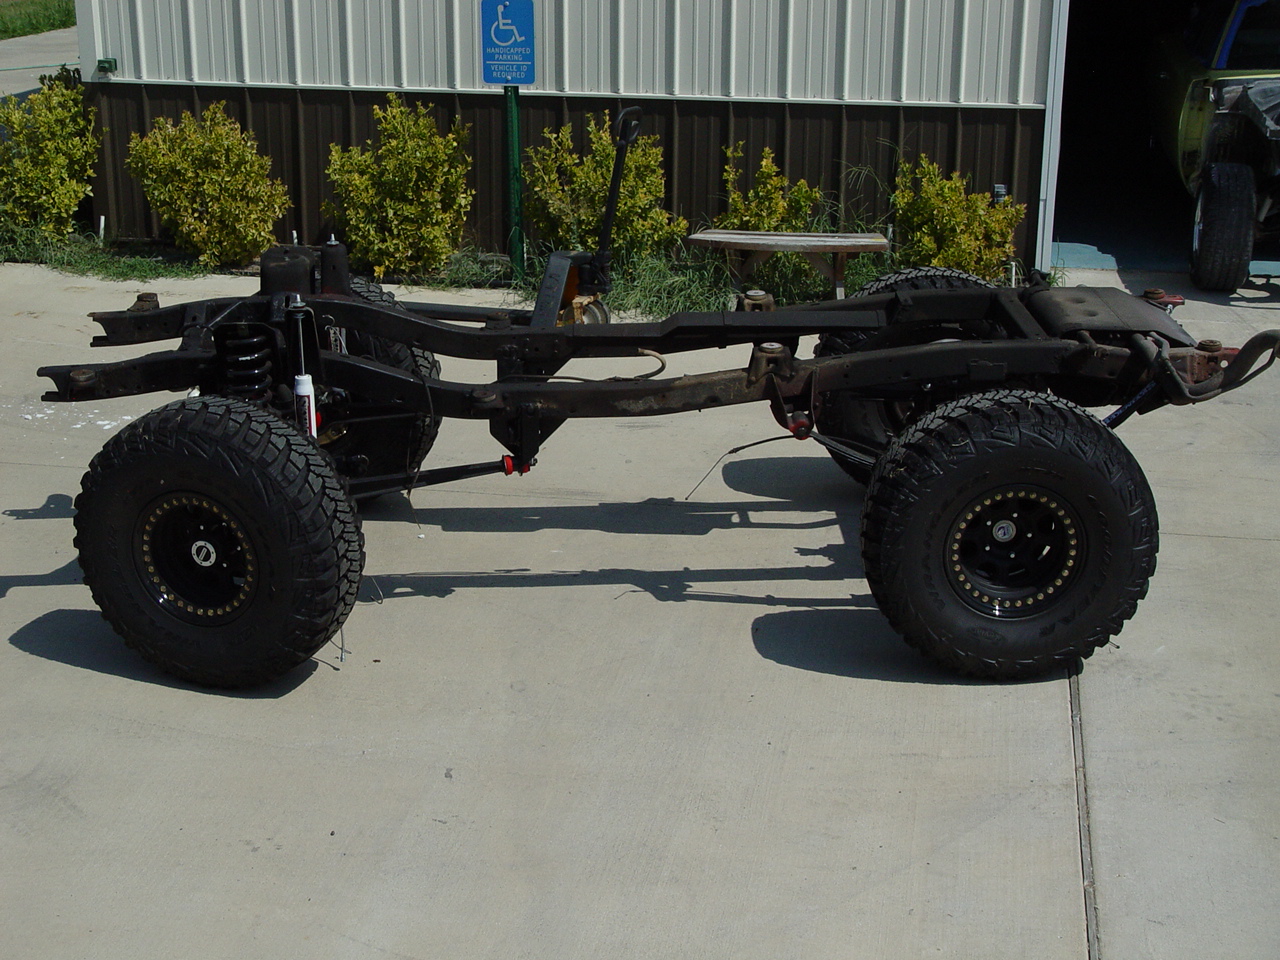
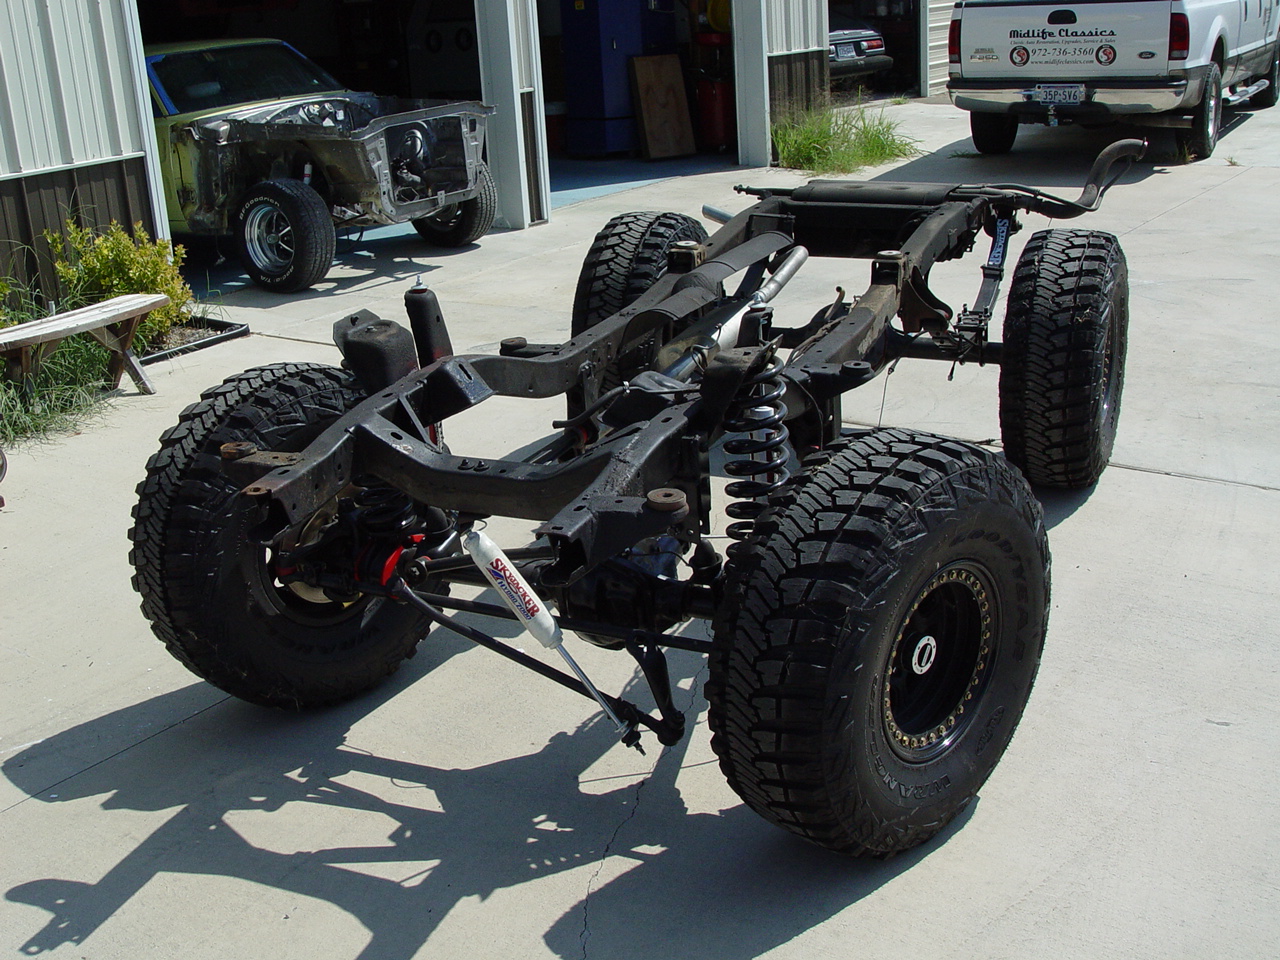
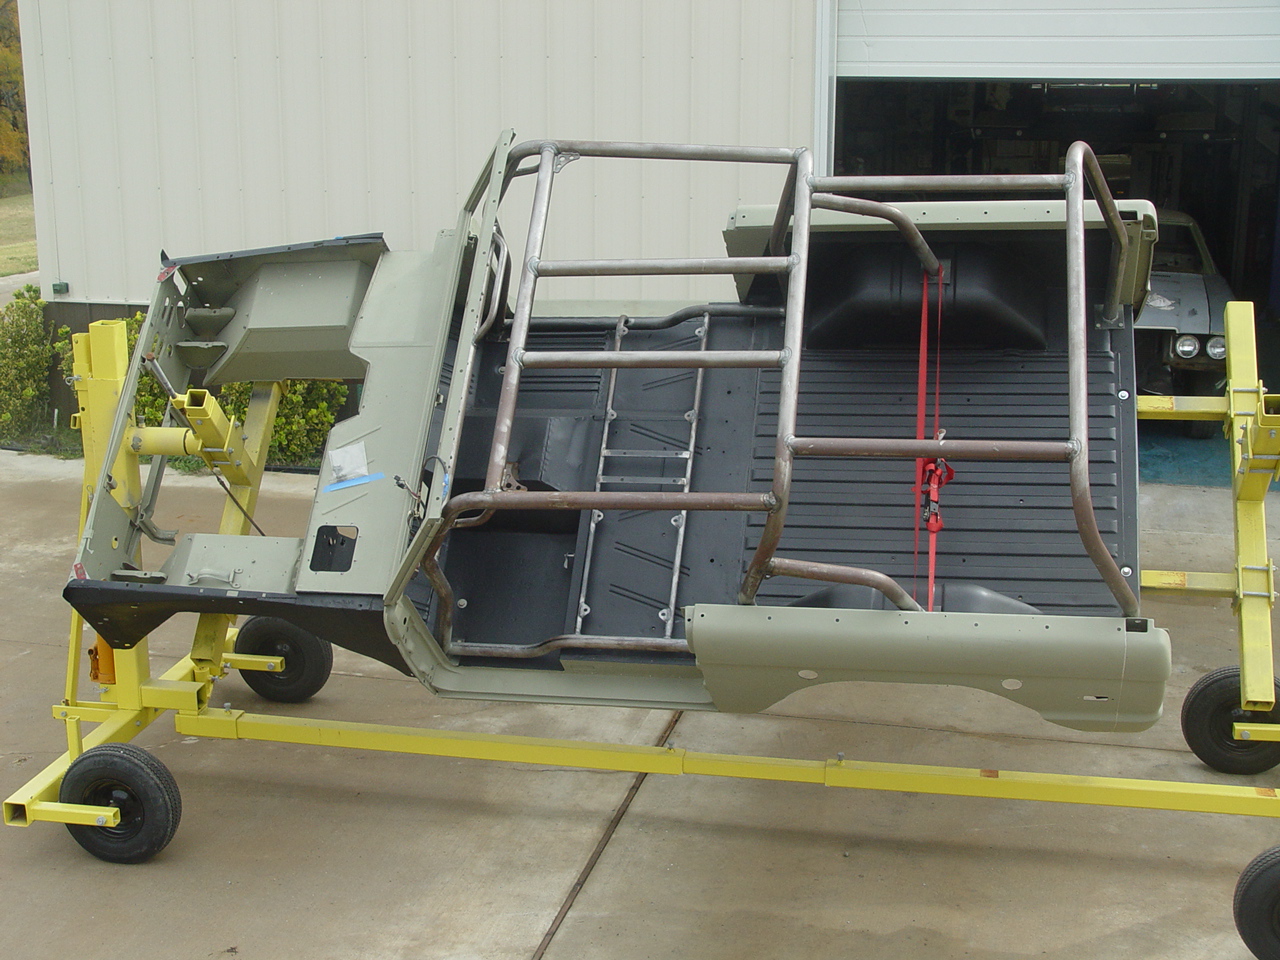
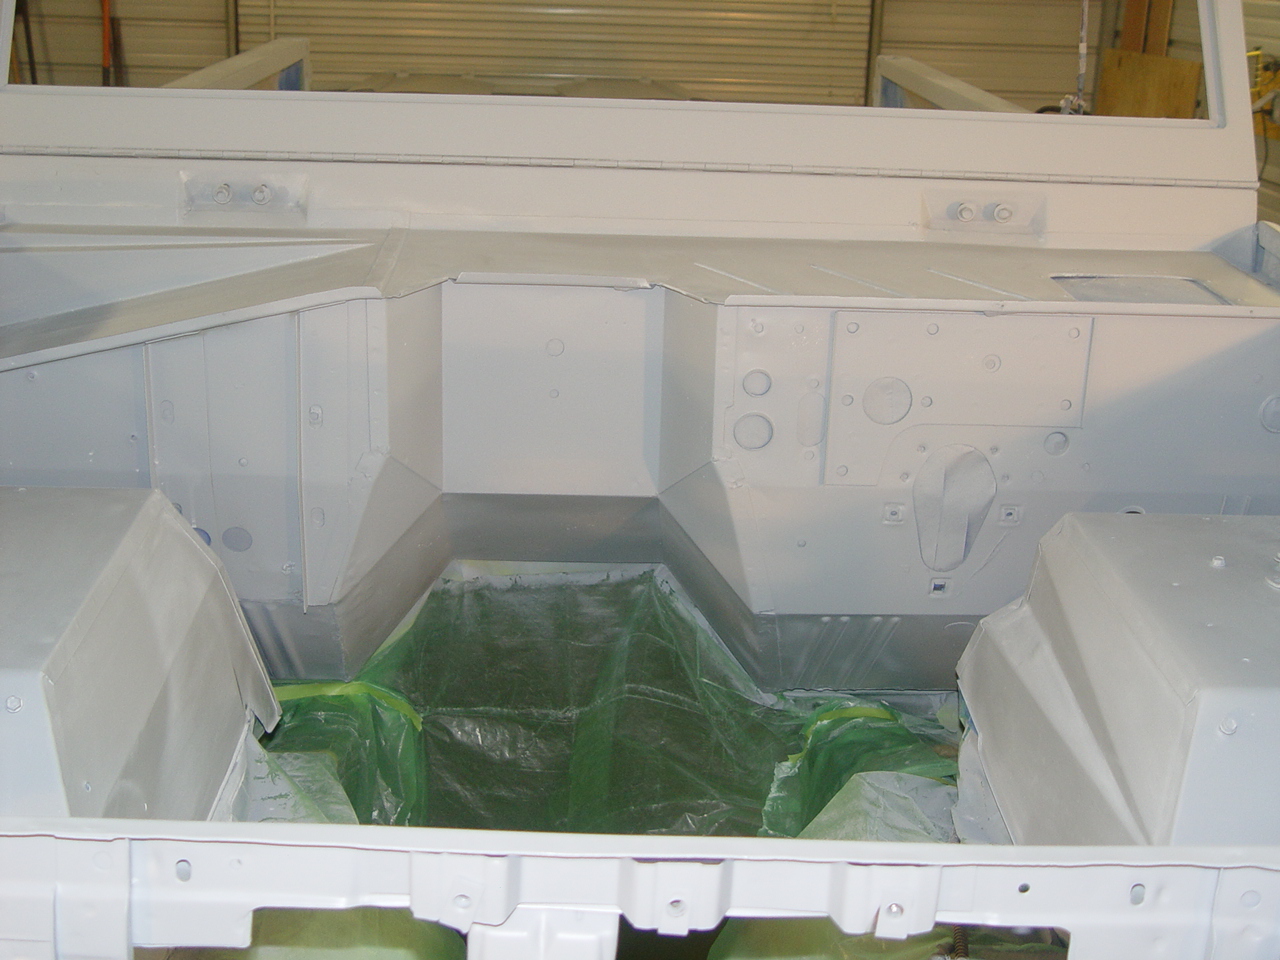
While the body was off the frame, we took the opportunity to clean, treat and recoat it. First it was sprayed with Gunk degreaser and scrubbed thoroughly with a brush. Next we sprayed it with POR-15's Marine Clean degreaser and rinsed that off with a pressure washer. The last step before painting it was to etch the surface and convert any rust with POR-15's Metal Prep - which leaves the surface with a white haze. Finally, we sprayed the entire frame with POR-15's Chassis Coat to give it a nice semi-gloss black finish that will protect it from rust.
Once we had the frame repainted and the body protected from rust with etch primer on the outer body and POR-15 inside and underneath, we lowered the body down onto the frame for the last time and secured it with a fresh set of urethane body mount bushings.
|
||||||
 |
 |
 |
 |
 |
||
 |
 |
 |
 |
 |
||
 |
 |
 |
 |
 |
||
| Click on an image for a larger view | ||||||
NEW BODY PANELS | ||||||
|
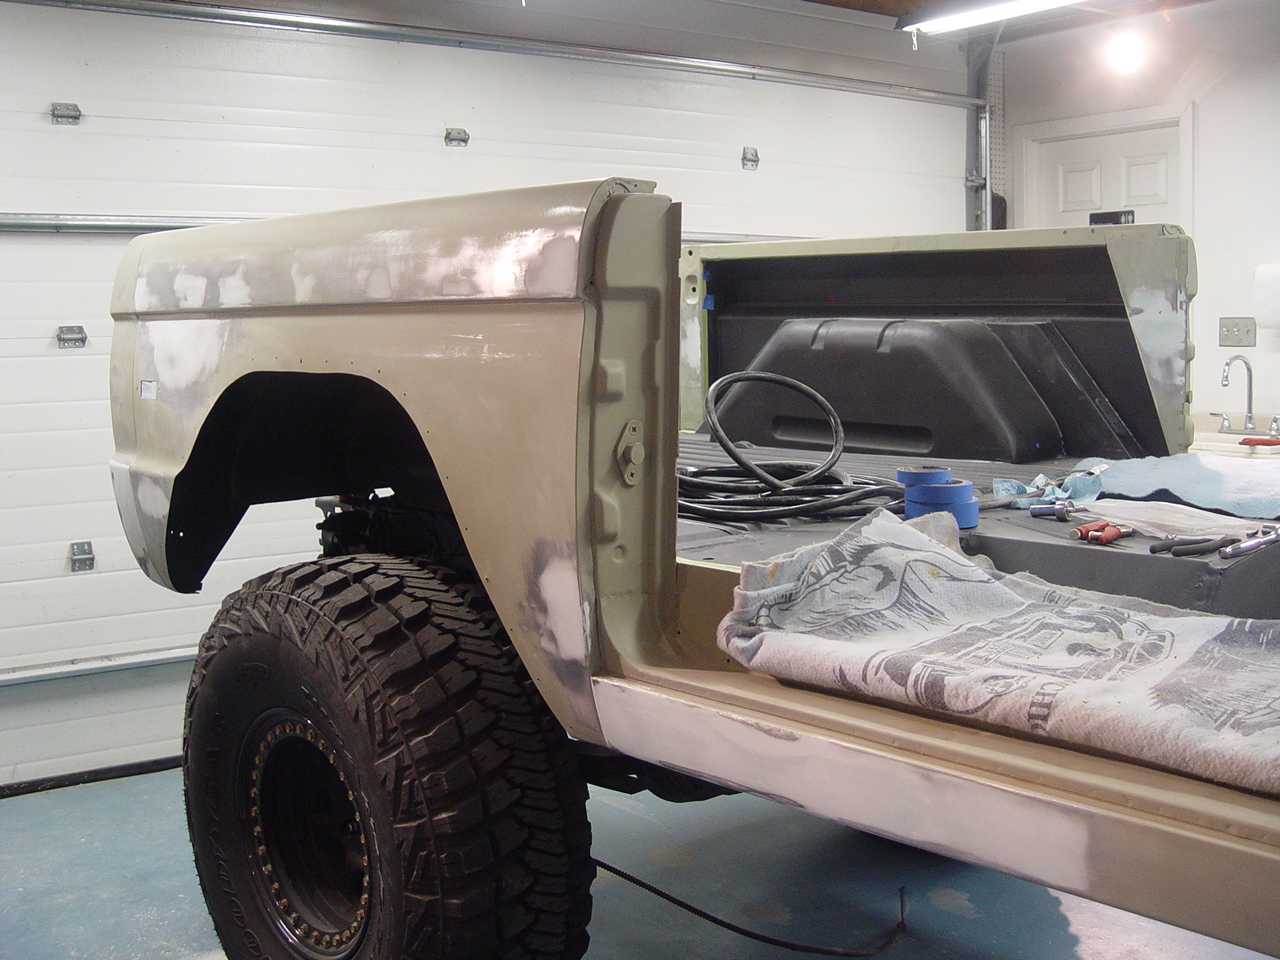
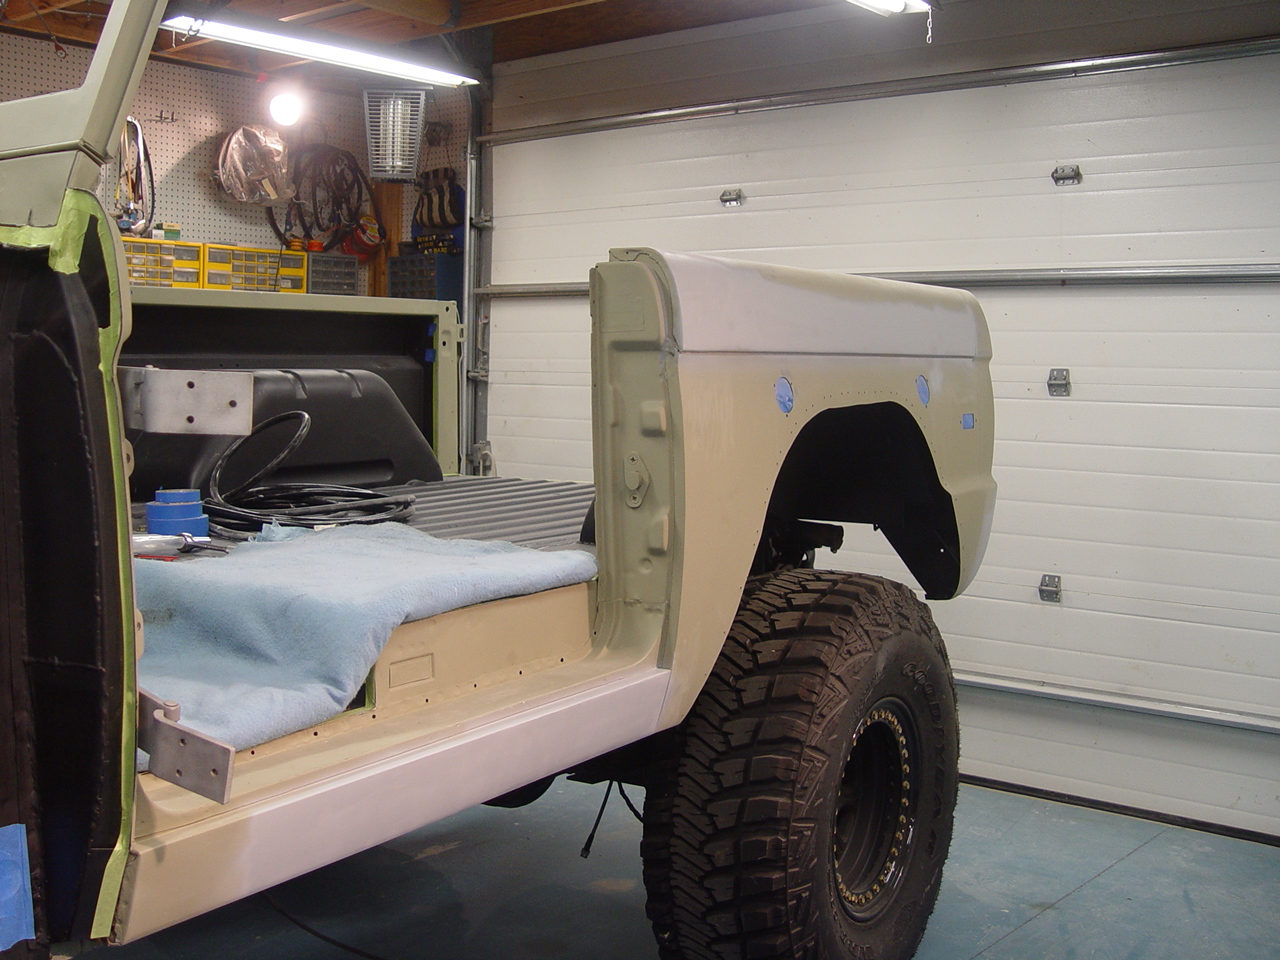
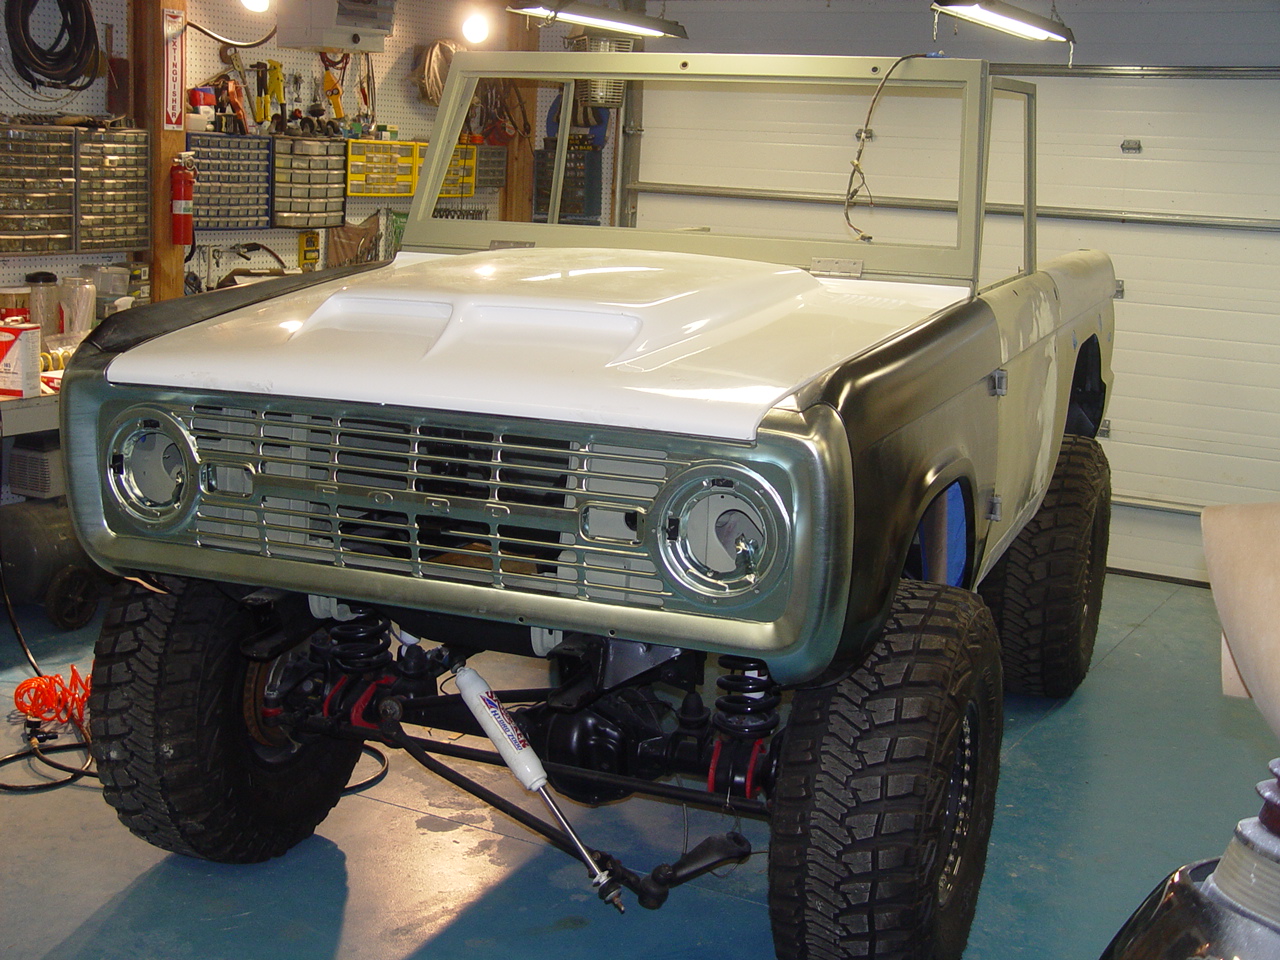
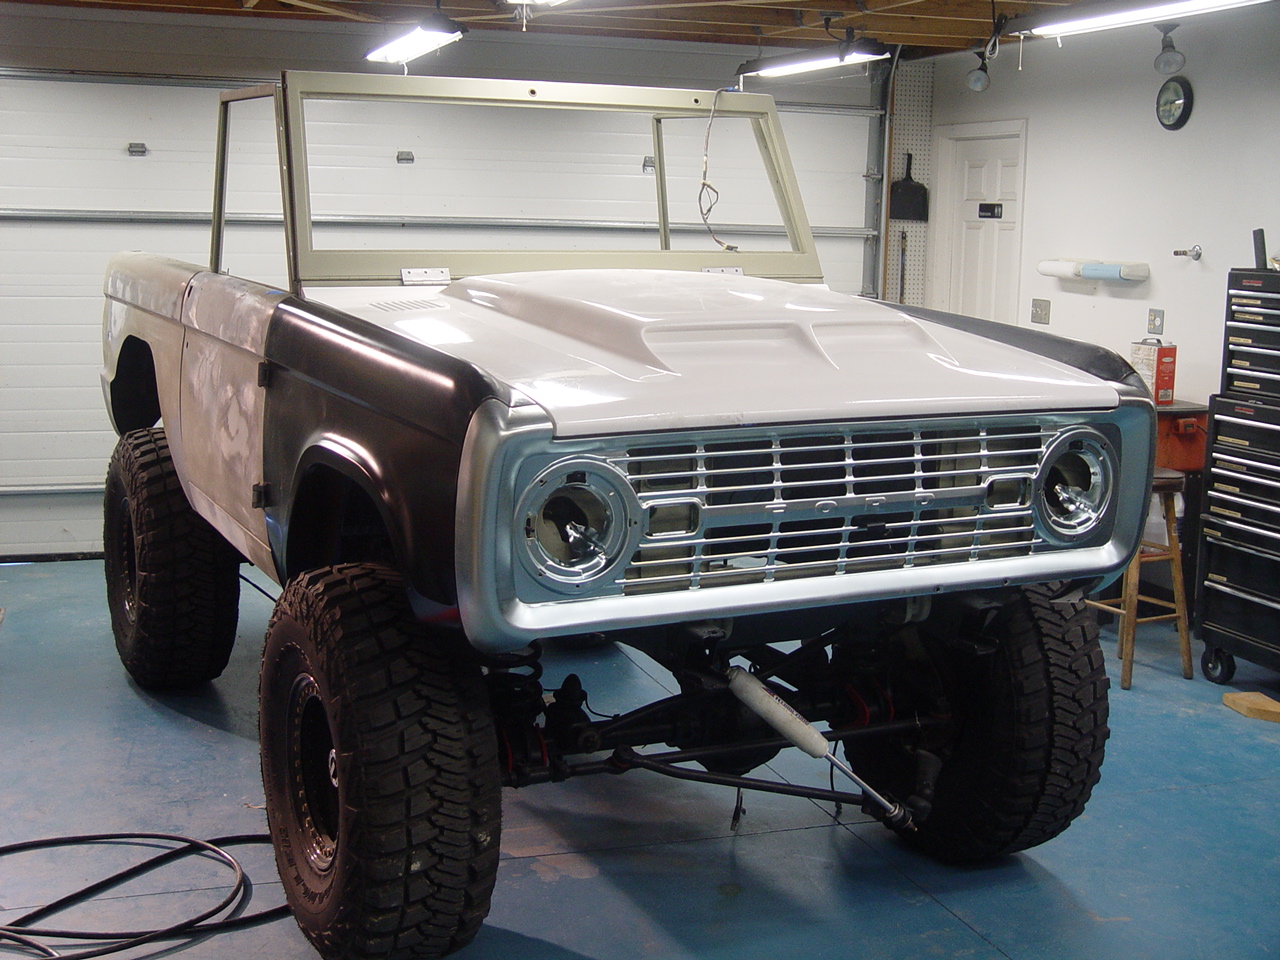
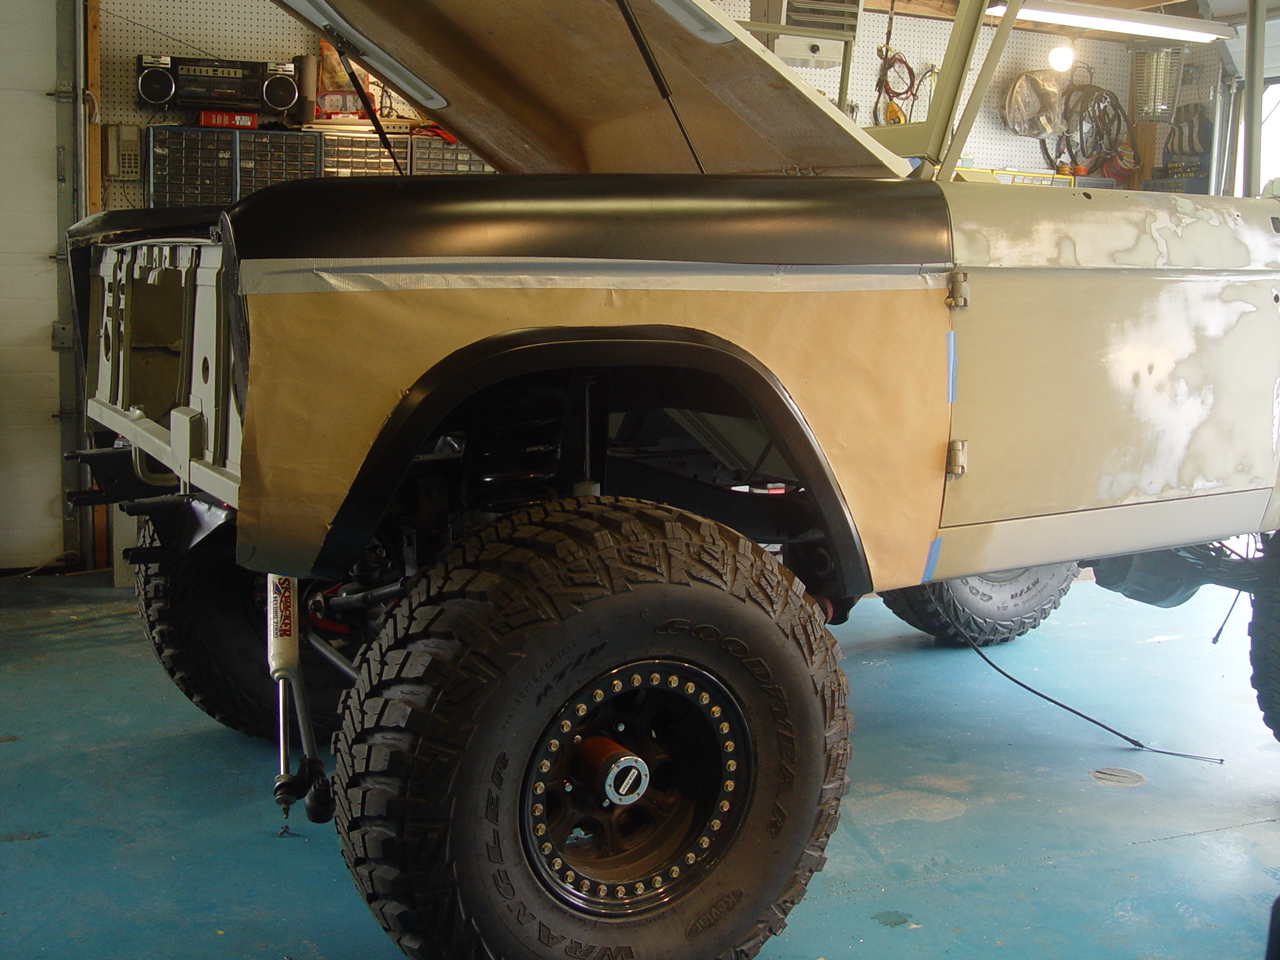
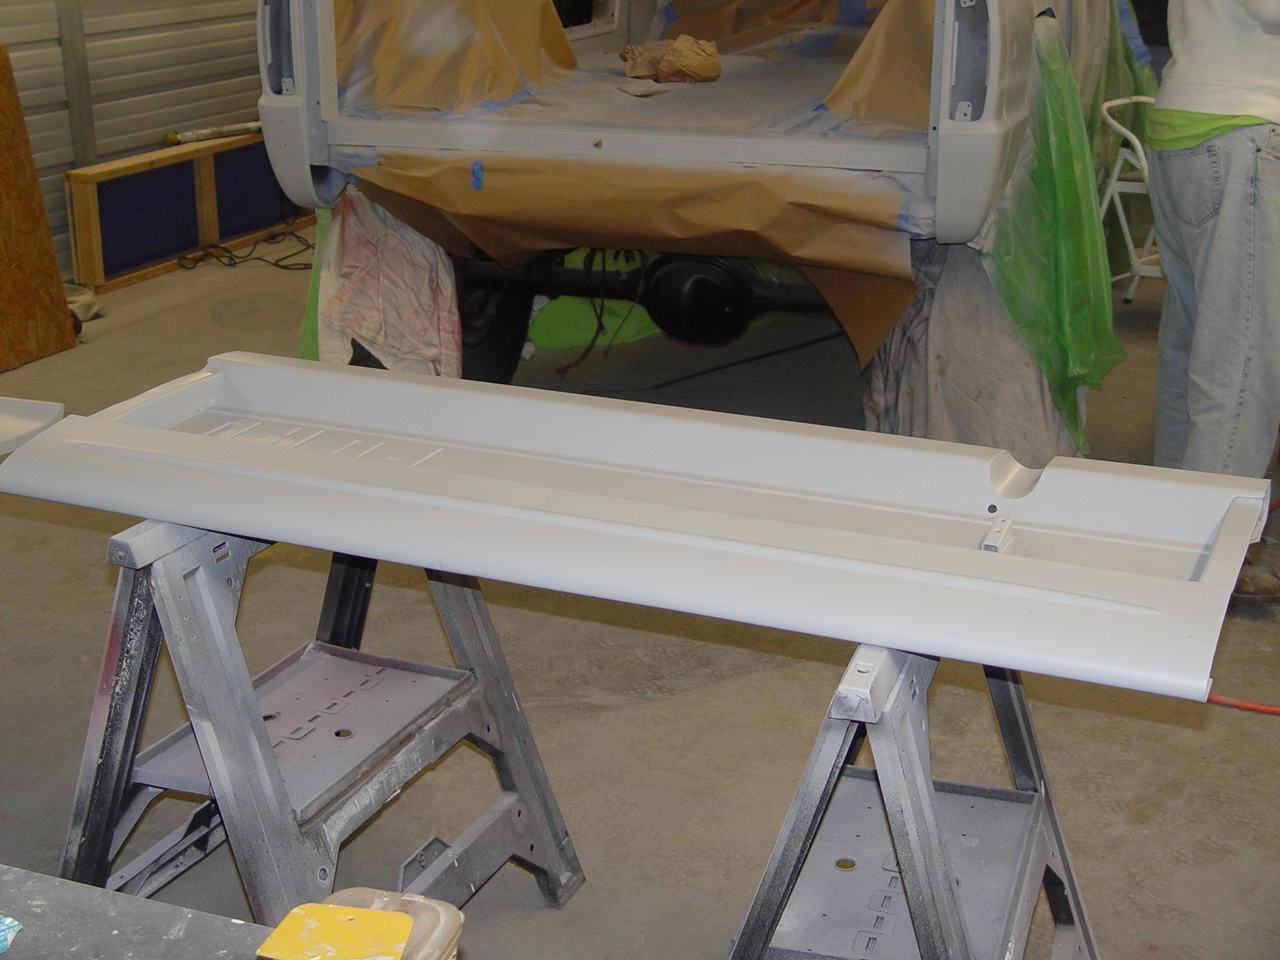
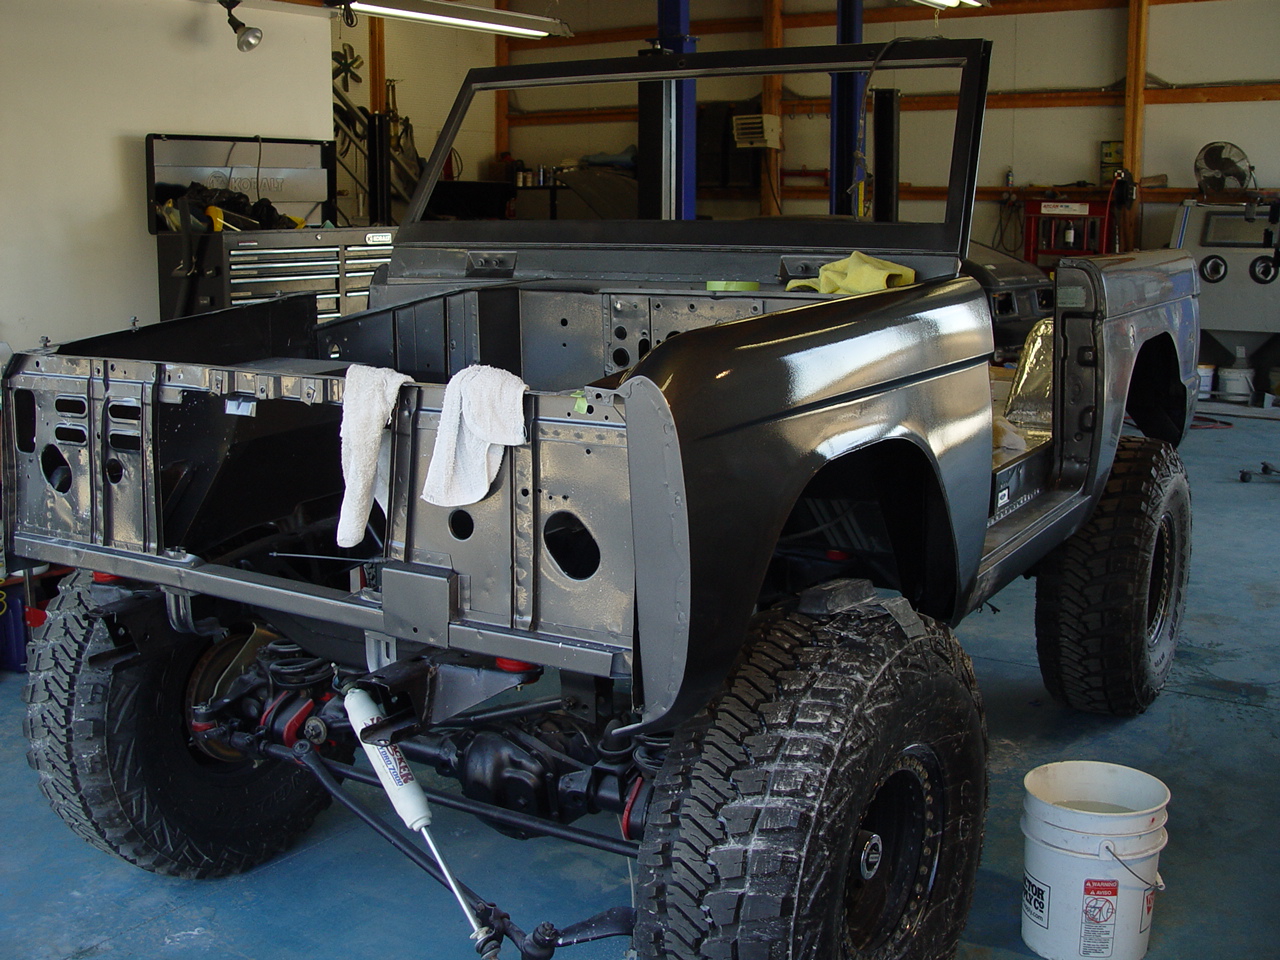
After completing the sheetmetal repair and making sure the underbody and interior surfaces are protected from rust, it was time to test fit all the new body panels and do any necessary modifications, tweaking and/or repairs prior to doing the final bodywork and paint prep.
First came the front fenders. These came to us as new reproductions - and they fit quite well. As to be expected, some minor tweaking was required to get them to fit just right and make sure all the panel seams are as even as possible ("as possible" being the operative word in an old truck like this). Also, no body panel ever seems to arrive without some minor dings, so those too were addressed.
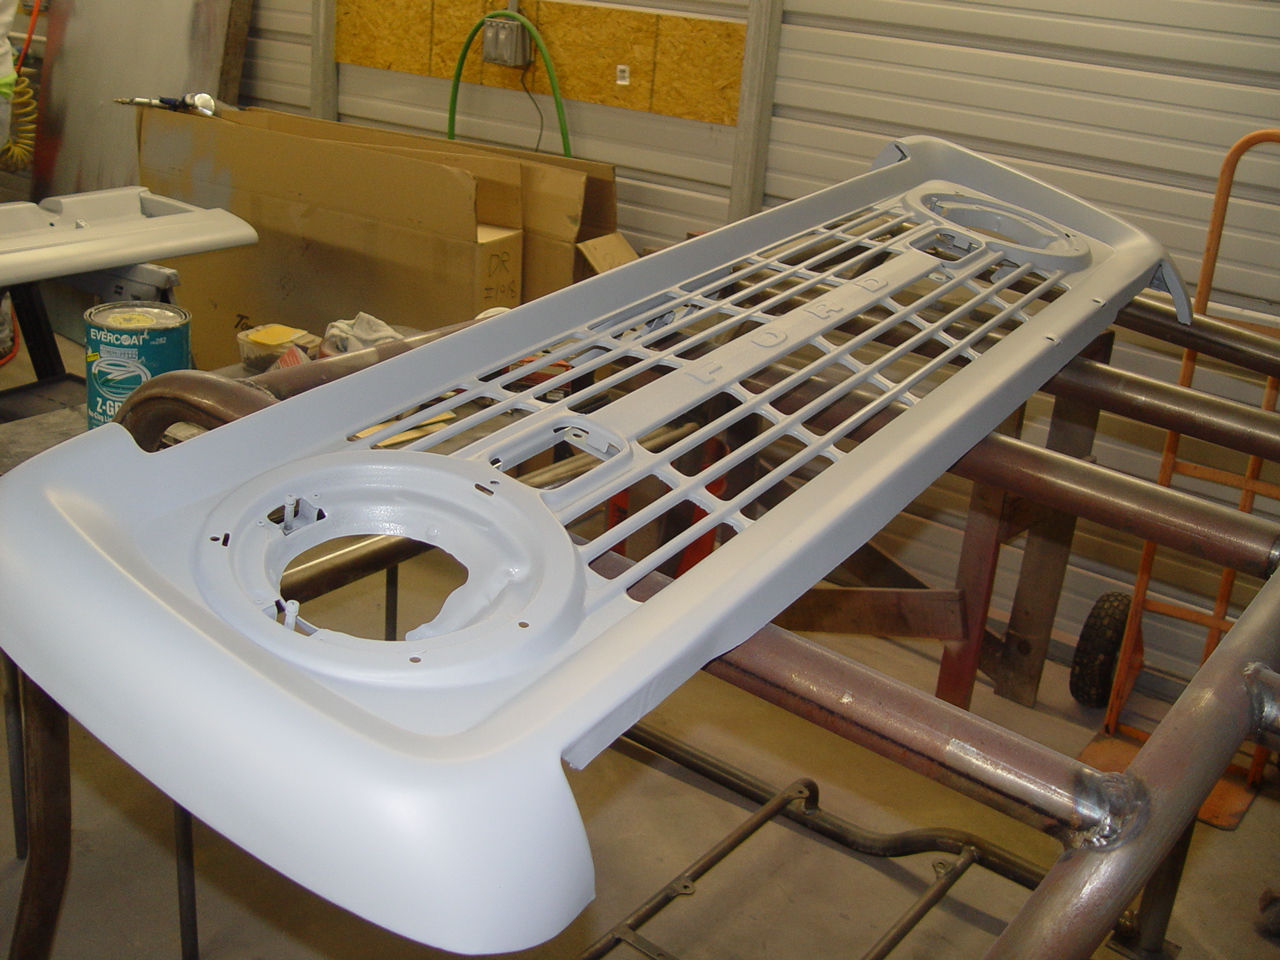
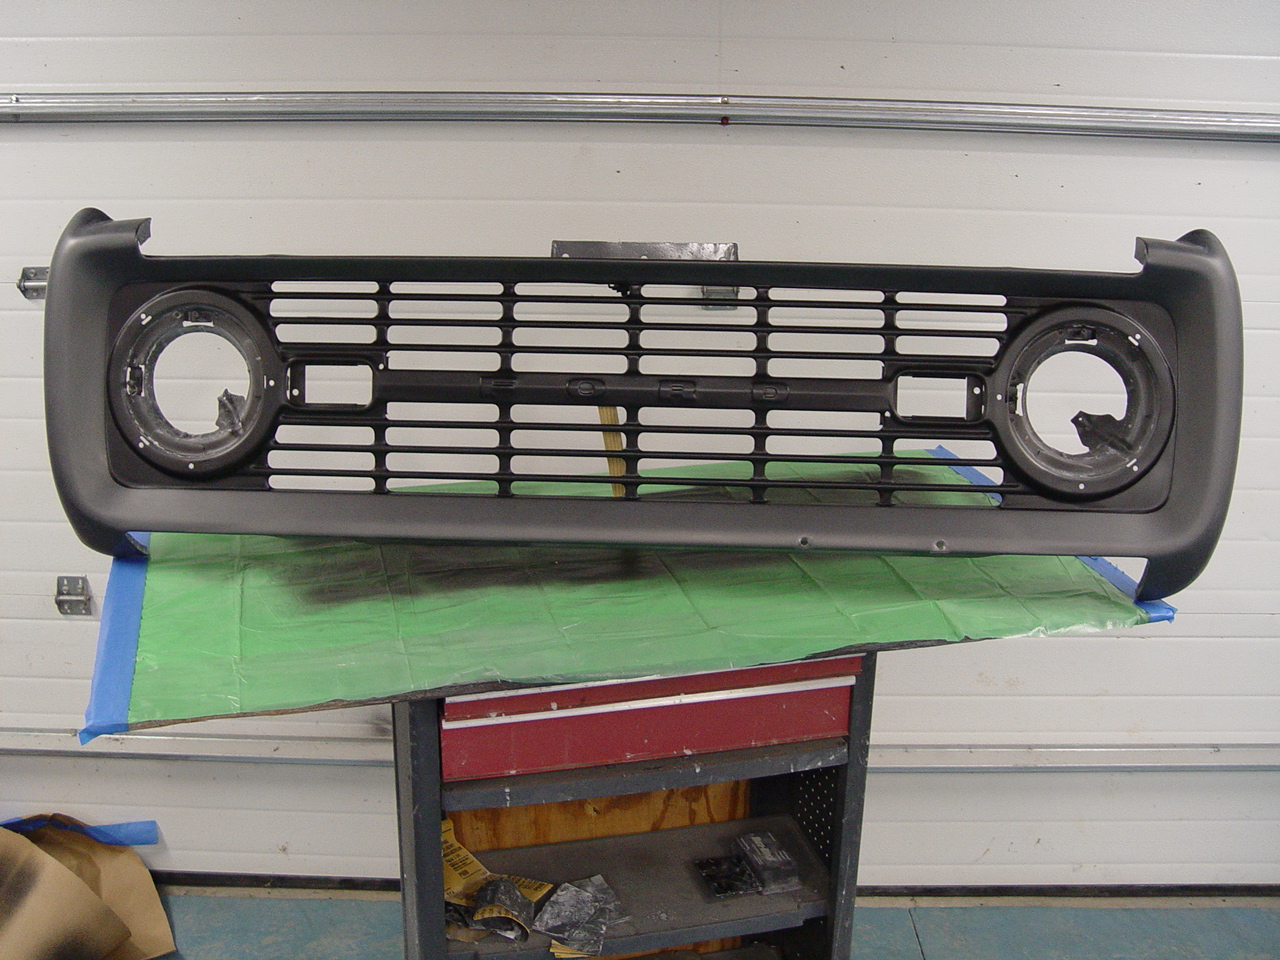
Next was the new grill. This is a new item made using original Ford tooling. Yet, still there was a little bit of work needed to get rid of some imperfections and - believe it or not - stretch marks.
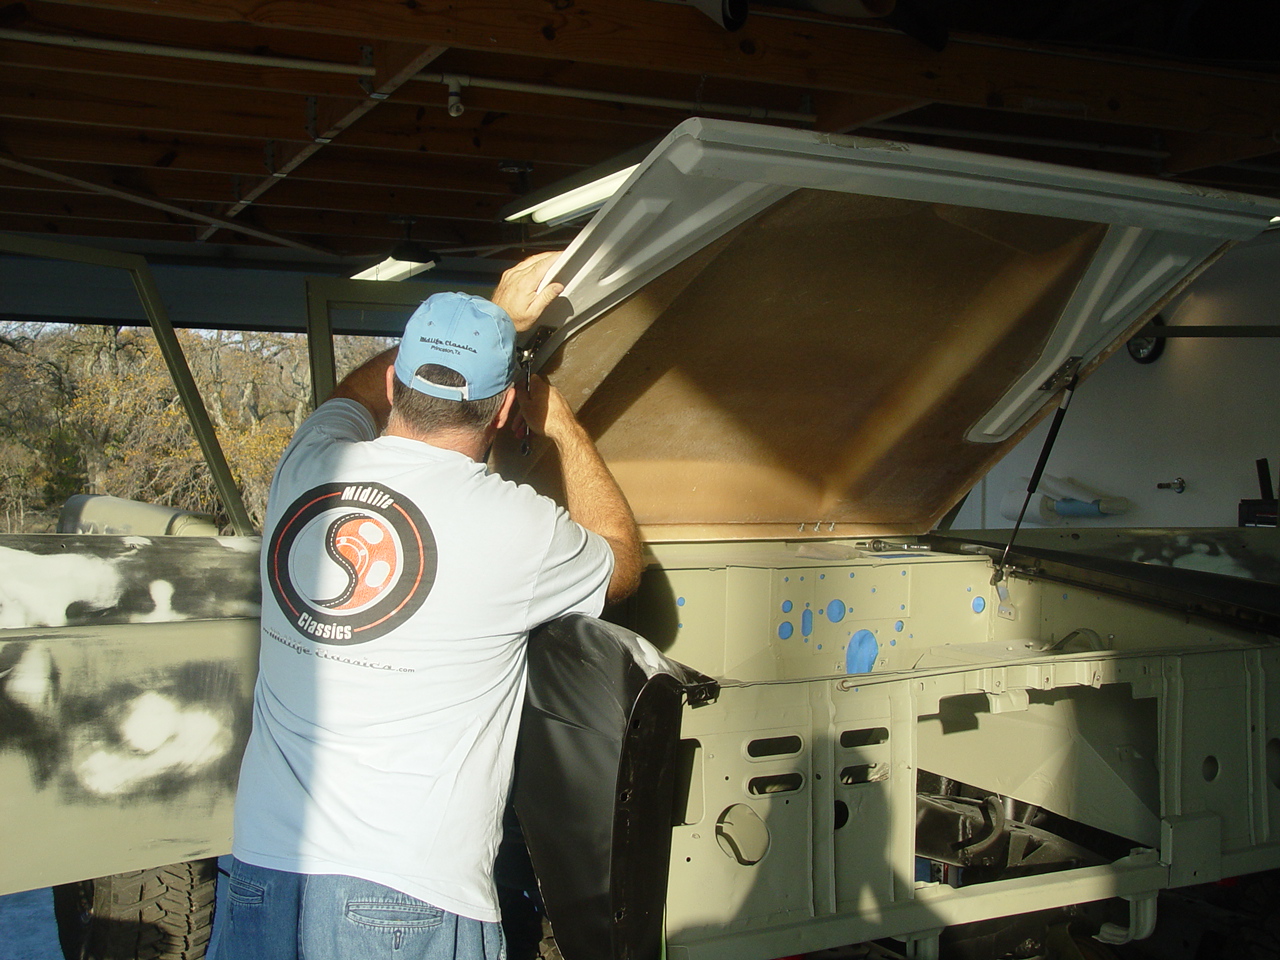
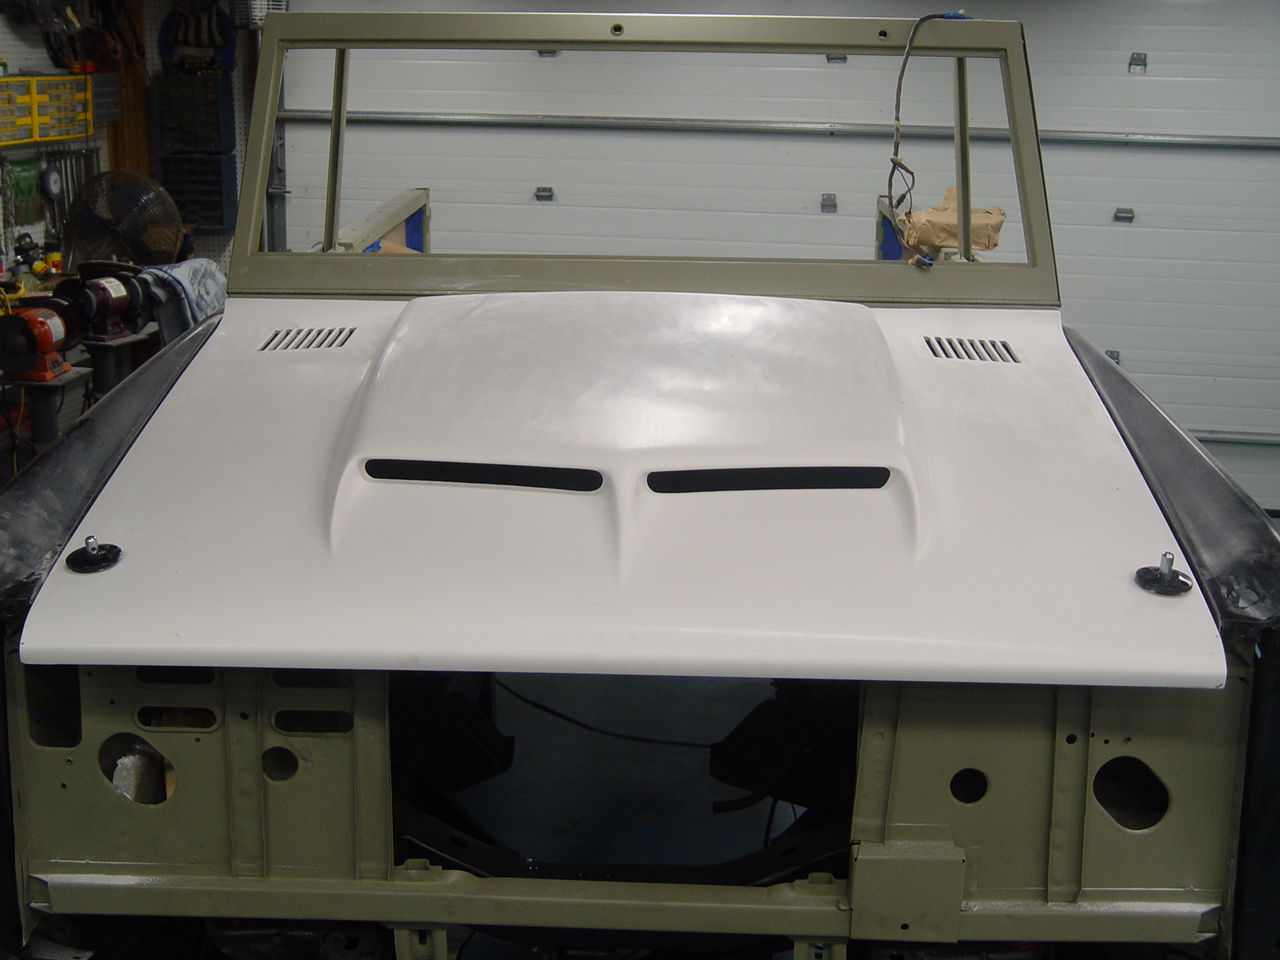
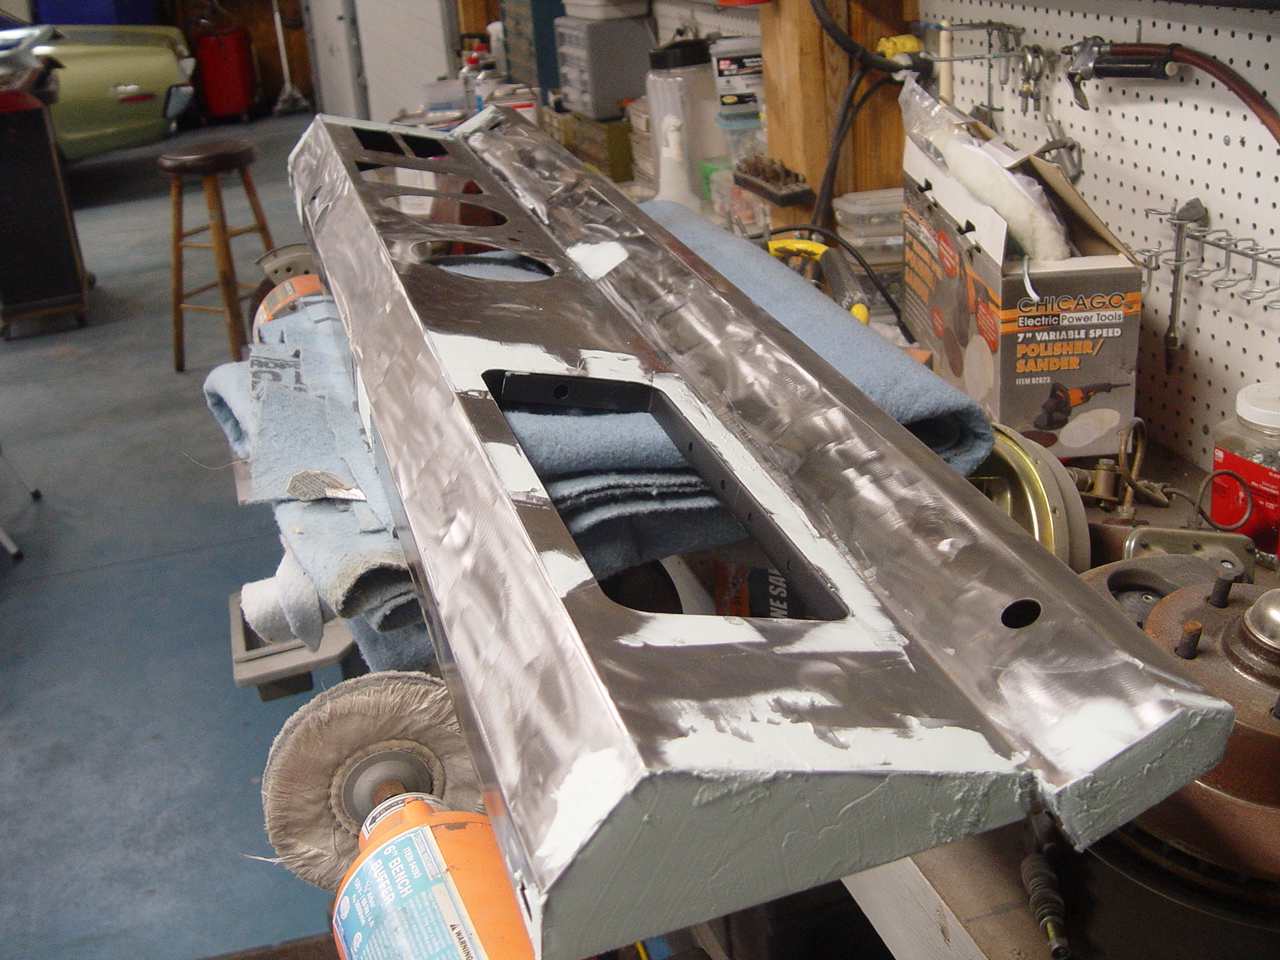
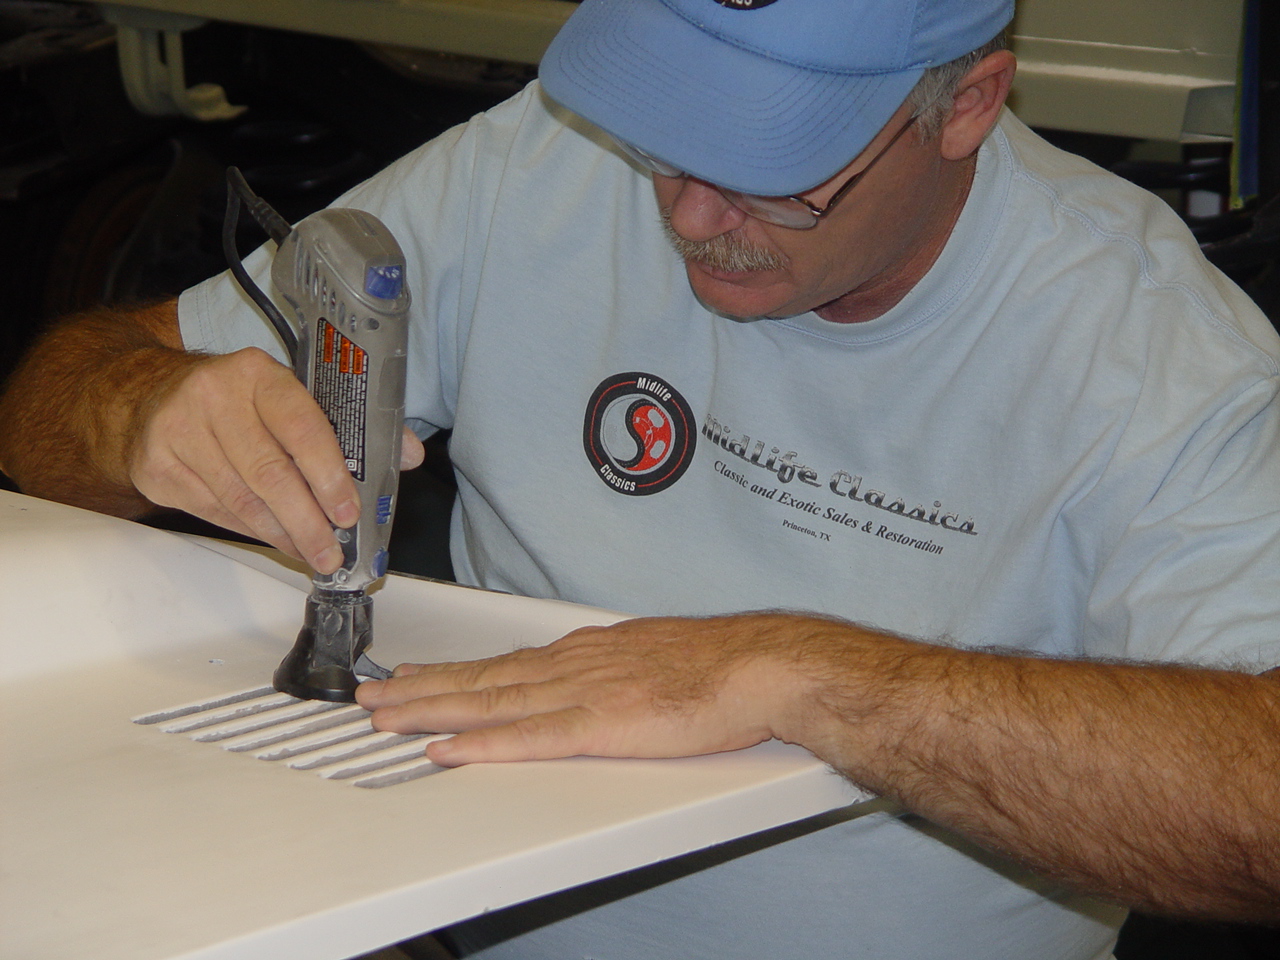
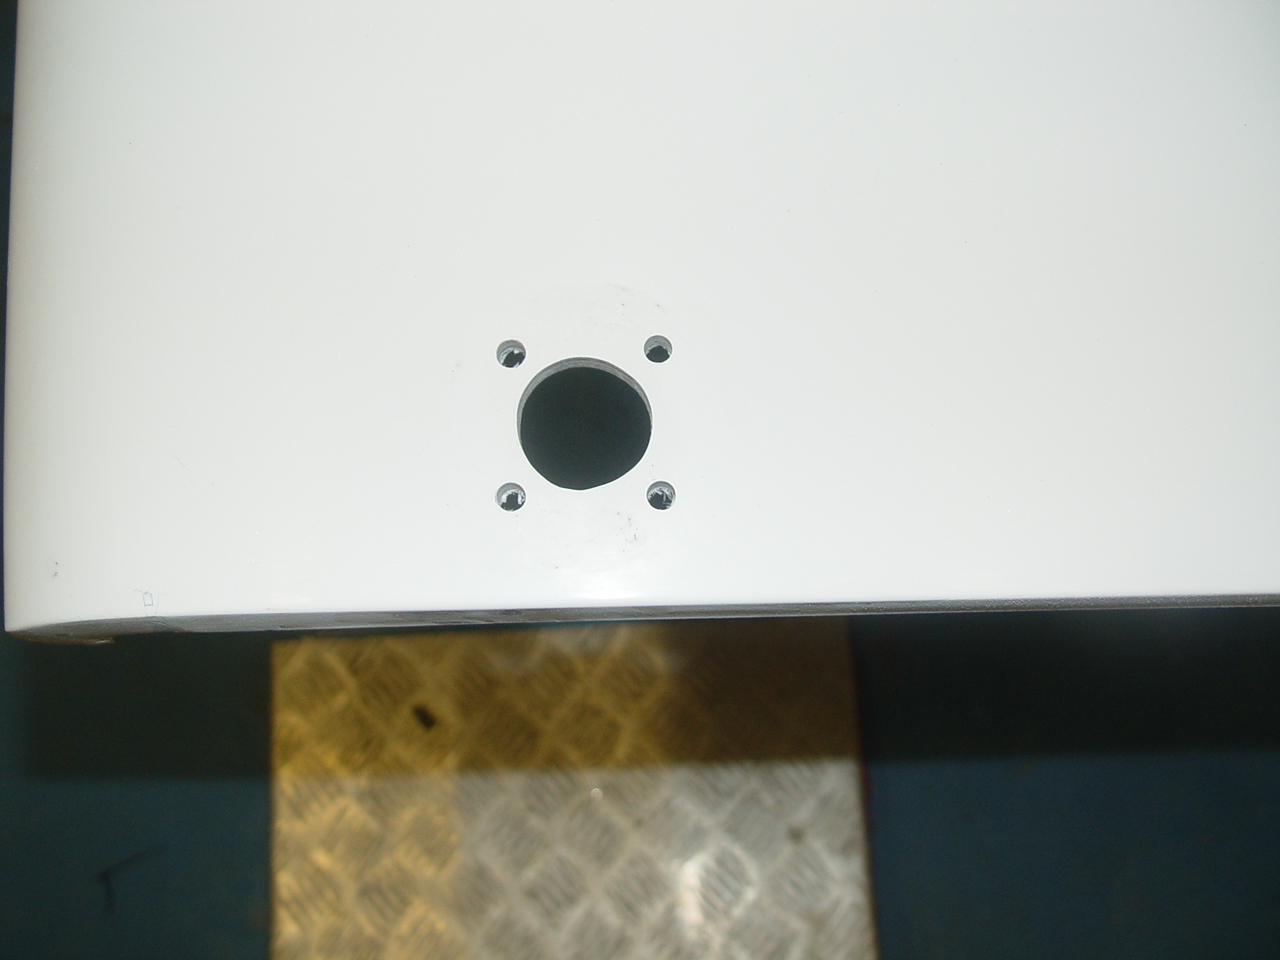
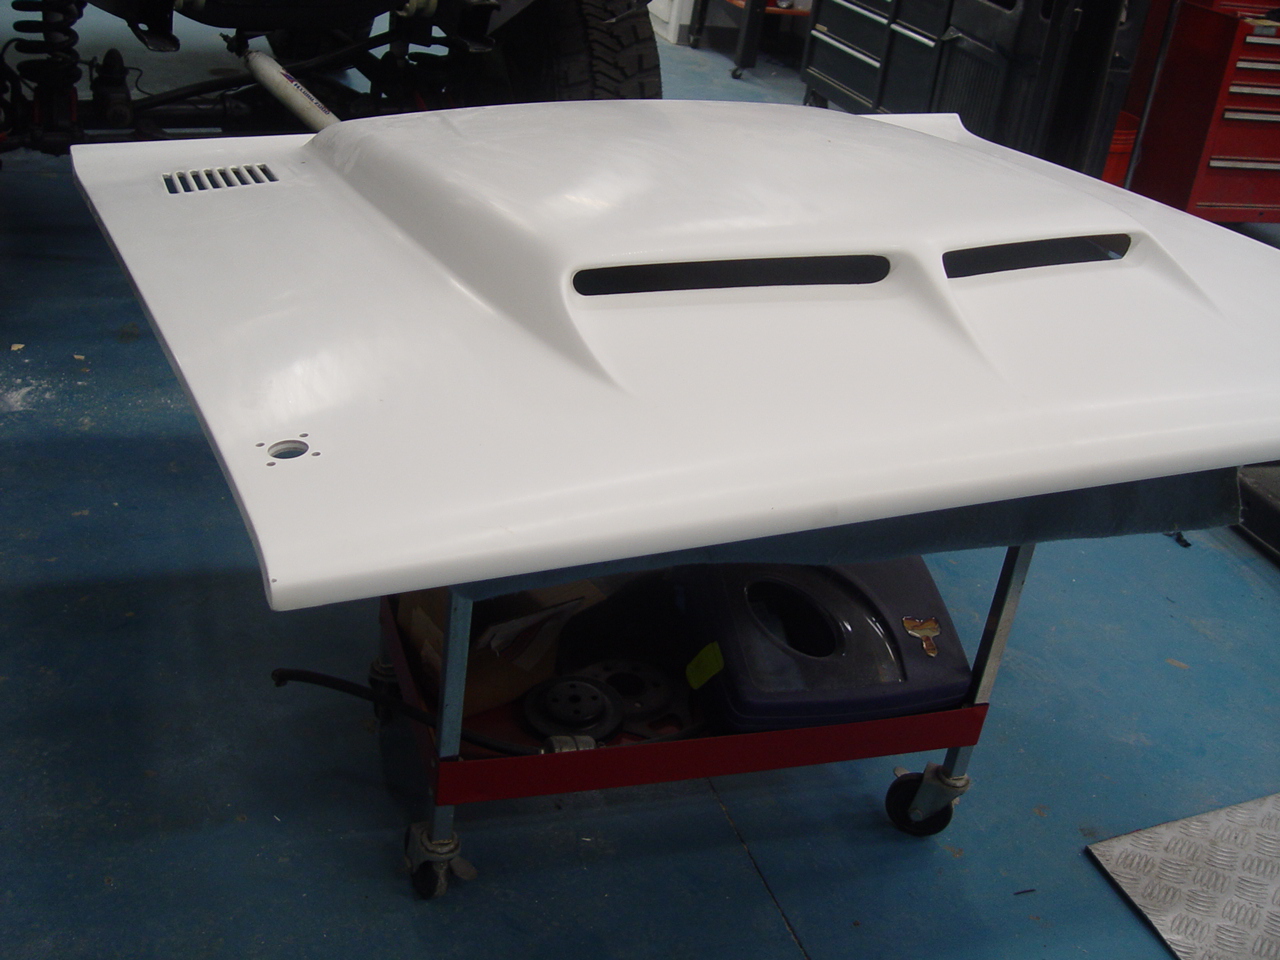
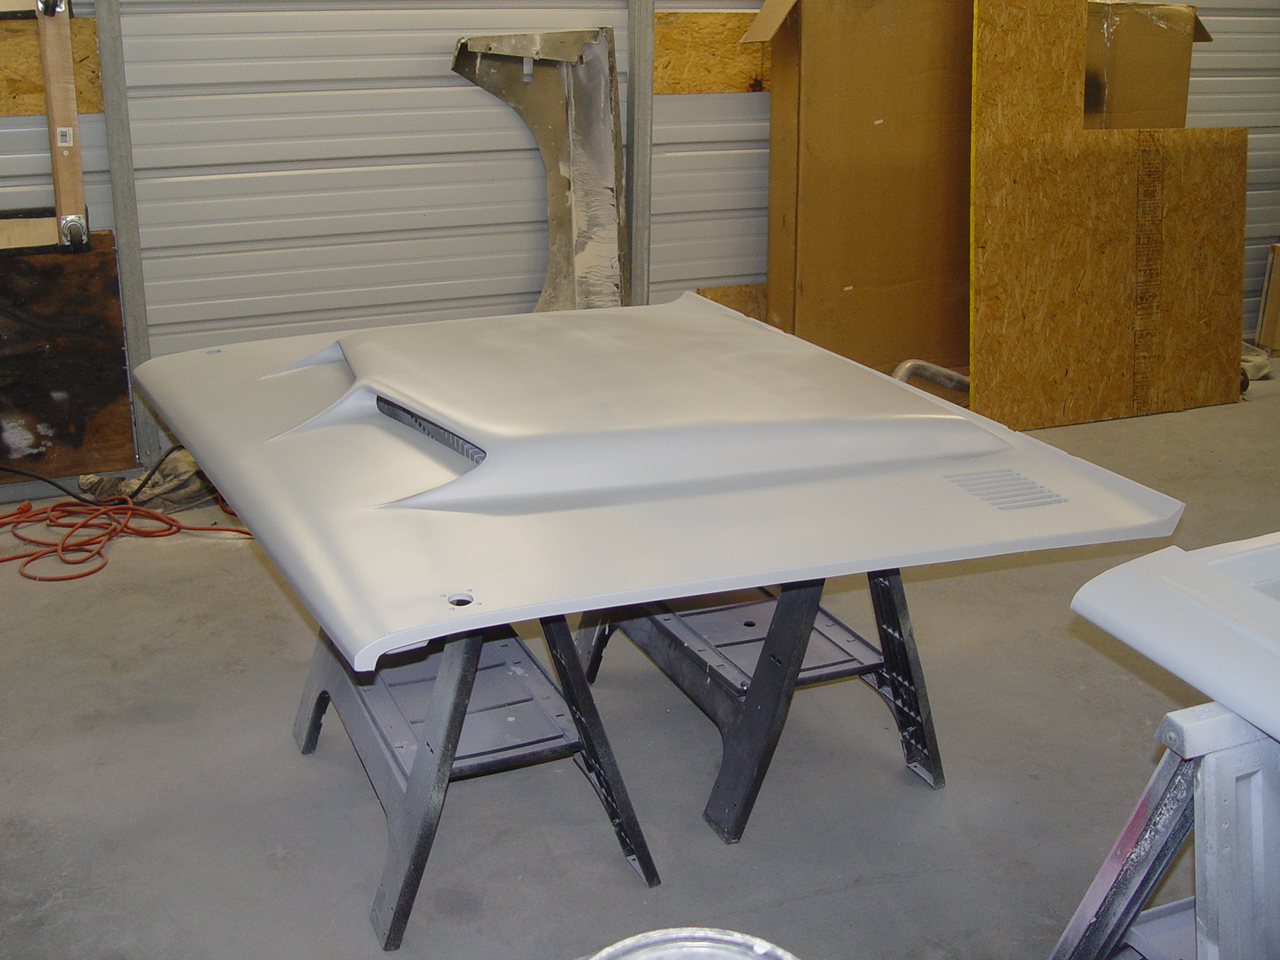
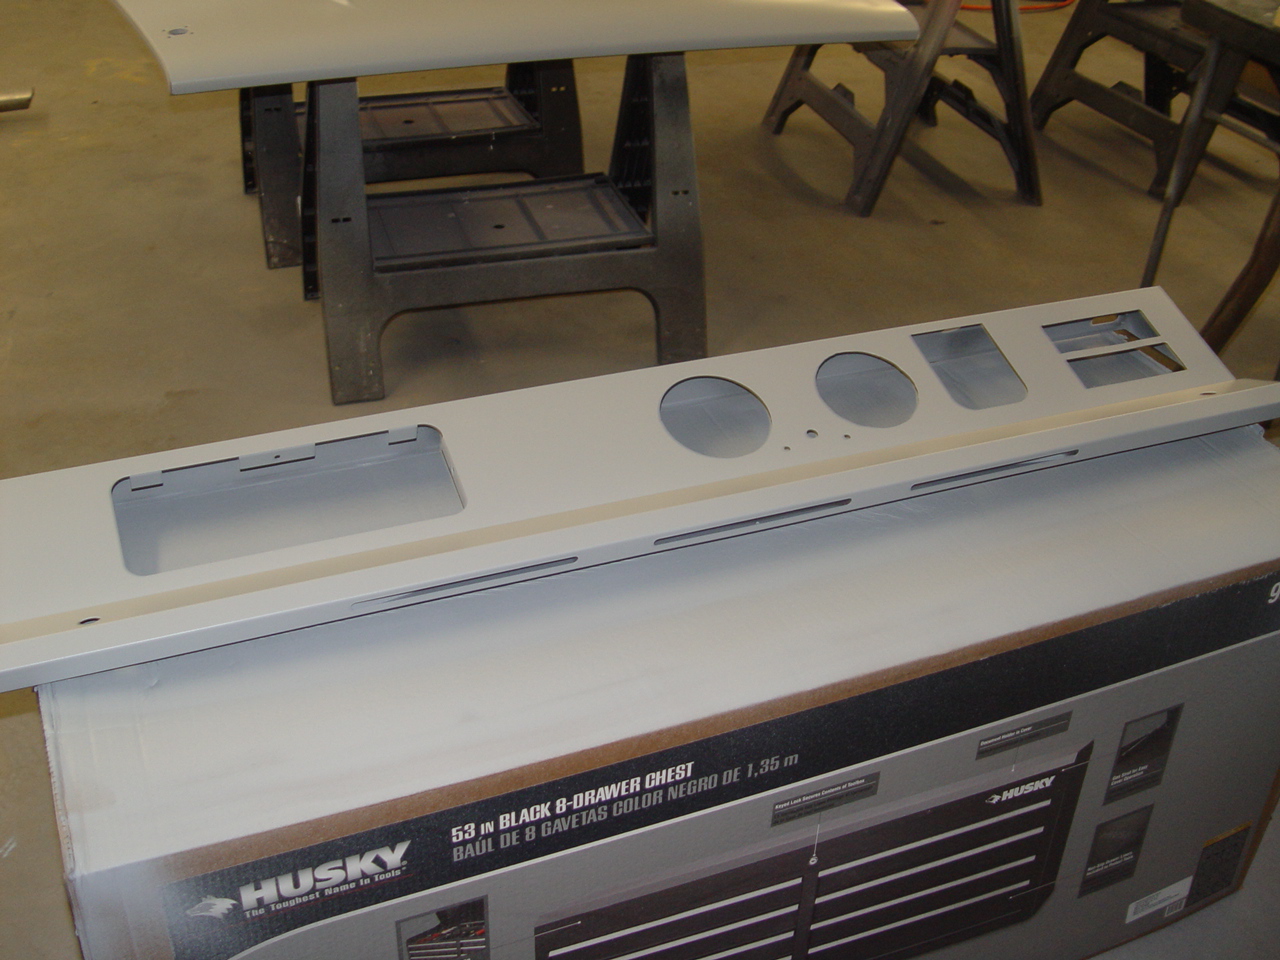
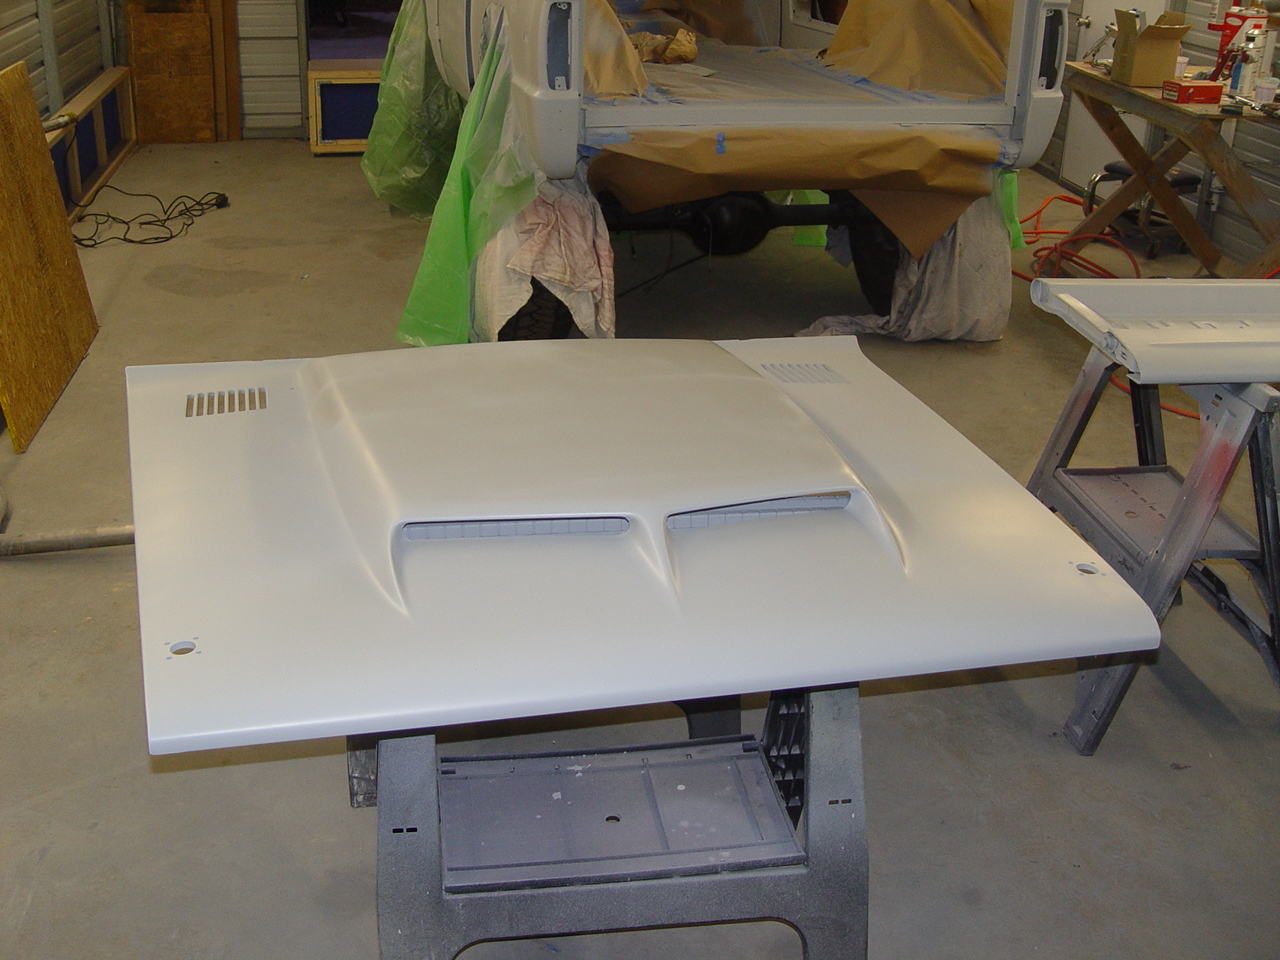
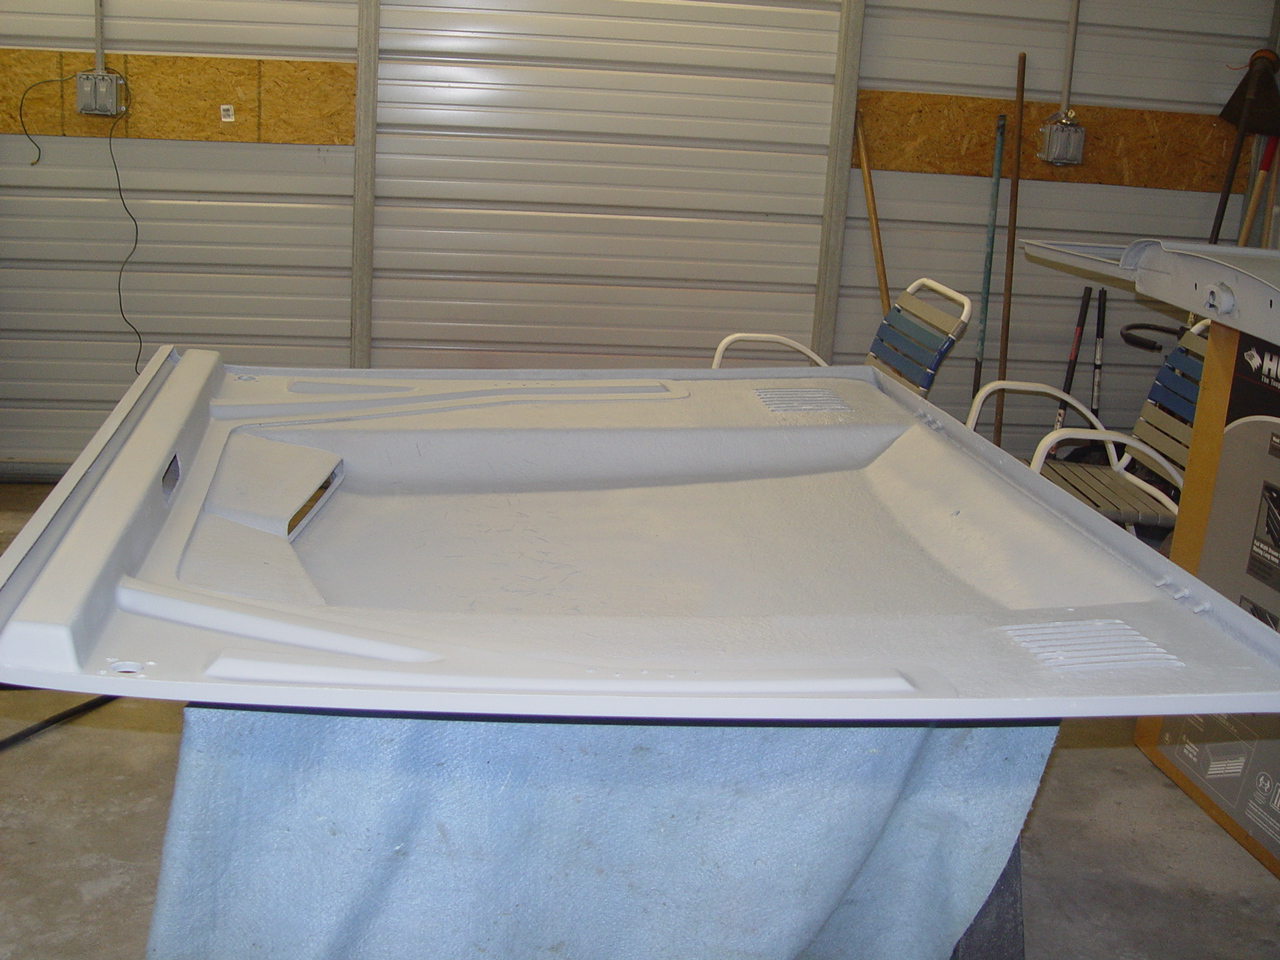
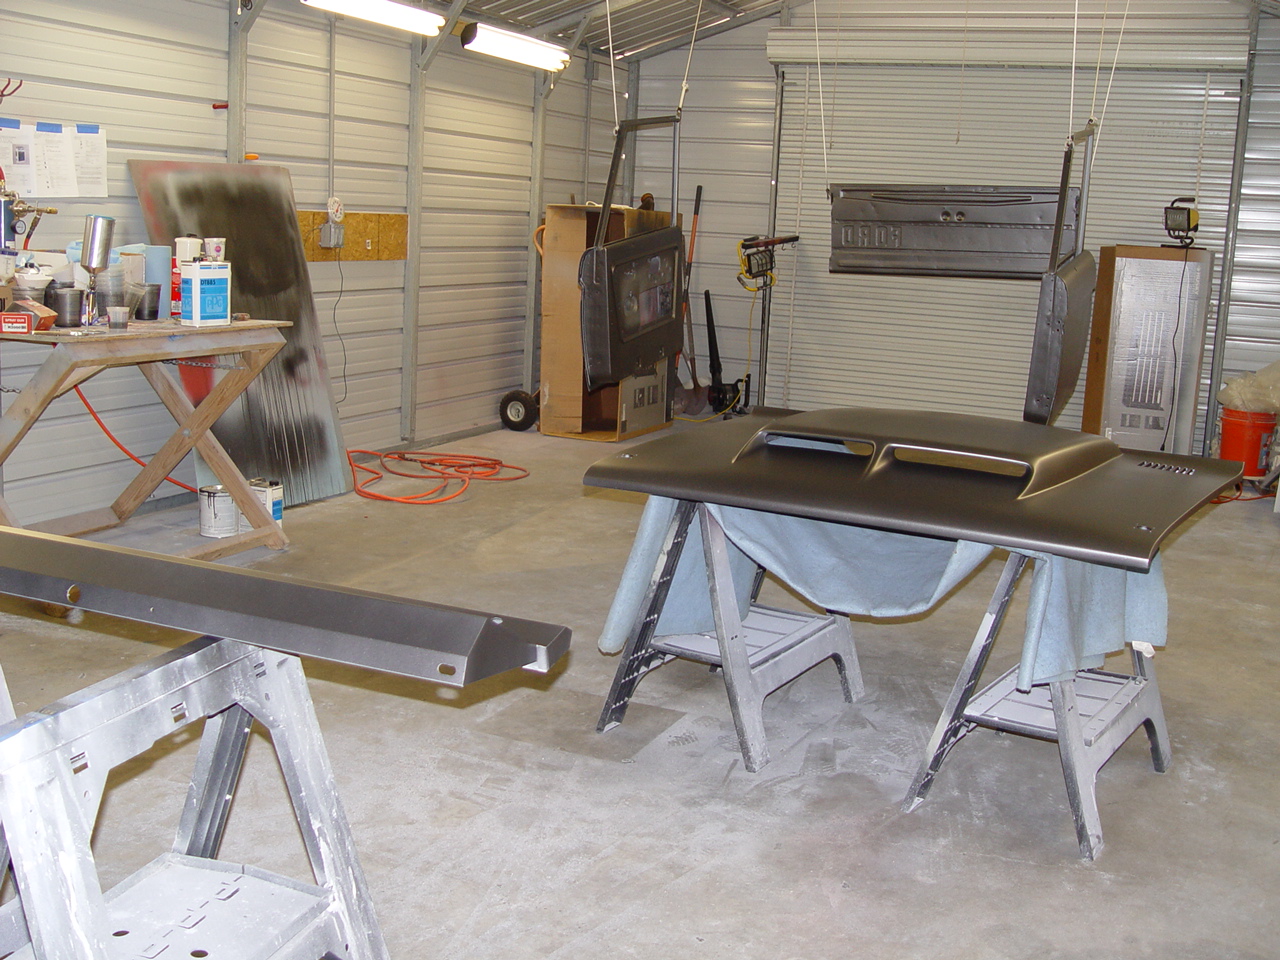
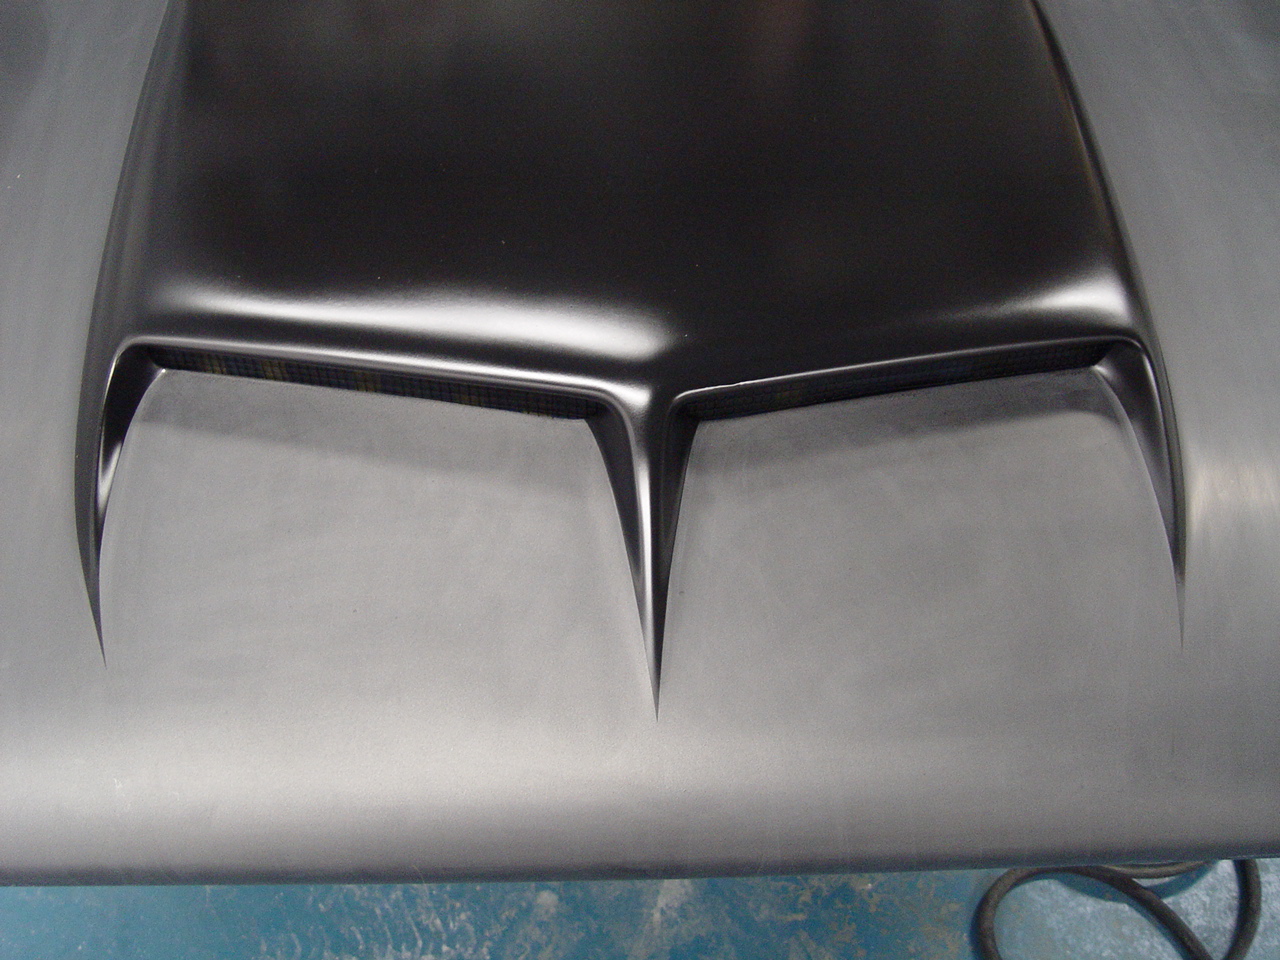
Then came the new fiberglass hood with integral hood scoop. The unfortunate thing about fiberglass hoods is that they always seem to have some minor cracking at the corners and around the edges. So, some minor repair work was needed there. Also, the scoops openings needed to be cut out as did both of the rear intake grates. All-in-all, the labor required to prepare the hood for paint exceeded the cost of the hood itself - by about double. But, once mounted (with its trick hydraulic supports), it's very cool.
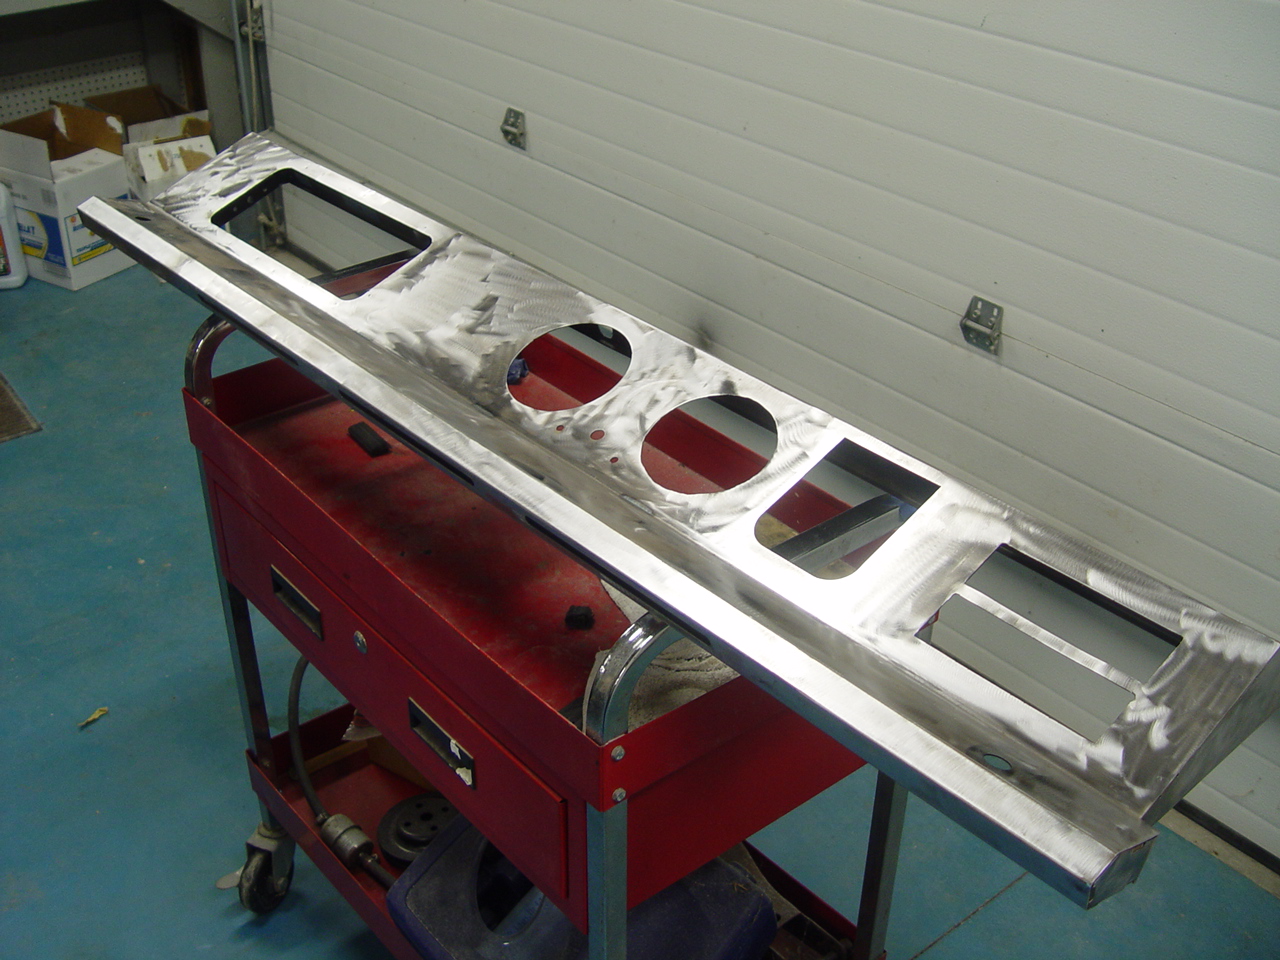
Finally, the new custom dash panel was filled and sanded smooth.
|
||||||
 |
 |
 |
 |
 |
||
 |
 |
 |
 |
 |
||
| Click on an image for a larger view | ||||||
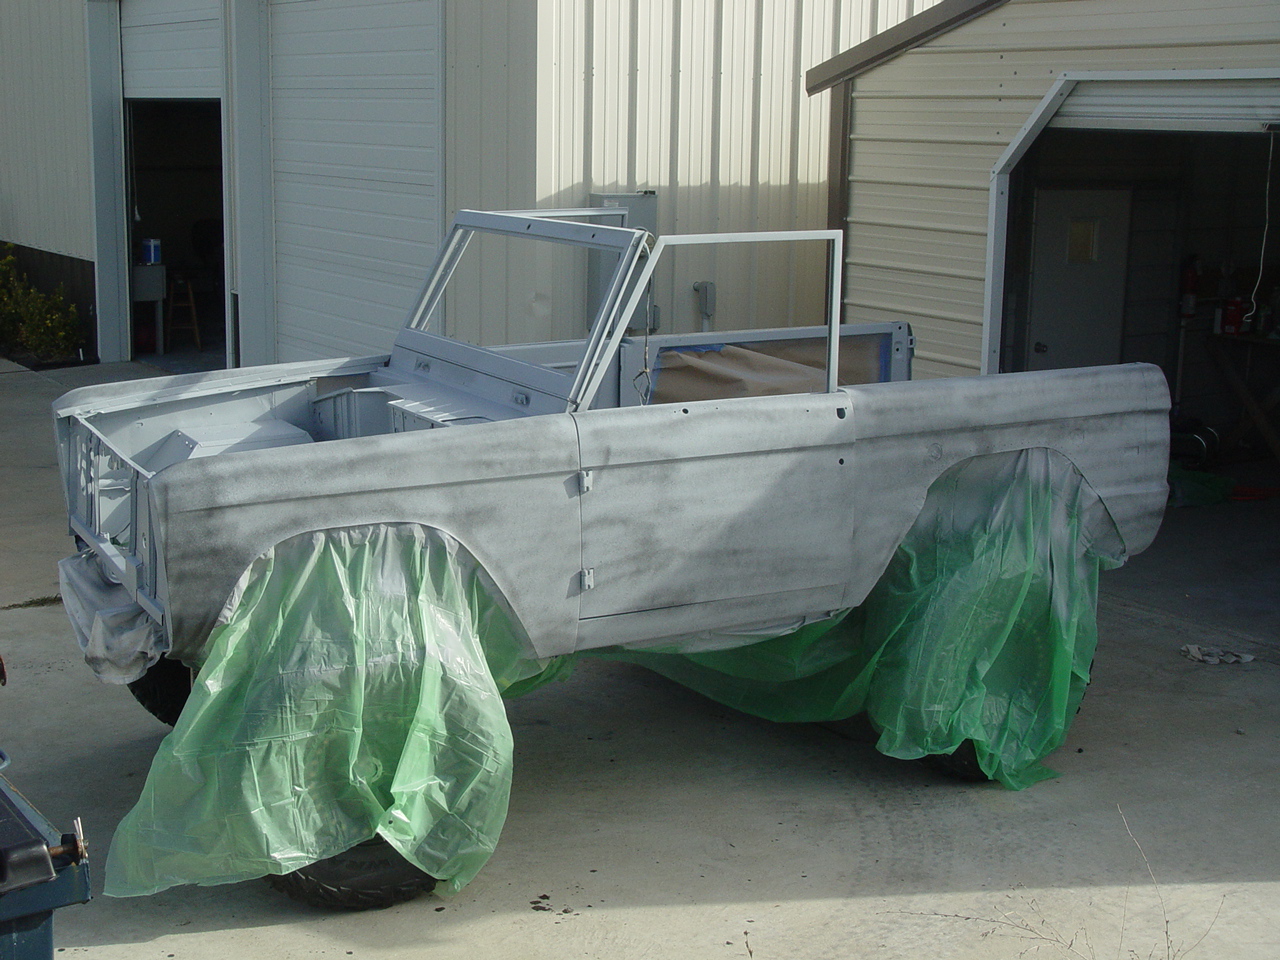
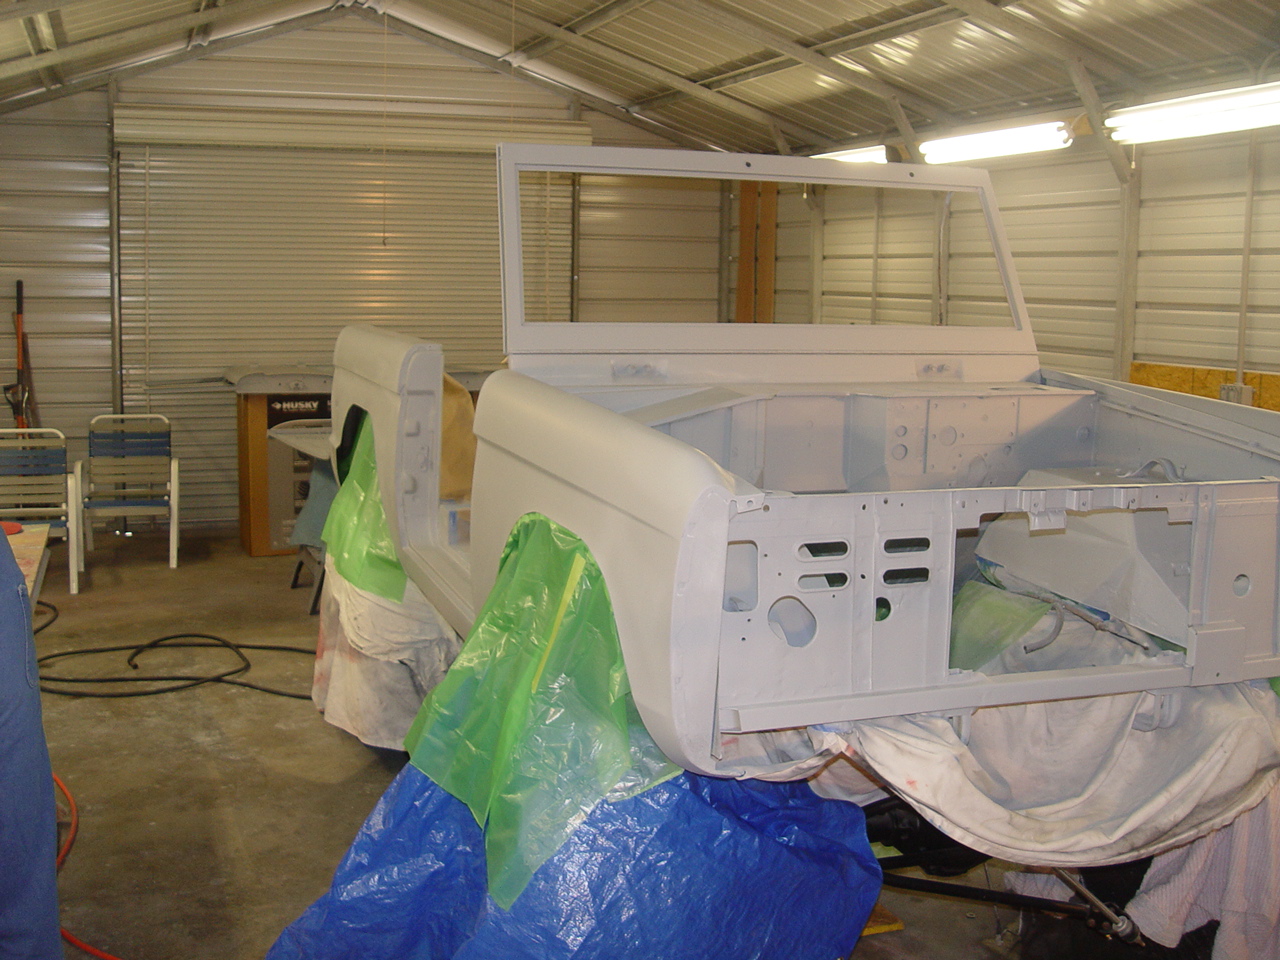
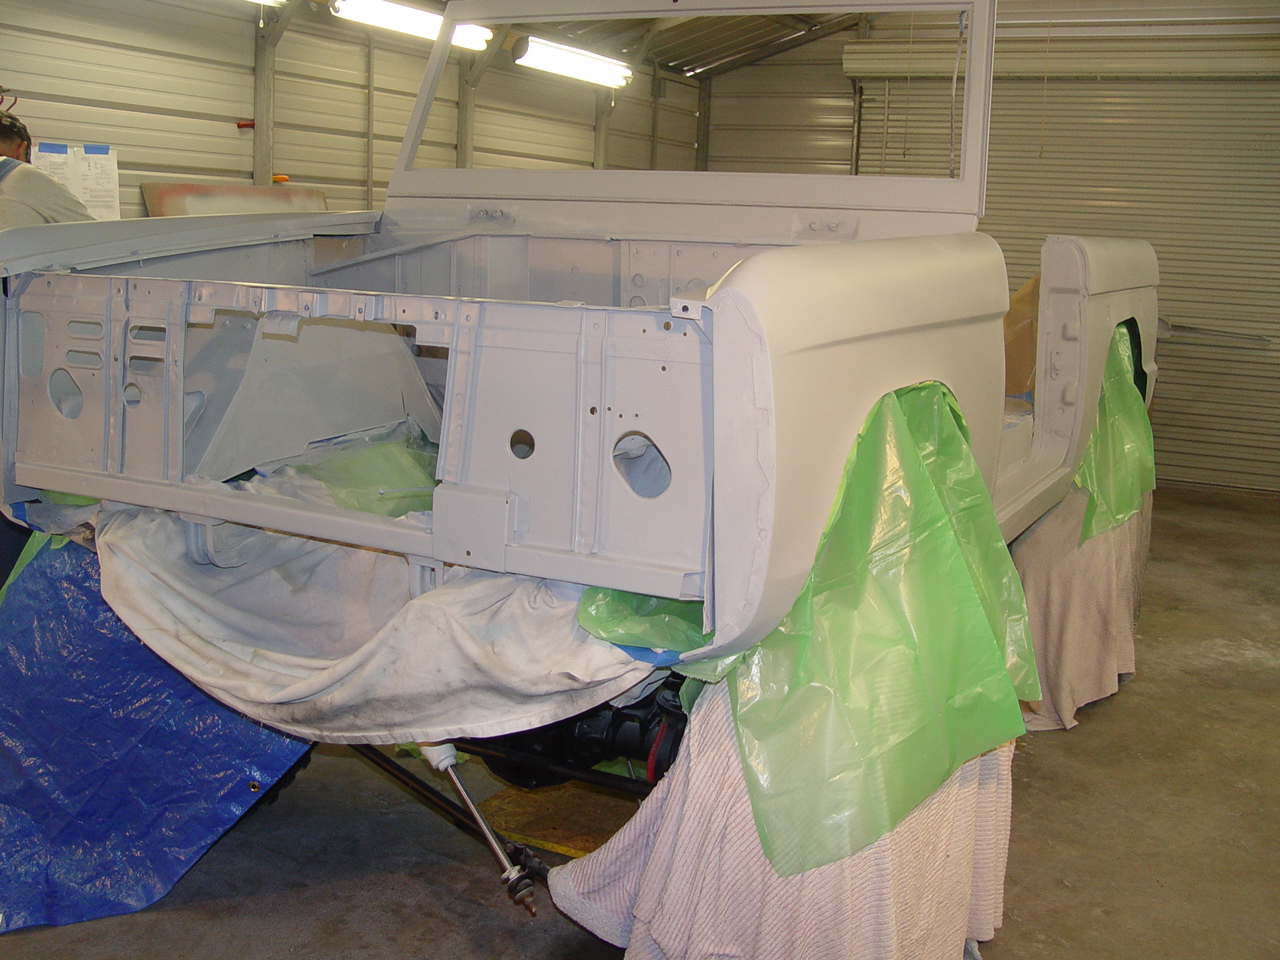
PAINT PREP | ||||||
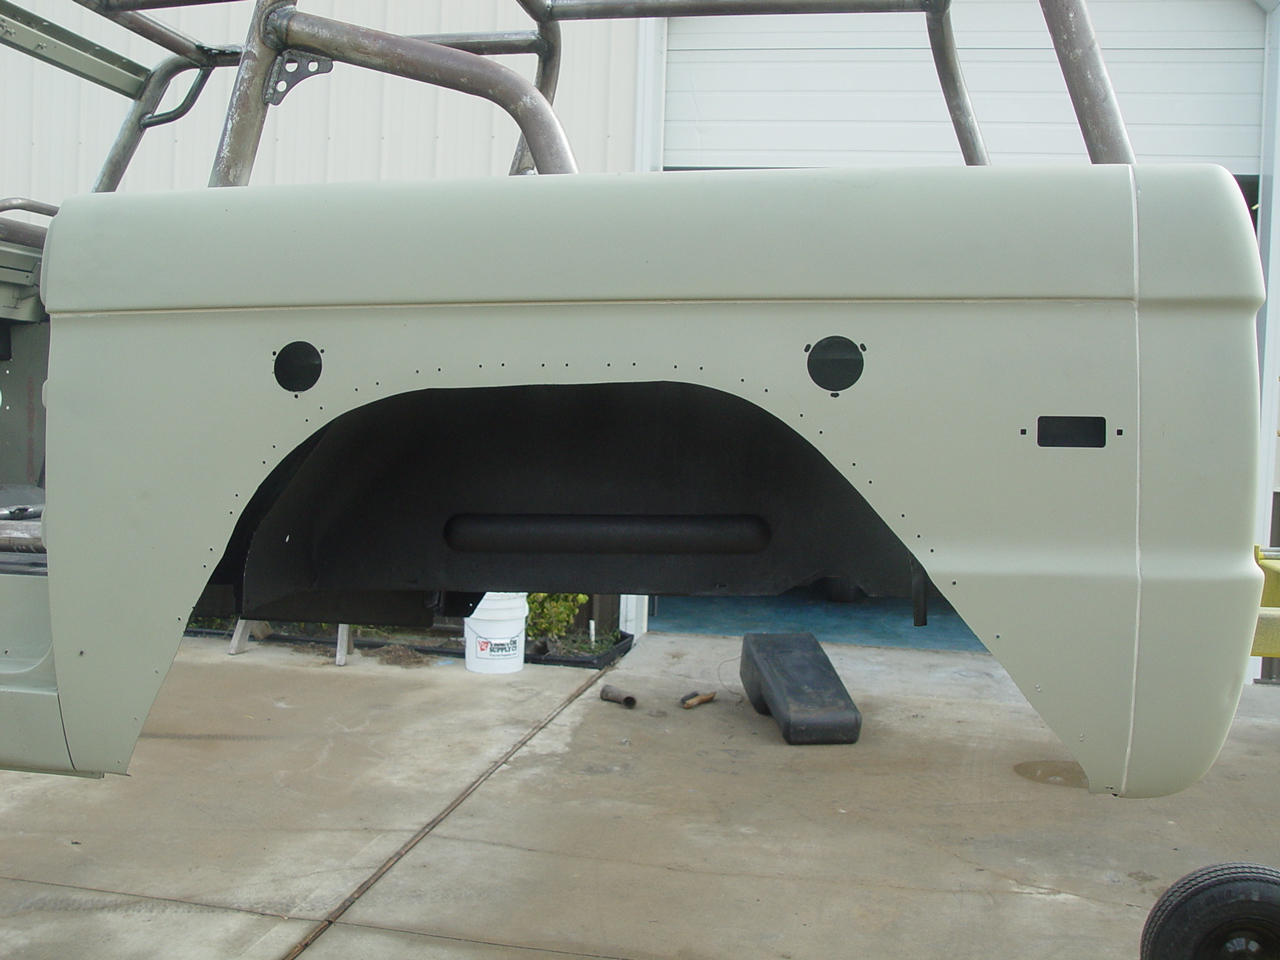
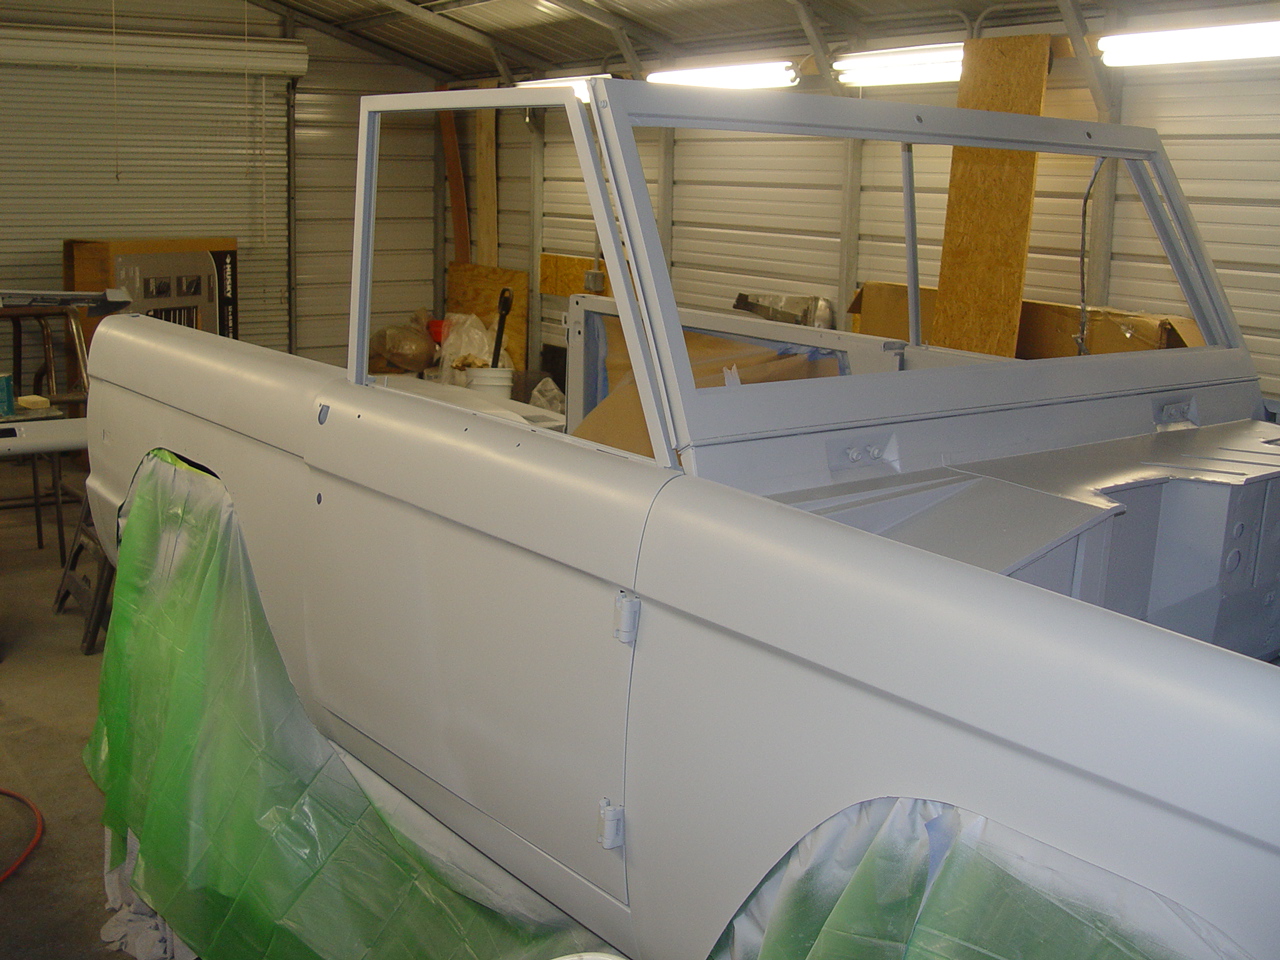
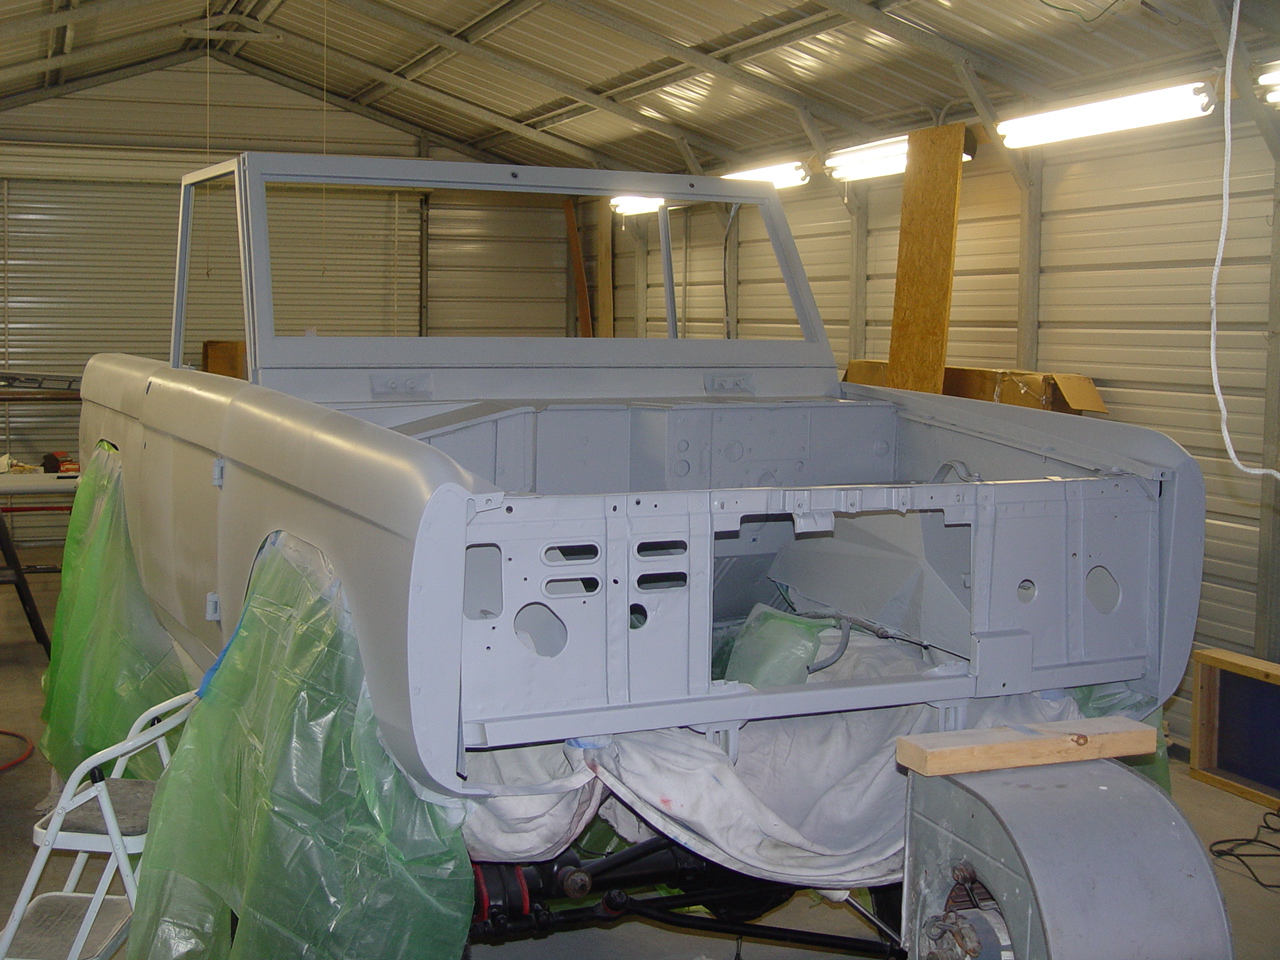
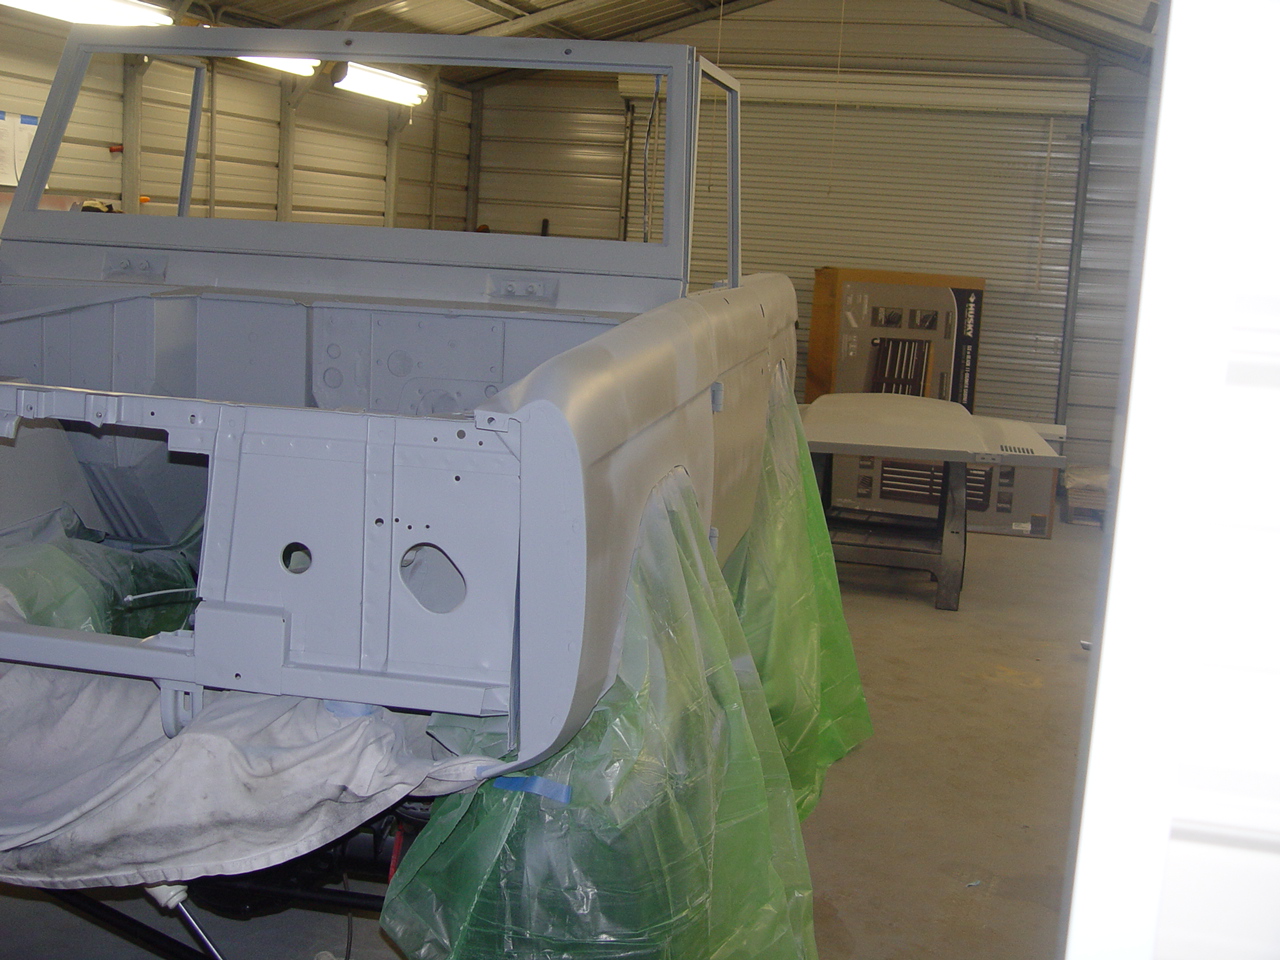
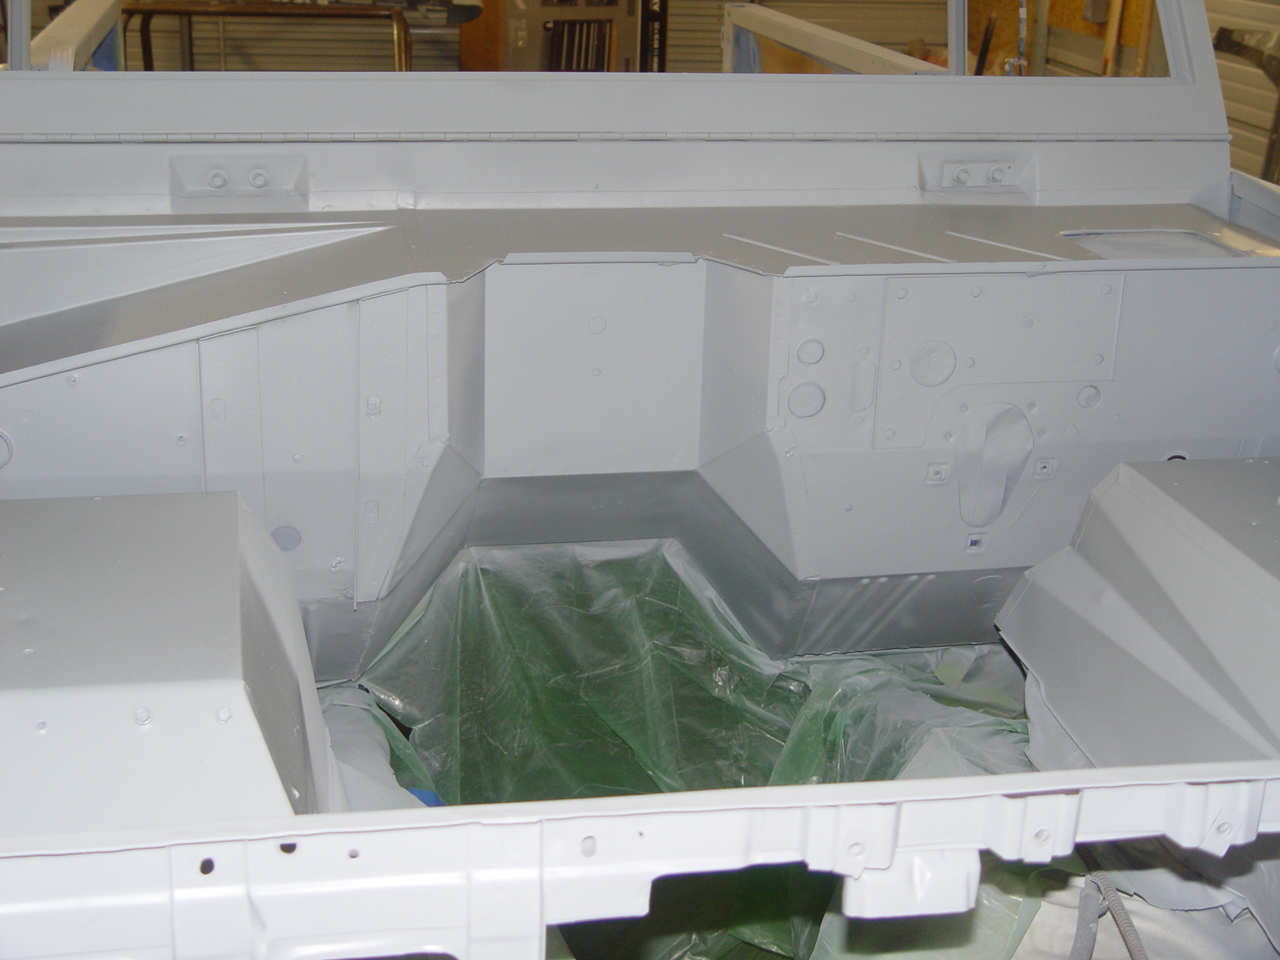
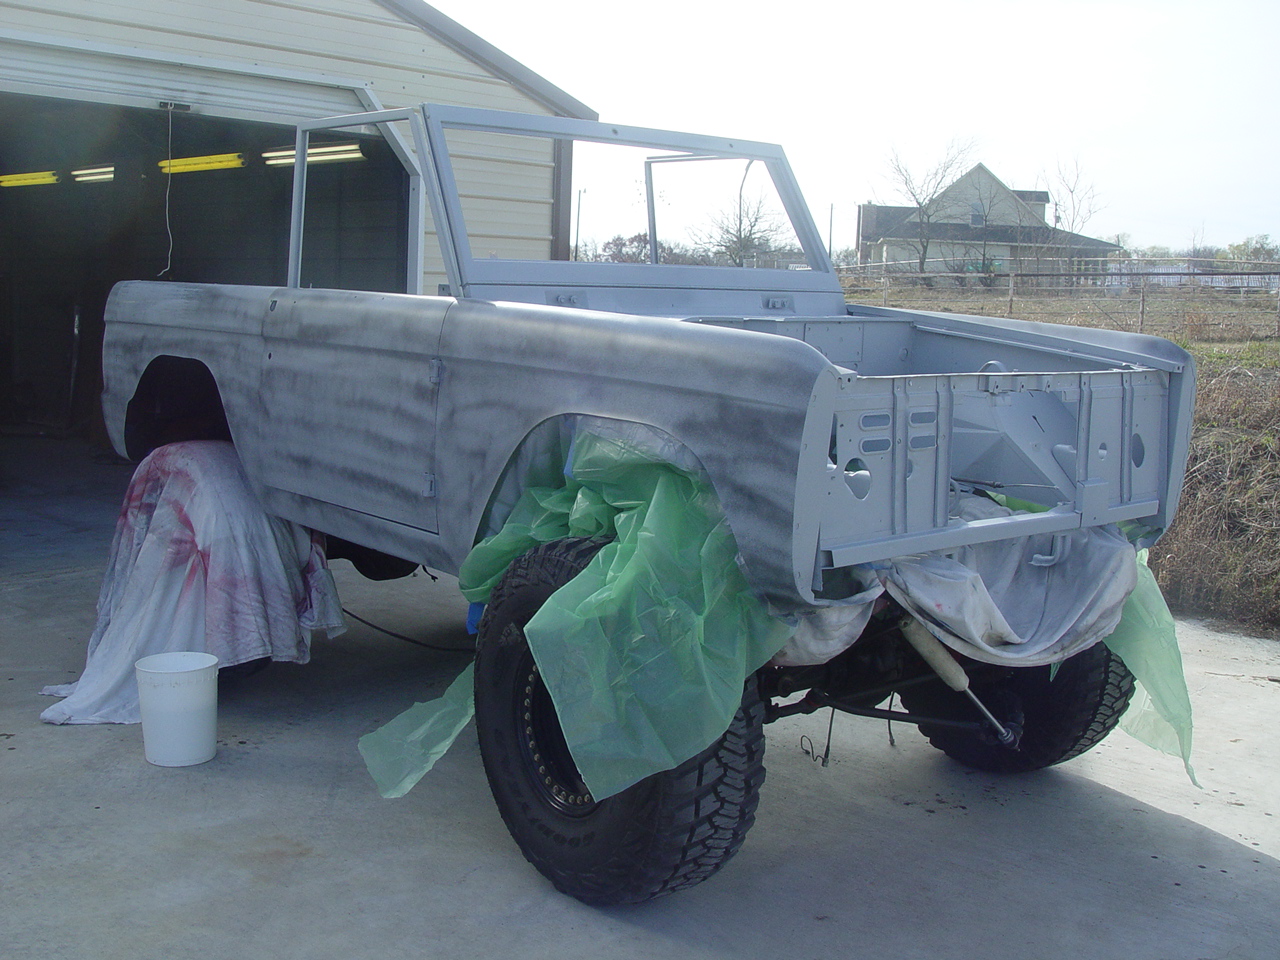
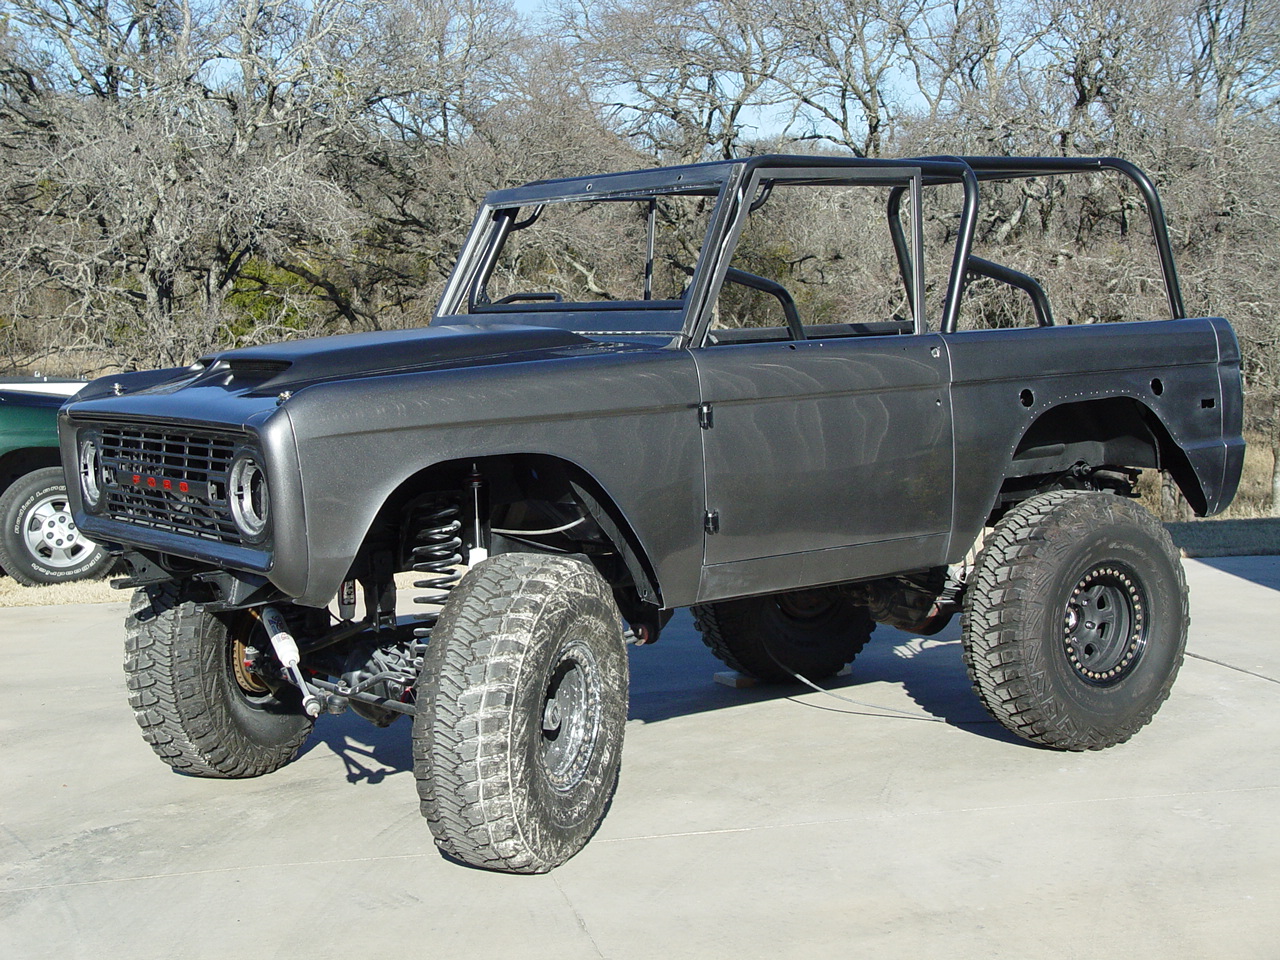
|
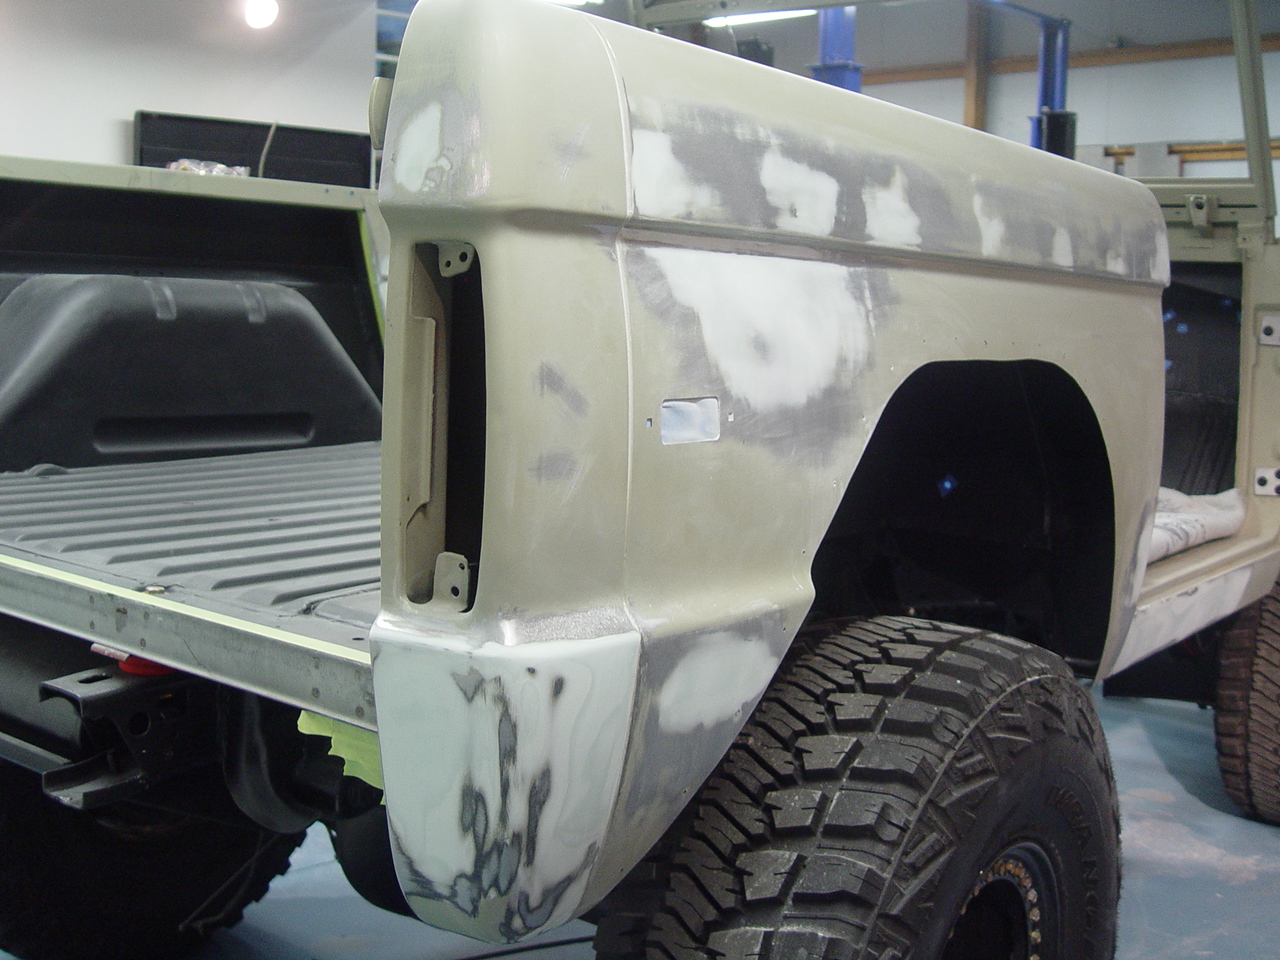
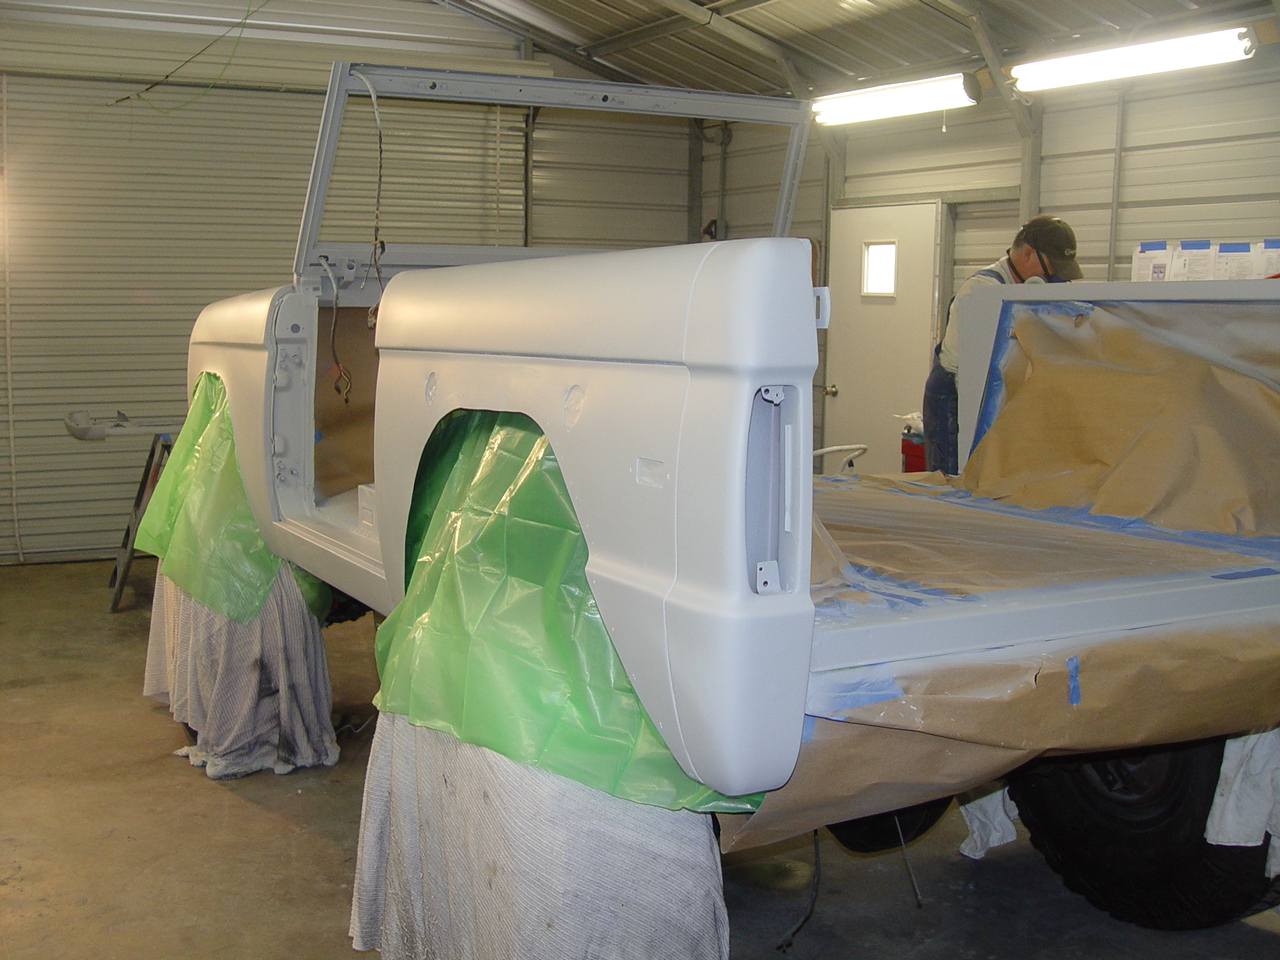
After all the bodywork was completed and all the new body panels fitted, we applied a couple of heavy coats of PPG's K38 High-Build primer. Once the primer had cured, a light guide coat was sprayed over the entire body prior to block sanding. Fortunately, our hard work paid off and between the two of us, we had it sanded down smooth and straight in just half a day. The following day, we applied a thinned coat of K38 primer as a sealer coat to provide a consistent backdrop for the basecoat.
|
||||||
 |
 |
 |
 |
 |
||
 |
 |
 |
 |
 |
||
 |
 |
 |
 |
 |
||
 |
 |
 |
 |
 |
||
| Click on an image for a larger view | ||||||
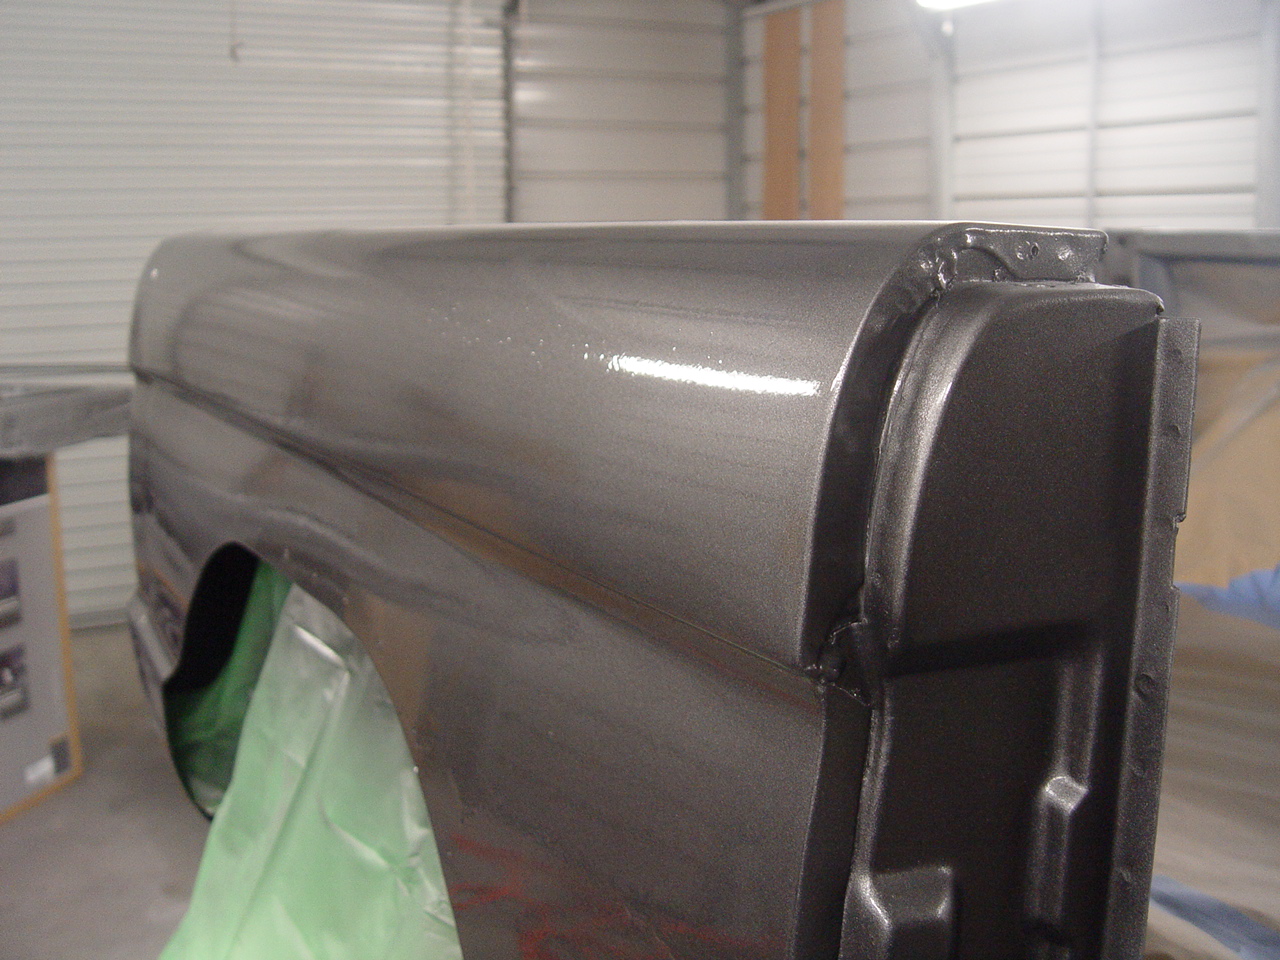
PAINT APPLICATION | ||||||
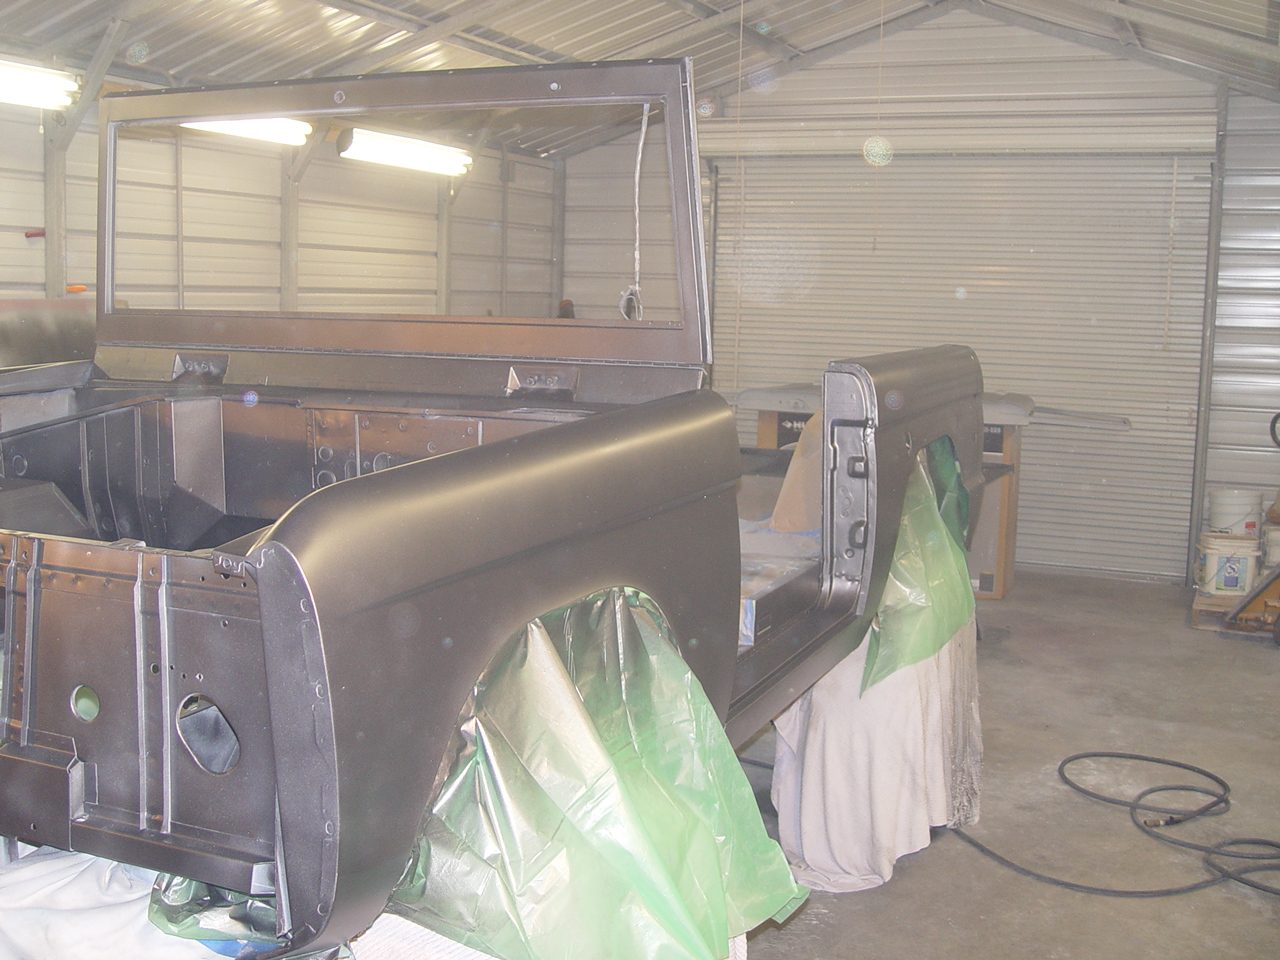
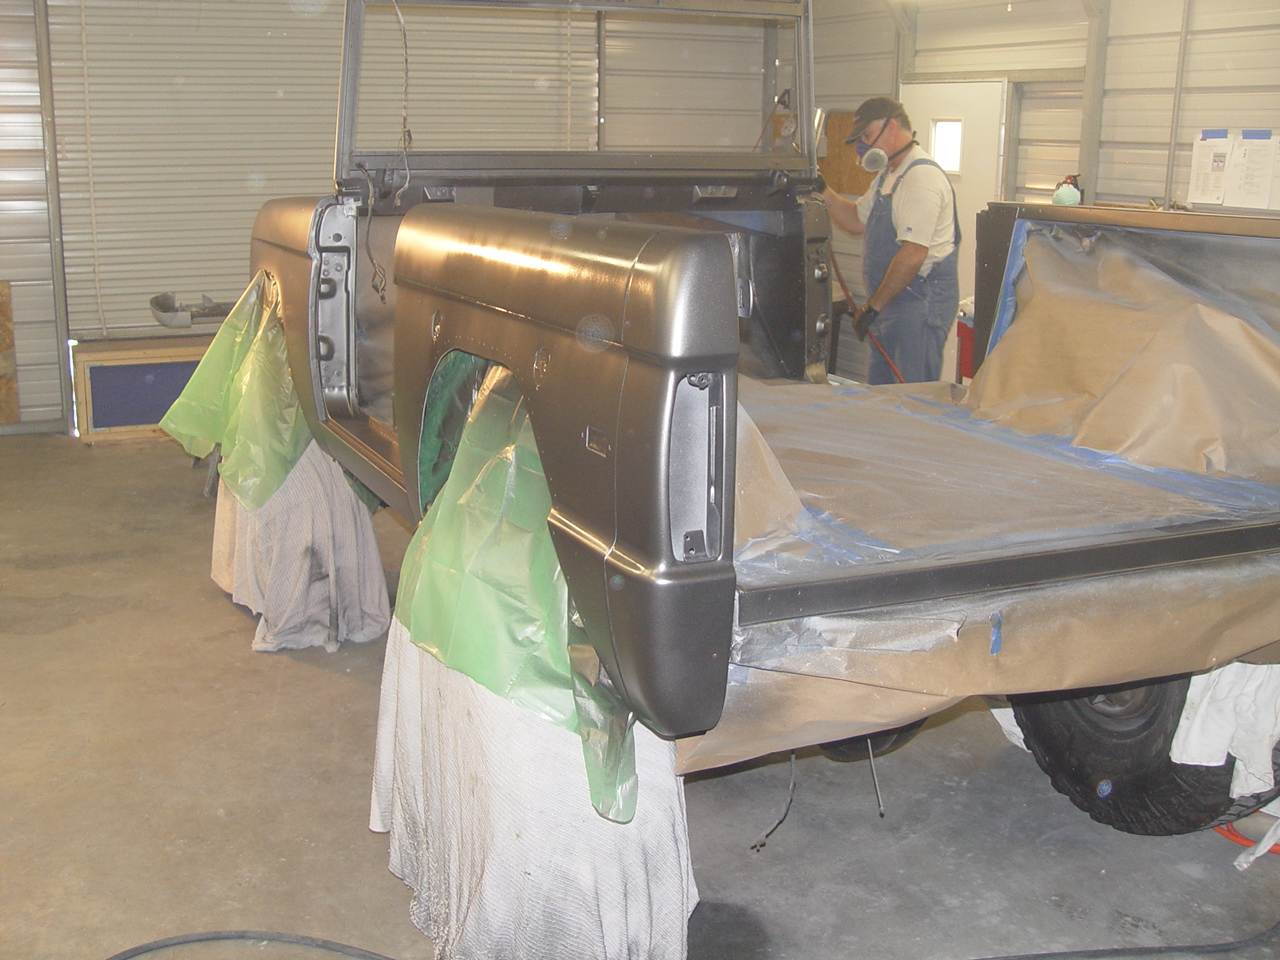
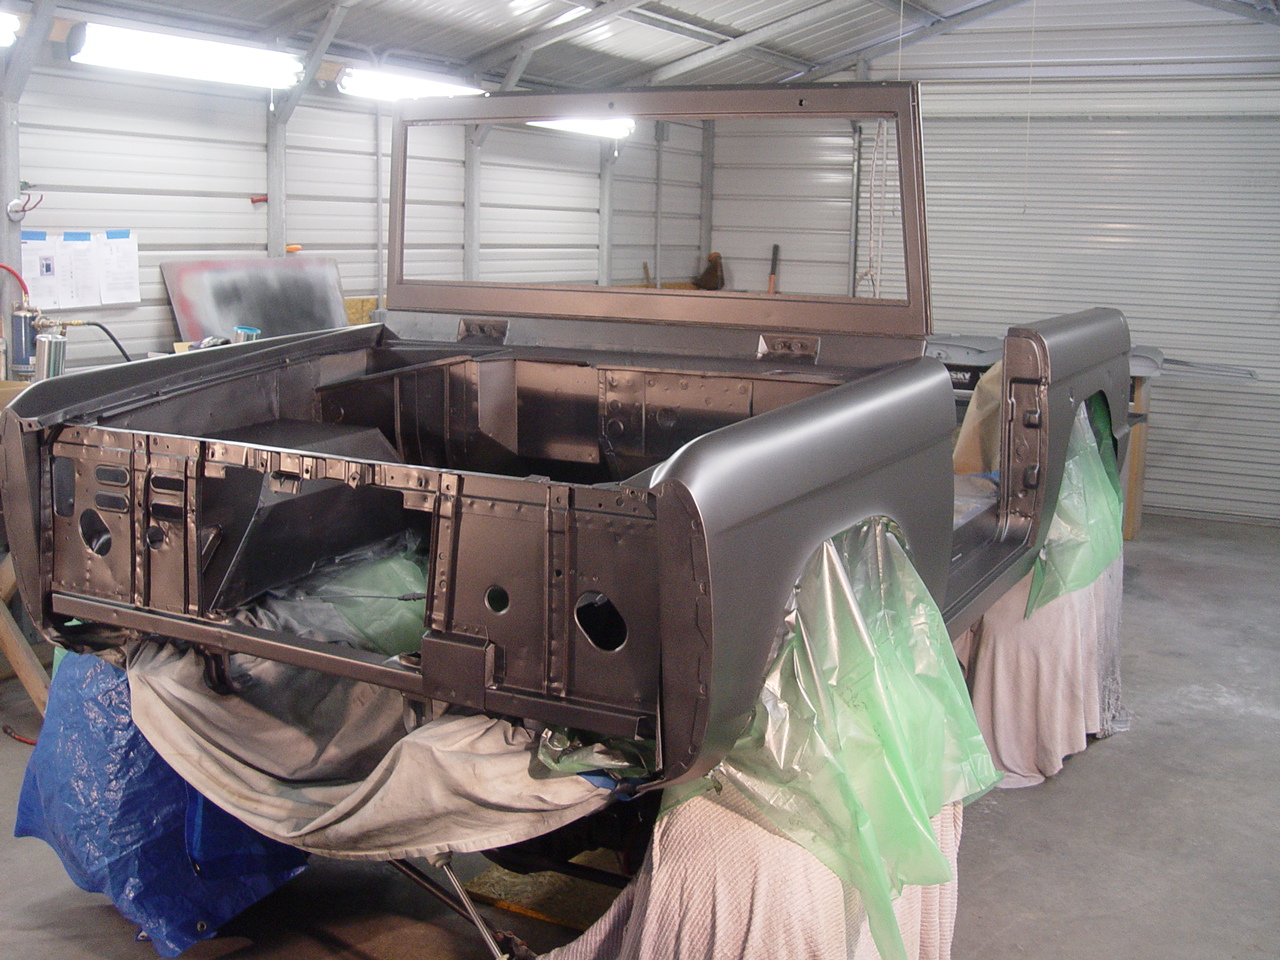
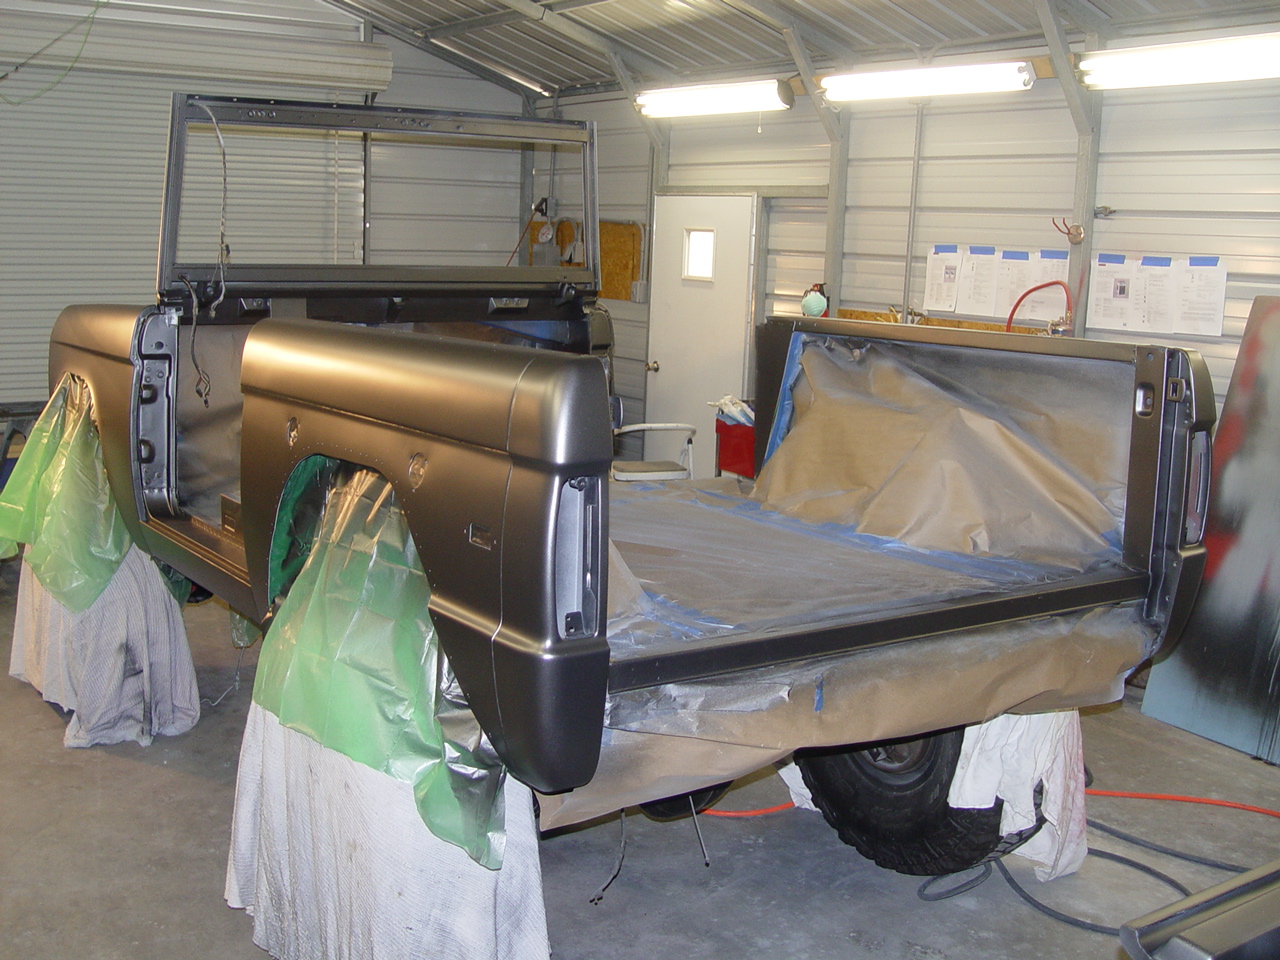
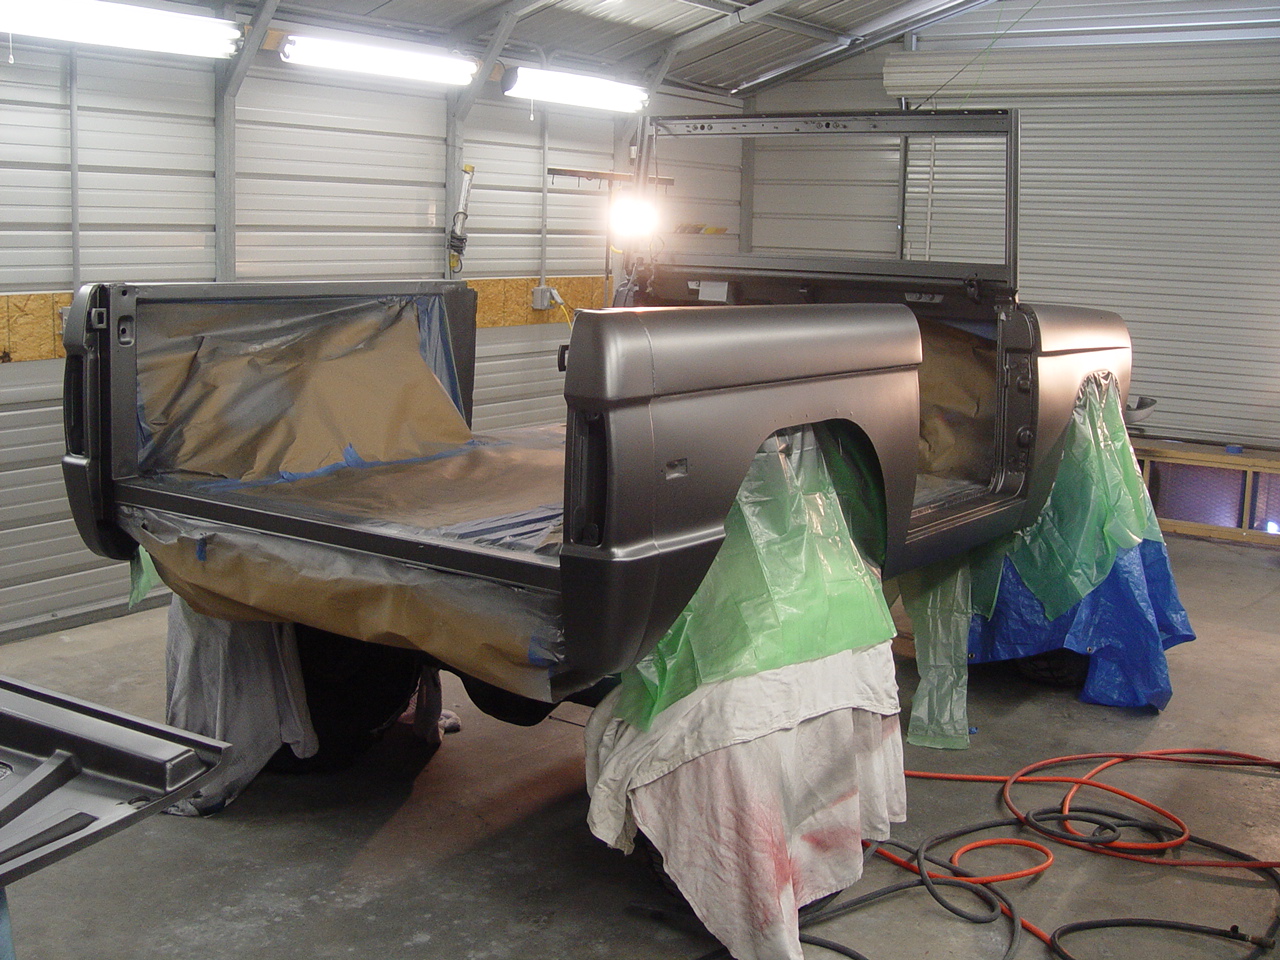
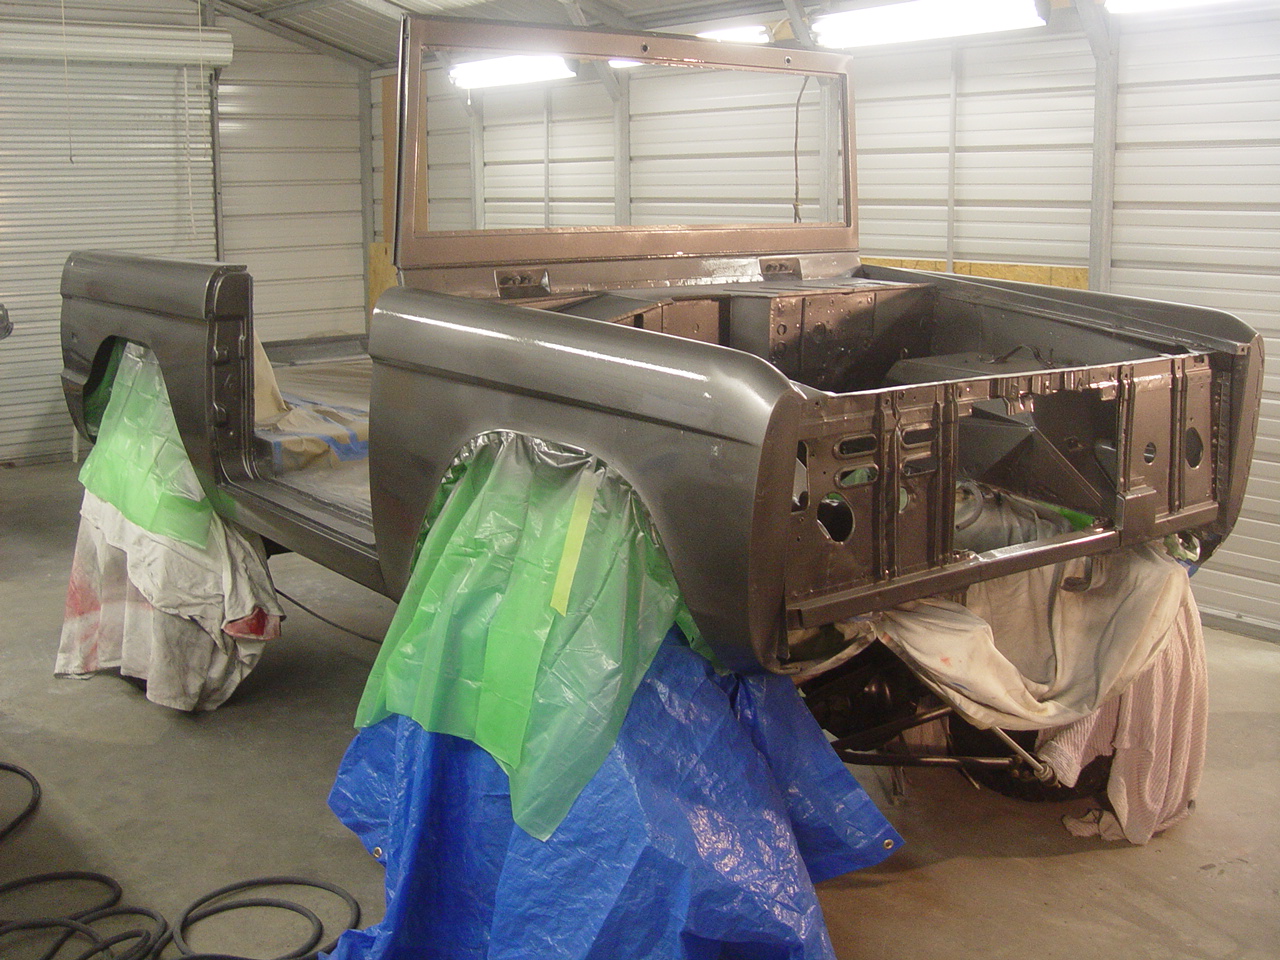
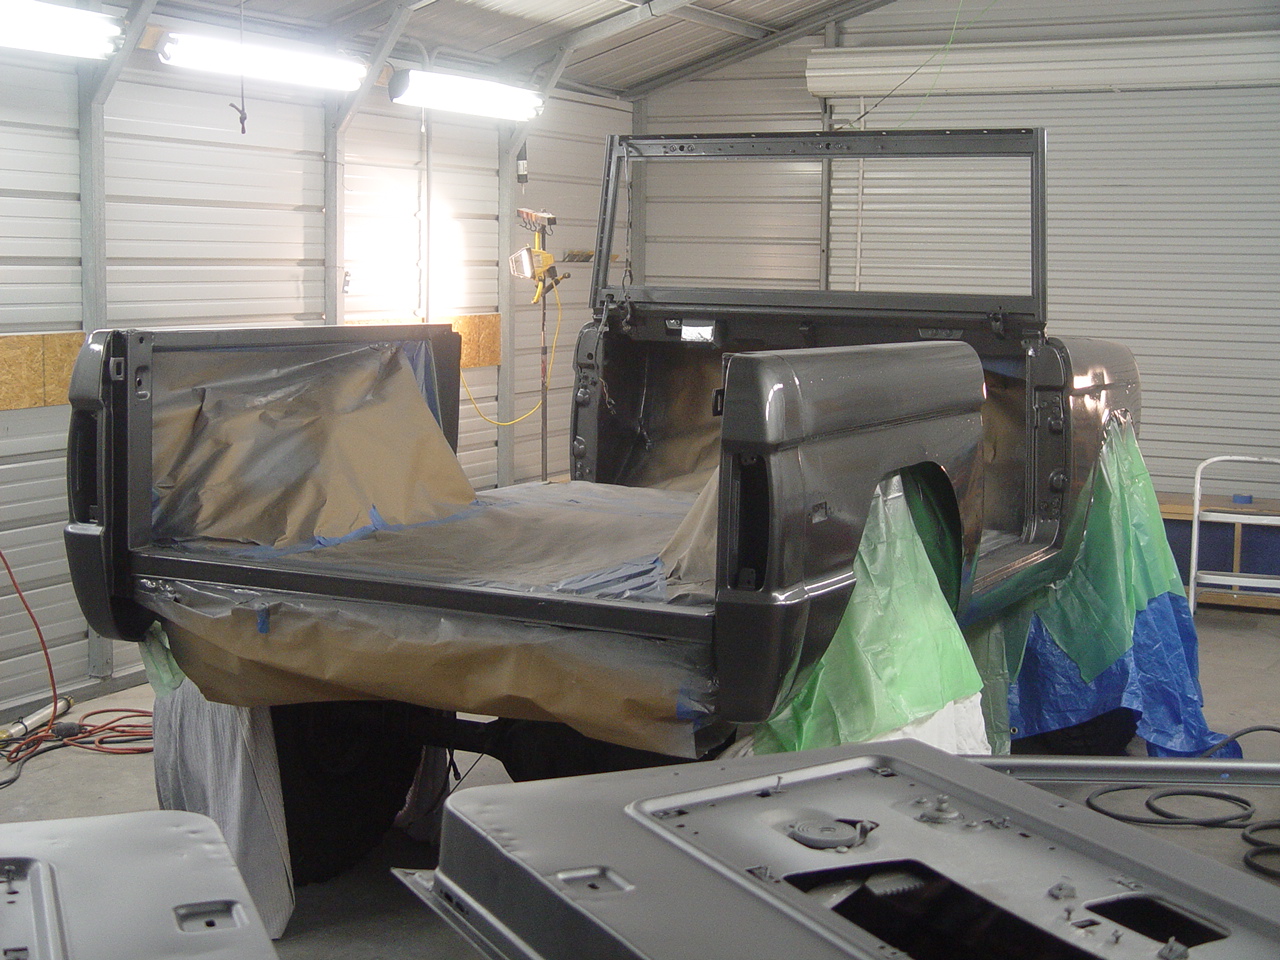
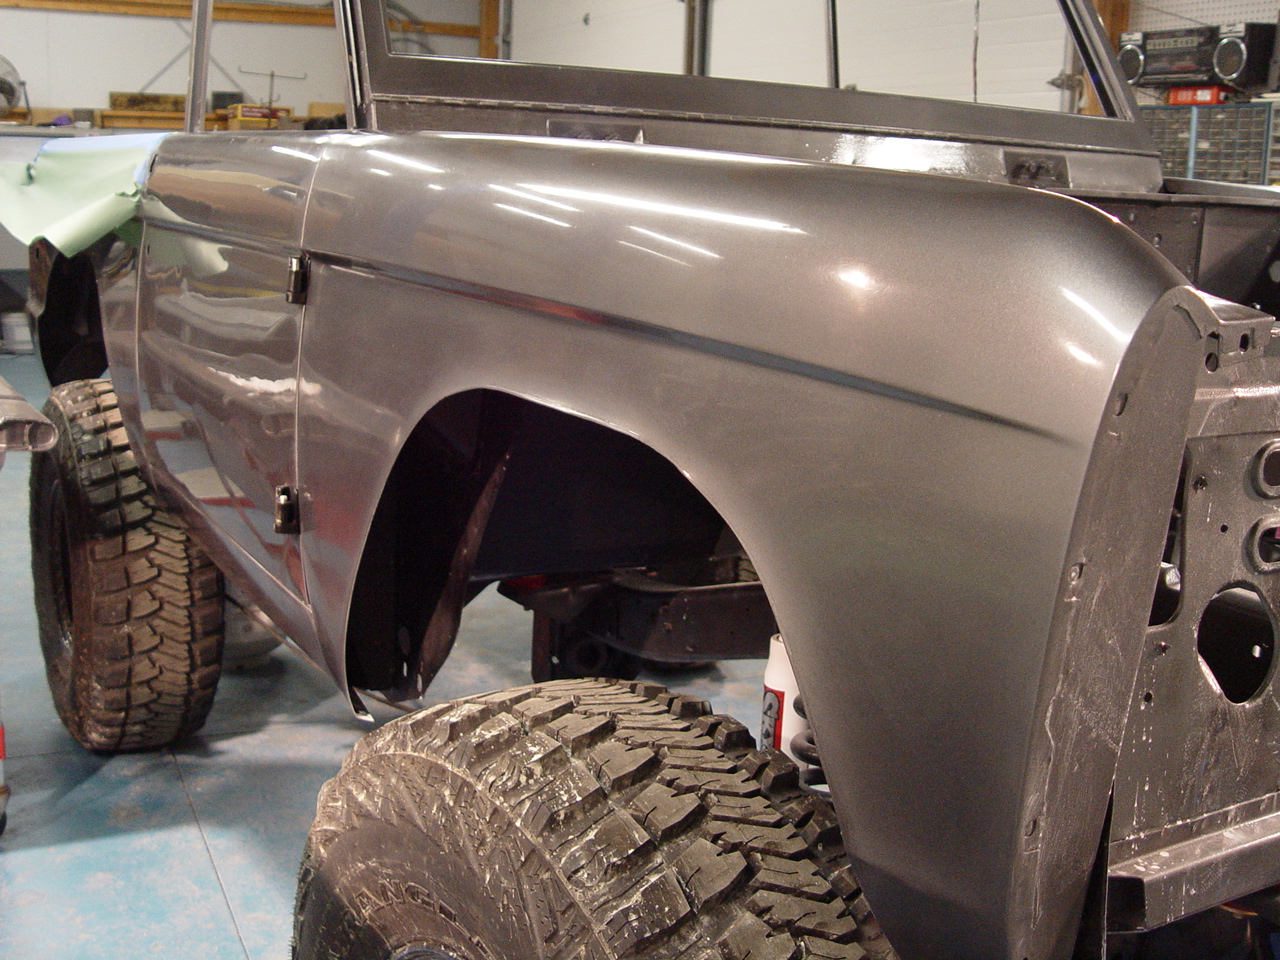
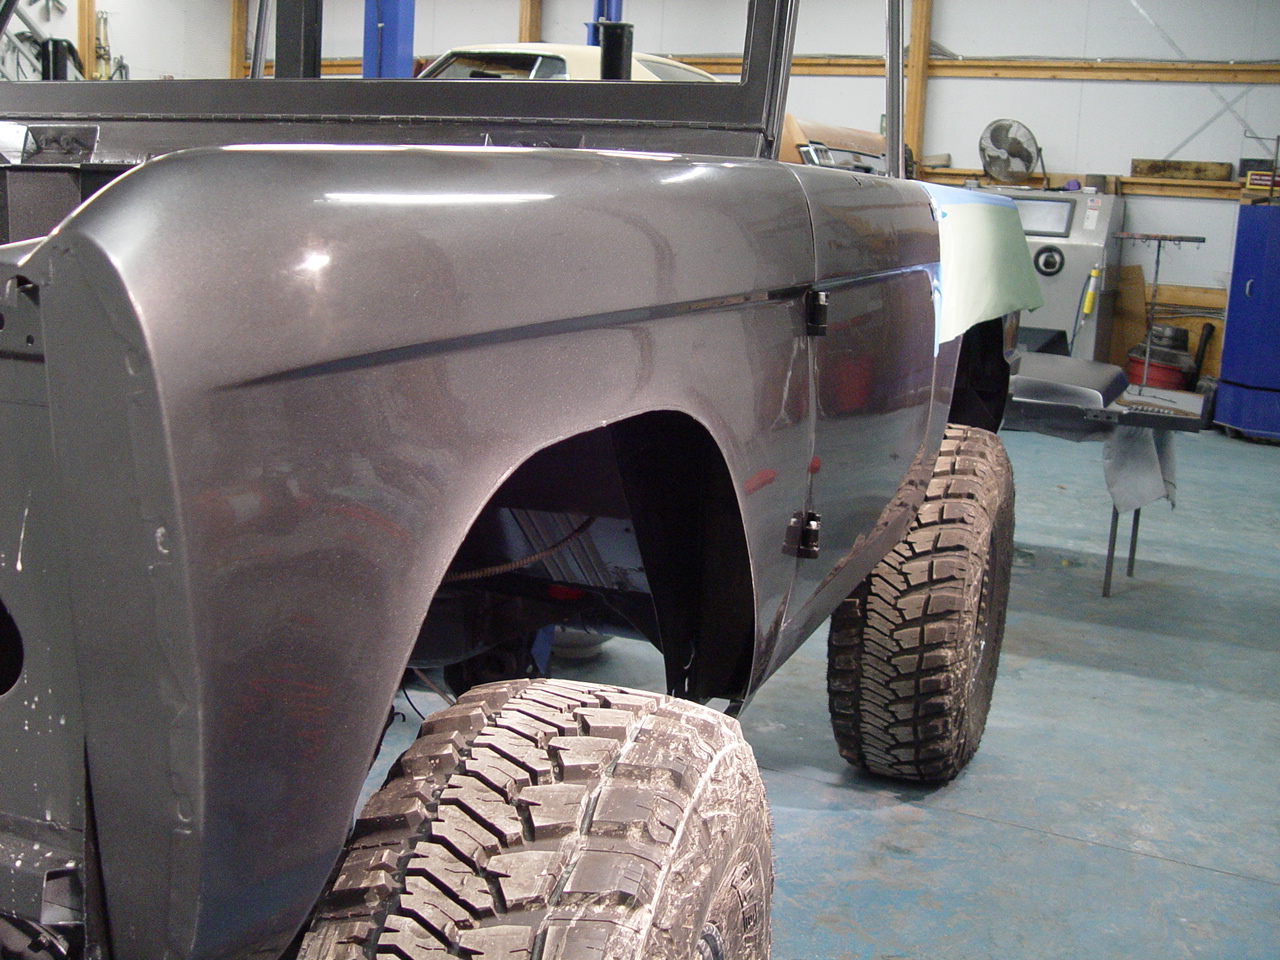
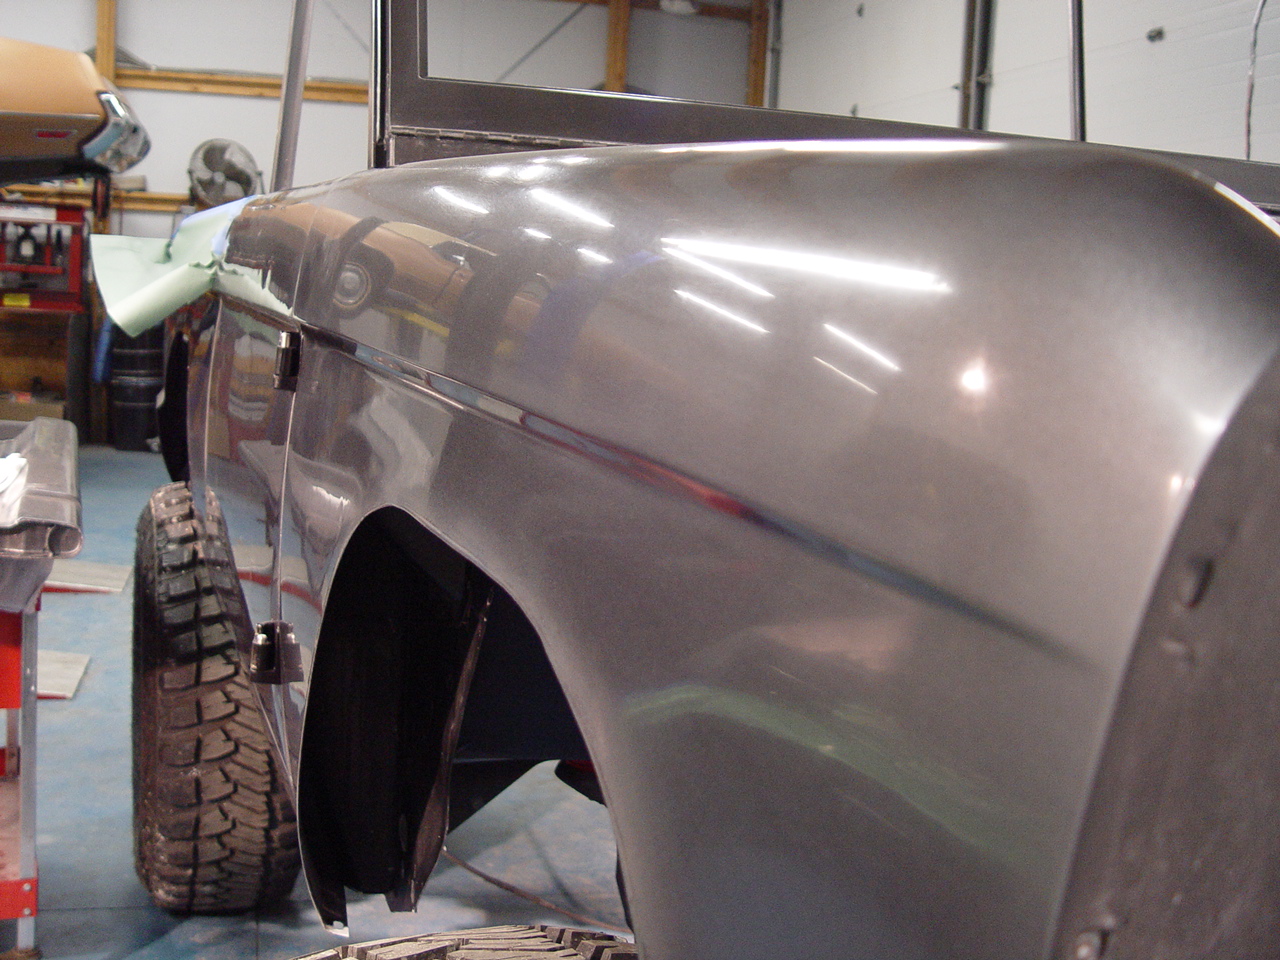
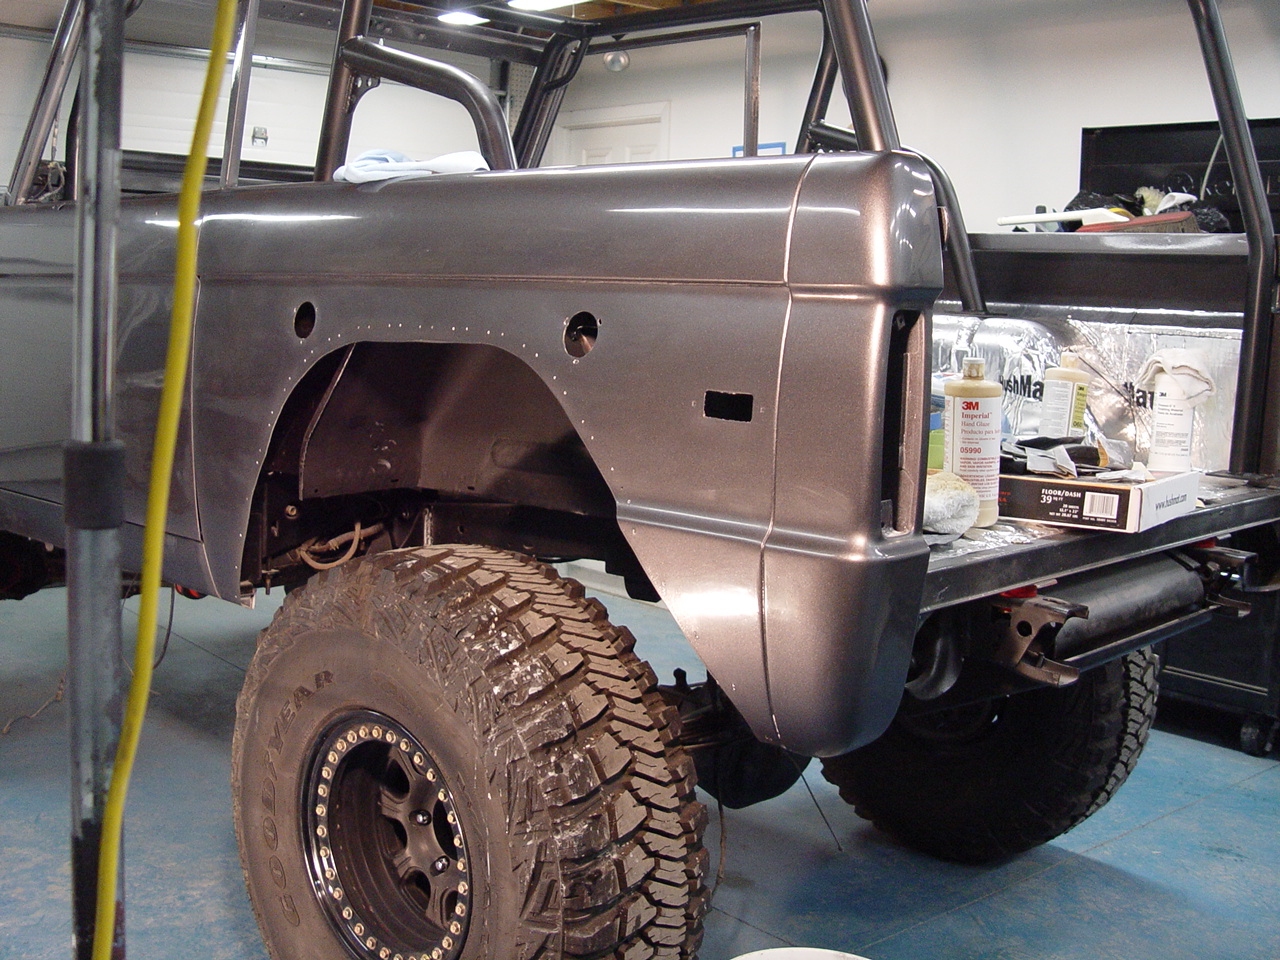
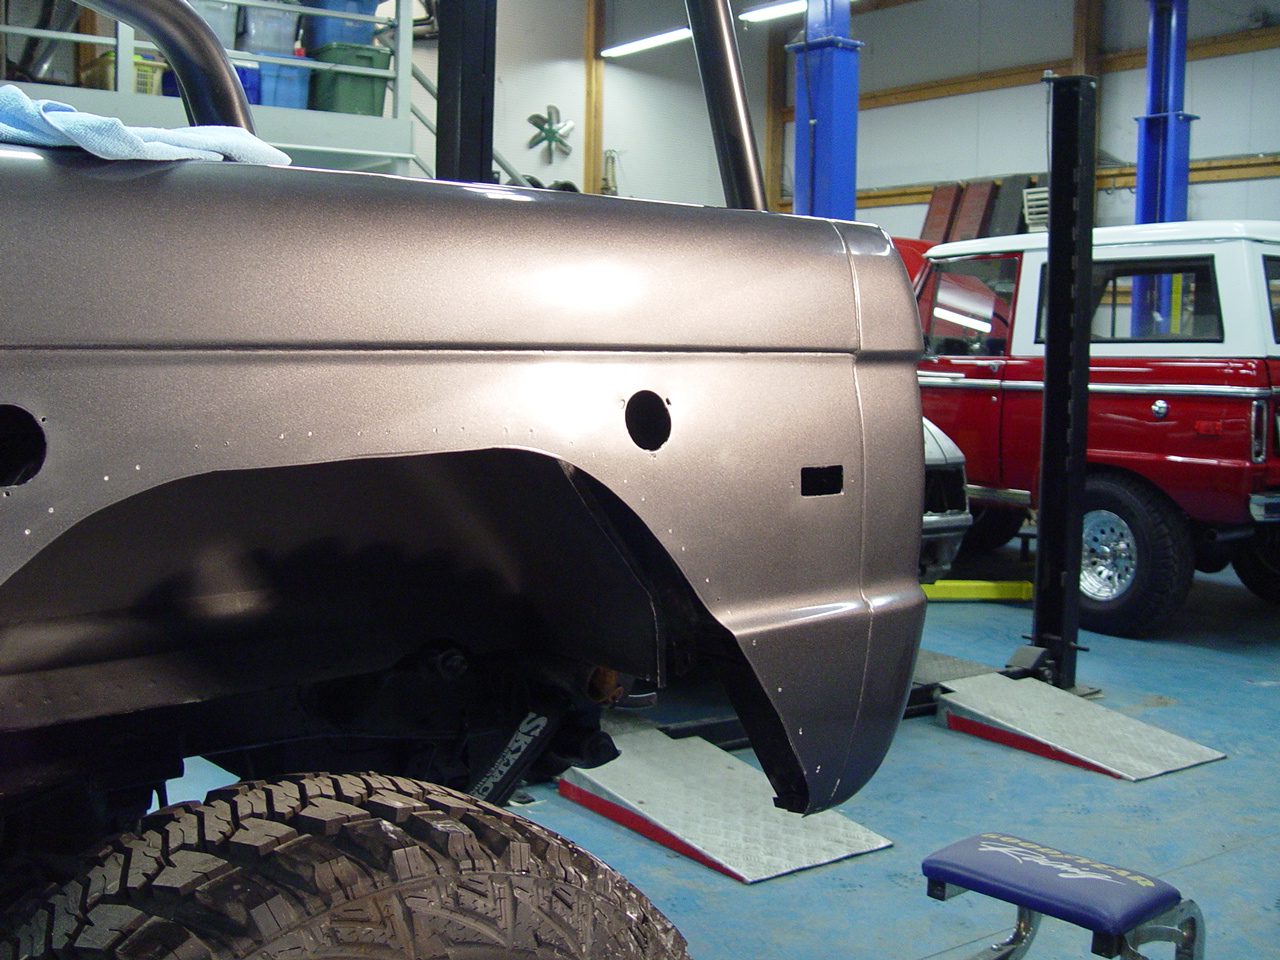
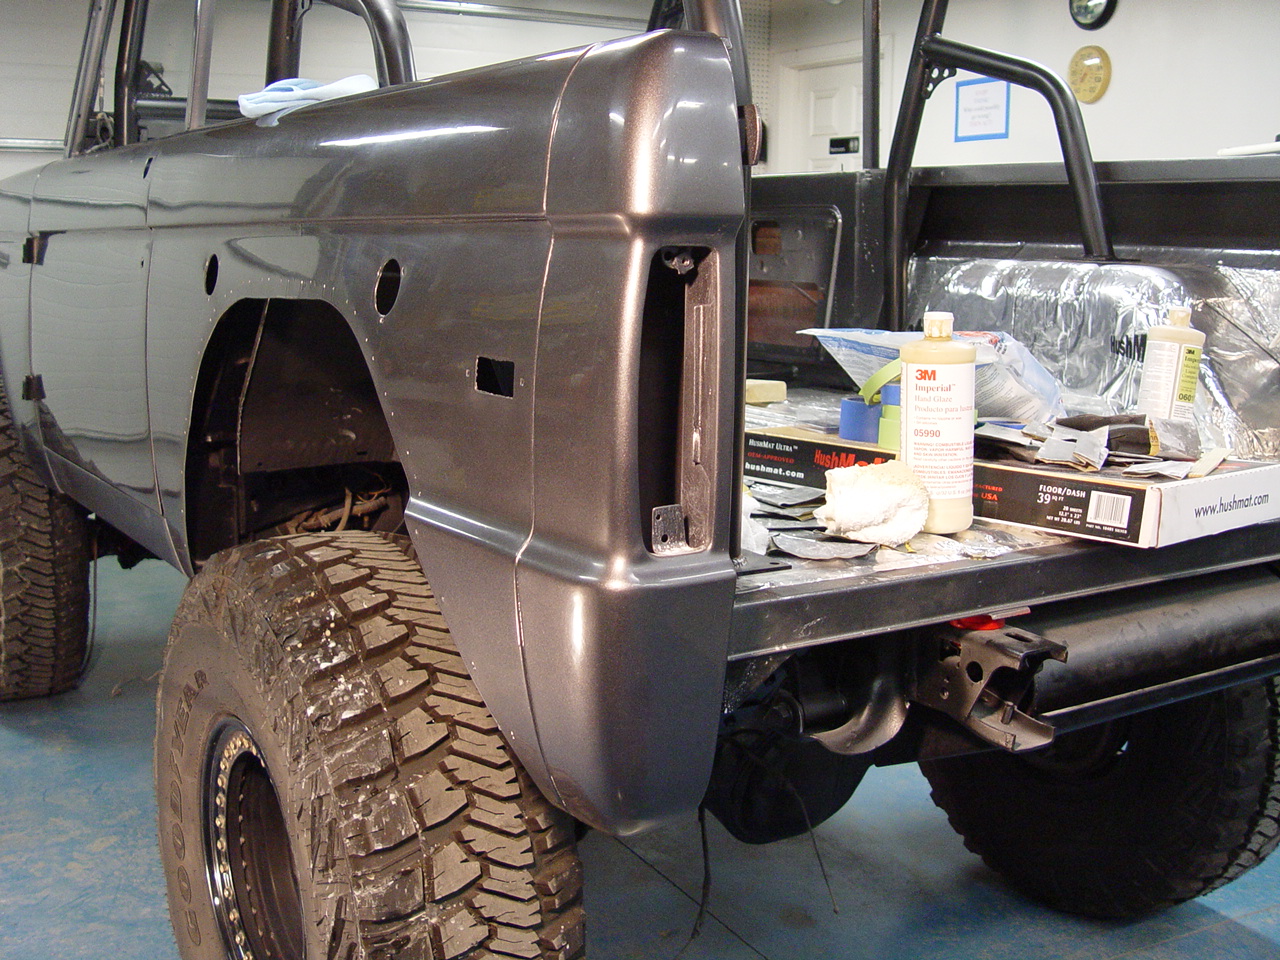
|
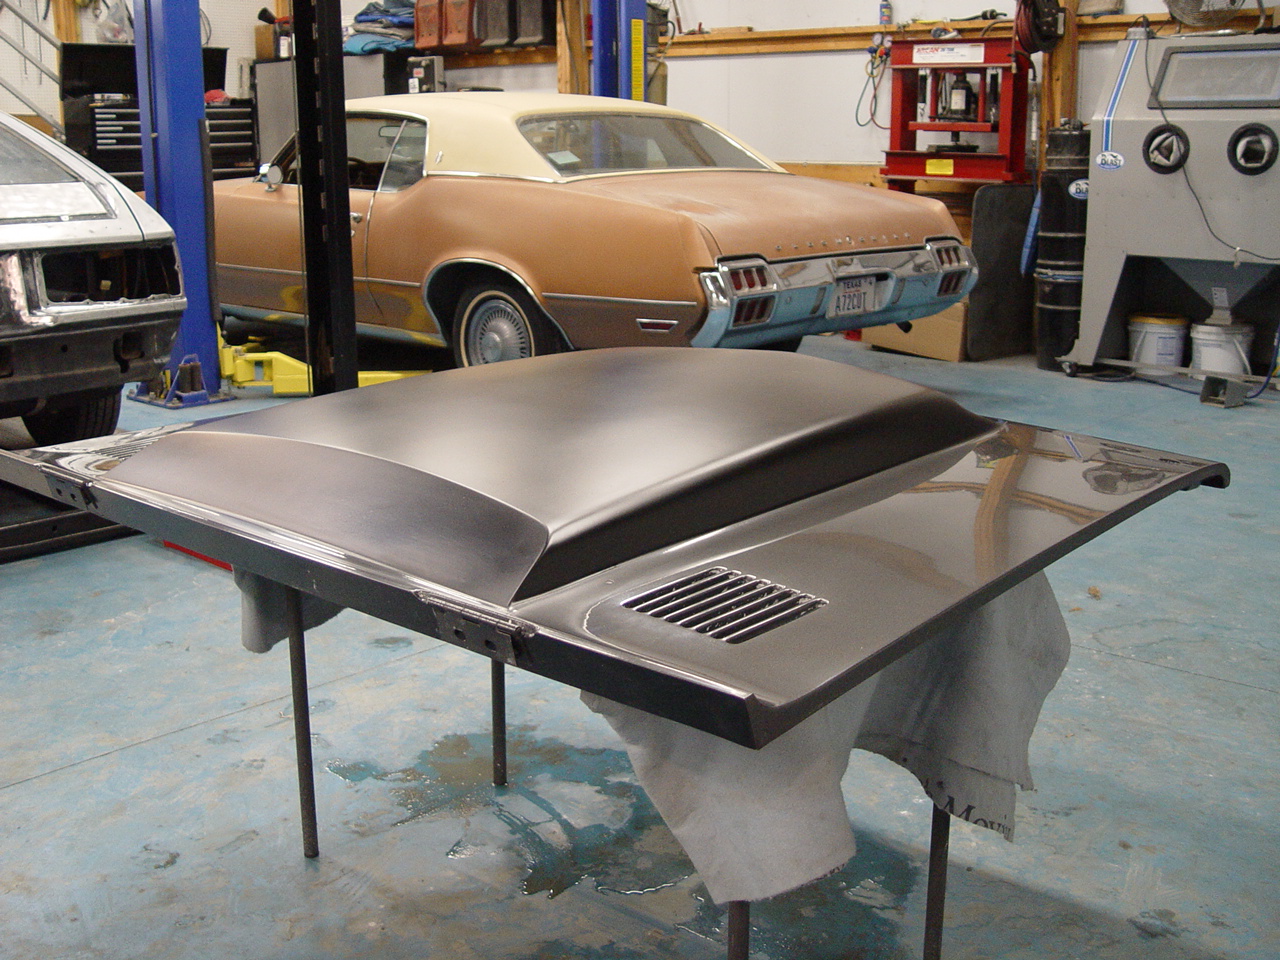
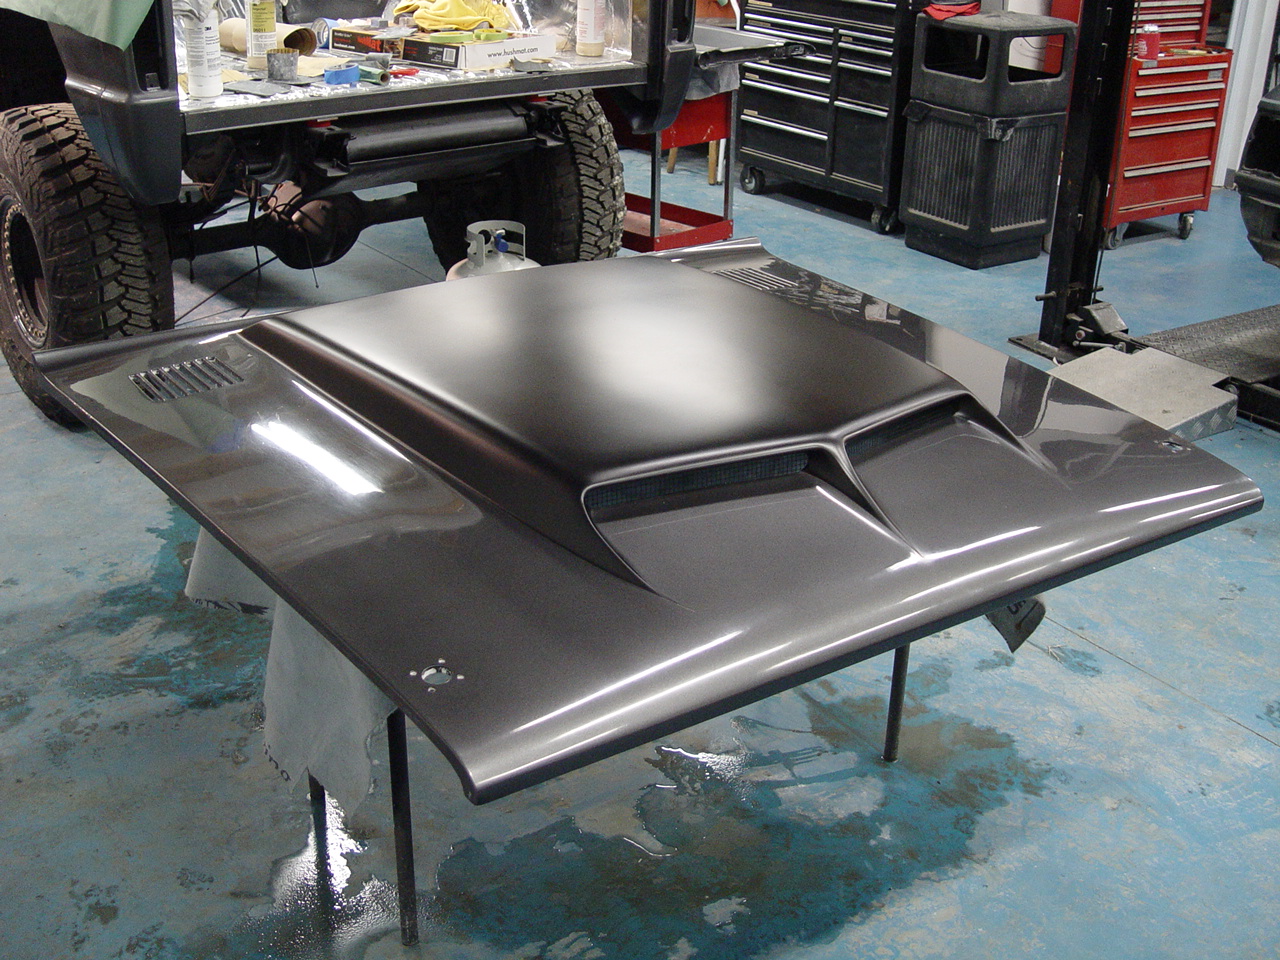
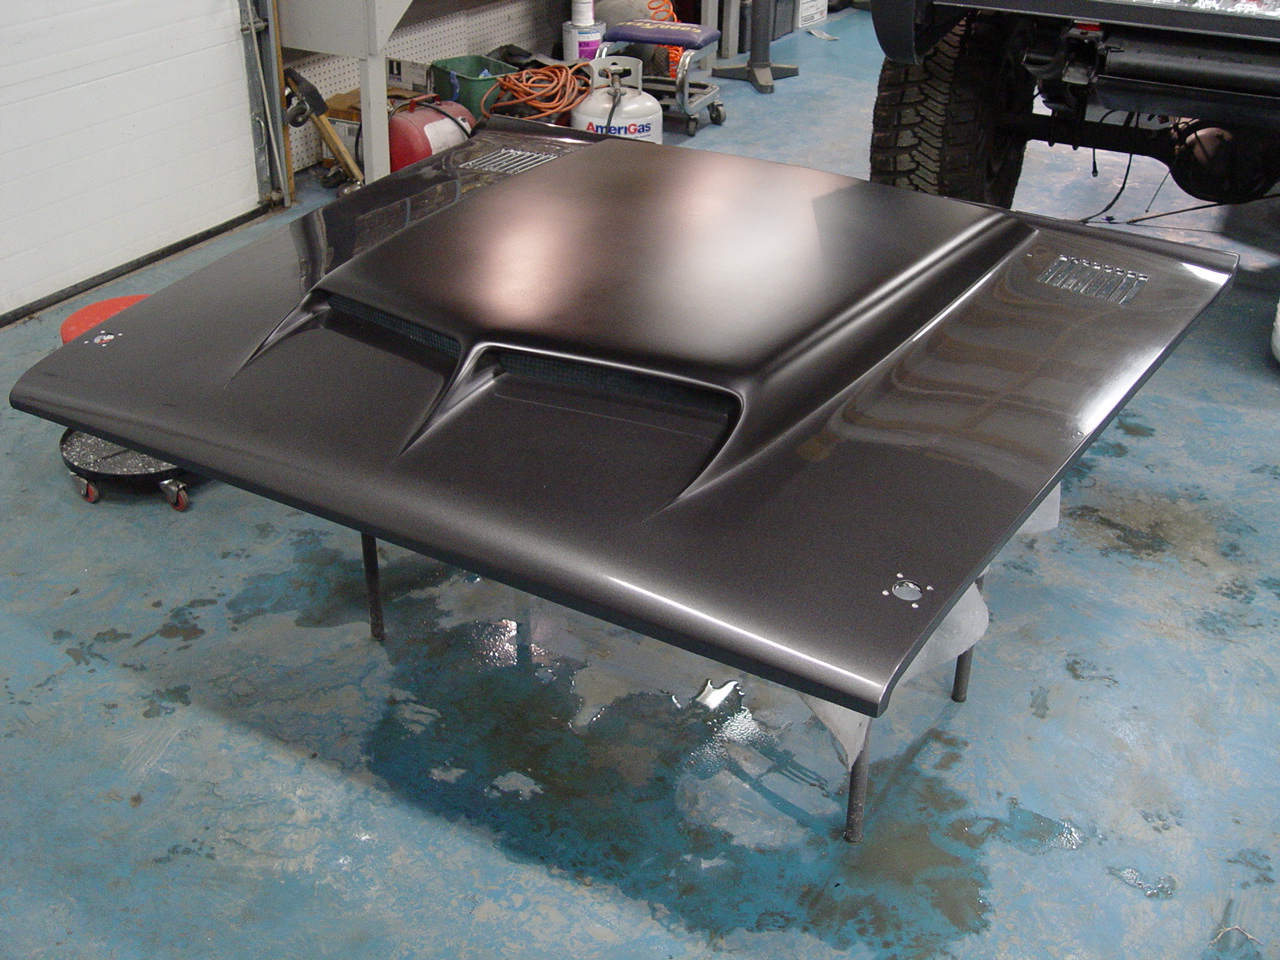
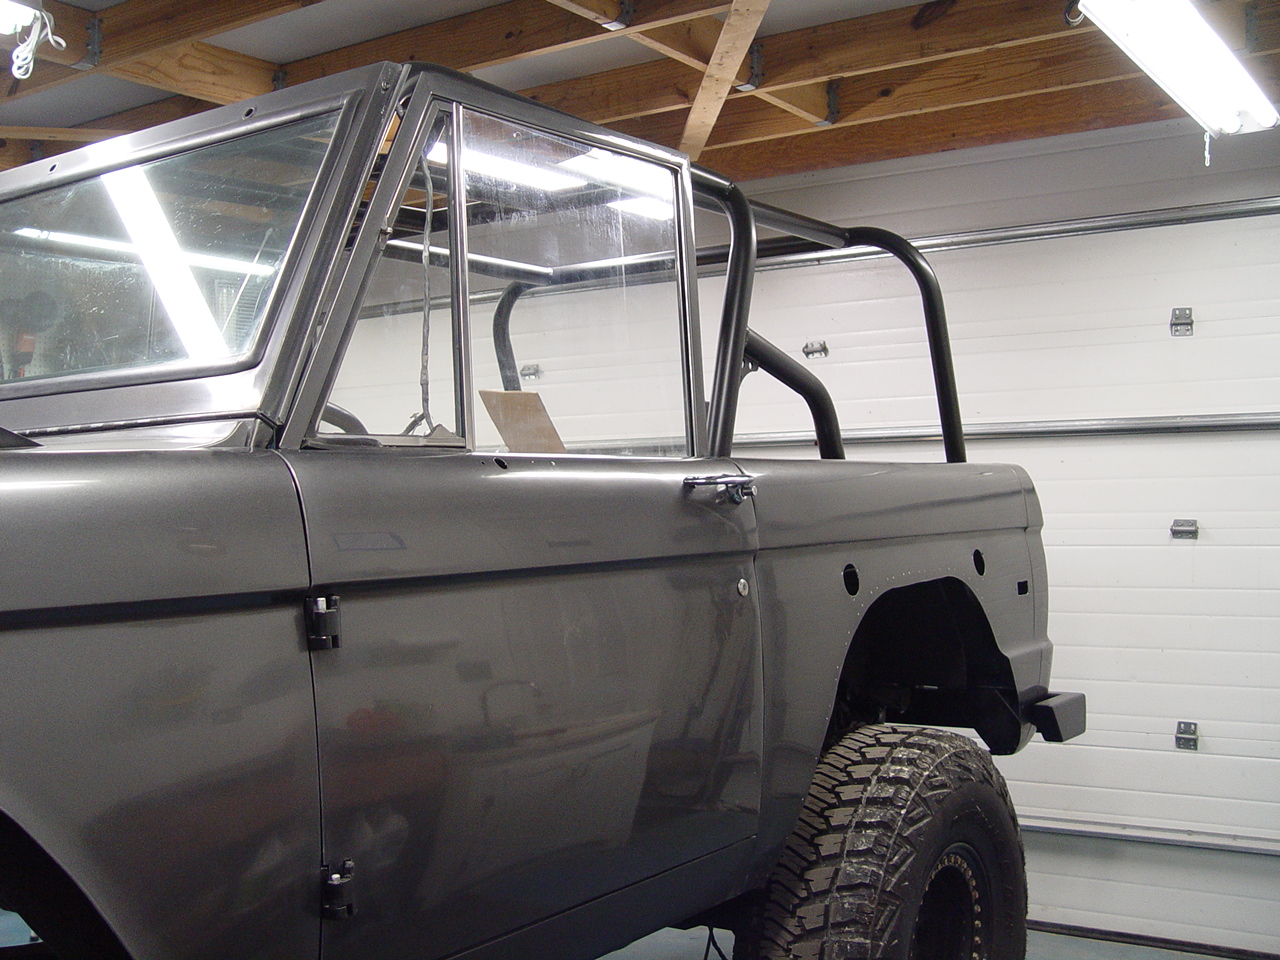
At long last, Buckshot was ready for paint. After masking and applying a coat of sealer primer, three coats of PPG DBC metallic gray (2010 Ford color) basecoat paint was applied, followed by two coats of PPG's DCU2042 clear. If we were looking at an economical "quickie" paint job, this is where the paint work would stop. But, Buckshot is destined for greatness. So, on to the next stage...colorsanding!
|
||||||
 |
 |
 |
 |
 |
||
 |
 |
 |
 |
 |
||
 |
 |
 |
 |
 |
||
 |
 |
 |
 |
 |
||
| Click on an image for a larger view | ||||||
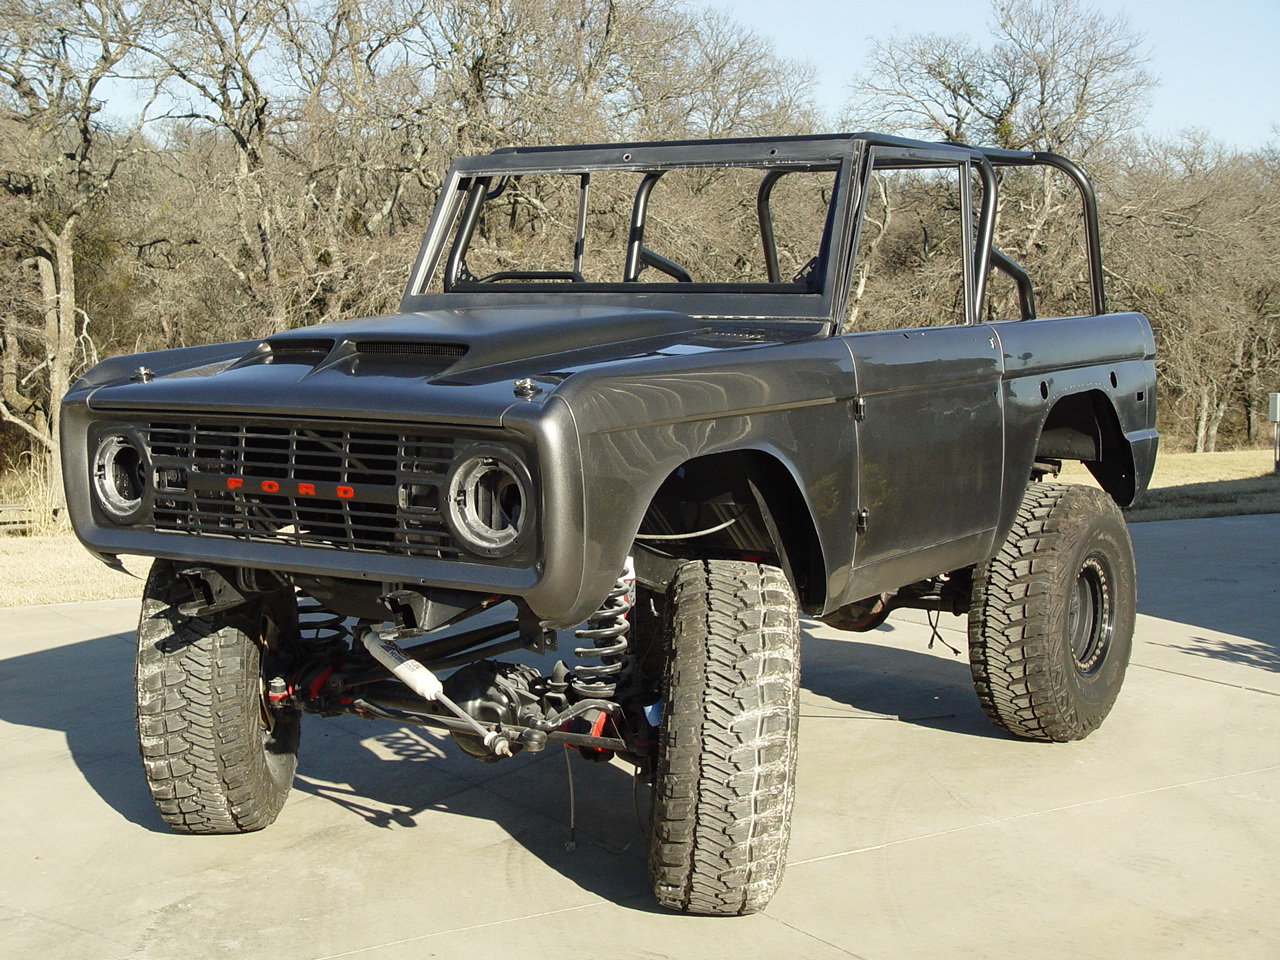
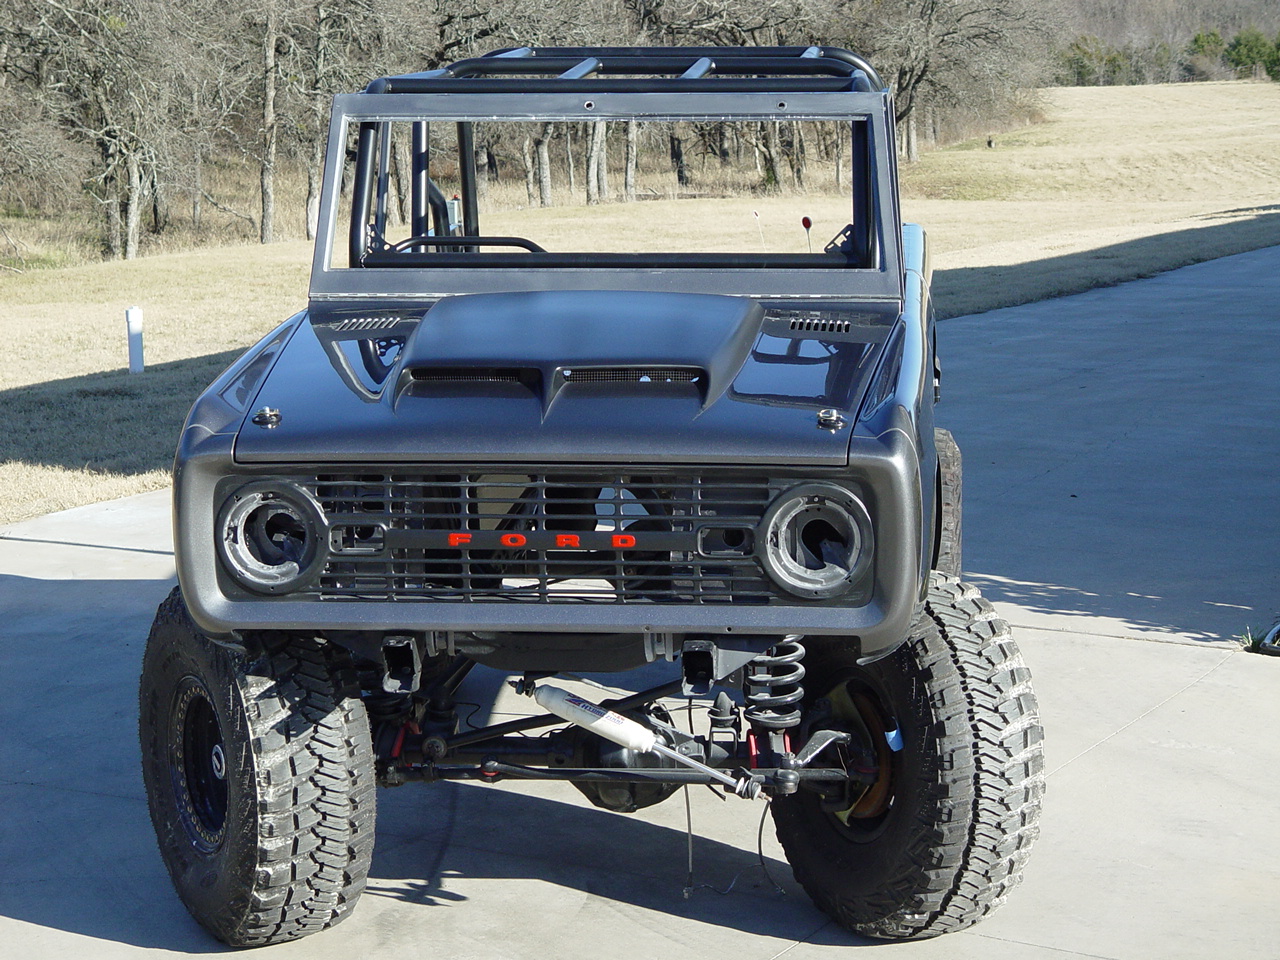
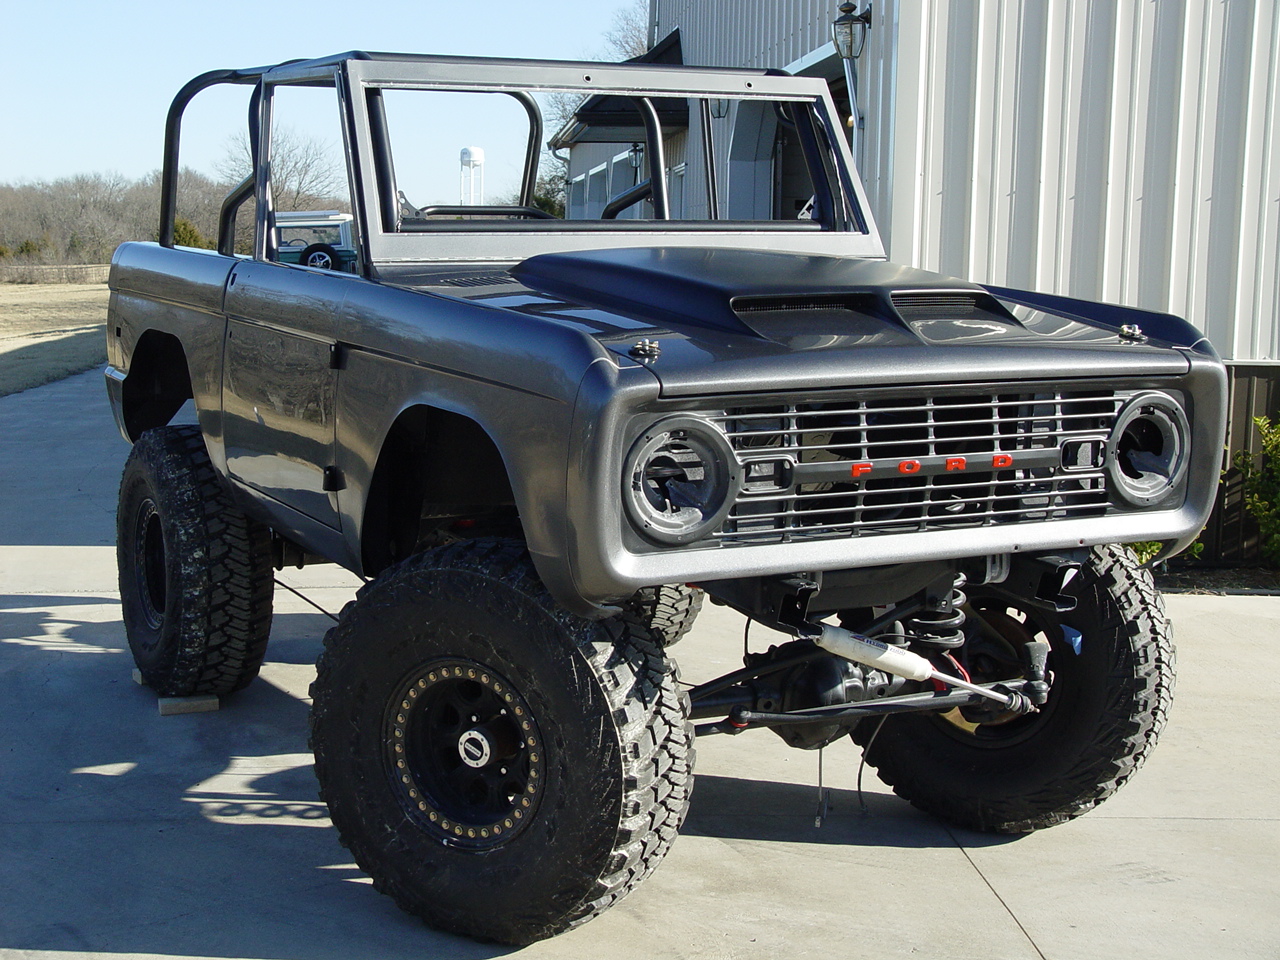
FINISHING TOUCHES | ||||||
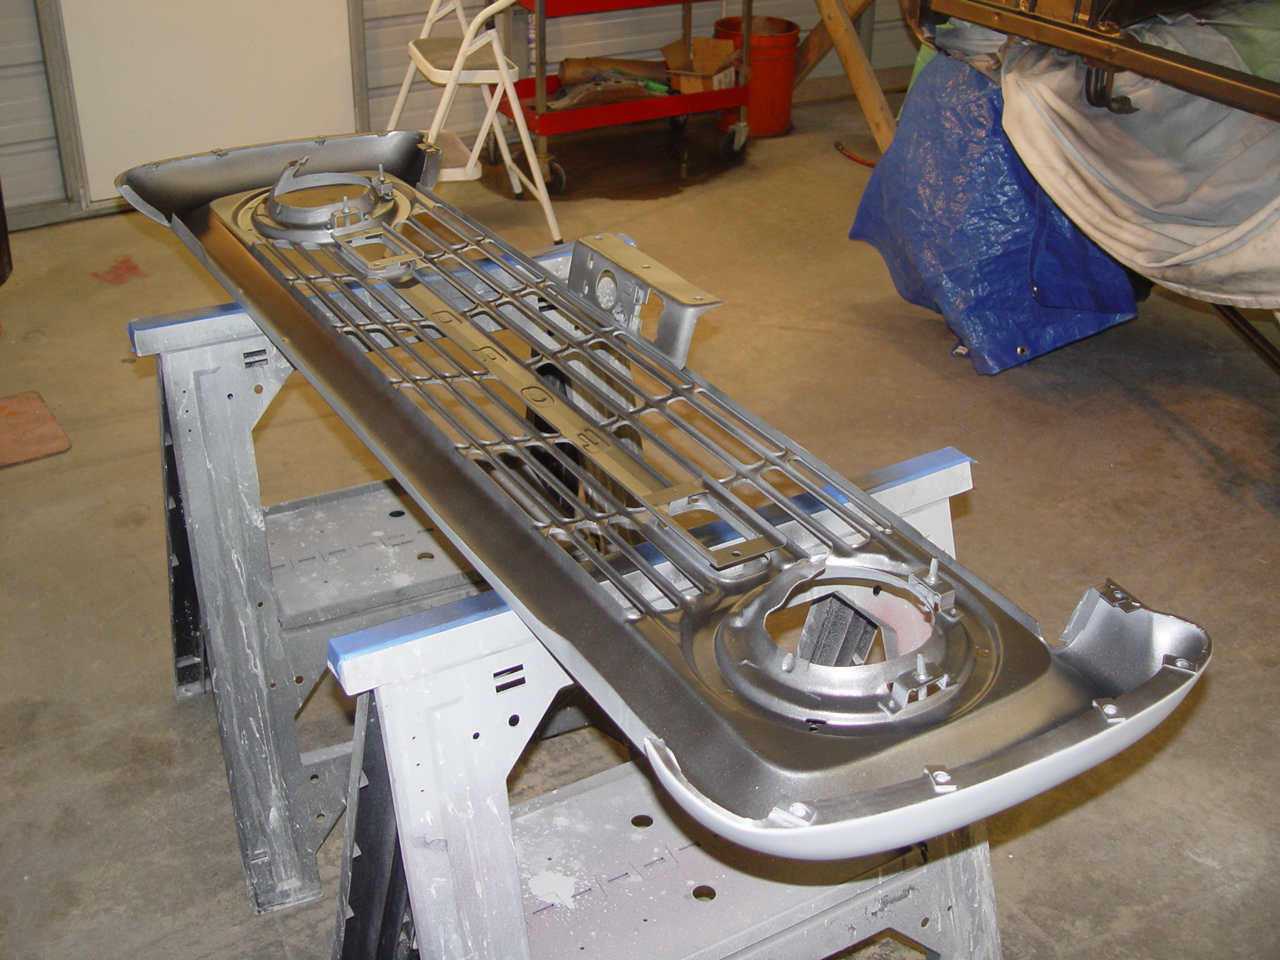
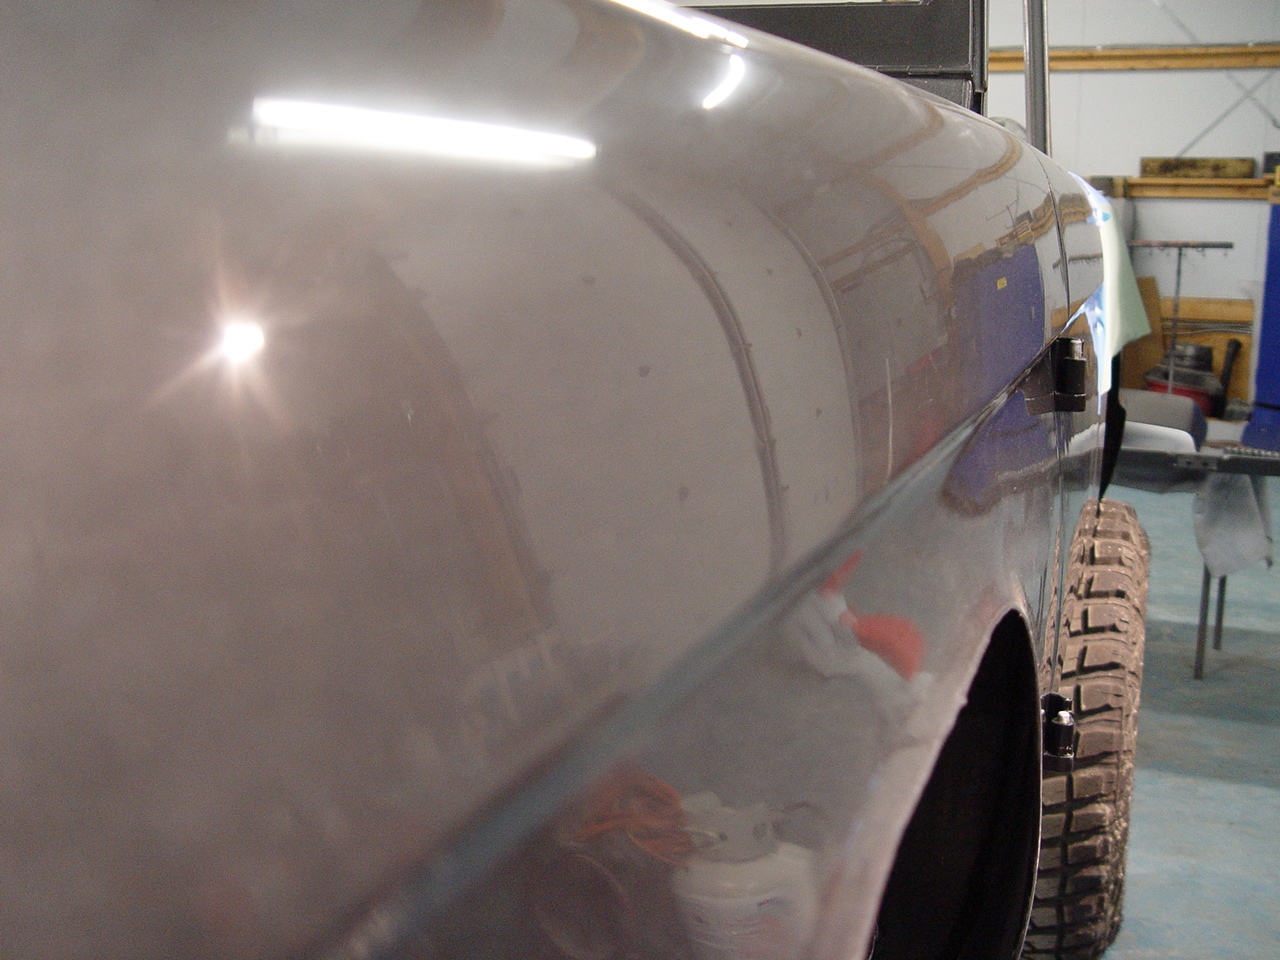
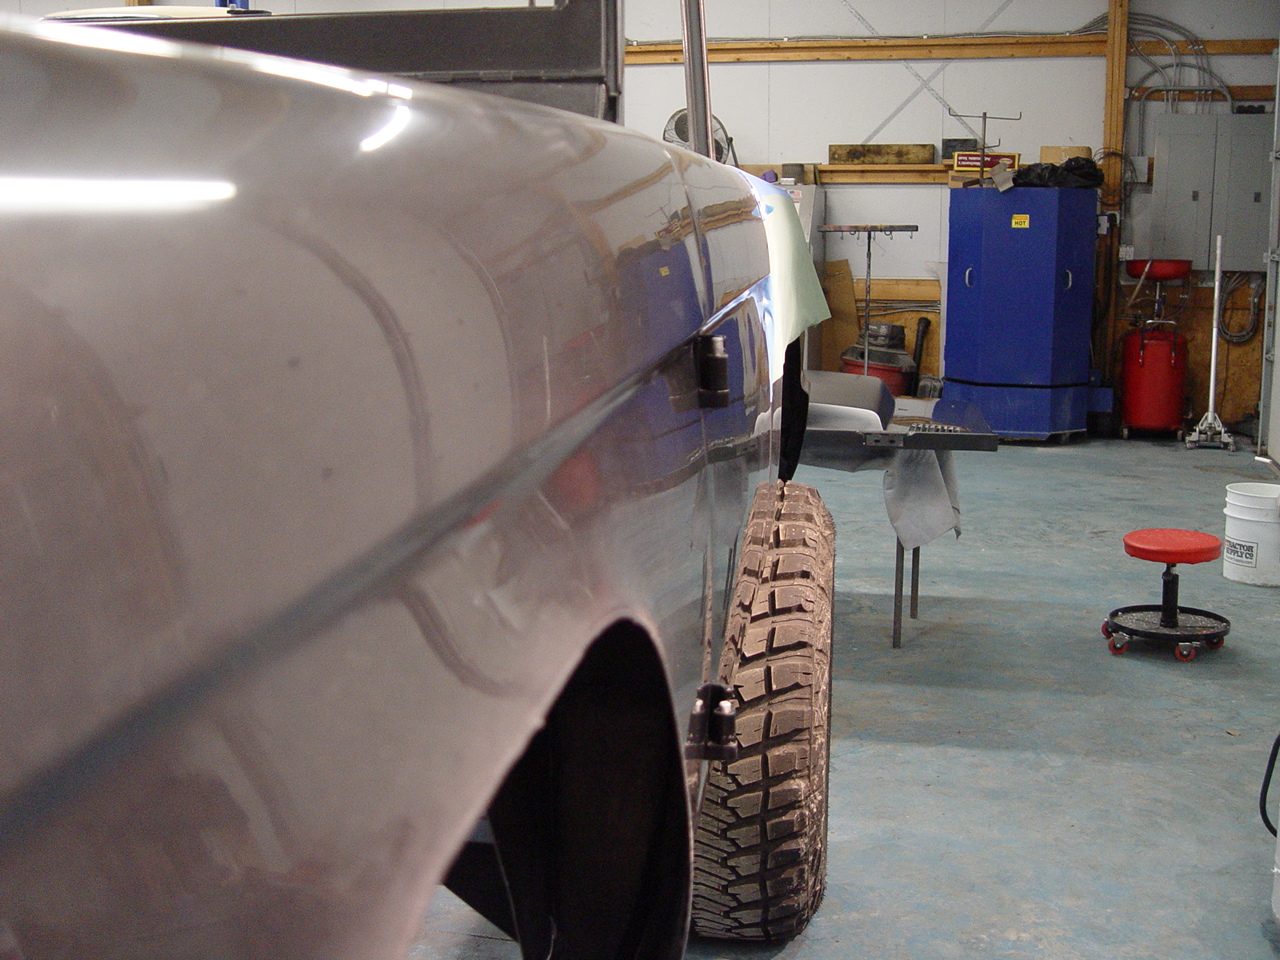
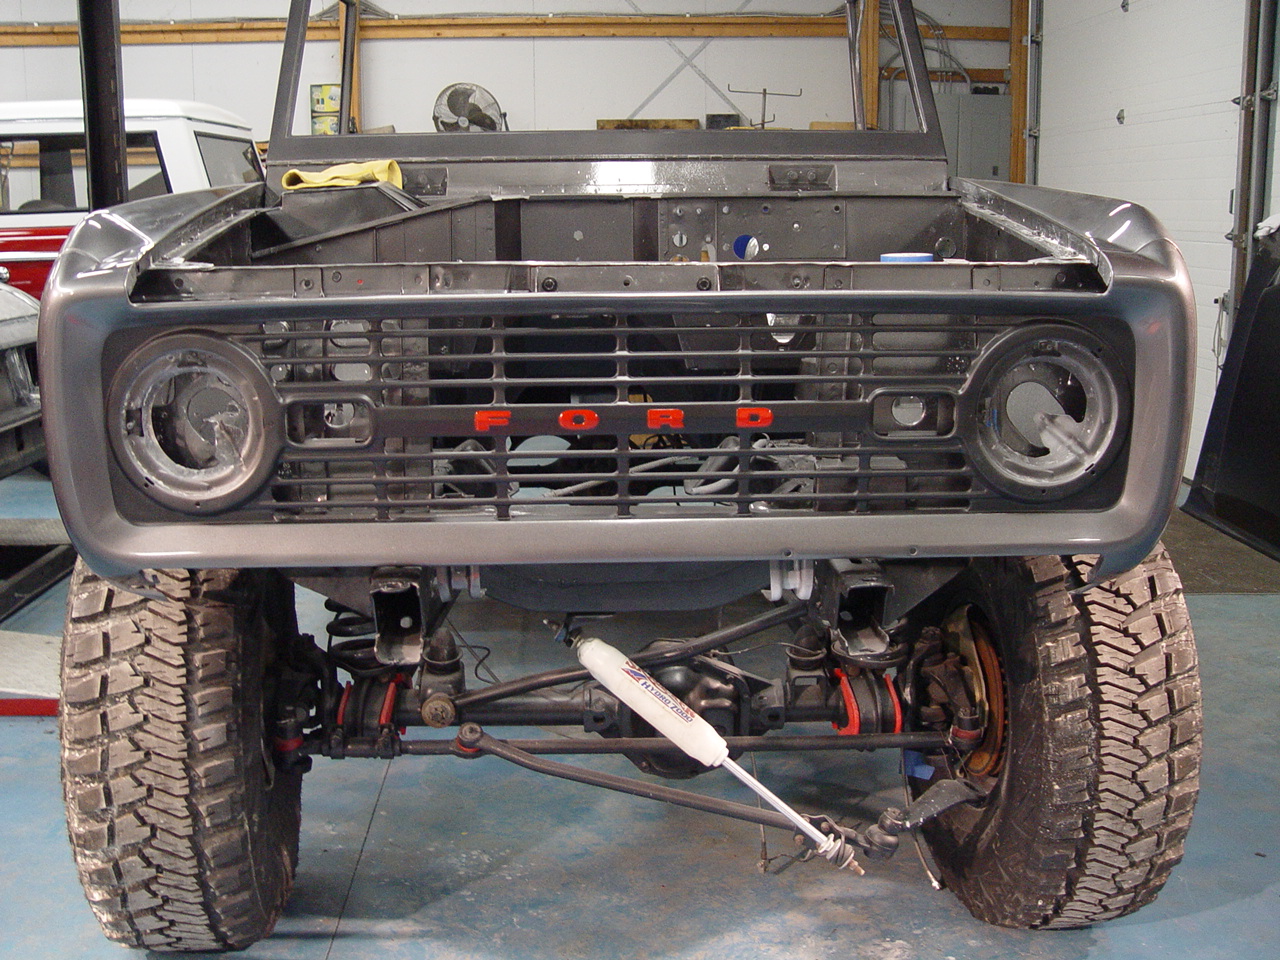
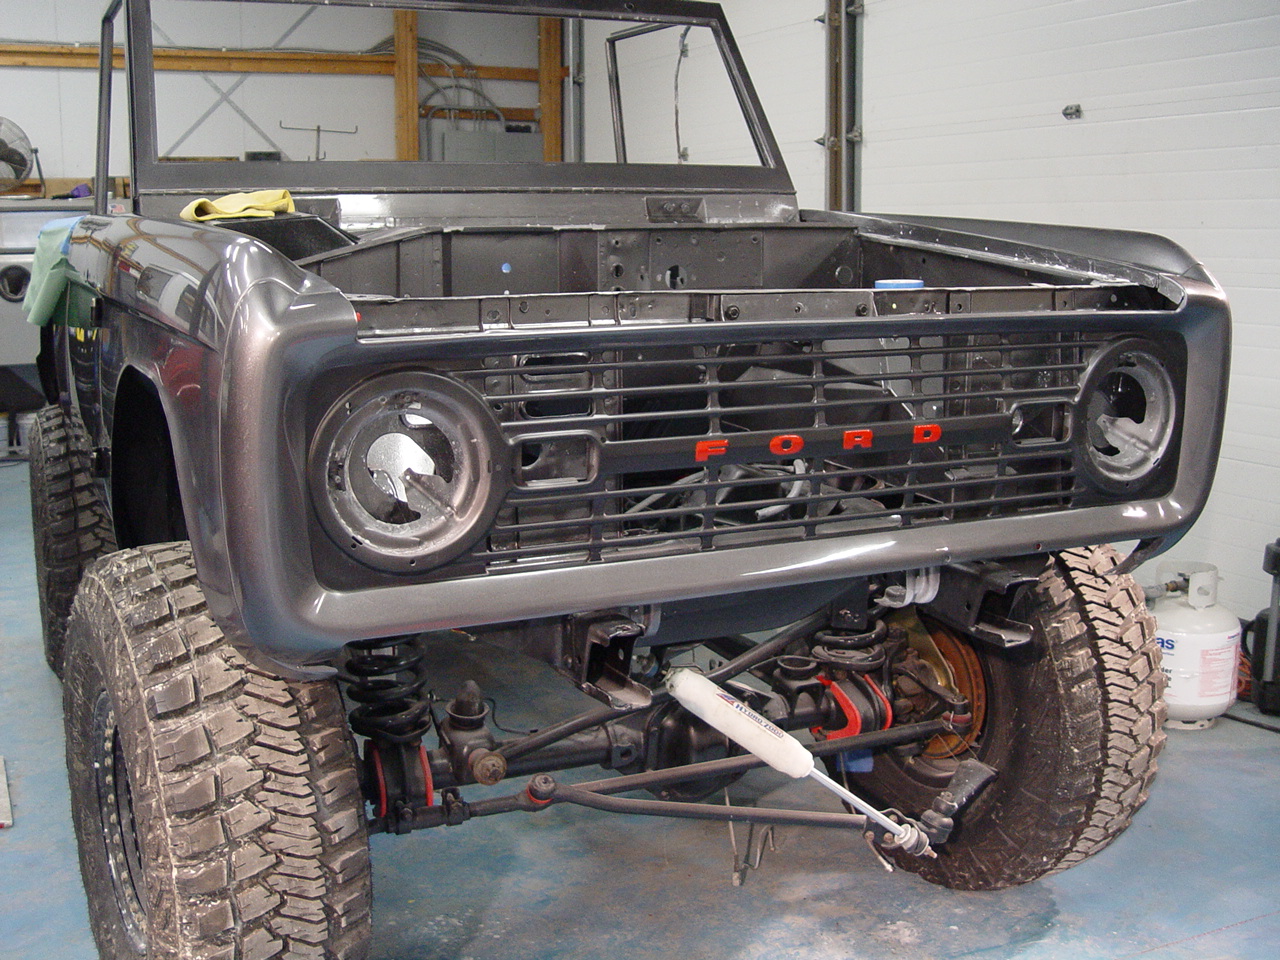
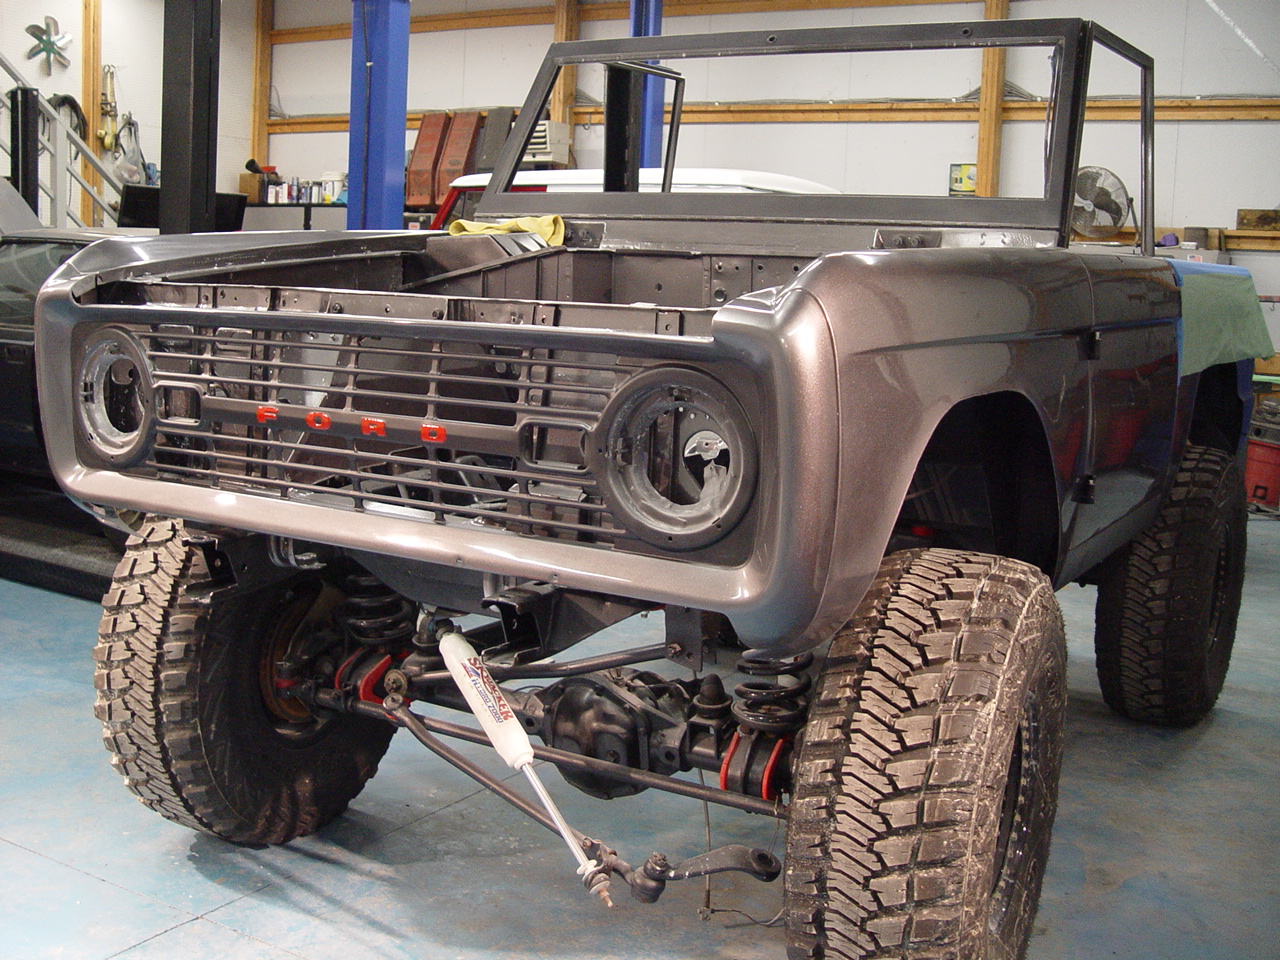
|
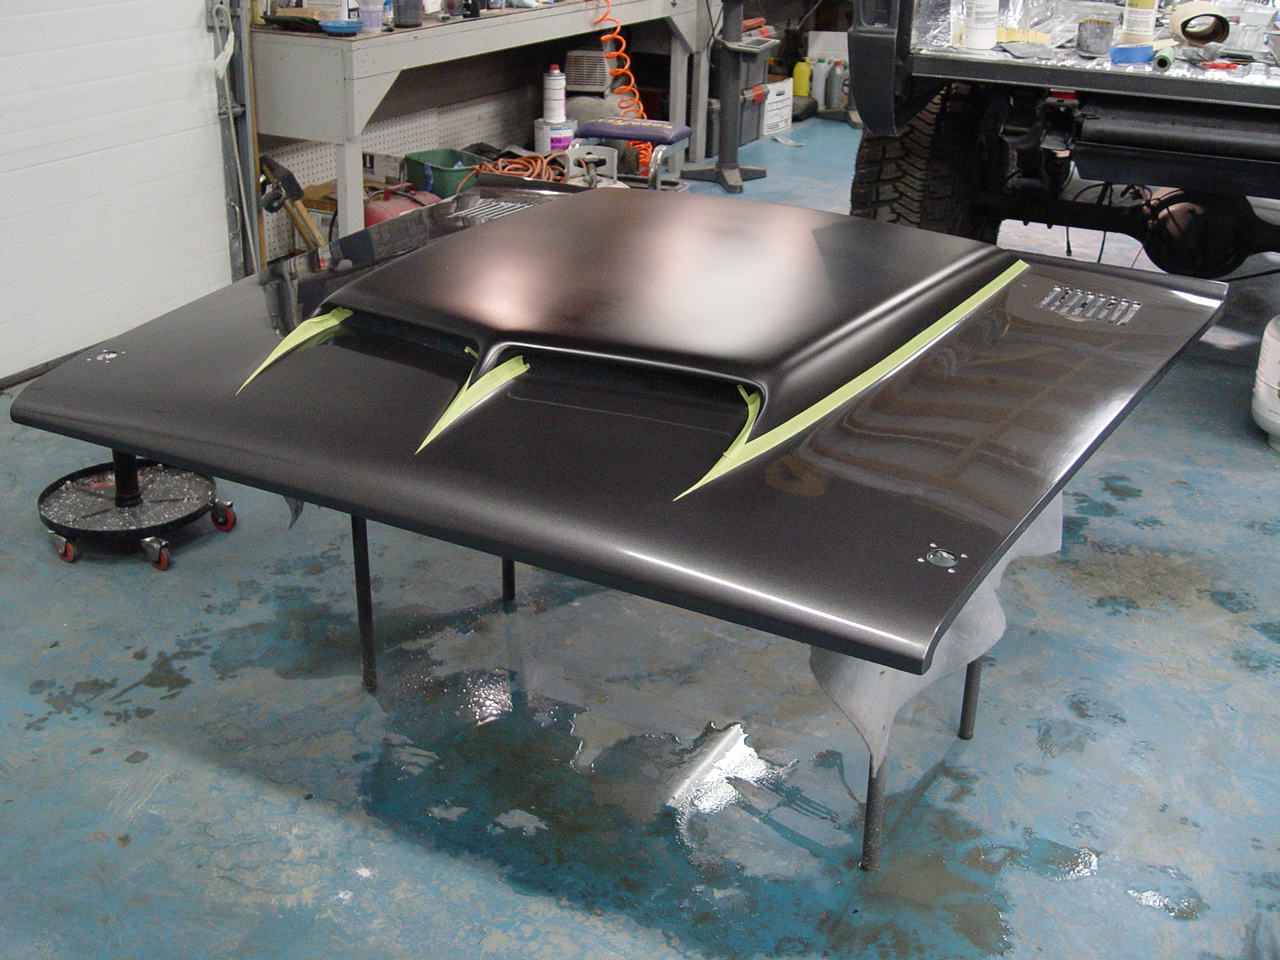
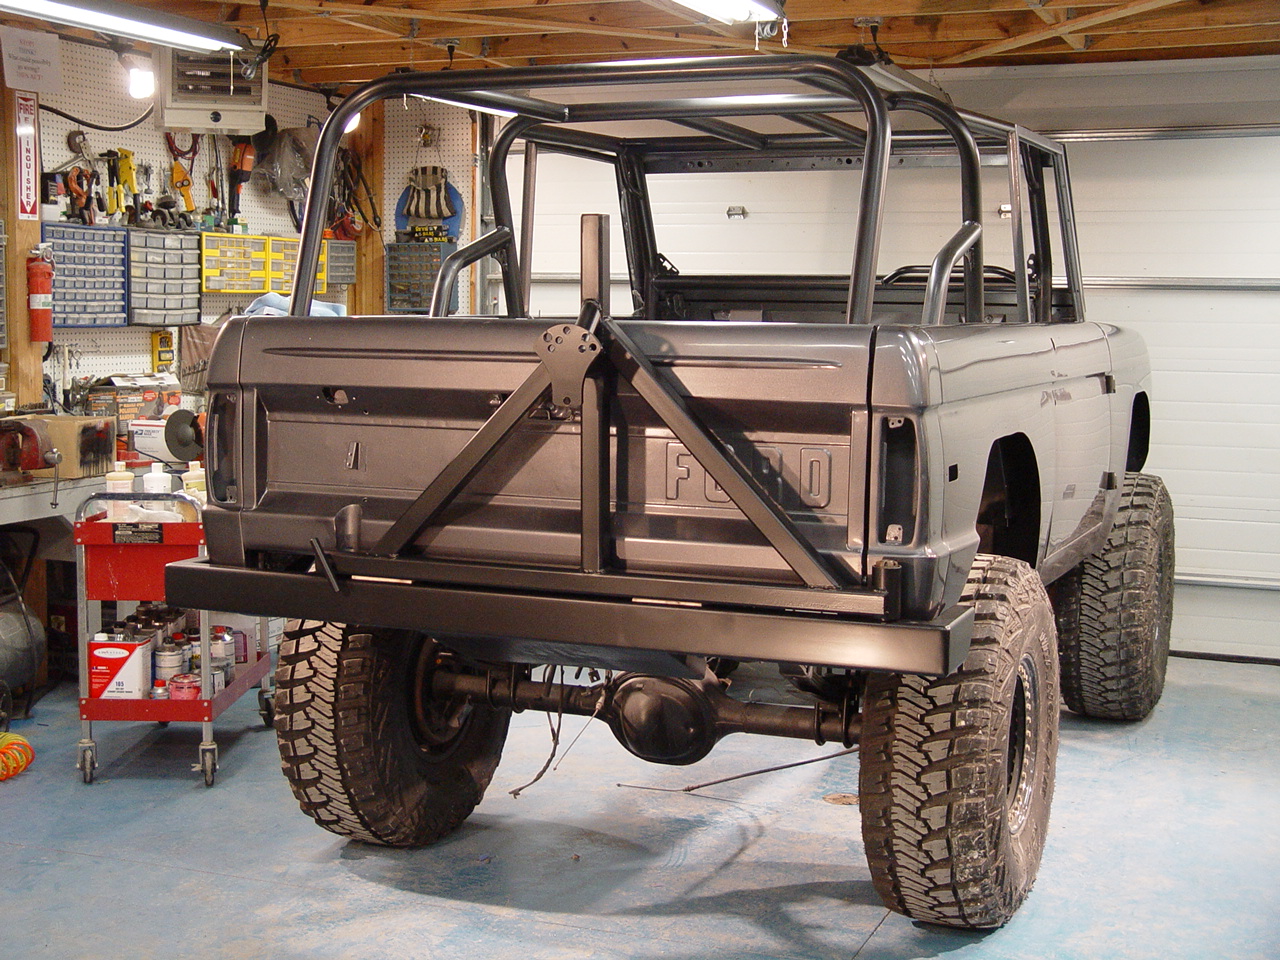
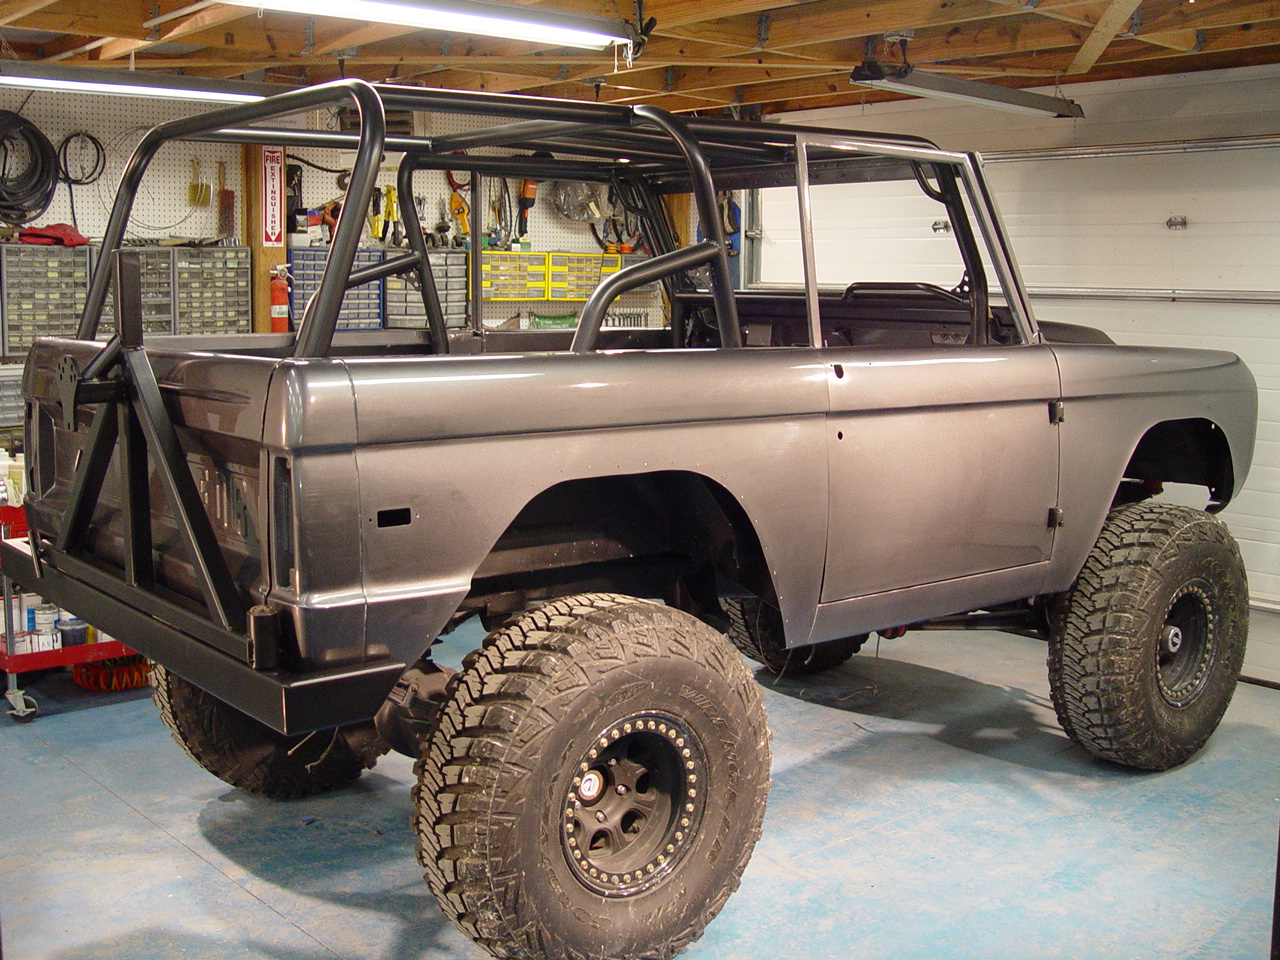
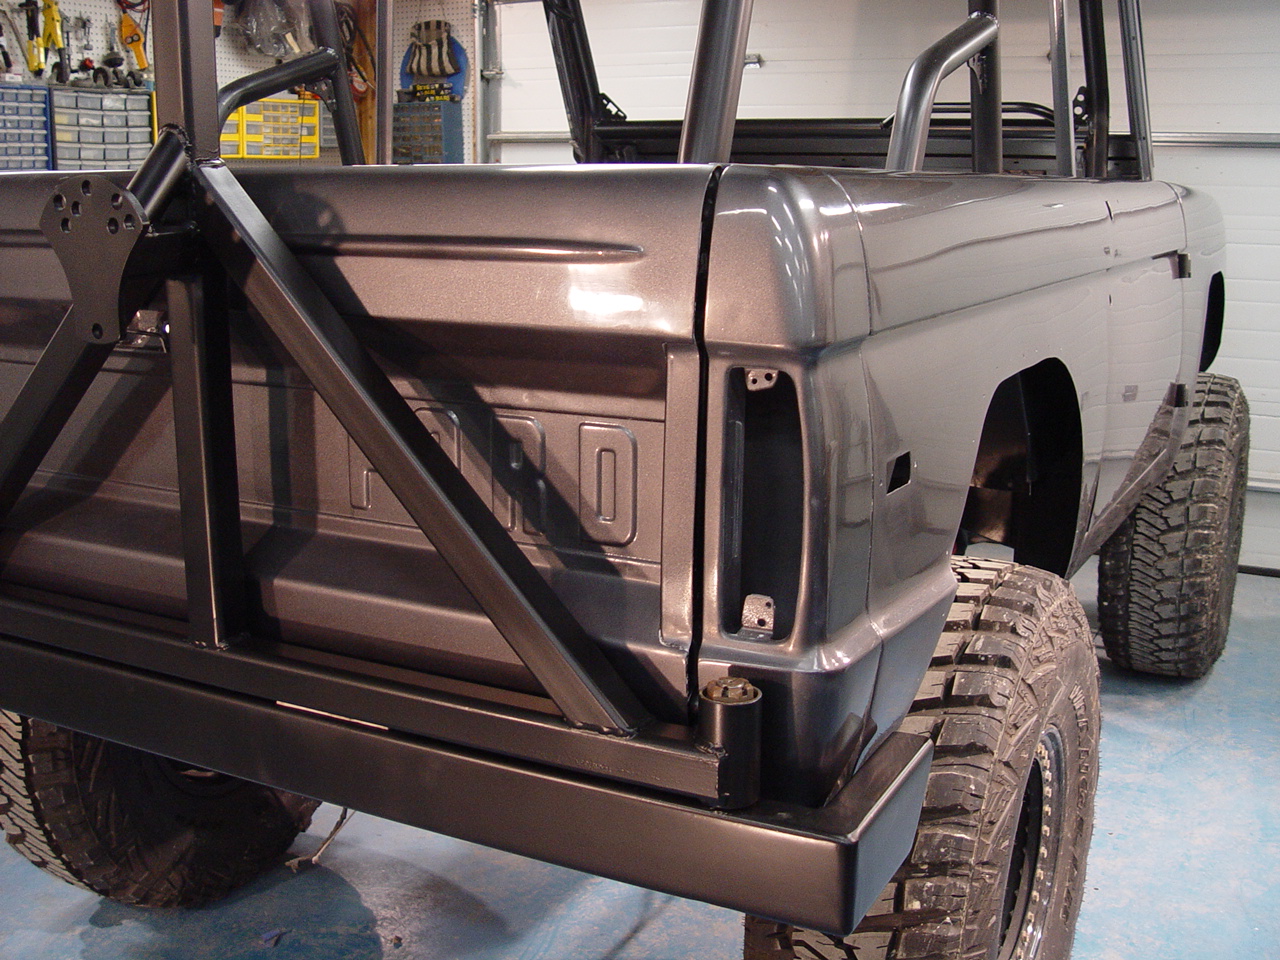
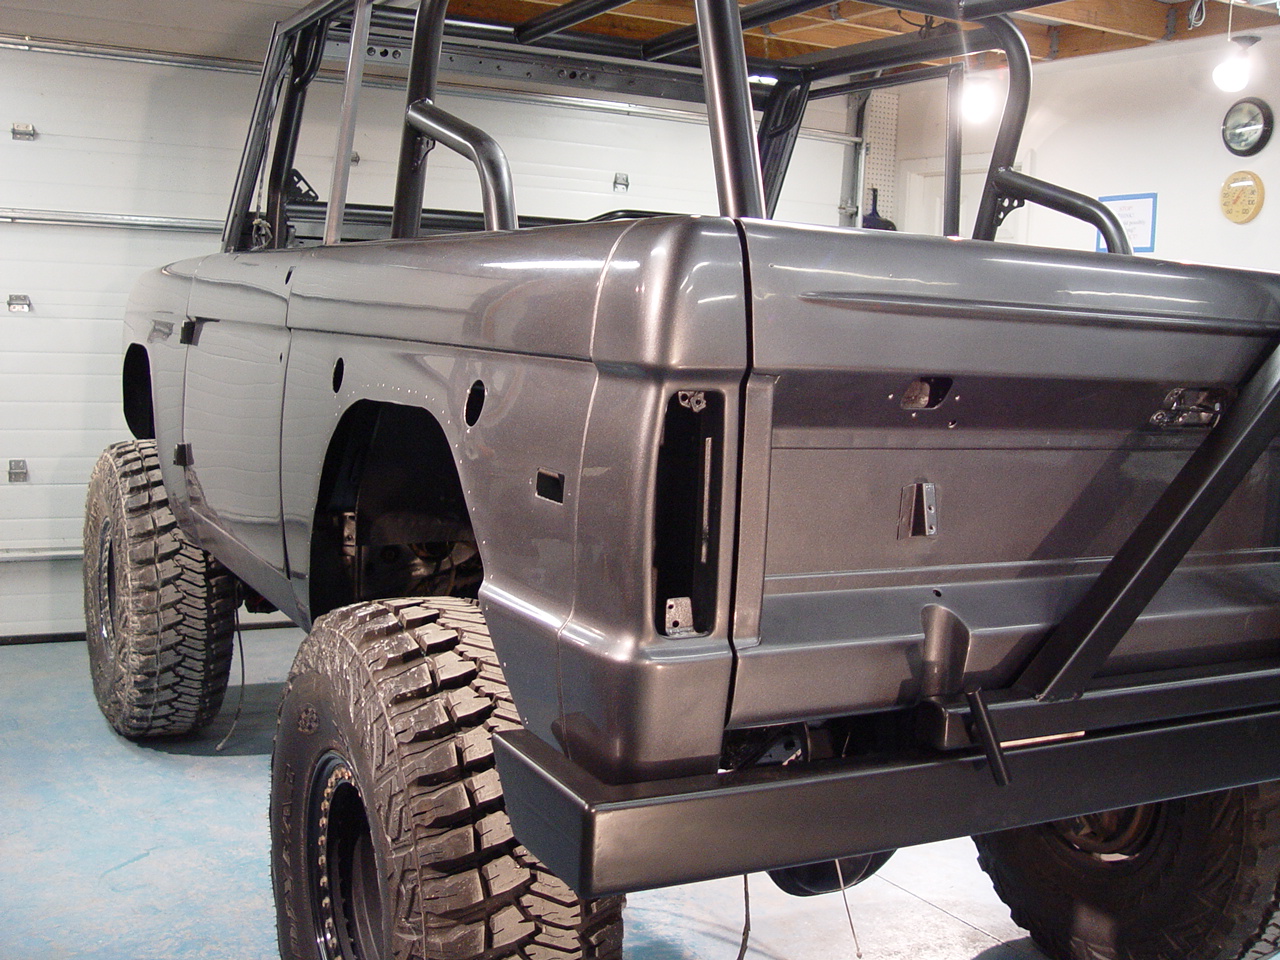
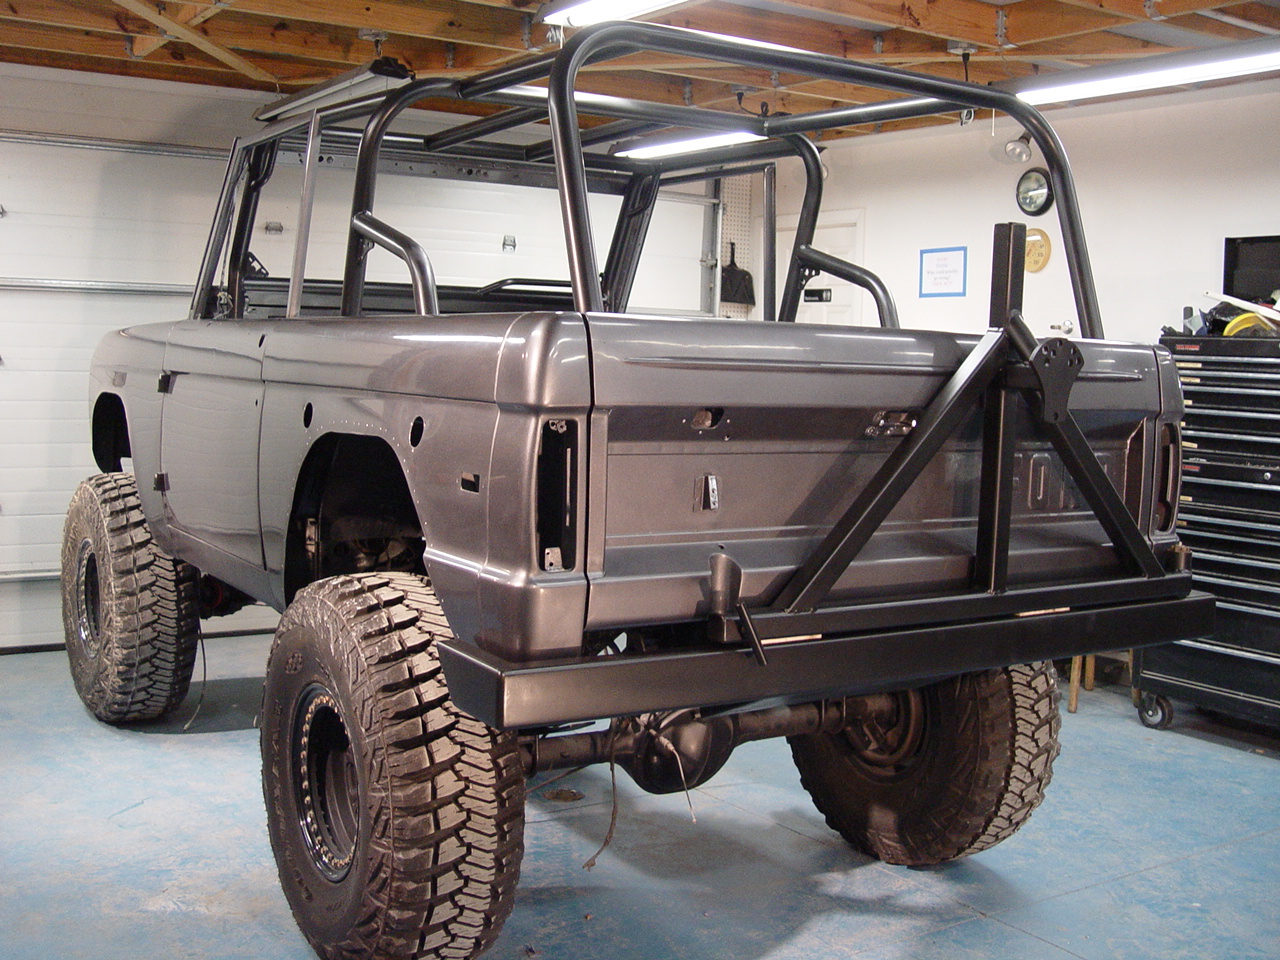
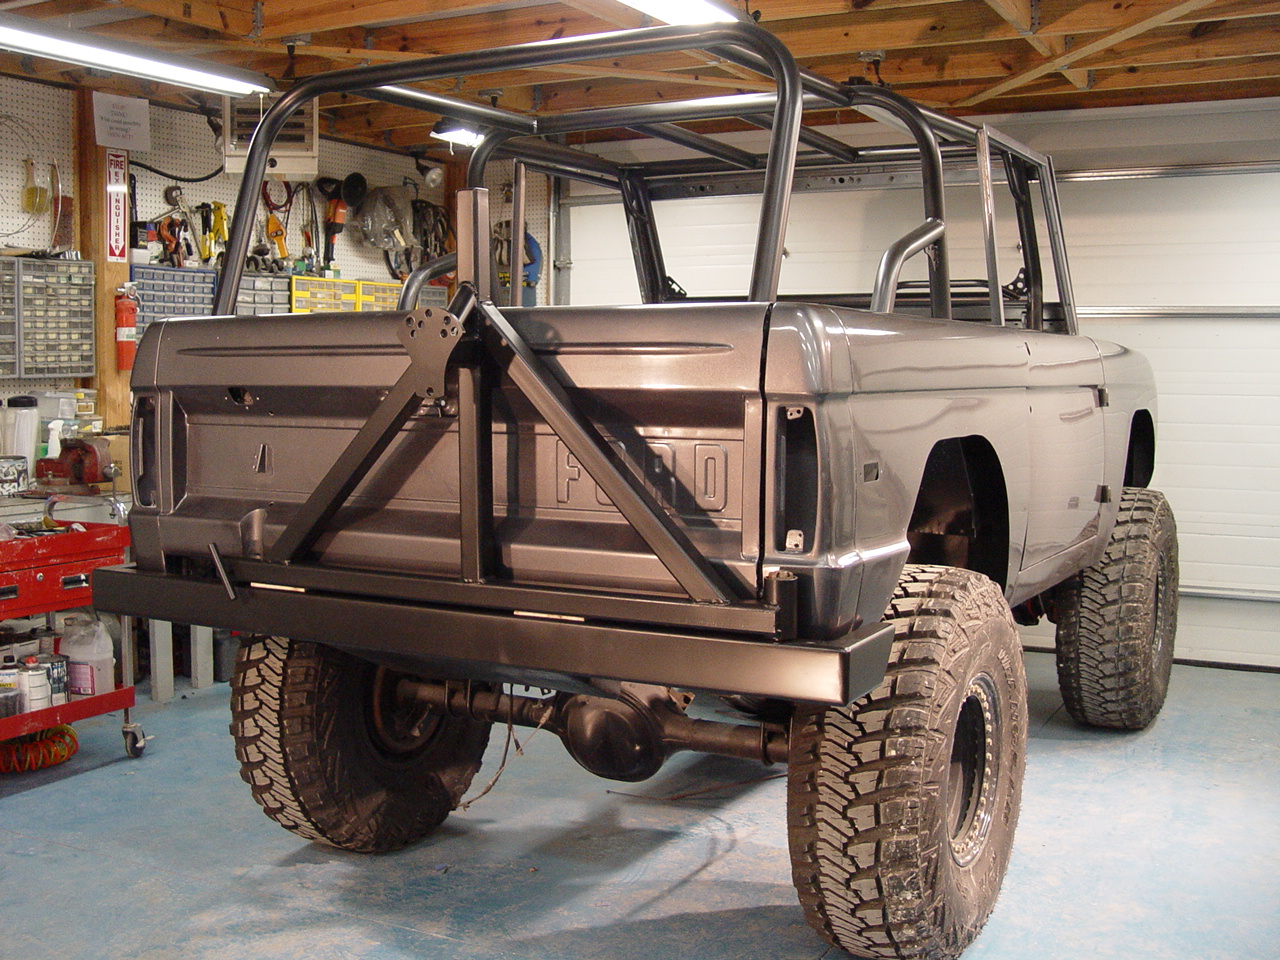
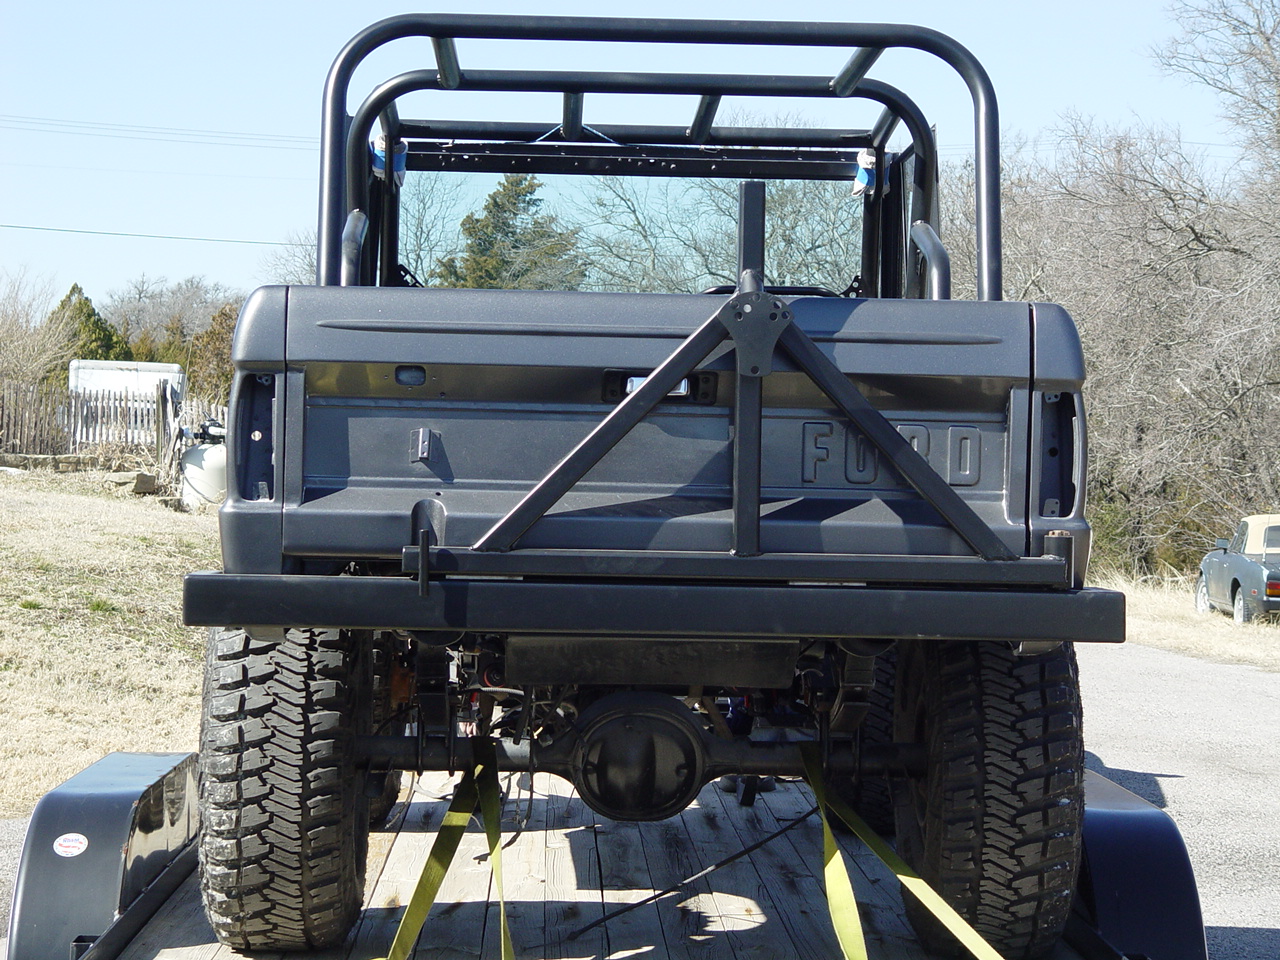
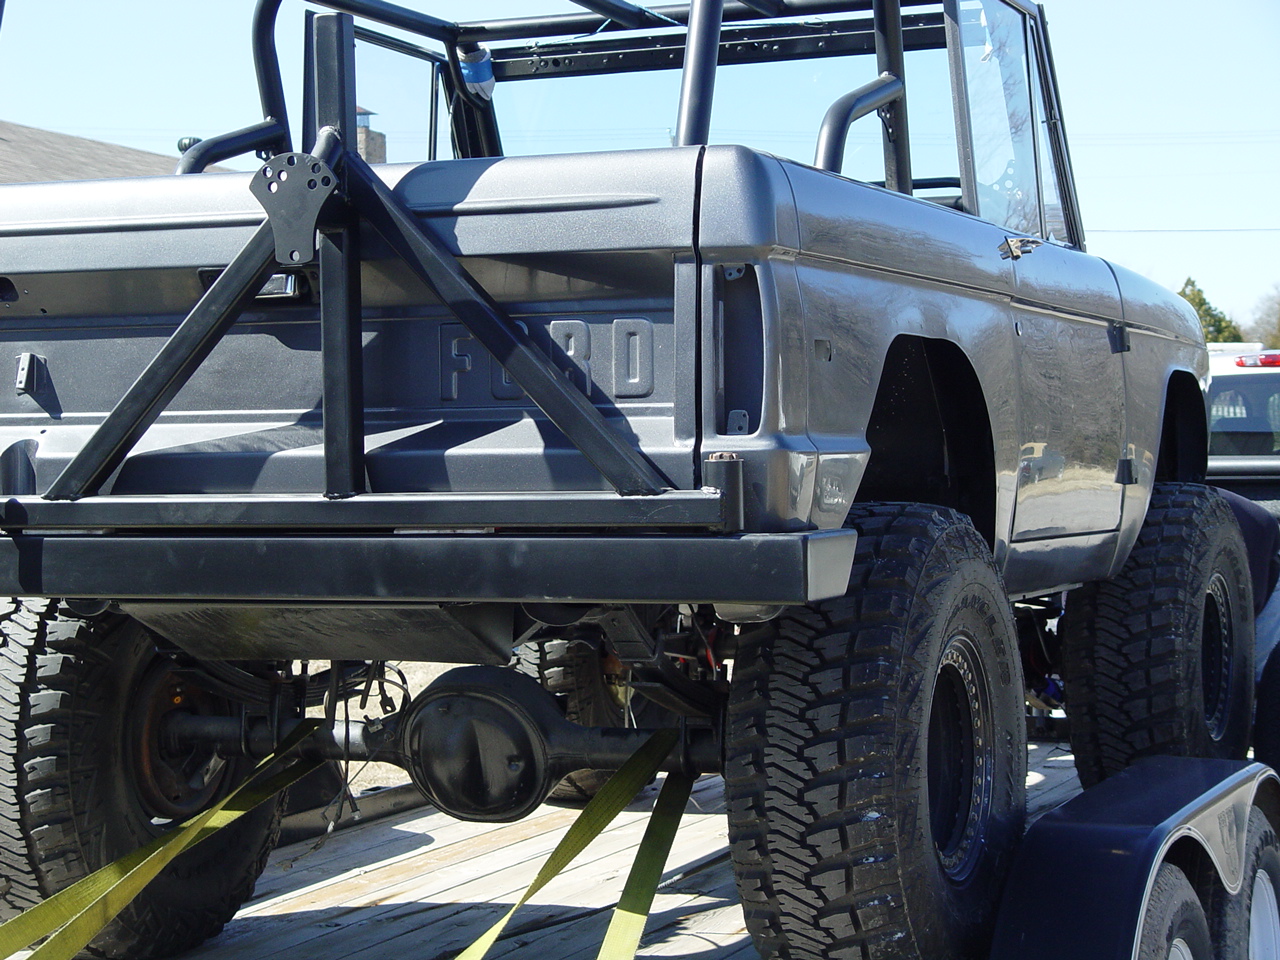
After painting the body, fenders, hood, grill and tailgate, we still had to paint the rear bumper, spare tire carrier and roll cage. Additionally, we blacked-out the center of the grill and the hood scoop. The hood scoop had scalloped tips which required some intricate masking. Also, the black used on the grill and hood scoop was custom matched to the same semi-gloss black as the POR-15 used on the roll cage and rear bumper. That meant that we had to back-mask the hood scoop when we started colorsanding and polishing the gray part of the hood. But - after painting the embossed "F O R D" letters on the grill red, all the pieces of the puzzle were finally ready for assembly.
We also colorsanded, compounded, polished and buffed the entire truck. All in all, this was probably the most time-consuming step of the entire project. But, it's also the final opportunity to make everything look its best.
|
||||||
 |
 |
 |
 |
 |
||
 |
 |
 |
 |
 |
||
 |
 |
 |
 |
 |
||
 |
 |
 |
 |
 |
||
 |
 |
 |
 |
 |
||
| Click on an image for a larger view | ||||||
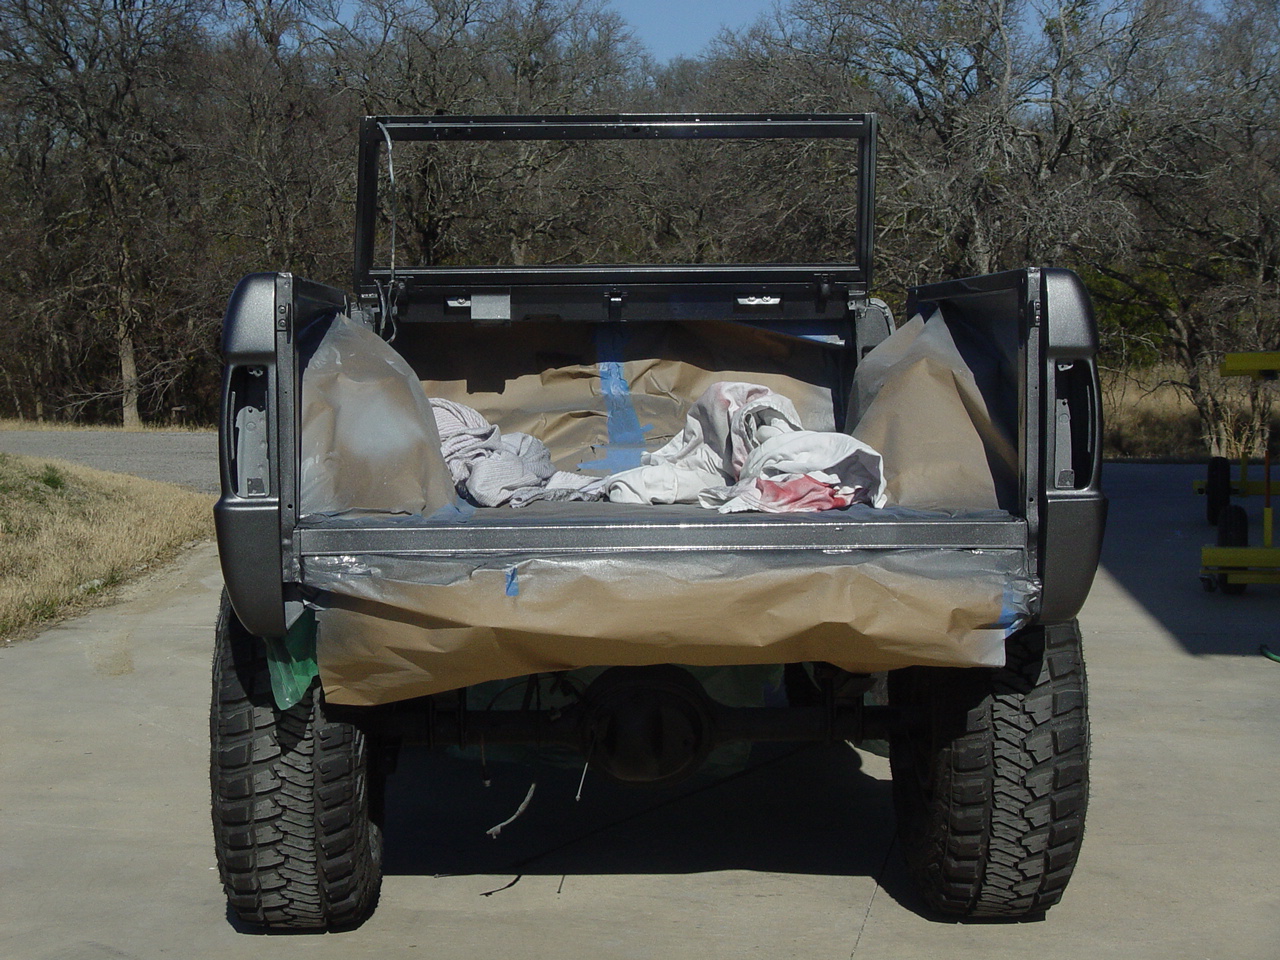
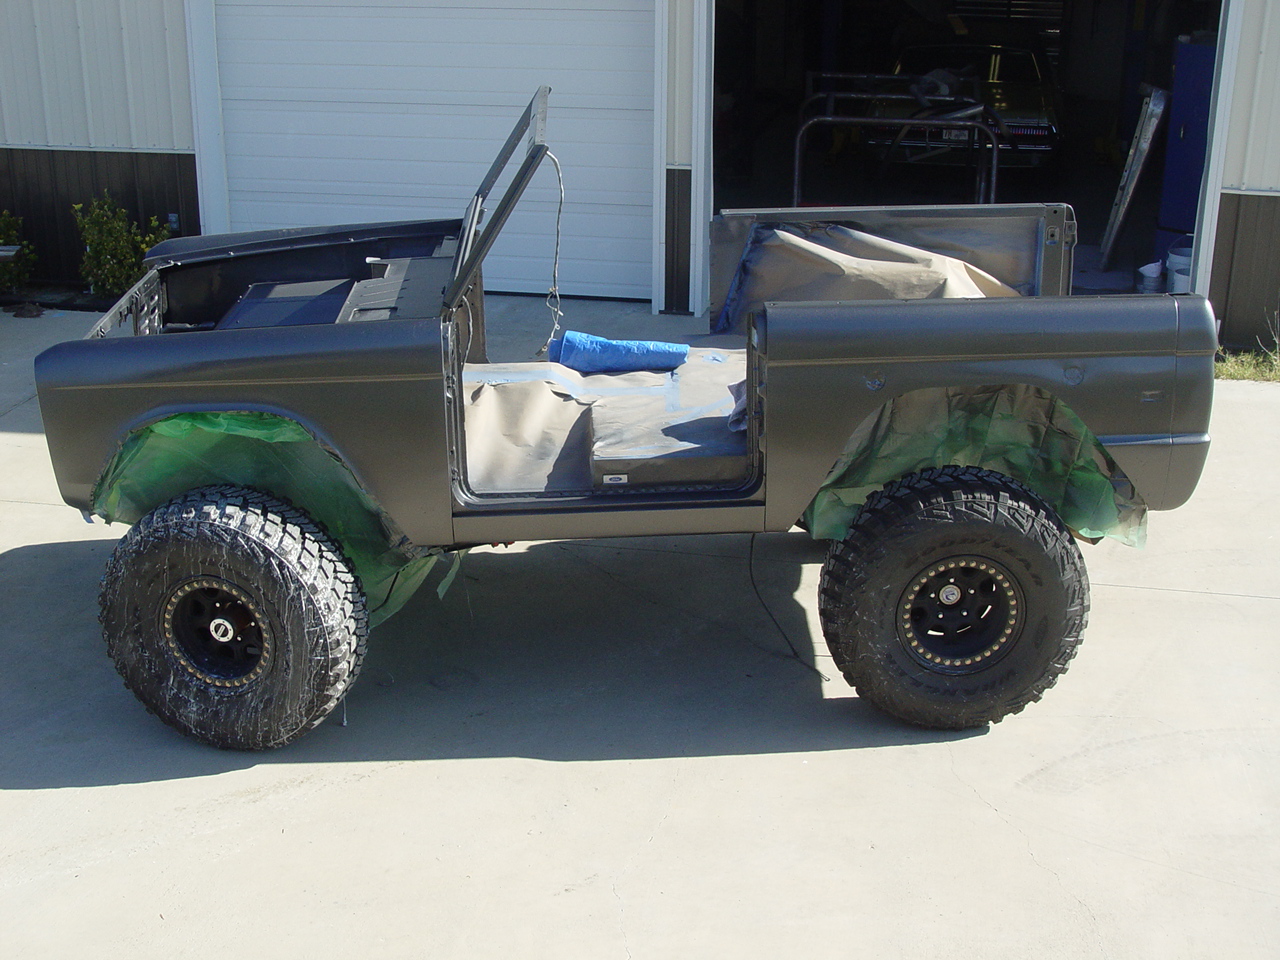
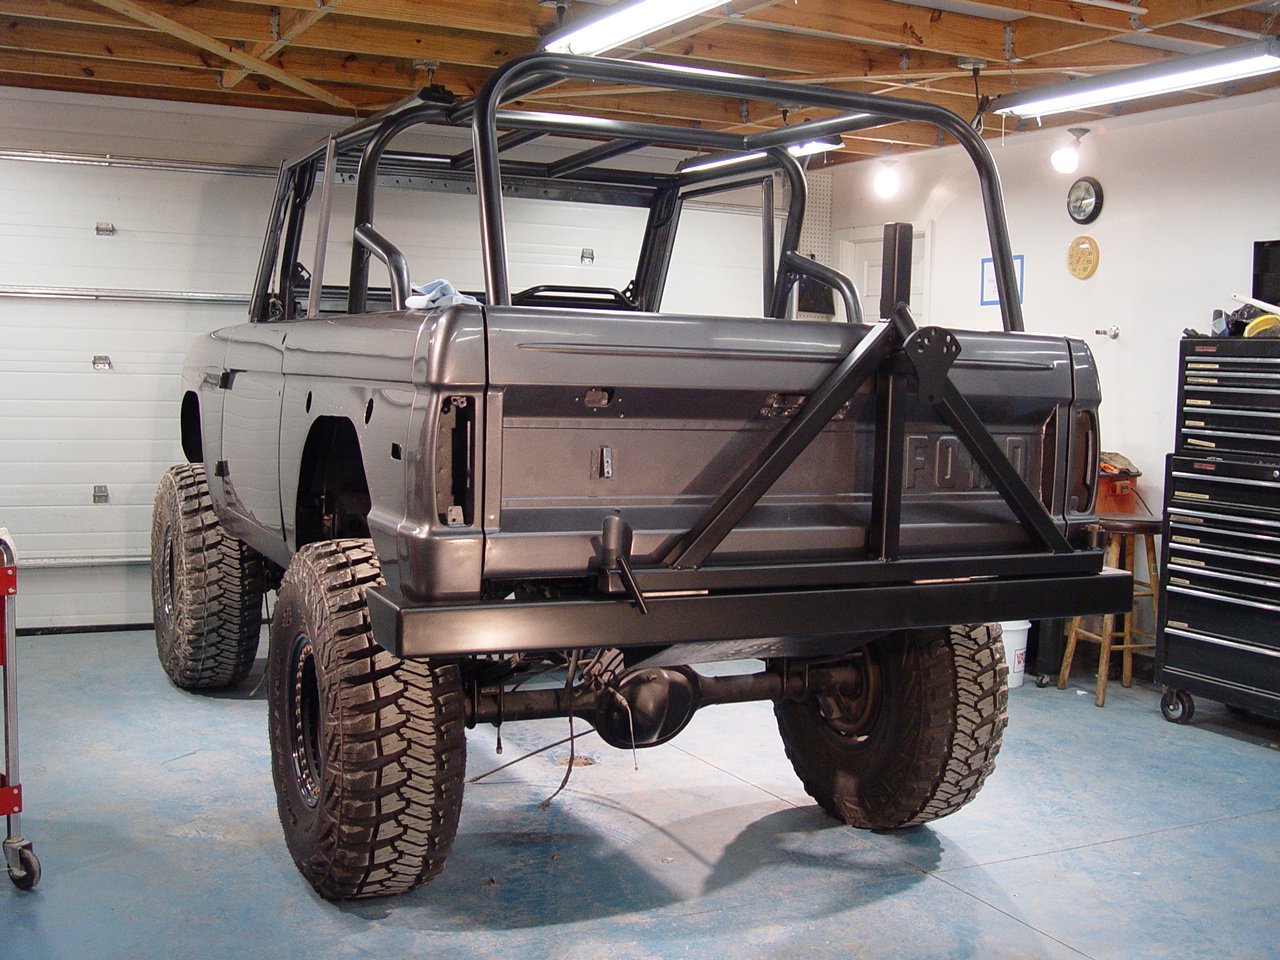
COMPLETION & DELIVERY | ||||||
|
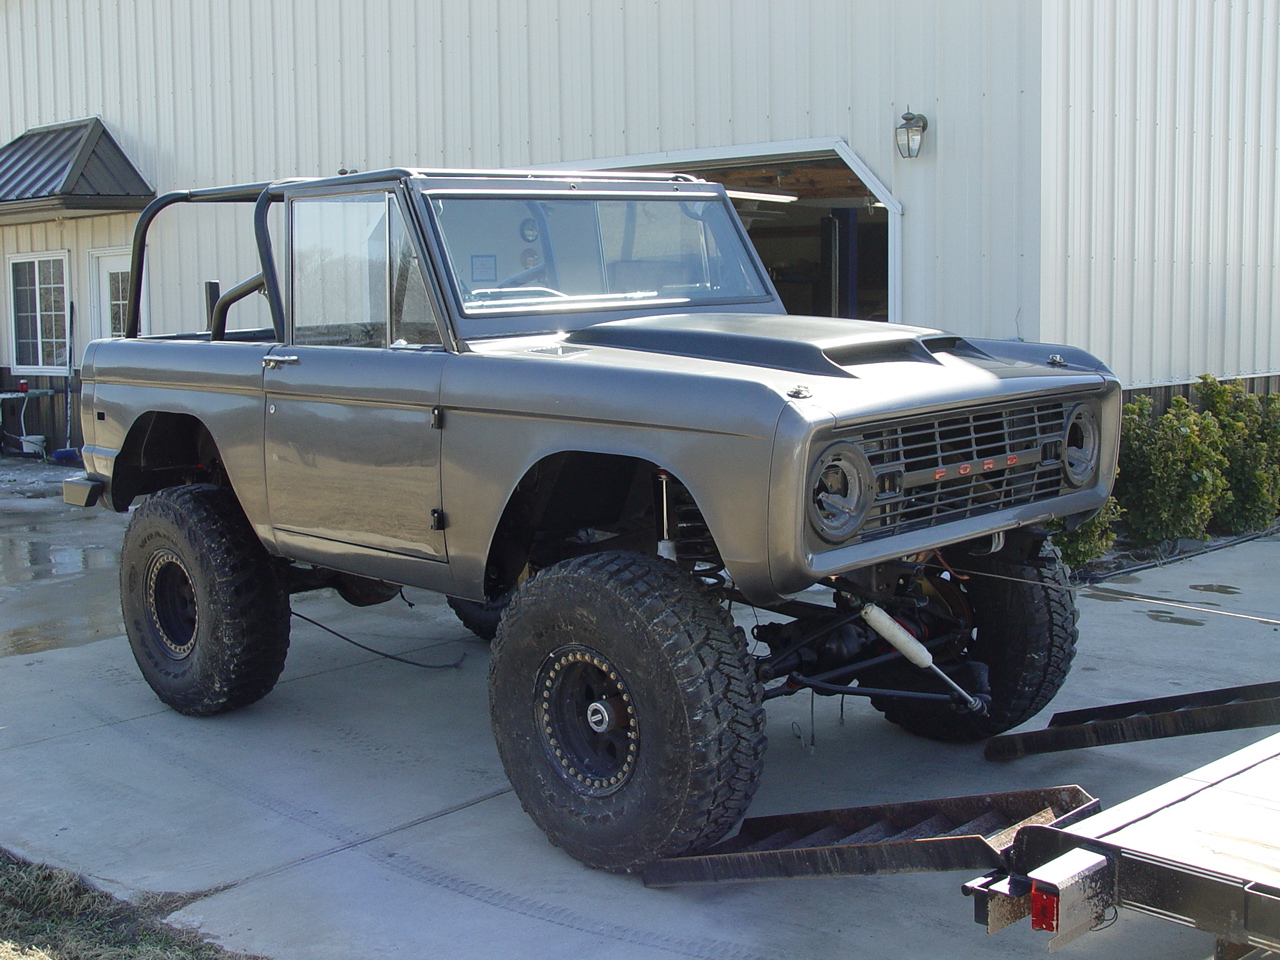
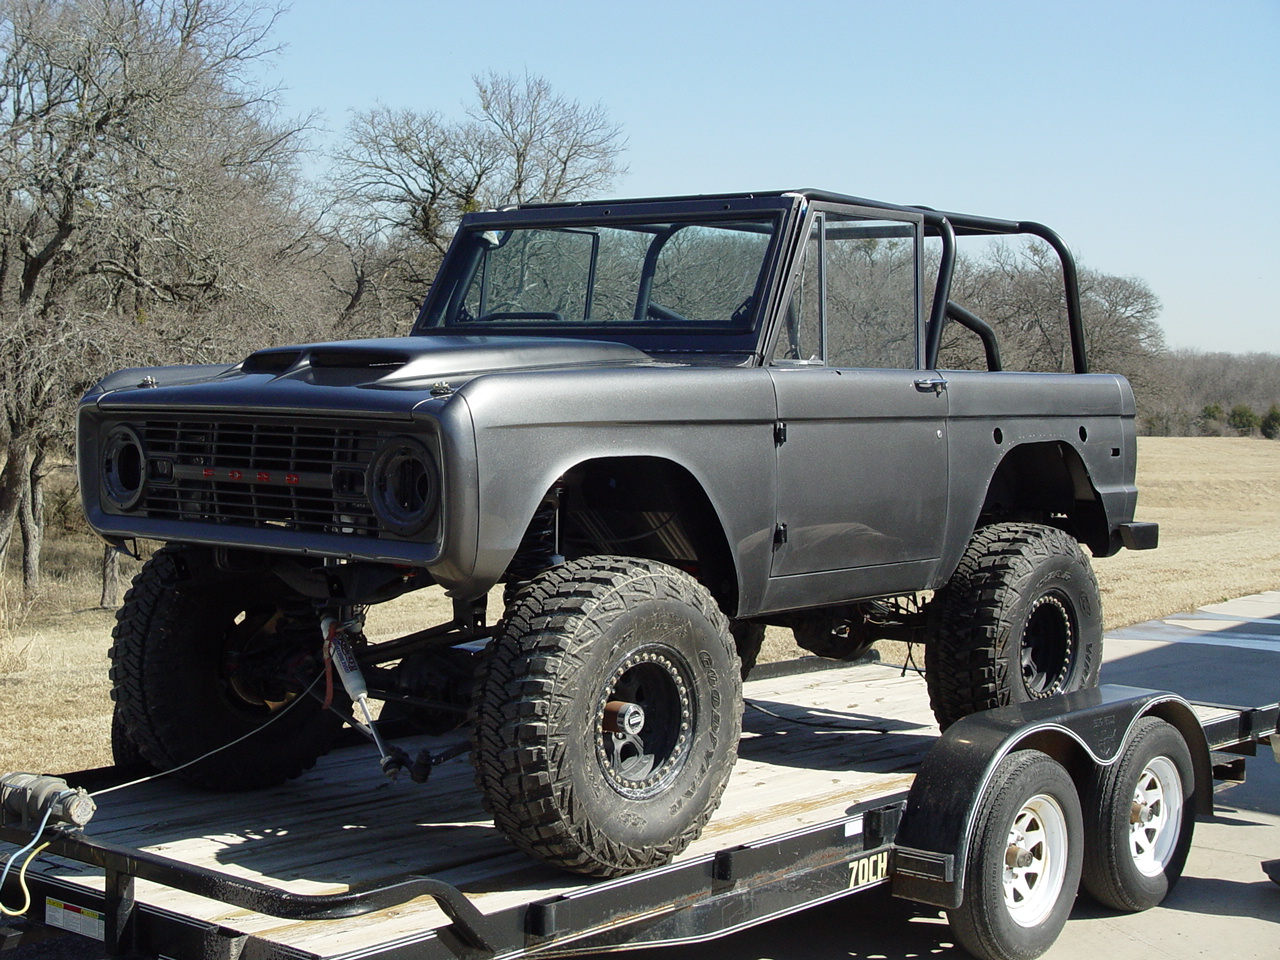
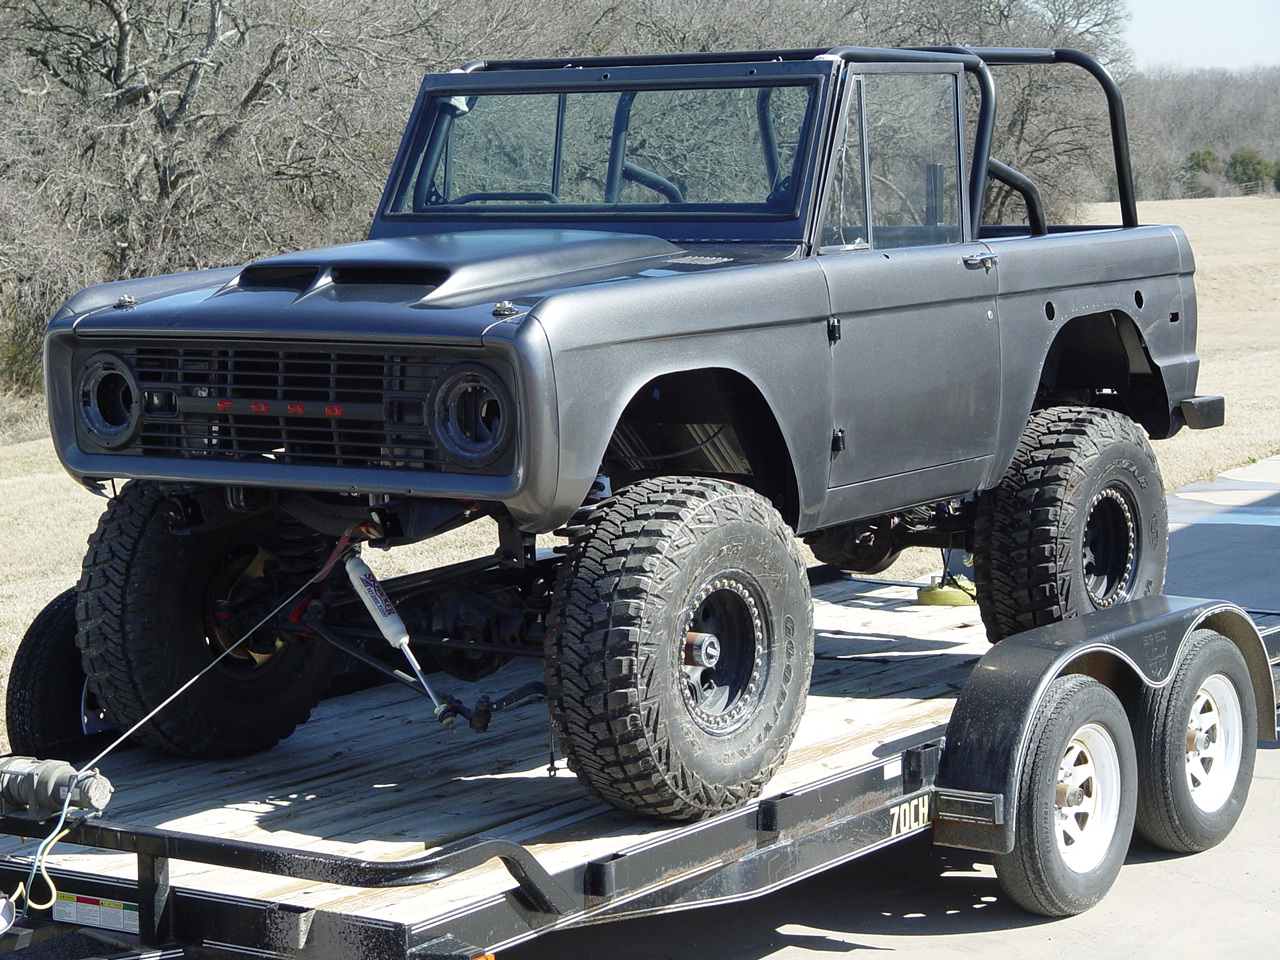
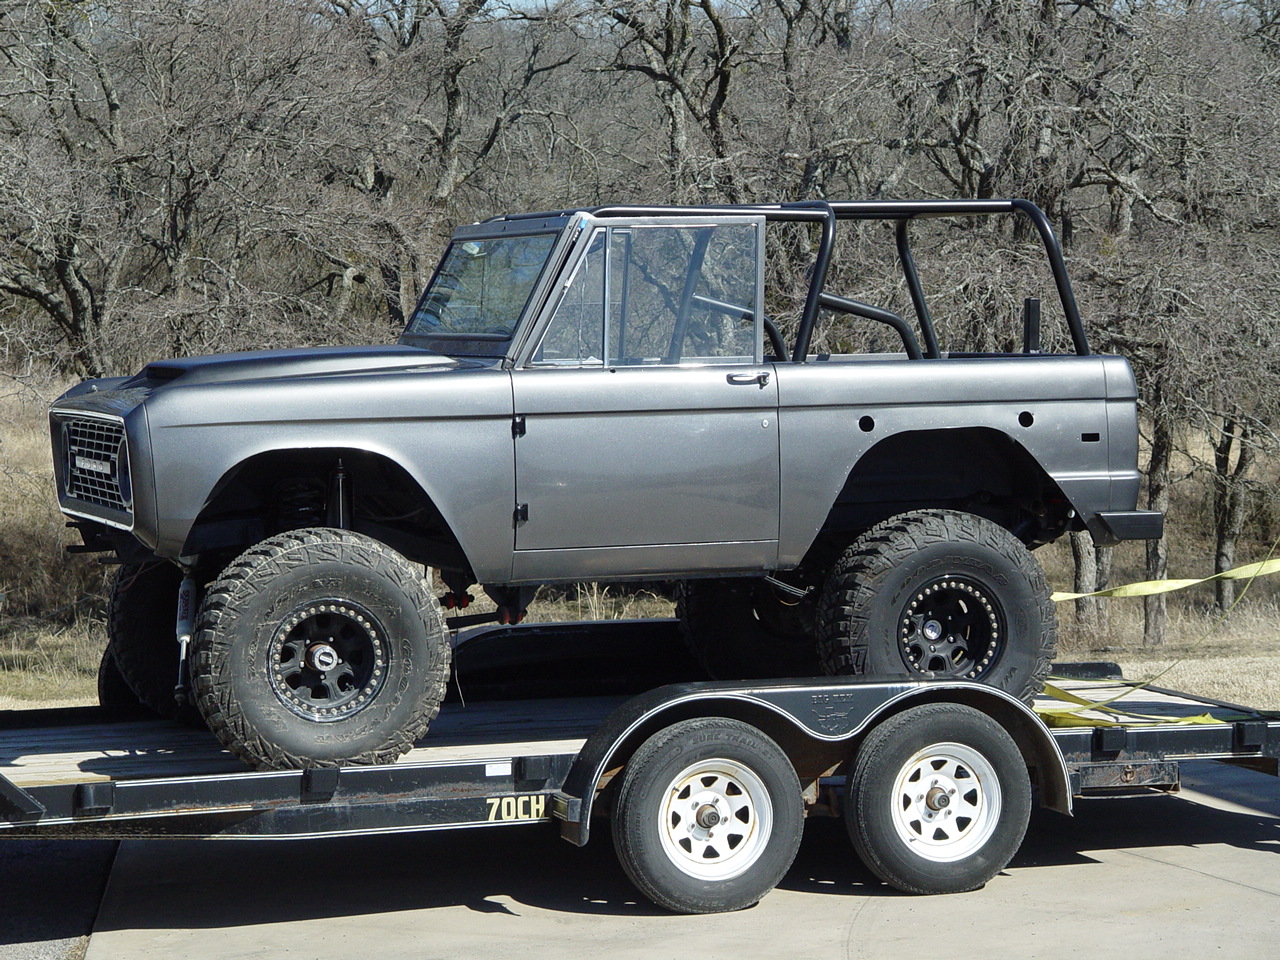
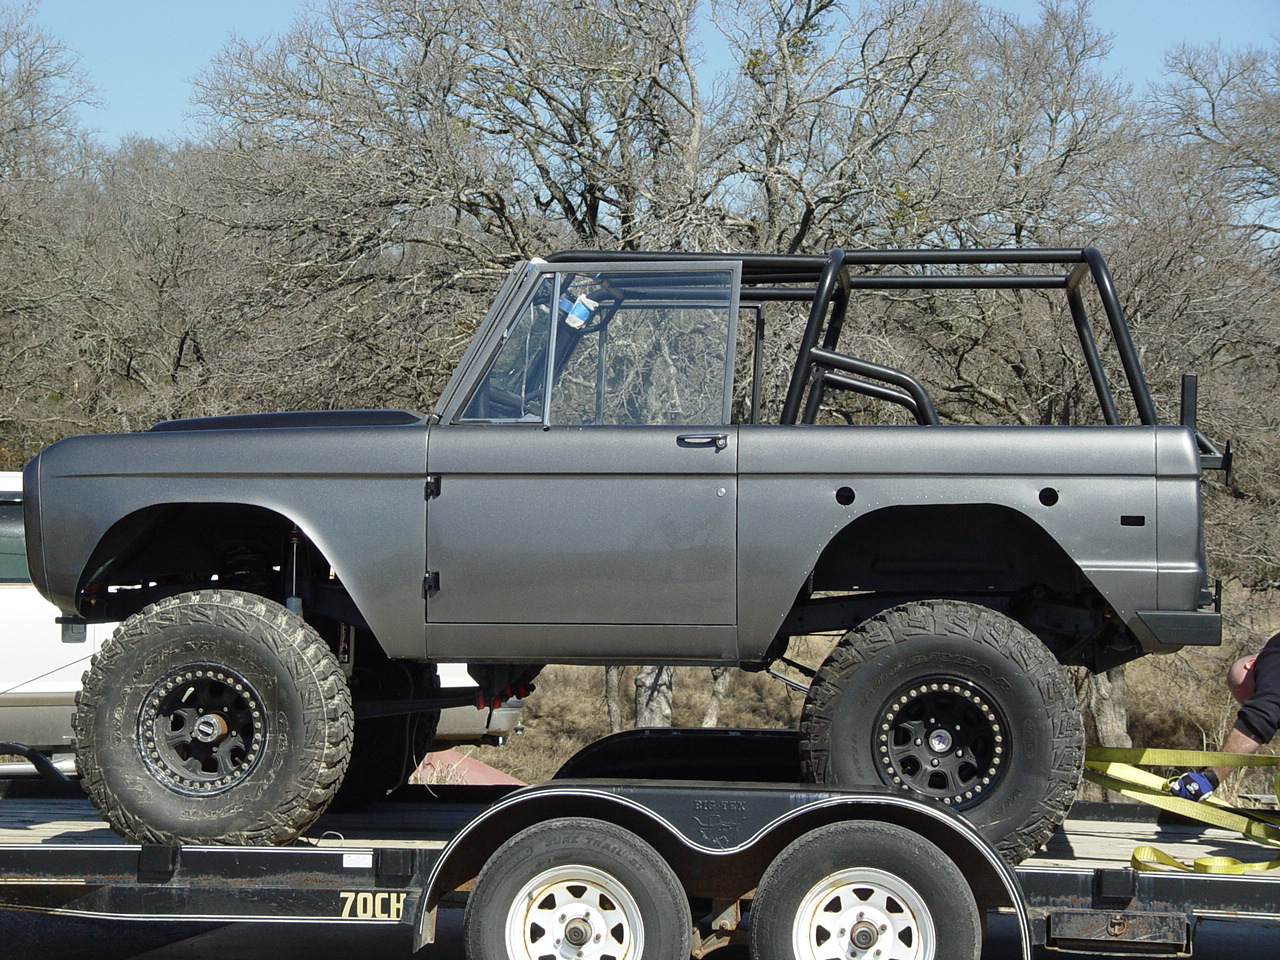
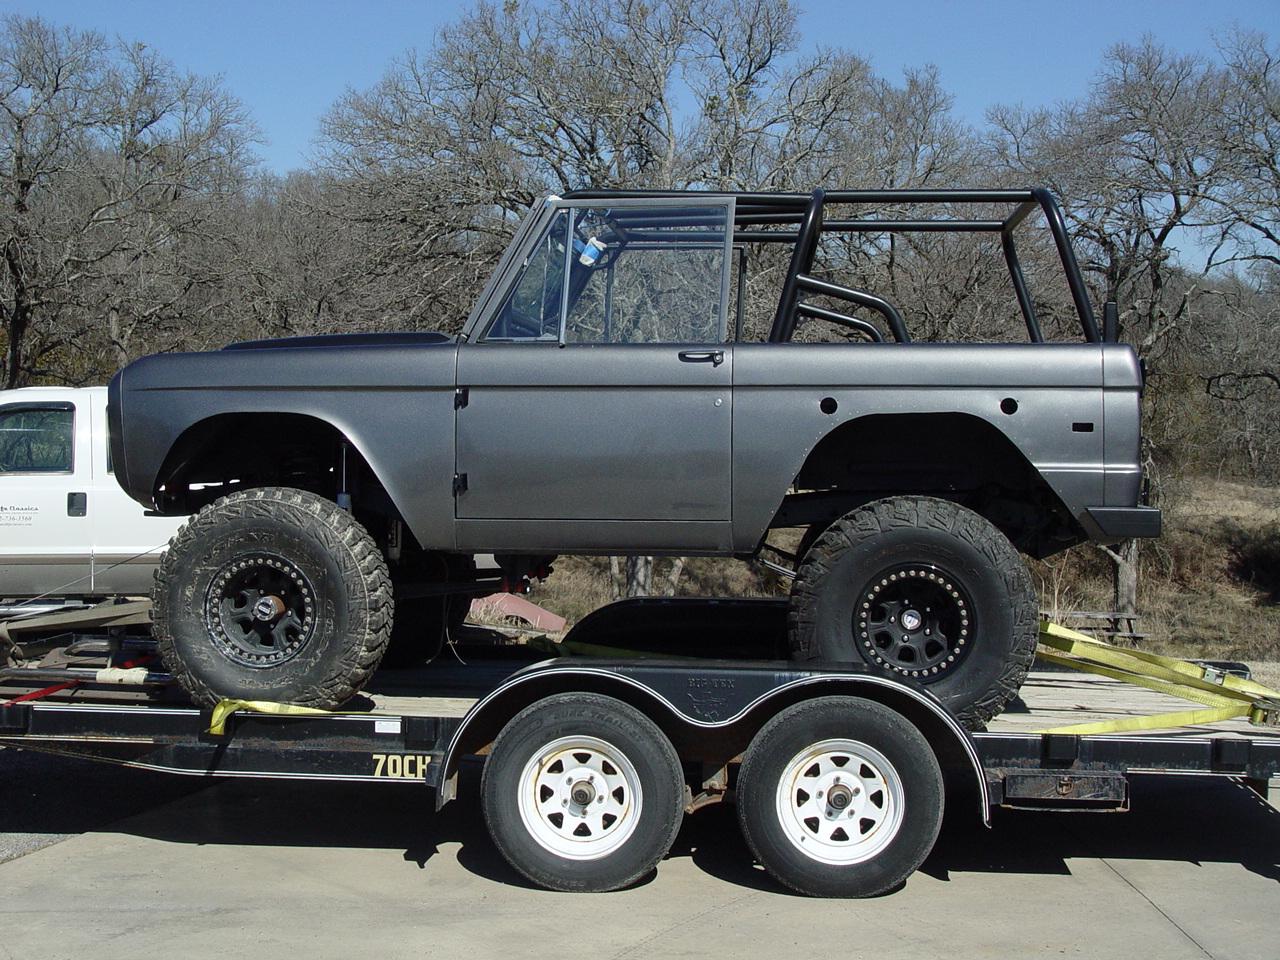
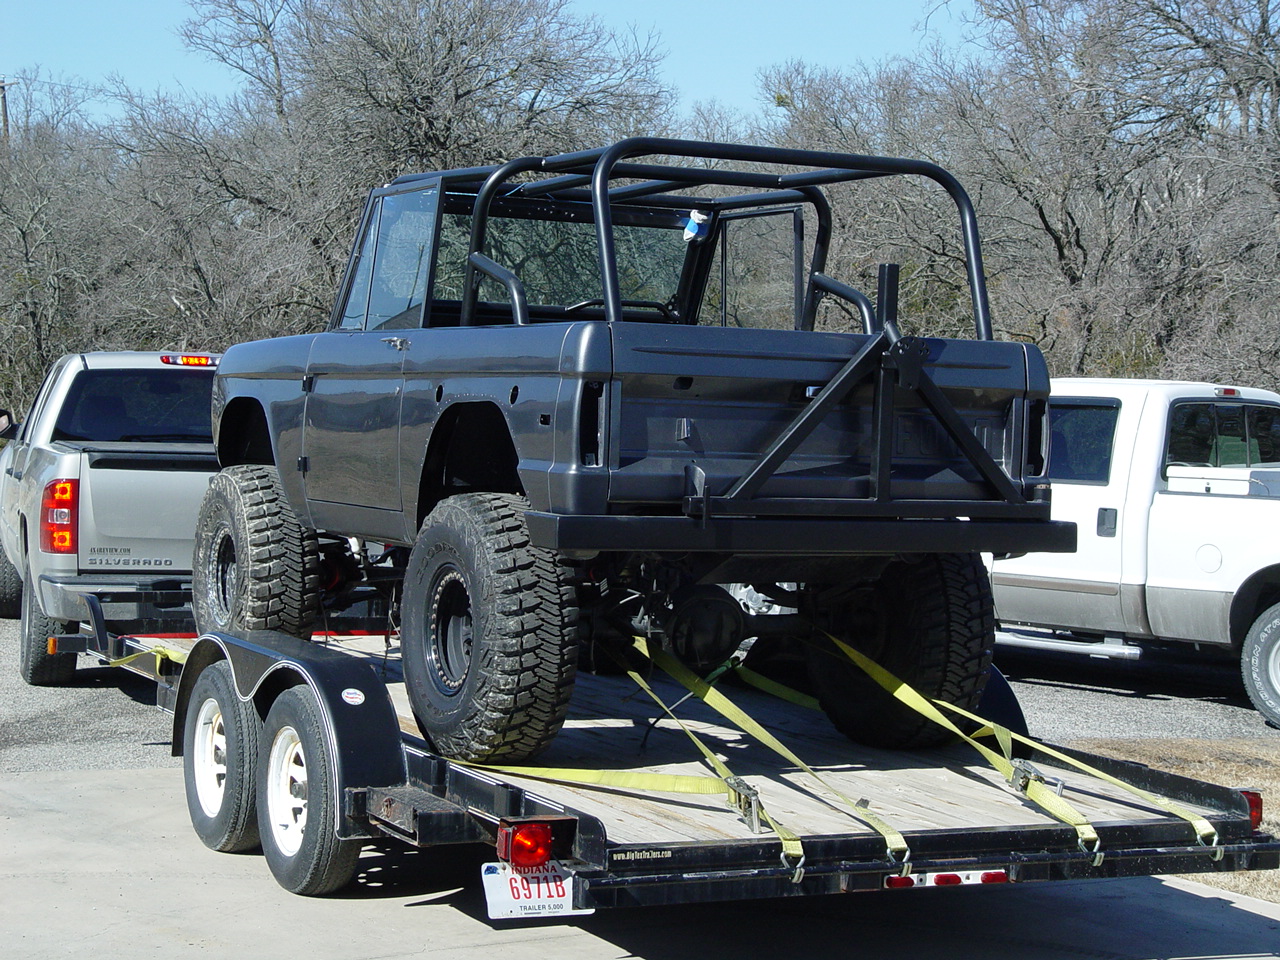
At long last, the time to reassemble Buckshot's body came and we finally got to see it all together. Rick came over to install HushMat insulation on the floor. A couple weeks later, Rick came back by with TJ to install the carpet and center console. We called Rick back over to "manage" the installation of the roll cage (so that he could take responsibility for any resulting scratches). Then we mounted up the rear bumper and spare tire carrier. Finally, we reassembld all the guts of the doors with all new weatherstripping.
Finally, Rick arrived to load Buckshot onto a trailer for the trip back to 4X4Review Offroad Magazine's shop for final assembly. But, we'll see it again when Rick brings it back to paint the rocker panels black after he mounts the rock scrapers.
|
||||||
 |
 |
 |
 |
 |
||
 |
 |
 |
 |
 |
||
 |
 |
 |
 |
 |
||
 |
 |
 |
 |
 |
||
 |
 |
 |
 |
 |
||
| Click on an image for a larger view | ||||||
| |
| Send Mail to |
| bob@midlifeclassics.com |
| |